dashboard FIAT TALENTO 2018 Owner handbook (in English)
[x] Cancel search | Manufacturer: FIAT, Model Year: 2018, Model line: TALENTO, Model: FIAT TALENTO 2018Pages: 232, PDF Size: 5.54 MB
Page 32 of 232
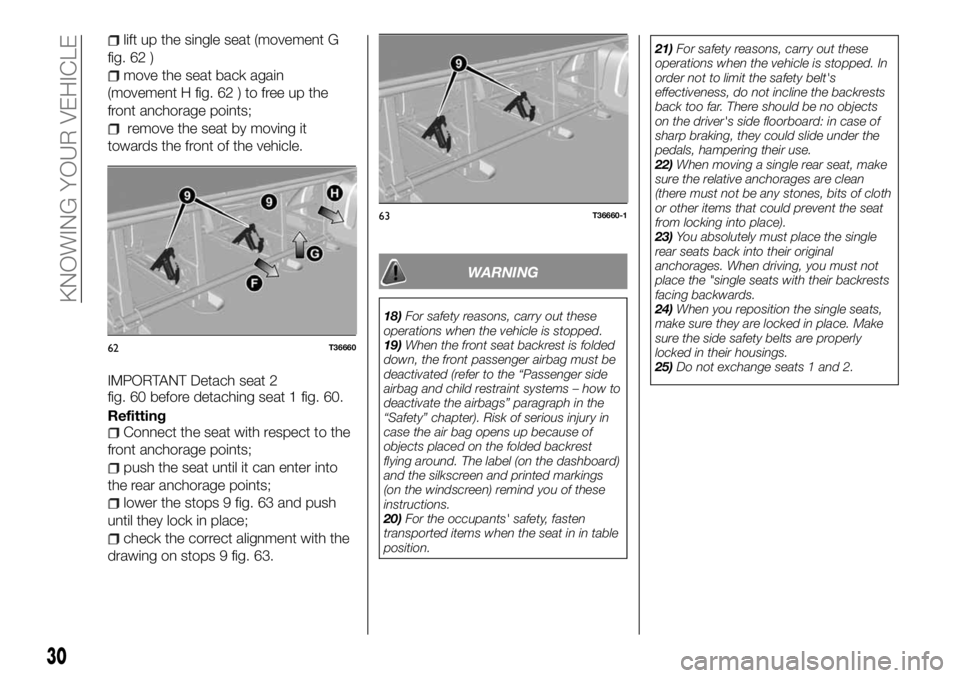
lift up the single seat (movement G
fig. 62 )
move the seat back again
(movement H fig. 62 ) to free up the
front anchorage points;
remove the seat by moving it
towards the front of the vehicle.
IMPORTANT Detach seat 2
fig. 60 before detaching seat 1 fig. 60.
Refitting
Connect the seat with respect to the
front anchorage points;
push the seat until it can enter into
the rear anchorage points;
lower the stops 9 fig. 63 and push
until they lock in place;
check the correct alignment with the
drawing on stops 9 fig. 63.
WARNING
18)For safety reasons, carry out these
operations when the vehicle is stopped.
19)When the front seat backrest is folded
down, the front passenger airbag must be
deactivated (refer to the “Passenger side
airbag and child restraint systems – how to
deactivate the airbags” paragraph in the
“Safety” chapter). Risk of serious injury in
case the air bag opens up because of
objects placed on the folded backrest
flying around. The label (on the dashboard)
and the silkscreen and printed markings
(on the windscreen) remind you of these
instructions.
20)For the occupants' safety, fasten
transported items when the seat in in table
position.21)For safety reasons, carry out these
operations when the vehicle is stopped. In
order not to limit the safety belt's
effectiveness, do not incline the backrests
back too far. There should be no objects
on the driver's side floorboard: in case of
sharp braking, they could slide under the
pedals, hampering their use.
22)When moving a single rear seat, make
sure the relative anchorages are clean
(there must not be any stones, bits of cloth
or other items that could prevent the seat
from locking into place).
23)You absolutely must place the single
rear seats back into their original
anchorages. When driving, you must not
place the "single seats with their backrests
facing backwards.
24)When you reposition the single seats,
make sure they are locked in place. Make
sure the side safety belts are properly
locked in their housings.
25)Do not exchange seats 1 and 2.
62T36660
63T36660-1
30
KNOWING YOUR VEHICLE
Page 51 of 232
Air temperature adjustment
Use control 5 fig. 91 depending on the
desired temperature. The farther the
indicator is in the red zone, the higher
the temperature.
Ventilation speed adjustment
Use control 3 fig. 91 from 0 to 4 fig. 91.
The farther to the right you turn it, the
more air is diffused. If you want to stop
air entry, place control 3 fig. 91 at 0.
The system is deactivated: ventilation
speed in the passenger compartment is
nil (vehicle stopped), you can still notice
a slight air flow when the vehicle is
moving.
NOTE Prolonged use of this control in
position 0 can make the side windows
and windscreen mist up even though
the air inside the passenger
compartment is not stuffy.
Quick de-misting: Passenger
compartment isolation/air recycling
deactivated (warning light on button 4
fig. 91 is off), turn controls 1 fig. 91 and
3 fig. 91 to the positions
. Air
conditioning activation lets you speed
up de-misting.
Activating the passenger
compartment isolation/air
recycling.
Press button 4 fig. 91 (the warning light
will go on).
In this position, the air in the passenger
compartment is recycled without
introducing outside air.Air recirculation allows you:
to isolate the outside environment
(when driving in polluted areas, etc.);
to get the desired internal passenger
compartment temperature more
quickly.
IMPORTANT Prolonged use of air
recycling can make the side windows
and windscreen mist up even though
the air inside the passenger
compartment is not stuffy. We advise
you to return to normal function
(outside air) by pressing button 4
fig. 91 again as soon as air recycling is
no longer needed.
Passenger compartment air
distribution
Turn the knob 1 fig. 91 to select the
distribution type.
The airflow is directed to the
dashboard vents.
The airflow is directed to the
dashboard vents and to the rear seat
lower vents.
The airflow is mainly directed
towards the front seat lower vents and
the dashboard vents. To direct the air
downwards only, close the dashboard
vents.
The airflow is distributed among all
the vents, the front side window vents,
the windscreen demisting vents and the
lower vents.
. The airflow is directed towards the
windscreen demisting vents and the
front side window demisting vents.
Turning the climate control system
on/off
The button 2 fig. 91 lets you turn on
(indicator light on) or off (indicator light
off) the air conditioning.
It cannot be turned on if control 3
fig. 91 is set at 0.
Using air conditioning lets you:
lower the interior car temperature;
de-mist the windows more quickly.
Air conditioning does not work when
the outside temperature is low.
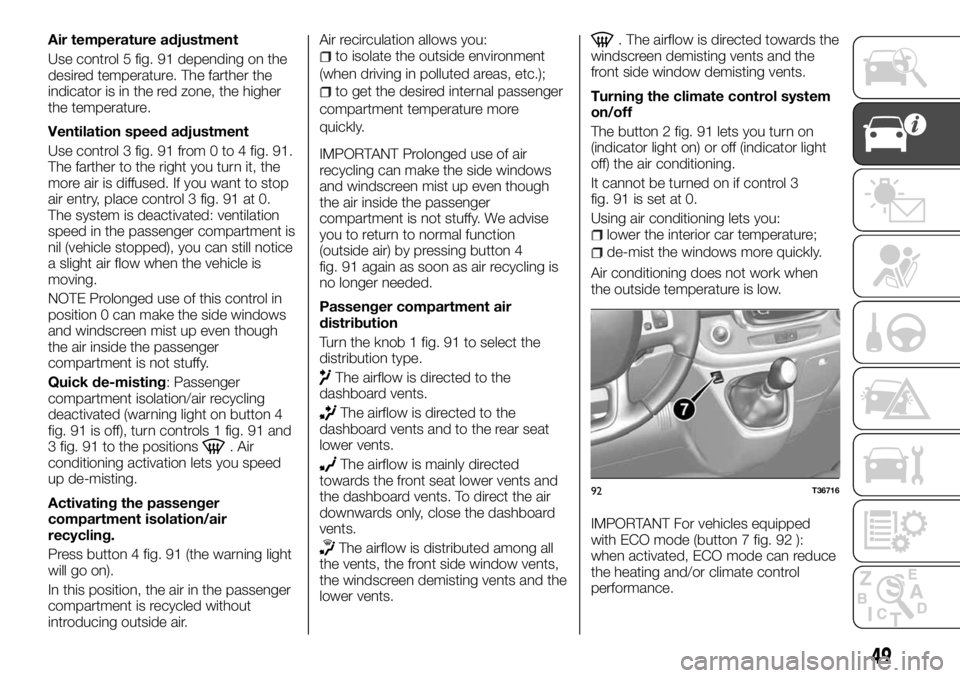
IMPORTANT For vehicles equipped
with ECO mode (button 7 fig. 92 ):
when activated, ECO mode can reduce
the heating and/or climate control
performance.
92T36716
49
Page 54 of 232
AUTO function (automatic
operation)
Automatic air conditioning is a system
that guarantees (except when using it in
extreme conditions) interior comfort and
a good level of visibility, optimising
consumption. The system uses
ventilation speed, air distribution, air
recycling, activating or turning off the air
conditioner and air temperature.
AUTO: optimising the selected comfort
level reached according to exterior
conditions. Press button 1 fig. 94.
Ventilation speed variation
In automatic mode, the system
oversees the best ventilation speed to
reach and maintain comfort.
You can always adjust the ventilation
speed by turning control 6 fig. 94 to
increase or reduce it.
Air temperature adjustment
Use control 2 fig. 94 depending on the
desired temperature.
The farther to the right you turn it, the
higher the air temperature.
NOTE The farthest adjustments allow
the system to produce the coldest or
hottest air ("18°C" and "26°C").
MAX DEF function
Press button 3 fig. 94 and the
integrated warning light will go on.
This function lets you quickly defrost
and de-mist the windscreen and rear
windows, the side front windows andexterior rear view mirrors (depending on
the vehicle version). Set the automatic
air condition and rear window defrost
activation.
Press button 8 fig. 94 to disconnect the
rear window heat function, the
integrated warning light goes off.
To turn the function off, press button 3
fig. 94 or 1 fig. 94.
IMPORTANT Some of the buttons have
an in use light that indicates the
function status.
Passenger compartment air
distribution
Press one of the buttons 4 fig. 94. The
warning light in the selected button
goes on.
You can select two positions at a time
by pressing two of the buttons 4 fig. 94.
The airflow is distributed mainly
among all the vents, the side front
window demisting vents and the
windscreen demisting vents.
The airflow is directed mainly to the
dashboard vents.
The airflow is directed mainly to the
rear seat lower vents.
Heated rearscreen and door mirror
thermal resistance switch
(For versions/markets where provided)
Press button 8 fig. 94 and the
integrated warning light will go on. This
function lets you quickly demist the
rearscreen and door mirrors (forversions/markets where provided).
Press button 8 fig. 94 again to
deactivate the this function. The
function turns off automatically
Turning the climate control system
on/off
In automatic mode, the climate control
system turns on or off according to the
outside weather conditions.
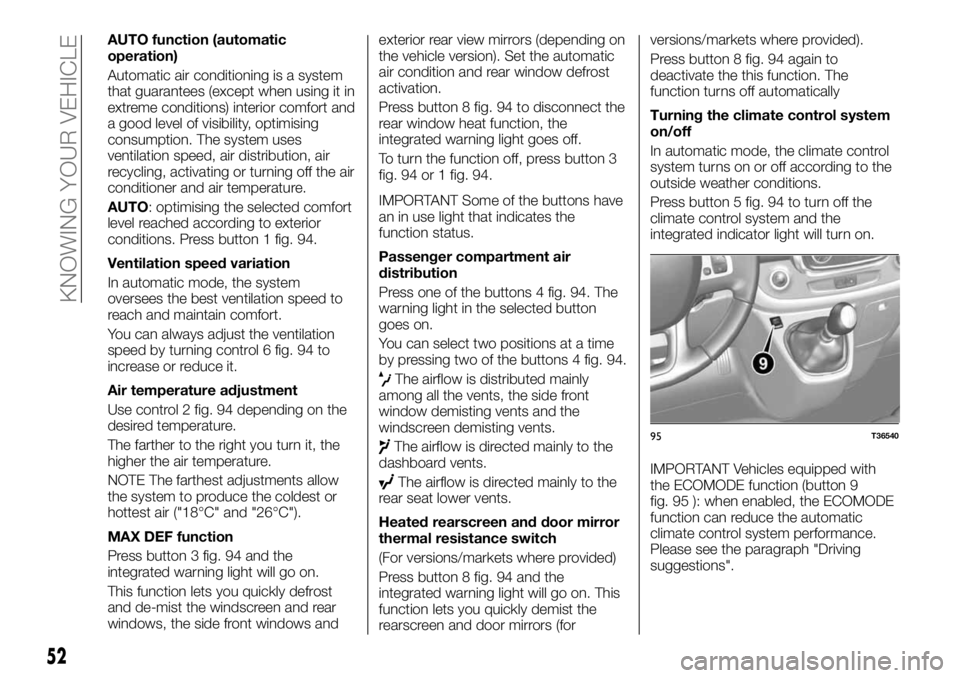
Press button 5 fig. 94 to turn off the
climate control system and the
integrated indicator light will turn on.
IMPORTANT Vehicles equipped with
the ECOMODE function (button 9
fig. 95 ): when enabled, the ECOMODE
function can reduce the automatic
climate control system performance.
Please see the paragraph "Driving
suggestions".
95T36540
52
KNOWING YOUR VEHICLE
Page 63 of 232
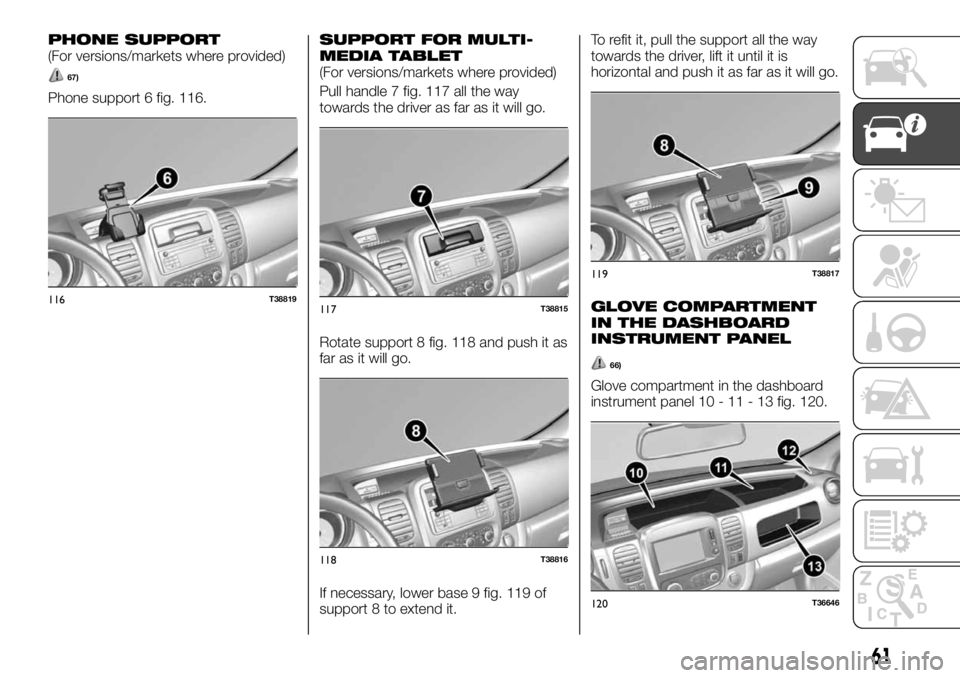
PHONE SUPPORT(For versions/markets where provided)
67)
Phone support 6 fig. 116.
SUPPORT FOR MULTI-
MEDIA TABLET
(For versions/markets where provided)
Pull handle 7 fig. 117 all the way
towards the driver as far as it will go.
Rotate support 8 fig. 118 and push it as
far as it will go.
If necessary, lower base 9 fig. 119 of
support 8 to extend it.To refit it, pull the support all the way
towards the driver, lift it until it is
horizontal and push it as far as it will go.
GLOVE COMPARTMENT
IN THE DASHBOARD
INSTRUMENT PANEL
66)
Glove compartment in the dashboard
instrument panel 10 - 11 - 13 fig. 120.
116T38819117T38815
118T38816
119T38817
120T36646
61
Page 64 of 232
HOUSING
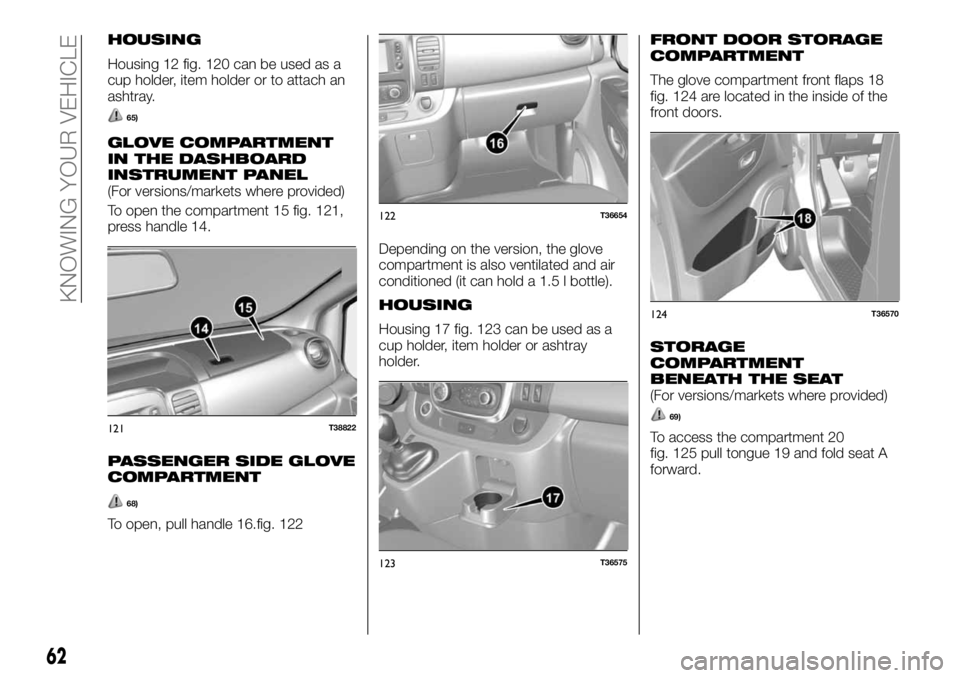
Housing 12 fig. 120 can be used as a
cup holder, item holder or to attach an
ashtray.
65)
GLOVE COMPARTMENT
IN THE DASHBOARD
INSTRUMENT PANEL
(For versions/markets where provided)
To open the compartment 15 fig. 121,
press handle 14.
PASSENGER SIDE GLOVE
COMPARTMENT
68)
To open, pull handle 16.fig. 122Depending on the version, the glove
compartment is also ventilated and air
conditioned (it can hold a 1.5 l bottle).
HOUSING
Housing 17 fig. 123 can be used as a
cup holder, item holder or ashtray
holder.
FRONT DOOR STORAGE
COMPARTMENT
The glove compartment front flaps 18
fig. 124 are located in the inside of the
front doors.
STORAGE
COMPARTMENT
BENEATH THE SEAT
(For versions/markets where provided)
69)
To access the compartment 20
fig. 125 pull tongue 19 and fold seat A
forward.121T38822
122T36654
123T36575
124T36570
62
KNOWING YOUR VEHICLE
Page 97 of 232
FRONT AIRBAGS
DRIVER AND
PASSENGER AIR BAGS
101) 102)
These are installed in correspondence
to the driver's and front passenger's
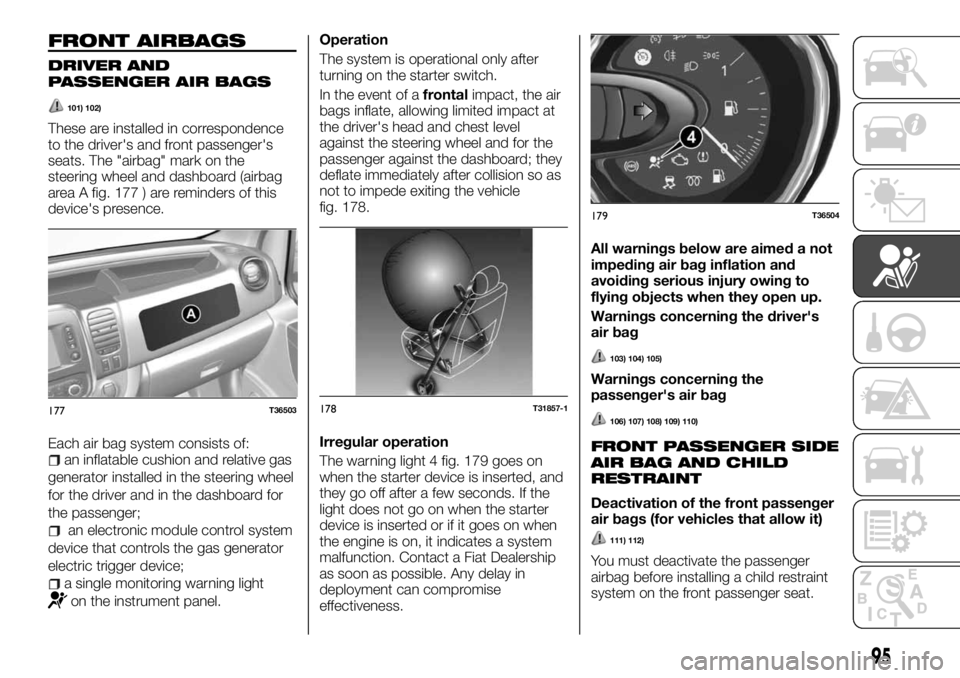
seats. The "airbag" mark on the
steering wheel and dashboard (airbag
area A fig. 177 ) are reminders of this
device's presence.
Each air bag system consists of:
an inflatable cushion and relative gas
generator installed in the steering wheel
for the driver and in the dashboard for
the passenger;
an electronic module control system
device that controls the gas generator
electric trigger device;
a single monitoring warning light
on the instrument panel.Operation
The system is operational only after
turning on the starter switch.
In the event of afrontalimpact, the air
bags inflate, allowing limited impact at
the driver's head and chest level
against the steering wheel and for the
passenger against the dashboard; they
deflate immediately after collision so as
not to impede exiting the vehicle
fig. 178.
Irregular operation
The warning light 4 fig. 179 goes on
when the starter device is inserted, and
they go off after a few seconds. If the
light does not go on when the starter
device is inserted or if it goes on when
the engine is on, it indicates a system
malfunction. Contact a Fiat Dealership
as soon as possible. Any delay in
deployment can compromise
effectiveness.All warnings below are aimed a not
impeding air bag inflation and
avoiding serious injury owing to
flying objects when they open up.
Warnings concerning the driver's
air bag
103) 104) 105)
Warnings concerning the
passenger's air bag
106) 107) 108) 109) 110)
FRONT PASSENGER SIDE
AIR BAG AND CHILD
RESTRAINT
Deactivation of the front passenger
air bags (for vehicles that allow it)
111) 112)
You must deactivate the passenger
airbag before installing a child restraint
system on the front passenger seat.
177T36503178T31857-1
179T36504
95
Page 98 of 232
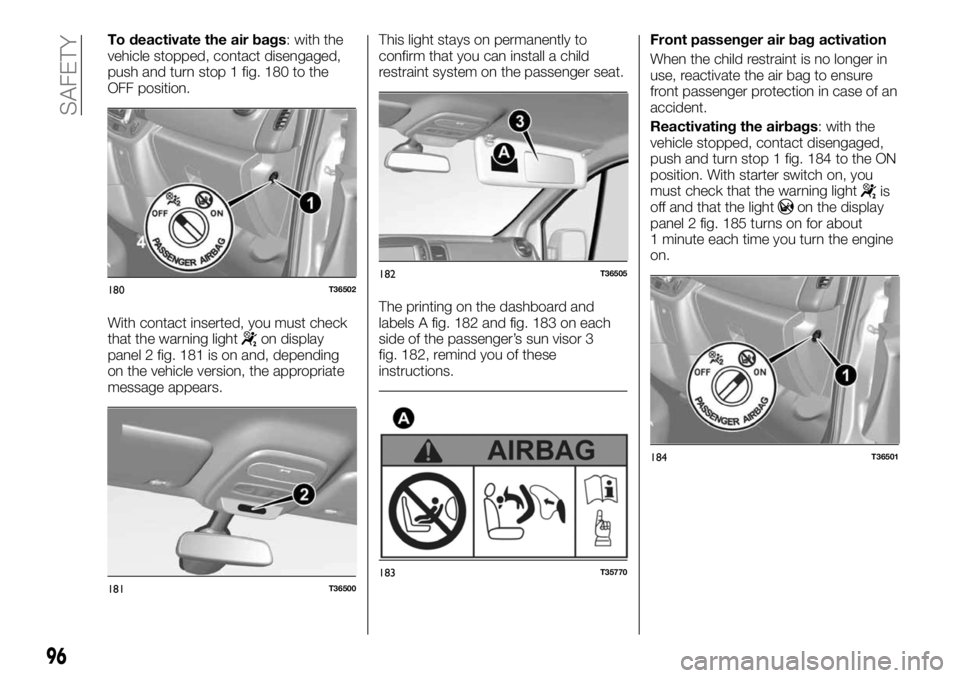
To deactivate the air bags: with the
vehicle stopped, contact disengaged,
push and turn stop 1 fig. 180 to the
OFF position.
With contact inserted, you must check
that the warning light
on display
panel 2 fig. 181 is on and, depending
on the vehicle version, the appropriate
message appears.This light stays on permanently to
confirm that you can install a child
restraint system on the passenger seat.
The printing on the dashboard and
labels A fig. 182 and fig. 183 on each
side of the passenger’s sun visor 3
fig. 182, remind you of these
instructions.Front passenger air bag activation
When the child restraint is no longer in
use, reactivate the air bag to ensure
front passenger protection in case of an
accident.
Reactivating the airbags: with the
vehicle stopped, contact disengaged,
push and turn stop 1 fig. 184 to the ON
position. With starter switch on, you
must check that the warning light
is
off and that the lighton the display
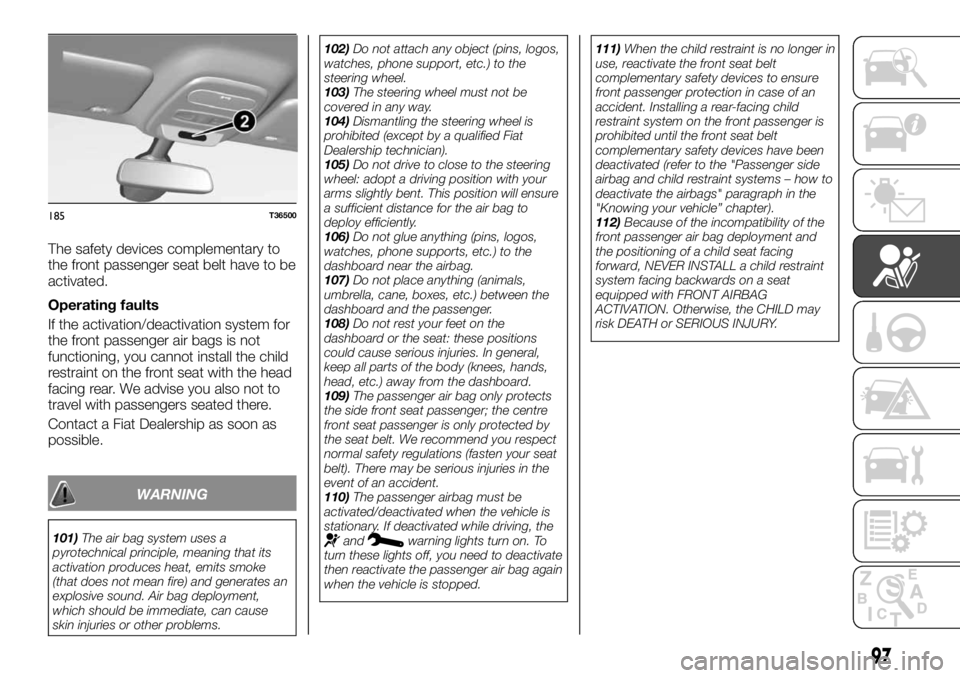
panel 2 fig. 185 turns on for about
1 minute each time you turn the engine
on.
180T36502
181T36500
182T36505
183T35770
184T36501
96
SAFETY
Page 99 of 232
The safety devices complementary to
the front passenger seat belt have to be
activated.
Operating faults
If the activation/deactivation system for
the front passenger air bags is not
functioning, you cannot install the child
restraint on the front seat with the head
facing rear. We advise you also not to
travel with passengers seated there.
Contact a Fiat Dealership as soon as
possible.
WARNING
101)The air bag system uses a
pyrotechnical principle, meaning that its
activation produces heat, emits smoke
(that does not mean fire) and generates an
explosive sound. Air bag deployment,
which should be immediate, can cause
skin injuries or other problems.102)Do not attach any object (pins, logos,
watches, phone support, etc.) to the
steering wheel.
103)The steering wheel must not be
covered in any way.
104)Dismantling the steering wheel is
prohibited (except by a qualified Fiat
Dealership technician).
105)Do not drive to close to the steering
wheel: adopt a driving position with your
arms slightly bent. This position will ensure
a sufficient distance for the air bag to
deploy efficiently.
106)Do not glue anything (pins, logos,
watches, phone supports, etc.) to the
dashboard near the airbag.
107)Do not place anything (animals,
umbrella, cane, boxes, etc.) between the
dashboard and the passenger.
108)Do not rest your feet on the
dashboard or the seat: these positions
could cause serious injuries. In general,
keep all parts of the body (knees, hands,
head, etc.) away from the dashboard.
109)The passenger air bag only protects
the side front seat passenger; the centre
front seat passenger is only protected by
the seat belt. We recommend you respect
normal safety regulations (fasten your seat
belt). There may be serious injuries in the
event of an accident.
110)The passenger airbag must be
activated/deactivated when the vehicle is
stationary. If deactivated while driving, theandwarning lights turn on. To
turn these lights off, you need to deactivate
then reactivate the passenger air bag again
when the vehicle is stopped.111)When the child restraint is no longer in
use, reactivate the front seat belt
complementary safety devices to ensure
front passenger protection in case of an
accident. Installing a rear-facing child
restraint system on the front passenger is
prohibited until the front seat belt
complementary safety devices have been
deactivated (refer to the "Passenger side
airbag and child restraint systems – how to
deactivate the airbags" paragraph in the
"Knowing your vehicle” chapter).
112)Because of the incompatibility of the
front passenger air bag deployment and
the positioning of a child seat facing
forward, NEVER INSTALL a child restraint
system facing backwards on a seat
equipped with FRONT AIRBAG
ACTIVATION. Otherwise, the CHILD may
risk DEATH or SERIOUS INJURY.
185T36500
97
Page 102 of 232
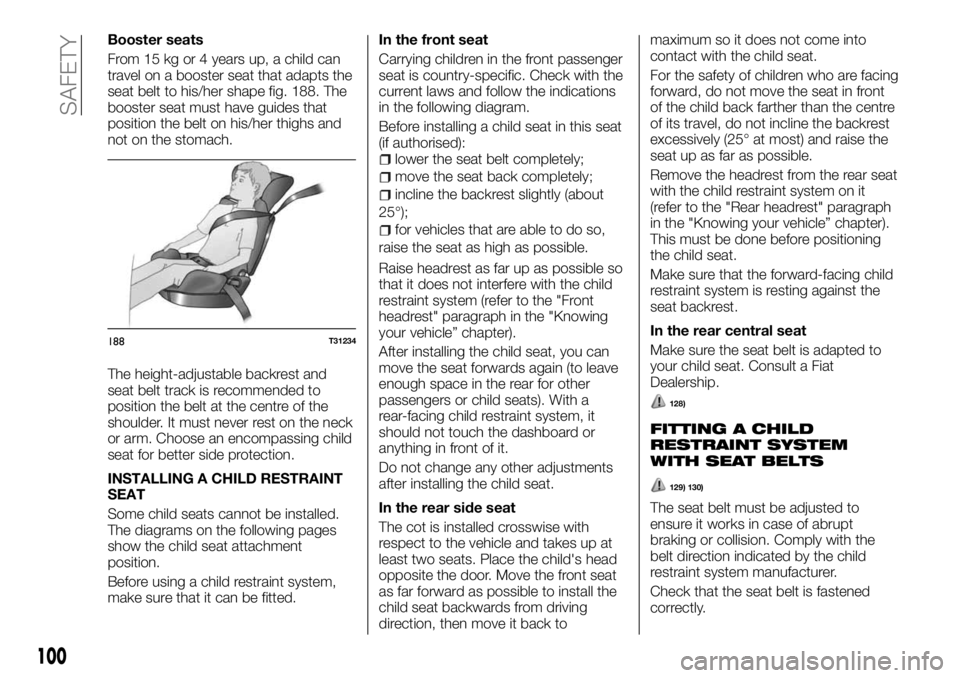
Booster seats
From 15 kg or 4 years up, a child can
travel on a booster seat that adapts the
seat belt to his/her shape fig. 188. The
booster seat must have guides that
position the belt on his/her thighs and
not on the stomach.
The height-adjustable backrest and
seat belt track is recommended to
position the belt at the centre of the
shoulder. It must never rest on the neck
or arm. Choose an encompassing child
seat for better side protection.
INSTALLING A CHILD RESTRAINT
SEAT
Some child seats cannot be installed.
The diagrams on the following pages
show the child seat attachment
position.
Before using a child restraint system,
make sure that it can be fitted.In the front seat
Carrying children in the front passenger
seat is country-specific. Check with the
current laws and follow the indications
in the following diagram.
Before installing a child seat in this seat
(if authorised):
lower the seat belt completely;
move the seat back completely;
incline the backrest slightly (about
25°);
for vehicles that are able to do so,
raise the seat as high as possible.
Raise headrest as far up as possible so
that it does not interfere with the child
restraint system (refer to the "Front
headrest" paragraph in the "Knowing
your vehicle” chapter).
After installing the child seat, you can
move the seat forwards again (to leave
enough space in the rear for other
passengers or child seats). With a
rear-facing child restraint system, it
should not touch the dashboard or
anything in front of it.
Do not change any other adjustments
after installing the child seat.
In the rear side seat
The cot is installed crosswise with
respect to the vehicle and takes up at
least two seats. Place the child's head
opposite the door. Move the front seat
as far forward as possible to install the
child seat backwards from driving
direction, then move it back tomaximum so it does not come into
contact with the child seat.
For the safety of children who are facing
forward, do not move the seat in front
of the child back farther than the centre
of its travel, do not incline the backrest
excessively (25° at most) and raise the
seat up as far as possible.
Remove the headrest from the rear seat
with the child restraint system on it
(refer to the "Rear headrest" paragraph
in the "Knowing your vehicle” chapter).
This must be done before positioning
the child seat.
Make sure that the forward-facing child
restraint system is resting against the
seat backrest.
In the rear central seat
Make sure the seat belt is adapted to
your child seat. Consult a Fiat
Dealership.
128)
FITTING A CHILD
RESTRAINT SYSTEM
WITH SEAT BELTS
129) 130)
The seat belt must be adjusted to
ensure it works in case of abrupt
braking or collision. Comply with the
belt direction indicated by the child
restraint system manufacturer.
Check that the seat belt is fastened
correctly.
188T31234
100
SAFETY
Page 137 of 232
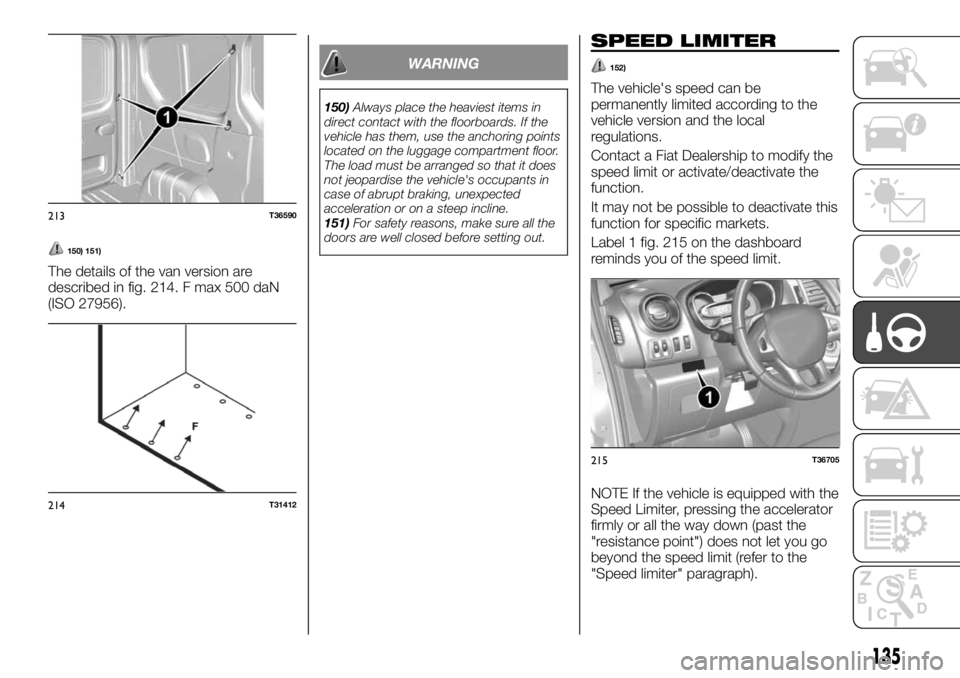
150) 151)
The details of the van version are
described in fig. 214. F max 500 daN
(ISO 27956).
WARNING
150)Always place the heaviest items in
direct contact with the floorboards. If the
vehicle has them, use the anchoring points
located on the luggage compartment floor.
The load must be arranged so that it does
not jeopardise the vehicle's occupants in
case of abrupt braking, unexpected
acceleration or on a steep incline.
151)For safety reasons, make sure all the
doors are well closed before setting out.
SPEED LIMITER
152)
The vehicle's speed can be
permanently limited according to the
vehicle version and the local
regulations.
Contact a Fiat Dealership to modify the
speed limit or activate/deactivate the
function.
It may not be possible to deactivate this
function for specific markets.
Label 1 fig. 215 on the dashboard
reminds you of the speed limit.
NOTE If the vehicle is equipped with the
Speed Limiter, pressing the accelerator
firmly or all the way down (past the
"resistance point") does not let you go
beyond the speed limit (refer to the
"Speed limiter" paragraph).
213T36590
214T31412
215T36705
135