technical specification FORD B MAX 2012 1.G User Guide
[x] Cancel search | Manufacturer: FORD, Model Year: 2012, Model line: B MAX, Model: FORD B MAX 2012 1.GPages: 256, PDF Size: 19.67 MB
Page 152 of 256
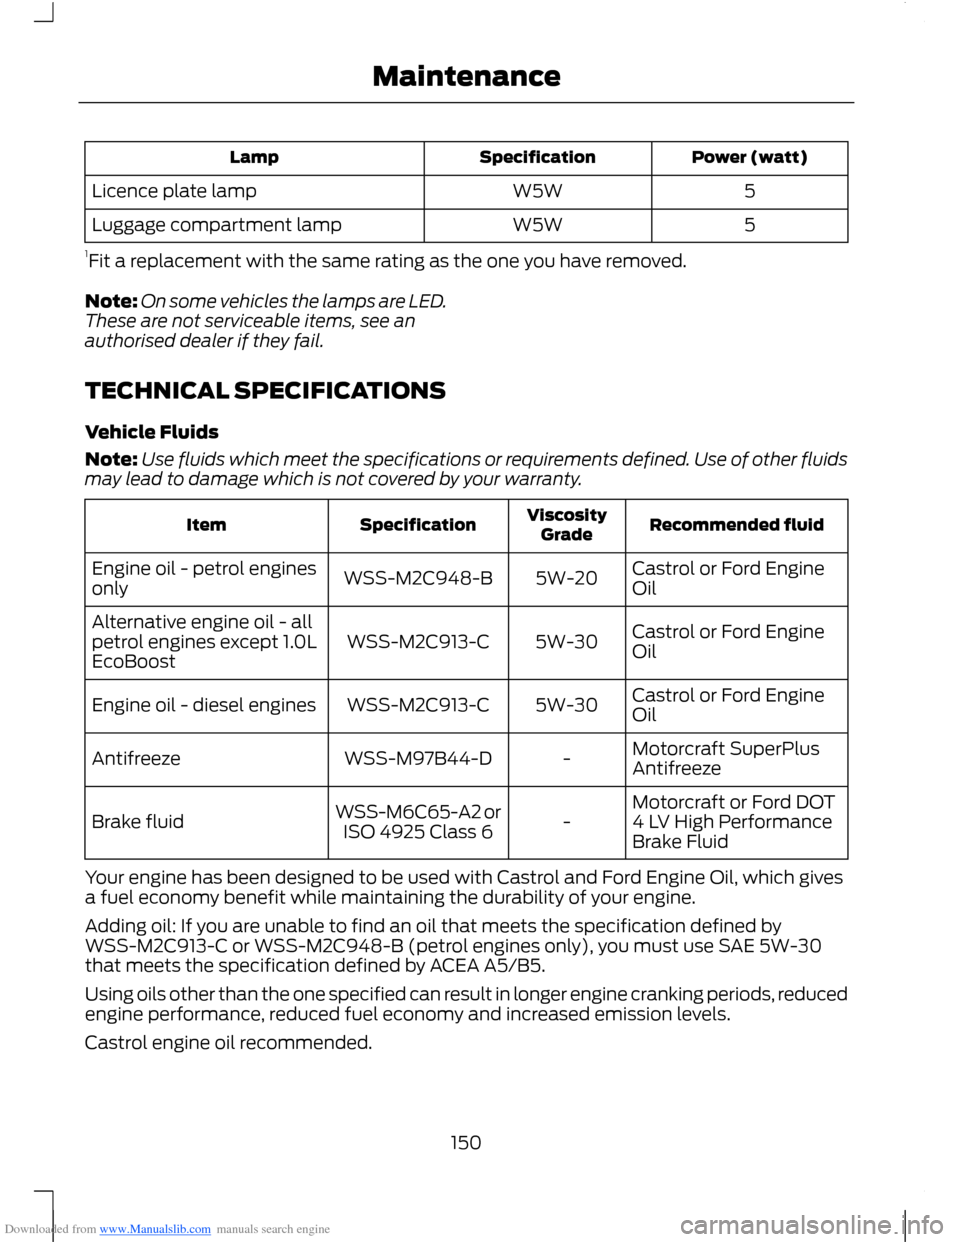
Downloaded from www.Manualslib.com manuals search engine Power (watt)SpecificationLamp
5W5WLicence plate lamp
5W5WLuggage compartment lamp
1Fit a replacement with the same rating as the one you have removed.
Note:On some vehicles the lamps are LED.These are not serviceable items, see anauthorised dealer if they fail.
TECHNICAL SPECIFICATIONS
Vehicle Fluids
Note:Use fluids which meet the specifications or requirements defined. Use of other fluidsmay lead to damage which is not covered by your warranty.
Recommended fluidViscosityGradeSpecificationItem
Castrol or Ford EngineOil5W-20WSS-M2C948-BEngine oil - petrol enginesonly
Castrol or Ford EngineOil5W-30WSS-M2C913-CAlternative engine oil - allpetrol engines except 1.0LEcoBoost
Castrol or Ford EngineOil5W-30WSS-M2C913-CEngine oil - diesel engines
Motorcraft SuperPlusAntifreeze-WSS-M97B44-DAntifreeze
Motorcraft or Ford DOT4 LV High PerformanceBrake Fluid-WSS-M6C65-A2 orISO 4925 Class 6Brake fluid
Your engine has been designed to be used with Castrol and Ford Engine Oil, which givesa fuel economy benefit while maintaining the durability of your engine.
Adding oil: If you are unable to find an oil that meets the specification defined byWSS-M2C913-C or WSS-M2C948-B (petrol engines only), you must use SAE 5W-30that meets the specification defined by ACEA A5/B5.
Using oils other than the one specified can result in longer engine cranking periods, reducedengine performance, reduced fuel economy and increased emission levels.
Castrol engine oil recommended.
150Maintenance
Page 160 of 256
Downloaded from www.Manualslib.com manuals search engine 18.Stop your vehicle after drivingapproximately two miles (threekilometres). Check, and wherenecessary, adjust the pressure of thedamaged tyre.
19.Attach the kit and read the tyrepressure from the pressure gauge E.
20.Adjust it to the specified pressure.See Technical Specifications(page 164).
21.Once you have inflated the tyre to itscorrect tyre pressure, move thecompressor switch G to position 0,remove the power plug F from thesocket, unscrew the hose C andfasten the valve cap.
22.Leave hose C and H connected to thesealant bottle B and store the kitaway safely.
23.Go to the nearest tyre specialist toget the damaged tyre replaced.Before the tyre is removed from therim, inform your tyre dealer that thetyre contains sealant. You mustrenew the sealant bottle B and hoseC as soon as possible once used.
Note:Remember that emergency roadsidekits only provide temporary mobility.Regulations concerning tyre repair afterusage of the kit may differ from country tocountry. You should consult a tyre specialistfor advice.
WARNING
You must, make sure the tyre isadjusted to the recommendedinflation pressure. See TechnicalSpecifications (page 164). You must,monitor the tyre pressure until the sealedtyre is replaced.
Empty sealant bottles can be disposed oftogether with normal household waste.Return remains of sealant to your dealeror dispose of it in compliance with localwaste disposal regulations.
TYRE CARE
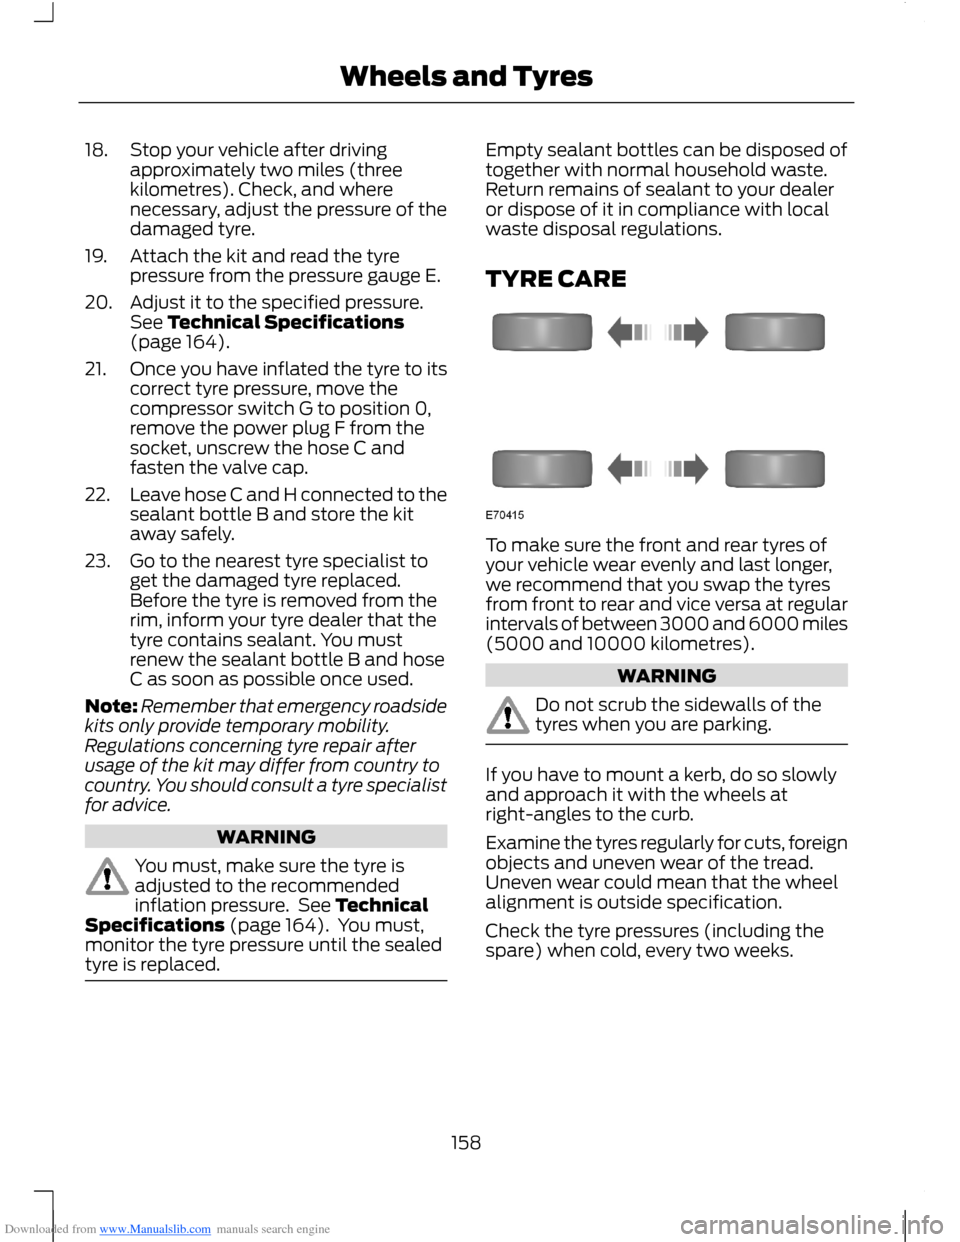
To make sure the front and rear tyres ofyour vehicle wear evenly and last longer,we recommend that you swap the tyresfrom front to rear and vice versa at regularintervals of between 3000 and 6000 miles(5000 and 10000 kilometres).
WARNING
Do not scrub the sidewalls of thetyres when you are parking.
If you have to mount a kerb, do so slowlyand approach it with the wheels atright-angles to the curb.
Examine the tyres regularly for cuts, foreignobjects and uneven wear of the tread.Uneven wear could mean that the wheelalignment is outside specification.
Check the tyre pressures (including thespare) when cold, every two weeks.
158Wheels and Tyres
Page 161 of 256
Downloaded from www.Manualslib.com manuals search engine USING WINTER TYRES
WARNING
When using winter tyres on yourvehicle, you must make sure that youfit the correct type of wheel nuts.
If winter tyres are used, make sure that thetyre pressures are correct. See TechnicalSpecifications (page 164).
USING SNOW CHAINS
WARNINGS
Do not exceed 30 mph (50 km/h).
Do not use snow chains on snow-freeroads.
Only fit snow chains to specifiedtyres. See TechnicalSpecifications (page 164).
If your vehicle has wheel trims,remove them before fitting snowchains.
Note:The anti-lock braking system willcontinue to operate normally.
Only use small link snow chains.
Only use snow chains on the front wheels.
Vehicles With Stability Control
When stability control is on, your vehiclemay exhibit some unusual drivingcharacteristics. To reduce this, switchtraction control off. See Using StabilityControl (page 103).
TYRE PRESSURE
MONITORING SYSTEM
WARNINGS
The system does not relieve you ofyour responsibility to regularly checkthe tyre pressures.
The system will only provide a lowtyre pressure warning. It will notinflate the tyres.
Do not drive on significantlyunder-inflated tyres. This may causethe tyres to overheat and fail.Under-inflation reduces fuel efficiency, tyretread life and may also affect your abilityto drive your vehicle safely.
Do not bend or damage the valveswhen you are inflating the tyres.
Have tyres installed by an authoriseddealer.
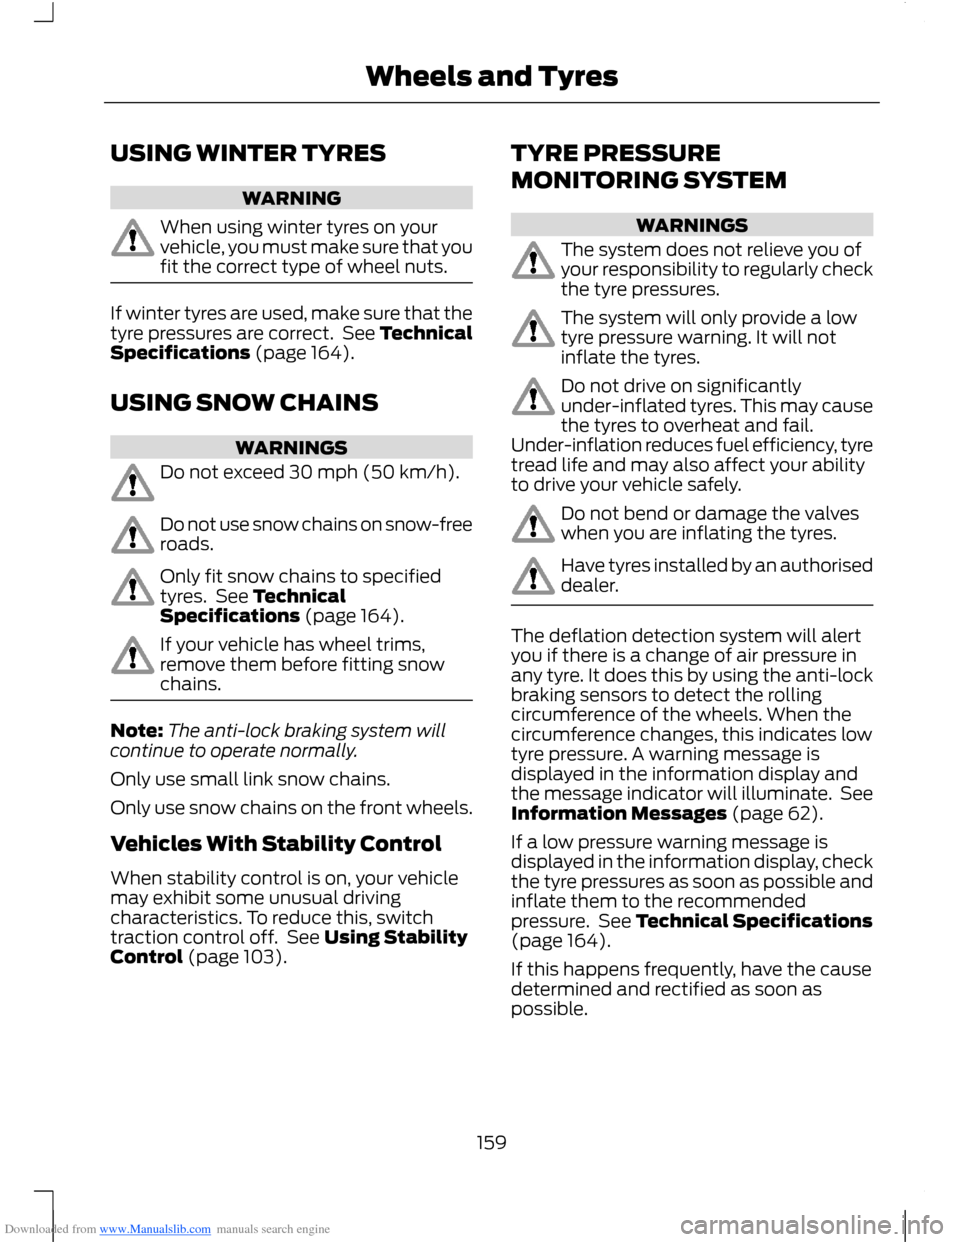
The deflation detection system will alertyou if there is a change of air pressure inany tyre. It does this by using the anti-lockbraking sensors to detect the rollingcircumference of the wheels. When thecircumference changes, this indicates lowtyre pressure. A warning message isdisplayed in the information display andthe message indicator will illuminate. SeeInformation Messages (page 62).
If a low pressure warning message isdisplayed in the information display, checkthe tyre pressures as soon as possible andinflate them to the recommendedpressure. See Technical Specifications(page 164).
If this happens frequently, have the causedetermined and rectified as soon aspossible.
159Wheels and Tyres
Page 162 of 256
Downloaded from www.Manualslib.com manuals search engine Apart from a too low tyre pressure or adamaged tyre, the following situations canaffect the rolling circumference:
•Vehicle load is uneven.
•When using a trailer or travelling up anddown an incline.
•Using snow chains.
•Driving on soft surfaces such as snowor mud.
Note:The system will still functioncorrectly, but there may be an increaseddetection time.
System Reset
Note:Do not reset the system when yourvehicle is moving.
Note:You should reset the systemfollowing any adjustment to the tyrepressures or any changing of tyres.
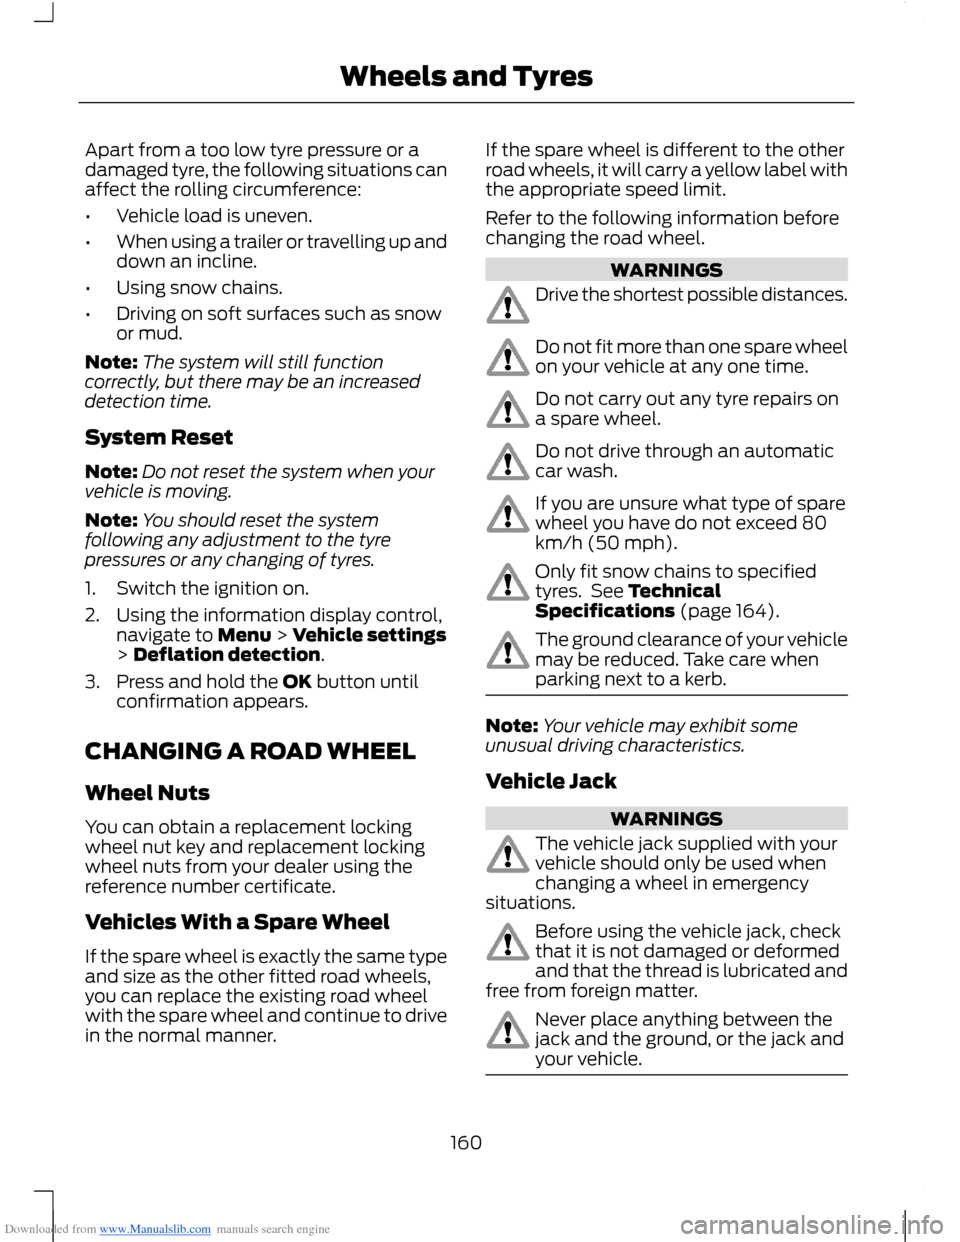
1.Switch the ignition on.
2.Using the information display control,navigate to Menu > Vehicle settings> Deflation detection.
3.Press and hold the OK button untilconfirmation appears.
CHANGING A ROAD WHEEL
Wheel Nuts
You can obtain a replacement lockingwheel nut key and replacement lockingwheel nuts from your dealer using thereference number certificate.
Vehicles With a Spare Wheel
If the spare wheel is exactly the same typeand size as the other fitted road wheels,you can replace the existing road wheelwith the spare wheel and continue to drivein the normal manner.
If the spare wheel is different to the otherroad wheels, it will carry a yellow label withthe appropriate speed limit.
Refer to the following information beforechanging the road wheel.
WARNINGS
Drive the shortest possible distances.
Do not fit more than one spare wheelon your vehicle at any one time.
Do not carry out any tyre repairs ona spare wheel.
Do not drive through an automaticcar wash.
If you are unsure what type of sparewheel you have do not exceed 80km/h (50 mph).
Only fit snow chains to specifiedtyres. See TechnicalSpecifications (page 164).
The ground clearance of your vehiclemay be reduced. Take care whenparking next to a kerb.
Note:Your vehicle may exhibit someunusual driving characteristics.
Vehicle Jack
WARNINGS
The vehicle jack supplied with yourvehicle should only be used whenchanging a wheel in emergencysituations.
Before using the vehicle jack, checkthat it is not damaged or deformedand that the thread is lubricated andfree from foreign matter.
Never place anything between thejack and the ground, or the jack andyour vehicle.
160Wheels and Tyres
Page 165 of 256
Downloaded from www.Manualslib.com manuals search engine Note:Make sure that you pull the wheeltrim remover at right angles to the trim.
Removing a Road Wheel
WARNINGS
Park your vehicle in such a positionthat neither the traffic nor you arehindered or endangered.
Set up a warning triangle.
Make sure that your vehicle is on firm,level ground with the wheels pointingstraight ahead.
Switch the ignition off and apply theparking brake.
If your vehicle has a manualtransmission, move the selector leverto first or reverse gear. If it has anautomatic transmission, move the selectorlever to position (P).
Have the passengers leave yourvehicle.
Secure the diagonally oppositewheel with an appropriate block orwheel chock.
Make sure that the arrows ondirectional tyres point in the directionof rotation when your vehicle ismoving forward. If you have to fit a sparewheel with the arrows pointing in theopposite direction, have the tyre refittedin the correct direction by an authoriseddealer.
Do not work underneath your vehiclewhen it is supported only by a jack.
Make sure that the jack is vertical tothe jacking point and the base is flaton the ground.
Note:Do not lay alloy wheels face downon the ground, this will damage the paint.
Note:The spare wheel is located under thefloor cover in the luggage compartment.
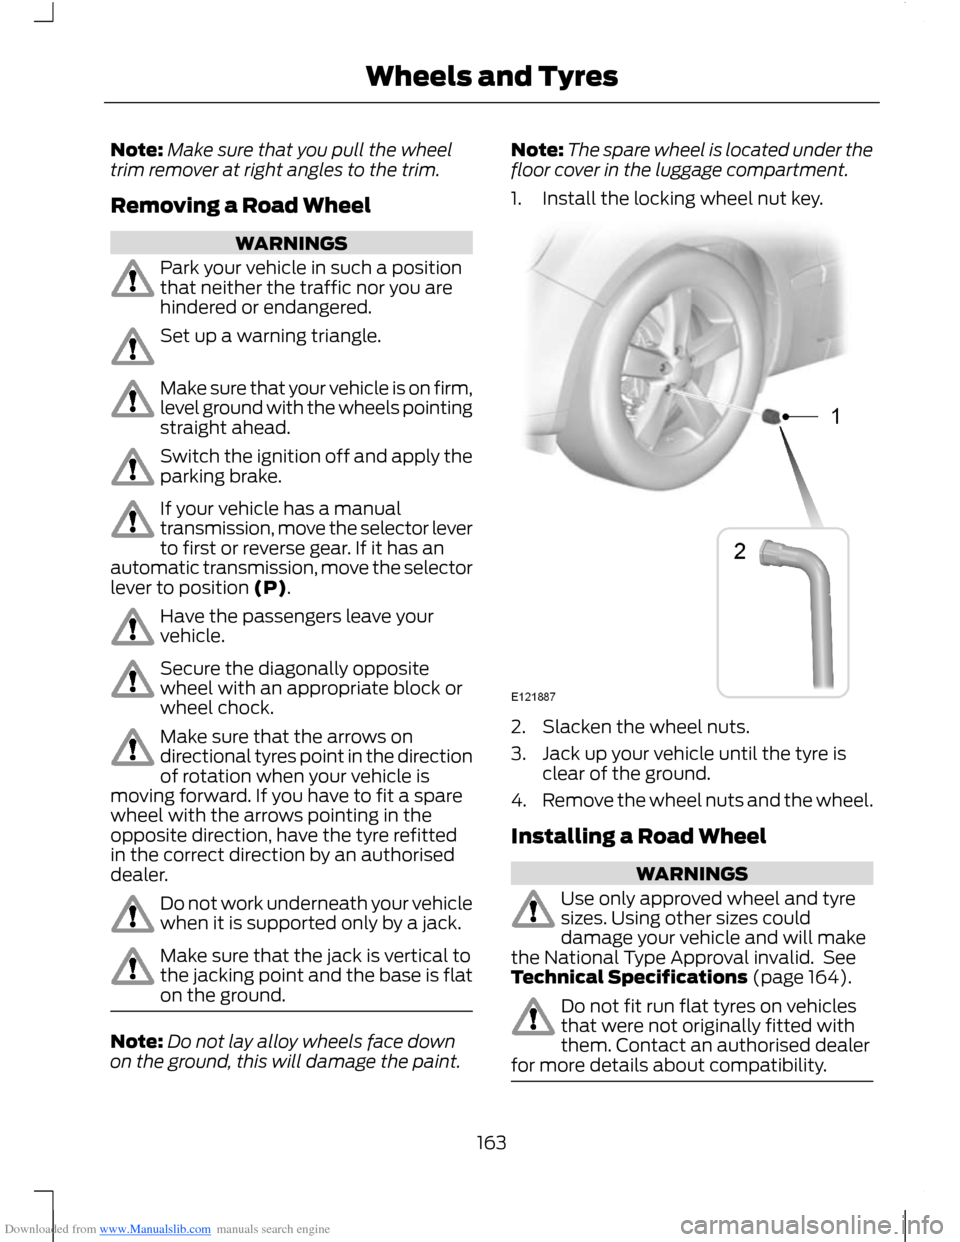
1.Install the locking wheel nut key.
2.Slacken the wheel nuts.
3.Jack up your vehicle until the tyre isclear of the ground.
4.Remove the wheel nuts and the wheel.
Installing a Road Wheel
WARNINGS
Use only approved wheel and tyresizes. Using other sizes coulddamage your vehicle and will makethe National Type Approval invalid. SeeTechnical Specifications (page 164).
Do not fit run flat tyres on vehiclesthat were not originally fitted withthem. Contact an authorised dealerfor more details about compatibility.
163Wheels and Tyres
Page 166 of 256
Downloaded from www.Manualslib.com manuals search engine WARNING
Do not install alloy wheels usingwheel nuts designed for use withsteel wheels.
Note:The wheel nuts of alloy wheels andspoked steel wheels can also be used forthe steel spare wheel for a short time(maximum two weeks).
Note:Make sure the wheel and hub contactsurfaces are free from foreign matter.
Note:Make sure that the cones on thewheel nuts are against the wheel.
1.Install the wheel.
2.Install the wheel nuts finger tight.
3.Install the locking wheel nut key.
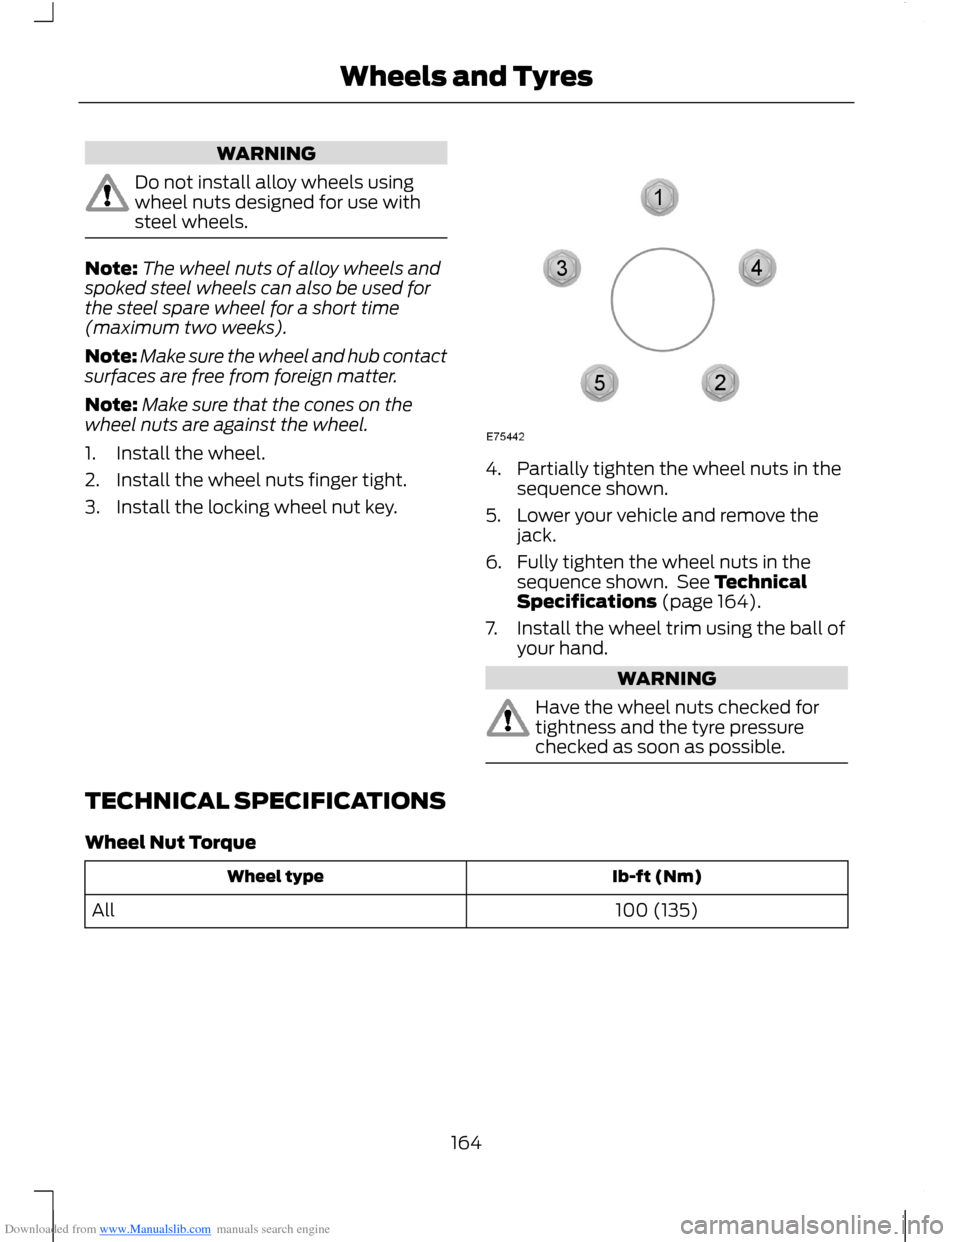
4.Partially tighten the wheel nuts in thesequence shown.
5.Lower your vehicle and remove thejack.
6.Fully tighten the wheel nuts in thesequence shown. See TechnicalSpecifications (page 164).
7.Install the wheel trim using the ball ofyour hand.
WARNING
Have the wheel nuts checked fortightness and the tyre pressurechecked as soon as possible.
TECHNICAL SPECIFICATIONS
Wheel Nut Torque
Ib-ft (Nm)Wheel type
100 (135)All
164Wheels and Tyres
Page 170 of 256
Downloaded from www.Manualslib.com manuals search engine VEHICLE IDENTIFICATION
NUMBER
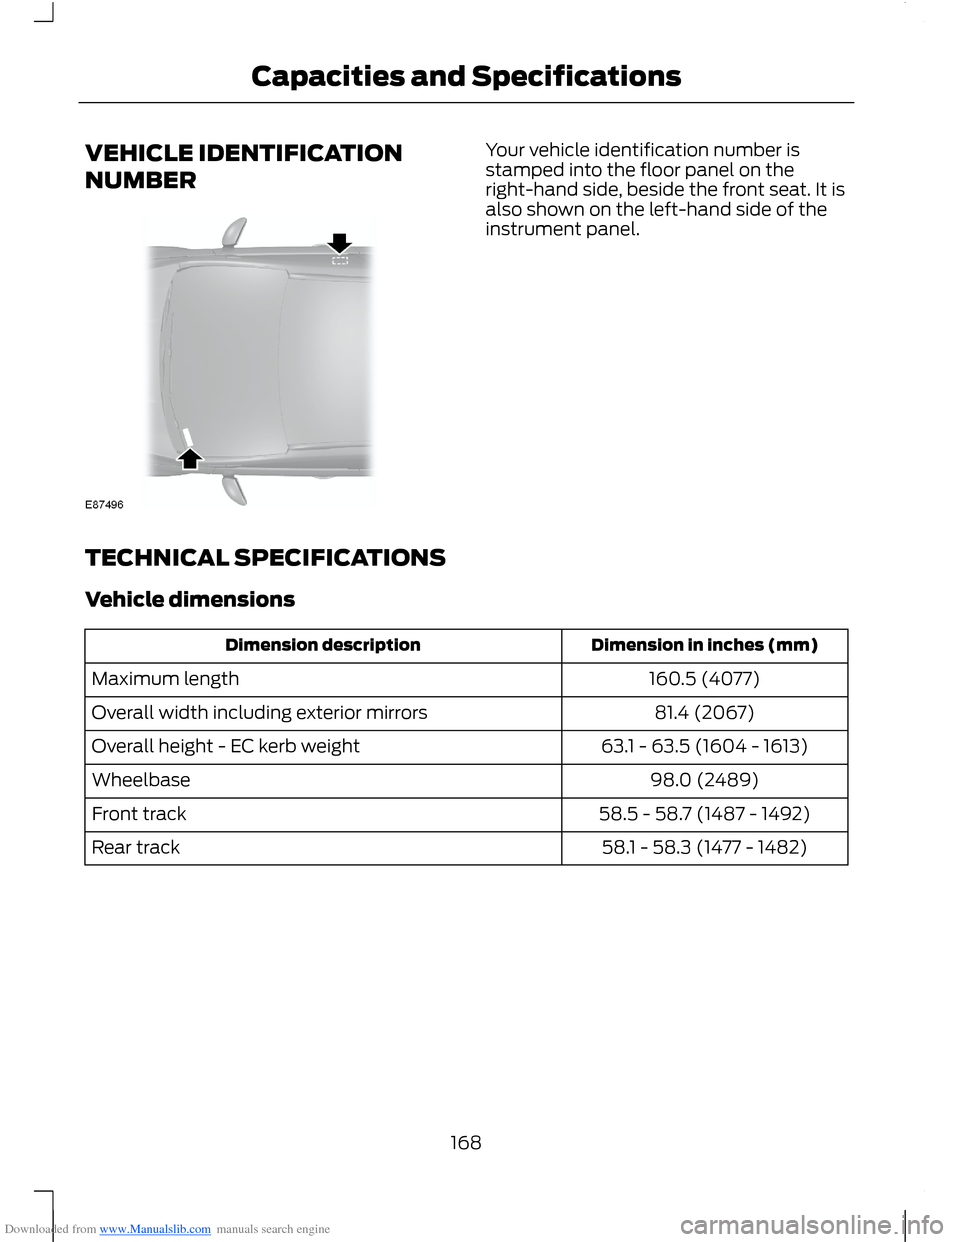
Your vehicle identification number isstamped into the floor panel on theright-hand side, beside the front seat. It isalso shown on the left-hand side of theinstrument panel.
TECHNICAL SPECIFICATIONS
Vehicle dimensions
Dimension in inches (mm)Dimension description
160.5 (4077)Maximum length
81.4 (2067)Overall width including exterior mirrors
63.1 - 63.5 (1604 - 1613)Overall height - EC kerb weight
98.0 (2489)Wheelbase
58.5 - 58.7 (1487 - 1492)Front track
58.1 - 58.3 (1477 - 1482)Rear track
168Capacities and Specifications
Page 243 of 256
Downloaded from www.Manualslib.com manuals search engine THE GRACENOTE SOFTWARE, EACH ITEMOF GRACENOTE DATA AND THEGRACENOTE CONTENT ARE LICENCEDTO YOU "AS IS". NEITHER GRACENOTEMAKES ANY REPRESENTATIONS ORWARRANTIES, EXPRESS OR IMPLIED,REGARDING THE ACCURACY OF ANYGRACENOTE DATA FROM THEGRACENOTE SERVERS OR GRACENOTECONTENT. GRACENOTE COLLECTIVELYAND SEPARATELY RESERVE THE RIGHTTO DELETE DATA AND/OR CONTENTFROM THE COMPANIES' RESPECTIVESERVERS OR, IN THE CASE OFGRACENOTE, CHANGE DATACATEGORIES FOR ANY CAUSE THATGRACENOTE DEEMS SUFFICIENT. NOWARRANTY IS MADE THAT EITHERGRACENOTE CONTENT OR THEGRACENOTE SOFTWARE ORGRACENOTE SERVERS ARE ERROR-FREEOR THAT THE FUNCTIONING OF THEGRACENOTE SOFTWARE ORGRACENOTE SERVERS WILL BEUNINTERRUPTED. GRACENOTE IS NOTOBLIGATED TO PROVIDE YOU WITH ANYENHANCED OR ADDITIONAL DATA TYPESTHAT GRACENOTE MAY CHOOSE TOPROVIDE IN THE FUTURE AND IS FREETO DISCONTINUE ITS ONLINE SERVICESAT ANY TIME. GRACENOTE DISCLAIM ALLWARRANTIES EXPRESS OR IMPLIED,INCLUDING, BUT NOT LIMITED TO,IMPLIED WARRANTIES OFMERCHANTABILITY, FITNESS FOR APARTICULAR PURPOSE, TITLE, ANDNON-INFRINGEMENT. NEITHERGRACENOTE WARRANTS THE RESULTSTHAT WILL BE OBTAINED BY YOUR USEOF THE GRACENOTE SOFTWARE OR ANYGRACENOTE SERVER. IN NO CASE WILLGRACENOTE BE LIABLE FOR ANYCONSEQUENTIAL OR INCIDENTALDAMAGES OR FOR ANY LOST PROFITSOR LOST REVENUES FOR ANY REASONWHATSOEVER.
© Gracenote 2007.
FCC ID: KMHSYNCG2
IC: 1422A-SYNCG2
This device complies with Part 15 of theFCC Rules and with RSS-210 of IndustryCanada. Operation is subject to thefollowing two conditions: (1) This devicemay not cause harmful interference, and(2) this device must accept anyinterference received, includinginterference that may cause undesiredoperation.
WARNING
Changes or modifications notexpressively approved by the partyresponsible for compliance couldvoid the user's authority to operate theequipment. The term "IC" before the radiocertification number only signifies thatIndustry Canada technical specificationswere met.
The antenna used for this transmitter mustnot be co-located or operating inconjunction with any other antenna ortransmitter.
241Appendices
Page 246 of 256
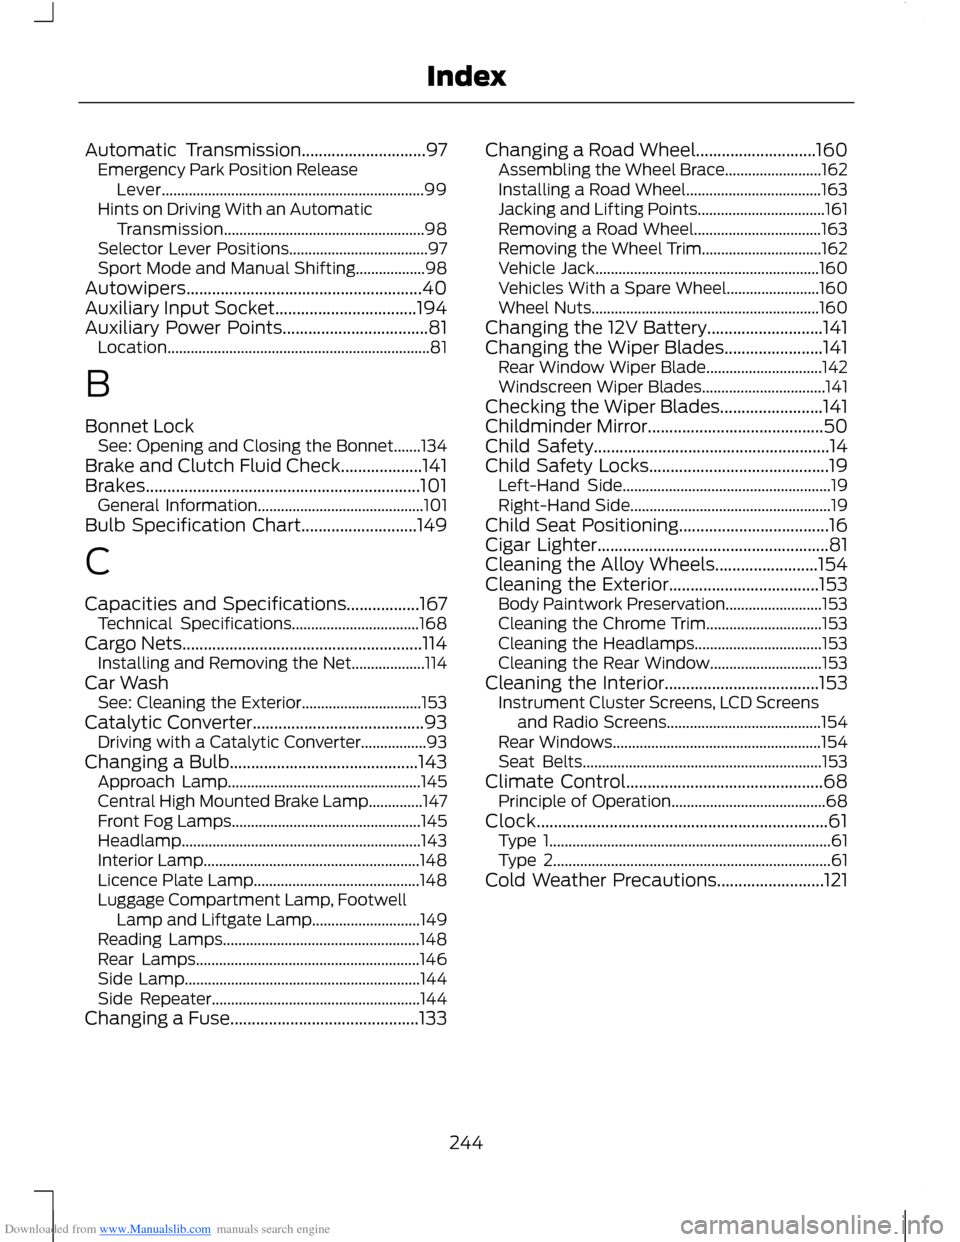
Downloaded from www.Manualslib.com manuals search engine Automatic Transmission.............................97Emergency Park Position ReleaseLever....................................................................99Hints on Driving With an AutomaticTransmission....................................................98Selector Lever Positions....................................97Sport Mode and Manual Shifting..................98Autowipers.......................................................40Auxiliary Input Socket.................................194Auxiliary Power Points..................................81Location....................................................................81
B
Bonnet LockSee: Opening and Closing the Bonnet.......134Brake and Clutch Fluid Check...................141Brakes................................................................101General Information...........................................101Bulb Specification Chart...........................149
C
Capacities and Specifications.................167Technical Specifications.................................168Cargo Nets........................................................114Installing and Removing the Net...................114Car WashSee: Cleaning the Exterior...............................153Catalytic Converter........................................93Driving with a Catalytic Converter.................93Changing a Bulb............................................143Approach Lamp..................................................145Central High Mounted Brake Lamp..............147Front Fog Lamps.................................................145Headlamp..............................................................143Interior Lamp........................................................148Licence Plate Lamp...........................................148Luggage Compartment Lamp, FootwellLamp and Liftgate Lamp............................149Reading Lamps...................................................148Rear Lamps..........................................................146Side Lamp.............................................................144Side Repeater......................................................144Changing a Fuse............................................133
Changing a Road Wheel............................160Assembling the Wheel Brace.........................162Installing a Road Wheel...................................163Jacking and Lifting Points.................................161Removing a Road Wheel.................................163Removing the Wheel Trim...............................162Vehicle Jack..........................................................160Vehicles With a Spare Wheel........................160Wheel Nuts...........................................................160Changing the 12V Battery...........................141Changing the Wiper Blades.......................141Rear Window Wiper Blade..............................142Windscreen Wiper Blades................................141Checking the Wiper Blades........................141Childminder Mirror.........................................50Child Safety.......................................................14Child Safety Locks..........................................19Left-Hand Side......................................................19Right-Hand Side....................................................19Child Seat Positioning...................................16Cigar Lighter......................................................81Cleaning the Alloy Wheels........................154Cleaning the Exterior...................................153Body Paintwork Preservation.........................153Cleaning the Chrome Trim..............................153Cleaning the Headlamps.................................153Cleaning the Rear Window.............................153Cleaning the Interior....................................153Instrument Cluster Screens, LCD Screensand Radio Screens........................................154Rear Windows......................................................154Seat Belts..............................................................153Climate Control..............................................68Principle of Operation........................................68Clock....................................................................61Type 1.........................................................................61Type 2........................................................................61Cold Weather Precautions.........................121
244Index
Page 247 of 256
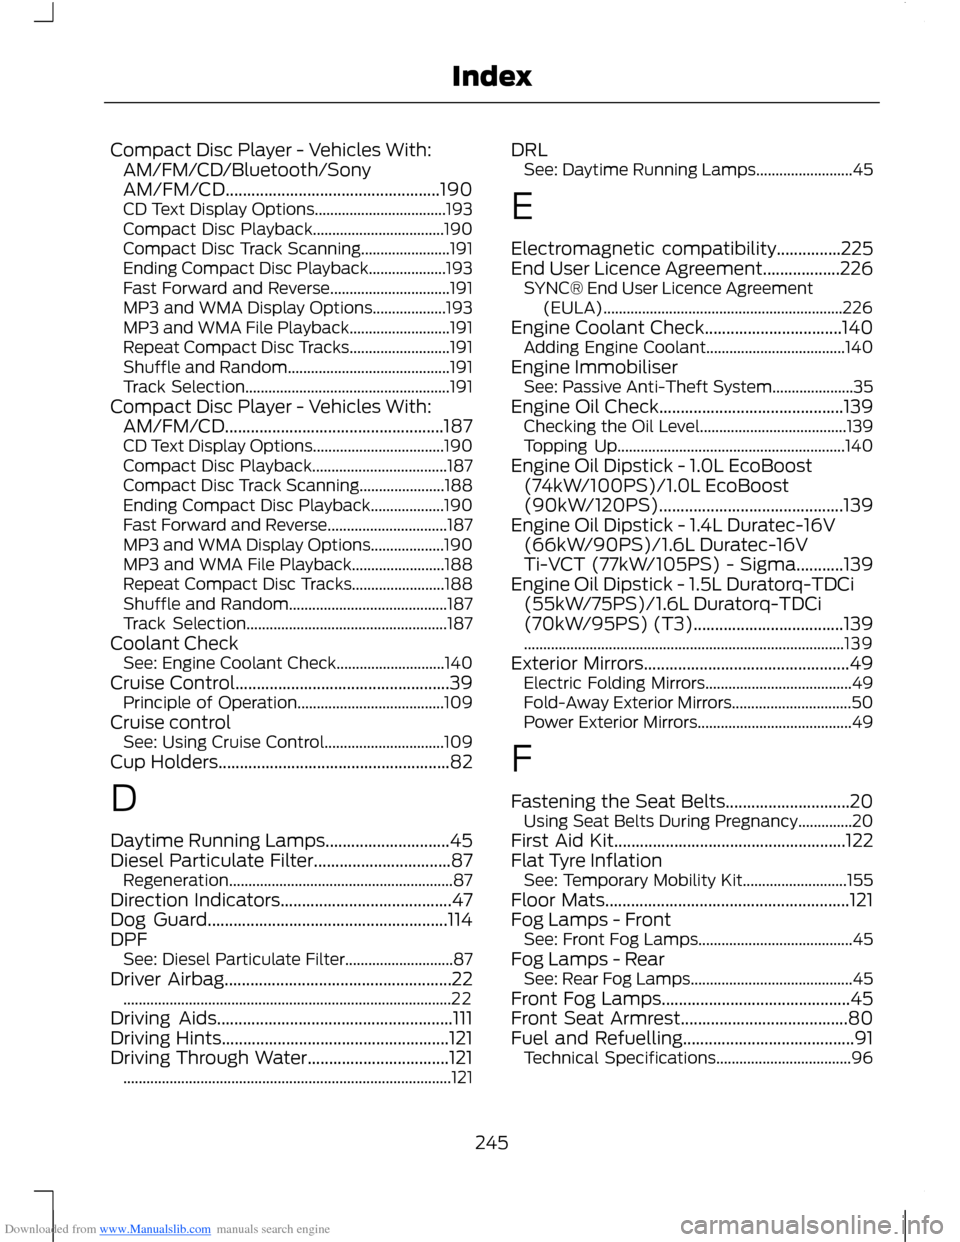
Downloaded from www.Manualslib.com manuals search engine Compact Disc Player - Vehicles With:AM/FM/CD/Bluetooth/SonyAM/FM/CD..................................................190CD Text Display Options..................................193Compact Disc Playback..................................190Compact Disc Track Scanning.......................191Ending Compact Disc Playback....................193Fast Forward and Reverse...............................191MP3 and WMA Display Options...................193MP3 and WMA File Playback..........................191Repeat Compact Disc Tracks..........................191Shuffle and Random..........................................191Track Selection.....................................................191Compact Disc Player - Vehicles With:AM/FM/CD...................................................187CD Text Display Options..................................190Compact Disc Playback...................................187Compact Disc Track Scanning......................188Ending Compact Disc Playback...................190Fast Forward and Reverse...............................187MP3 and WMA Display Options...................190MP3 and WMA File Playback........................188Repeat Compact Disc Tracks........................188Shuffle and Random.........................................187Track Selection....................................................187Coolant CheckSee: Engine Coolant Check............................140Cruise Control..................................................39Principle of Operation......................................109Cruise controlSee: Using Cruise Control...............................109Cup Holders......................................................82
D
Daytime Running Lamps.............................45Diesel Particulate Filter................................87Regeneration..........................................................87Direction Indicators........................................47Dog Guard........................................................114DPFSee: Diesel Particulate Filter............................87Driver Airbag.....................................................22.....................................................................................22Driving Aids.......................................................111Driving Hints.....................................................121Driving Through Water.................................121.....................................................................................121
DRLSee: Daytime Running Lamps.........................45
E
Electromagnetic compatibility...............225End User Licence Agreement..................226SYNC® End User Licence Agreement(EULA)..............................................................226Engine Coolant Check................................140Adding Engine Coolant....................................140Engine ImmobiliserSee: Passive Anti-Theft System.....................35Engine Oil Check...........................................139Checking the Oil Level......................................139Topping Up...........................................................140Engine Oil Dipstick - 1.0L EcoBoost(74kW/100PS)/1.0L EcoBoost(90kW/120PS)...........................................139Engine Oil Dipstick - 1.4L Duratec-16V(66kW/90PS)/1.6L Duratec-16VTi-VCT (77kW/105PS) - Sigma...........139Engine Oil Dipstick - 1.5L Duratorq-TDCi(55kW/75PS)/1.6L Duratorq-TDCi(70kW/95PS) (T3)...................................139...................................................................................139Exterior Mirrors................................................49Electric Folding Mirrors......................................49Fold-Away Exterior Mirrors...............................50Power Exterior Mirrors........................................49
F
Fastening the Seat Belts.............................20Using Seat Belts During Pregnancy..............20First Aid Kit......................................................122Flat Tyre InflationSee: Temporary Mobility Kit...........................155Floor Mats.........................................................121Fog Lamps - FrontSee: Front Fog Lamps........................................45Fog Lamps - RearSee: Rear Fog Lamps..........................................45Front Fog Lamps............................................45Front Seat Armrest.......................................80Fuel and Refuelling........................................91Technical Specifications...................................96
245Index