ECU FORD B MAX 2012 1.G Owners Manual
[x] Cancel search | Manufacturer: FORD, Model Year: 2012, Model line: B MAX, Model: FORD B MAX 2012 1.GPages: 256, PDF Size: 19.67 MB
Page 3 of 256
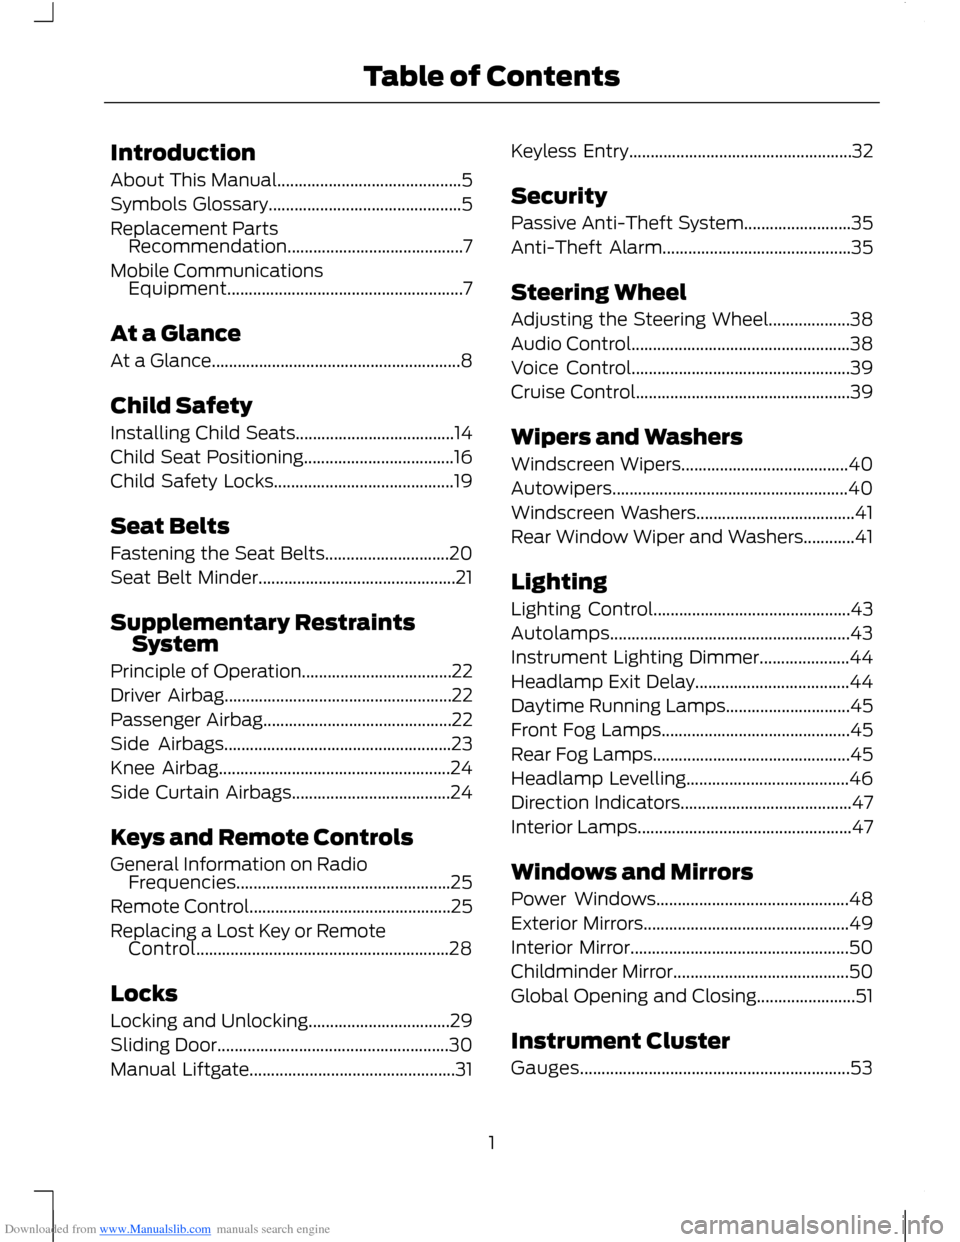
Downloaded from www.Manualslib.com manuals search engine Introduction
About This Manual...........................................5
Symbols Glossary.............................................5
Replacement PartsRecommendation.........................................7
Mobile CommunicationsEquipment.......................................................7
At a Glance
At a Glance..........................................................8
Child Safety
Installing Child Seats.....................................14
Child Seat Positioning...................................16
Child Safety Locks..........................................19
Seat Belts
Fastening the Seat Belts.............................20
Seat Belt Minder..............................................21
Supplementary RestraintsSystem
Principle of Operation...................................22
Driver Airbag.....................................................22
Passenger Airbag............................................22
Side Airbags.....................................................23
Knee Airbag......................................................24
Side Curtain Airbags.....................................24
Keys and Remote Controls
General Information on RadioFrequencies..................................................25
Remote Control...............................................25
Replacing a Lost Key or RemoteControl...........................................................28
Locks
Locking and Unlocking.................................29
Sliding Door......................................................30
Manual Liftgate................................................31
Keyless Entry....................................................32
Security
Passive Anti-Theft System.........................35
Anti-Theft Alarm............................................35
Steering Wheel
Adjusting the Steering Wheel...................38
Audio Control...................................................38
Voice Control...................................................39
Cruise Control..................................................39
Wipers and Washers
Windscreen Wipers.......................................40
Autowipers.......................................................40
Windscreen Washers.....................................41
Rear Window Wiper and Washers............41
Lighting
Lighting Control..............................................43
Autolamps........................................................43
Instrument Lighting Dimmer.....................44
Headlamp Exit Delay....................................44
Daytime Running Lamps.............................45
Front Fog Lamps............................................45
Rear Fog Lamps..............................................45
Headlamp Levelling......................................46
Direction Indicators........................................47
Interior Lamps..................................................47
Windows and Mirrors
Power Windows.............................................48
Exterior Mirrors................................................49
Interior Mirror...................................................50
Childminder Mirror.........................................50
Global Opening and Closing.......................51
Instrument Cluster
Gauges...............................................................53
1Table of Contents
Page 6 of 256
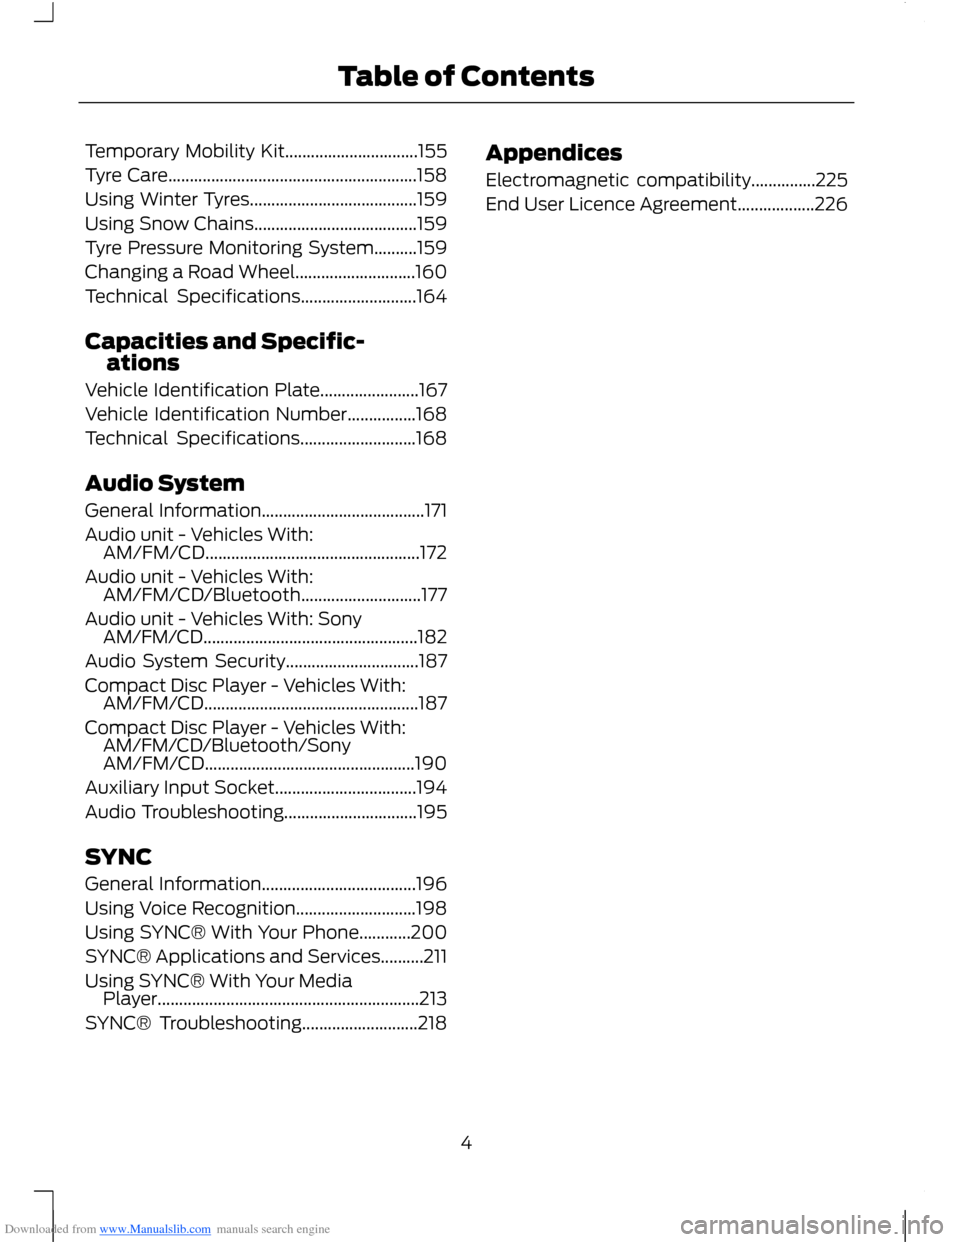
Downloaded from www.Manualslib.com manuals search engine Temporary Mobility Kit...............................155
Tyre Care..........................................................158
Using Winter Tyres.......................................159
Using Snow Chains......................................159
Tyre Pressure Monitoring System..........159
Changing a Road Wheel............................160
Technical Specifications...........................164
Capacities and Specific-ations
Vehicle Identification Plate.......................167
Vehicle Identification Number................168
Technical Specifications...........................168
Audio System
General Information......................................171
Audio unit - Vehicles With:AM/FM/CD..................................................172
Audio unit - Vehicles With:AM/FM/CD/Bluetooth............................177
Audio unit - Vehicles With: SonyAM/FM/CD..................................................182
Audio System Security...............................187
Compact Disc Player - Vehicles With:AM/FM/CD..................................................187
Compact Disc Player - Vehicles With:AM/FM/CD/Bluetooth/SonyAM/FM/CD.................................................190
Auxiliary Input Socket.................................194
Audio Troubleshooting...............................195
SYNC
General Information....................................196
Using Voice Recognition............................198
Using SYNC® With Your Phone............200
SYNC® Applications and Services..........211
Using SYNC® With Your MediaPlayer.............................................................213
SYNC® Troubleshooting...........................218
Appendices
Electromagnetic compatibility...............225
End User Licence Agreement..................226
4Table of Contents
Page 9 of 256
Downloaded from www.Manualslib.com manuals search engine REPLACEMENT PARTS
RECOMMENDATION
Your vehicle has been built to the higheststandards using quality parts. Werecommend that you demand the use ofgenuine Ford and Motorcraft partswhenever your vehicle requires scheduledmaintenance or repair. You can clearlyidentify genuine Ford and Motorcraft partsby looking for the Ford, FoMoCo orMotorcraft branding on the parts or theirpackaging.
Scheduled Maintenance andMechanical Repairs
One of the best ways for you to make surethat your vehicle provides years of serviceis to have it maintained in line with ourrecommendations using parts thatconform to the specifications detailed inthis Owner’s Manual. Genuine Ford andMotorcraft parts meet or exceed thesespecifications.
Collision Repairs
We hope that you never experience acollision, but accidents do happen. GenuineFord replacement collision parts meet ourstringent requirements for fit, finish,structural integrity, corrosion protectionand dent resistance. During vehicledevelopment we validate these partsdeliver the intended level of protection asa whole system. A great way to know forsure you are getting this level of protectionis to use genuine Ford replacementcollision parts.
Warranty on Replacement Parts
Genuine Ford and Motorcraft replacementparts are the only replacement parts thatbenefit from a Ford Warranty. Damagecaused to your vehicle as a result of thefailure of non-Ford parts may not becovered by the Ford Warranty. Foradditional information, refer to the termsand conditions of the Ford Warranty.
MOBILE COMMUNICATIONS
EQUIPMENT
Using mobile communications equipmentis becoming increasingly important in theconduct of business and personal affairs.However, you must not compromise yourown or others’ safety when using suchequipment. Mobile communications canenhance personal safety and security whenappropriately used, particularly inemergency situations. Safety must beparamount when using mobilecommunications equipment to avoidnegating these benefits. Mobilecommunication equipment includes, butis not limited to, cellular phones, pagers,portable email devices, text messagingdevices and portable two-way radios.
WARNING
Driving while distracted can result inloss of vehicle control, accident andinjury. We strongly recommend thatyou use extreme caution when using anydevice or feature that may take your focusoff the road. Your primary responsibility isthe safe operation of your vehicle. Werecommend against the use of anyhandheld device while driving and that youcomply with all applicable laws.
7Introduction
Page 16 of 256
Downloaded from www.Manualslib.com manuals search engine INSTALLING CHILD SEATS
WARNINGS
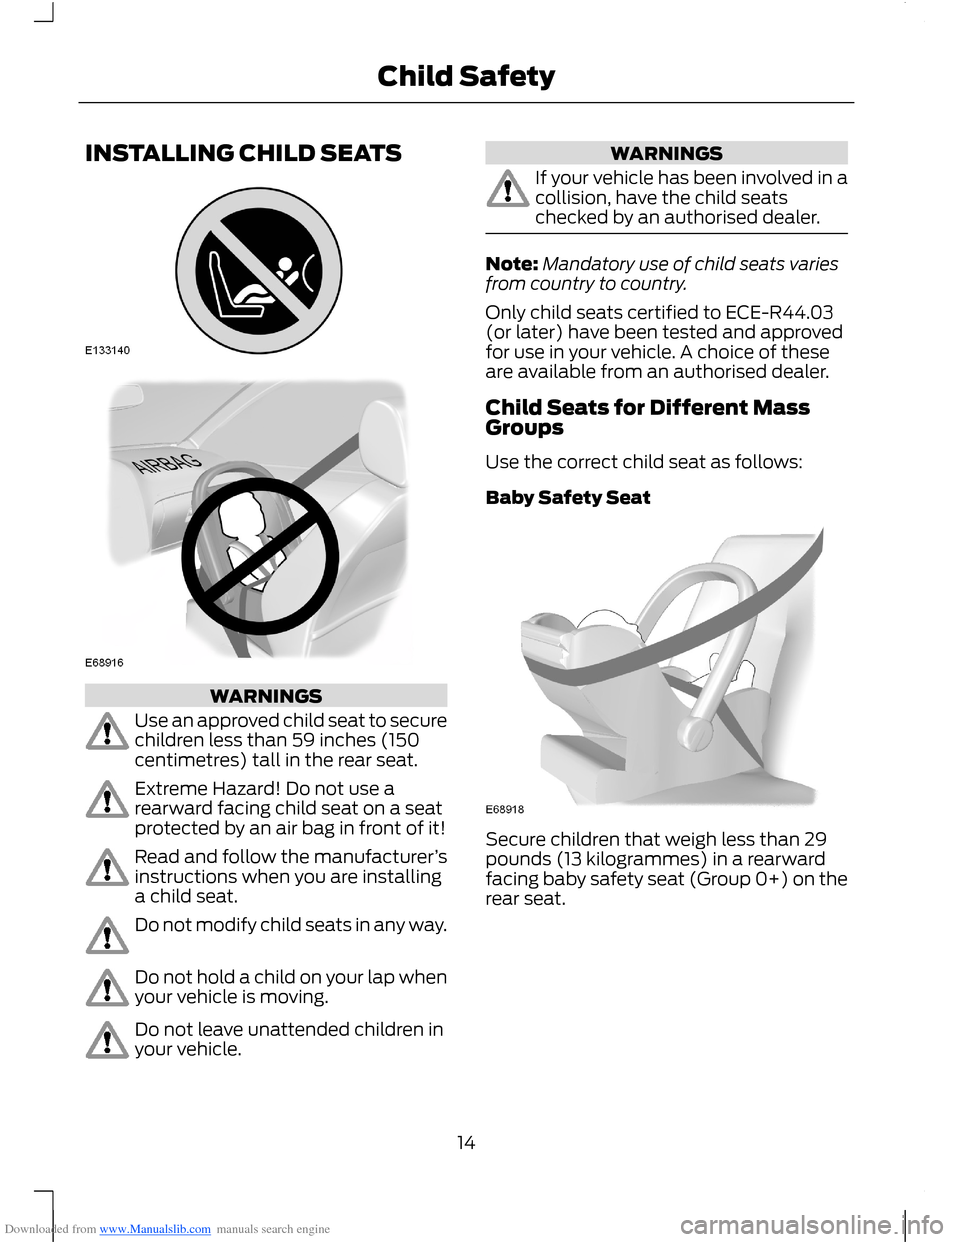
Use an approved child seat to securechildren less than 59 inches (150centimetres) tall in the rear seat.
Extreme Hazard! Do not use arearward facing child seat on a seatprotected by an air bag in front of it!
Read and follow the manufacturer’sinstructions when you are installinga child seat.
Do not modify child seats in any way.
Do not hold a child on your lap whenyour vehicle is moving.
Do not leave unattended children inyour vehicle.
WARNINGS
If your vehicle has been involved in acollision, have the child seatschecked by an authorised dealer.
Note:Mandatory use of child seats variesfrom country to country.
Only child seats certified to ECE-R44.03(or later) have been tested and approvedfor use in your vehicle. A choice of theseare available from an authorised dealer.
Child Seats for Different MassGroups
Use the correct child seat as follows:
Baby Safety Seat
Secure children that weigh less than 29pounds (13 kilogrammes) in a rearwardfacing baby safety seat (Group 0+) on therear seat.
14Child Safety
Page 17 of 256
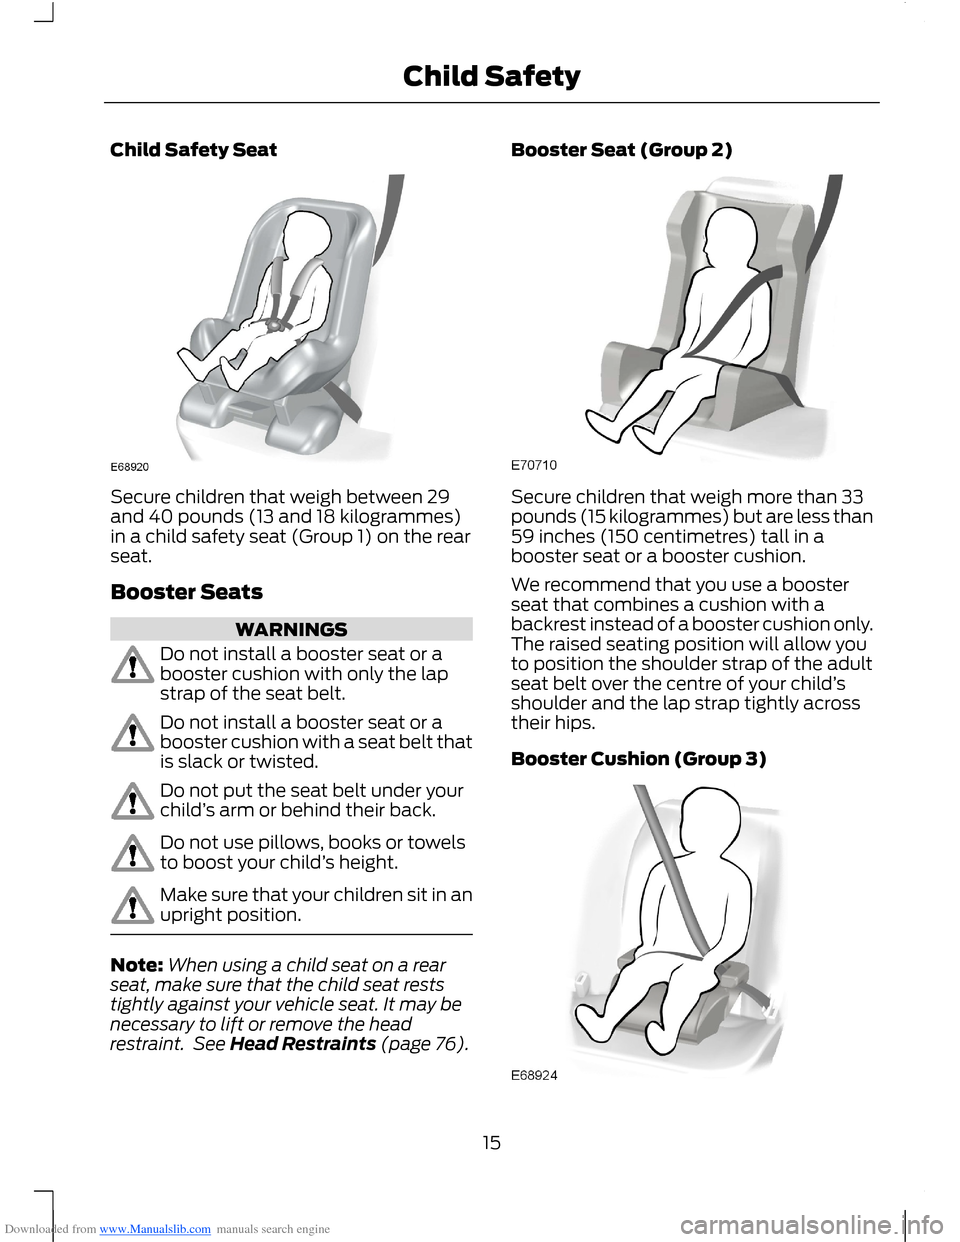
Downloaded from www.Manualslib.com manuals search engine Child Safety Seat
Secure children that weigh between 29and 40 pounds (13 and 18 kilogrammes)in a child safety seat (Group 1) on the rearseat.
Booster Seats
WARNINGS
Do not install a booster seat or abooster cushion with only the lapstrap of the seat belt.
Do not install a booster seat or abooster cushion with a seat belt thatis slack or twisted.
Do not put the seat belt under yourchild’s arm or behind their back.
Do not use pillows, books or towelsto boost your child’s height.
Make sure that your children sit in anupright position.
Note:When using a child seat on a rearseat, make sure that the child seat reststightly against your vehicle seat. It may benecessary to lift or remove the headrestraint. See Head Restraints (page 76).
Booster Seat (Group 2)
Secure children that weigh more than 33pounds (15 kilogrammes) but are less than59 inches (150 centimetres) tall in abooster seat or a booster cushion.
We recommend that you use a boosterseat that combines a cushion with abackrest instead of a booster cushion only.The raised seating position will allow youto position the shoulder strap of the adultseat belt over the centre of your child’sshoulder and the lap strap tightly acrosstheir hips.
Booster Cushion (Group 3)
15Child Safety
Page 19 of 256
Downloaded from www.Manualslib.com manuals search engine WARNINGS
Extreme Hazard! Do not use arearward facing child seat on a seatprotected by an air bag in front of it!
When using a child seat with asupport leg, the support leg mustrest securely on the floor.
When using a child seat with a seatbelt, make sure that the seat belt isnot slack or twisted.
WARNINGS
The child seat must rest tightlyagainst the vehicle seat. It may benecessary to lift or remove the headrestraint. See Head Restraints (page 76).
Note:When using a child seat on a frontseat, always adjust the front passenger'sseat to its fully rearward position. If it provesdifficult to tighten the lap section of the seatbelt without slack remaining, adjust theseatback to the fully upright position andraise the height of the seat. See Seats(page 76).
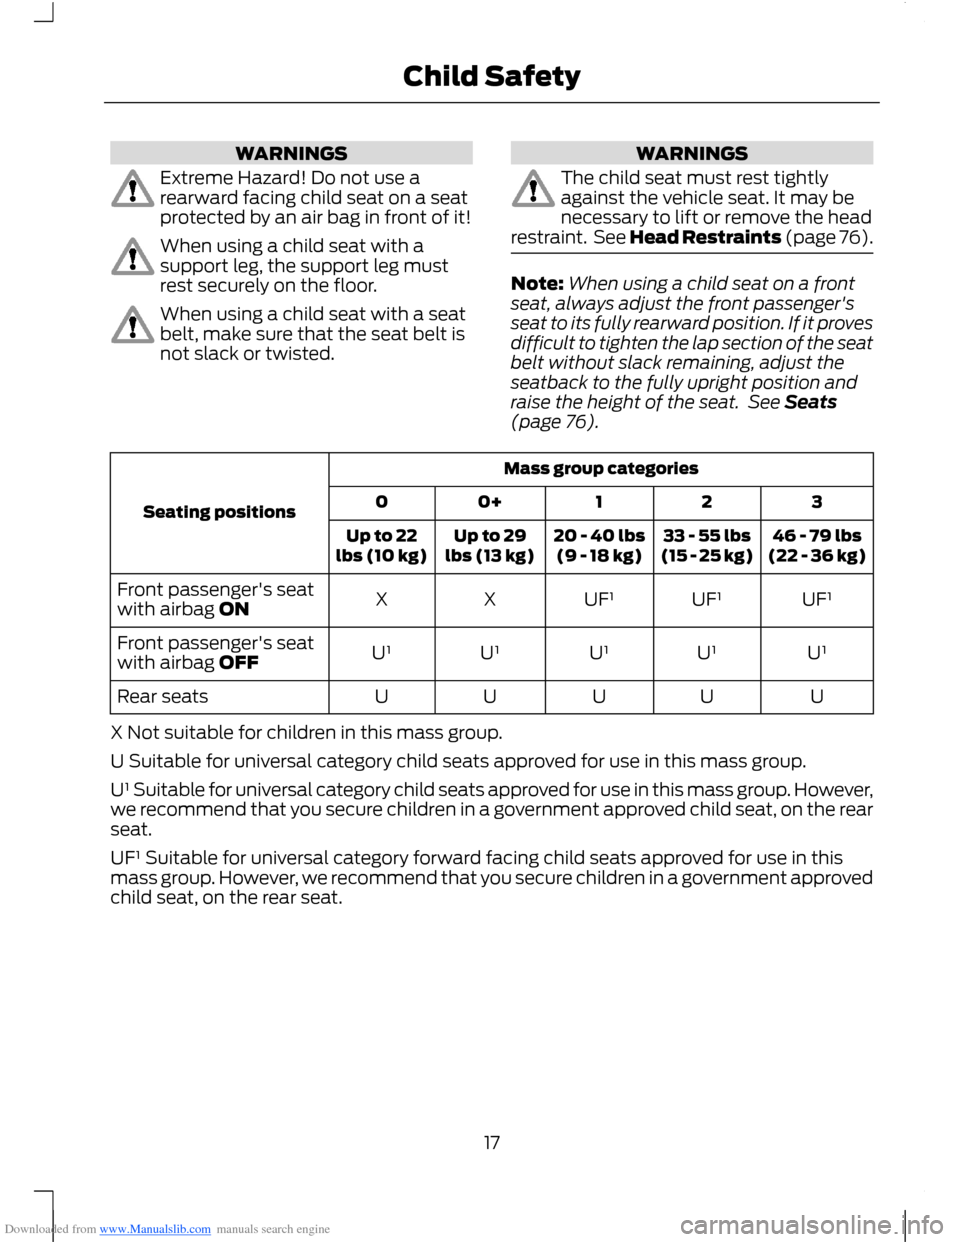
Mass group categories
Seating positions3210+0
46 - 79 lbs(22 - 36 kg)33 - 55 lbs(15 - 25 kg)20 - 40 lbs(9 - 18 kg)Up to 29lbs (13 kg)Up to 22lbs (10 kg)
UF¹UF¹UF¹XXFront passenger's seatwith airbag ON
U¹U¹U¹U¹U¹Front passenger's seatwith airbag OFF
UUUUURear seats
X Not suitable for children in this mass group.
U Suitable for universal category child seats approved for use in this mass group.
U¹ Suitable for universal category child seats approved for use in this mass group. However,we recommend that you secure children in a government approved child seat, on the rearseat.
UF¹ Suitable for universal category forward facing child seats approved for use in thismass group. However, we recommend that you secure children in a government approvedchild seat, on the rear seat.
17Child Safety
Page 22 of 256
Downloaded from www.Manualslib.com manuals search engine FASTENING THE SEAT BELTS
WARNINGS
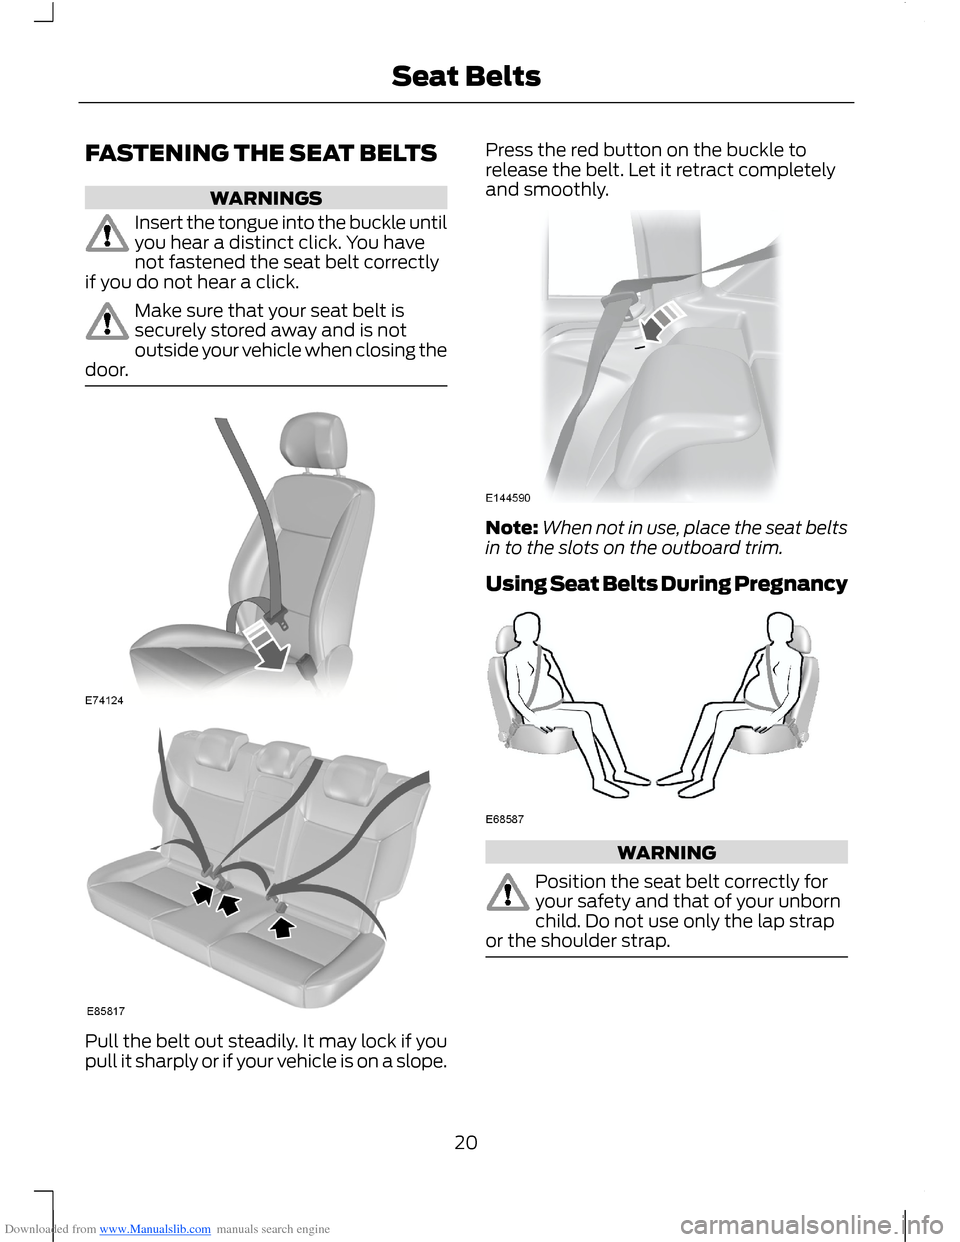
Insert the tongue into the buckle untilyou hear a distinct click. You havenot fastened the seat belt correctlyif you do not hear a click.
Make sure that your seat belt issecurely stored away and is notoutside your vehicle when closing thedoor.
Pull the belt out steadily. It may lock if youpull it sharply or if your vehicle is on a slope.
Press the red button on the buckle torelease the belt. Let it retract completelyand smoothly.
Note:When not in use, place the seat beltsin to the slots on the outboard trim.
Using Seat Belts During Pregnancy
WARNING
Position the seat belt correctly foryour safety and that of your unbornchild. Do not use only the lap strapor the shoulder strap.
20Seat Belts
Page 37 of 256
Downloaded from www.Manualslib.com manuals search engine PASSIVE ANTI-THEFT
SYSTEM
Principle of Operation
The engine immobiliser is a theft protectionsystem that prevents someone fromstarting the engine with an incorrectlycoded key.
Coded Keys
Note:Do not shield your keys with metalobjects. This may prevent the receiver fromrecognising your key as a valid one.
Note:Have all of your remaining keyserased and recoded if you lose a key. Ask anauthorised dealer for further information.Have replacement keys recoded togetherwith your existing keys.
If you lose a key, you can obtain areplacement from an authroised dealer. Ifpossible, provide them with the keynumber from the tag provided with theoriginal keys. You can also obtainadditional keys from an authroised dealer.
Arming the Engine Immobiliser
After you switch the ignition off the engineimmobiliser will arm automatically after ashort time.
Disarming the Engine Immobiliser
The engine immobiliser is disarmedautomatically when you switch the ignitionon with a correctly coded key.
When the indicator stays on, flashes forapproximately one minute or repeatedlyat irregular intervals, the key has not beenrecognised. Remove the key and try again.
If you are unable to start the engine with acorrectly coded key, this indicates amalfunction. Have the immobiliser checkedimmediately.
ANTI-THEFT ALARM
Alarm System
Your vehicle may have one of the followingalarm systems:
•Perimeter alarm.
•Perimeter alarm with interior sensors.
•Category one alarm with interiorsensors and battery back-up sounder.
Perimeter Alarm
The perimeter alarm is a deterrent againstunauthorised access to your vehiclethrough the doors and the bonnet. It alsoprotects the audio unit.
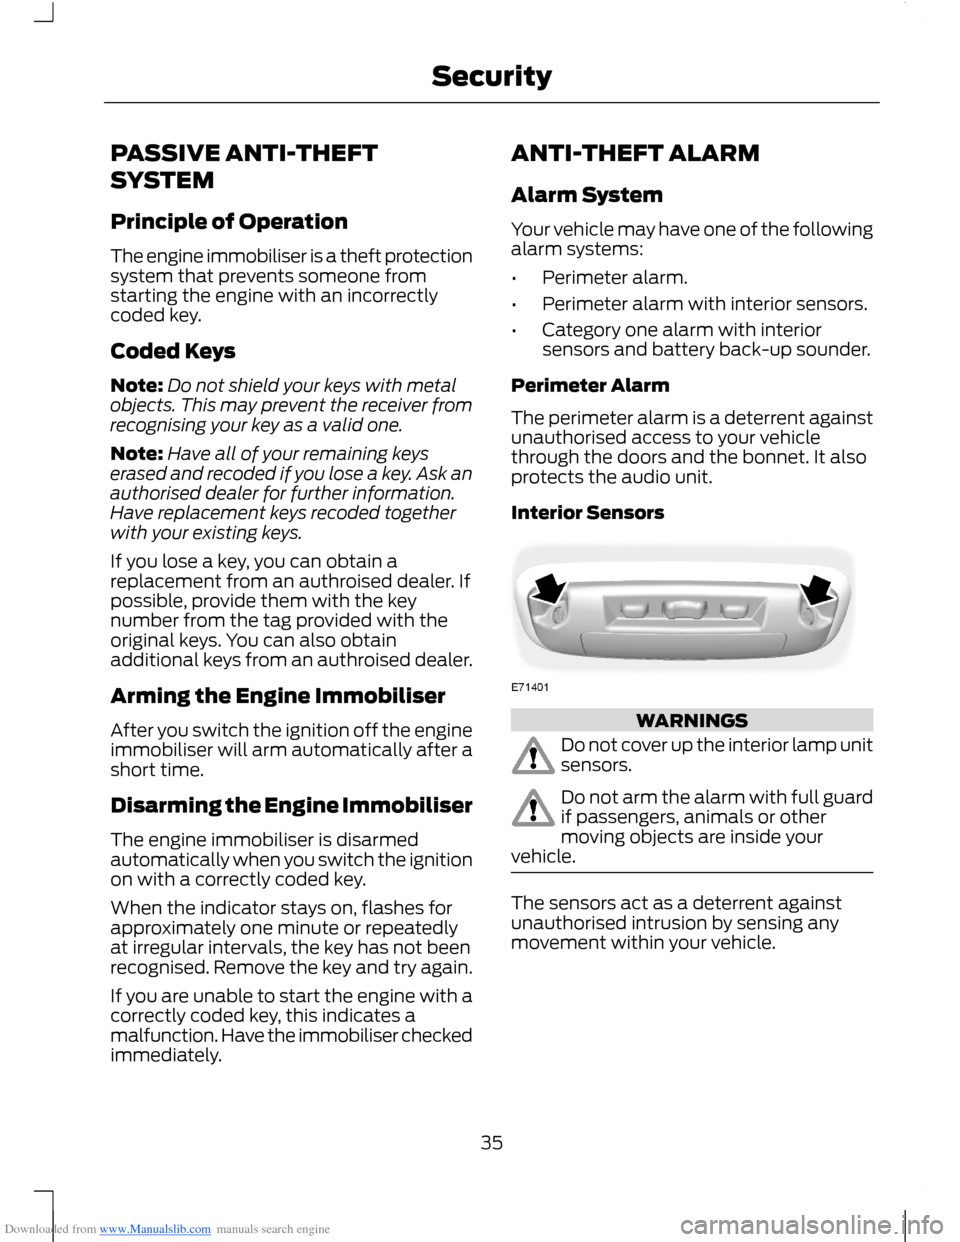
Interior Sensors
WARNINGS
Do not cover up the interior lamp unitsensors.
Do not arm the alarm with full guardif passengers, animals or othermoving objects are inside yourvehicle.
The sensors act as a deterrent againstunauthorised intrusion by sensing anymovement within your vehicle.
35Security
Page 38 of 256
Downloaded from www.Manualslib.com manuals search engine Battery Back-up Sounder
The battery back-up sounder is an extraalarm system which will sound a sirenwhen the alarm is triggered. When you lockyour vehicle the system is armed. Thesounder has its own battery and will soundan alarm siren even if someonedisconnects your vehicle battery or thebattery back-up sounder itself.
Triggering the Alarm
Once armed, the alarm is triggered in anyof the following ways:
•If someone opens a door, the liftgateor the hood without a valid key orremote control.
•If someone removes the audio ornavigation system.
•If you switch the ignition on without avalid key.
•If the interior sensors detect movementwithin your vehicle.
•On vehicles with a battery back-upsounder, if someone disconnects yourvehicle battery or the battery back-upsounder itself.
If the alarm is triggered, the alarm horn willsound for 30 seconds and the hazardwarning flasher will flash for five minutes.
Any further attempts to perform one of theabove will trigger the alarm again.
Full and Reduced Guard
Full Guard
Full guard is the standard setting.
In full guard, the interior sensors are onwhen you arm the alarm.
Note:This may result in false alarms ifanimals or moving objects are inside yourvehicle.
Reduced Guard
In reduced guard, the interior sensors areoff when you arm the alarm.
Note:You can set the alarm to reducedguard for the current ignition cycle only. Thealarm will reset to full guard the next timeyou switch the ignition on.
Ask on Exit
You can set the information display to askyou each time which level of guard youwish to set.
If you select Ask on Exit, the messageReduced guard? appears in theinformation display each time you switchthe ignition off. See InformationMessages (page 62).
If you wish to arm the alarm with reducedguard, press the OK button when thismessage appears.
If you wish to arm the alarm with full guard,leave your vehicle without pressing the OKbutton.
Selecting Full or Reduced Guard
Note:Selecting Reduced does not set thealarm permanently to reduced guard. It setsit to reduced guard only for the currentignition cycle. If you regularly set the alarmto reduced guard, select Ask on Exit.
You can select full or reduced guard usingthe information display. See GeneralInformation (page 58).
Arming the Alarm
To arm the alarm, lock your vehicle. SeeLocks (page 29).
36Security
Page 39 of 256
Downloaded from www.Manualslib.com manuals search engine Disarming the Alarm
Vehicles Without Keyless Entry
Perimeter Alarm
Disarm and silence the alarm by unlockingthe doors with the key and switching theignition on with a correctly coded key orunlocking the doors with the remotecontrol.
Category One Alarm
Disarm and silence the alarm by unlockingthe doors with the key and switching theignition on with a correctly coded keywithin 12 seconds or unlocking the doorswith the remote control.
Vehicles with Keyless Entry
Note:A valid passive key must be locatedwithin the detection range of that door forkeyless entry. See Keyless Entry (page 32).
Perimeter Alarm
Disarm and silence the alarm by unlockingthe doors and switching the ignition on orunlocking the doors with the remotecontrol.
Category One Alarm
Disarm and silence the alarm by unlockingthe doors and switching the ignition onwithin 12 seconds or unlocking the doorsor the liftgate with the remote control.
37Security