check engine light FORD B MAX 2013 1.G Owners Manual
[x] Cancel search | Manufacturer: FORD, Model Year: 2013, Model line: B MAX, Model: FORD B MAX 2013 1.GPages: 298, PDF Size: 20.63 MB
Page 3 of 298
Downloaded from www.Manualslib.com manuals search engine Introduction
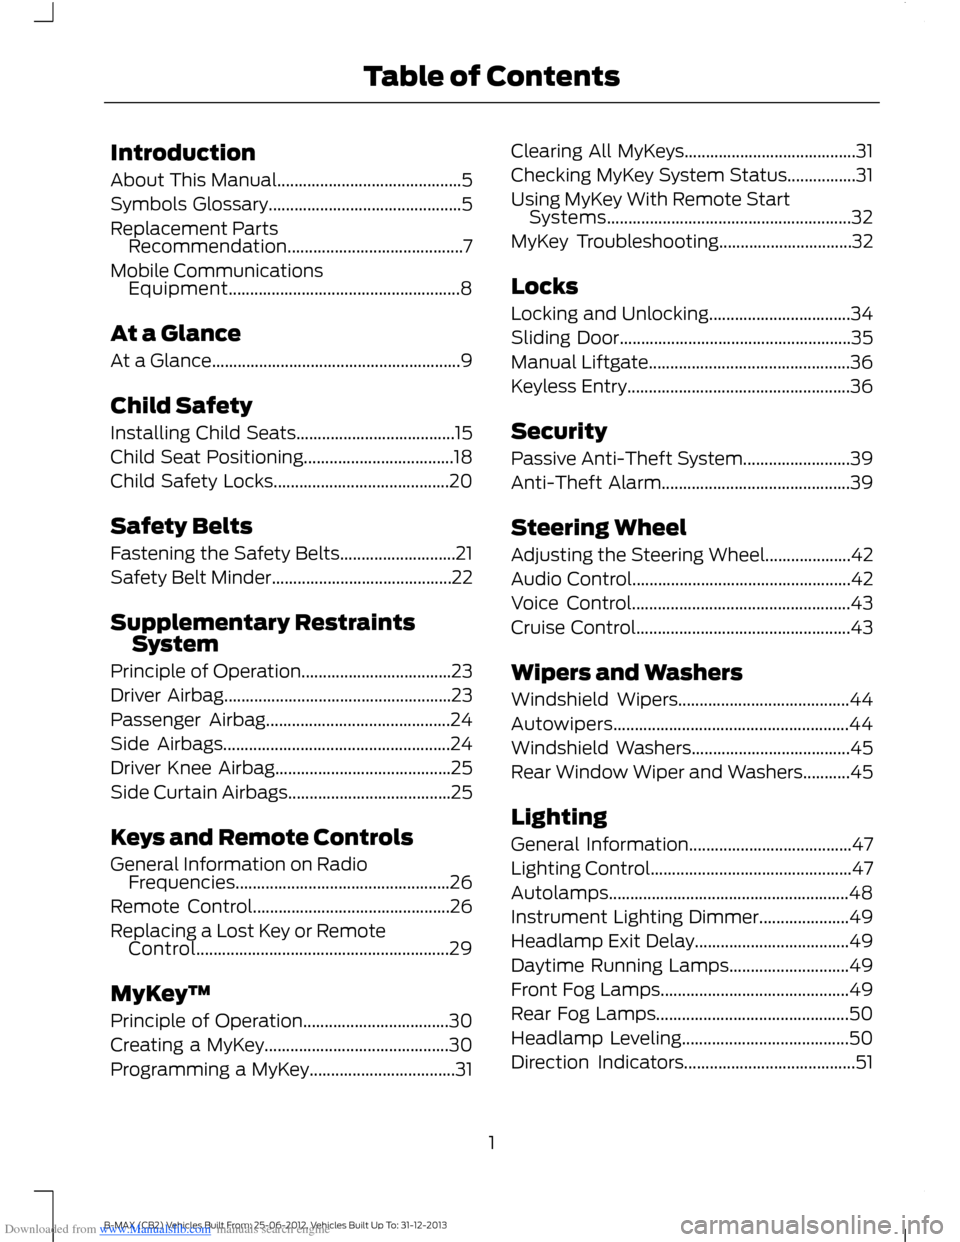
About This Manual...........................................5
Symbols Glossary.............................................5
Replacement PartsRecommendation.........................................7
Mobile CommunicationsEquipment......................................................8
At a Glance
At a Glance..........................................................9
Child Safety
Installing Child Seats.....................................15
Child Seat Positioning...................................18
Child Safety Locks.........................................20
Safety Belts
Fastening the Safety Belts...........................21
Safety Belt Minder..........................................22
Supplementary RestraintsSystem
Principle of Operation...................................23
Driver Airbag.....................................................23
Passenger Airbag...........................................24
Side Airbags.....................................................24
Driver Knee Airbag.........................................25
Side Curtain Airbags......................................25
Keys and Remote Controls
General Information on RadioFrequencies..................................................26
Remote Control..............................................26
Replacing a Lost Key or RemoteControl...........................................................29
MyKey™
Principle of Operation..................................30
Creating a MyKey...........................................30
Programming a MyKey..................................31
Clearing All MyKeys........................................31
Checking MyKey System Status................31
Using MyKey With Remote StartSystems.........................................................32
MyKey Troubleshooting...............................32
Locks
Locking and Unlocking.................................34
Sliding Door......................................................35
Manual Liftgate...............................................36
Keyless Entry....................................................36
Security
Passive Anti-Theft System.........................39
Anti-Theft Alarm............................................39
Steering Wheel
Adjusting the Steering Wheel....................42
Audio Control...................................................42
Voice Control...................................................43
Cruise Control..................................................43
Wipers and Washers
Windshield Wipers........................................44
Autowipers.......................................................44
Windshield Washers.....................................45
Rear Window Wiper and Washers...........45
Lighting
General Information......................................47
Lighting Control...............................................47
Autolamps........................................................48
Instrument Lighting Dimmer.....................49
Headlamp Exit Delay....................................49
Daytime Running Lamps............................49
Front Fog Lamps............................................49
Rear Fog Lamps.............................................50
Headlamp Leveling.......................................50
Direction Indicators........................................51
1B-MAX (CB2) Vehicles Built From: 25-06-2012, Vehicles Built Up To: 31-12-2013Table of Contents
Page 8 of 298
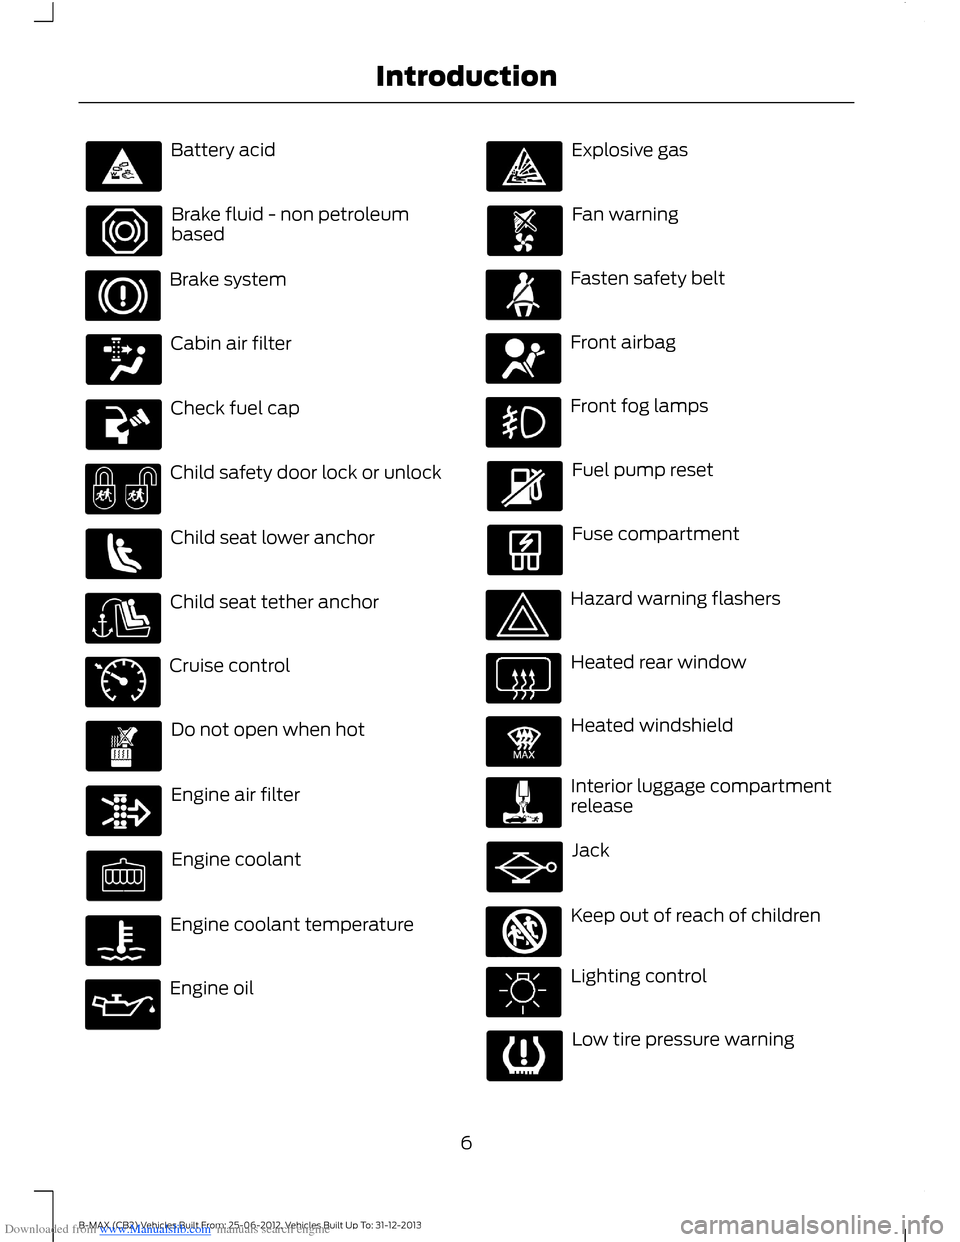
Downloaded from www.Manualslib.com manuals search engine Battery acid
Brake fluid - non petroleumbased
Brake system
Cabin air filter
Check fuel cap
Child safety door lock or unlock
Child seat lower anchor
Child seat tether anchor
Cruise control
Do not open when hot
Engine air filter
Engine coolant
Engine coolant temperature
Engine oil
Explosive gas
Fan warning
Fasten safety belt
Front airbag
Front fog lamps
Fuel pump reset
Fuse compartment
Hazard warning flashers
Heated rear window
Heated windshield
Interior luggage compartmentrelease
Jack
Keep out of reach of children
Lighting control
Low tire pressure warning
6B-MAX (CB2) Vehicles Built From: 25-06-2012, Vehicles Built Up To: 31-12-2013Introduction
Page 49 of 298
Downloaded from www.Manualslib.com manuals search engine GENERAL INFORMATION
Condensation in Lamp Assemblies
Exterior lamps have vents toaccommodate normal changes in airpressure.
Condensation can be a natural by-productof this design. When moist air enters thelamp assembly through the vents, there isa possibility that condensation can occurwhen the temperature is cold. Whennormal condensation occurs, a fine mistcan form on the interior of the lens. Thefine mist eventually clears and exitsthrough the vents during normal operation.
Clearing time may take as long as 48 hoursunder dry weather conditions.
Examples of acceptable condensation are:
•The presence of a fine mist (no streaks,drip marks or large droplets).
•A fine mist covers less than 50% of thelens.
Examples of unacceptable condensationare:
•A water puddle inside the lamp.
•Streaks, drip marks or large dropletspresent on the interior of the lens.
If you see any unacceptable condensation,have your vehicle checked by an authorizeddealer.
LIGHTING CONTROL
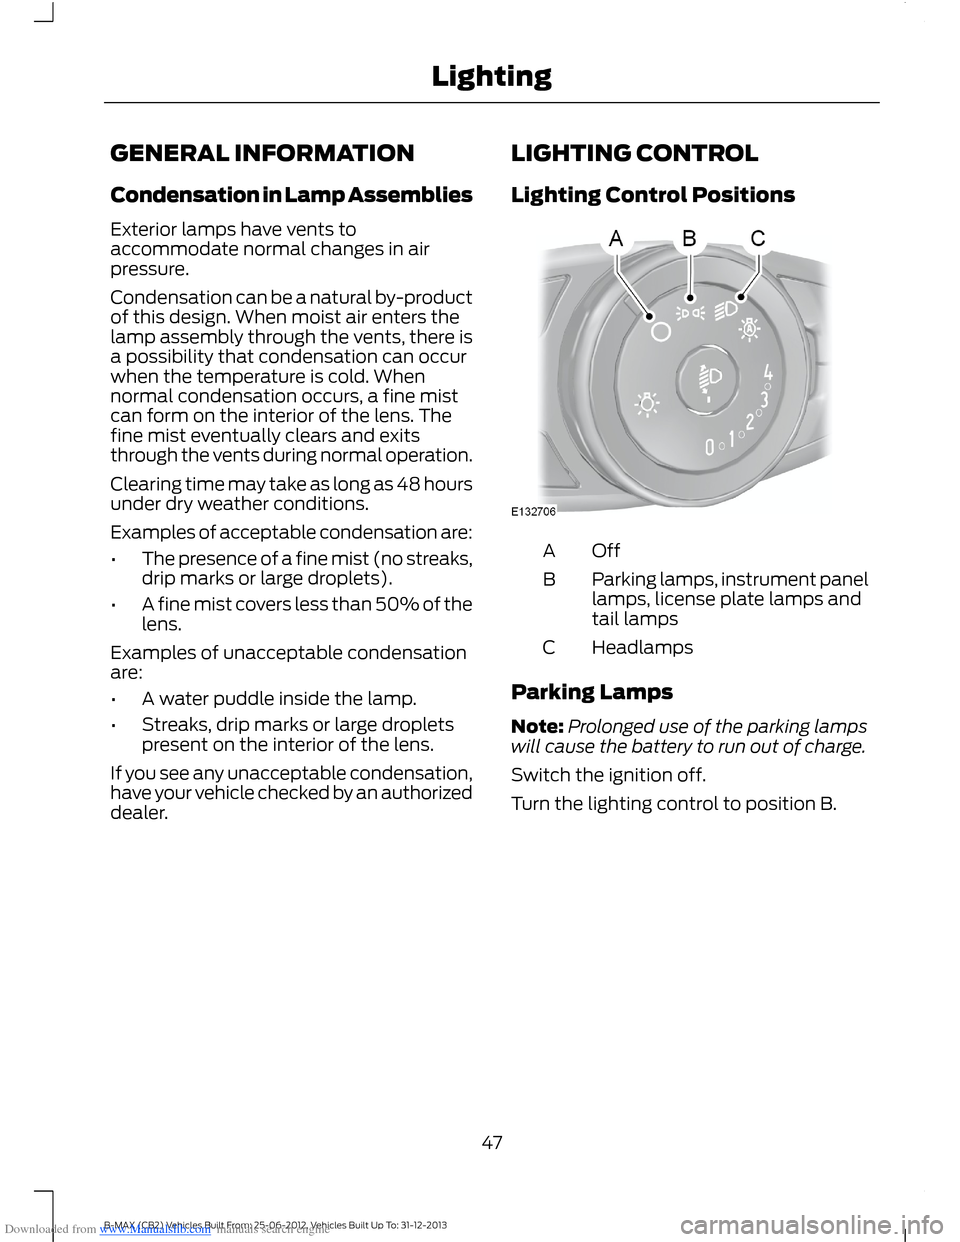
Lighting Control Positions
OffA
Parking lamps, instrument panellamps, license plate lamps andtail lamps
B
HeadlampsC
Parking Lamps
Note:Prolonged use of the parking lampswill cause the battery to run out of charge.
Switch the ignition off.
Turn the lighting control to position B.
47B-MAX (CB2) Vehicles Built From: 25-06-2012, Vehicles Built Up To: 31-12-2013Lighting
Page 72 of 298
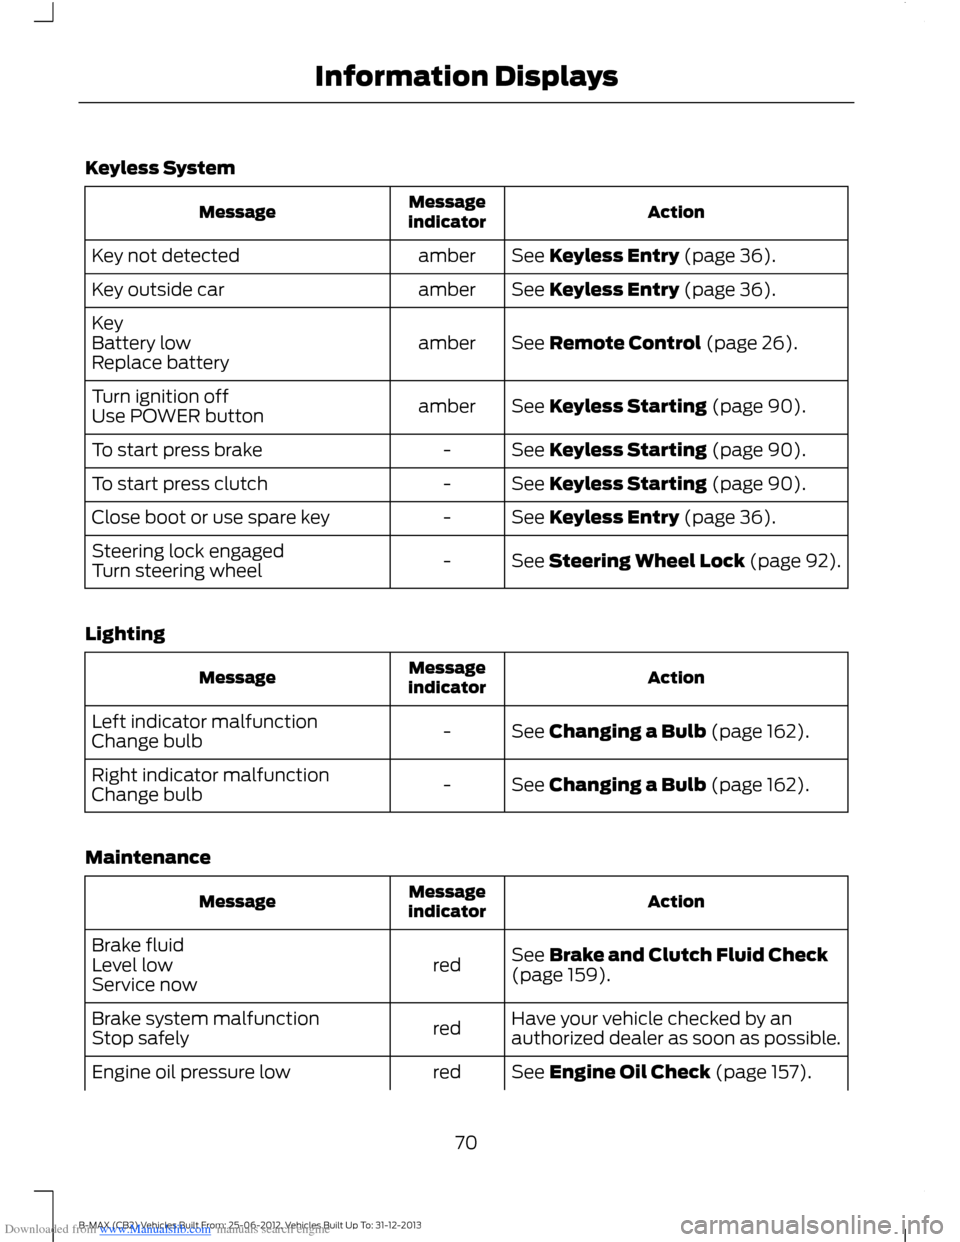
Downloaded from www.Manualslib.com manuals search engine Keyless System
ActionMessageindicatorMessage
See Keyless Entry (page 36).amberKey not detected
See Keyless Entry (page 36).amberKey outside car
See Remote Control (page 26).amberKeyBattery lowReplace battery
See Keyless Starting (page 90).amberTurn ignition offUse POWER button
See Keyless Starting (page 90).-To start press brake
See Keyless Starting (page 90).-To start press clutch
See Keyless Entry (page 36).-Close boot or use spare key
See Steering Wheel Lock (page 92).-Steering lock engagedTurn steering wheel
Lighting
ActionMessageindicatorMessage
See Changing a Bulb (page 162).-Left indicator malfunctionChange bulb
See Changing a Bulb (page 162).-Right indicator malfunctionChange bulb
Maintenance
ActionMessageindicatorMessage
See Brake and Clutch Fluid Check(page 159).redBrake fluidLevel lowService now
Have your vehicle checked by anauthorized dealer as soon as possible.redBrake system malfunctionStop safely
See Engine Oil Check (page 157).redEngine oil pressure low
70B-MAX (CB2) Vehicles Built From: 25-06-2012, Vehicles Built Up To: 31-12-2013Information Displays
Page 73 of 298
Downloaded from www.Manualslib.com manuals search engine ActionMessageindicatorMessage
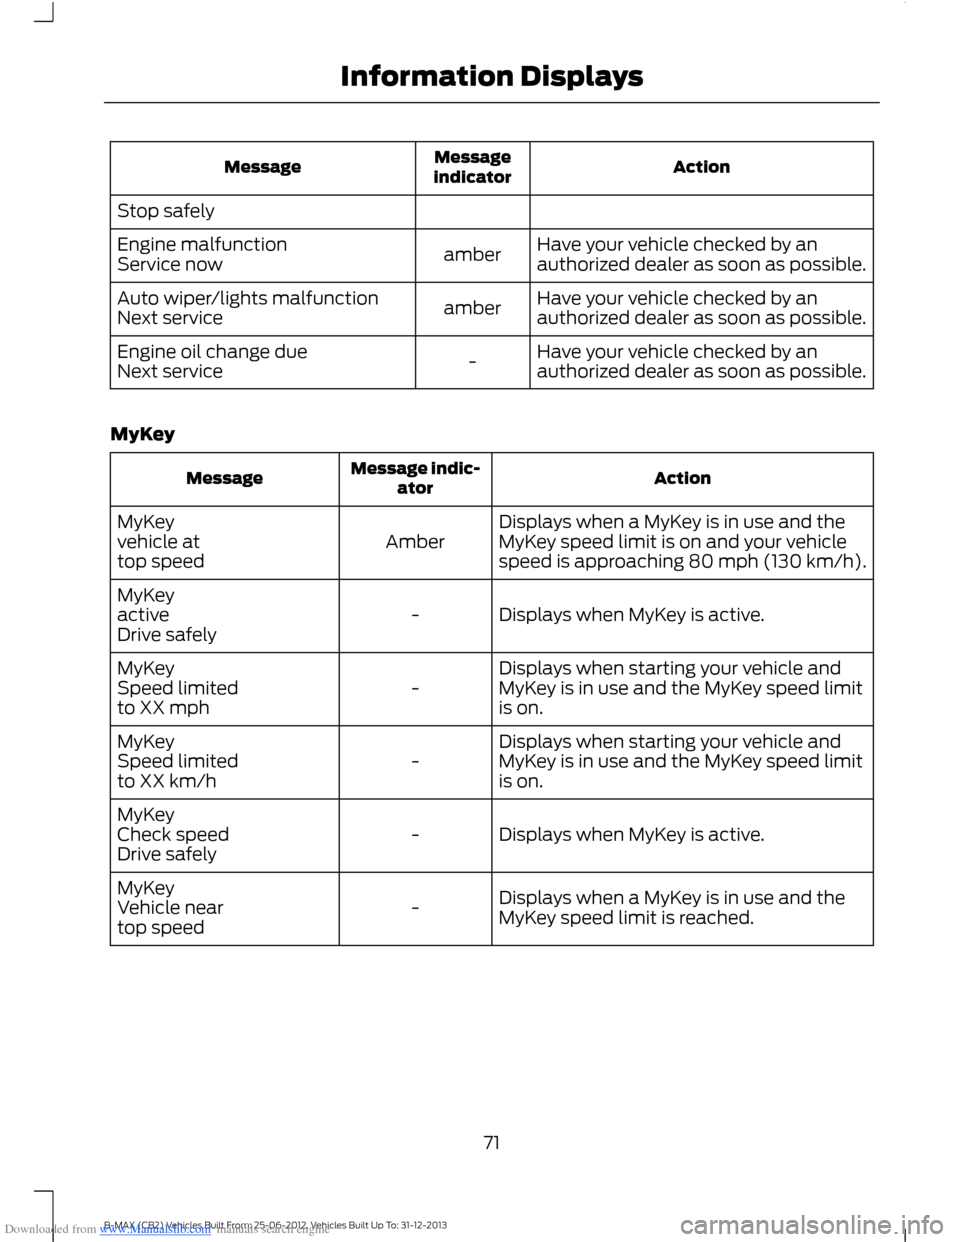
Stop safely
Have your vehicle checked by anauthorized dealer as soon as possible.amberEngine malfunctionService now
Have your vehicle checked by anauthorized dealer as soon as possible.amberAuto wiper/lights malfunctionNext service
Have your vehicle checked by anauthorized dealer as soon as possible.-Engine oil change dueNext service
MyKey
ActionMessage indic-atorMessage
Displays when a MyKey is in use and theMyKey speed limit is on and your vehiclespeed is approaching 80 mph (130 km/h).AmberMyKeyvehicle attop speed
Displays when MyKey is active.-MyKeyactiveDrive safely
Displays when starting your vehicle andMyKey is in use and the MyKey speed limitis on.-MyKeySpeed limitedto XX mph
Displays when starting your vehicle andMyKey is in use and the MyKey speed limitis on.-MyKeySpeed limitedto XX km/h
Displays when MyKey is active.-MyKeyCheck speedDrive safely
Displays when a MyKey is in use and theMyKey speed limit is reached.-MyKeyVehicle neartop speed
71B-MAX (CB2) Vehicles Built From: 25-06-2012, Vehicles Built Up To: 31-12-2013Information Displays
Page 94 of 298
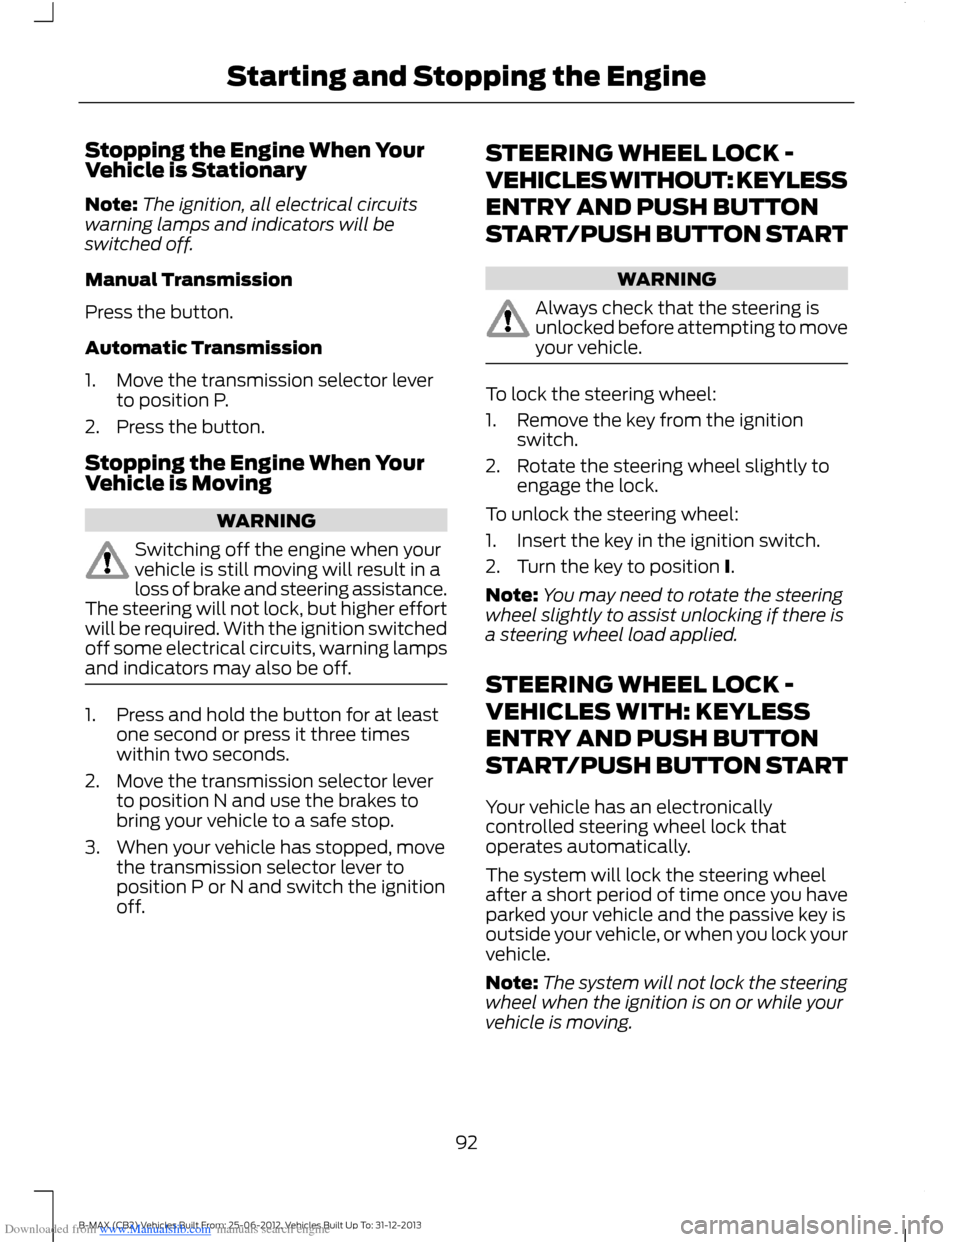
Downloaded from www.Manualslib.com manuals search engine Stopping the Engine When YourVehicle is Stationary
Note:The ignition, all electrical circuitswarning lamps and indicators will beswitched off.
Manual Transmission
Press the button.
Automatic Transmission
1.Move the transmission selector leverto position P.
2.Press the button.
Stopping the Engine When YourVehicle is Moving
WARNING
Switching off the engine when yourvehicle is still moving will result in aloss of brake and steering assistance.The steering will not lock, but higher effortwill be required. With the ignition switchedoff some electrical circuits, warning lampsand indicators may also be off.
1.Press and hold the button for at leastone second or press it three timeswithin two seconds.
2.Move the transmission selector leverto position N and use the brakes tobring your vehicle to a safe stop.
3.When your vehicle has stopped, movethe transmission selector lever toposition P or N and switch the ignitionoff.
STEERING WHEEL LOCK -
VEHICLES WITHOUT: KEYLESS
ENTRY AND PUSH BUTTON
START/PUSH BUTTON START
WARNING
Always check that the steering isunlocked before attempting to moveyour vehicle.
To lock the steering wheel:
1.Remove the key from the ignitionswitch.
2.Rotate the steering wheel slightly toengage the lock.
To unlock the steering wheel:
1.Insert the key in the ignition switch.
2.Turn the key to position I.
Note:You may need to rotate the steeringwheel slightly to assist unlocking if there isa steering wheel load applied.
STEERING WHEEL LOCK -
VEHICLES WITH: KEYLESS
ENTRY AND PUSH BUTTON
START/PUSH BUTTON START
Your vehicle has an electronicallycontrolled steering wheel lock thatoperates automatically.
The system will lock the steering wheelafter a short period of time once you haveparked your vehicle and the passive key isoutside your vehicle, or when you lock yourvehicle.
Note:The system will not lock the steeringwheel when the ignition is on or while yourvehicle is moving.
92B-MAX (CB2) Vehicles Built From: 25-06-2012, Vehicles Built Up To: 31-12-2013Starting and Stopping the Engine
Page 98 of 298
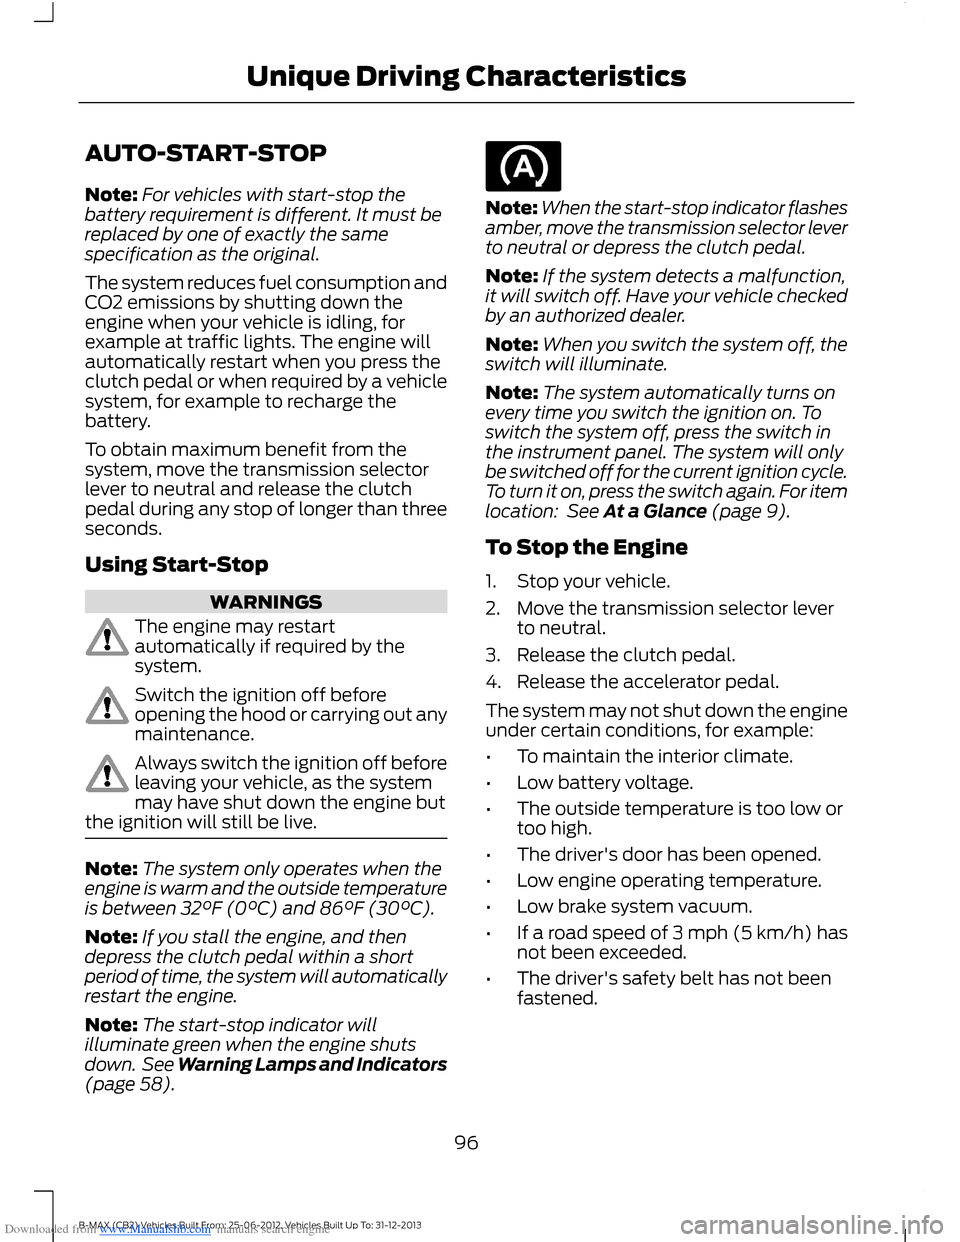
Downloaded from www.Manualslib.com manuals search engine AUTO-START-STOP
Note:For vehicles with start-stop thebattery requirement is different. It must bereplaced by one of exactly the samespecification as the original.
The system reduces fuel consumption andCO2 emissions by shutting down theengine when your vehicle is idling, forexample at traffic lights. The engine willautomatically restart when you press theclutch pedal or when required by a vehiclesystem, for example to recharge thebattery.
To obtain maximum benefit from thesystem, move the transmission selectorlever to neutral and release the clutchpedal during any stop of longer than threeseconds.
Using Start-Stop
WARNINGS
The engine may restartautomatically if required by thesystem.
Switch the ignition off beforeopening the hood or carrying out anymaintenance.
Always switch the ignition off beforeleaving your vehicle, as the systemmay have shut down the engine butthe ignition will still be live.
Note:The system only operates when theengine is warm and the outside temperatureis between 32°F (0°C) and 86°F (30°C).
Note:If you stall the engine, and thendepress the clutch pedal within a shortperiod of time, the system will automaticallyrestart the engine.
Note:The start-stop indicator willilluminate green when the engine shutsdown. See Warning Lamps and Indicators(page 58).
Note:When the start-stop indicator flashesamber, move the transmission selector leverto neutral or depress the clutch pedal.
Note:If the system detects a malfunction,it will switch off. Have your vehicle checkedby an authorized dealer.
Note:When you switch the system off, theswitch will illuminate.
Note:The system automatically turns onevery time you switch the ignition on. Toswitch the system off, press the switch inthe instrument panel. The system will onlybe switched off for the current ignition cycle.To turn it on, press the switch again. For itemlocation: See At a Glance (page 9).
To Stop the Engine
1.Stop your vehicle.
2.Move the transmission selector leverto neutral.
3.Release the clutch pedal.
4.Release the accelerator pedal.
The system may not shut down the engineunder certain conditions, for example:
•To maintain the interior climate.
•Low battery voltage.
•The outside temperature is too low ortoo high.
•The driver's door has been opened.
•Low engine operating temperature.
•Low brake system vacuum.
•If a road speed of 3 mph (5 km/h) hasnot been exceeded.
•The driver's safety belt has not beenfastened.
96B-MAX (CB2) Vehicles Built From: 25-06-2012, Vehicles Built Up To: 31-12-2013Unique Driving Characteristics
Page 106 of 298
Downloaded from www.Manualslib.com manuals search engine MANUAL TRANSMISSION
Selecting Reverse Gear
Do not engage reverse gear when yourvehicle is moving. This can cause damageto the transmission.
AUTOMATIC TRANSMISSION
WARNINGS
Always set the parking brake fullyand make sure you move thetransmission selector lever toposition P. Switch the ignition off andremove the key whenever you leave yourvehicle.
Do not apply the brake pedal andaccelerator pedal simultaneously.Applying both pedals simultaneouslyfor more than three seconds will limitengine rpm, which may result in difficultymaintaining speed in traffic and could leadto serious injury.
Note:The system performs a series ofchecks when you switch the ignition off. Youmay hear a slight clicking sound. This isnormal.
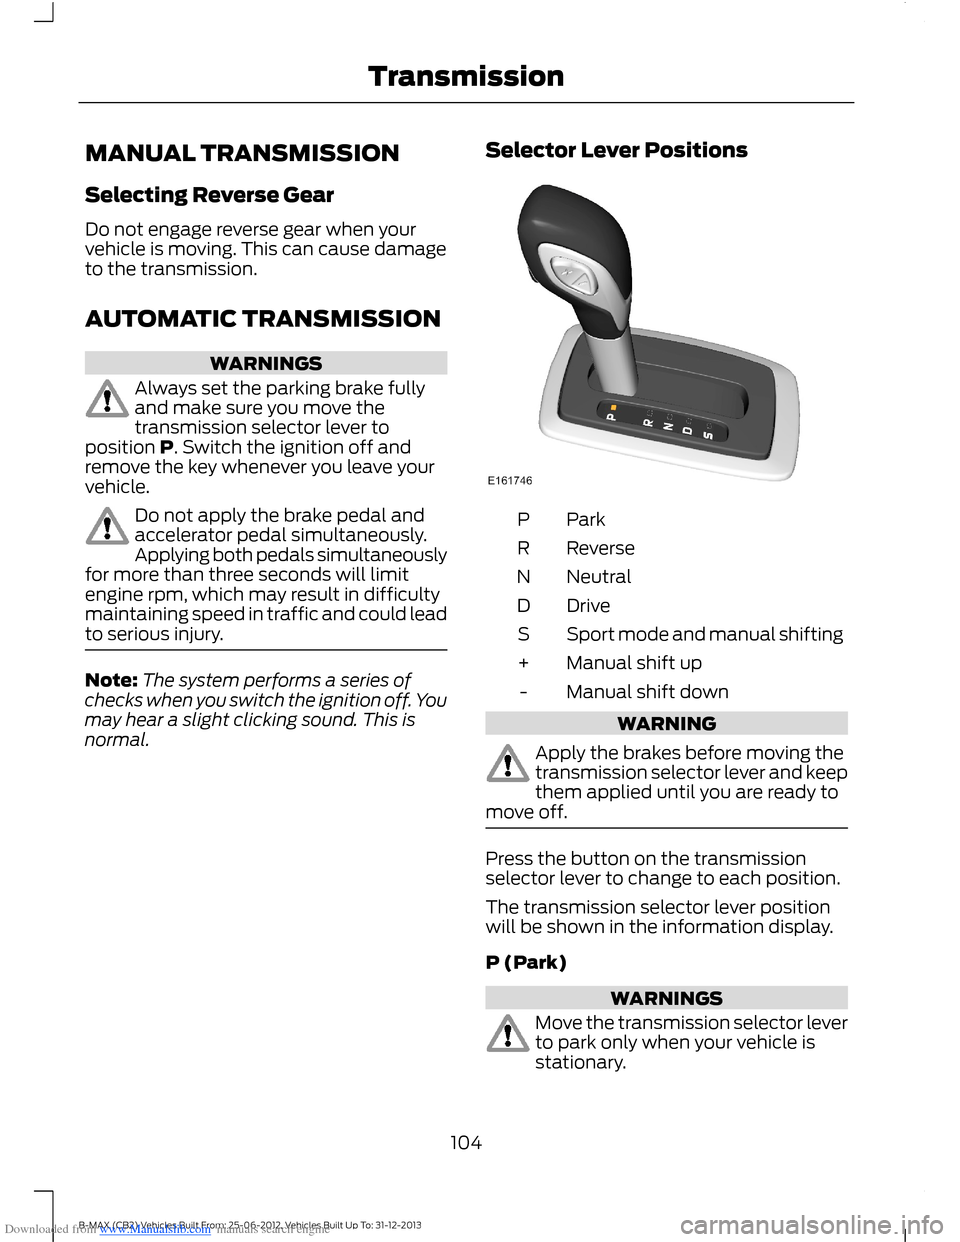
Selector Lever Positions
ParkP
ReverseR
NeutralN
DriveD
Sport mode and manual shiftingS
Manual shift up+
Manual shift down-
WARNING
Apply the brakes before moving thetransmission selector lever and keepthem applied until you are ready tomove off.
Press the button on the transmissionselector lever to change to each position.
The transmission selector lever positionwill be shown in the information display.
P (Park)
WARNINGS
Move the transmission selector leverto park only when your vehicle isstationary.
104B-MAX (CB2) Vehicles Built From: 25-06-2012, Vehicles Built Up To: 31-12-2013Transmission
Page 132 of 298
Downloaded from www.Manualslib.com manuals search engine BREAKING-IN
Tires
WARNING
New tires need to be run-in forapproximately 300 miles (500kilometers). During this time, youmay experience different drivingcharacteristics.
Brakes and Clutch
WARNING
Avoid heavy use of the brakes andclutch if possible for the first 100miles (150 kilometers) in town andfor the first 1000 miles (1500 kilometers)on freeways.
Engine
WARNING
Avoid driving too fast during the first1000 miles (1500 kilometers). Varyyour speed frequently and changeup through the gears early. Do not laborthe engine.
COLD WEATHER
PRECAUTIONS
The functional operation of somecomponents and systems can be affectedat temperatures below -13°F (-25°C).
DRIVING THROUGH WATER
WARNINGS
Drive through water in an emergencyonly and not as part of normaldriving.
WARNINGS
Engine damage can occur if waterenters the air filter.
In an emergency, you can drive your vehiclethrough water to a maximum depth of 8inches (200 millimeters) and at amaximum speed of 6 mph (10 km/h). Youmust take extra care when driving throughflowing water.
When driving in water, maintain a lowspeed and do not stop your vehicle. Afterdriving through water and as soon as it issafe to do so:
•Depress the brake pedal lightly tocheck that the brakes are functioningcorrectly.
•Check that the horn works.
•Check that your vehicle's lamps arefully operational.
•Check the power assistanceof the steering system.
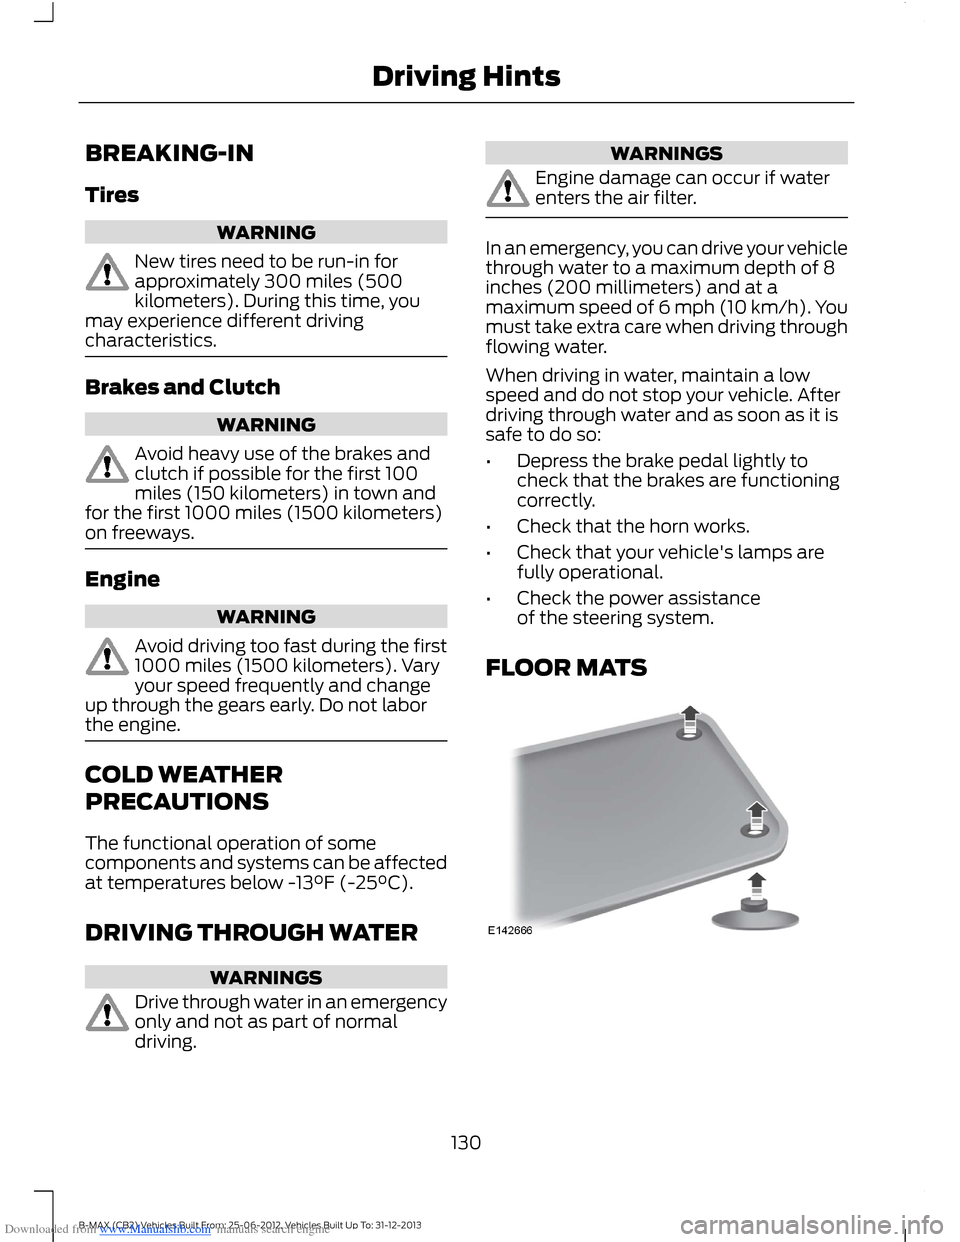
FLOOR MATS
130B-MAX (CB2) Vehicles Built From: 25-06-2012, Vehicles Built Up To: 31-12-2013Driving Hints
Page 178 of 298
Downloaded from www.Manualslib.com manuals search engine Repair kit hoseH
Pressure relief valveI
1.Remove the kit from the wrapping.
2.Peel off the label A showing themaximum permissible speed of50 mph (80 km/h) from the sealantbottle and attach it to the instrumentpanel in the driver’s field of view. Makesure the label does not obscureanything important.
3.Take the hose H with the pressure reliefvalve I and the power plug with cableF out of the kit.
4.Connect the hose H with the pressurerelief valve I to the sealant bottle B.
5.Engage the sealant bottle B into thebottle holder D.
6.Remove the valve cap from thedamaged tire.
7.Screw the sealant bottle hose C firmlyonto the valve of the damaged tire.
8.Make sure that the compressor switchG is in position 0.
9.Insert the power plug F into the cigarlighter socket or auxiliary power socket.See Auxiliary Power Points (page88). See Cigar Lighter (page 88).
10.Start the engine.
11.Move the compressor switch G toposition 1.
12.Inflate the tire for no longer than 10minutes to an inflation pressure ofminimum 26 psi (1.8 bar) and amaximum of 51 psi (3.5 bar). Movethe compressor switch G to position0 and check the current tire pressurewith pressure gauge E.
Note:If a tire pressure of 26 psi (1.8 bar) isnot reached do not continue.
Note:When pumping in the sealant throughthe tire valve, the pressure may rise up to87 psi (6 bar) but will drop again after about30 seconds.
Note:After you have switched thecompressor off, you may hear air escapingfrom the damaged tire. This is normal andcan be ignored provided that the specifiedminimum tire pressure has been reached.
13.Remove the power plug F from thecigar lighter socket or auxiliary powersocket.
14.Quickly unscrew the hose C from thetire valve. Fasten the valve cap again.
Note:Some residual sealant fluid may dripor spray out of hose C while you aredisconnecting it. This is normal.
15.Leave the sealant bottle B in thebottle holder D.
16.Make sure the kit is stored safely, butstill easily accessible in your vehicle.The kit will be required again whenyou check the tire pressure.
17.Immediately drive approximatelytwo miles (three kilometers) so thatthe sealant can seal the damagedarea.
WARNING
If you experience heavy vibrations,unsteady steering behaviour ornoises while driving, reduce yourspeed and drive with caution to a placewhere it is safe for you to stop your vehicle.Recheck the tire and its pressure. If the tirepressure is less than 14.7 psi (1 bar) or ifthere are any cracks, bumps or similardamage visible, do not continue drivingwith this tire.
18.Stop your vehicle after drivingapproximately two miles (threekilometers). Check, and wherenecessary, adjust the pressure of thedamaged tire.
176B-MAX (CB2) Vehicles Built From: 25-06-2012, Vehicles Built Up To: 31-12-2013Wheels and Tires