engine coolant FORD C MAX 2011 2.G Owners Manual
[x] Cancel search | Manufacturer: FORD, Model Year: 2011, Model line: C MAX, Model: FORD C MAX 2011 2.GPages: 296, PDF Size: 7.87 MB
Page 6 of 296
Downloaded from www.Manualslib.com manuals search engine Engine Oil Dipstick - 1.6L Duratec-16V
Ti-VCT (Sigma)........................................190
Engine Oil Dipstick - 1.6L Duratorq-TDCi (DV) Diesel/2.0L Duratorq-TDCi (DW)
Diesel............................................................190
Engine Oil Check..........................................190
Engine Coolant Check.................................191
Brake and Clutch Fluid Check...................191
Washer Fluid Check.....................................192
Technical Specifications............................192
Vehicle Care
Cleaning the Exterior...................................195
Cleaning the Interior....................................195
Repairing Minor Paint Damage...............196
Vehicle battery
Jump-Starting the Vehicle........................197
Changing the Vehicle Battery..................198
Battery connection points........................198
Wheels and Tyres
General Information....................................199
Changing a Road Wheel............................199
Tyre Repair Kit..............................................204
Tyre Care.........................................................207
Using Winter Tyres......................................208
Using Snow Chains....................................208
Tyre Pressure Monitoring System.........208
Technical Specifications..........................209
Vehicle identification
Vehicle Identification Plate.......................214
Vehicle Identification Number.................215
Capacities and Specific- ations
Technical Specifications............................216 Audio introduction
Important audio information...................219
Audio unit overview
Audio unit overview....................................220
Audio system security
Security code.................................................226
Audio unit operation
On/off control................................................227
Sound button.................................................227
Waveband button........................................227
Station tuning control................................227
Station preset buttons..............................228
Autostore control.........................................228
Traffic information control.......................228
Audio unit menus
Automatic volume control.......................230
Digital signal processing (DSP).............230
News broadcasts.........................................230
Alternative frequencies.............................230
Regional mode (REG).................................231
Compact disc player
Compact disc playback.............................232
Track selection..............................................232
Fast forward/reverse..................................232
Shuffle/random............................................232
Repeat compact disc tracks....................232
Compact disc track scanning..................233
MP3 file playback........................................233
MP3 display options...................................233
Ending compact disc playback..............234
Auxiliary input (AUX IN)
socket
Auxiliary input (AUX IN) socket..............235
4
Table of Contents
Page 79 of 296
Downloaded from www.Manualslib.com manuals search engine GAUGES
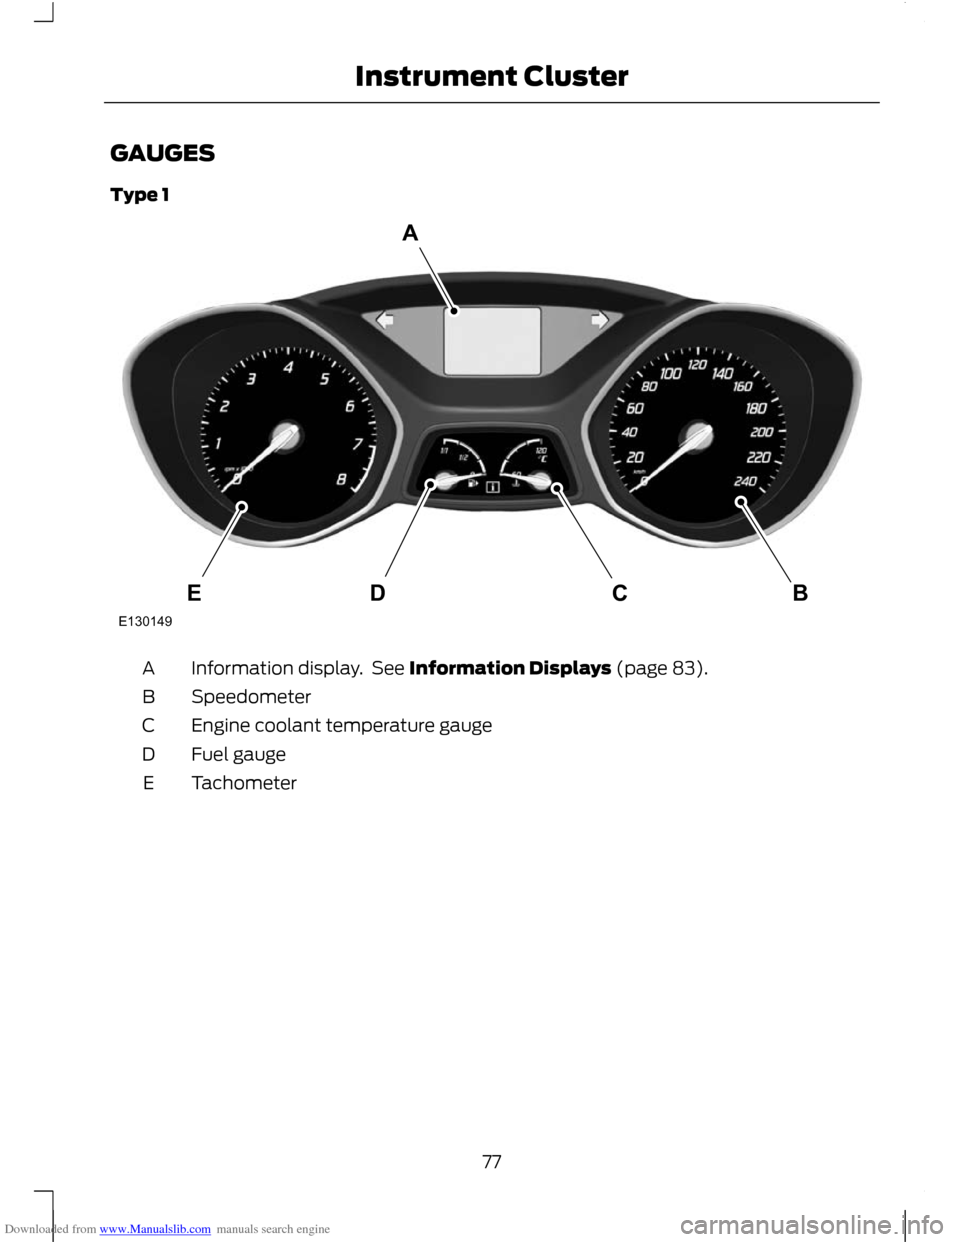
Type 1
Information display. See Information Displays (page 83).
A
Speedometer
B
Engine coolant temperature gauge
C
Fuel gauge
D
Tachometer
E
77
Instrument ClusterBCDEAE130149
Page 80 of 296
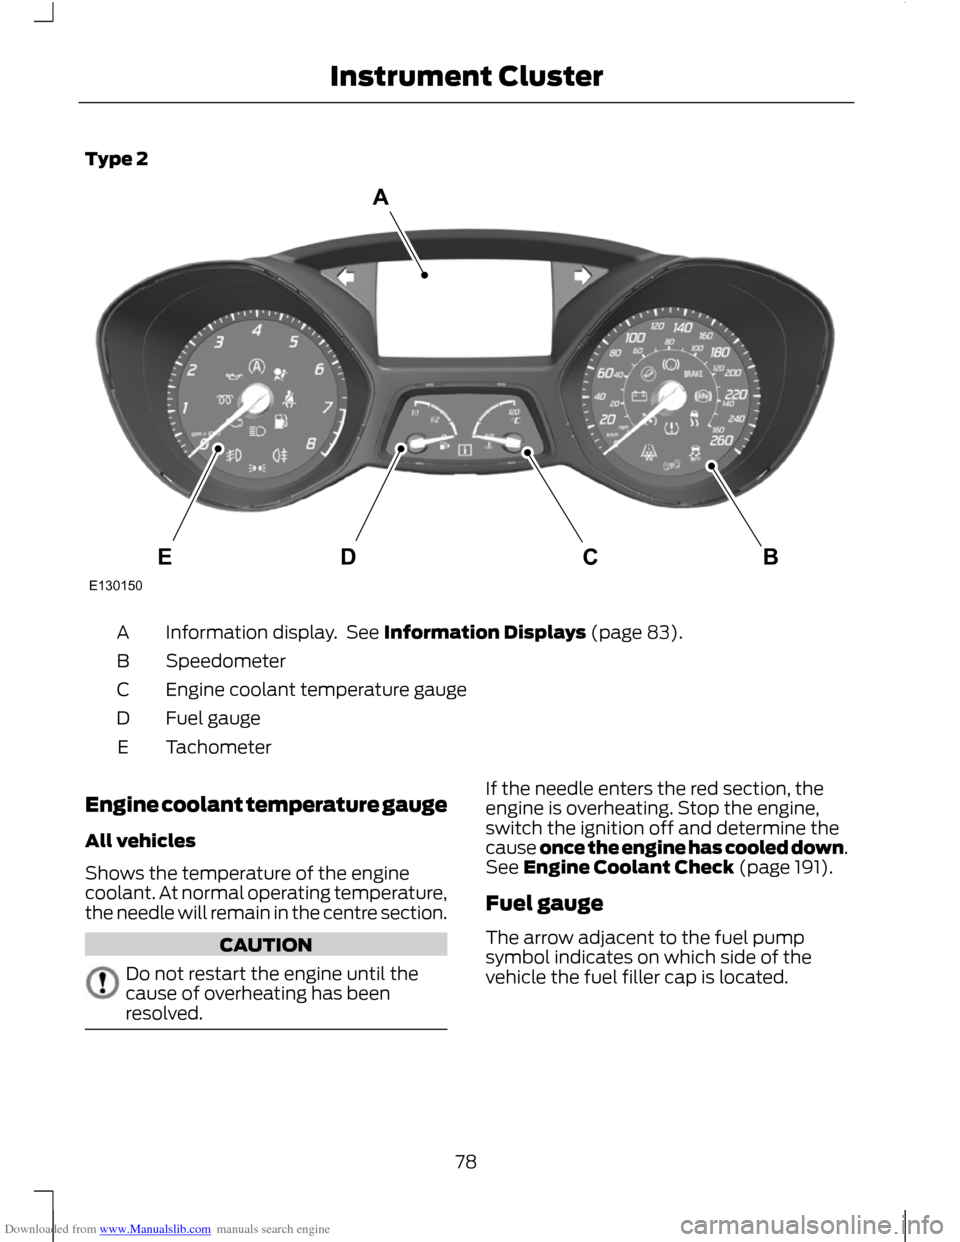
Downloaded from www.Manualslib.com manuals search engine Type 2
Information display. See Information Displays (page 83).
A
Speedometer
B
Engine coolant temperature gauge
C
Fuel gauge
D
Tachometer
E
Engine coolant temperature gauge
All vehicles
Shows the temperature of the engine
coolant. At normal operating temperature,
the needle will remain in the centre section. CAUTION
Do not restart the engine until the
cause of overheating has been
resolved. If the needle enters the red section, the
engine is overheating. Stop the engine,
switch the ignition off and determine the
cause once the engine has cooled down.
See Engine Coolant Check (page 191).
Fuel gauge
The arrow adjacent to the fuel pump
symbol indicates on which side of the
vehicle the fuel filler cap is located.
78
Instrument ClusterBCDEAE130150
Page 102 of 296
Downloaded from www.Manualslib.com manuals search engine PRINCIPLE OF OPERATION
Outside air
Keep the air intakes forward of the
windscreen free from obstruction (snow,
leaves etc.) to allow the climate control
system to function effectively.
Recirculated air
CAUTION
Prolonged use of recirculated air may
cause the windows to mist up. If the
windows mist up, follow the settings
for defrosting and demisting the
windscreen. The air currently in the passenger
compartment will be recirculated. Outside
air will not enter the vehicle.
Heating
Heating performance depends on the
temperature of the engine coolant.
Air conditioning
Note:
The air conditioning operates only
when the temperature is above 4°C (39°F).
Note: If you use the air conditioning, the
fuel consumption of your vehicle will be
higher.
Air is directed through the evaporator
where it is cooled. Humidity is extracted
from the air to help keep the windows free
of mist. The resulting condensation is
directed to the outside of the vehicle and
it is therefore normal if you see a small
pool of water under your vehicle.
General information on controlling
the interior climate
Fully close all the windows. Warming the interior
Direct the air towards your feet. In cold or
humid weather conditions, direct some of
the air towards the windscreen and the
door windows.
Cooling the interior
Direct the air towards your face.
AIR VENTS
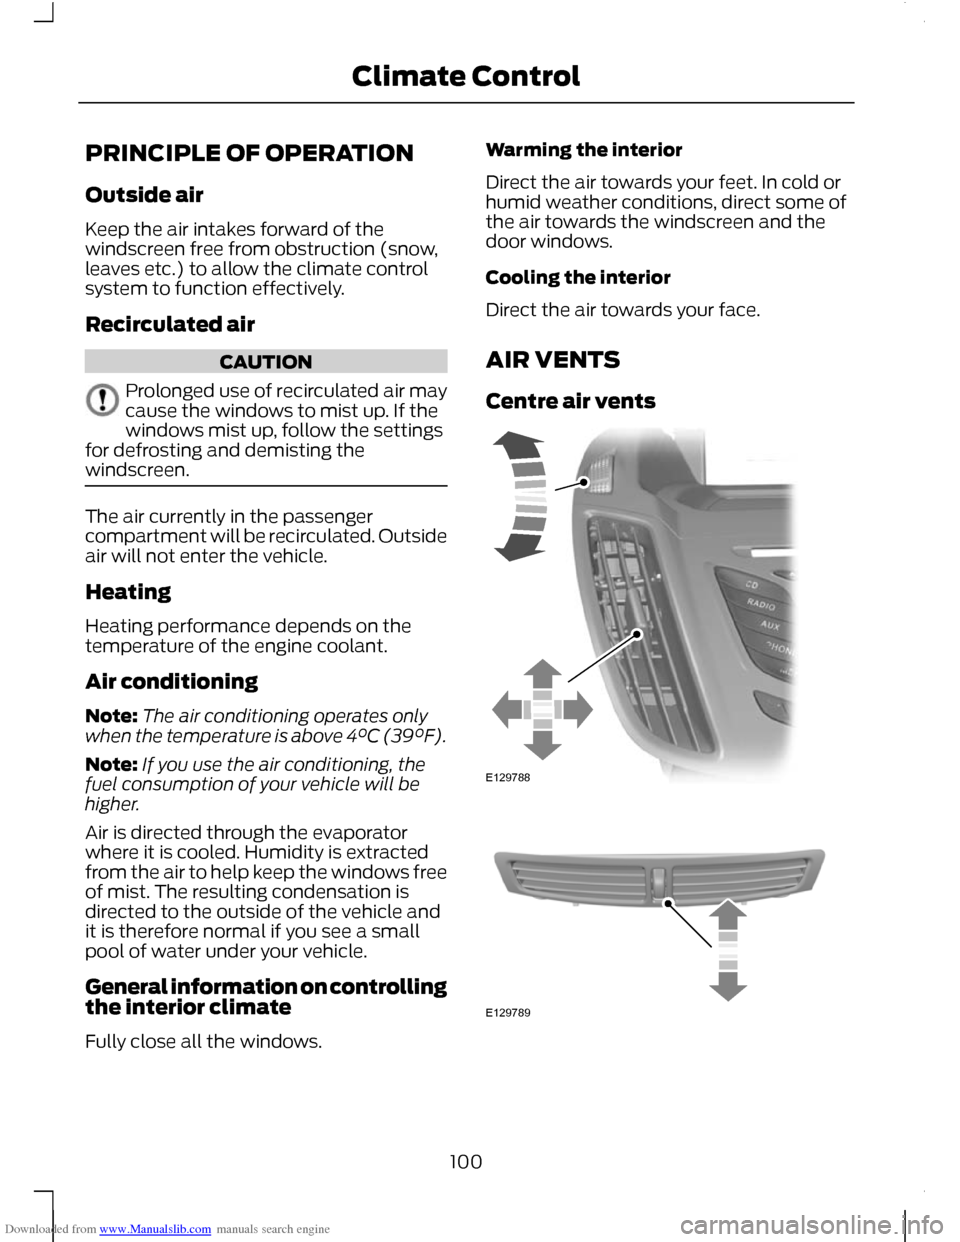
Centre air vents
100
Climate ControlE129788 E129789
Page 107 of 296
Downloaded from www.Manualslib.com manuals search engine Windscreen defrosting and
demisting
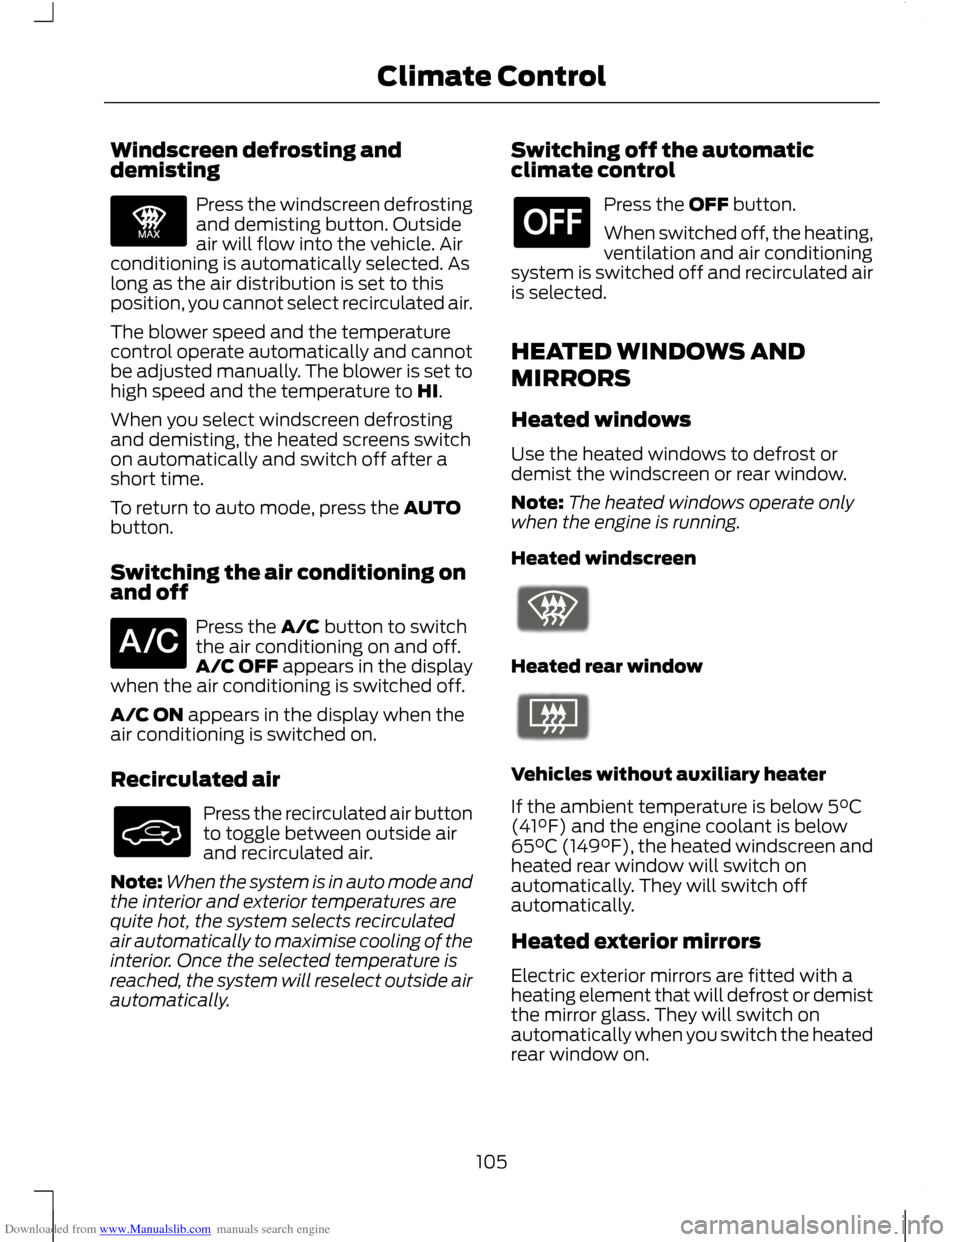
Press the windscreen defrosting
and demisting button. Outside
air will flow into the vehicle. Air
conditioning is automatically selected. As
long as the air distribution is set to this
position, you cannot select recirculated air.
The blower speed and the temperature
control operate automatically and cannot
be adjusted manually. The blower is set to
high speed and the temperature to HI.
When you select windscreen defrosting
and demisting, the heated screens switch
on automatically and switch off after a
short time.
To return to auto mode, press the AUTO
button.
Switching the air conditioning on
and off Press the A/C button to switch
the air conditioning on and off.
A/C OFF appears in the display
when the air conditioning is switched off.
A/C ON appears in the display when the
air conditioning is switched on.
Recirculated air Press the recirculated air button
to toggle between outside air
and recirculated air.
Note: When the system is in auto mode and
the interior and exterior temperatures are
quite hot, the system selects recirculated
air automatically to maximise cooling of the
interior. Once the selected temperature is
reached, the system will reselect outside air
automatically. Switching off the automatic
climate control Press the OFF button.
When switched off, the heating,
ventilation and air conditioning
system is switched off and recirculated air
is selected.
HEATED WINDOWS AND
MIRRORS
Heated windows
Use the heated windows to defrost or
demist the windscreen or rear window.
Note: The heated windows operate only
when the engine is running.
Heated windscreen Heated rear window
Vehicles without auxiliary heater
If the ambient temperature is below 5°C
(41°F) and the engine coolant is below
65°C (149°F), the heated windscreen and
heated rear window will switch on
automatically. They will switch off
automatically.
Heated exterior mirrors
Electric exterior mirrors are fitted with a
heating element that will defrost or demist
the mirror glass. They will switch on
automatically when you switch the heated
rear window on.
105
Climate ControlE91392 E91394 E72506 E72507
Page 108 of 296
Downloaded from www.Manualslib.com manuals search engine AUXILIARY HEATER
Parking heater
WARNINGS
The parking heater must not be
operated at filling stations, near
sources of combustible vapours or
dust or in enclosed spaces. The parking heater should be
switched on for approximately 10
minutes at least once a month all
year round. This prevents the water pump
and heater motor from seizing. Note:
The parking heater will only operate
if there is at least 7.5 litres (1.6 gallons) of
fuel in the fuel tank and the ambient
temperature is below 15°C (59°F). The
heater will not operate if the battery is low.
Note: The heating depends on the outside
air temperature.
Note: When the parking heater is activated,
exhaust fumes may come from under the
sides of the vehicle. This is normal.
Note: On vehicles with manual climate
control the heating of the vehicle interior is
dependent on the temperature, air
distribution and blower control settings.
The parking heater operates independently
of the vehicle heater by heating the
engine ’s coolant circuit. It is fed from the
vehicle fuel tank. You can also use it while
the vehicle is in motion to help the vehicle
heater warm up the interior more quickly.
Used properly, the parking heater provides
the following benefits: •
It preheats the interior of the vehicle.
• It keeps the windows clear of ice in the
event of frost and prevents
condensation.
• It avoids cold starts and allows the
engine to reach operating temperature
sooner.
To prevent the battery from discharging:
• Once the parking heater has performed
one heating cycle, the next
programmed heating cycle will only be
carried out if you have started the
vehicle ’s engine in between.
• After a heating cycle, drive the vehicle
for at least the period of the heating
cycle.
Programming the parking heater
Note: The programmed time is the time at
which you wish the vehicle to be warm and
ready to drive, not the time at which the
heater switches on.
Note: You must programme the times at
least 70 minutes in advance of the time you
wish to set.
Note: You must set the time and date
correctly. See Clock (page 122).
To programme the heating times:
1. Use the arrow buttons on the steering wheel to enter the main menu. See
Information Displays (page 83).
2. Select the park heater option.
106
Climate Control
Page 110 of 296
Downloaded from www.Manualslib.com manuals search engine Fuel operated heater (depending
on country)
WARNING
The fuel operated heater must not
be operated at filling stations, near
sources of combustible vapours or
dust or in enclosed spaces. The fuel operated heater aids in warming
the engine and the vehicle interior on
vehicles with a diesel engine. It is switched
on or off automatically depending on the
outside air temperature and the coolant
temperature, unless you have deactivated
it.
To deactivate the fuel operated heater:
1. Highlight Aux. Heater and press the
OK button. A cross appears in the box
when the heater is activated.
Diesel auxiliary heater (depending
on country)
The diesel auxiliary heater (PTC electrical
heater) aids in warming the engine and the
vehicle interior on vehicles with a diesel
engine. It is switched on or off
automatically depending on the outside
air temperature, the coolant temperature
and the alternator load.
108
Climate Control
Page 187 of 296
Downloaded from www.Manualslib.com manuals search engine GENERAL INFORMATION
Have your vehicle serviced regularly to help
maintain its roadworthiness and resale
value. There is a large network of Ford
Authorised Repairers that are there to help
you with their professional servicing
expertise. We believe that their specially
trained technicians are best qualified to
service your vehicle properly and expertly.
They are supported by a wide range of
highly specialised tools developed
specifically for servicing your vehicle.
In addition to regular servicing, we
recommend that you carry out the
following additional checks.
WARNINGS
Switch the ignition off before
touching or attempting adjustment
of any kind.
Do not touch the electronic ignition
system parts after you have switched
the ignition on or when the engine is
running. The system operates at high
voltage. Keep your hands and clothing clear
of the engine cooling fan. Under
certain conditions, the fan may
continue to run for several minutes after
you have switched the engine off. CAUTION
When carrying out maintenance
checks, make sure that filler caps are
fitted securely.
Daily checks
•
Exterior lamps.
• Interior lamps.
• Warning lamps and indicators. Check when refuelling
•
Engine oil level. See Engine Oil Check
(page 190).
• Brake fluid level. See Brake and
Clutch Fluid Check (page 191).
• Washer fluid level. See Washer Fluid
Check (page 192).
• Tyre pressures (when cold). See
Technical Specifications (page 209).
• Tyre condition. See Wheels and Tyres
(page 199).
Monthly checks
• Engine coolant level (engine cold). See
Engine Coolant Check (page 191).
• Pipes, hoses and reservoirs for leaks.
• Air conditioning operation.
• Parking brake operation.
• Horn operation.
• Tightness of wheel nuts. See
Technical Specifications (page 209).
OPENING AND CLOSING THE
BONNET
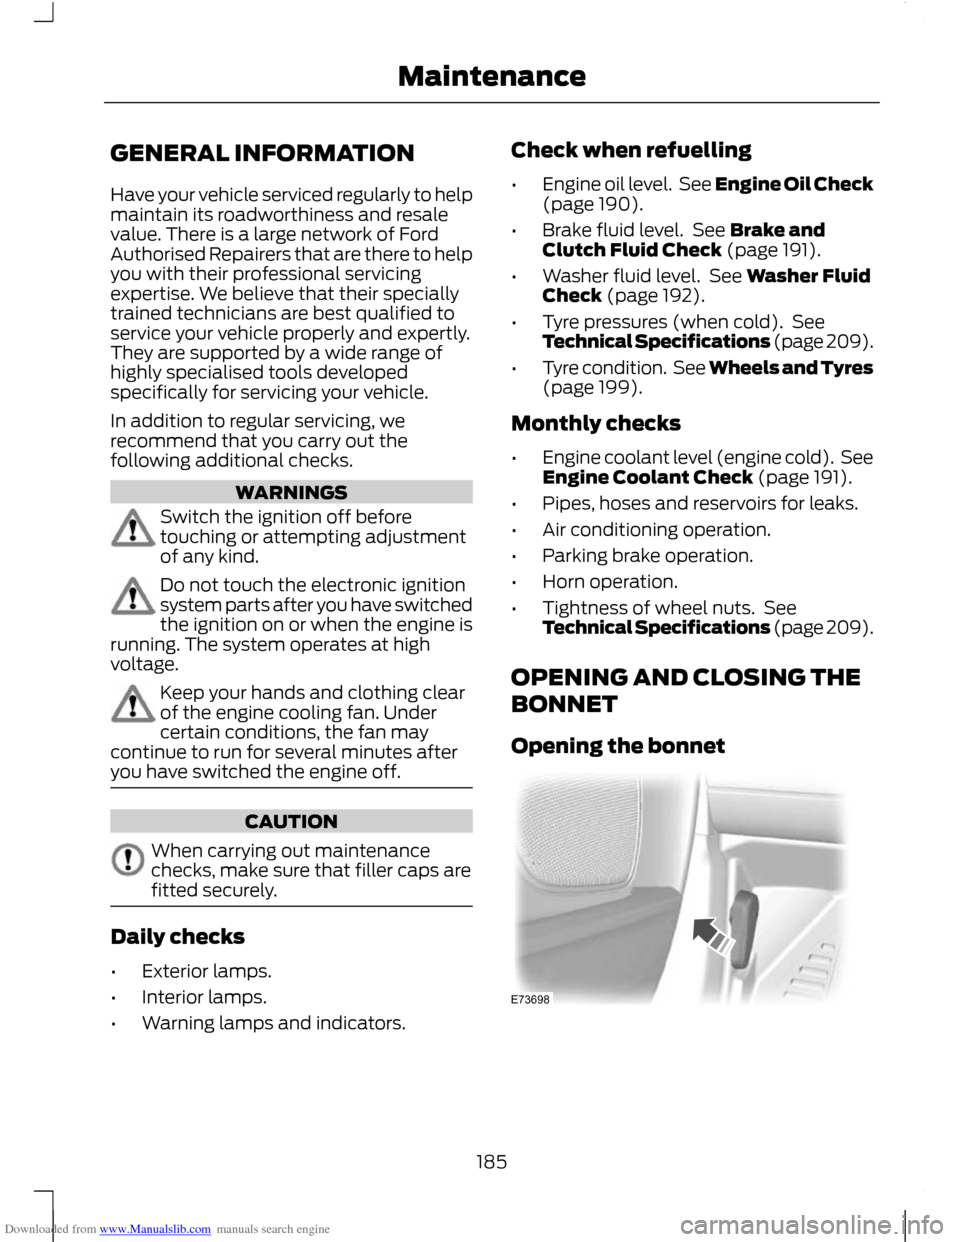
Opening the bonnet 185
MaintenanceE73698
Page 189 of 296
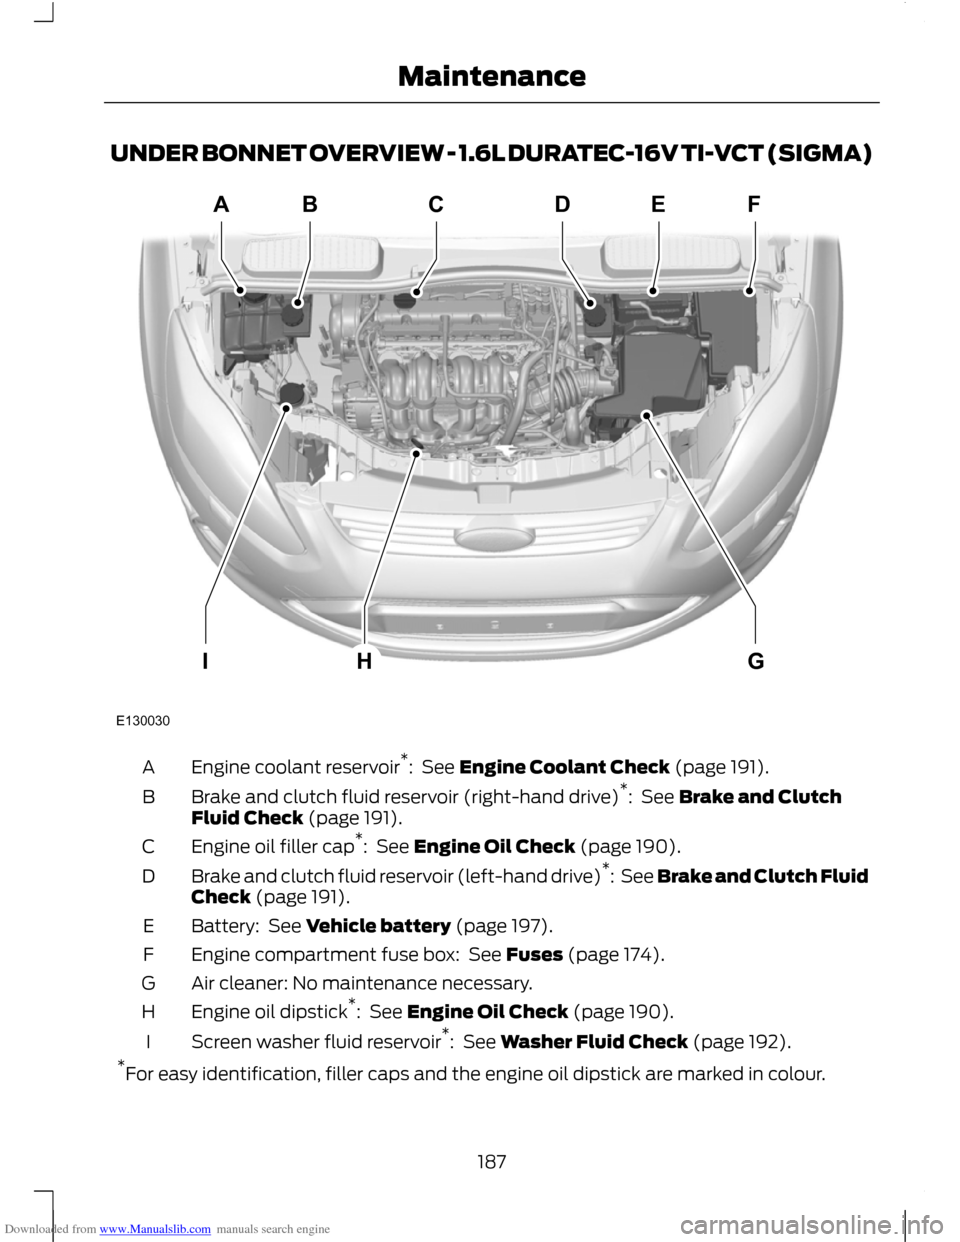
Downloaded from www.Manualslib.com manuals search engine UNDER BONNET OVERVIEW - 1.6L DURATEC-16V TI-VCT (SIGMA)
Engine coolant reservoir
*
: See Engine Coolant Check (page 191).
A
Brake and clutch fluid reservoir (right-hand drive) *
: See Brake and Clutch
Fluid Check (page 191).
B
Engine oil filler cap *
: See Engine Oil Check (page 190).
C
Brake and clutch fluid reservoir (left-hand drive) *
: See Brake and Clutch Fluid
Check (page 191).
D
Battery: See Vehicle battery (page 197).
E
Engine compartment fuse box: See Fuses (page 174).
F
Air cleaner: No maintenance necessary.
G
Engine oil dipstick *
: See Engine Oil Check (page 190).
H
Screen washer fluid reservoir *
: See Washer Fluid Check (page 192).
I
* For easy identification, filler caps and the engine oil dipstick are marked in colour.
187
MaintenanceE130030ABCDEFGHI
Page 190 of 296
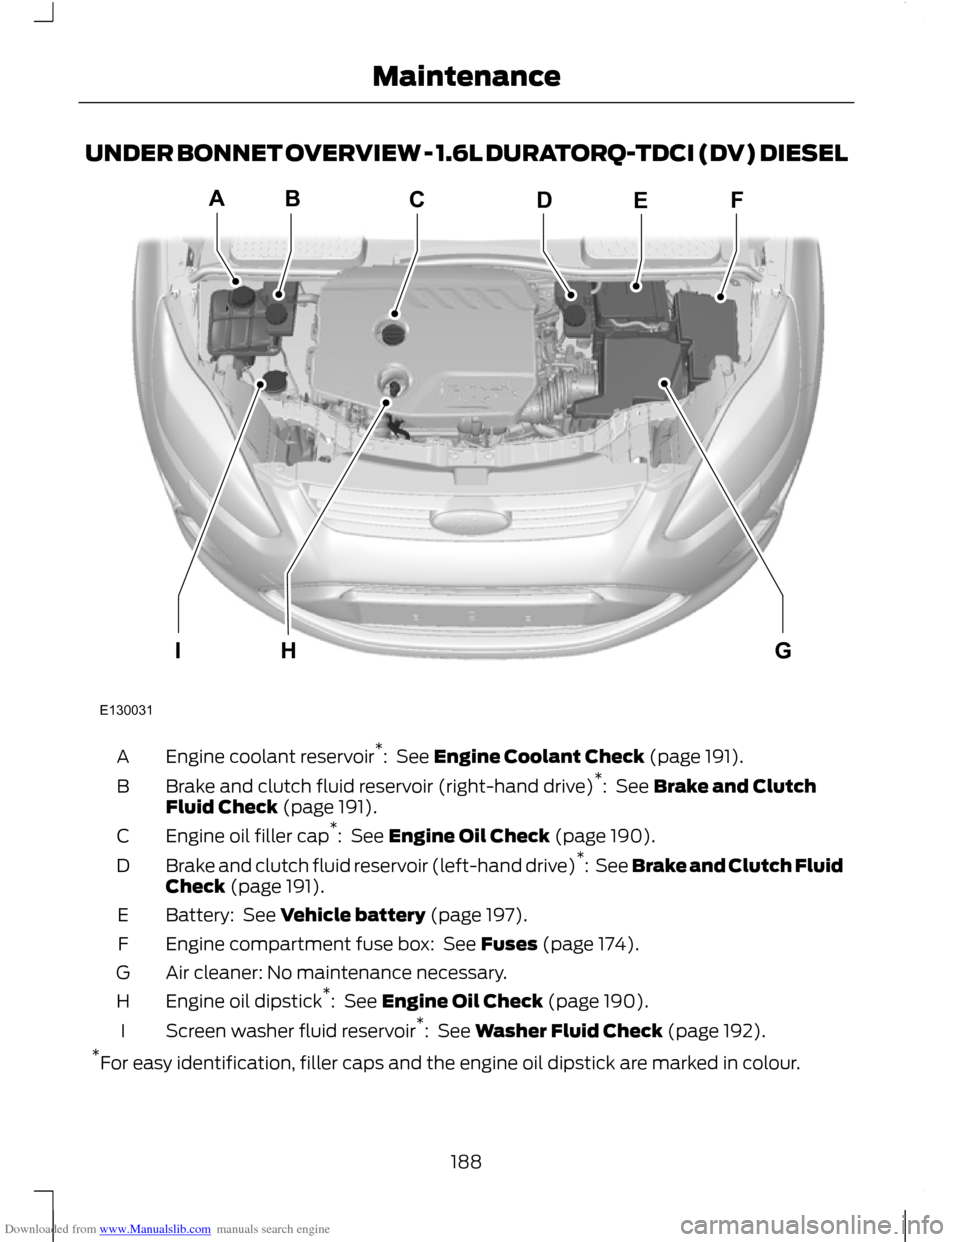
Downloaded from www.Manualslib.com manuals search engine UNDER BONNET OVERVIEW - 1.6L DURATORQ-TDCI (DV) DIESEL
Engine coolant reservoir
*
: See Engine Coolant Check (page 191).
A
Brake and clutch fluid reservoir (right-hand drive) *
: See Brake and Clutch
Fluid Check (page 191).
B
Engine oil filler cap *
: See Engine Oil Check (page 190).
C
Brake and clutch fluid reservoir (left-hand drive) *
: See Brake and Clutch Fluid
Check (page 191).
D
Battery: See Vehicle battery (page 197).
E
Engine compartment fuse box: See Fuses (page 174).
F
Air cleaner: No maintenance necessary.
G
Engine oil dipstick *
: See Engine Oil Check (page 190).
H
Screen washer fluid reservoir *
: See Washer Fluid Check (page 192).
I
* For easy identification, filler caps and the engine oil dipstick are marked in colour.
188
MaintenanceE130031ABCDEFGHI