display FORD C MAX 2015 Service Manual
[x] Cancel search | Manufacturer: FORD, Model Year: 2015, Model line: C MAX, Model: FORD C MAX 2015Pages: 469, PDF Size: 6.16 MB
Page 136 of 469
The vehicle may enter Enable Engine mode
if the climate control is in a defrost mode
and the outside temperature is cold. A
message Engine Enabled Due to Defrost
will display if this occurs. If defrost is not
needed, select a different climate control
mode to permit EV Now.
When you enable EV Now, a blue EV icon
displays in the left-hand information
display. If the vehicle is in the Engine
Enabled mode, the EV icon will be yellow.
EV Now will automatically exit when the
Plug in power has been depleted.
EV Later
This mode saves most of the
high voltage battery plug in
power for future use (for
example, your initial drive is at high speeds
on open roads, but later your drive will be
at low speeds in an urban area where
plug-in power usage is most efficient).
Your vehicle will run the engine as needed
and keep most of the high voltage battery
plug in power for later use in Auto Mode or
EV Now mode.
When you enable EV Later, a white EV
Later icon appears on the left-hand
information display.
The EV Later mode will automatically reset
to EV Auto mode when you power the
vehicle off. You may press the EV button
twice during the next drive to return to EV
Later mode, if desired.
Hybrid Vehicle Operation
This hybrid vehicle combines electric and
gasoline propulsion to provide
breakthrough performance and improved
efficiency. Familiarizing yourself with these
unique characteristics will provide an
optimal driving experience from your new
vehicle. Note:
You may notice higher engine speeds
upon start-up. This temporary condition is
normal and necessary to heat up the cabin
and minimize emissions. Starting: When you start your
vehicle, a green ready indicator
light will appear in the lower right
portion of the instrument cluster and a
ready to drive message will appear in the
middle of the left cluster screen, letting
you know that the vehicle is ready for
driving.
The engine may not start because this
vehicle is equipped with silent key start.
This fuel saving feature allows your vehicle
to be ready –to–drive without requiring the
gas engine to be running. This indicator will
remain on while the vehicle is on, whether
the engine is running or not to indicate the
vehicle is capable of movement (using its
electric motor, engine, or both). Typically,
the engine will not start unless the vehicle
is cold, a climate control change is
requested, or the accelerator is pressed.
Driving:
The gas engine automatically
starts and stops to provide power when
needed and to save fuel when not needed.
While coasting at low speeds, coming to
a stop, or standing, the gas engine normally
shuts down and the vehicle operates in
electric-only mode. Conditions that may
cause the engine to start up or remain
running include:
• Considerable vehicle acceleration.
• Vehicle speed above 85 mph (137
km/h) However, the maximum speed
for electric-only operation may be
lower while driving in hot temperatures
or on hilly terrain.
• Ascending a hill.
• Charge level of high voltage battery is
low.
133
C-MAX (CCG) Canada/United States of America, enUSA, Second Printing Unique Driving CharacteristicsE151263 E144692
Page 138 of 469
During certain events (such as vehicle
servicing) your low voltage 12-volt battery
may become disconnected or disabled.
Once the battery is reconnected and after
driving the vehicle, the engine may
continue to operate for three to five
seconds after the key is turned to off. This
is a normal condition.
Braking: Your hybrid is equipped with
standard hydraulic braking and
regenerative braking. Regenerative braking
is performed by your transmission and it
captures brake energy and stores it in your
high voltage battery.
Driving to Optimize Fuel Economy
Note: Having your engine running is not
always an indication of inefficiency. In some
cases, it is actually more efficient than
driving in electric mode.
Your fuel economy should improve
throughout your hybrid's break-in period.
As with any vehicle, your driving habits and
accessory usage can significantly impact
your fuel economy. For best results, keep
in mind these tips:
• Keep the tires properly inflated and
only use the recommended size.
• Aggressive driving increases the
amount of energy required to move
your vehicle. In general, you can
achieve better fuel economy with mild
to moderate acceleration and
deceleration. Moderate braking is
particularly important since it allows
you to maximize the energy captured
by the regenerative braking system.
Additional Tips:
• Do not carry extra loads.
• Be mindful of adding external
accessories that may increase
aerodynamic drag.
• Observe posted speed limits. •
Perform all scheduled maintenance.
• There is no need to wait for your engine
to warm up. The vehicle is ready to
drive immediately after starting.
EV+ Mode (C-MAX Energi Only)
Your vehicle will recognize your frequent
destinations and allow for more EV driving
as you approach them. For example, when
nearing your home it should be easier to
stay in electric mode. The EV indicator will
display EV+ when this mode is active. You
should see this approximately 1/8 mile
(200 meters) from a frequent destination.
See
Information Displays (page 91).
Note: Frequent destinations are learned by
your vehicle after two to four weeks of use.
You can clear these destinations with a
Driving History reset through the Settings
menu.
Note: You can switch the EV+ feature on
or off through the Driver Assist section of
the Settings menu.
Low Engine Use (If Equipped)
The low engine use mode is equipped on
Energi models only. The low engine use
mode will activate automatically when you
drive your vehicle with limited engine use.
The mode will maintain proper engine
lubrication at sufficient temperature. If your
vehicle is in low engine use mode when you
start the vehicle, a message will appear in
the information display. When your vehicle
is in low engine use mode, your vehicle will
automatically run the engine as necessary.
If you select the EV Now mode while the
vehicle is in the low engine use mode, EV
Now mode will be suspended for as long
as you are in low engine use mode The low
engine use mode will resume the next time
you start your vehicle and will
automatically stop when no longer needed.
135
C-MAX (CCG) Canada/United States of America, enUSA, Second Printing Unique Driving Characteristics
Page 142 of 469
FUEL QUALITY
Note:
Your warranty will not cover any
vehicle damage, powertrain damage, loss
of vehicle performance or repairs to your
vehicle, caused by the use of fuel not
recommended.
Choosing the Right Fuel
Use only UNLEADED gasoline or
UNLEADED gasoline blended with a
maximum of 15% ethanol in your gasoline
vehicle. If your vehicle is a Flex Fuel Vehicle
(FFV), it will have a yellow bezel placed
over the fuel fill inlet.
Do not use:
• Fuels containing more than 15%
ethanol or E-85 fuel.
• Fuels containing methanol.
• Fuels containing metallic based
additives, including manganese-based
compounds.
• Fuels containing the octane booster
additive, methylcyclopentadienyl
manganese tricarbonyl (MMT).
• Prohibited by law, you cannot use
leaded fuel.
Note: Use of any fuel other than the
recommended fuel can cause powertrain
damage, impair the emission control system
or cause loss of vehicle performance. Any
damage to your vehicle that is caused by
the use of fuel not recommended will not
be covered under warranty. Octane Recommendations
We recommend regular unleaded gasoline
with a pump (R+M)/2 octane rating of 87.
Some stations offer fuels posted as regular
with an octane rating below 87, particularly
in high altitude areas. We do not
recommend fuels with an octane rating
below 87. Premium fuel will provide
improved performance and is
recommended for severe duty usage such
as trailer tow.
Fuel Freshness Mode (Energi
Vehicles Only)
This feature helps keep the fuel system
functional and the fuel fresh.
If you mainly operate your vehicle in plug-in
power mode using electricity from plugging
in without refueling, the gasoline in the fuel
tank will become stale due to aging over
an extended period. Stale gasoline can
damage the engine and fuel system.
Your vehicle will automatically operate in
fuel freshness mode if you do not refill your
vehicle with fresh fuel within an 18-month
period. The design of fuel freshness mode
protects your vehicle from potential engine
and fuel system damage caused by using
stale fuel.
Note:
If you do not add new fuel during an
18-month period, fuel freshness mode will
consume fuel until you have about 1 gal
(3.8 L) in the tank.
During fuel freshness mode:
• The information display screen will
indicate that fuel freshness mode is
active.
• The vehicle will only run in hybrid mode.
EV Now will not be available.
• Most of the plug-in power will be
stored until fuel freshness mode is
completed.
139
C-MAX (CCG) Canada/United States of America, enUSA, Second Printing Fuel and Refueling
Page 146 of 469
If this action corrects the problem, the
message may not reset immediately. It
may take several driving cycles for the
message to turn off. A driving cycle
consists of an engine start-up (after four
or more hours with the engine off) followed
by city or highway driving. Continuing to
drive with the message on may cause the
service engine soon lamp to turn on as
well.
Easy Fuel
™ Capless System
(Energi Vehicles Only) WARNING
The fuel system may be under
pressure. If you hear a hissing sound
near the fuel filler door, do not refuel
until the sound stops. Otherwise, fuel may
spray out, which could cause serious
personal injury. Note:
Your vehicle features a locking fuel
door and an auto-sealing feature that locks
the fuel tank refueling valve. Before you can
refuel your vehicle, you must first press the
button located on the center console.
Pressing this button will unlock the fuel tank
refueling valve allowing the fuel filler door
to open so that you can insert the fuel filler
nozzle into the fuel inlet. This could take up
to fifteen seconds before the fuel filler door
pops open allowing the insertion of the fuel
filler nozzle.
When fueling your vehicle:
1. Put the vehicle in park (P) and switch the ignition off.
2. Press the fuel button located on the center console. 3. Wait up to fifteen seconds before
opening the fuel filler door. During this
time, a Fuel Door Opening message
will appear in the information display
screen.
4. When the door is open, a
Fuel Door
Open message will appear in the
information display, indicating that
your vehicle is ready to refuel. The
vehicle will remain ready to refuel for
approximately 20 minutes. If more than
20 minutes is required, you will need to
press the refueling button again. You
may experience the fuel pump turning
off if you do not press the refuel button
again.
5. Open the fuel filler door. 6. Slowly insert the fuel filler nozzle fully
into the fuel system and leave the
nozzle fully inserted until pumping is
complete. Hold the handle higher while
inserting for easier access.
143
C-MAX (CCG) Canada/United States of America, enUSA, Second Printing Fuel and RefuelingE145428 E156032
Page 157 of 469
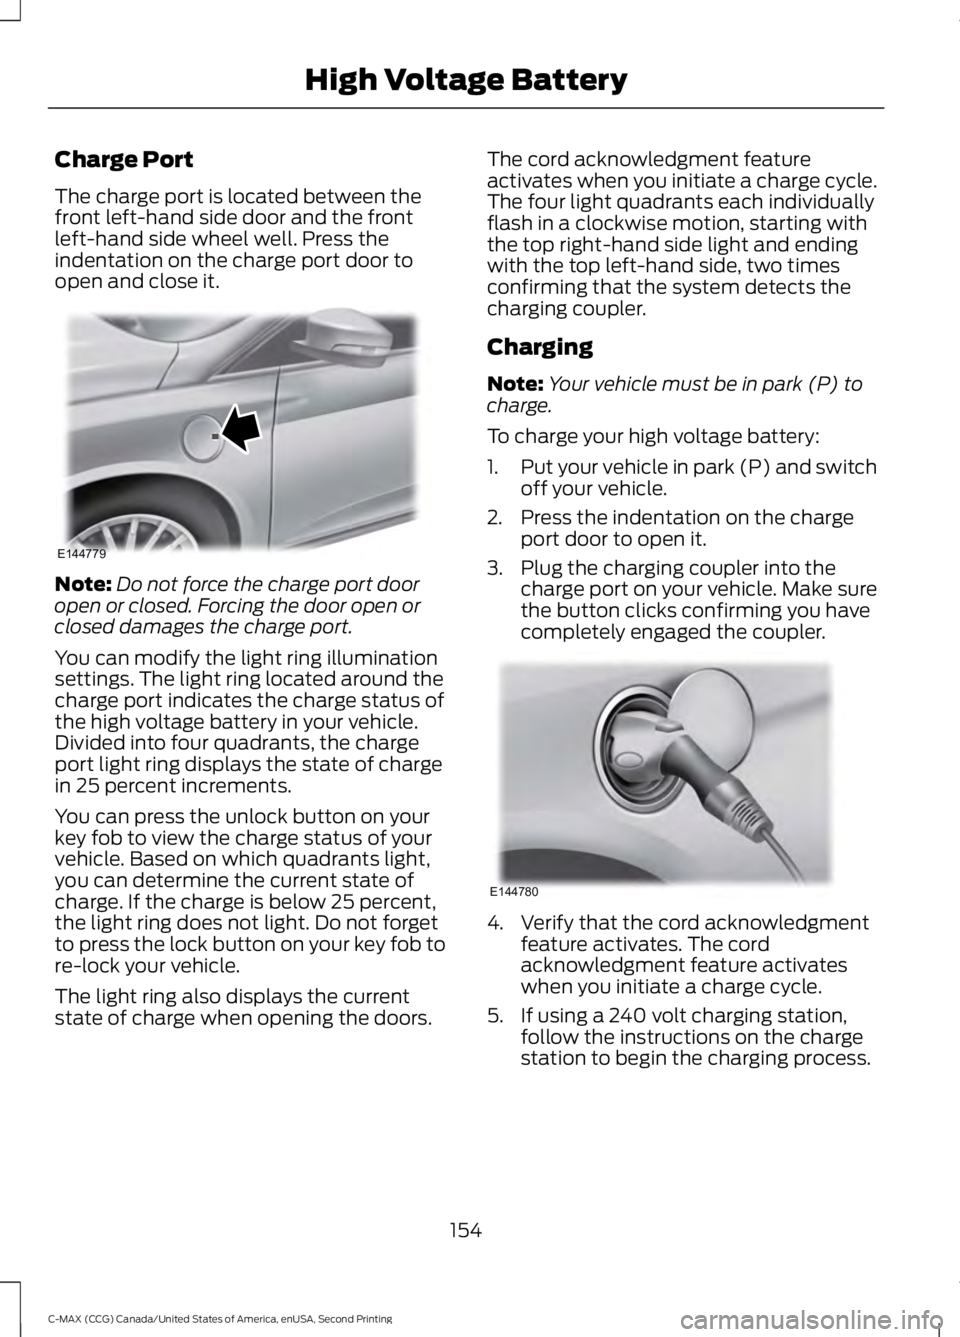
Charge Port
The charge port is located between the
front left-hand side door and the front
left-hand side wheel well. Press the
indentation on the charge port door to
open and close it.
Note:
Do not force the charge port door
open or closed. Forcing the door open or
closed damages the charge port.
You can modify the light ring illumination
settings. The light ring located around the
charge port indicates the charge status of
the high voltage battery in your vehicle.
Divided into four quadrants, the charge
port light ring displays the state of charge
in 25 percent increments.
You can press the unlock button on your
key fob to view the charge status of your
vehicle. Based on which quadrants light,
you can determine the current state of
charge. If the charge is below 25 percent,
the light ring does not light. Do not forget
to press the lock button on your key fob to
re-lock your vehicle.
The light ring also displays the current
state of charge when opening the doors. The cord acknowledgment feature
activates when you initiate a charge cycle.
The four light quadrants each individually
flash in a clockwise motion, starting with
the top right-hand side light and ending
with the top left-hand side, two times
confirming that the system detects the
charging coupler.
Charging
Note:
Your vehicle must be in park (P) to
charge.
To charge your high voltage battery:
1. Put your vehicle in park (P) and switch
off your vehicle.
2. Press the indentation on the charge port door to open it.
3. Plug the charging coupler into the charge port on your vehicle. Make sure
the button clicks confirming you have
completely engaged the coupler. 4. Verify that the cord acknowledgment
feature activates. The cord
acknowledgment feature activates
when you initiate a charge cycle.
5. If using a 240 volt charging station, follow the instructions on the charge
station to begin the charging process.
154
C-MAX (CCG) Canada/United States of America, enUSA, Second Printing High Voltage BatteryE144779 E144780
Page 158 of 469
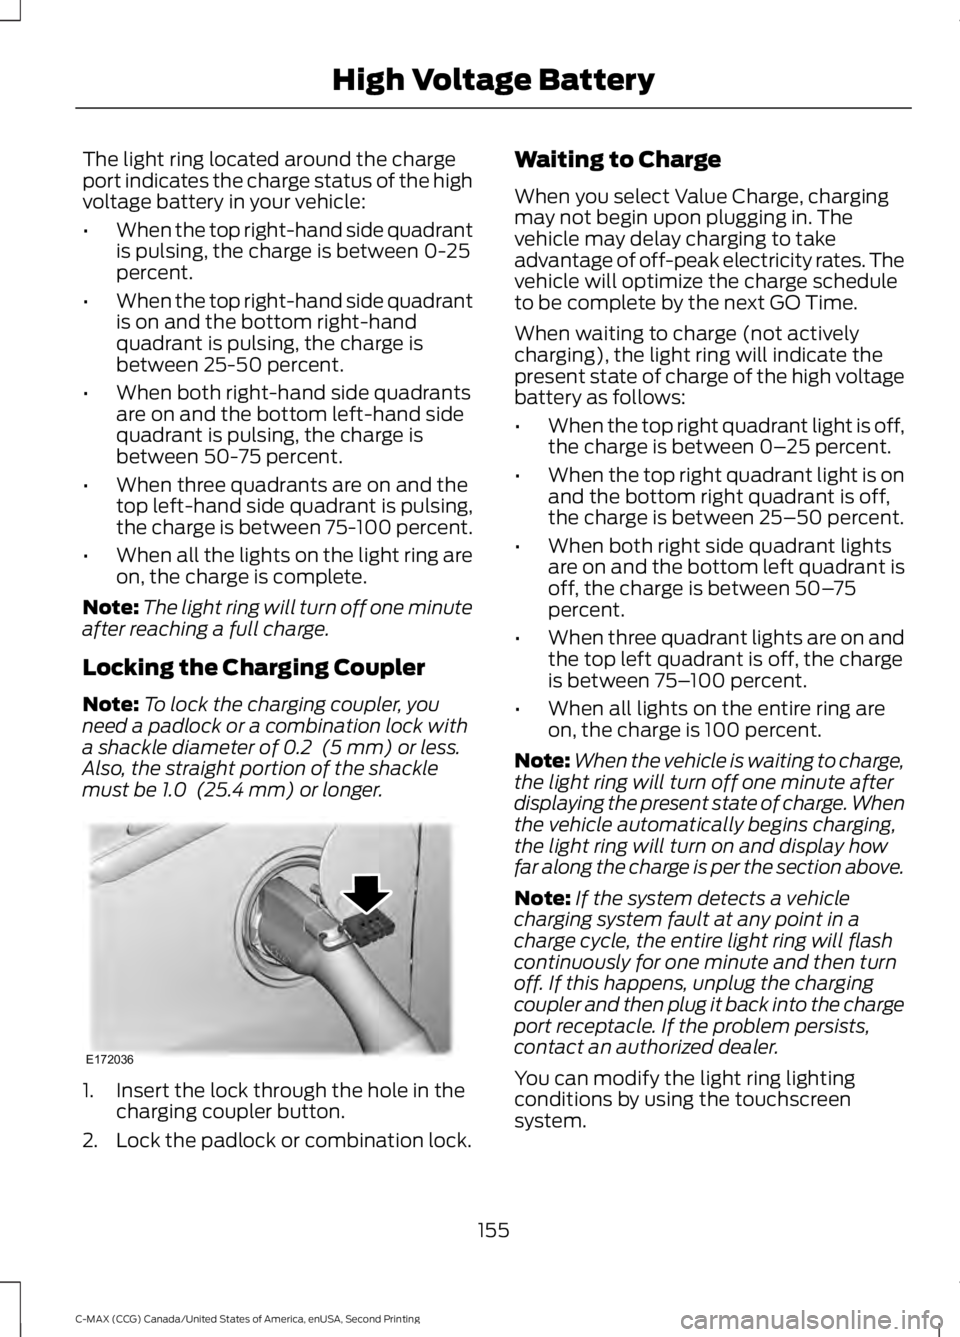
The light ring located around the charge
port indicates the charge status of the high
voltage battery in your vehicle:
•
When the top right-hand side quadrant
is pulsing, the charge is between 0-25
percent.
• When the top right-hand side quadrant
is on and the bottom right-hand
quadrant is pulsing, the charge is
between 25-50 percent.
• When both right-hand side quadrants
are on and the bottom left-hand side
quadrant is pulsing, the charge is
between 50-75 percent.
• When three quadrants are on and the
top left-hand side quadrant is pulsing,
the charge is between 75-100 percent.
• When all the lights on the light ring are
on, the charge is complete.
Note: The light ring will turn off one minute
after reaching a full charge.
Locking the Charging Coupler
Note: To lock the charging coupler, you
need a padlock or a combination lock with
a shackle diameter of 0.2 (5 mm) or less.
Also, the straight portion of the shackle
must be
1.0 (25.4 mm) or longer. 1. Insert the lock through the hole in the
charging coupler button.
2. Lock the padlock or combination lock. Waiting to Charge
When you select Value Charge, charging
may not begin upon plugging in. The
vehicle may delay charging to take
advantage of off-peak electricity rates. The
vehicle will optimize the charge schedule
to be complete by the next GO Time.
When waiting to charge (not actively
charging), the light ring will indicate the
present state of charge of the high voltage
battery as follows:
•
When the top right quadrant light is off,
the charge is between 0– 25 percent.
• When the top right quadrant light is on
and the bottom right quadrant is off,
the charge is between 25–50 percent.
• When both right side quadrant lights
are on and the bottom left quadrant is
off, the charge is between 50– 75
percent.
• When three quadrant lights are on and
the top left quadrant is off, the charge
is between 75– 100 percent.
• When all lights on the entire ring are
on, the charge is 100 percent.
Note: When the vehicle is waiting to charge,
the light ring will turn off one minute after
displaying the present state of charge. When
the vehicle automatically begins charging,
the light ring will turn on and display how
far along the charge is per the section above.
Note: If the system detects a vehicle
charging system fault at any point in a
charge cycle, the entire light ring will flash
continuously for one minute and then turn
off. If this happens, unplug the charging
coupler and then plug it back into the charge
port receptacle. If the problem persists,
contact an authorized dealer.
You can modify the light ring lighting
conditions by using the touchscreen
system.
155
C-MAX (CCG) Canada/United States of America, enUSA, Second Printing High Voltage BatteryE172036
Page 165 of 469
The system makes it easier to pull away
when your vehicle is on a slope without the
need to use the parking brake.
When the system is active, your vehicle
remains stationary on the slope for two to
three seconds after you release the brake
pedal. This allows time to move your foot
from the brake to the accelerator pedal.
The system releases the brakes
automatically once the engine has
developed sufficient drive to prevent your
vehicle from rolling down the slope. This
is an advantage when pulling away on a
slope, for example from a car park ramp,
traffic lights or when reversing uphill into
a parking space.
Note:
The system only functions when you
bring your vehicle to a complete standstill
in an uphill gear (for example, drive when
facing uphill or reverse when facing
downhill).
Note: There is no warning light to indicate
the system is either on or off.
Using Hill Start Assist
1. Press the brake pedal to bring your vehicle to a complete standstill. Keep
the brake pedal pressed.
2. If the sensors detect that your vehicle is on a slope, the system activates
automatically.
3. When you remove your foot from the brake pedal, your vehicle remains on
the slope without rolling away for
about two to three seconds. This hold
time automatically extends if you are
in the process of driving off.
4. Drive off in the normal manner. The system releases the brakes
automatically.
Note: When you remove your foot from the
brake pedal and press the pedal again when
the system is active, you will experience
significantly reduced brake pedal travel. This
is normal. Switching the System On and Off
Vehicles with Manual Transmission
You can switch this feature on or off in the
information display. The system
remembers the last setting when you start
your vehicle.
Vehicles with Automatic Transmission
You cannot turn the system on or off.
When you switch the ignition on, the
system automatically turns on.
162
C-MAX (CCG) Canada/United States of America, enUSA, Second Printing Brakes
Page 166 of 469
PRINCIPLE OF OPERATION
The traction control system helps avoid
drive wheel spin and loss of traction.
If your vehicle begins to slide, the system
applies the brakes to individual wheels
and, when needed, reduces engine power
at the same time. If the wheels spin when
accelerating on slippery or loose surfaces,
the system reduces engine power in order
to increase traction.
USING TRACTION CONTROL
In certain situations for example, stuck in
snow or mud, turning the traction control
off may be beneficial as this allows the
wheels to spin with full engine power.
Depending on the type of system you have
on your vehicle, you can either turn the
system off using the information display
or by pressing the button.
Switching the System Off Using
the Information Display Controls
(If Equipped)
Your vehicle comes with this feature
already enabled. If required, you can switch
this feature off using the information
display controls. See General
Information (page 91).
Switching the System Off Using a
Switch
(If Equipped)
The button is located in the instrument
panel.
Press the button. You will see a message
in conjunction with an illuminated icon in
the display. Press the button again to
return the system to normal mode.
When you switch the traction control
system off, stability control remains fully
active. System Indicator Lights and
Messages WARNING
If a failure has been detected within
the AdvanceTrac system, the
stability control light will illuminate
steadily. Verify that the AdvanceTrac
system was not manually disabled through
the information display. If the stability
control light still illuminates steadily, have
the system serviced by an authorized
dealer immediately. Operating your vehicle
with AdvanceTrac disabled could lead to
an increased risk of loss of vehicle control,
vehicle rollover, personal injury and death. The stability control light
temporarily illuminates on
engine start-up and flashes
when a driving condition activates the
stability system. The stability control off light
temporarily illuminates on
engine start-up and stays on
when you turn the traction control system
off.
When you turn the traction control system
off or on, a message appears in the
information display showing system status.
163
C-MAX (CCG) Canada/United States of America, enUSA, Second Printing Traction ControlE138639
Page 170 of 469
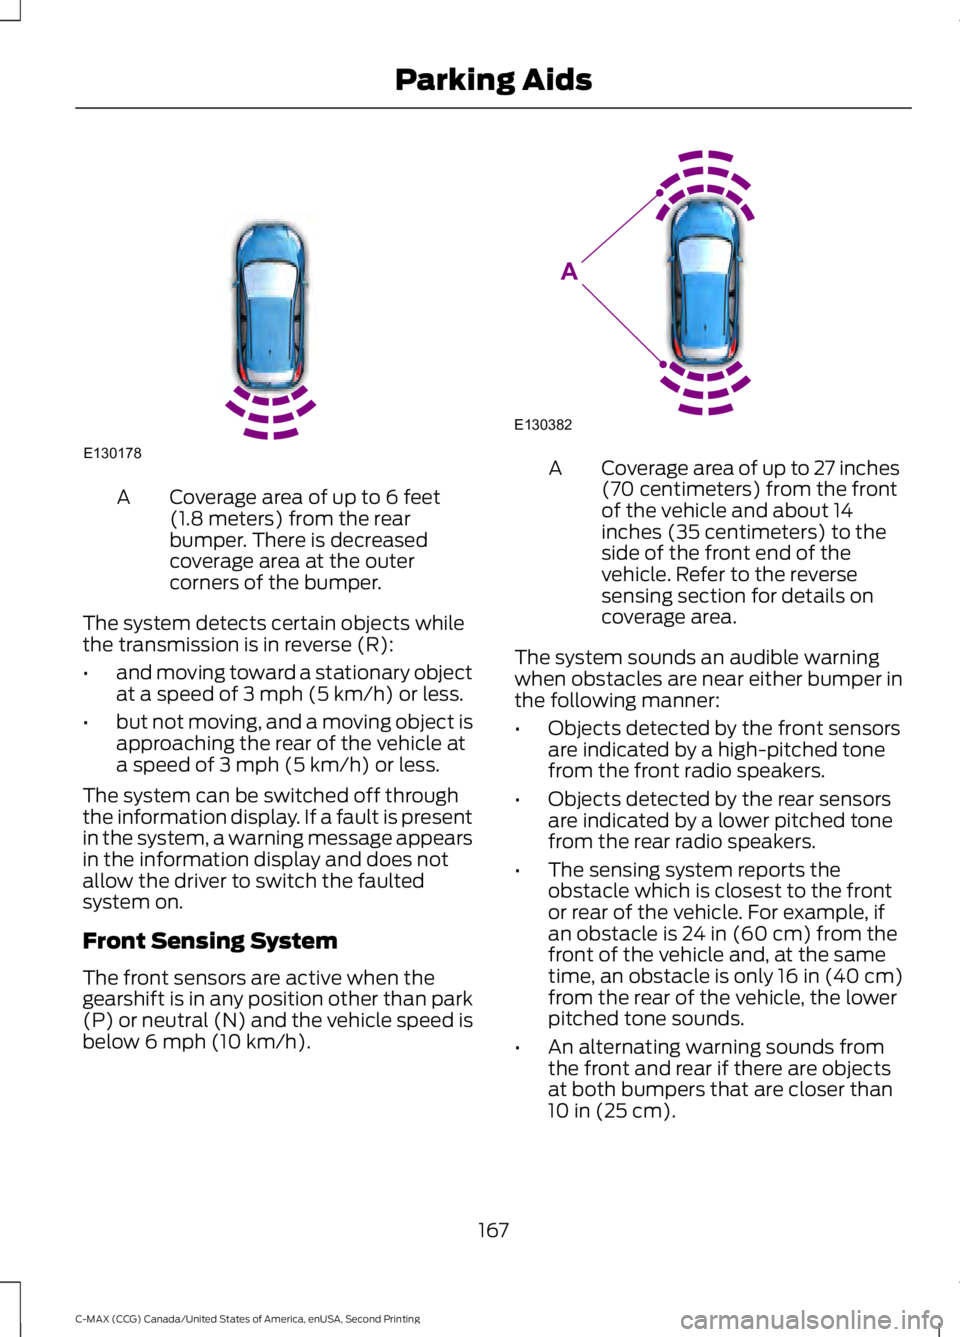
Coverage area of up to 6 feet
(1.8 meters) from the rear
bumper. There is decreased
coverage area at the outer
corners of the bumper.
A
The system detects certain objects while
the transmission is in reverse (R):
• and moving toward a stationary object
at a speed of 3 mph (5 km/h) or less.
• but not moving, and a moving object is
approaching the rear of the vehicle at
a speed of
3 mph (5 km/h) or less.
The system can be switched off through
the information display. If a fault is present
in the system, a warning message appears
in the information display and does not
allow the driver to switch the faulted
system on.
Front Sensing System
The front sensors are active when the
gearshift is in any position other than park
(P) or neutral (N) and the vehicle speed is
below
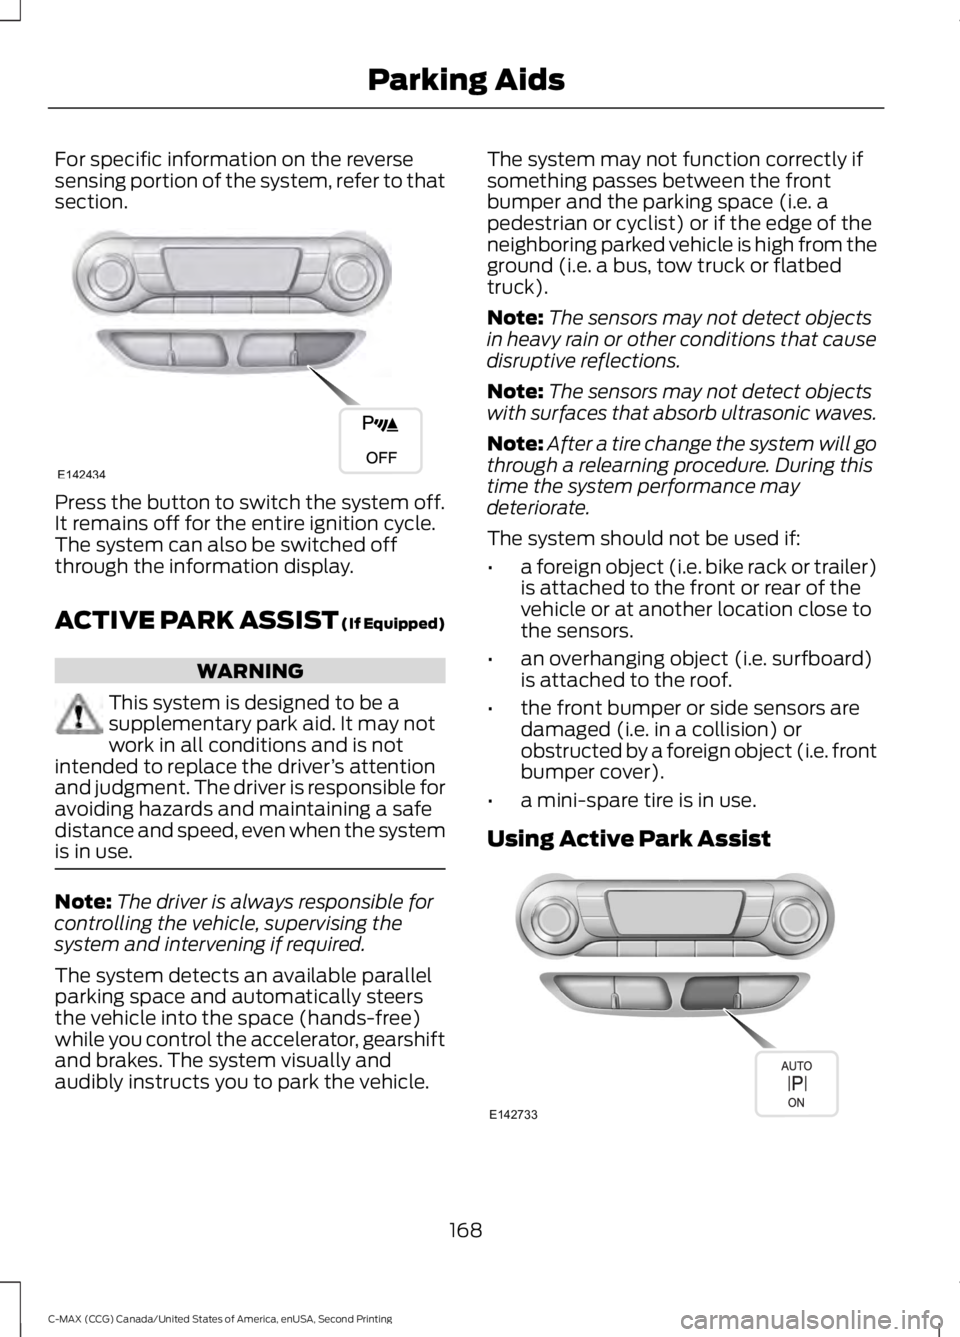
6 mph (10 km/h). Coverage area of up to 27 inches
(70 centimeters) from the front
of the vehicle and about 14
inches (35 centimeters) to the
side of the front end of the
vehicle. Refer to the reverse
sensing section for details on
coverage area.
A
The system sounds an audible warning
when obstacles are near either bumper in
the following manner:
• Objects detected by the front sensors
are indicated by a high-pitched tone
from the front radio speakers.
• Objects detected by the rear sensors
are indicated by a lower pitched tone
from the rear radio speakers.
• The sensing system reports the
obstacle which is closest to the front
or rear of the vehicle. For example, if
an obstacle is
24 in (60 cm) from the
front of the vehicle and, at the same
time, an obstacle is only
16 in (40 cm)
from the rear of the vehicle, the lower
pitched tone sounds.
• An alternating warning sounds from
the front and rear if there are objects
at both bumpers that are closer than
10 in (25 cm)
.
167
C-MAX (CCG) Canada/United States of America, enUSA, Second Printing Parking AidsE130178 E130382
A
Page 171 of 469
For specific information on the reverse
sensing portion of the system, refer to that
section.
Press the button to switch the system off.
It remains off for the entire ignition cycle.
The system can also be switched off
through the information display.
ACTIVE PARK ASSIST (If Equipped)
WARNING
This system is designed to be a
supplementary park aid. It may not
work in all conditions and is not
intended to replace the driver ’s attention
and judgment. The driver is responsible for
avoiding hazards and maintaining a safe
distance and speed, even when the system
is in use. Note:
The driver is always responsible for
controlling the vehicle, supervising the
system and intervening if required.
The system detects an available parallel
parking space and automatically steers
the vehicle into the space (hands-free)
while you control the accelerator, gearshift
and brakes. The system visually and
audibly instructs you to park the vehicle. The system may not function correctly if
something passes between the front
bumper and the parking space (i.e. a
pedestrian or cyclist) or if the edge of the
neighboring parked vehicle is high from the
ground (i.e. a bus, tow truck or flatbed
truck).
Note:
The sensors may not detect objects
in heavy rain or other conditions that cause
disruptive reflections.
Note: The sensors may not detect objects
with surfaces that absorb ultrasonic waves.
Note: After a tire change the system will go
through a relearning procedure. During this
time the system performance may
deteriorate.
The system should not be used if:
• a foreign object (i.e. bike rack or trailer)
is attached to the front or rear of the
vehicle or at another location close to
the sensors.
• an overhanging object (i.e. surfboard)
is attached to the roof.
• the front bumper or side sensors are
damaged (i.e. in a collision) or
obstructed by a foreign object (i.e. front
bumper cover).
• a mini-spare tire is in use.
Using Active Park Assist 168
C-MAX (CCG) Canada/United States of America, enUSA, Second Printing Parking AidsE142434 E142733