warning FORD C MAX HYBRID 2014 2.G Owners Manual
[x] Cancel search | Manufacturer: FORD, Model Year: 2014, Model line: C MAX HYBRID, Model: FORD C MAX HYBRID 2014 2.GPages: 447, PDF Size: 8.06 MB
Page 181 of 447
WARNINGS
Exceeding the Safety
Compliance Certification
Label vehicle weight rating limits
could result in substandard
vehicle handling or performance,
engine, transmission and/or
structural damage, serious
damage to the vehicle, loss of
control and personal injury. Do not exceed the GVWR or
the GAWR specified on the
Safety Compliance Certification
Label. Do not use replacement tires
with lower load carrying
capacities than the original tires
because they may lower the
vehicle ’s GVWR and GAWR
limitations. Replacement tires
with a higher limit than the original
tires do not increase the GVWR
and GAWR limitations. WARNINGS
Exceeding any vehicle weight
rating limitation could result
in serious damage to the vehicle
and/or personal injury. Steps for determining the
correct load limit:
1. Locate the statement "The
combined weight of occupants
and cargo should never exceed
XXX kg or XXX lb." on your
vehicle ’s placard.
2. Determine the combined
weight of the driver and
passengers that will be riding
in your vehicle.
3. Subtract the combined weight
of the driver and passengers
from XXX kg or XXX lb.
179
C-MAX (CCG) Load CarryingE142524
Page 184 of 447
TOWING A TRAILER
WARNING
Never tow a trailer with your
vehicle. This powertrain is not
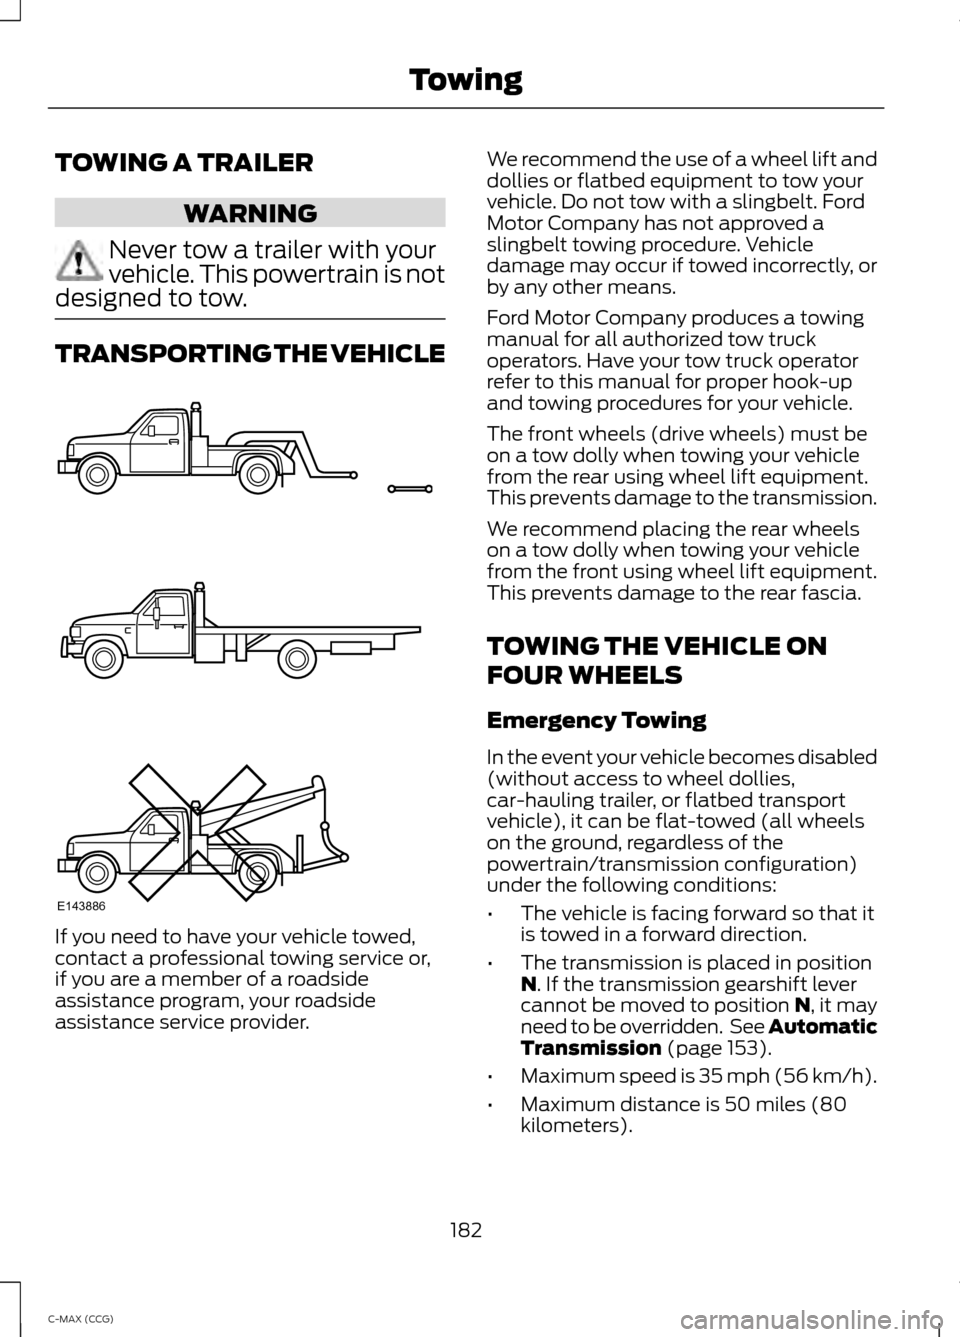
designed to tow. TRANSPORTING THE VEHICLE
If you need to have your vehicle towed,
contact a professional towing service or,
if you are a member of a roadside
assistance program, your roadside
assistance service provider. We recommend the use of a wheel lift and
dollies or flatbed equipment to tow your
vehicle. Do not tow with a slingbelt. Ford
Motor Company has not approved a
slingbelt towing procedure. Vehicle
damage may occur if towed incorrectly, or
by any other means.
Ford Motor Company produces a towing
manual for all authorized tow truck
operators. Have your tow truck operator
refer to this manual for proper hook-up
and towing procedures for your vehicle.
The front wheels (drive wheels) must be
on a tow dolly when towing your vehicle
from the rear using wheel lift equipment.
This prevents damage to the transmission.
We recommend placing the rear wheels
on a tow dolly when towing your vehicle
from the front using wheel lift equipment.
This prevents damage to the rear fascia.
TOWING THE VEHICLE ON
FOUR WHEELS
Emergency Towing
In the event your vehicle becomes disabled
(without access to wheel dollies,
car-hauling trailer, or flatbed transport
vehicle), it can be flat-towed (all wheels
on the ground, regardless of the
powertrain/transmission configuration)
under the following conditions:
•
The vehicle is facing forward so that it
is towed in a forward direction.
• The transmission is placed in position
N. If the transmission gearshift lever
cannot be moved to position N, it may
need to be overridden. See Automatic
Transmission
(page 153).
• Maximum speed is 35 mph (56 km/h).
• Maximum distance is 50 miles (80
kilometers).
182
C-MAX (CCG) TowingE143886
Page 188 of 447
FLOOR MATS
WARNINGS
Always use floor mats that are
designed to fit the foot well of your
vehicle, leaving the pedal area
unobstructed, and which can be firmly
secured to retention posts so that they
cannot slip out of position and interfere
with the pedals or impair safe operation of
your vehicle in other ways. Incorrectly fitted floor mats can
cause the accelerator pedal to
become stuck in the open position.
This can cause loss of vehicle control. Always correctly install the floor
mats to the retention posts so that
they cannot slip out of position or
obstruct pedal operation. Do not place unsecured floor mats
or any other covering in the foot well.
Do not place additional floor mats
or any other covering on top of the
original floor mats. This will reduce
the pedal clearance and interfere with the
pedal operation. Do not allow objects to fall or
become trapped under the pedals of
your vehicle. This can cause loss of
vehicle control. Carry out regular inspections to make
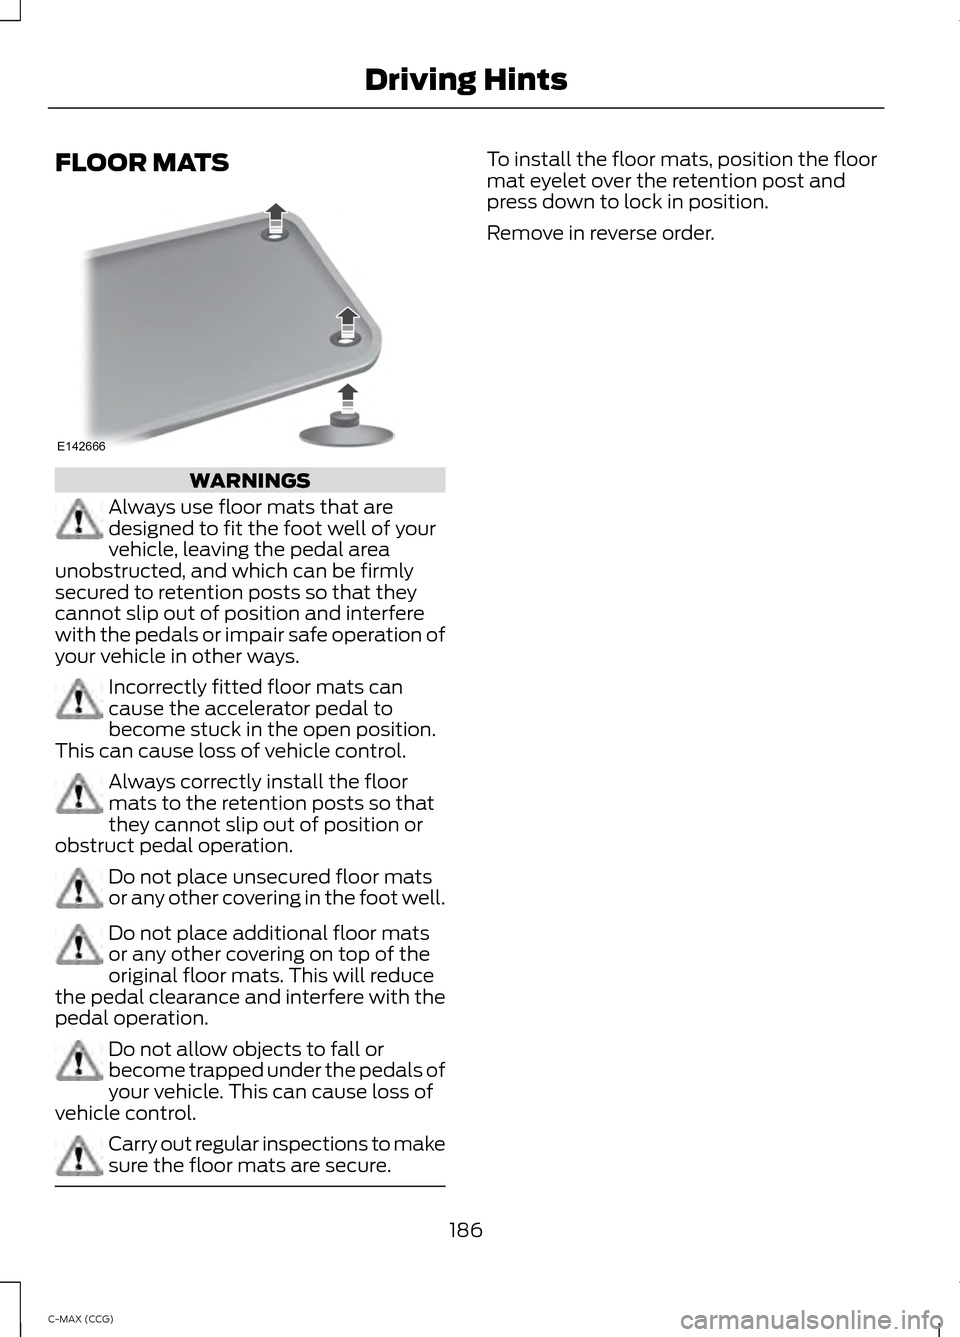
sure the floor mats are secure. To install the floor mats, position the floor
mat eyelet over the retention post and
press down to lock in position.
Remove in reverse order.
186
C-MAX (CCG) Driving HintsE142666
Page 190 of 447
HAZARD WARNING FLASHERS
Note:
If used when the vehicle is not
running, the battery will lose charge. There
may be insufficient power to restart your
vehicle. The hazard warning button is
located on the instrument panel.
Use it when your vehicle is
creating a safety hazard for other
motorists.
• Press the button to turn on the hazard
warning function, and the front and
rear direction indicators will flash.
• Press the button again to turn them
off.
FUEL SHUTOFF WARNING
Failure to inspect and, if necessary,
repair fuel leaks after a collision may
increase the risk of fire and serious
injury. Ford Motor Company recommends
that the fuel system be inspected by an
authorized dealer after any collision. In the event of a moderate to severe
collision, this vehicle is equipped with a
fuel pump shut-off feature that stops the
flow of fuel to the engine. Not every impact
will cause a shut-off.
Should your vehicle shut off after a
collision, you may restart your vehicle by
doing the following:
1. Turn the ignition off.
2. Turn the ignition to crank.
3. Turn the ignition off.
4.
Turn the ignition on again to re-enable
the fuel pump.
For vehicles equipped with a push button
start system: 1. Press the START/STOP button to
turn the ignition off.
2. Press the brake pedal and press the START/STOP
button (crank
attempt).
3. Remove your foot from the brake pedal
and press the
START/STOP button
(ignition off).
4. Press the
START/STOP button again
to re-enable the fuel system.
JUMP-STARTING THE VEHICLE WARNINGS
The gases around the battery can
explode if exposed to flames, sparks
or lit cigarettes. An explosion could
result in injury or vehicle damage. Batteries contain sulfuric acid which
can burn skin, eyes and clothing, if
contacted.
Do not attempt to push-start your
automatic transmission vehicle. Automatic
transmissions do not have push-start
capability. Attempting to push-start a
vehicle with an automatic transmission
may cause transmission damage.
Preparing Your Vehicle
Note:
Use only a 12-volt supply to start your
vehicle.
Note: Do not disconnect the battery of the
disabled vehicle as this could damage the
vehicle's electrical system.
1. Park the booster vehicle close to the hood of the disabled vehicle making
sure the two vehicles do not touch. Set
the parking brake on both vehicles and
stay clear of the engine cooling fan and
other moving parts.
188
C-MAX (CCG) Roadside Emergencies
Page 192 of 447
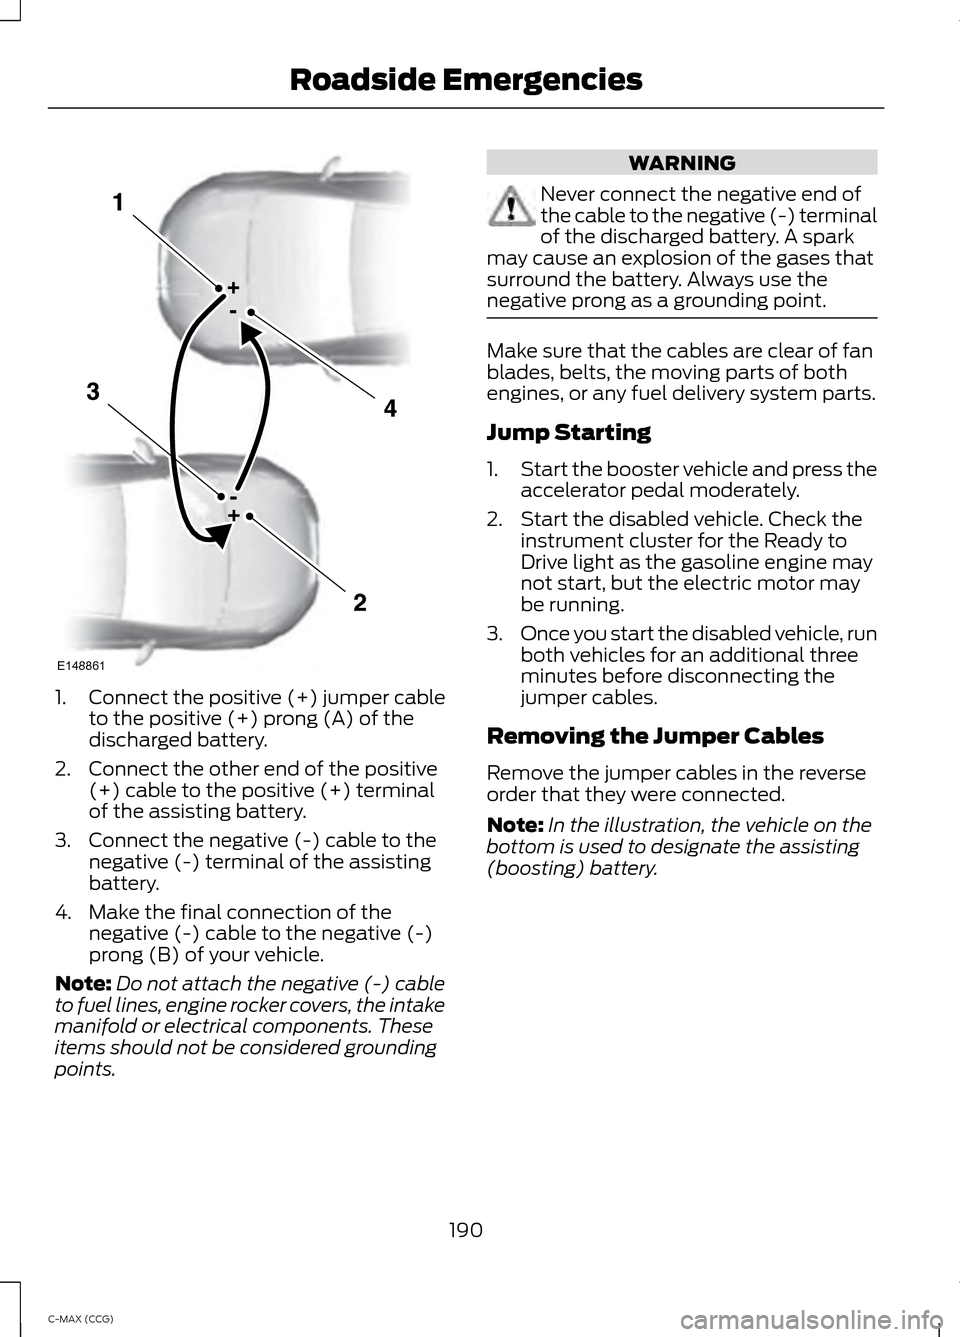
1.
Connect the positive (+) jumper cable
to the positive (+) prong (A) of the
discharged battery.
2. Connect the other end of the positive (+) cable to the positive (+) terminal
of the assisting battery.
3. Connect the negative (-) cable to the negative (-) terminal of the assisting
battery.
4. Make the final connection of the negative (-) cable to the negative (-)
prong (B) of your vehicle.
Note: Do not attach the negative (-) cable
to fuel lines, engine rocker covers, the intake
manifold or electrical components. These
items should not be considered grounding
points. WARNING
Never connect the negative end of
the cable to the negative (-) terminal
of the discharged battery. A spark
may cause an explosion of the gases that
surround the battery. Always use the
negative prong as a grounding point. Make sure that the cables are clear of fan
blades, belts, the moving parts of both
engines, or any fuel delivery system parts.
Jump Starting
1.
Start the booster vehicle and press the
accelerator pedal moderately.
2. Start the disabled vehicle. Check the instrument cluster for the Ready to
Drive light as the gasoline engine may
not start, but the electric motor may
be running.
3. Once you start the disabled vehicle, run
both vehicles for an additional three
minutes before disconnecting the
jumper cables.
Removing the Jumper Cables
Remove the jumper cables in the reverse
order that they were connected.
Note: In the illustration, the vehicle on the
bottom is used to designate the assisting
(boosting) battery.
190
C-MAX (CCG) Roadside EmergenciesE148861
Page 202 of 447
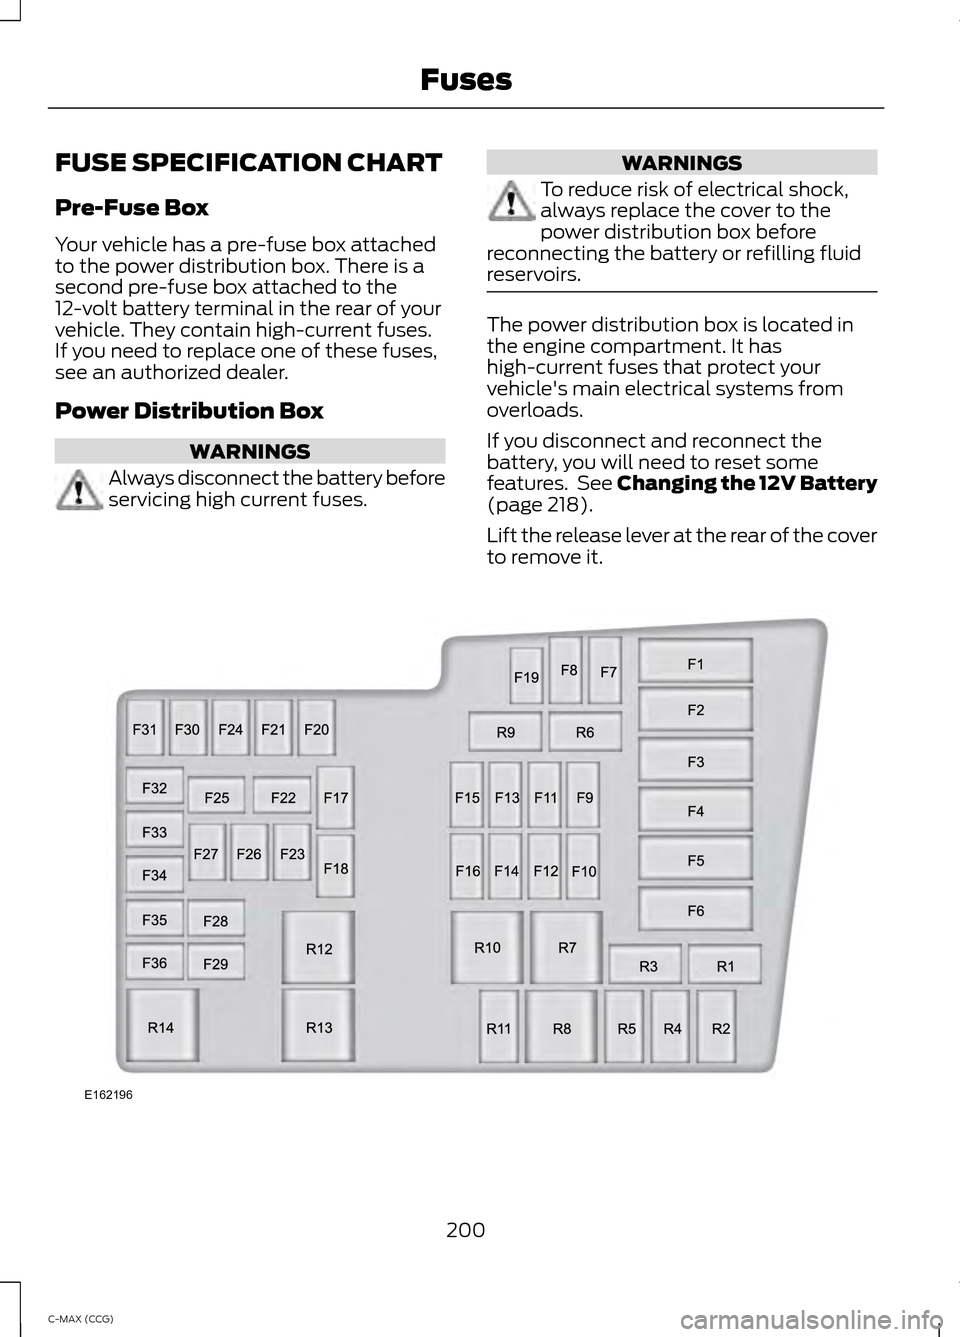
FUSE SPECIFICATION CHART
Pre-Fuse Box
Your vehicle has a pre-fuse box attached
to the power distribution box. There is a
second pre-fuse box attached to the
12-volt battery terminal in the rear of your
vehicle. They contain high-current fuses.
If you need to replace one of these fuses,
see an authorized dealer.
Power Distribution Box
WARNINGS
Always disconnect the battery before
servicing high current fuses. WARNINGS
To reduce risk of electrical shock,
always replace the cover to the
power distribution box before
reconnecting the battery or refilling fluid
reservoirs. The power distribution box is located in
the engine compartment. It has
high-current fuses that protect your
vehicle's main electrical systems from
overloads.
If you disconnect and reconnect the
battery, you will need to reset some
features. See Changing the 12V Battery
(page 218).
Lift the release lever at the rear of the cover
to remove it. 200
C-MAX (CCG) FusesE162196
Page 209 of 447
Protected components
Fuse amp rating
Fuse or relay number
Driver seat heater
20A
F34
Passenger seat heater
20A
F35
Not used
—
F36
Power sun shade
20A
F37
Not used
—
F38
Not used
—
F39
Not used
—
F40
Not used
—
F41
Not used
—
F42
Not used
—
F43
Not used
—
F44
Humidity sensor
5A
F45
Fuel system
10A
F46
Rear 15 relay
Power relay
R1
Heated rear window
Mini relay
R2
Fuel door (C-MAX Energi)
Micro relay
R3
Not used
—
R4
Not used
—
R5
Rear wiper
Micro relay
R6
CHANGING A FUSE
Fuses WARNING
Always replace a fuse with one that
has the specified amperage rating.
Using a fuse with a higher amperage
rating can cause severe wire damage and
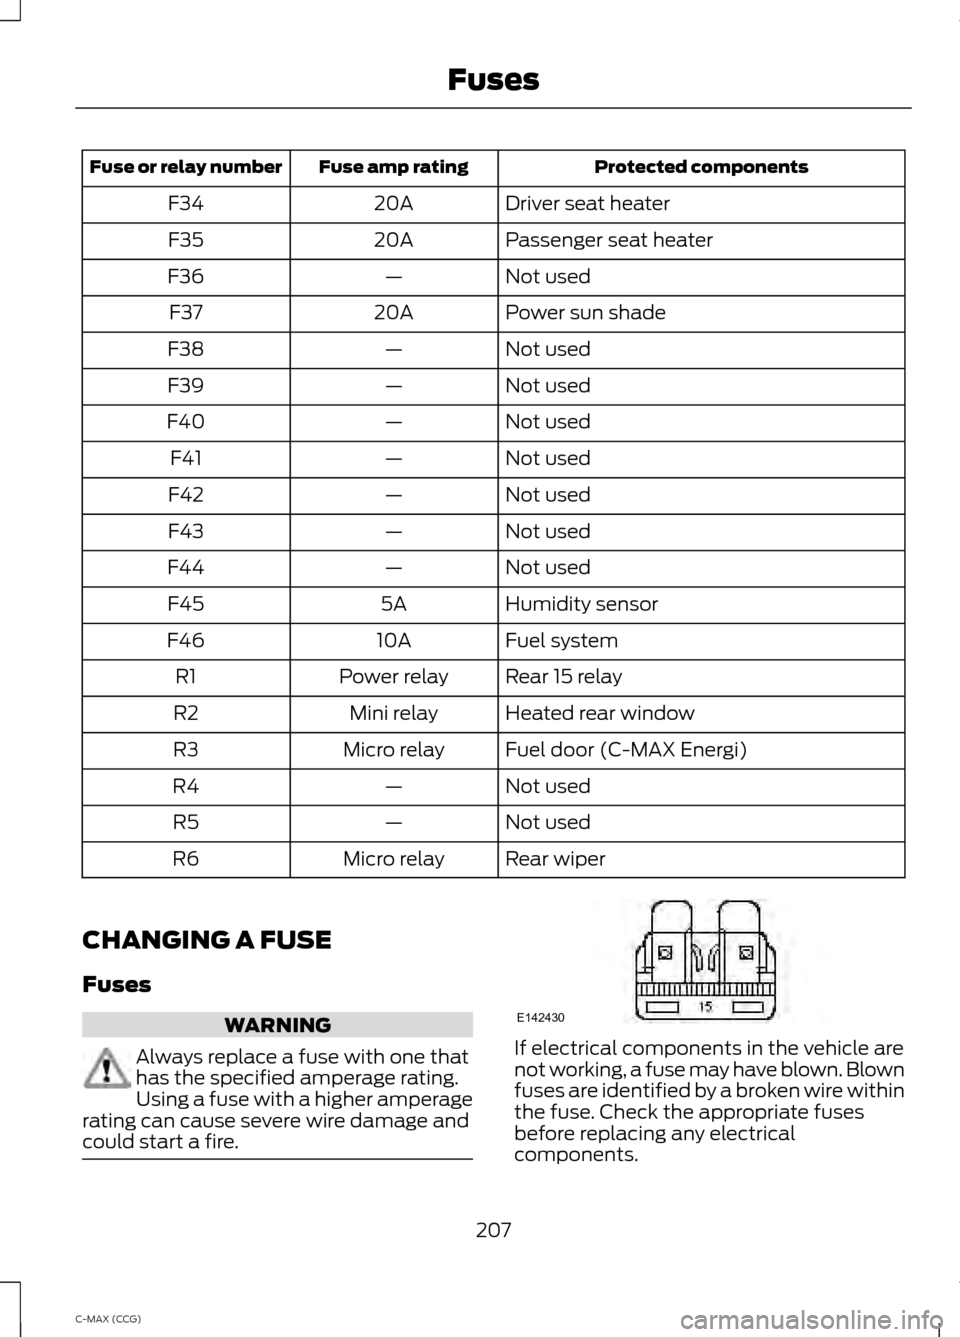
could start a fire. If electrical components in the vehicle are
not working, a fuse may have blown. Blown
fuses are identified by a broken wire within
the fuse. Check the appropriate fuses
before replacing any electrical
components.
207
C-MAX (CCG) FusesE142430
Page 211 of 447
GENERAL INFORMATION
Have your vehicle serviced regularly to help
maintain its roadworthiness and resale
value. There is a large network of Ford
authorized dealers that are there to help
you with their professional servicing
expertise. We believe that their specially
trained technicians are best qualified to
service your vehicle properly and expertly.
They are supported by a wide range of
highly specialized tools developed
specifically for servicing your vehicle.
To help you service your vehicle, we
provide scheduled maintenance
information which makes tracking routine
service easy. See Scheduled
Maintenance (page 417).
If your vehicle requires professional service,
your authorized dealer can provide the
necessary parts and service. Check your
warranty information to find out which
parts and services are covered.
Use only recommended fuels, lubricants,
fluids and service parts conforming to
specifications. Motorcraft® parts are
designed and built to provide the best
performance in your vehicle.
Precautions
• Do not work on a hot engine.
• Make sure that nothing gets caught in
moving parts.
• Do not work on a vehicle with the
engine running in an enclosed space,
unless you are sure you have enough
ventilation.
• Keep all open flames and other burning
material (such as cigarettes) away
from the battery and all fuel related
parts. Working with the Engine Off
1. Set the parking brake and shift to
P
(Park).
2. Turn off the engine and remove the key
(if equipped).
3. Block the wheels.
Working with the Engine On WARNING
To reduce the risk of vehicle damage
and/or personal burn injuries, do not
start your engine with the air cleaner
removed and do not remove it while the
engine is running. 1. Set the parking brake and shift to
P
(Park).
2. Block the wheels
OPENING AND CLOSING THE
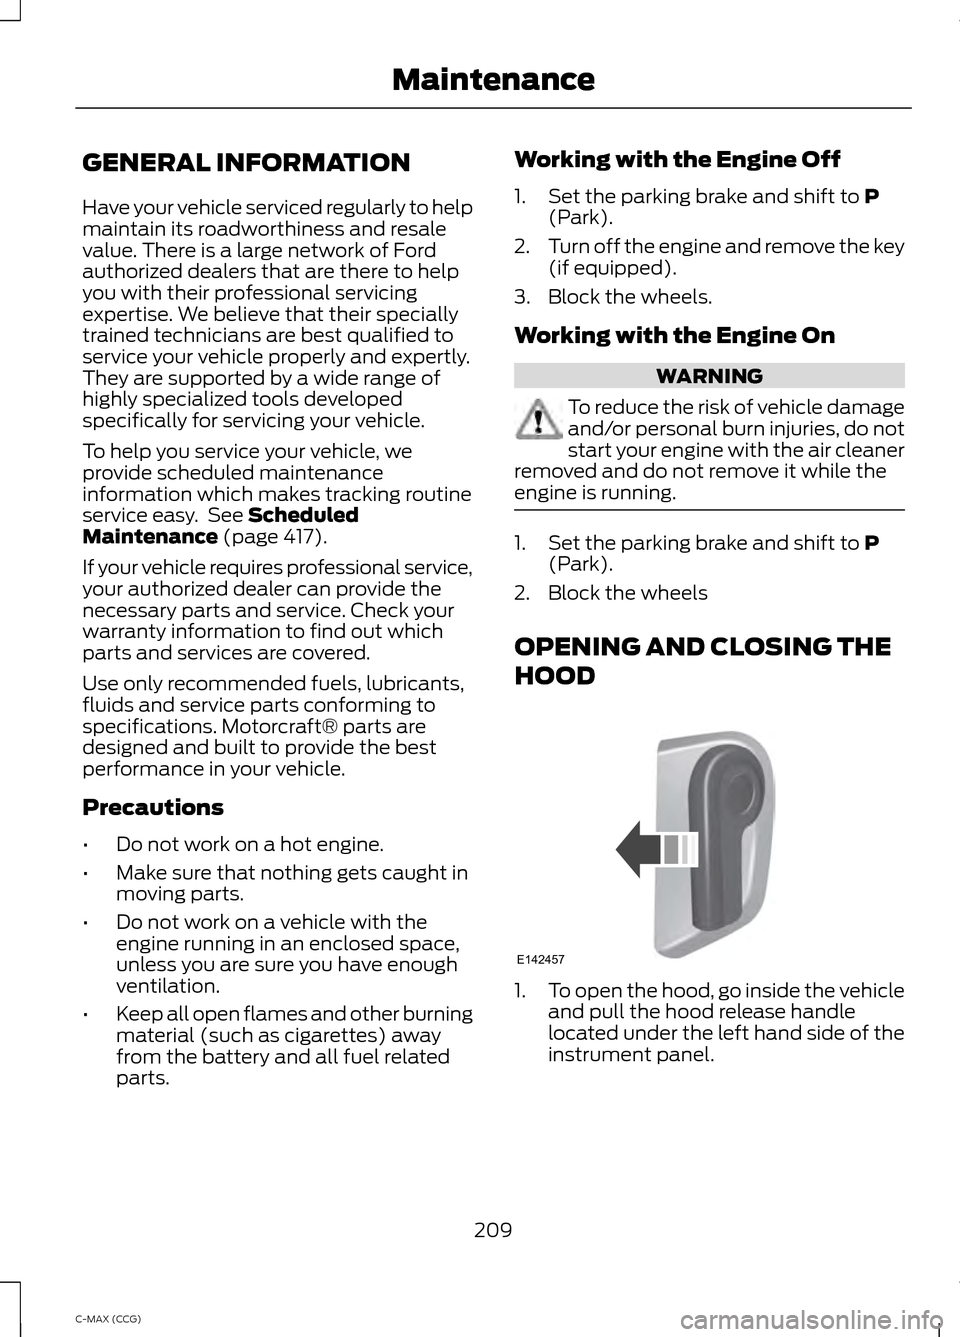
HOOD 1.
To open the hood, go inside the vehicle
and pull the hood release handle
located under the left hand side of the
instrument panel.
209
C-MAX (CCG) MaintenanceE142457
Page 212 of 447
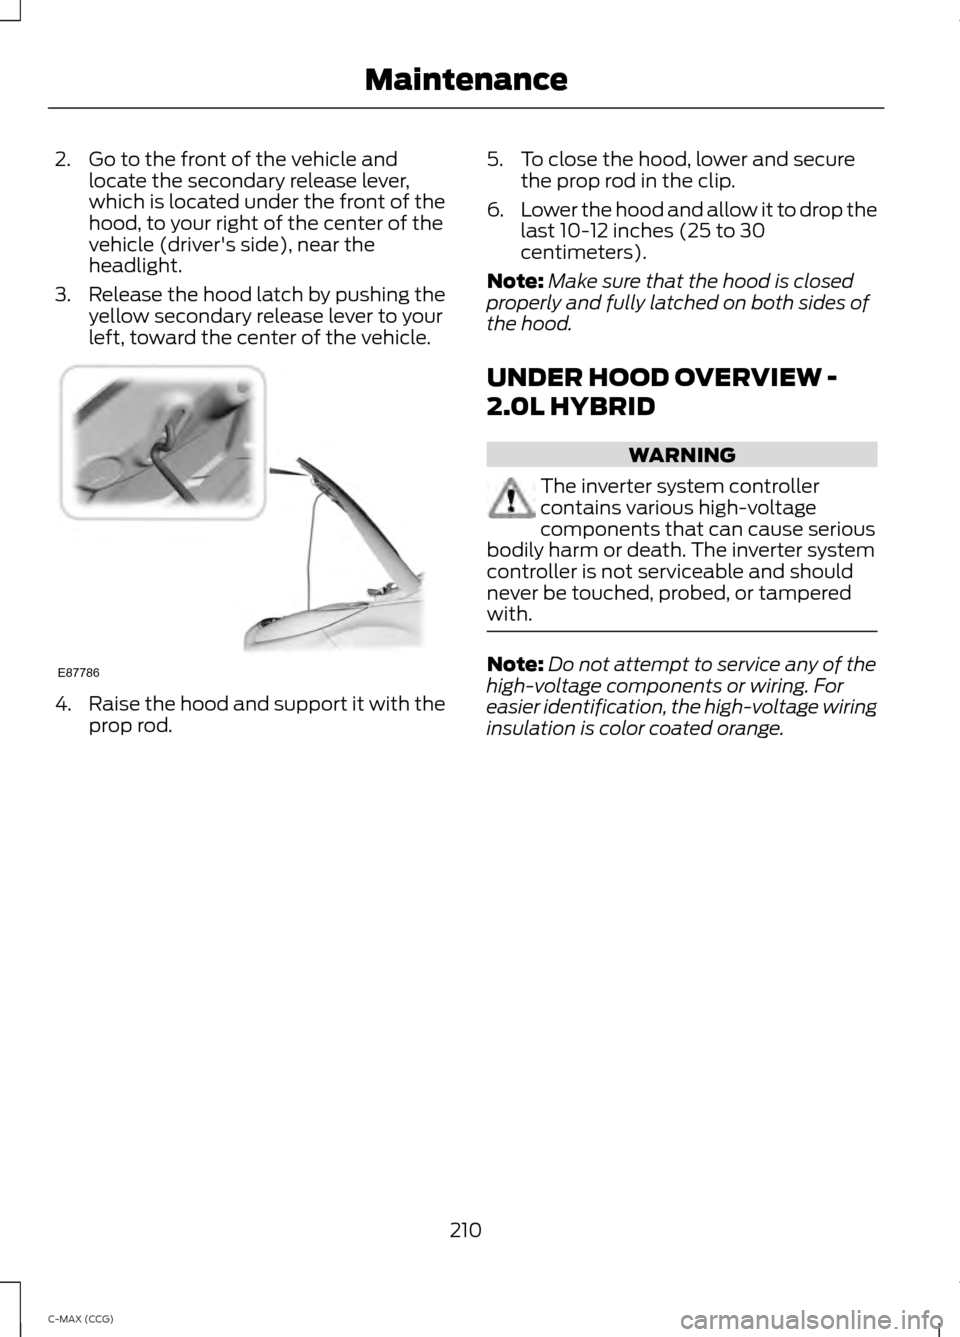
2. Go to the front of the vehicle and
locate the secondary release lever,
which is located under the front of the
hood, to your right of the center of the
vehicle (driver's side), near the
headlight.
3. Release the hood latch by pushing the yellow secondary release lever to your
left, toward the center of the vehicle. 4.
Raise the hood and support it with the
prop rod. 5. To close the hood, lower and secure
the prop rod in the clip.
6. Lower the hood and allow it to drop the
last 10-12 inches (25 to 30
centimeters).
Note: Make sure that the hood is closed
properly and fully latched on both sides of
the hood.
UNDER HOOD OVERVIEW -
2.0L HYBRID WARNING
The inverter system controller
contains various high-voltage
components that can cause serious
bodily harm or death. The inverter system
controller is not serviceable and should
never be touched, probed, or tampered
with. Note:
Do not attempt to service any of the
high-voltage components or wiring. For
easier identification, the high-voltage wiring
insulation is color coated orange.
210
C-MAX (CCG) MaintenanceE87786
Page 216 of 447
Note:
For best results, coolant
concentration should be tested with a
refractometer such as Rotunda tool
300-ROB75240 available from your dealer.
Ford does not recommend the use of
hydrometers or coolant test strips for
measuring coolant concentrations.
Note: Automotive fluids are not
interchangeable. Do not use engine coolant
or antifreeze or windshield washer fluid
outside of its specified function and vehicle
location.
Adding Coolant WARNINGS
Do not add engine coolant when the
engine is hot. Steam and scalding
liquids released from a hot cooling
system can burn you badly. Also, you can
be burned if you spill coolant on hot engine
parts. Do not put engine coolant in the
windshield washer fluid container. If
sprayed on the windshield, engine
coolant could make it difficult to see
through the windshield. To reduce the risk of personal injury,
make sure the engine is cool before
unscrewing the coolant pressure
relief cap. The cooling system is under
pressure; steam and hot liquid can come
out forcefully when the cap is loosened
slightly. Do not add coolant further than the
MAX mark.
Note:
Do not use stop leak pellets, cooling
system sealants, or additives as they can
cause damage to the cooling or heating
systems. This damage would not be covered
under your vehicle ’s warranty. Note:
During normal vehicle operation, the
coolant may change color from orange to
pink or light red. As long as the coolant is
clear and uncontaminated, this color change
does not indicate the coolant has degraded
nor does it require the coolant to be drained,
the system to be flushed, or the coolant to
be replaced.
Note: It is very important to use prediluted
coolant meeting the Ford specification in
order to avoid plugging the small coolant
passageways. Use of concentrated coolant
and water may cause coolant passageway
plugging and void the warranty. See
Capacities and Specifications (page 265).
• Do not mix different colors or types of
coolant in your vehicle. Make sure the
correct coolant is used. Mixing of
coolants may harm your cooling
system. The use of an improper coolant
may harm the engine, inverter system
controller, and cooling system
components and may void the
warranty.
• In case of emergency, a large amount
of water without engine coolant may
be added to the engine cooling system
only in order to reach a vehicle service
location. In this instance, the engine
cooling system must be drained,
chemically cleaned with Motorcraft
Premium Cooling System Flush, and
refilled with prediluted engine coolant
as soon as possible. Water alone
(without engine coolant) can cause
engine damage from corrosion,
overheating, or freezing. DO NOT use
this method for the inverter system
controller cooling system. The inverter
system controller cooling system
operates close to ambient
temperature, and is susceptible to
freezing in any subfreezing environment
in the absence of coolant.
214
C-MAX (CCG) Maintenance