remote control FORD C MAX HYBRID 2014 2.G User Guide
[x] Cancel search | Manufacturer: FORD, Model Year: 2014, Model line: C MAX HYBRID, Model: FORD C MAX HYBRID 2014 2.GPages: 447, PDF Size: 8.06 MB
Page 60 of 447
Autounlock (If Equipped)
The autounlock feature will unlock all the
doors when:
•
the ignition is on, all the doors are
closed, and your vehicle has been in
motion at a speed greater than 4 mph
(7 km/h);
• your vehicle comes to a stop and you
switch the ignition off or to accessory;
and
• you open the driver door within 10
minutes of the switching the ignition
off or to accessory.
Note: The doors will not autounlock if you
electronically lock your vehicle after you
switch the ignition off and before you open
the driver door.
Enabling or Disabling Autolock and
Autounlock
Note: Your authorized dealer can perform
this procedure, or you can do the procedure
yourself.
To enable or disable these features, do the
following:
Note: You will have 30 seconds to
complete the procedure.
1. Switch the ignition on.
2. Press the power door unlock button three times.
3. Switch the ignition off.
4. Press the power door unlock button three times.
5. Switch the ignition on. The horn will sound indicating your vehicle is in
programming mode.
Autolock: Press the power door unlock
button then the lock button. The horn will
sound once if disabled or twice (one short
and one long) if enabled. Autounlock:
Press the power door lock
button then the unlock button. The horn
will sound once if disabled or twice (one
short and one long) if enabled.
After programming the feature, switch the
ignition off. The horn will sound once
indicating programming is complete.
Note: You can enable or disable the
autounlock feature independently of the
autolock feature.
Illuminated Entry
The interior lamps and select exterior
lamps will illuminate when you unlock the
doors with the remote entry system.
The illuminated entry system will turn off
the lights if:
• you start your vehicle,
• you press the remote control lock
button, or
• after 25 seconds of illumination.
The lights will not turn off if:
• you turn them on with the lamp control,
or
• any door is open.
Illuminated Exit
The interior lamps and select exterior
lamps will illuminate when all doors are
closed and you switch the ignition off.
The lamps will turn off if all the doors
remain closed and:
• 25 seconds elapse, or
• you lock your vehicle from the outside.
Battery Saver
If you leave the courtesy lamps or dome
lamps on and switch the ignition off, the
battery saver shuts them off after some
time.
58
C-MAX (CCG) Locks
Page 61 of 447
Accessory Mode Battery Saver for
Intelligent Access Keys (If Equipped)
If you leave the ignition on after leaving
your vehicle, it will shut off 15 minutes after
you close all of the doors.
MANUAL LIFTGATE
WARNINGS
It is extremely dangerous to ride in a
cargo area, inside or outside of a
vehicle. In a crash, people riding in
these areas are more likely to be seriously
injured or killed. Do not allow people to ride
in any area of your vehicle that is not
equipped with seats and safety belts. Be
sure everyone in your vehicle is in a seat
and using a safety belt properly. Failure to
follow this warning could result in serious
personal injury or death. Make sure to close and latch the
liftgate to prevent drawing exhaust
fumes into your vehicle. This will also
prevent passengers and cargo from falling
out. If you must drive with the liftgate open,
keep the vents or windows open so outside
air comes into your vehicle. Failure to
follow this warning could result in serious
personal injury. Note:
Be careful when opening or closing
the liftgate in a garage or other enclosed
area to avoid damaging the liftgate.
Note: Do not hang anything, for example a
bike rack, from the glass or liftgate. This
could damage the liftgate and its
components.
Note: Do not leave the liftgate open while
driving. This could damage the liftgate and
its components. Opening the Liftgate
Manually
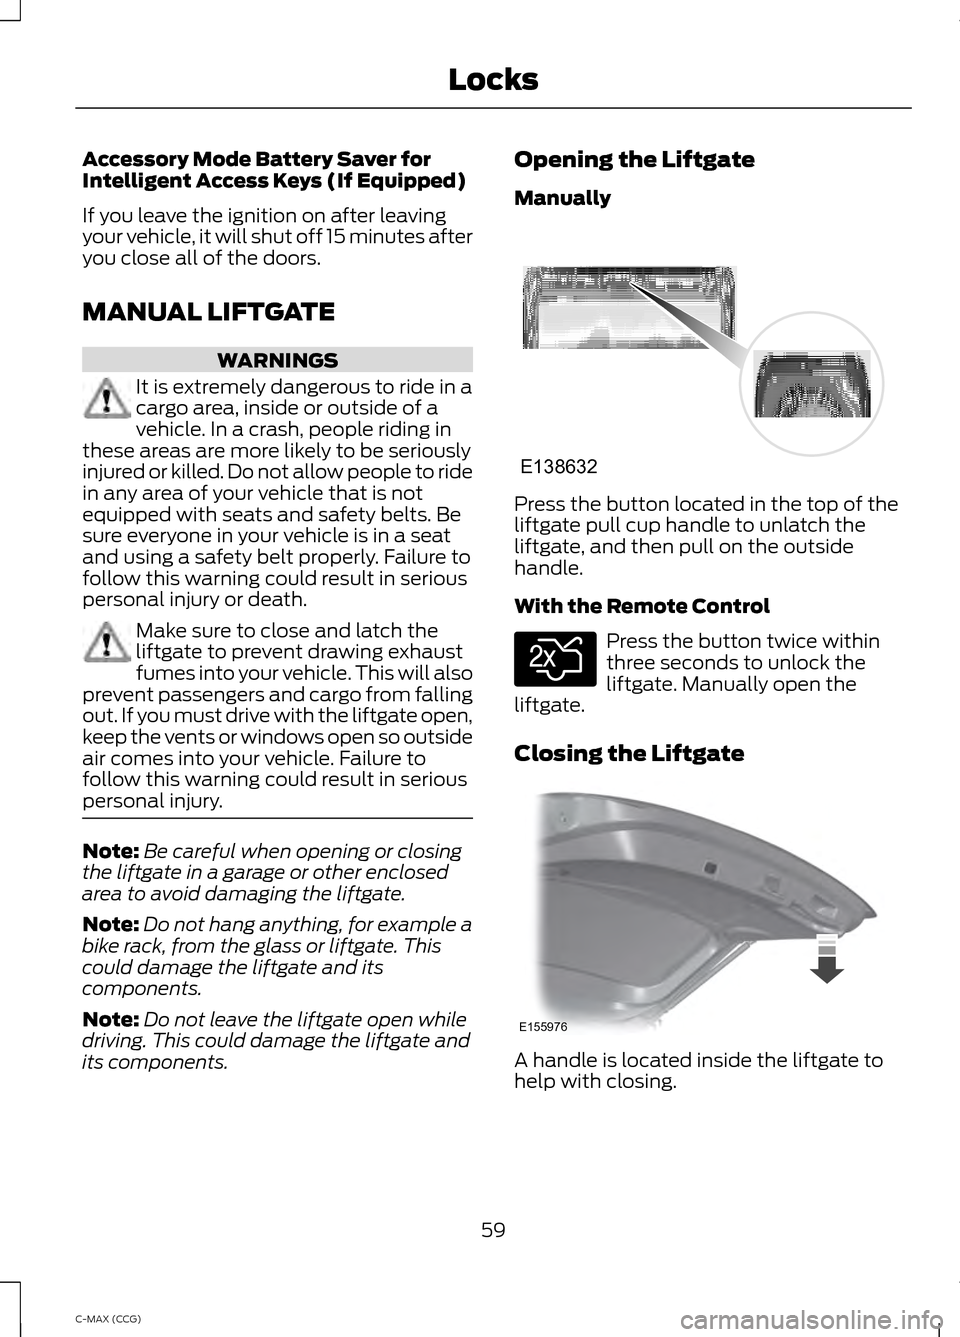
Press the button located in the top of the
liftgate pull cup handle to unlatch the
liftgate, and then pull on the outside
handle.
With the Remote Control
Press the button twice within
three seconds to unlock the
liftgate. Manually open the
liftgate.
Closing the Liftgate A handle is located inside the liftgate to
help with closing.
59
C-MAX (CCG) LocksE138632 E138630 E155976
Page 62 of 447
POWER LIFTGATE (IF EQUIPPED)
WARNINGS
It is extremely dangerous to ride in a
cargo area, inside or outside of a
vehicle. In a collision, people riding in
these areas are more likely to be seriously
injured or killed. Do not allow people to ride
in any area of your vehicle that is not
equipped with seats and safety belts. Be
sure everyone in your vehicle is in a seat
and using a safety belt properly. Make sure to close and latch the
liftgate to prevent drawing exhaust
fumes into your vehicle. This will also
prevent passengers and cargo from falling
out. If you must drive with the liftgate open,
keep the vents or windows open so outside
air comes into your vehicle. Failure to
follow this warning could result in serious
personal injury. Keep keys out of reach of children.
Do not allow children to play near an
open or moving power liftgate.
Note:
Cycling the ignition while the liftgate
is power closing and is near the latch may
cause the liftgate to reverse to full open
position. Make sure that you close the
liftgate before operating or moving the
vehicle, especially in an enclosure, like a
garage or a parking structure. You could
damage the liftgate or its components.
Note: Do not hang anything, for example a
bike rack, from the spoiler, glass or liftgate.
This could damage the liftgate and its
components.
If the vehicle is running, the liftgate will only
operate with the transmission in park.
Three warning tones will sound once as
the liftgate begins to power close. Five
short chimes indicate a problem with the
open or close request, caused by: •
the ignition is on and the transmission
is not in P;
• or the battery voltage is below the
minimum operating voltage;
• or the vehicle speed is at or above 3
mph (5 km/h).
If the liftgate falls to the closed direction
after the liftgate has stopped in the open
position, four short warning chimes
indicate excessive weight on the gate or a
possible gas strut failure. Have the system
checked by an authorized dealer if you still
have the issue after you remove the load.
Opening and Closing the Liftgate WARNING
Make sure all persons are clear of the
power liftgate area before using the
power liftgate control.
Note:
Be careful when opening or closing
the liftgate in a garage or other enclosed
area to avoid damaging the liftgate.
Note: Do not leave the liftgate open while
driving. This could damage the liftgate and
its components.
Note: You can stop the liftgate movement
direction with a second press of the
instrument panel button or the control
button on the liftgate, a second press of the
transmitter button, or by using a kicking
motion with your foot for hands-free
liftgates.
From the Instrument Panel Press the instrument panel
button.
With the Remote Control Press the remote control button
twice within three seconds.
60
C-MAX (CCG) LocksE138633 E138630
Page 63 of 447
Hands-Free Feature (If Equipped)
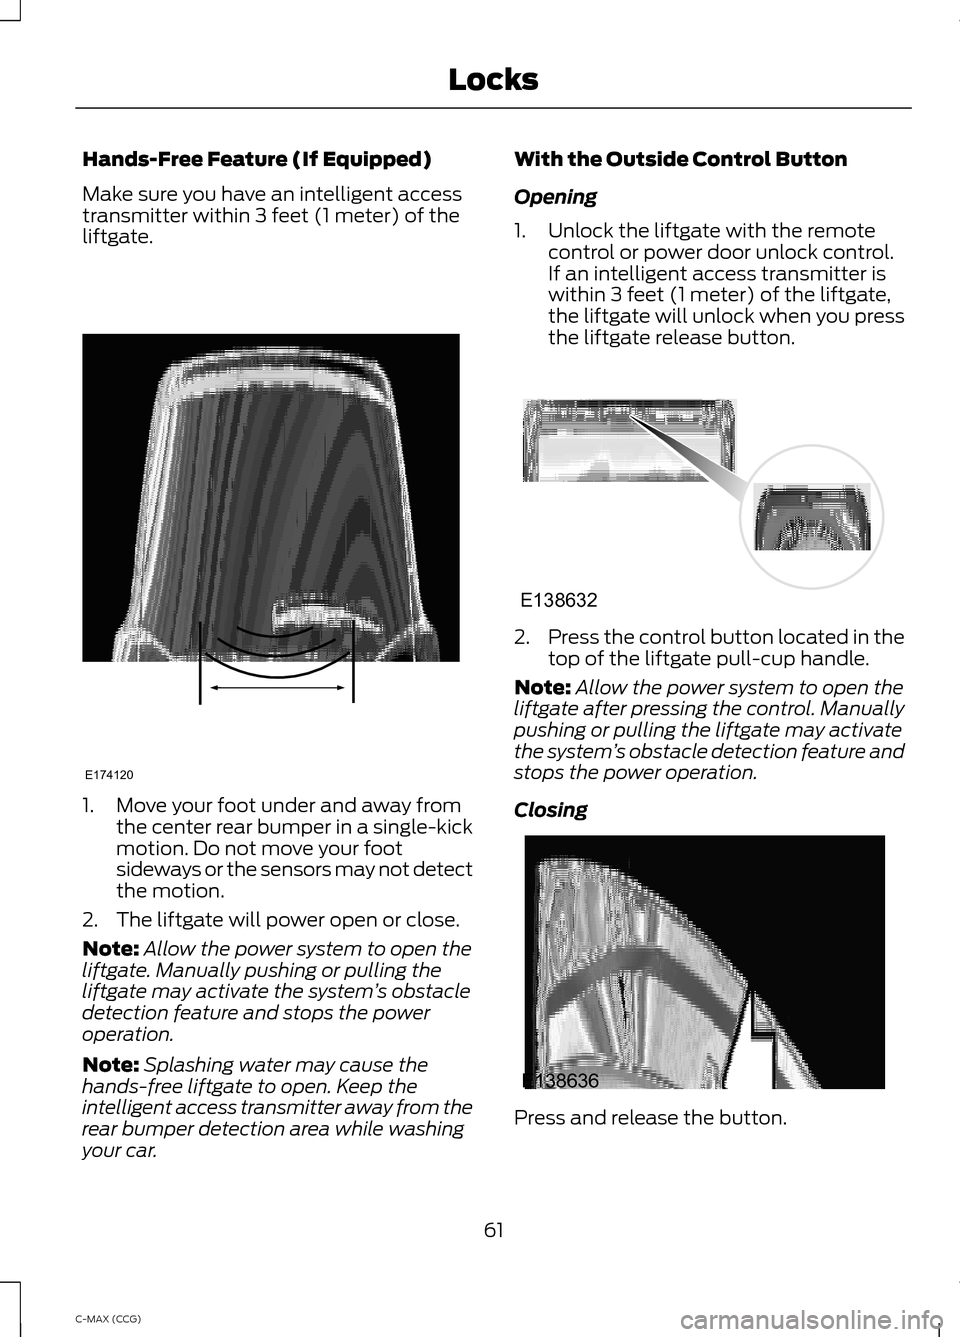
Make sure you have an intelligent access
transmitter within 3 feet (1 meter) of the
liftgate.
1. Move your foot under and away from
the center rear bumper in a single-kick
motion. Do not move your foot
sideways or the sensors may not detect
the motion.
2. The liftgate will power open or close.
Note: Allow the power system to open the
liftgate. Manually pushing or pulling the
liftgate may activate the system ’s obstacle
detection feature and stops the power
operation.
Note: Splashing water may cause the
hands-free liftgate to open. Keep the
intelligent access transmitter away from the
rear bumper detection area while washing
your car. With the Outside Control Button
Opening
1. Unlock the liftgate with the remote
control or power door unlock control.
If an intelligent access transmitter is
within 3 feet (1 meter) of the liftgate,
the liftgate will unlock when you press
the liftgate release button. 2.
Press the control button located in the
top of the liftgate pull-cup handle.
Note: Allow the power system to open the
liftgate after pressing the control. Manually
pushing or pulling the liftgate may activate
the system ’s obstacle detection feature and
stops the power operation.
Closing Press and release the button.
61
C-MAX (CCG) LocksE174120 E138632 E138636
Page 65 of 447
PASSIVE ANTI-THEFT
SYSTEM
SecuriLock®
The system helps prevent your vehicle
from starting unless you use a coded key
programmed to your vehicle. Using the
wrong key may prevent your vehicle from
starting. A message may appear in the
information display.
If you are unable to start your vehicle with
a correctly coded key, a malfunction has
happened. A message may appear in the
information display.
Automatic Arming
Your vehicle arms immediately after you
switch the ignition off.
Automatic Disarming
Switching the ignition on with a coded key
disarms your vehicle.
Replacement Keys
Note:
Your vehicle comes equipped with
two integrated keyhead transmitters or two
intelligent access keys.
The integrated keyhead transmitter
functions as a programmed ignition key
that operates all the locks and starts your
vehicle, as well as a remote control.
The intelligent access key functions as a
programmed key that operates the driver
door lock and activates the intelligent
access with push button start system, as
well as a remote control. If your programmed transmitters or
standard SecuriLock coded keys
(integrated keyhead transmitters only) are
lost or stolen and you do not have an extra
coded key, you will need to have your
vehicle towed to an authorized dealer. You
need to erase the key codes from your
vehicle and program new coded keys.
Store an extra programmed key away from
your vehicle in a safe place to help prevent
any inconveniences. See your authorized
dealer to purchase additional spare or
replacement keys.
Programming a Spare Integrated
Keyhead Transmitter
Note:
You can program a maximum of eight
coded keys to your vehicle. All eight can be
integrated keyhead transmitters.
You can program your own integrated
keyhead transmitter or standard
SecuriLock coded keys to your vehicle. This
procedure will program both the vehicle
immobilizer keycode and the remote entry
portion of the remote control to your
vehicle
Only use integrated keyhead transmitters
or standard SecuriLock keys.
You must have two previously
programmed coded keys and the new
unprogrammed key readily accessible. See
your authorized dealer to have the spare
key programmed if two previously
programmed coded keys are not available.
Read and understand the entire procedure
before you begin.
1. Insert the first previously programmed
coded key into the ignition.
2. Switch the ignition from off to on. Keep
the ignition on for at least three
seconds, but no more than 10 seconds.
3. Switch the ignition off and remove the
first coded key from the ignition.
63
C-MAX (CCG) Security
Page 66 of 447
4. After three seconds but within 10
seconds of switching the ignition off,
insert the second previously coded key
into the ignition.
5. Switch the ignition from off to on. Keep
the ignition on for at least three
seconds, but no more than 10 seconds.
6. Switch the ignition off and remove the
second previously programmed coded
key from the ignition.
7. After three seconds but within 10 seconds of switching the ignition off
and removing the previously
programmed coded key, insert the new
unprogrammed key into the ignition.
8. Switch the ignition from off to on. Keep
the ignition on for at least six seconds.
9. Remove the newly programmed coded
key from the ignition.
If the key has been successfully
programmed it will start your vehicle and
operate the remote entry system (if the
new key is an integrated keyhead
transmitter).
If programming was not successful, wait
10 seconds and repeat Steps 1 through 8.
If you are still unsuccessful, take your
vehicle to your authorized dealer.
Programming a Spare Intelligent
Access Key
See your authorized dealer to have
additional keys programmed to your
vehicle.
ANTI-THEFT ALARM (IF EQUIPPED)
The system warns you of an unauthorized
entry to your vehicle. It triggers if any door,
the luggage compartment or the hood
opens without using the key or remote
control. The direction indicators flash and the horn
sounds if unauthorized entry is attempted
while the alarm is armed.
Take all remote controls to an authorized
dealer if there is any potential alarm
problem with your vehicle.
Arming the Alarm
The alarm is ready to arm when there is
not a key in the ignition. Electronically lock
the vehicle to arm the alarm.
Disarming the Alarm
Disarm the alarm by any of the following
actions:
•
Unlock the doors or luggage
compartment with the remote control
or keyless entry keypad.
• Switch the ignition on or start the
vehicle.
• Use a key in the driver ’s door to unlock
the vehicle, then switch the ignition on
within 12 seconds.
Note: Pressing the panic button on the
remote control will stop the horn and signal
indicators, but will not disarm the system.
64
C-MAX (CCG) Security
Page 76 of 447
•
You open any door.
• You press a remote control button.
• You press switch B on the front interior
lamp.
Front Interior Lamp
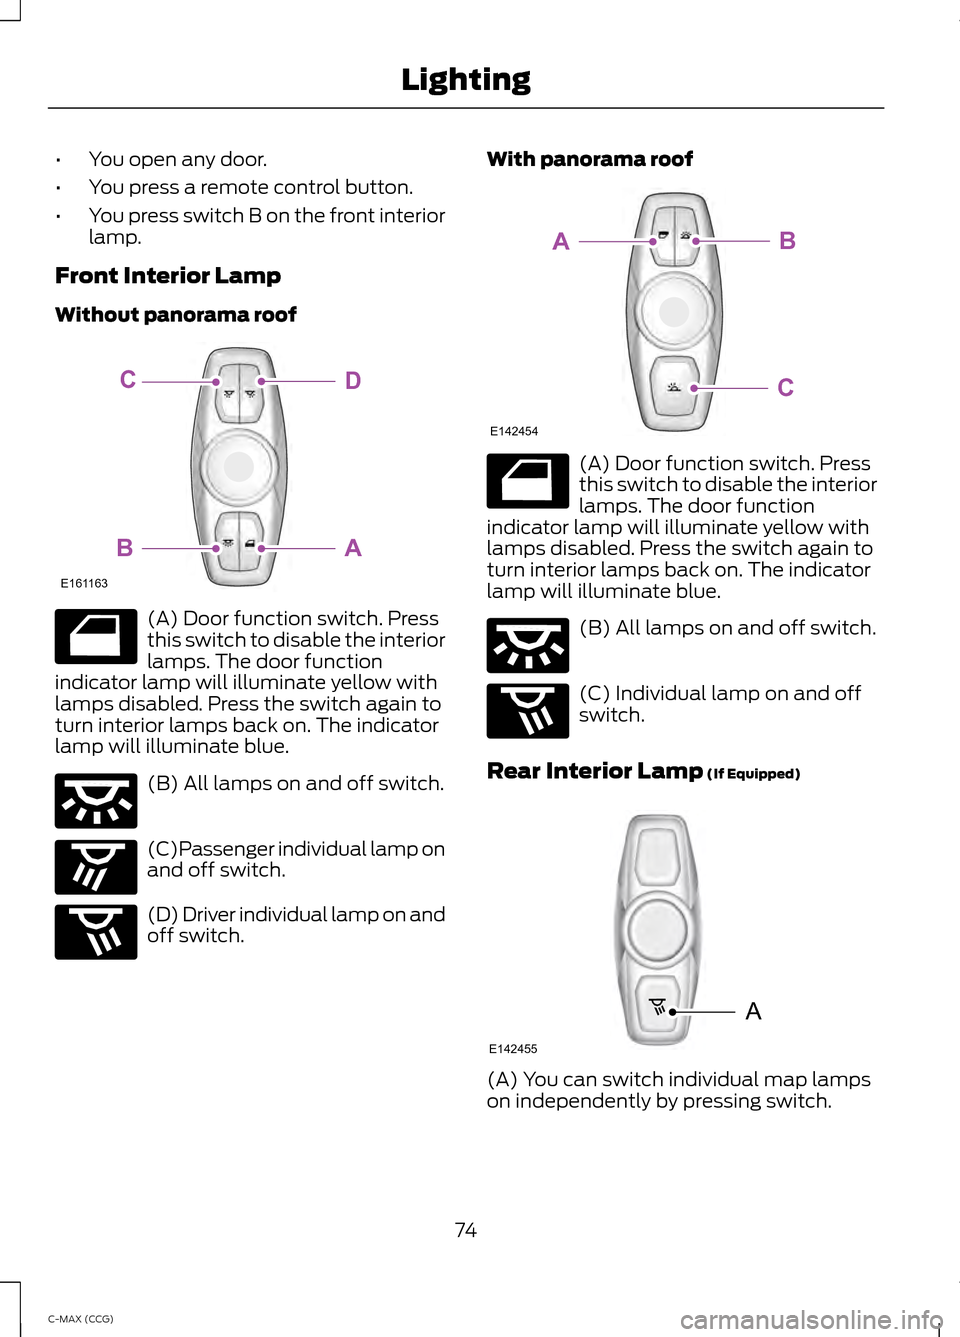
Without panorama roof (A) Door function switch. Press
this switch to disable the interior
lamps. The door function
indicator lamp will illuminate yellow with
lamps disabled. Press the switch again to
turn interior lamps back on. The indicator
lamp will illuminate blue. (B) All lamps on and off switch.
(C)Passenger individual lamp on
and off switch.
(D) Driver individual lamp on and
off switch. With panorama roof (A) Door function switch. Press
this switch to disable the interior
lamps. The door function
indicator lamp will illuminate yellow with
lamps disabled. Press the switch again to
turn interior lamps back on. The indicator
lamp will illuminate blue. (B) All lamps on and off switch.
(C) Individual lamp on and off
switch.
Rear Interior Lamp (If Equipped) (A) You can switch individual map lamps
on independently by pressing switch.
74
C-MAX (CCG) LightingE161163
DC
AB E160819 E160816 E160817 E160818 E142454
BA
C E160819 E160816 E160818 A
E142455
Page 79 of 447
2. Close the window a third time to the
point of resistance. The bounce-back
feature is now disabled and you can
close the window manually. The
window will go past the point of
resistance and you can close it fully.
See an authorized dealer as soon as
possible if the window does not close after
the third attempt.
Resetting the Bounce-Back Feature WARNING
The bounce-back feature remains
turned off until you reset the
memory.
If you have disconnected the battery, you
must reset the bounce-back memory
separately for each window.
1. Lift and hold the switch until the
window is fully closed.
2. Release the switch.
3. Lift the switch again for one more second.
4. Press and hold the switch until the window is fully open.
5. Release the switch.
6. Lift and hold the switch until the window is fully closed.
7. Open the window and then try to close
it automatically.
8. Reset and repeat the procedure if the window does not close automatically.
Accessory Delay (If Equipped)
You can use the window switches for
several minutes after you switch the
ignition off or until you open either front
door. GLOBAL OPENING
You can use the remote control to operate
the windows with the ignition off.
Note:
To operate this feature, accessory
delay must not be active.
Opening the Windows
You can only open the windows for a short
time after you unlock your vehicle with the
remote control. After you unlock your
vehicle, press and hold the remote control
unlock button to open the windows.
Release the button once movement starts.
Press the lock or unlock button to stop
movement.
EXTERIOR MIRRORS
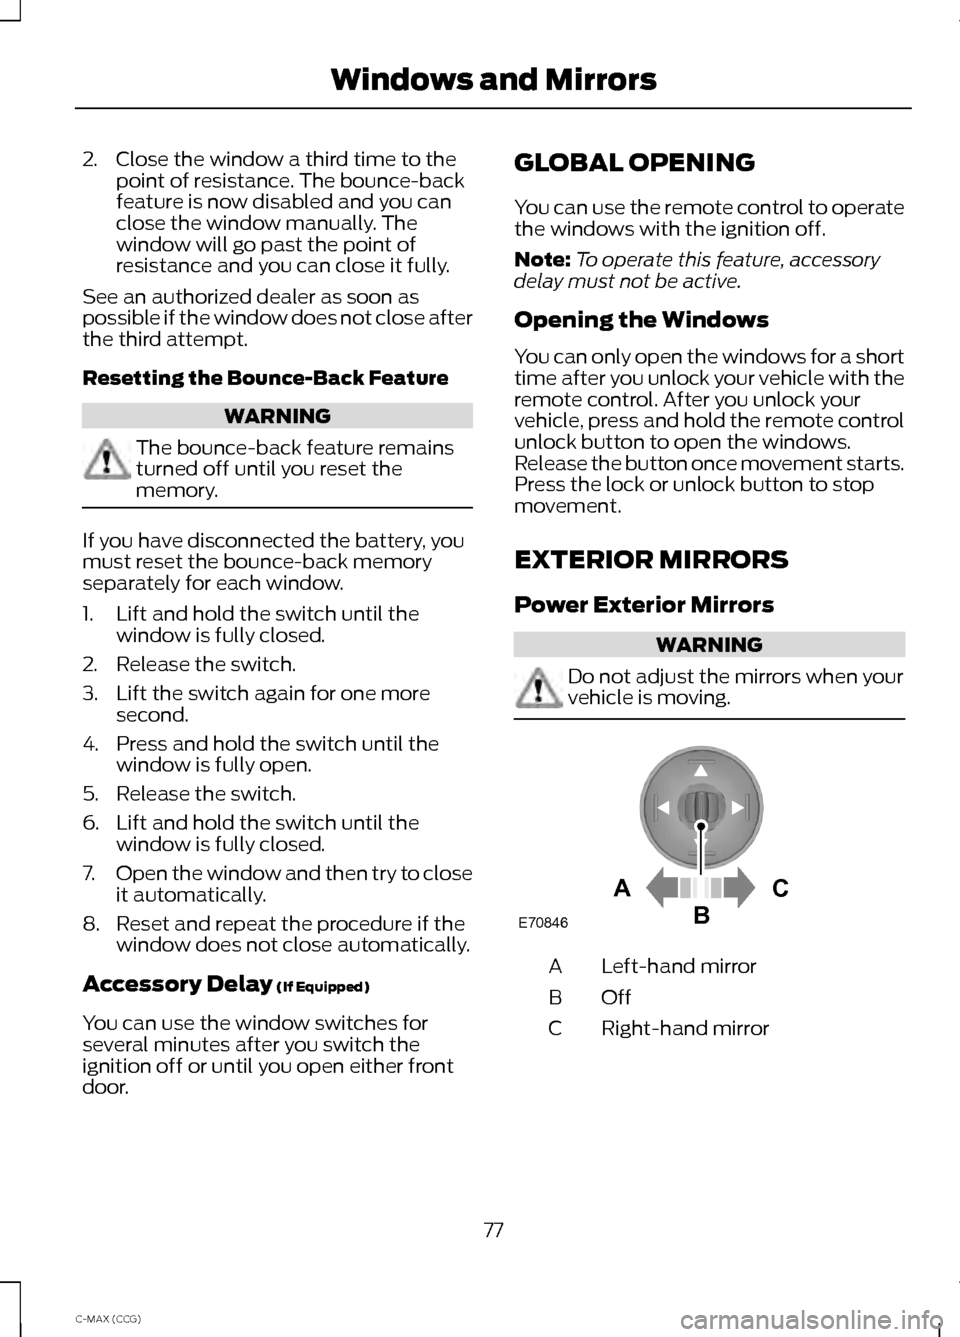
Power Exterior Mirrors WARNING
Do not adjust the mirrors when your
vehicle is moving.
Left-hand mirror
A
OffB
Right-hand mirror
C
77
C-MAX (CCG) Windows and MirrorsAC
B
E70846
Page 99 of 447
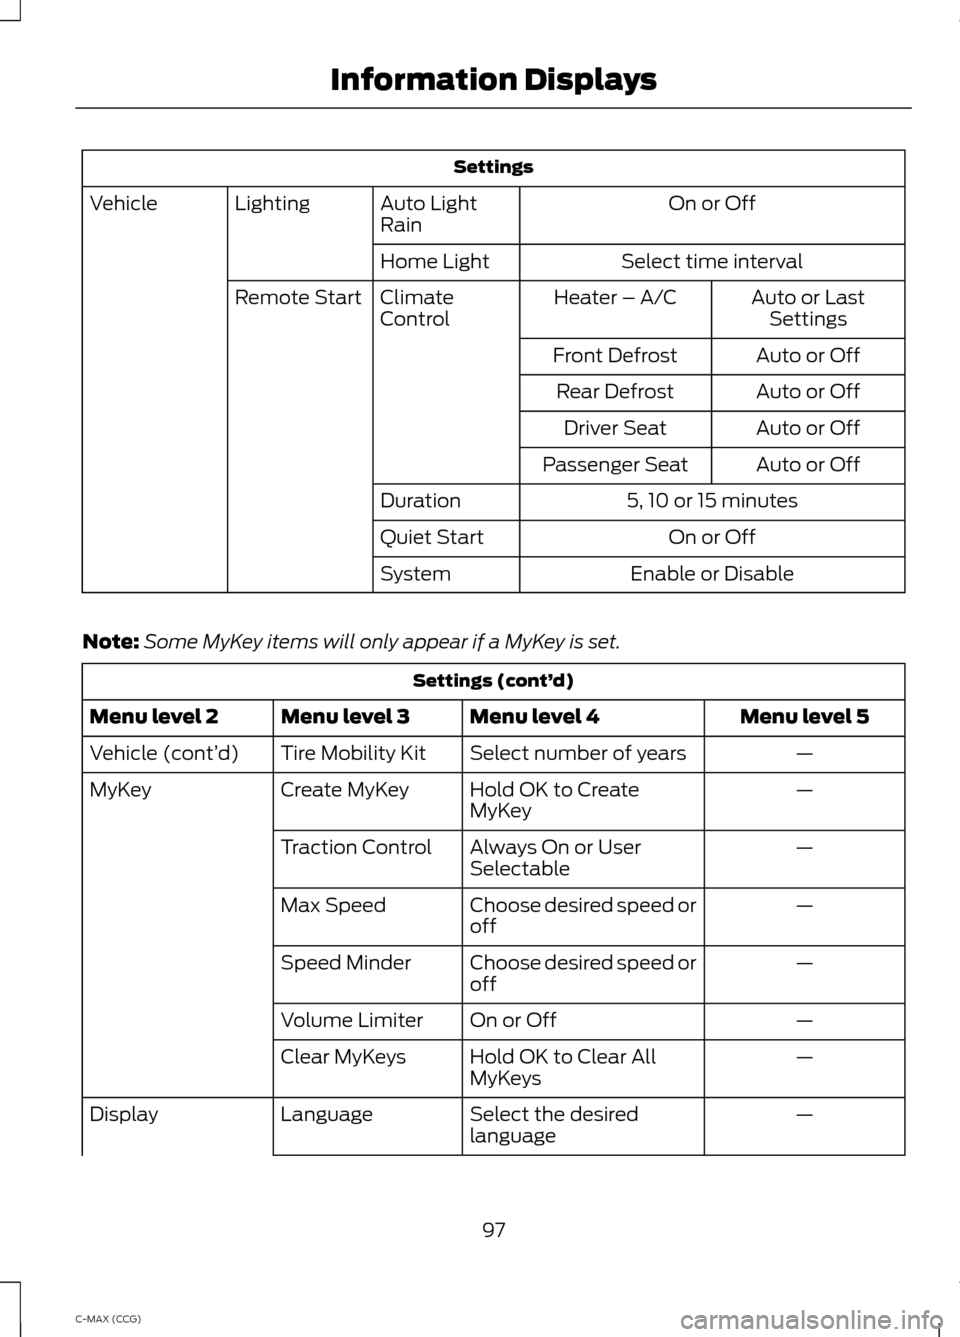
Settings
On or Off
Auto Light
Rain
Lighting
Vehicle
Select time interval
Home Light
Auto or LastSettings
Heater – A/C
Climate
Control
Remote Start
Auto or Off
Front Defrost
Auto or Off
Rear Defrost
Auto or Off
Driver Seat
Auto or Off
Passenger Seat
5, 10 or 15 minutes
Duration
On or Off
Quiet Start
Enable or Disable
System
Note: Some MyKey items will only appear if a MyKey is set. Settings (cont’
d)
Menu level 5
Menu level 4
Menu level 3
Menu level 2
—
Select number of years
Tire Mobility Kit
Vehicle (cont’ d)
—
Hold OK to Create
MyKey
Create MyKey
MyKey
—
Always On or User
Selectable
Traction Control
—
Choose desired speed or
off
Max Speed
—
Choose desired speed or
off
Speed Minder
—
On or Off
Volume Limiter
—
Hold OK to Clear All
MyKeys
Clear MyKeys
—
Select the desired
language
Language
Display
97
C-MAX (CCG) Information Displays
Page 110 of 447
Press the button to clear the rear window
of thin ice and fog. Press the button again
to switch it off. The feature will turn off
automatically after several minutes, or
when you switch the ignition off.
Do not use razor blades or other sharp
objects to clean the inside of the rear
window, or to remove decals from the
inside of the rear window. This may
cause damage to the heated grid lines.
Your warranty does not cover this
damage.
Heated Exterior Mirror (If Equipped)
Note: Do not remove ice from the mirrors
with a scraper or attempt to readjust the
mirror glass that has frozen in place. These
actions could cause damage to the glass
and mirrors.
Note: Do not clean the housing or glass of
any mirror with harsh abrasives, fuel or other
petroleum-based cleaning products.
The heated mirrors remove ice, mist and
fog when you switch on the heated rear
window.
CABIN AIR FILTER
Note: Make sure you have a cabin air filter
installed at all times. This prevents foreign
objects from entering the system. Running
the system without a filter in place could
result in degradation or damage to the
system
Your cabin air filter is located under the
instrument panel in the passenger footwell
area. The particulate filtration system
reduces the concentration of airborne
particles such as dust, spores and pollen
in the air supplied to the interior of your
vehicle. The particulate filtration system gives you
and your passengers the following
benefits:
•
It improves your driving comfort by
reducing particle concentration.
• It improves the interior compartment
cleanliness.
• It protects the climate control
components from particle deposits.
Replace the filter at regular intervals. See
the
Scheduled Maintenance chapter.
For more information about your filter, see
an authorized dealer.
REMOTE START
(IF EQUIPPED)
The climate control system adjusts the
cabin temperature during remote start.
You cannot adjust the system during
remote start operation. Turn the ignition
on to return the system to its previous
settings. You can now make adjustments.
You need to turn certain
vehicle-dependent features back on, such
as:
• heated seats
• heated mirrors
• heated rear window.
You can adjust the settings using the
information display controls. See
Information Displays
(page 88).
Automatic Settings
You can set the climate control to operate
in AUTO mode through the information
display setting: Remote Start > Climate
Control > Heater-A/C > Auto. The climate
control system automatically sets the
interior temperature to 72°F (22°C).
In hot weather, the system is set to 72°F
(22°C).
108
C-MAX (CCG) Climate Control