ignition FORD C MAX HYBRID 2014 2.G Owner's Manual
[x] Cancel search | Manufacturer: FORD, Model Year: 2014, Model line: C MAX HYBRID, Model: FORD C MAX HYBRID 2014 2.GPages: 447, PDF Size: 8.06 MB
Page 82 of 447
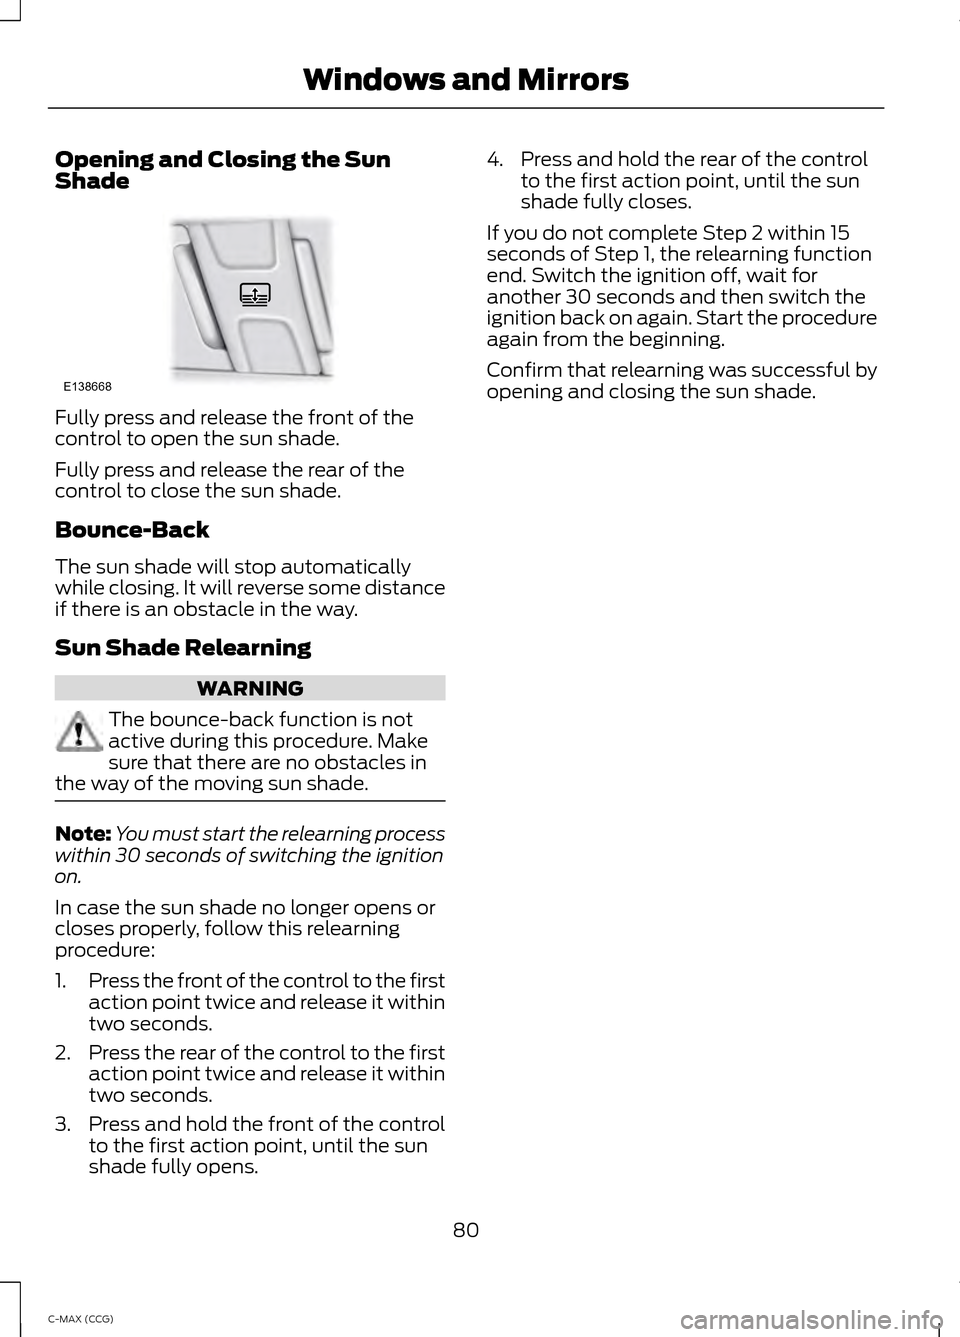
Opening and Closing the Sun
Shade
Fully press and release the front of the
control to open the sun shade.
Fully press and release the rear of the
control to close the sun shade.
Bounce-Back
The sun shade will stop automatically
while closing. It will reverse some distance
if there is an obstacle in the way.
Sun Shade Relearning
WARNING
The bounce-back function is not
active during this procedure. Make
sure that there are no obstacles in
the way of the moving sun shade. Note:
You must start the relearning process
within 30 seconds of switching the ignition
on.
In case the sun shade no longer opens or
closes properly, follow this relearning
procedure:
1. Press the front of the control to the first
action point twice and release it within
two seconds.
2. Press the rear of the control to the first
action point twice and release it within
two seconds.
3. Press and hold the front of the control
to the first action point, until the sun
shade fully opens. 4. Press and hold the rear of the control
to the first action point, until the sun
shade fully closes.
If you do not complete Step 2 within 15
seconds of Step 1, the relearning function
end. Switch the ignition off, wait for
another 30 seconds and then switch the
ignition back on again. Start the procedure
again from the beginning.
Confirm that relearning was successful by
opening and closing the sun shade.
80
C-MAX (CCG) Windows and MirrorsE138668
Page 86 of 447
Note:
Some warning indicators appear in
the information display and function the
same as a warning lamp but do not display
when you start your vehicle.
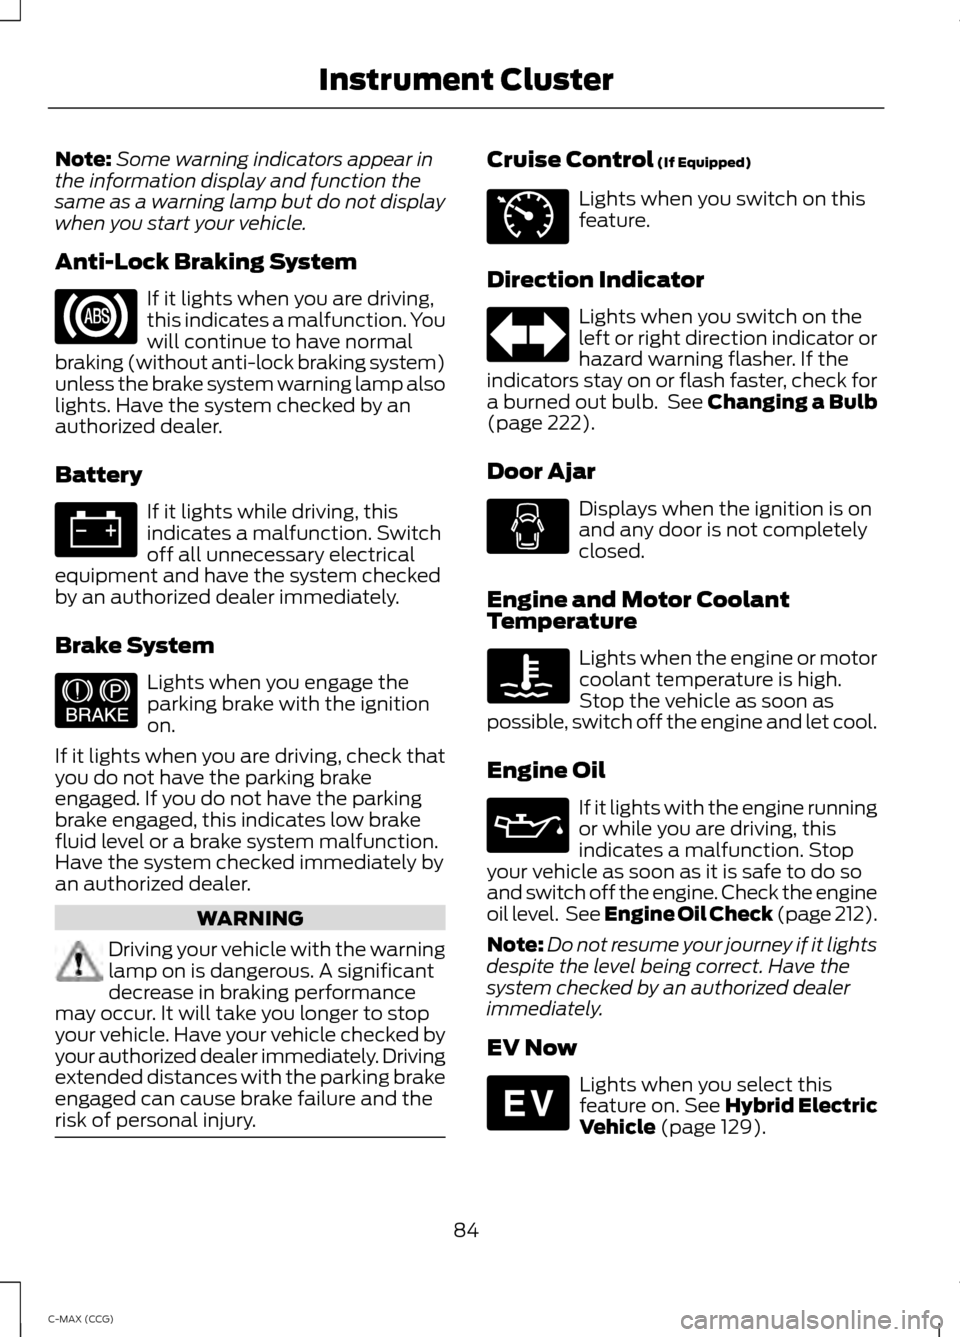
Anti-Lock Braking System If it lights when you are driving,
this indicates a malfunction. You
will continue to have normal
braking (without anti-lock braking system)
unless the brake system warning lamp also
lights. Have the system checked by an
authorized dealer.
Battery If it lights while driving, this
indicates a malfunction. Switch
off all unnecessary electrical
equipment and have the system checked
by an authorized dealer immediately.
Brake System Lights when you engage the
parking brake with the ignition
on.
If it lights when you are driving, check that
you do not have the parking brake
engaged. If you do not have the parking
brake engaged, this indicates low brake
fluid level or a brake system malfunction.
Have the system checked immediately by
an authorized dealer. WARNING
Driving your vehicle with the warning
lamp on is dangerous. A significant
decrease in braking performance
may occur. It will take you longer to stop
your vehicle. Have your vehicle checked by
your authorized dealer immediately. Driving
extended distances with the parking brake
engaged can cause brake failure and the
risk of personal injury. Cruise Control (If Equipped)
Lights when you switch on this
feature.
Direction Indicator Lights when you switch on the
left or right direction indicator or
hazard warning flasher. If the
indicators stay on or flash faster, check for
a burned out bulb. See
Changing a Bulb
(page 222).
Door Ajar Displays when the ignition is on
and any door is not completely
closed.
Engine and Motor Coolant
Temperature Lights when the engine or motor
coolant temperature is high.
Stop the vehicle as soon as
possible, switch off the engine and let cool.
Engine Oil If it lights with the engine running
or while you are driving, this
indicates a malfunction. Stop
your vehicle as soon as it is safe to do so
and switch off the engine. Check the engine
oil level. See Engine Oil Check (page
212).
Note: Do not resume your journey if it lights
despite the level being correct. Have the
system checked by an authorized dealer
immediately.
EV Now Lights when you select this
feature on. See Hybrid Electric
Vehicle
(page 129).
84
C-MAX (CCG) Instrument Cluster E144522 E71340 E144814
Page 87 of 447
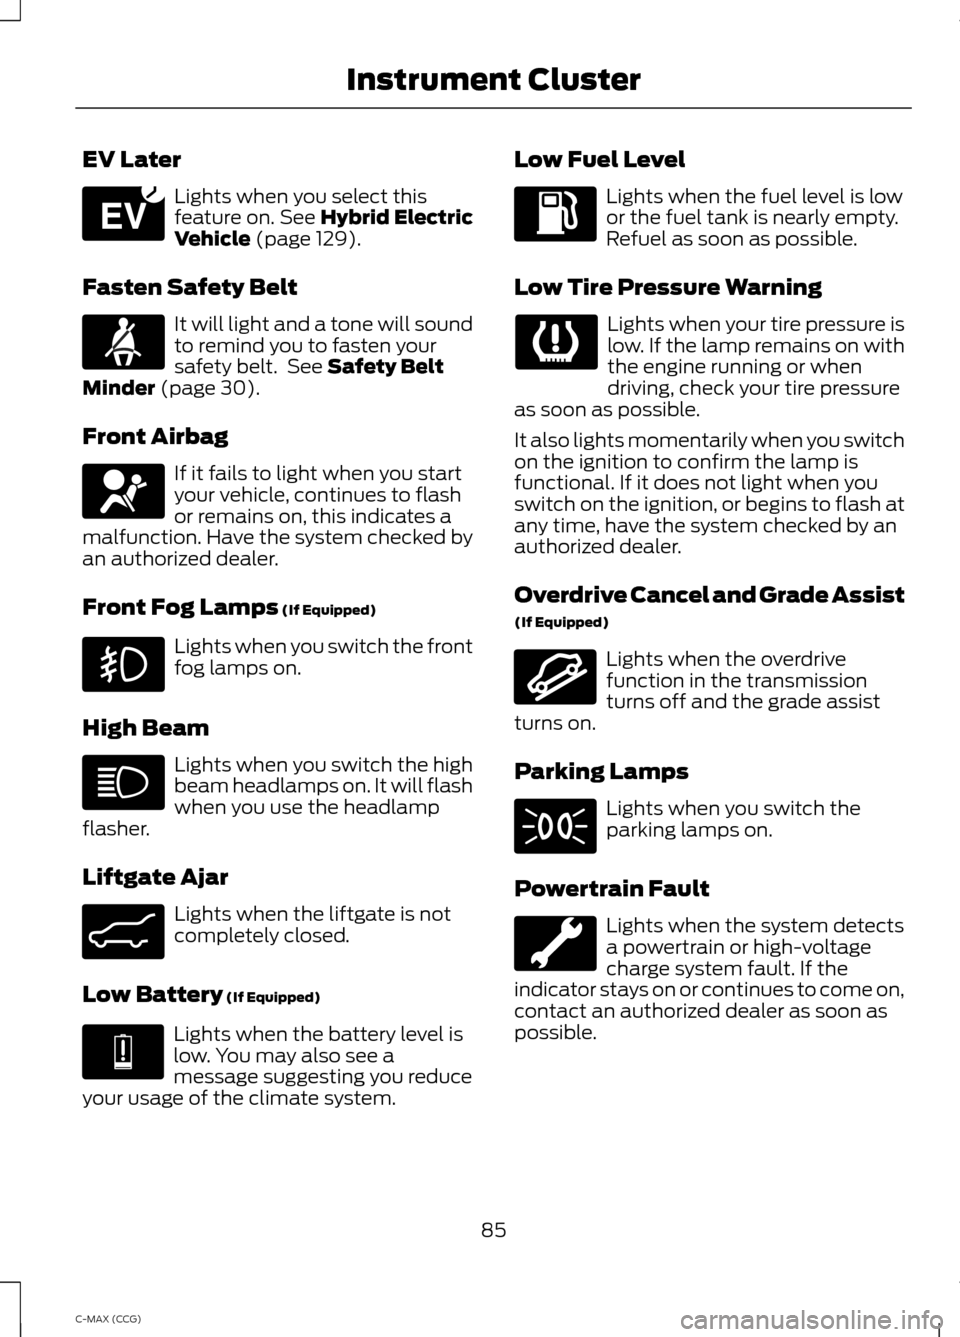
EV Later
Lights when you select this
feature on. See Hybrid Electric
Vehicle (page 129).
Fasten Safety Belt It will light and a tone will sound
to remind you to fasten your
safety belt. See
Safety Belt
Minder (page 30).
Front Airbag If it fails to light when you start
your vehicle, continues to flash
or remains on, this indicates a
malfunction. Have the system checked by
an authorized dealer.
Front Fog Lamps
(If Equipped) Lights when you switch the front
fog lamps on.
High Beam Lights when you switch the high
beam headlamps on. It will flash
when you use the headlamp
flasher.
Liftgate Ajar Lights when the liftgate is not
completely closed.
Low Battery
(If Equipped) Lights when the battery level is
low. You may also see a
message suggesting you reduce
your usage of the climate system. Low Fuel Level Lights when the fuel level is low
or the fuel tank is nearly empty.
Refuel as soon as possible.
Low Tire Pressure Warning Lights when your tire pressure is
low. If the lamp remains on with
the engine running or when
driving, check your tire pressure
as soon as possible.
It also lights momentarily when you switch
on the ignition to confirm the lamp is
functional. If it does not light when you
switch on the ignition, or begins to flash at
any time, have the system checked by an
authorized dealer.
Overdrive Cancel and Grade Assist
(If Equipped) Lights when the overdrive
function in the transmission
turns off and the grade assist
turns on.
Parking Lamps Lights when you switch the
parking lamps on.
Powertrain Fault Lights when the system detects
a powertrain or high-voltage
charge system fault. If the
indicator stays on or continues to come on,
contact an authorized dealer as soon as
possible.
85
C-MAX (CCG) Instrument ClusterE151263 E162453 E144691 E162456
Page 88 of 447
Note:
If your vehicle detects certain faults,
it will not allow you to operate the
accelerator pedal. If this happens, press the
brake pedal and release it. This will activate
limp home vehicle operation. In limp home
vehicle operation, your vehicle will
accelerate in a controlled manner up to a
maximum speed of 35 mph (56 km/h) on
a flat surface. If you apply the brake pedal
or move the transmission to neutral (N) you
can override your vehicle ’s acceleration.
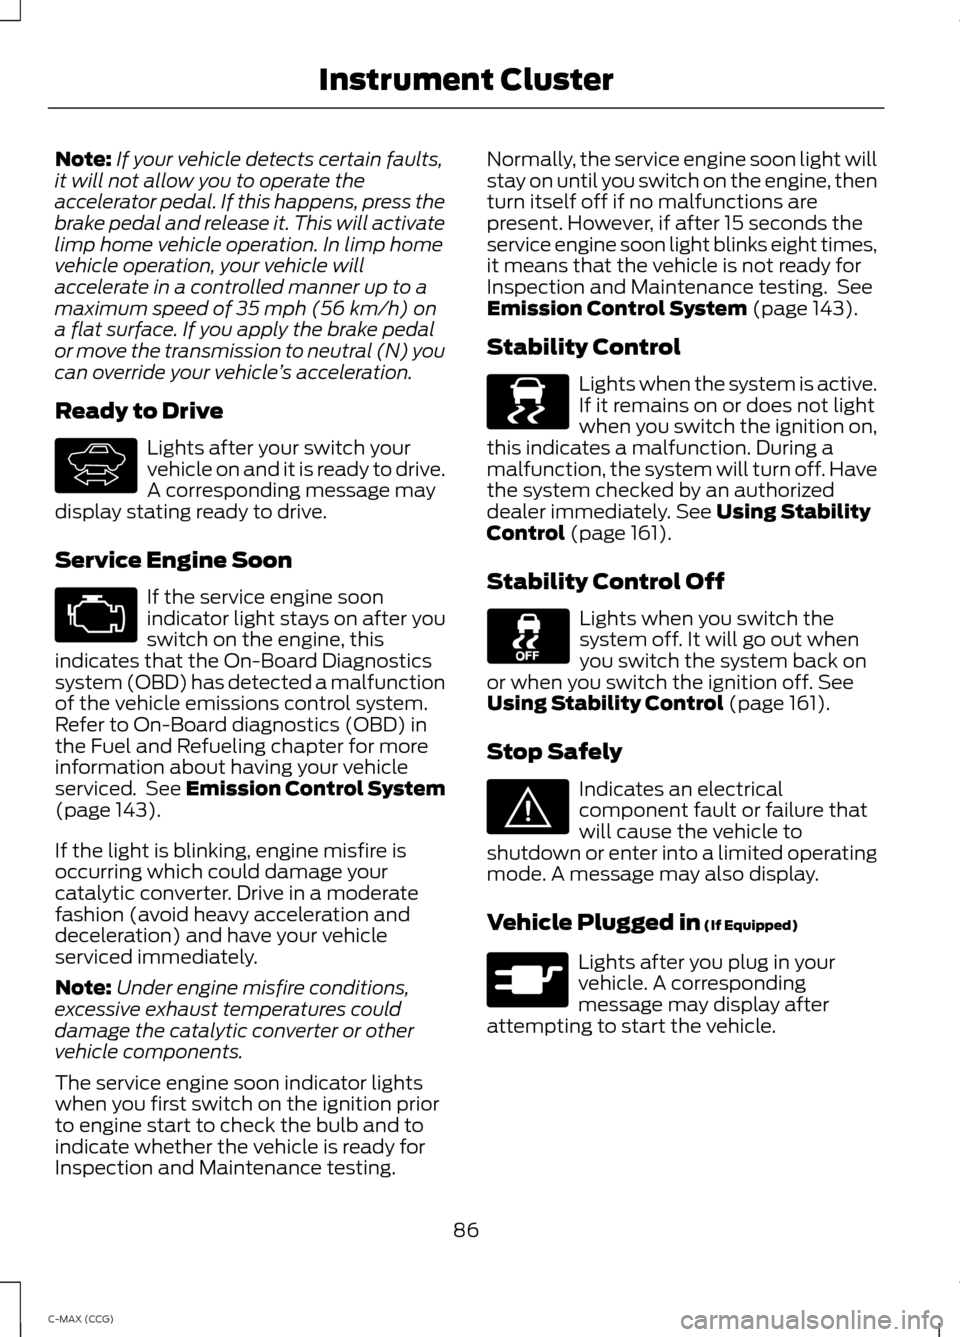
Ready to Drive Lights after your switch your
vehicle on and it is ready to drive.
A corresponding message may
display stating ready to drive.
Service Engine Soon If the service engine soon
indicator light stays on after you
switch on the engine, this
indicates that the On-Board Diagnostics
system (OBD) has detected a malfunction
of the vehicle emissions control system.
Refer to On-Board diagnostics (OBD) in
the Fuel and Refueling chapter for more
information about having your vehicle
serviced. See Emission Control System
(page 143).
If the light is blinking, engine misfire is
occurring which could damage your
catalytic converter. Drive in a moderate
fashion (avoid heavy acceleration and
deceleration) and have your vehicle
serviced immediately.
Note: Under engine misfire conditions,
excessive exhaust temperatures could
damage the catalytic converter or other
vehicle components.
The service engine soon indicator lights
when you first switch on the ignition prior
to engine start to check the bulb and to
indicate whether the vehicle is ready for
Inspection and Maintenance testing. Normally, the service engine soon light will
stay on until you switch on the engine, then
turn itself off if no malfunctions are
present. However, if after 15 seconds the
service engine soon light blinks eight times,
it means that the vehicle is not ready for
Inspection and Maintenance testing. See
Emission Control System
(page 143).
Stability Control Lights when the system is active.
If it remains on or does not light
when you switch the ignition on,
this indicates a malfunction. During a
malfunction, the system will turn off. Have
the system checked by an authorized
dealer immediately.
See Using Stability
Control (page 161).
Stability Control Off Lights when you switch the
system off. It will go out when
you switch the system back on
or when you switch the ignition off.
See
Using Stability Control (page 161).
Stop Safely Indicates an electrical
component fault or failure that
will cause the vehicle to
shutdown or enter into a limited operating
mode. A message may also display.
Vehicle Plugged in
(If Equipped) Lights after you plug in your
vehicle. A corresponding
message may display after
attempting to start the vehicle.
86
C-MAX (CCG) Instrument ClusterE144692 E138639 E144693 E144694
Page 89 of 447
AUDIBLE WARNINGS AND
INDICATORS
Key in Ignition Warning Chime
Sounds when you open the driver's door
and you have left the key in the ignition
with it in the off or accessory position.
Engine On Warning Chime
A warning chime will sound when any door
is opened if the vehicle exceeds a relatively
low speed.
Keyless Warning Alert (If Equipped)
Sounds the horn twice when you exit the
vehicle and the keyless vehicle is in RUN,
indicating the vehicle is still on.
Headlamps On Warning Chime
Sounds when you remove the key from the
ignition and open the driver's door and you
have left the headlamps or parking lamps
on.
Parking Brake On Warning Chime
Sounds when you have left the parking
brake on and drive your vehicle. If the
warning chime remains on after you have
released the parking brake, have the
system checked by your authorized dealer
immediately.
Automatic Transmission Warning
Chime
Sounds when you have not moved the
transmission selector lever to position
P.
A message will be shown in the display.
87
C-MAX (CCG) Instrument Cluster
Page 103 of 447
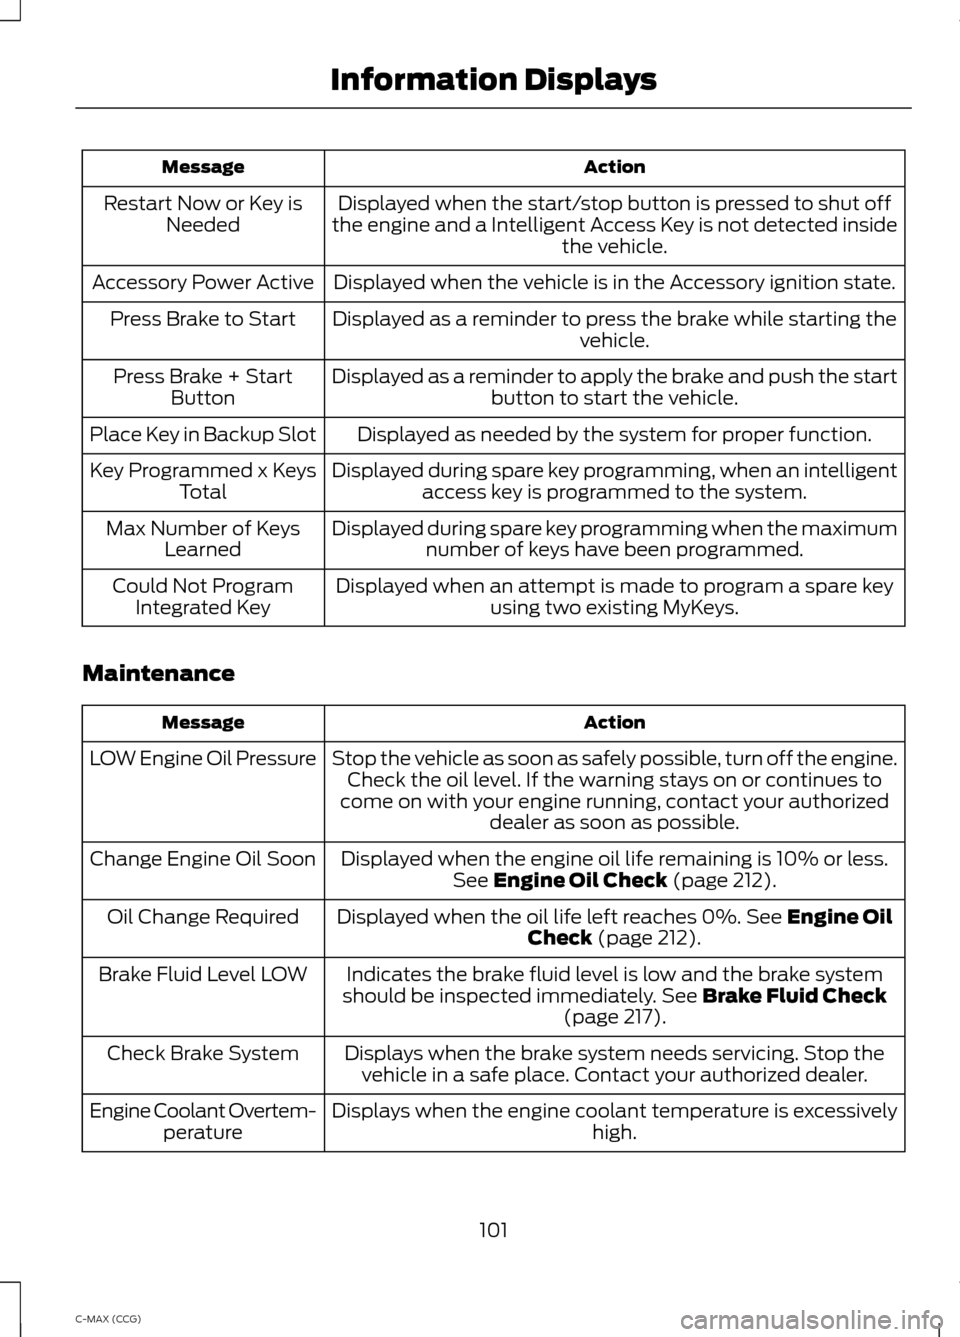
Action
Message
Displayed when the start/stop button is pressed to shut off
the engine and a Intelligent Access Key is not detected inside the vehicle.
Restart Now or Key is
Needed
Displayed when the vehicle is in the Accessory ignition state.
Accessory Power Active
Displayed as a reminder to press the brake while starting the vehicle.
Press Brake to Start
Displayed as a reminder to apply the brake and push the startbutton to start the vehicle.
Press Brake + Start
Button
Displayed as needed by the system for proper function.
Place Key in Backup Slot
Displayed during spare key programming, when an intelligentaccess key is programmed to the system.
Key Programmed x Keys
Total
Displayed during spare key programming when the maximumnumber of keys have been programmed.
Max Number of Keys
Learned
Displayed when an attempt is made to program a spare keyusing two existing MyKeys.
Could Not Program
Integrated Key
Maintenance Action
Message
Stop the vehicle as soon as safely possible, turn off the engine.Check the oil level. If the warning stays on or continues to
come on with your engine running, contact your authorized dealer as soon as possible.
LOW Engine Oil Pressure
Displayed when the engine oil life remaining is 10% or less.See Engine Oil Check (page 212).
Change Engine Oil Soon
Displayed when the oil life left reaches 0%.
See Engine Oil
Check (page 212).
Oil Change Required
Indicates the brake fluid level is low and the brake system
should be inspected immediately.
See Brake Fluid Check
(page 217).
Brake Fluid Level LOW
Displays when the brake system needs servicing. Stop thevehicle in a safe place. Contact your authorized dealer.
Check Brake System
Displays when the engine coolant temperature is excessively high.
Engine Coolant Overtem-
perature
101
C-MAX (CCG) Information Displays
Page 109 of 447
Switching Back to Single Zone
Temperature Control
Press and hold AUTO for 2-4 seconds. The
passenger ’s side temperature switches to
the driver ’s side temperature setting.
HINTS ON CONTROLLING THE
INTERIOR CLIMATE
General Hints
Note: Prolonged use of recirculated air may
cause the windows to fog up.
Note: You may feel a small amount of air
from the footwell air vents regardless of the
air distribution setting.
Note: To reduce humidity build-up inside
your vehicle, do not drive with the system
switched off or with recirculated air always
switched on.
Note: Do not place objects under the front
seats as this may interfere with the airflow
to the rear seats.
Note: Remove any snow, ice or leaves from
the air intake area at the base of the
windshield.
Note: Do not adjust the settings when your
vehicle interior is extremely hot or cold. The
system automatically adjusts to the
previously stored settings. For the system
to function efficiently, the instrument panel
and side air vents should be fully open.
Note: At low ambient temperatures with
AUTO selected, the system directs the air
stream toward the windshield and side
windows for as long as the engine remains
cold.
Note: When you switch off the system,
outside air does not enter your vehicle. Note:
When the system is in AUTO mode,
and the interior and exterior temperatures
are high, the system automatically selects
recirculated air to maximize cooling of the
interior. When the interior reaches the
selected temperature, the system
automatically selects outside air.
Note: When you select windshield
defrosting and defogging, the instrument
panel and footwell level functions switch
off automatically and air conditioning
switches on. Outside air flows into your
vehicle.
For maximum cooling performance, press
MAX A/C
.
To aid in side window defogging and
demisting in cold weather, press the floor
vent button.
In mild weather, you can improve your fuel
economy when using the climate control
system by using outside air instead of air
conditioning.
• Turn the temperature control knob(s)
so the interior temperature is set to
60°F (15.5°C).
• Set the air distribution to panel or floor
(or both).
• Press
A/C so that A/C OFF appears
in the display.
• Press the recirculated air button so
fresh air enters the vehicle.
• Press the small fan button until the fan
is at its lowest setting.
HEATED WINDOWS AND
MIRRORS
(IF EQUIPPED)
Heated Rear Window
Note: You must switch the ignition on to
use this feature.
107
C-MAX (CCG) Climate Control
Page 110 of 447
Press the button to clear the rear window
of thin ice and fog. Press the button again
to switch it off. The feature will turn off
automatically after several minutes, or
when you switch the ignition off.
Do not use razor blades or other sharp
objects to clean the inside of the rear
window, or to remove decals from the
inside of the rear window. This may
cause damage to the heated grid lines.
Your warranty does not cover this
damage.
Heated Exterior Mirror (If Equipped)
Note: Do not remove ice from the mirrors
with a scraper or attempt to readjust the
mirror glass that has frozen in place. These
actions could cause damage to the glass
and mirrors.
Note: Do not clean the housing or glass of
any mirror with harsh abrasives, fuel or other
petroleum-based cleaning products.
The heated mirrors remove ice, mist and
fog when you switch on the heated rear
window.
CABIN AIR FILTER
Note: Make sure you have a cabin air filter
installed at all times. This prevents foreign
objects from entering the system. Running
the system without a filter in place could
result in degradation or damage to the
system
Your cabin air filter is located under the
instrument panel in the passenger footwell
area. The particulate filtration system
reduces the concentration of airborne
particles such as dust, spores and pollen
in the air supplied to the interior of your
vehicle. The particulate filtration system gives you
and your passengers the following
benefits:
•
It improves your driving comfort by
reducing particle concentration.
• It improves the interior compartment
cleanliness.
• It protects the climate control
components from particle deposits.
Replace the filter at regular intervals. See
the
Scheduled Maintenance chapter.
For more information about your filter, see
an authorized dealer.
REMOTE START
(IF EQUIPPED)
The climate control system adjusts the
cabin temperature during remote start.
You cannot adjust the system during
remote start operation. Turn the ignition
on to return the system to its previous
settings. You can now make adjustments.
You need to turn certain
vehicle-dependent features back on, such
as:
• heated seats
• heated mirrors
• heated rear window.
You can adjust the settings using the
information display controls. See
Information Displays
(page 88).
Automatic Settings
You can set the climate control to operate
in AUTO mode through the information
display setting: Remote Start > Climate
Control > Heater-A/C > Auto. The climate
control system automatically sets the
interior temperature to 72°F (22°C).
In hot weather, the system is set to 72°F
(22°C).
108
C-MAX (CCG) Climate Control
Page 119 of 447
HomeLink Wireless Control
System (If Equipped)
WARNING
Do not use the system with any
garage door opener that does not
have the safety stop and reverse
feature as required by U.S. Federal Safety
Standards (this includes any garage door
opener manufactured before April 1, 1982).
A garage door opener which cannot detect
an object, signaling the door to stop and
reverse, does not meet current federal
safety standards. Using a garage door
opener without these features increases
the risk of serious injury or death. Note:
Make sure that the garage door and
security device are free from obstruction
when you are programming. Do not program
the system with the vehicle in the garage.
Note: Make sure you keep the original
remote control transmitter for use in other
vehicles as well as for future system
programming.
Note: We recommend that upon the sale
or lease termination of your vehicle, you
erase the programmed function buttons for
security reasons. See Erasing the function
button codes later in this section.
Note: You can program a maximum of
three devices. To change or replace any of
the three devices after it has been initially
programmed, you must first erase the
current settings. See Erasing the function
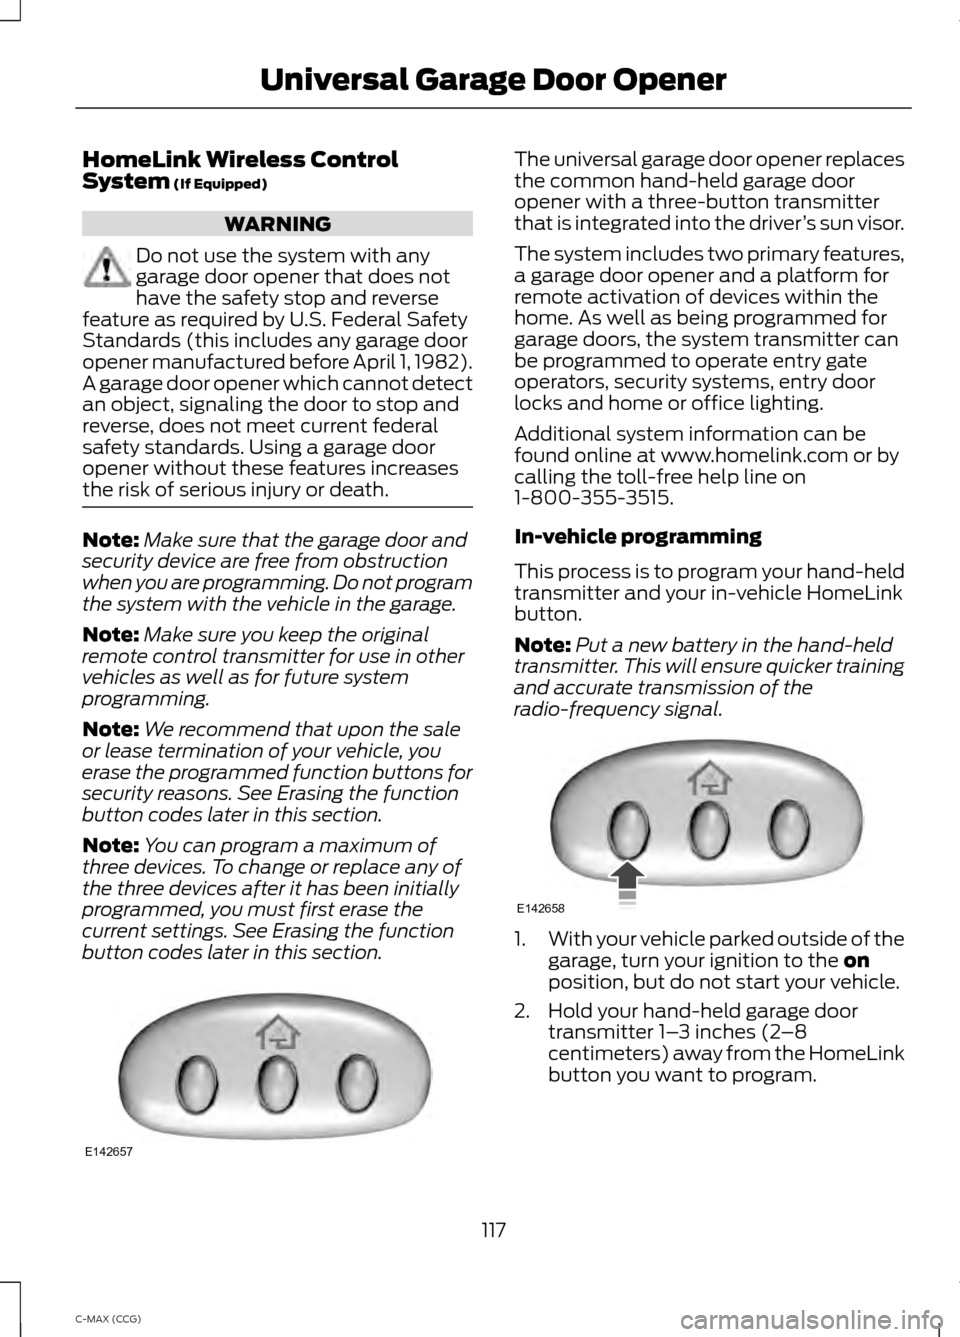
button codes later in this section. The universal garage door opener replaces
the common hand-held garage door
opener with a three-button transmitter
that is integrated into the driver
’s sun visor.
The system includes two primary features,
a garage door opener and a platform for
remote activation of devices within the
home. As well as being programmed for
garage doors, the system transmitter can
be programmed to operate entry gate
operators, security systems, entry door
locks and home or office lighting.
Additional system information can be
found online at www.homelink.com or by
calling the toll-free help line on
1-800-355-3515.
In-vehicle programming
This process is to program your hand-held
transmitter and your in-vehicle HomeLink
button.
Note: Put a new battery in the hand-held
transmitter. This will ensure quicker training
and accurate transmission of the
radio-frequency signal. 1.
With your vehicle parked outside of the
garage, turn your ignition to the
on
position, but do not start your vehicle.
2. Hold your hand-held garage door transmitter 1– 3 inches (2–8
centimeters) away from the HomeLink
button you want to program.
117
C-MAX (CCG) Universal Garage Door OpenerE142657 E142658
Page 123 of 447
12-volt DC power point
WARNING
Do not plug optional electrical
accessories into the cigar lighter
socket (if equipped). Improper use
of the lighter can cause damage not
covered by your warranty, and can result
in fire or serious injury. Note:
If used when the vehicle is not
running, the battery will discharge. There
may be insufficient power to restart your
vehicle.
Note: Do not insert objects other than an
accessory plug into the power point. This
will damage the outlet and blow the fuse.
Note: Do not hang any type of accessory or
accessory bracket from the plug.
Note: Do not use the power point over the
vehicle capacity of 12 volt DC 180 watts or
a fuse may blow.
Note: Do not use the power point for
operating a cigar lighter element.
Note: Improper use of the power point can
cause damage not covered by your
warranty.
Note: Always keep the power point caps
closed when not in use.
Run the vehicle for full capacity use of the
power point. To prevent the battery from
being discharged:
• Do not use the power point longer than
necessary when the vehicle is not
running.
• Do not leave devices plugged in
overnight or when the vehicle is parked
for extended periods.
Locations
Power points may be found: •
on the front of the center console
• inside the center console storage bin
• in the luggage compartment.
110-volt AC power point (If Equipped) WARNING
Do not keep electrical devices
plugged in the power point whenever
the device is not in use. Do not use
any extension cord with the 110-volt AC
power point, since it will defeat the safety
protection design. Doing so my cause the
power point to overload due to powering
multiple devices that can reach beyond
the 150-watt load limit and could result in
fire or serious injury. Note:
The power point will turn off when
the ignition is switched off or the battery
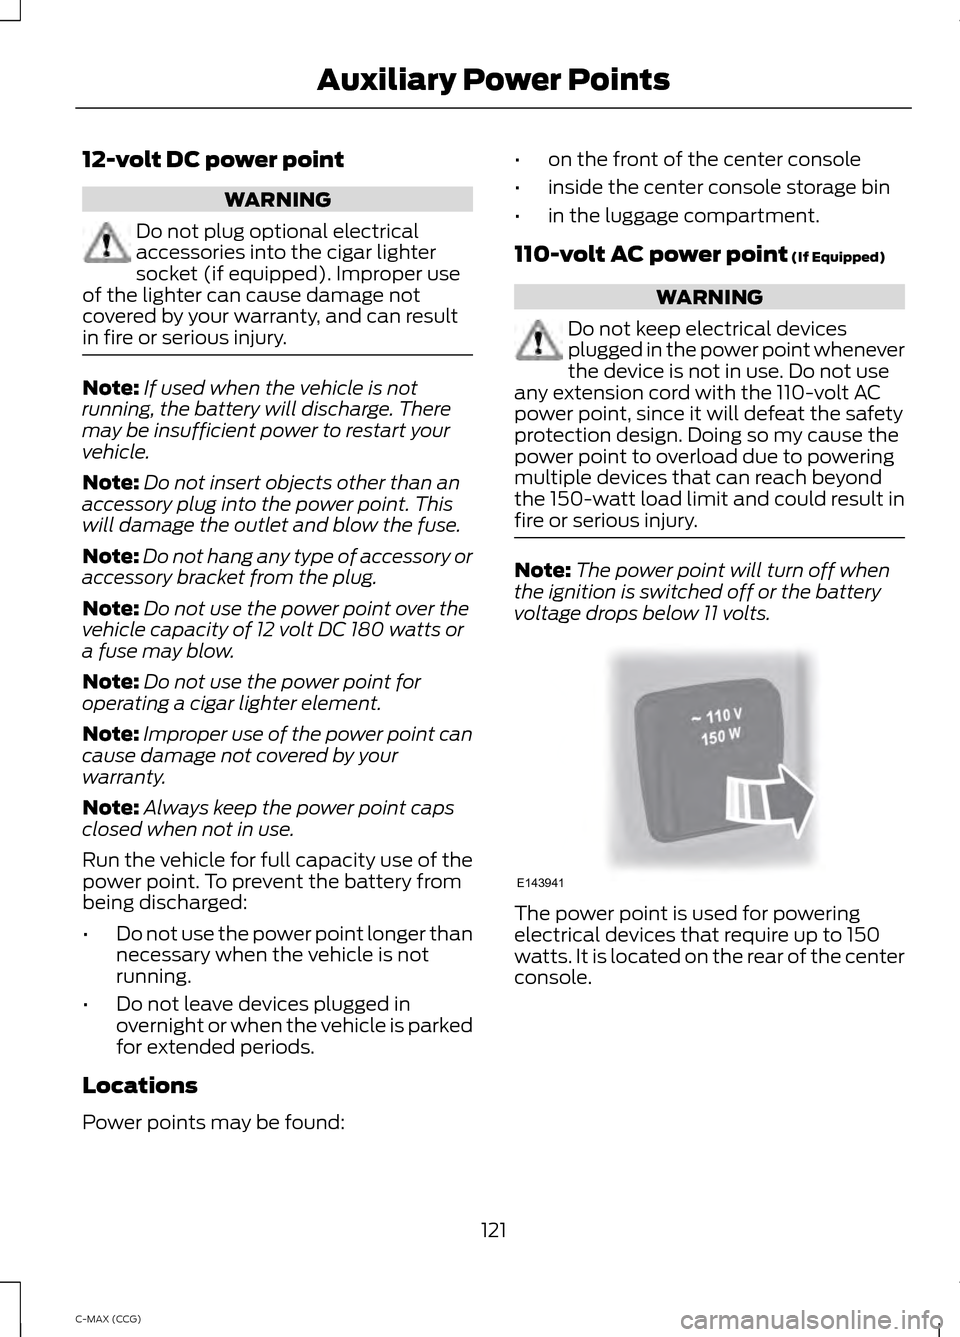
voltage drops below 11 volts. The power point is used for powering
electrical devices that require up to 150
watts. It is located on the rear of the center
console.
121
C-MAX (CCG) Auxiliary Power PointsE143941