ignition FORD C MAX HYBRID 2014 2.G Workshop Manual
[x] Cancel search | Manufacturer: FORD, Model Year: 2014, Model line: C MAX HYBRID, Model: FORD C MAX HYBRID 2014 2.GPages: 447, PDF Size: 8.06 MB
Page 175 of 447
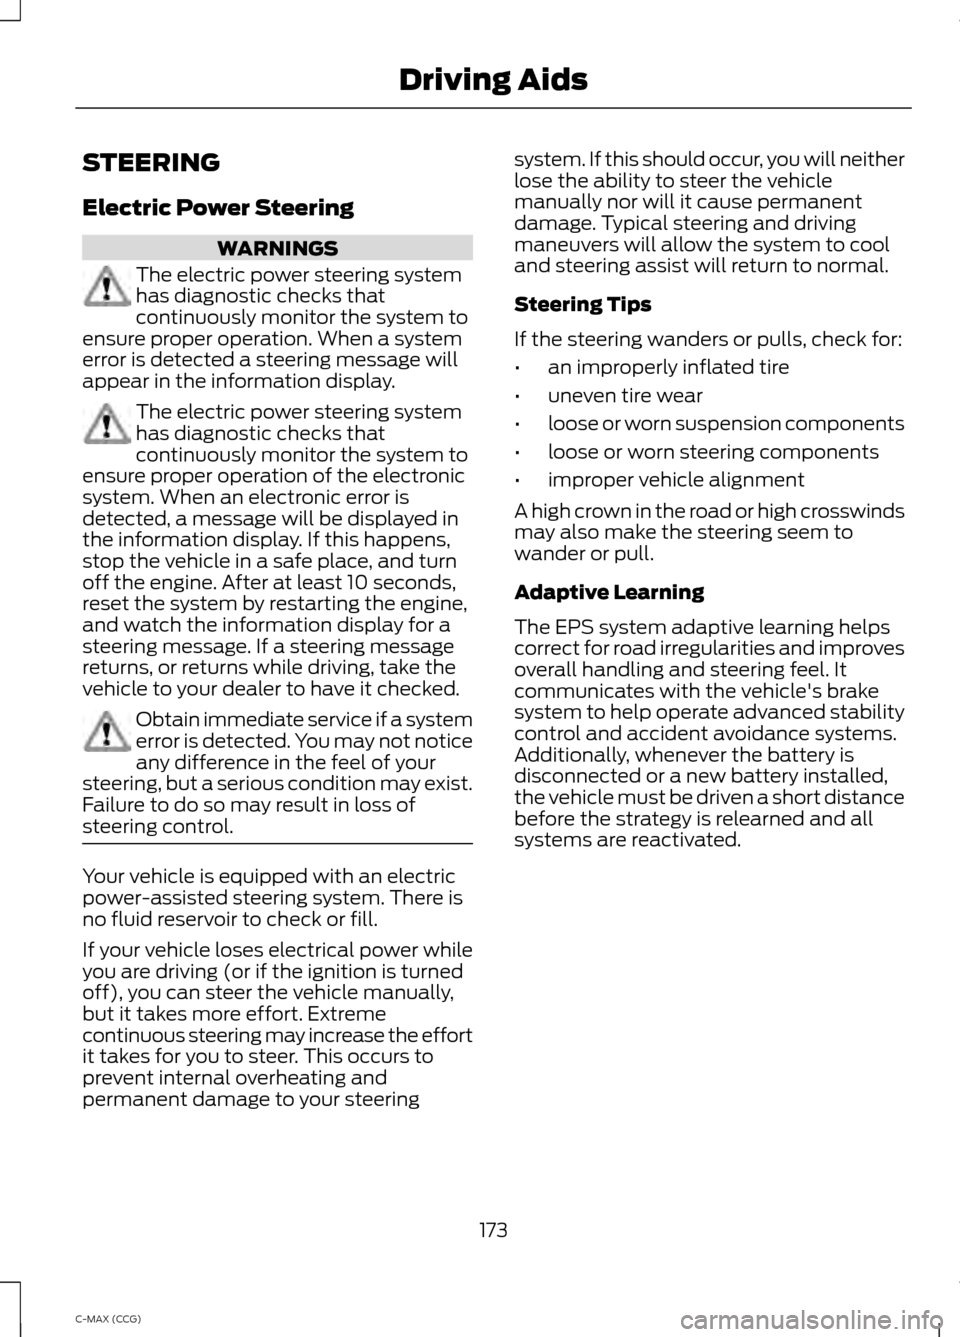
STEERING
Electric Power Steering
WARNINGS
The electric power steering system
has diagnostic checks that
continuously monitor the system to
ensure proper operation. When a system
error is detected a steering message will
appear in the information display. The electric power steering system
has diagnostic checks that
continuously monitor the system to
ensure proper operation of the electronic
system. When an electronic error is
detected, a message will be displayed in
the information display. If this happens,
stop the vehicle in a safe place, and turn
off the engine. After at least 10 seconds,
reset the system by restarting the engine,
and watch the information display for a
steering message. If a steering message
returns, or returns while driving, take the
vehicle to your dealer to have it checked. Obtain immediate service if a system
error is detected. You may not notice
any difference in the feel of your
steering, but a serious condition may exist.
Failure to do so may result in loss of
steering control. Your vehicle is equipped with an electric
power-assisted steering system. There is
no fluid reservoir to check or fill.
If your vehicle loses electrical power while
you are driving (or if the ignition is turned
off), you can steer the vehicle manually,
but it takes more effort. Extreme
continuous steering may increase the effort
it takes for you to steer. This occurs to
prevent internal overheating and
permanent damage to your steering system. If this should occur, you will neither
lose the ability to steer the vehicle
manually nor will it cause permanent
damage. Typical steering and driving
maneuvers will allow the system to cool
and steering assist will return to normal.
Steering Tips
If the steering wanders or pulls, check for:
•
an improperly inflated tire
• uneven tire wear
• loose or worn suspension components
• loose or worn steering components
• improper vehicle alignment
A high crown in the road or high crosswinds
may also make the steering seem to
wander or pull.
Adaptive Learning
The EPS system adaptive learning helps
correct for road irregularities and improves
overall handling and steering feel. It
communicates with the vehicle's brake
system to help operate advanced stability
control and accident avoidance systems.
Additionally, whenever the battery is
disconnected or a new battery installed,
the vehicle must be driven a short distance
before the strategy is relearned and all
systems are reactivated.
173
C-MAX (CCG) Driving Aids
Page 185 of 447
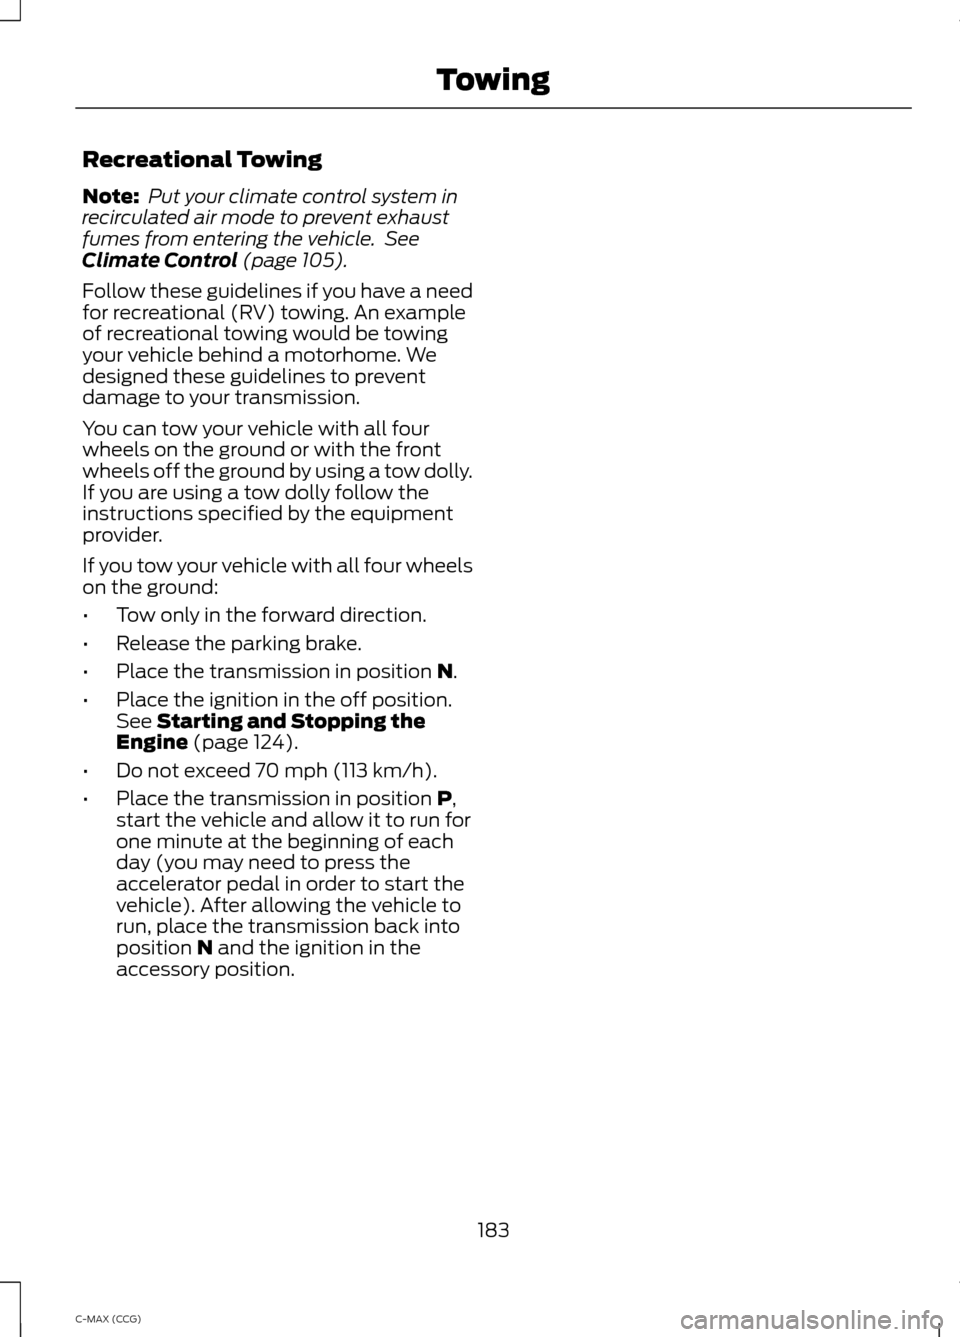
Recreational Towing
Note:
Put your climate control system in
recirculated air mode to prevent exhaust
fumes from entering the vehicle. See
Climate Control (page 105).
Follow these guidelines if you have a need
for recreational (RV) towing. An example
of recreational towing would be towing
your vehicle behind a motorhome. We
designed these guidelines to prevent
damage to your transmission.
You can tow your vehicle with all four
wheels on the ground or with the front
wheels off the ground by using a tow dolly.
If you are using a tow dolly follow the
instructions specified by the equipment
provider.
If you tow your vehicle with all four wheels
on the ground:
• Tow only in the forward direction.
• Release the parking brake.
• Place the transmission in position
N.
• Place the ignition in the off position.
See
Starting and Stopping the
Engine (page 124).
• Do not exceed 70 mph (113 km/h).
• Place the transmission in position
P,
start the vehicle and allow it to run for
one minute at the beginning of each
day (you may need to press the
accelerator pedal in order to start the
vehicle). After allowing the vehicle to
run, place the transmission back into
position
N and the ignition in the
accessory position.
183
C-MAX (CCG) Towing
Page 190 of 447
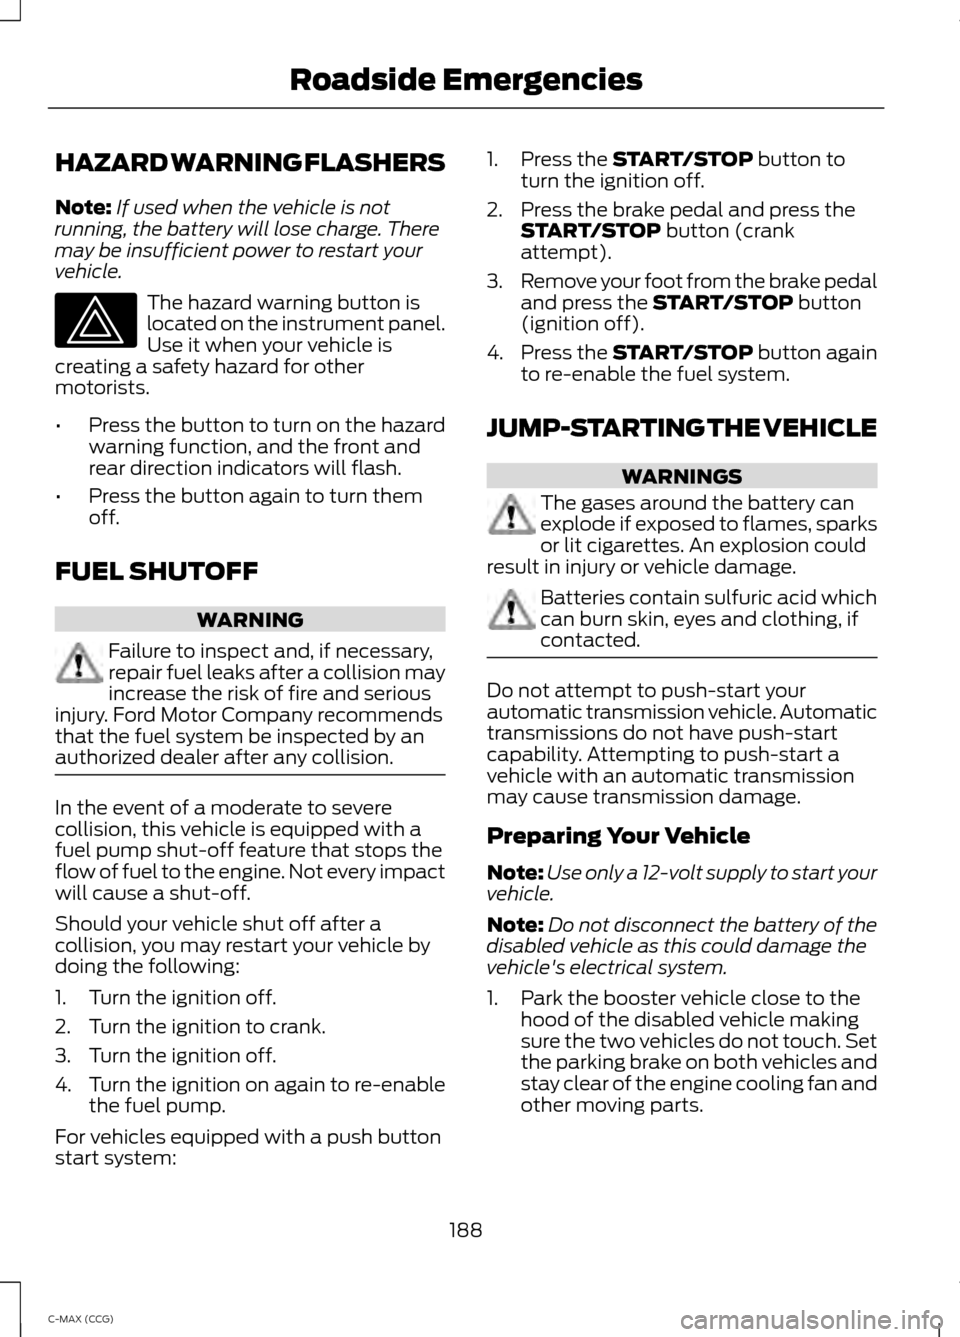
HAZARD WARNING FLASHERS
Note:
If used when the vehicle is not
running, the battery will lose charge. There
may be insufficient power to restart your
vehicle. The hazard warning button is
located on the instrument panel.
Use it when your vehicle is
creating a safety hazard for other
motorists.
• Press the button to turn on the hazard
warning function, and the front and
rear direction indicators will flash.
• Press the button again to turn them
off.
FUEL SHUTOFF WARNING
Failure to inspect and, if necessary,
repair fuel leaks after a collision may
increase the risk of fire and serious
injury. Ford Motor Company recommends
that the fuel system be inspected by an
authorized dealer after any collision. In the event of a moderate to severe
collision, this vehicle is equipped with a
fuel pump shut-off feature that stops the
flow of fuel to the engine. Not every impact
will cause a shut-off.
Should your vehicle shut off after a
collision, you may restart your vehicle by
doing the following:
1. Turn the ignition off.
2. Turn the ignition to crank.
3. Turn the ignition off.
4.
Turn the ignition on again to re-enable
the fuel pump.
For vehicles equipped with a push button
start system: 1. Press the START/STOP button to
turn the ignition off.
2. Press the brake pedal and press the START/STOP
button (crank
attempt).
3. Remove your foot from the brake pedal
and press the
START/STOP button
(ignition off).
4. Press the
START/STOP button again
to re-enable the fuel system.
JUMP-STARTING THE VEHICLE WARNINGS
The gases around the battery can
explode if exposed to flames, sparks
or lit cigarettes. An explosion could
result in injury or vehicle damage. Batteries contain sulfuric acid which
can burn skin, eyes and clothing, if
contacted.
Do not attempt to push-start your
automatic transmission vehicle. Automatic
transmissions do not have push-start
capability. Attempting to push-start a
vehicle with an automatic transmission
may cause transmission damage.
Preparing Your Vehicle
Note:
Use only a 12-volt supply to start your
vehicle.
Note: Do not disconnect the battery of the
disabled vehicle as this could damage the
vehicle's electrical system.
1. Park the booster vehicle close to the hood of the disabled vehicle making
sure the two vehicles do not touch. Set
the parking brake on both vehicles and
stay clear of the engine cooling fan and
other moving parts.
188
C-MAX (CCG) Roadside Emergencies
Page 204 of 447
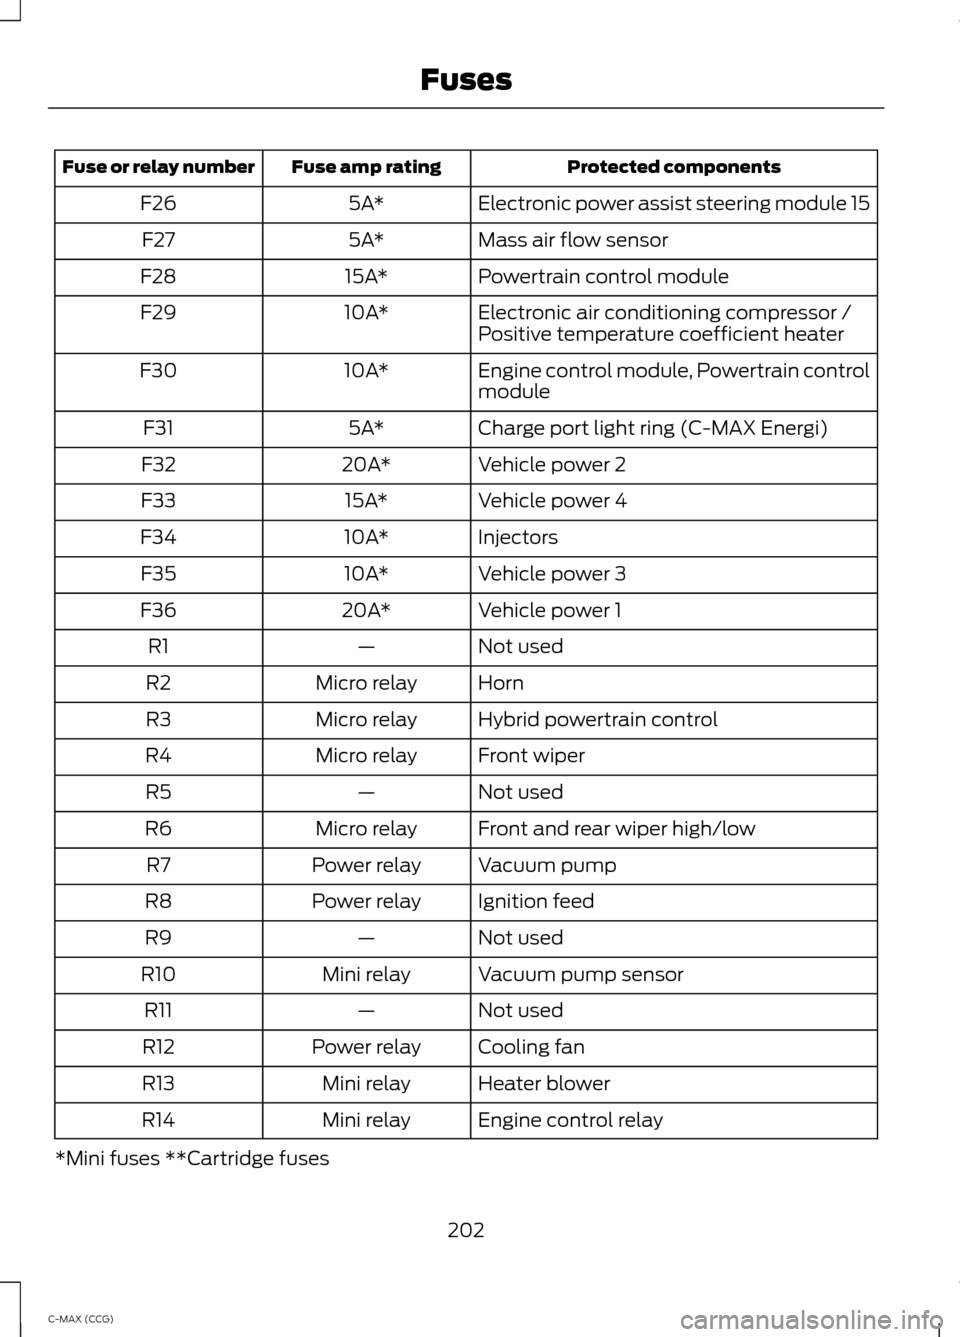
Protected components
Fuse amp rating
Fuse or relay number
Electronic power assist steering module 15
5A*
F26
Mass air flow sensor
5A*
F27
Powertrain control module
15A*
F28
Electronic air conditioning compressor /
Positive temperature coefficient heater
10A*
F29
Engine control module, Powertrain control
module
10A*
F30
Charge port light ring (C-MAX Energi)
5A*
F31
Vehicle power 2
20A*
F32
Vehicle power 4
15A*
F33
Injectors
10A*
F34
Vehicle power 3
10A*
F35
Vehicle power 1
20A*
F36
Not used
—
R1
Horn
Micro relay
R2
Hybrid powertrain control
Micro relay
R3
Front wiper
Micro relay
R4
Not used
—
R5
Front and rear wiper high/low
Micro relay
R6
Vacuum pump
Power relay
R7
Ignition feed
Power relay
R8
Not used
—
R9
Vacuum pump sensor
Mini relay
R10
Not used
—
R11
Cooling fan
Power relay
R12
Heater blower
Mini relay
R13
Engine control relay
Mini relay
R14
*Mini fuses **Cartridge fuses
202
C-MAX (CCG) Fuses
Page 206 of 447
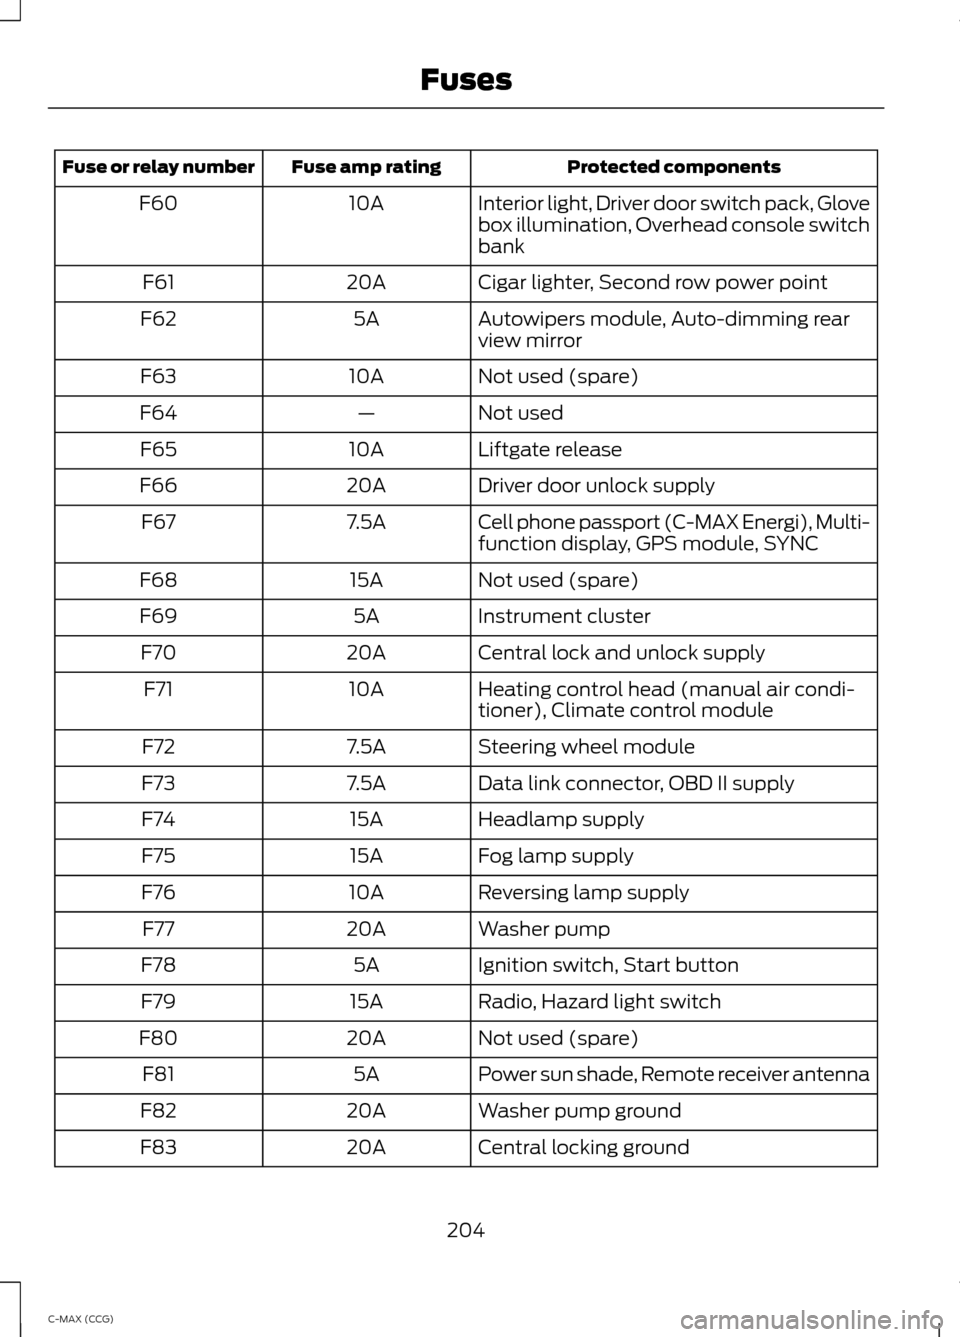
Protected components
Fuse amp rating
Fuse or relay number
Interior light, Driver door switch pack, Glove
box illumination, Overhead console switch
bank
10A
F60
Cigar lighter, Second row power point
20A
F61
Autowipers module, Auto-dimming rear
view mirror
5A
F62
Not used (spare)
10A
F63
Not used
—
F64
Liftgate release
10A
F65
Driver door unlock supply
20A
F66
Cell phone passport (C-MAX Energi), Multi-
function display, GPS module, SYNC
7.5A
F67
Not used (spare)
15A
F68
Instrument cluster
5A
F69
Central lock and unlock supply
20A
F70
Heating control head (manual air condi-
tioner), Climate control module
10A
F71
Steering wheel module
7.5A
F72
Data link connector, OBD II supply
7.5A
F73
Headlamp supply
15A
F74
Fog lamp supply
15A
F75
Reversing lamp supply
10A
F76
Washer pump
20A
F77
Ignition switch, Start button
5A
F78
Radio, Hazard light switch
15A
F79
Not used (spare)
20A
F80
Power sun shade, Remote receiver antenna
5A
F81
Washer pump ground
20A
F82
Central locking ground
20A
F83
204
C-MAX (CCG) Fuses
Page 214 of 447
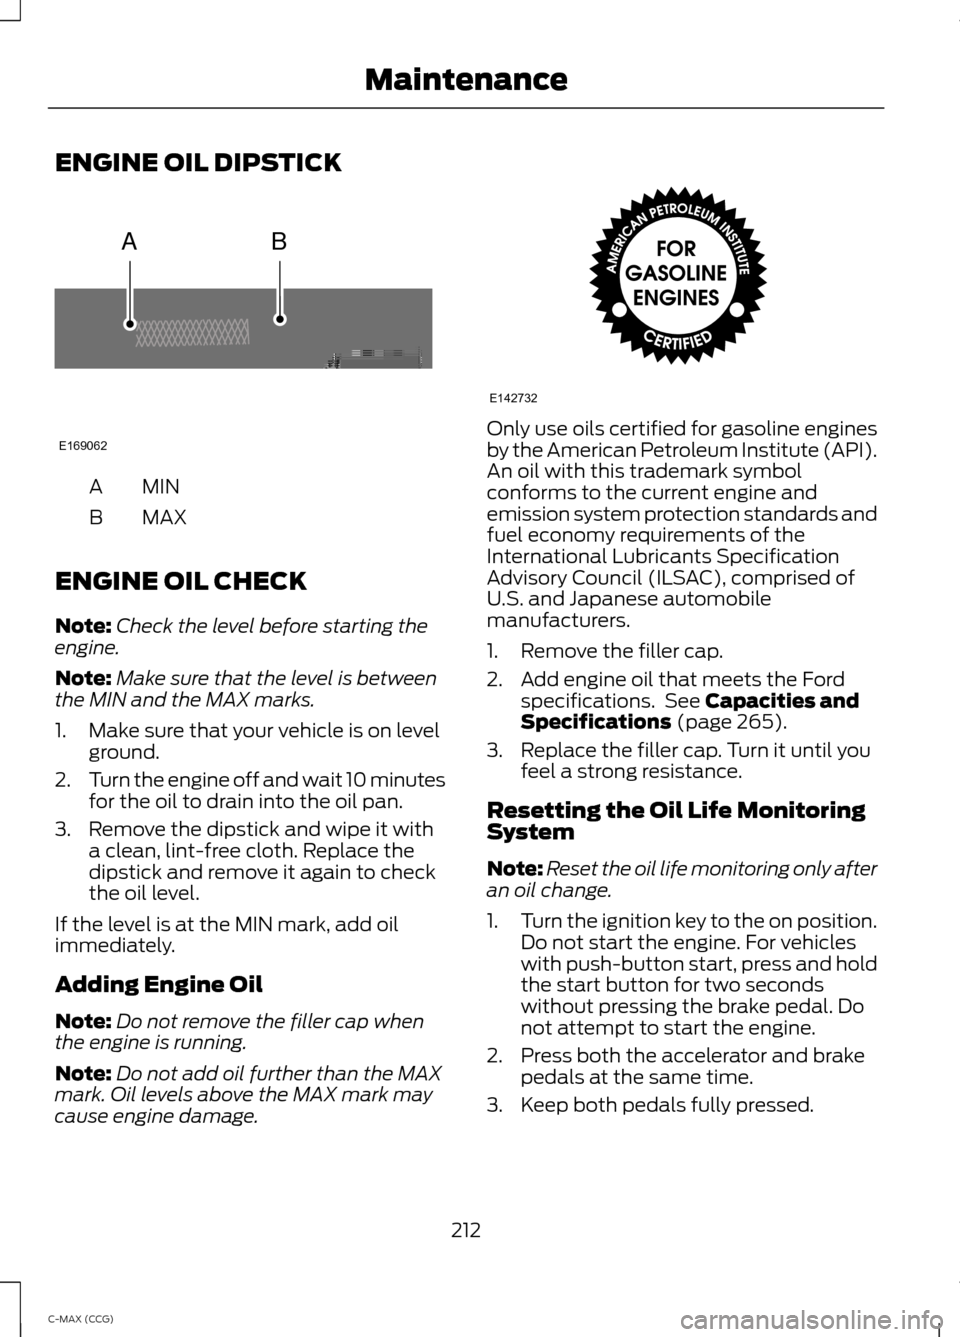
ENGINE OIL DIPSTICK
MINA
MAX
B
ENGINE OIL CHECK
Note: Check the level before starting the
engine.
Note: Make sure that the level is between
the MIN and the MAX marks.
1. Make sure that your vehicle is on level ground.
2. Turn the engine off and wait 10 minutes
for the oil to drain into the oil pan.
3. Remove the dipstick and wipe it with a clean, lint-free cloth. Replace the
dipstick and remove it again to check
the oil level.
If the level is at the MIN mark, add oil
immediately.
Adding Engine Oil
Note: Do not remove the filler cap when
the engine is running.
Note: Do not add oil further than the MAX
mark. Oil levels above the MAX mark may
cause engine damage. Only use oils certified for gasoline engines
by the American Petroleum Institute (API).
An oil with this trademark symbol
conforms to the current engine and
emission system protection standards and
fuel economy requirements of the
International Lubricants Specification
Advisory Council (ILSAC), comprised of
U.S. and Japanese automobile
manufacturers.
1. Remove the filler cap.
2. Add engine oil that meets the Ford
specifications. See Capacities and
Specifications (page 265).
3. Replace the filler cap. Turn it until you feel a strong resistance.
Resetting the Oil Life Monitoring
System
Note: Reset the oil life monitoring only after
an oil change.
1. Turn the ignition key to the on position.
Do not start the engine. For vehicles
with push-button start, press and hold
the start button for two seconds
without pressing the brake pedal. Do
not attempt to start the engine.
2. Press both the accelerator and brake pedals at the same time.
3. Keep both pedals fully pressed.
212
C-MAX (CCG) MaintenanceAB
E169062 E142732
Page 221 of 447
presets, are also maintained in memory by
power from the low voltage battery. When
a technician disconnects and connects the
low voltage battery, these settings are
erased. Complete the following procedure
in order to restore the settings:
1. With the vehicle at a complete stop,
set the parking brake.
2. Shift the transmission into P.
3. Turn off all accessories.
4. Step on the brake pedal and start the vehicle.
5. Run the engine until it reaches normal operating temperature. While the
engine is warming up, complete the
following: Reset the clock. See Audio
System (page 272). Reset the power
windows bounce-back feature. See
Windows and Mirrors
(page 76).
Reset the radio station presets. See
Audio System
(page 272).
6. Allow the engine to idle for at least one
minute. If the engine turns off, step on
the accelerator to start the engine.
7. While the engine is running, step on the
brake pedal and shift the transmission
to N.
8. Allow the engine to run for at least one
minute by pressing on the accelerator
pedal.
9. Drive the vehicle at least 10 miles (16 kilometers) to completely relearn the
idle and fuel trim strategy.
Note: If you do not allow the engine to
relearn the idle and fuel trim strategy, the
idle quality of your vehicle may be adversely
affected until the engine computer
eventually relearns the idle trim and fuel
trim strategy. Note:
Always dispose of automotive
batteries in a responsible manner. Follow
your local authorized standards for disposal.
Call your local authorized recycling center
to find out more about recycling automotive
batteries.
Note: It is recommended that the negative
battery cable terminal be disconnected from
the battery if you plan to store your vehicle
for an extended period of time.
CHECKING THE WIPER
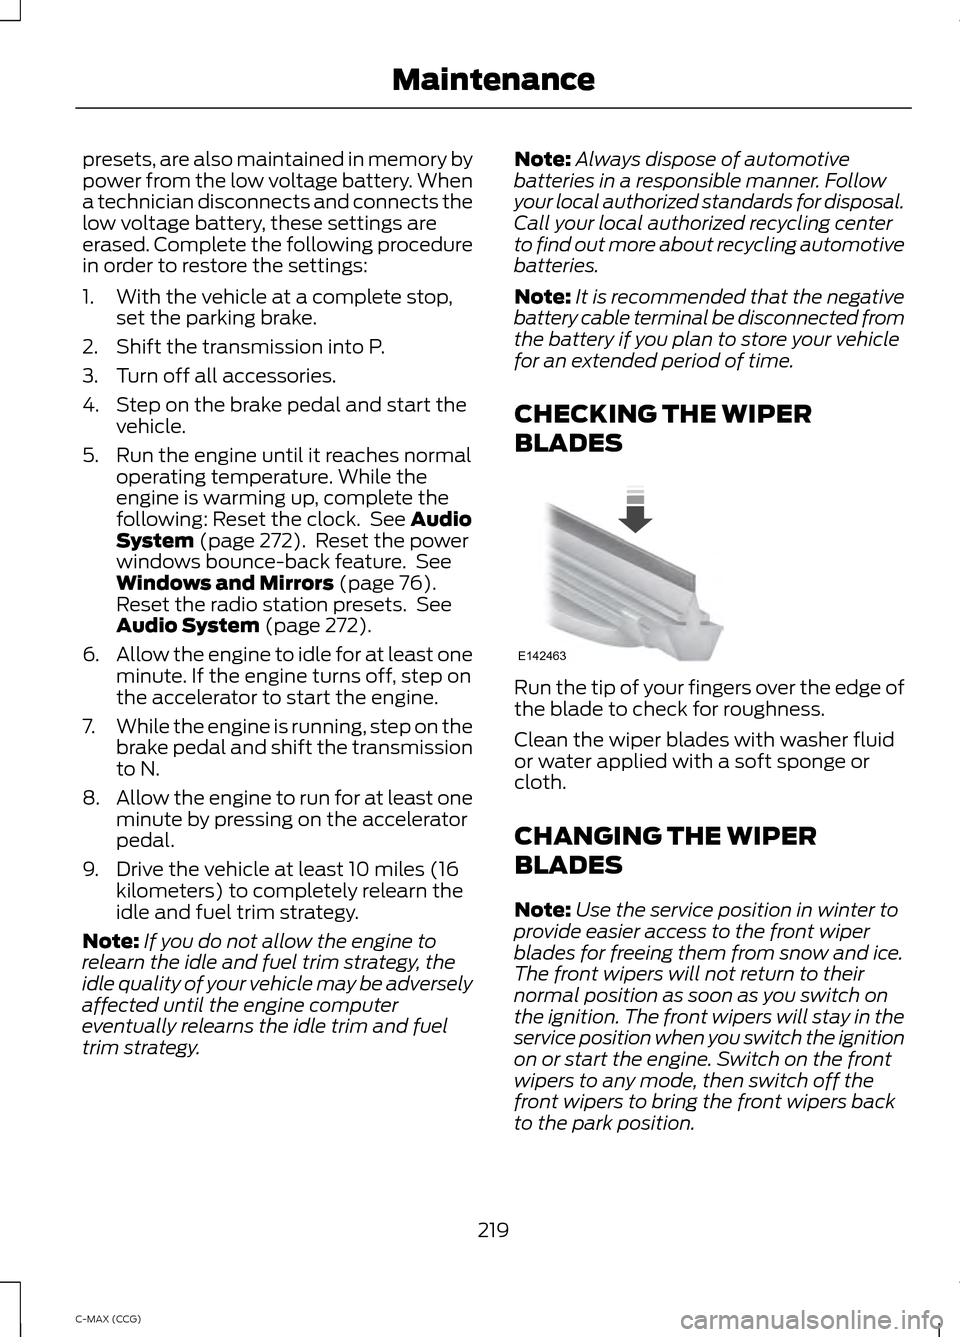
BLADES Run the tip of your fingers over the edge of
the blade to check for roughness.
Clean the wiper blades with washer fluid
or water applied with a soft sponge or
cloth.
CHANGING THE WIPER
BLADES
Note:
Use the service position in winter to
provide easier access to the front wiper
blades for freeing them from snow and ice.
The front wipers will not return to their
normal position as soon as you switch on
the ignition. The front wipers will stay in the
service position when you switch the ignition
on or start the engine. Switch on the front
wipers to any mode, then switch off the
front wipers to bring the front wipers back
to the park position.
219
C-MAX (CCG) MaintenanceE142463
Page 222 of 447
Note:
The windshield wiper blades are
different in length. If you install wiper blades
of the wrong length, the wipers may not
work correctly. If equipped with autowipers,
the rain sensor may not work correctly.
Note: Make sure that the wiper blade locks
into place. Lower the wiper arm and blade
back to the windshield. The wiper arms will
automatically return to their normal position
when the ignition is turned on.
Note: Replace wiper blades at least once
per year for optimum performance.
Note: Poor wiper quality can be improved
by cleaning the wiper blades and the
windshield
Setting the Front Wipers in the
Service Position
1. Make sure that the outside of the windshield is free from snow and ice.
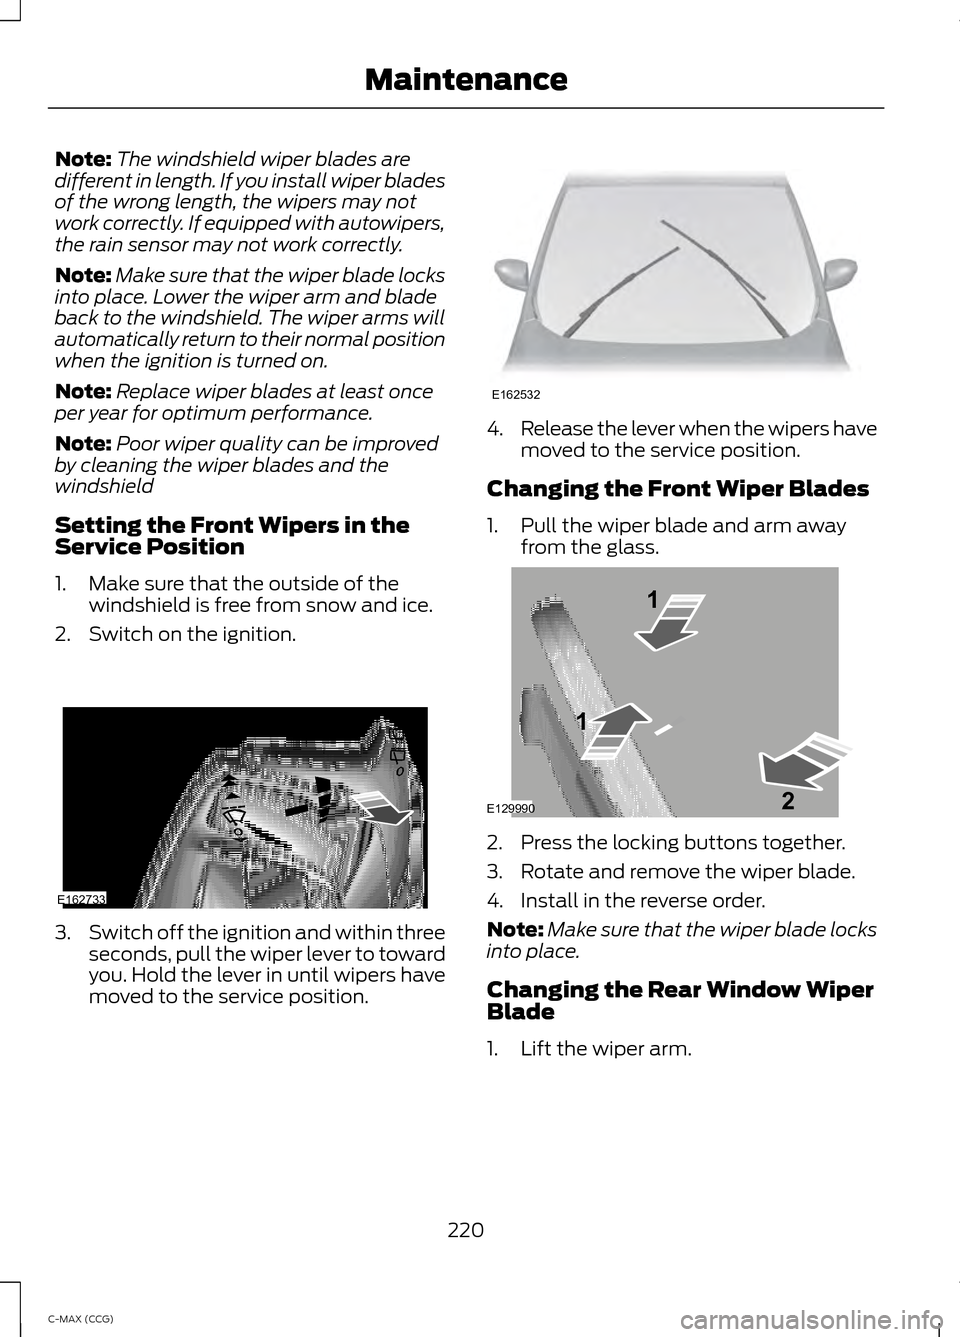
2. Switch on the ignition. 3.
Switch off the ignition and within three
seconds, pull the wiper lever to toward
you. Hold the lever in until wipers have
moved to the service position. 4.
Release the lever when the wipers have
moved to the service position.
Changing the Front Wiper Blades
1. Pull the wiper blade and arm away from the glass. 2. Press the locking buttons together.
3. Rotate and remove the wiper blade.
4. Install in the reverse order.
Note:
Make sure that the wiper blade locks
into place.
Changing the Rear Window Wiper
Blade
1. Lift the wiper arm.
220
C-MAX (CCG) MaintenanceE162733 E162532 E129990
1
1 2
Page 236 of 447
•
Never wash or rinse any ignition coil,
spark plug wire or spark plug well, or
the area in and around these locations.
• Cover the battery, power distribution
box, and air filter assembly to prevent
water damage when cleaning the
engine.
CLEANING THE WINDOWS AND
WIPER BLADES
Car wash chemicals and environmental
fallout can result in windshield and wiper
blade contamination. Dirty windshield and
wipers will result in poor windshield wiper
operation. Keep the windshield and wiper
blades clean to maintain windshield wiper
performance.
To clean the windshield and wiper blades:
• Clean the windshield with a
non-abrasive glass cleaner.
• For windshields contaminated with
tree sap, chemicals, wax or bugs, clean
the entire windshield using steel wool
(no greater than 0000 grade) in a
circular motion and rinse with water.
• Clean the wiper blades with isopropyl
rubbing alcohol or windshield washer
fluid.
Note: Do not use razor blades or other
sharp objects to clean or remove decals
from the inside of the heated rear window.
The vehicle warranty does not cover
damage caused to the heated rear window
grid lines.
CLEANING THE INTERIOR WARNINGS
Do not use cleaning solvents, bleach
or dye on the vehicle
’s safety belts,
as these actions may weaken the
belt webbing. WARNINGS
On vehicles equipped with
seat-mounted airbags, do not use
chemical solvents or strong
detergents. Such products could
contaminate the side airbag system and
affect performance of the side airbag in a
collision. For fabric, carpets, cloth seats, safety belts
and seats equipped with side airbags:
•
Remove dust and loose dirt with a
vacuum cleaner.
• Remove light stains and soil with
Motorcraft Professional Strength
Carpet & Upholstery Cleaner.
• If grease or tar is present on the
material, spot-clean the area first with
Motorcraft Spot and Stain Remover. In
Canada, use Motorcraft Multi-Purpose
Cleaner.
• If a ring forms on the fabric after spot
cleaning, clean the entire area
immediately (but do not oversaturate)
or the ring will set.
• Do not use household cleaning
products or glass cleaners, which can
stain and discolor the fabric and affect
the flame retardant abilities of the seat
materials.
CLEANING THE INSTRUMENT
PANEL AND INSTRUMENT
CLUSTER LENS WARNING
Do not use chemical solvents or
strong detergents when cleaning the
steering wheel or instrument panel
to avoid contamination of the airbag
system. 234
C-MAX (CCG) Vehicle Care
Page 267 of 447
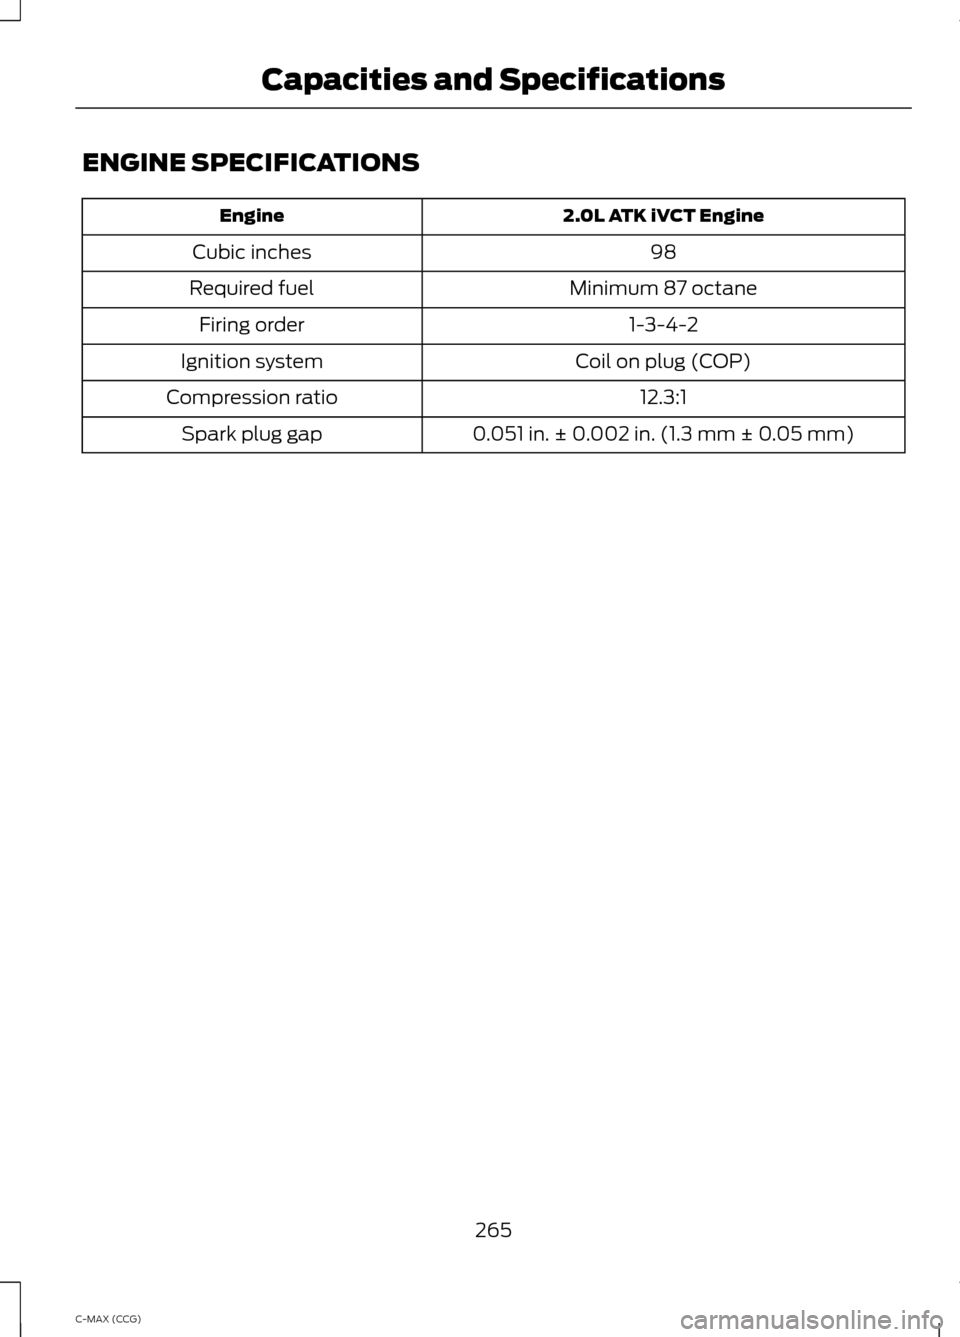
ENGINE SPECIFICATIONS
2.0L ATK iVCT Engine
Engine
98
Cubic inches
Minimum 87 octane
Required fuel
1-3-4-2
Firing order
Coil on plug (COP)
Ignition system
12.3:1
Compression ratio
0.051 in. ± 0.002 in. (1.3 mm ± 0.05 mm)
Spark plug gap
265
C-MAX (CCG) Capacities and Specifications