FORD C MAX HYBRID 2017 2.G Owners Manual
Manufacturer: FORD, Model Year: 2017, Model line: C MAX HYBRID, Model: FORD C MAX HYBRID 2017 2.GPages: 497, PDF Size: 6.3 MB
Page 151 of 497
4. Pull the manual fuel filler door release
lever.
5. Switch the ignition off and refuel your vehicle within 20 minutes. If more than
20 minutes is required, fully close the
fuel filler door and repeat the
procedure.
FUEL CONSUMPTION
The advertised capacity is the maximum
amount of fuel that you can add to the fuel
tank after running out of fuel. Included in
the advertised capacity is an empty
reserve. The empty reserve is an
unspecified amount of fuel that remains
in the fuel tank when the fuel gauge
indicates empty.
Note: The amount of fuel in the empty
reserve varies and should not be relied upon
to increase driving range.
Filling the Fuel Tank
For consistent results when refueling:
• Turn the ignition off before fueling; an
inaccurate reading results if the engine
is left running.
• Use the same fill rate
(low-medium-high) each time the tank
is filled.
• Allow no more than one automatic
shut-off when refueling.
Results are most accurate when the filling
method is consistent.
Calculating Fuel Economy
Do not measure fuel economy during the
first 1,000 mi (1,600 km) of driving (this is
your engine ’s break-in period). A more
accurate measurement is obtained after
2,000 mi (3,200 km)
to 3,000 mi
(4,800 km). Also, fuel expense, frequency
of fill ups or fuel gauge readings are not
accurate ways to measure fuel economy. 1.
Fill the fuel tank completely and record
the initial odometer reading.
2. Each time you fill the fuel tank, record the amount of fuel added.
3. After at least three fill ups, fill the fuel tank and record the current odometer
reading.
4. Subtract your initial odometer reading from the current odometer reading.
To calculate L/100 km (liters per 100
kilometers) fuel consumption, multiply the
liters used by 100, then divide by kilometers
traveled. To calculate MPG (miles per
gallon) fuel consumption, divide miles
traveled by gallons used.
Keep a record for at least one month and
record the type of driving (city or highway).
This provides an accurate estimate of your
vehicle's fuel economy under current
driving conditions. Keeping records during
summer and winter will show how
temperature impacts fuel economy.
Conditions
• Heavily loading your vehicle reduces
fuel economy.
• Carrying unnecessary weight in your
vehicle may reduce fuel economy.
• Adding certain accessories to your
vehicle such as bug deflectors, rollbars
or light bars, running boards and ski
racks may reduce fuel economy.
• Using fuel blended with alcohol may
lower fuel economy.
• Fuel economy may decrease with lower
temperatures.
• Fuel economy may decrease when
driving short distances.
• You will get better fuel economy when
driving on flat terrain than when driving
on hilly terrain.
148
C-MAX Energi / C-MAX Hybrid (CCG) Canada/United States of America, enUSA, First Printing Fuel and Refueling
Page 152 of 497
EMISSION CONTROL SYSTEM
WARNINGS
Do not park, idle, or drive your vehicle
in dry grass or other dry ground cover.
The emission system heats up the
engine compartment and exhaust system,
which can start a fire. Exhaust leaks may result in entry of
harmful and potentially lethal fumes
into the passenger compartment. If
you smell exhaust fumes inside your
vehicle, have your dealer inspect your
vehicle immediately. Do not drive if you
smell exhaust fumes. Your vehicle is equipped with various
emission control components and a
catalytic converter that will enable your
vehicle to comply with applicable exhaust
emission standards.
To make sure that the catalytic converter
and other emission control components
continue to work properly:
•
Use only the specified fuel listed.
• Avoid running out of fuel.
• Do not turn off the ignition while your
vehicle is moving, especially at high
speeds.
• Have the items listed in scheduled
maintenance information performed
according to the specified schedule.
The scheduled maintenance items listed
in scheduled maintenance information are
essential to the life and performance of
your vehicle and to its emissions system.
If you use anything other than Ford,
Motorcraft or Ford-authorized parts for
maintenance replacements or for service
of components affecting emission control,
such non-Ford parts should be equivalent
to genuine Ford Motor Company parts in
performance and durability. Illumination of the service engine soon
indicator, charging system warning light or
the temperature warning light, fluid leaks,
strange odors, smoke or loss of engine
power could indicate that the emission
control system is not working properly.
An improperly operating or damaged
exhaust system may allow exhaust to
enter the vehicle. Have a damaged or
improperly operating exhaust system
inspected and repaired immediately.
Do not make any unauthorized changes to
your vehicle or engine. By law, vehicle
owners and anyone who manufactures,
repairs, services, sells, leases, trades
vehicles, or supervises a fleet of vehicles
are not permitted to intentionally remove
an emission control device or prevent it
from working. Information about your
vehicle
’s emission system is on the Vehicle
Emission Control Information Decal
located on or near the engine. This decal
also lists engine displacement.
Please consult your warranty information
for complete details.
On-Board Diagnostics (OBD-II)
Your vehicle has a computer known as the
on-board diagnostics system (OBD-II) that
monitors the engine ’s emission control
system. The system protects the
environment by making sure that your
vehicle continues to meet government
emission standards. The OBD-II system
also assists a service technician in properly
servicing your vehicle. When the service engine soon
indicator illuminates, the OBD-II
system has detected a
malfunction. Temporary malfunctions may
cause the service engine soon indicator to
illuminate. Examples are:
1. Your vehicle has run out of fuel —the
engine may misfire or run poorly.
149
C-MAX Energi / C-MAX Hybrid (CCG) Canada/United States of America, enUSA, First Printing Fuel and Refueling
Page 153 of 497
2. Poor fuel quality or water in the
fuel —the engine may misfire or run
poorly.
3. The fuel fill inlet may not have closed properly. See Refueling (page 145).
4. Driving through deep water —the
electrical system may be wet.
You can correct these temporary
malfunctions by filling the fuel tank with
good quality fuel, properly closing the fuel
fill inlet or letting the electrical system dry
out. After three driving cycles without these
or any other temporary malfunctions
present, the service engine soon indicator
should stay off the next time you start the
engine. A driving cycle consists of a cold
engine startup followed by mixed city and
highway driving. No additional vehicle
service is required.
If the service engine soon indicator remains
on, have your vehicle serviced at the first
available opportunity. Although some
malfunctions detected by the OBD-II may
not have symptoms that are apparent,
continued driving with the service engine
soon indicator on can result in increased
emissions, lower fuel economy, reduced
engine and transmission smoothness and
lead to more costly repairs.
Readiness for Inspection and
Maintenance (I/M) Testing
Some state and provincial and local
governments may have
Inspection/Maintenance (I/M) programs
to inspect the emission control equipment
on your vehicle. Failure to pass this
inspection could prevent you from getting
a vehicle registration. If the service engine soon
indicator is on or the bulb does
not work, your vehicle may need
service. See On-Board Diagnostics. Your vehicle may not pass the I/M test if
the service engine soon indicator is on or
not working properly (bulb is burned out),
or if the OBD-II system has determined
that some of the emission control systems
have not been properly checked. In this
case, the vehicle is not ready for I/M
testing.
If the vehicle
’s engine or transmission has
just been serviced, or the battery has
recently run down or been replaced, the
OBD-II system may indicate that the
vehicle is not ready for I/M testing. To
determine if the vehicle is ready for I/M
testing, turn the ignition key to the on
position for 15 seconds without cranking
the engine. If the service engine soon
indicator blinks eight times, it means that
the vehicle is not ready for I/M testing; if
the service engine soon indicator stays on
solid, it means that your vehicle is ready
for I/M testing.
The OBD-II system checks the emission
control system during normal driving. A
complete check may take several days.
If the vehicle is not ready for I/M testing,
you can perform the following driving cycle
consisting of mixed city and highway
driving:
1. 15 minutes of steady driving on an expressway or highway followed by 20
minutes of stop-and-go driving with at
least four 30-second idle periods.
2. Allow your vehicle to sit for at least eight hours with the ignition off. Then,
start the vehicle and complete the
above driving cycle. The vehicle must
warm up to its normal operating
temperature. Once started, do not turn
off the vehicle until the above driving
cycle is complete.
If the vehicle is still not ready for I/M
testing, you need to repeat the above
driving cycle.
150
C-MAX Energi / C-MAX Hybrid (CCG) Canada/United States of America, enUSA, First Printing Fuel and Refueling
Page 154 of 497
GENERAL INFORMATION
WARNING
Have the battery pack serviced only
by an authorized electric vehicle
technician. Improper handling can
result in personal injury or death. Note:
The high-voltage battery does not
require regular service maintenance. Your vehicle consists of various
high-voltage components and wiring. All
of the high-voltage power flows through
specific wiring assemblies labeled as such
or covered with a solid orange convolute,
orange striped tape or both. Do not come
in contact with these components.
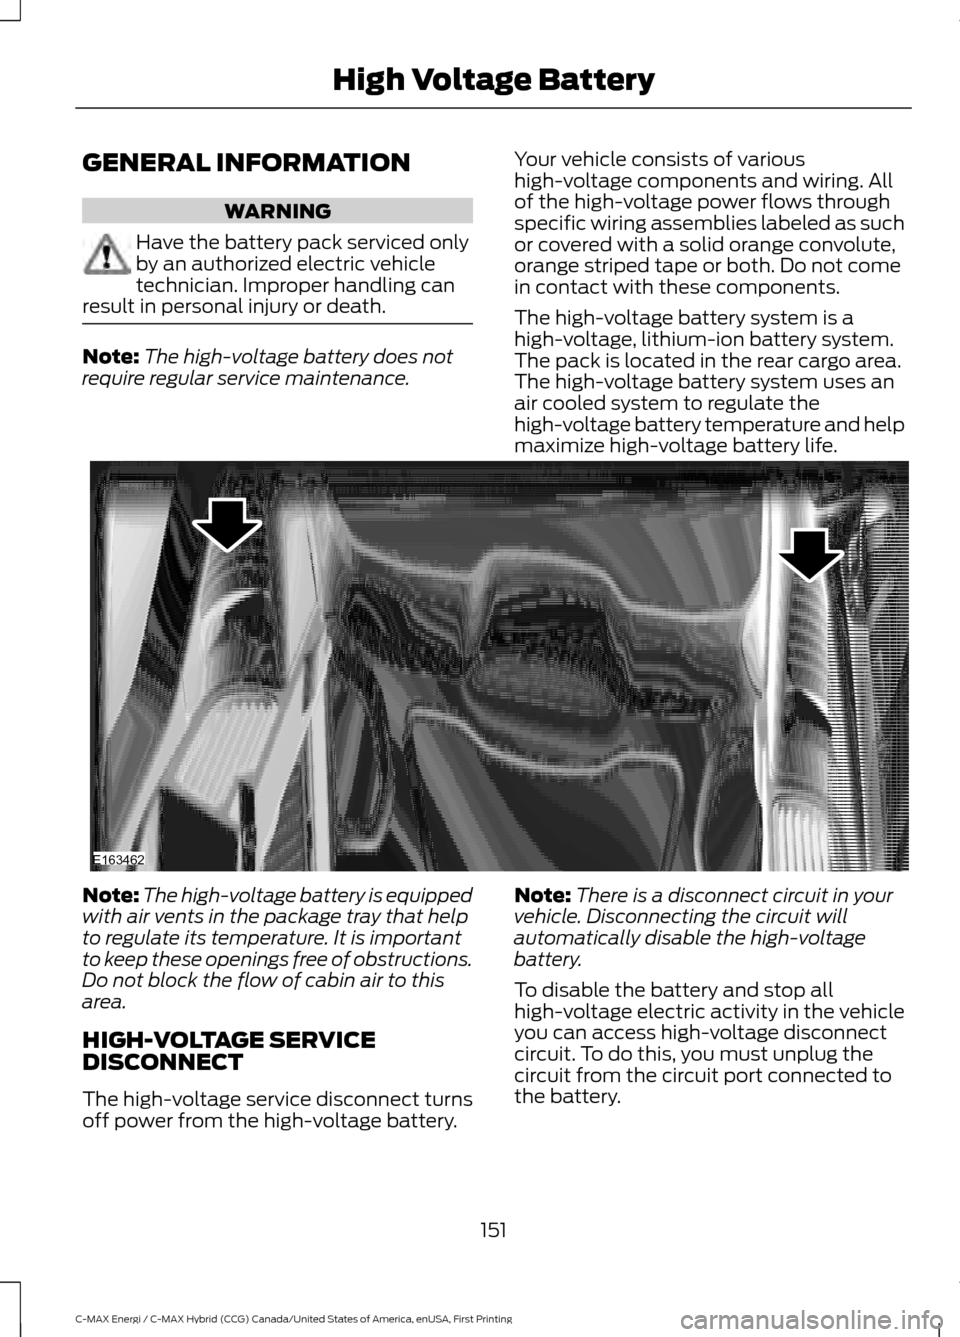
The high-voltage battery system is a
high-voltage, lithium-ion battery system.
The pack is located in the rear cargo area.
The high-voltage battery system uses an
air cooled system to regulate the
high-voltage battery temperature and help
maximize high-voltage battery life.Note:
The high-voltage battery is equipped
with air vents in the package tray that help
to regulate its temperature. It is important
to keep these openings free of obstructions.
Do not block the flow of cabin air to this
area.
HIGH-VOLTAGE SERVICE
DISCONNECT
The high-voltage service disconnect turns
off power from the high-voltage battery. Note:
There is a disconnect circuit in your
vehicle. Disconnecting the circuit will
automatically disable the high-voltage
battery.
To disable the battery and stop all
high-voltage electric activity in the vehicle
you can access high-voltage disconnect
circuit. To do this, you must unplug the
circuit from the circuit port connected to
the battery.
151
C-MAX Energi / C-MAX Hybrid (CCG) Canada/United States of America, enUSA, First Printing High Voltage BatteryE163462
Page 155 of 497
Note:
The service disconnect has an outer
lever to aid in the proper seating of the
service disconnect lever. Remove this to
disconnect the high-voltage service
disconnect.
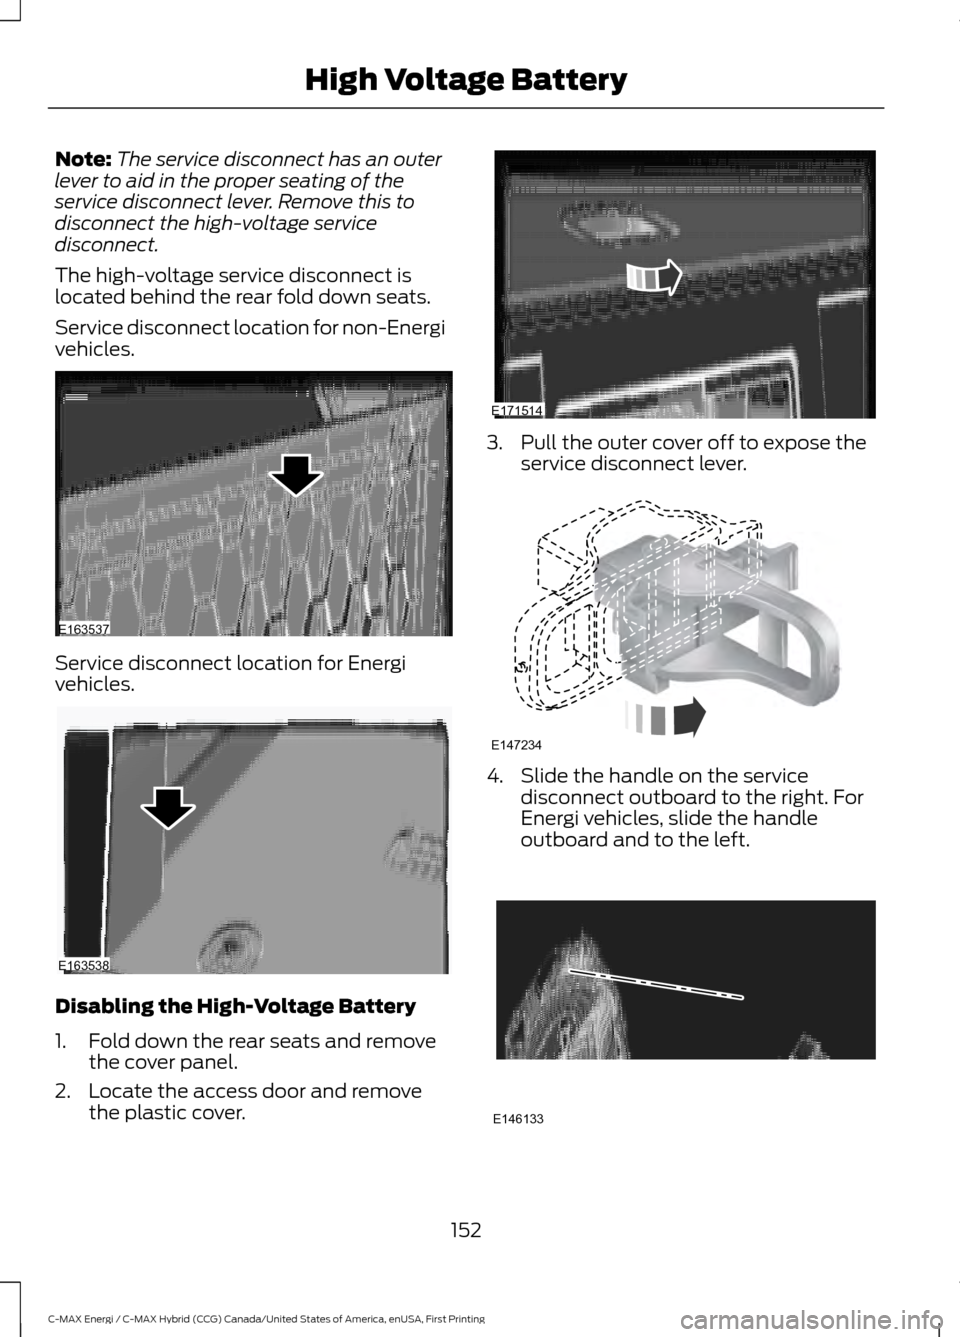
The high-voltage service disconnect is
located behind the rear fold down seats.
Service disconnect location for non-Energi
vehicles. Service disconnect location for Energi
vehicles.
Disabling the High-Voltage Battery
1. Fold down the rear seats and remove
the cover panel.
2. Locate the access door and remove the plastic cover. 3. Pull the outer cover off to expose the
service disconnect lever. 4. Slide the handle on the service
disconnect outboard to the right. For
Energi vehicles, slide the handle
outboard and to the left. 152
C-MAX Energi / C-MAX Hybrid (CCG) Canada/United States of America, enUSA, First Printing High Voltage BatteryE163537 E163538 E171514 E147234 E146133
Page 156 of 497
5.
Pull the handle toward you and remove
the service disconnect from the vehicle
to disable the high-voltage battery.
Reactivating the High-Voltage Battery
Note: If you have manually disconnected
your high-voltage shut off circuit, you will
need to reconnect the circuit before you can
reactivate it. The system will detect if the
electrical system is safe and turn on
automatically.
CHARGING THE HIGH
VOLTAGE BATTERY WARNINGS
Do not use the 120 volt convenience
cord with an extension cord,
two-prong adapter, surge protector,
timer or other adapter. In Canada, do not use the 120 volt
convenience cord in commercial
garages.
This equipment has arcing or
sparking parts. Do not expose to
flammable vapors. Position this
equipment at least 18 in (450 mm) above
the floor. The AC wall plug must fit firmly into
the AC outlet. If the connection feels
loose, worn or the AC outlet is
damaged, please have a qualified
electrician replace the AC outlet. Using a
convenience cord with a worn outlet may
cause burns, property damage and
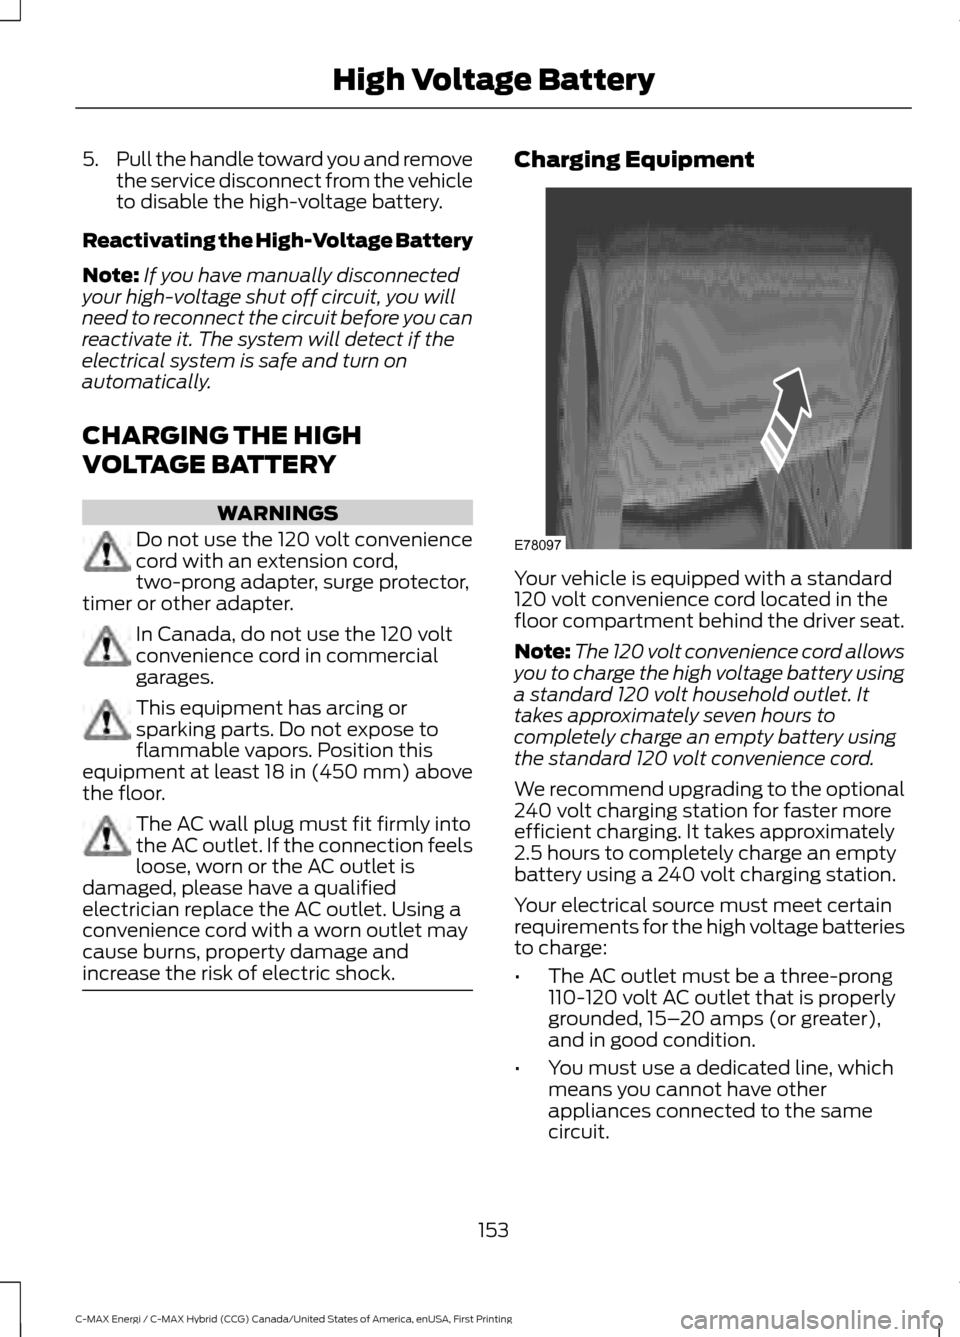
increase the risk of electric shock. Charging Equipment
Your vehicle is equipped with a standard
120 volt convenience cord located in the
floor compartment behind the driver seat.
Note:
The 120 volt convenience cord allows
you to charge the high voltage battery using
a standard 120 volt household outlet. It
takes approximately seven hours to
completely charge an empty battery using
the standard 120 volt convenience cord.
We recommend upgrading to the optional
240 volt charging station for faster more
efficient charging. It takes approximately
2.5 hours to completely charge an empty
battery using a 240 volt charging station.
Your electrical source must meet certain
requirements for the high voltage batteries
to charge:
• The AC outlet must be a three-prong
110-120 volt AC outlet that is properly
grounded, 15– 20 amps (or greater),
and in good condition.
• You must use a dedicated line, which
means you cannot have other
appliances connected to the same
circuit.
153
C-MAX Energi / C-MAX Hybrid (CCG) Canada/United States of America, enUSA, First Printing High Voltage BatteryE78097
Page 157 of 497
Note:
If you do not have a dedicated circuit,
contact a licensed professional electrician
for proper installation.
Make sure that the 120 volt convenience
cord is completely unwound before
charging. Always plug the cord into the AC
outlet before connecting the charging
coupler into the charge port on your
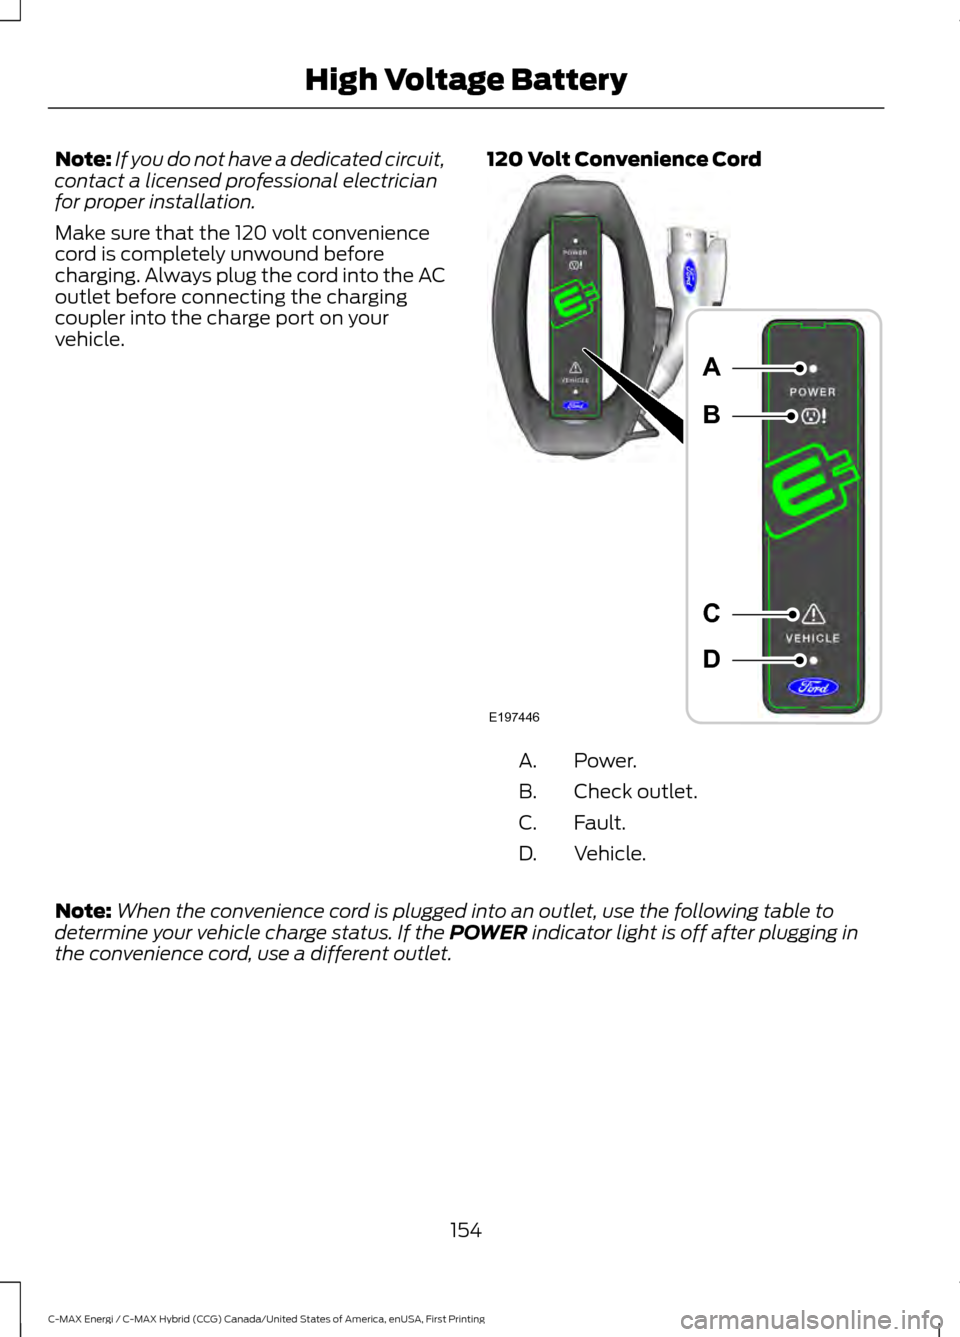
vehicle. 120 Volt Convenience Cord Power.
A.
Check outlet.
B.
Fault.
C.
Vehicle.
D.
Note: When the convenience cord is plugged into an outlet, use the following table to
determine your vehicle charge status. If the POWER indicator light is off after plugging in
the convenience cord, use a different outlet.
154
C-MAX Energi / C-MAX Hybrid (CCG) Canada/United States of America, enUSA, First Printing High Voltage BatteryE197446
A
B
C
D
Page 158 of 497
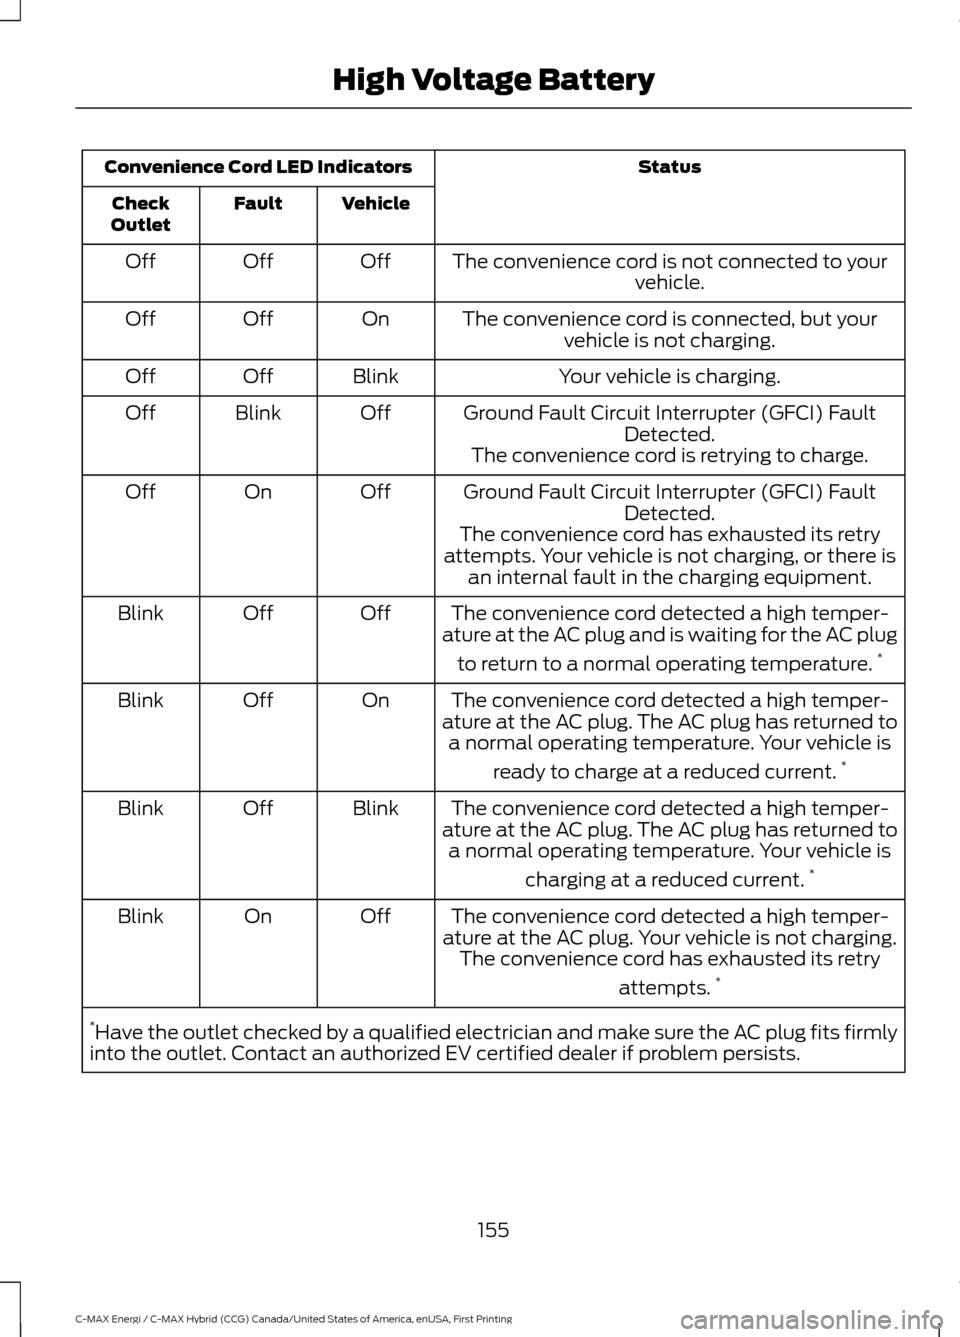
Status
Convenience Cord LED Indicators
Vehicle
Fault
Check
Outlet
The convenience cord is not connected to yourvehicle.
Off
Off
Off
The convenience cord is connected, but yourvehicle is not charging.
On
Off
Off
Your vehicle is charging.
Blink
Off
Off
Ground Fault Circuit Interrupter (GFCI) FaultDetected.
Off
Blink
Off
The convenience cord is retrying to charge.
Ground Fault Circuit Interrupter (GFCI) Fault Detected.
Off
On
Off
The convenience cord has exhausted its retry
attempts. Your vehicle is not charging, or there is an internal fault in the charging equipment.
The convenience cord detected a high temper-
ature at the AC plug and is waiting for the AC plug
to return to a normal operating temperature. *
Off
Off
Blink
The convenience cord detected a high temper-
ature at the AC plug. The AC plug has returned to a normal operating temperature. Your vehicle is
ready to charge at a reduced current. *
On
Off
Blink
The convenience cord detected a high temper-
ature at the AC plug. The AC plug has returned to a normal operating temperature. Your vehicle is
charging at a reduced current. *
Blink
Off
Blink
The convenience cord detected a high temper-
ature at the AC plug. Your vehicle is not charging. The convenience cord has exhausted its retry
attempts.*
Off
On
Blink
* Have the outlet checked by a qualified electrician and make sure the AC plug fits firmly
into the outlet. Contact an authorized EV certified dealer if problem persists.
155
C-MAX Energi / C-MAX Hybrid (CCG) Canada/United States of America, enUSA, First Printing High Voltage Battery
Page 159 of 497
Charge Port
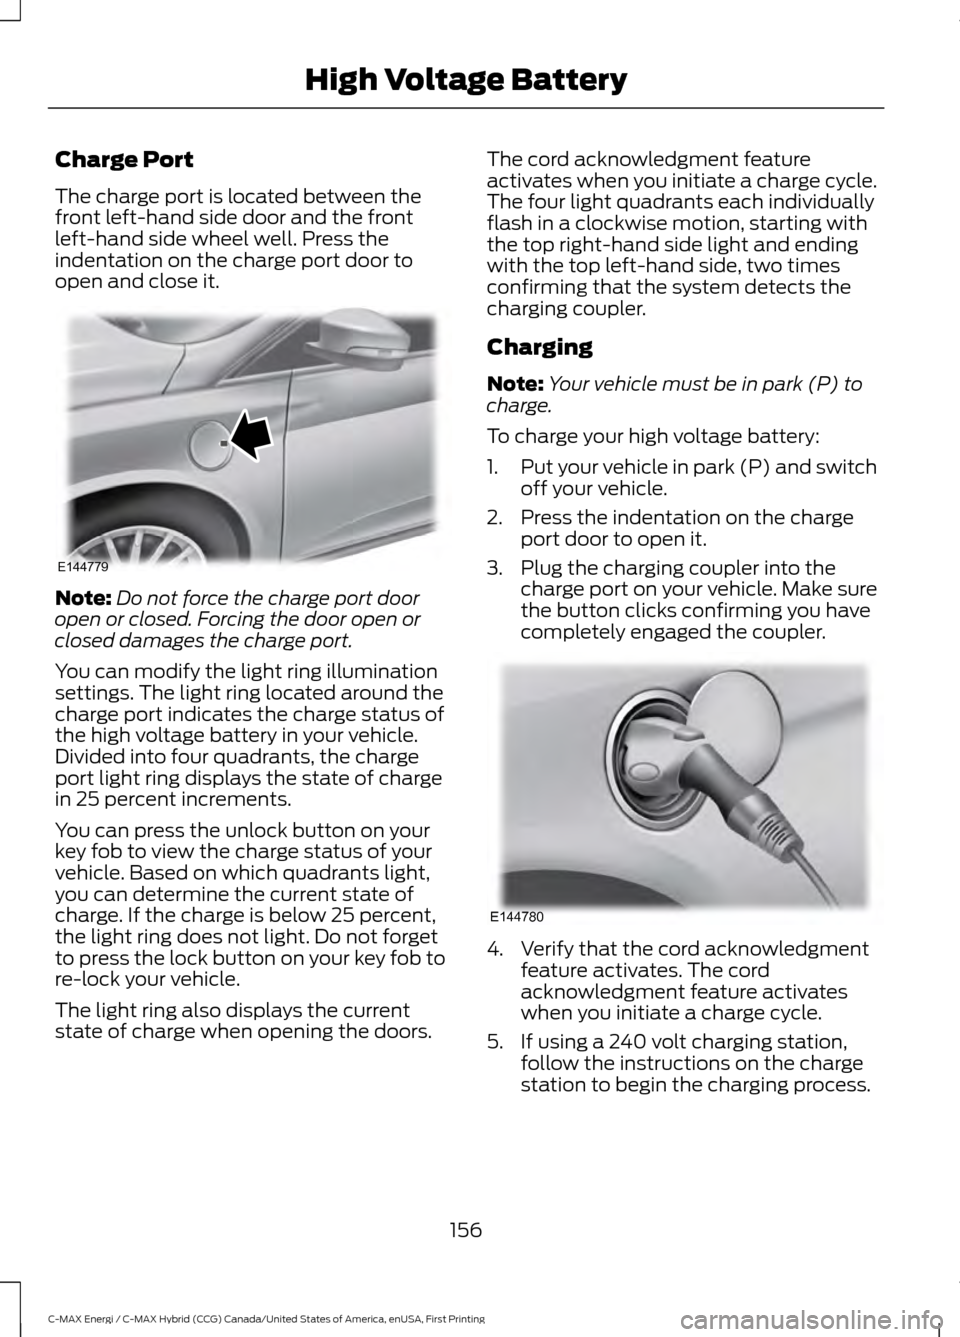
The charge port is located between the
front left-hand side door and the front
left-hand side wheel well. Press the
indentation on the charge port door to
open and close it.
Note:
Do not force the charge port door
open or closed. Forcing the door open or
closed damages the charge port.
You can modify the light ring illumination
settings. The light ring located around the
charge port indicates the charge status of
the high voltage battery in your vehicle.
Divided into four quadrants, the charge
port light ring displays the state of charge
in 25 percent increments.
You can press the unlock button on your
key fob to view the charge status of your
vehicle. Based on which quadrants light,
you can determine the current state of
charge. If the charge is below 25 percent,
the light ring does not light. Do not forget
to press the lock button on your key fob to
re-lock your vehicle.
The light ring also displays the current
state of charge when opening the doors. The cord acknowledgment feature
activates when you initiate a charge cycle.
The four light quadrants each individually
flash in a clockwise motion, starting with
the top right-hand side light and ending
with the top left-hand side, two times
confirming that the system detects the
charging coupler.
Charging
Note:
Your vehicle must be in park (P) to
charge.
To charge your high voltage battery:
1. Put your vehicle in park (P) and switch
off your vehicle.
2. Press the indentation on the charge port door to open it.
3. Plug the charging coupler into the charge port on your vehicle. Make sure
the button clicks confirming you have
completely engaged the coupler. 4. Verify that the cord acknowledgment
feature activates. The cord
acknowledgment feature activates
when you initiate a charge cycle.
5. If using a 240 volt charging station, follow the instructions on the charge
station to begin the charging process.
156
C-MAX Energi / C-MAX Hybrid (CCG) Canada/United States of America, enUSA, First Printing High Voltage BatteryE144779 E144780
Page 160 of 497
The light ring located around the charge
port indicates the charge status of the high
voltage battery in your vehicle:
•
When the top right-hand side quadrant
is pulsing, the charge is between 0-25
percent.
• When the top right-hand side quadrant
is on and the bottom right-hand
quadrant is pulsing, the charge is
between 25-50 percent.
• When both right-hand side quadrants
are on and the bottom left-hand side
quadrant is pulsing, the charge is
between 50-75 percent.
• When three quadrants are on and the
top left-hand side quadrant is pulsing,
the charge is between 75-100 percent.
• When all the lights on the light ring are
on, the charge is complete.
Note: The light ring will turn off one minute
after reaching a full charge.
Locking the Charging Coupler
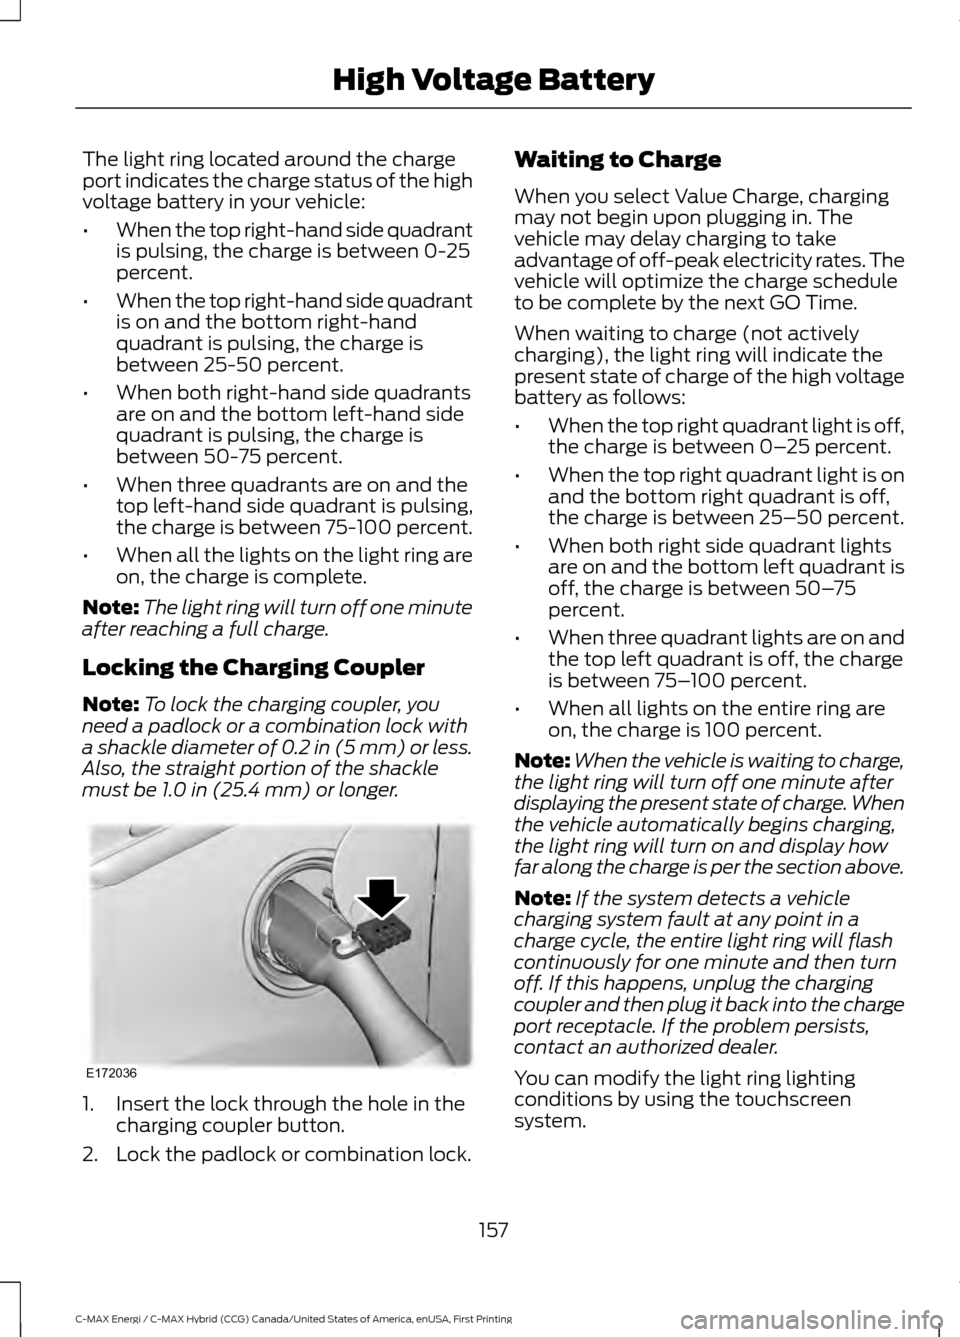
Note: To lock the charging coupler, you
need a padlock or a combination lock with
a shackle diameter of 0.2 in (5 mm) or less.
Also, the straight portion of the shackle
must be 1.0 in (25.4 mm) or longer. 1. Insert the lock through the hole in the
charging coupler button.
2. Lock the padlock or combination lock. Waiting to Charge
When you select Value Charge, charging
may not begin upon plugging in. The
vehicle may delay charging to take
advantage of off-peak electricity rates. The
vehicle will optimize the charge schedule
to be complete by the next GO Time.
When waiting to charge (not actively
charging), the light ring will indicate the
present state of charge of the high voltage
battery as follows:
•
When the top right quadrant light is off,
the charge is between 0– 25 percent.
• When the top right quadrant light is on
and the bottom right quadrant is off,
the charge is between 25–50 percent.
• When both right side quadrant lights
are on and the bottom left quadrant is
off, the charge is between 50– 75
percent.
• When three quadrant lights are on and
the top left quadrant is off, the charge
is between 75– 100 percent.
• When all lights on the entire ring are
on, the charge is 100 percent.
Note: When the vehicle is waiting to charge,
the light ring will turn off one minute after
displaying the present state of charge. When
the vehicle automatically begins charging,
the light ring will turn on and display how
far along the charge is per the section above.
Note: If the system detects a vehicle
charging system fault at any point in a
charge cycle, the entire light ring will flash
continuously for one minute and then turn
off. If this happens, unplug the charging
coupler and then plug it back into the charge
port receptacle. If the problem persists,
contact an authorized dealer.
You can modify the light ring lighting
conditions by using the touchscreen
system.
157
C-MAX Energi / C-MAX Hybrid (CCG) Canada/United States of America, enUSA, First Printing High Voltage BatteryE172036