ECO mode FORD E SERIES 2002 4.G User Guide
[x] Cancel search | Manufacturer: FORD, Model Year: 2002, Model line: E SERIES, Model: FORD E SERIES 2002 4.GPages: 272, PDF Size: 2.6 MB
Page 70 of 272
Encore (on remote control)
²Press the ENCORE control while in playback mode.
The VCP will reverse to the previous five seconds of the selection and
then operate at normal playback mode.
Auxiliary input jacks
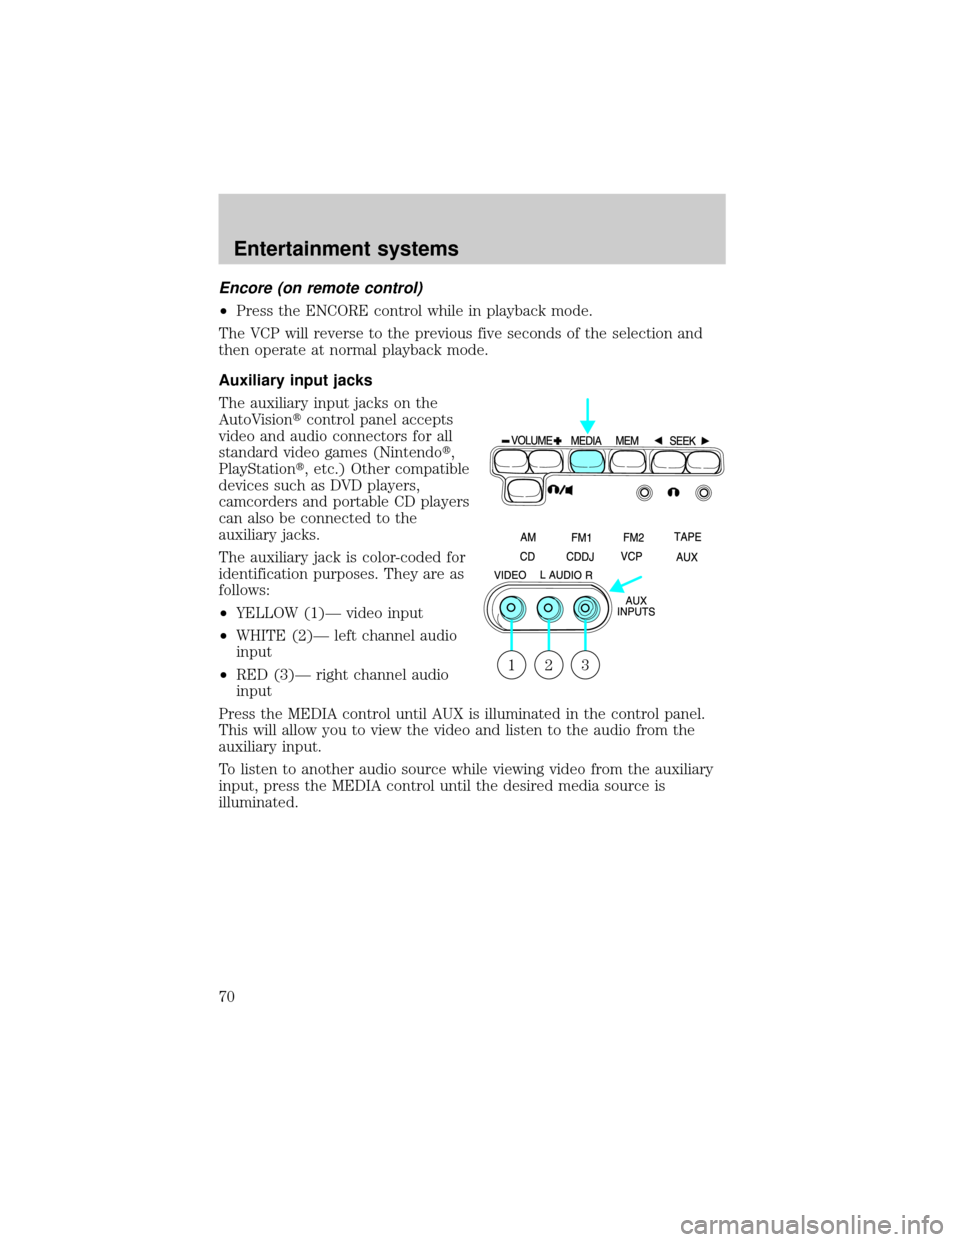
The auxiliary input jacks on the
AutoVisiontcontrol panel accepts
video and audio connectors for all
standard video games (Nintendot,
PlayStationt, etc.) Other compatible
devices such as DVD players,
camcorders and portable CD players
can also be connected to the
auxiliary jacks.
The auxiliary jack is color-coded for
identification purposes. They are as
follows:
²YELLOW (1)Ð video input
²WHITE (2)Ð left channel audio
input
²RED (3)Ð right channel audio
input
Press the MEDIA control until AUX is illuminated in the control panel.
This will allow you to view the video and listen to the audio from the
auxiliary input.
To listen to another audio source while viewing video from the auxiliary
input, press the MEDIA control until the desired media source is
illuminated.
321
Entertainment systems
70
Page 80 of 272
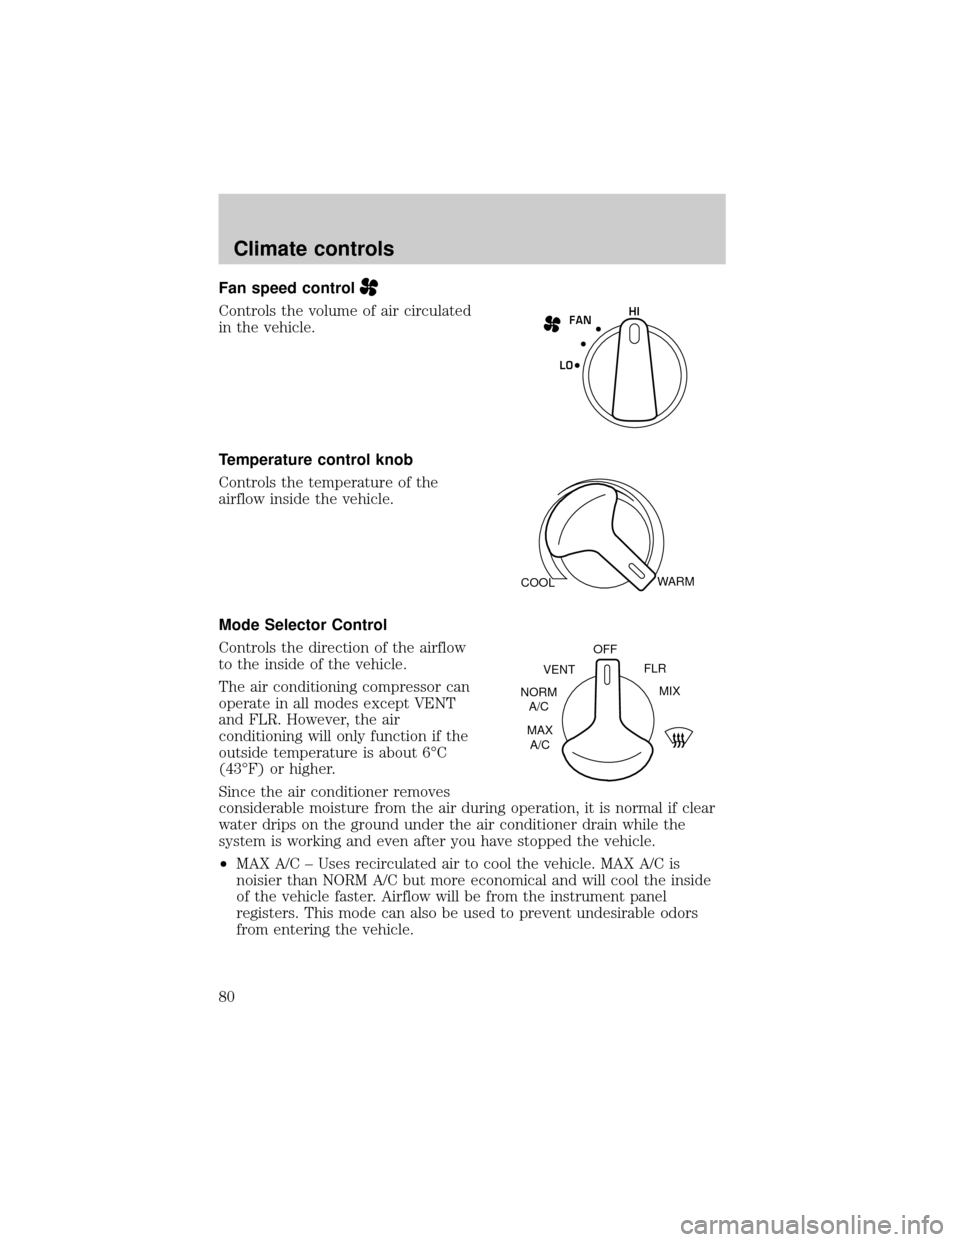
Fan speed control
Controls the volume of air circulated
in the vehicle.
Temperature control knob
Controls the temperature of the
airflow inside the vehicle.
Mode Selector Control
Controls the direction of the airflow
to the inside of the vehicle.
The air conditioning compressor can
operate in all modes except VENT
and FLR. However, the air
conditioning will only function if the
outside temperature is about 6ÉC
(43ÉF) or higher.
Since the air conditioner removes
considerable moisture from the air during operation, it is normal if clear
water drips on the ground under the air conditioner drain while the
system is working and even after you have stopped the vehicle.
²MAX A/C ± Uses recirculated air to cool the vehicle. MAX A/C is
noisier than NORM A/C but more economical and will cool the inside
of the vehicle faster. Airflow will be from the instrument panel
registers. This mode can also be used to prevent undesirable odors
from entering the vehicle.FAN
LOHI
COOLWARM
MAX
A/C NORM
A/CVENTOFF
FLR
MIX
Climate controls
80
Page 81 of 272
²NORM A/C ± Uses outside air to cool the vehicle. It is quieter than
MAX A/C but not as economical. Airflow will be from the instrument
panel registers.
²VENT ± Distributes outside air through the instrument panel registers.
However, the air will not be cooled below the outside temperature
because the air conditioning does not operate in this mode.
²OFF ± Outside air is shut out and the fan will not operate. For short
periods of time only, use this mode to prevent undesirable odors from
entering the vehicle.
²FLR ± Allows for maximum heating by distributing outside air through
the floor ducts. However, the air will not be cooled below the outside
temperature because the air conditioning does not operate in this
mode.
²MIX ± Distributes outside air through the windshield defroster ducts
and the floor ducts. Heating and air conditioning capabilities are
provided in this mode. For added customer comfort, when the
temperature control knob is anywhere in between the full hot and full
cold positions, the air distributed through the floor ducts will be
slightly warmer than the air sent to the windshield defroster ducts. If
the temperature is about 6ÉC (43ÉF) or higher, the air conditioner will
automatically dehumidify the air to reduce fogging.
²
(Defrost) ± Distributes outside air through the windshield
defroster ducts. It can be used to clear ice or fog from the windshield.
If the temperature is about 6ÉC (43ÉF) or higher, the air conditioner
will automatically dehumidify the air to reduce fogging.
Operating tips
²In humid weather conditions, place the climate control system in
Defrost mode before driving. This will reduce fogging on your
windshield. Once the windshield has been cleared, operate the climate
control system as desired.
²To reduce humidity buildup inside the vehicle in cold weather
conditions, don't drive with the climate control system in the OFF or
MAX A/C position.
²To reduce humidity buildup inside the vehicle in warm weather
conditions, don't drive with the climate control system in the OFF
position.
Climate controls
81
Page 102 of 272
OVERDRIVE CONTROL
Activating overdrive
(Overdrive) is the normal drive position for the best fuel economy.
The overdrive function allows automatic upshifts and downshifts through
all available gears.
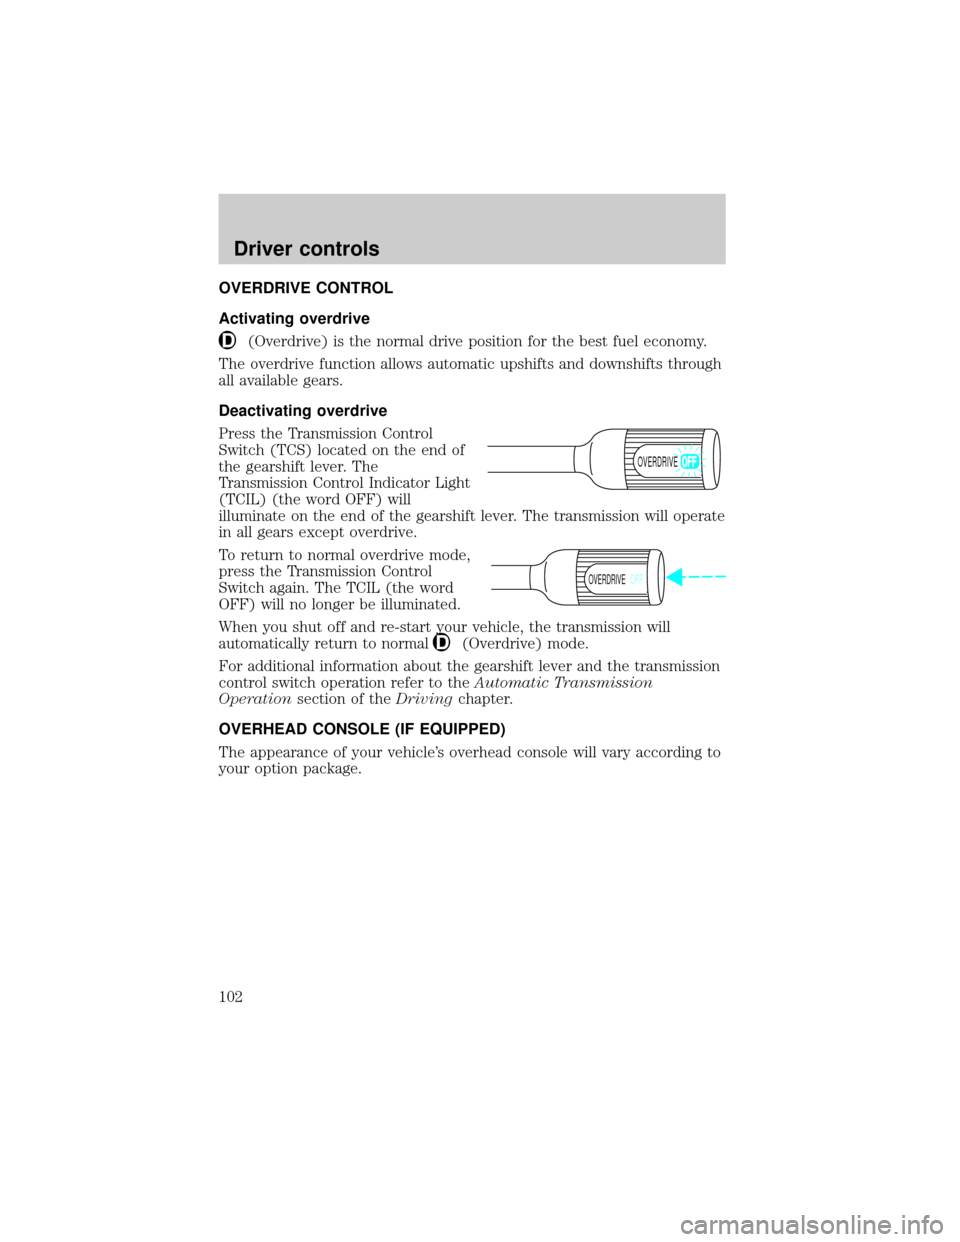
Deactivating overdrive
Press the Transmission Control
Switch (TCS) located on the end of
the gearshift lever. The
Transmission Control Indicator Light
(TCIL) (the word OFF) will
illuminate on the end of the gearshift lever. The transmission will operate
in all gears except overdrive.
To return to normal overdrive mode,
press the Transmission Control
Switch again. The TCIL (the word
OFF) will no longer be illuminated.
When you shut off and re-start your vehicle, the transmission will
automatically return to normal
(Overdrive) mode.
For additional information about the gearshift lever and the transmission
control switch operation refer to theAutomatic Transmission
Operationsection of theDrivingchapter.
OVERHEAD CONSOLE (IF EQUIPPED)
The appearance of your vehicle's overhead console will vary according to
your option package.
OVERDRIVE
OVERDRIVEOFF
Driver controls
102
Page 124 of 272
How to disengage the automatic locking mode
Ford recommends that all safety belt assemblies and attaching
hardware should be inspected by a qualified technician after any
collision. Safety belt assemblies not in use during a collision should also
be inspected and replaced if either damage or improper operation is
noted.
Disconnect the combination lap/shoulder belt and allow it to retract
completely to disengage the automatic locking mode and activate the
vehicle sensitive (emergency) locking mode.
After any vehicle collision, the front passenger and rear outboard
seat belt systems must be checked by a qualified technician to
verify that the ªautomatic locking retractorº feature for child seats is
still functioning properly. In addition, all seat belts should be checked
for proper function.
BELT AND RETRACTOR ASSEMBLY MUST BE REPLACED if
the seat belt assembly ªautomatic locking retractorº feature or
any other seat belt function is not operating properly when checked
according to the procedures in Workshop Manual.
Failure to replace the Belt and Retractor assembly could
increase the risk of injury in collisions.
Safety belt pretensioner
Your vehicle is equipped with safety belt pretensioners at the driver and
front passenger seating positions.
The safety belt pretensioner is a device which removes excess webbing
from the safety belt system. The safety belt pretensioner uses the same
crash sensor system as the front air bag supplemental restraint system
(SRS). When the safety belt pretensioner deploys, webbing from the lap
and shoulder belt is tightened. The driver and front passenger seat belt
system (including retractors, buckles and height adjusters) must be
replaced if the vehicle is involved in a collision that results in
deployment of front air bags and safety belt pretensioners. Refer to the
Safety belt maintenancesection in this chapter.
Seating and safety restraints
124
Page 140 of 272
²Put the safety belt in the automatic locking mode. Refer toAutomatic
locking mode(passenger side front and outboard rear seating
positions) (if equipped).
Ford recommends the use of a child safety seat having a top tether
strap. Install the child safety seat in a seating position which is capable
of providing a tether anchorage. For more information on top tether
straps, refer toAttaching safety seats with tether straps.
Carefully follow all of the manufacturer's instructions included
with the safety seat you put in your vehicle. If you do not install
and use the safety seat properly, the child may be injured in a sudden
stop or collision.
Installing child safety seats in combination lap and shoulder belt
seating positions
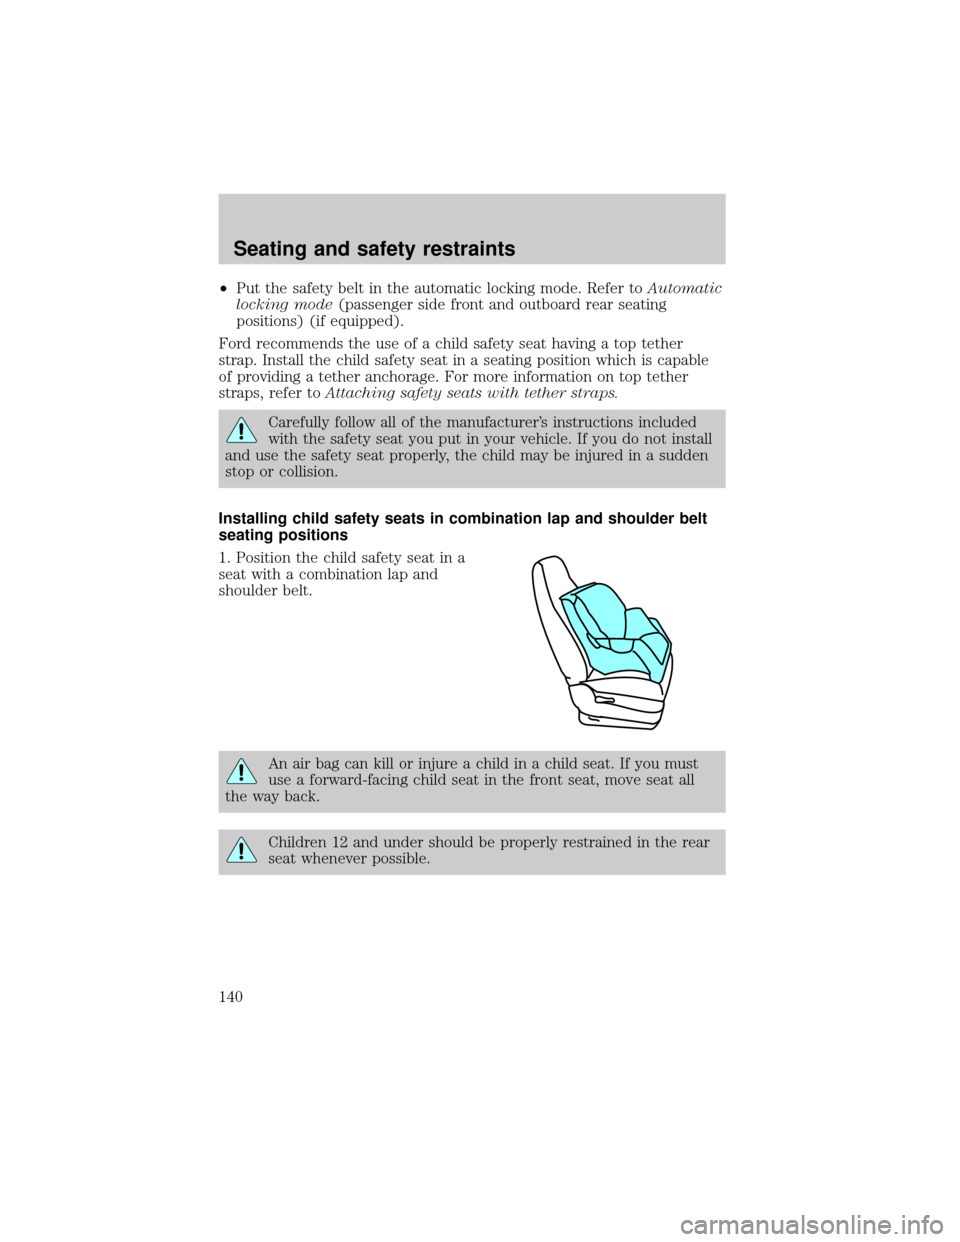
1. Position the child safety seat in a
seat with a combination lap and
shoulder belt.
An air bag can kill or injure a child in a child seat. If you must
use a forward-facing child seat in the front seat, move seat all
the way back.
Children 12 and under should be properly restrained in the rear
seat whenever possible.
Seating and safety restraints
140
Page 159 of 272
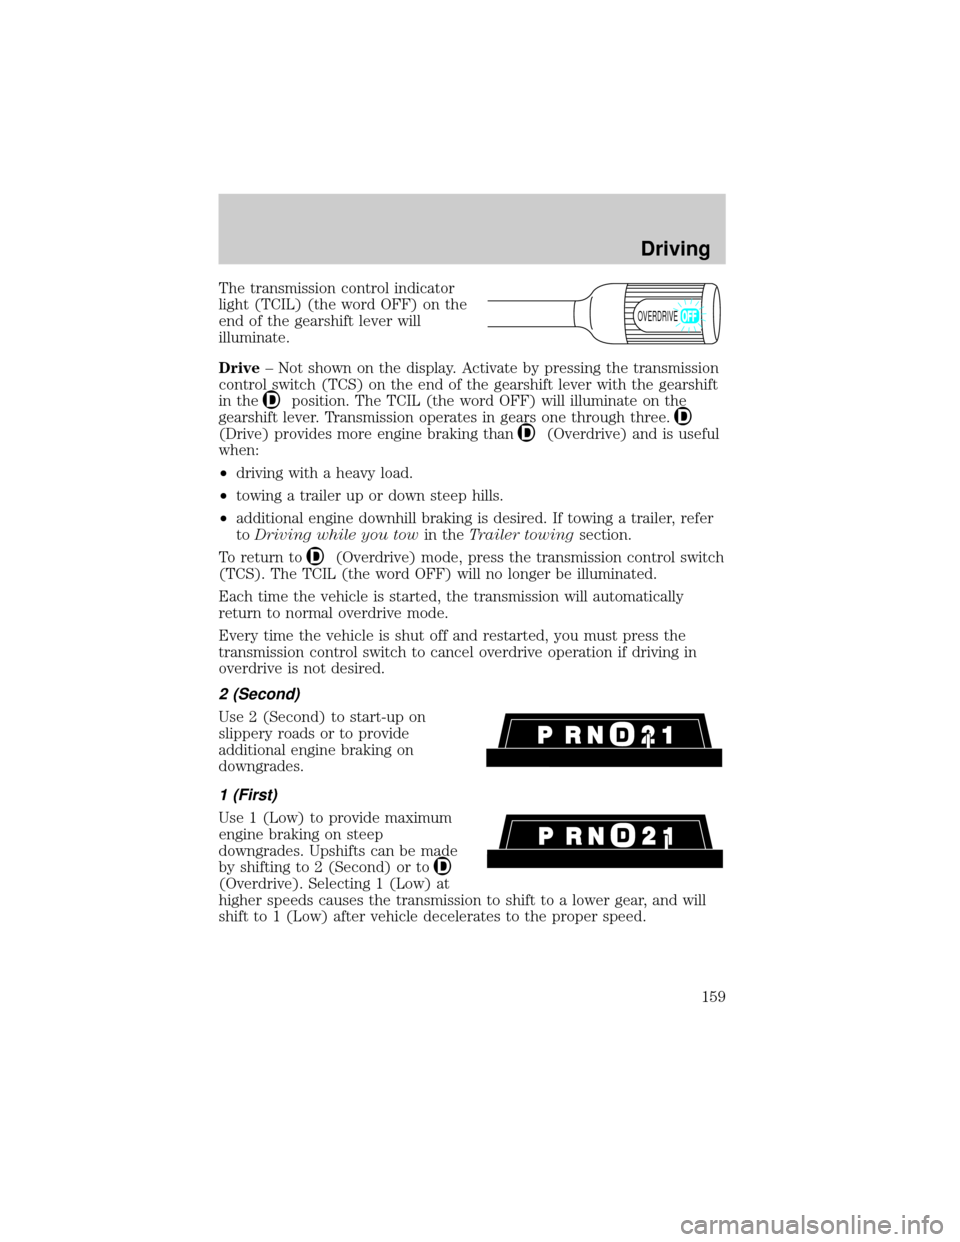
The transmission control indicator
light (TCIL) (the word OFF) on the
end of the gearshift lever will
illuminate.
Drive± Not shown on the display. Activate by pressing the transmission
control switch (TCS) on the end of the gearshift lever with the gearshift
in the
position. The TCIL (the word OFF) will illuminate on the
gearshift lever. Transmission operates in gears one through three.
(Drive) provides more engine braking than(Overdrive) and is useful
when:
²driving with a heavy load.
²towing a trailer up or down steep hills.
²additional engine downhill braking is desired. If towing a trailer, refer
toDriving while you towin theTrailer towingsection.
To return to
(Overdrive) mode, press the transmission control switch
(TCS). The TCIL (the word OFF) will no longer be illuminated.
Each time the vehicle is started, the transmission will automatically
return to normal overdrive mode.
Every time the vehicle is shut off and restarted, you must press the
transmission control switch to cancel overdrive operation if driving in
overdrive is not desired.
2 (Second)
Use 2 (Second) to start-up on
slippery roads or to provide
additional engine braking on
downgrades.
1 (First)
Use 1 (Low) to provide maximum
engine braking on steep
downgrades. Upshifts can be made
by shifting to 2 (Second) or to
(Overdrive). Selecting 1 (Low) at
higher speeds causes the transmission to shift to a lower gear, and will
shift to 1 (Low) after vehicle decelerates to the proper speed.
OVERDRIVE
Driving
159
Page 170 of 272

Using a step bumper (if equipped)
The rear bumper is equipped with an integral hitch and only requires a
ball with a 25.4 mm (one inch) shank diameter. The bumper has a
2 270 kg (5 000 lb.) trailer weight and 227 kg (500 lb.) tongue weight
capacity.
If it is necessary to relocate the trailer hitch ball position, a
frame-mounted trailer hitch must be installed.
Driving while you tow
When towing a trailer:
²Ensure that you turn off your speed control. The speed control may
shut off automatically when you are towing on long, steep grades.
²Consult your local motor vehicle speed regulations for towing a trailer.
²Use D (Drive) or a lower gear when towing up or down steep hills.
This will eliminate excessive downshifting and upshifting for optimum
fuel economy and transmission cooling.
²Anticipate stops and brake gradually.
When descending long, steep downhill grades, always use a lower gear to
provide engine braking to save wear on brakes. Use Drive (Overdrive
OFF) on moderately steep hills, Second (2) on steep hills, and First (1)
on very steep hills.
Servicing after towing
If you tow a trailer for long distances, your vehicle will require more
frequent service intervals. Refer to your scheduled maintenance guide for
more information.
Trailer towing tips
²Practice turning, stopping and backing up before starting on a trip to
get the feel of the vehicle trailer combination. When turning, make
wider turns so the trailer wheels will clear curbs and other obstacles.
²Allow more distance for stopping with a trailer attached.
²The trailer tongue weight should be 10±15% of the loaded trailer
weight.
Driving
170
Page 190 of 272
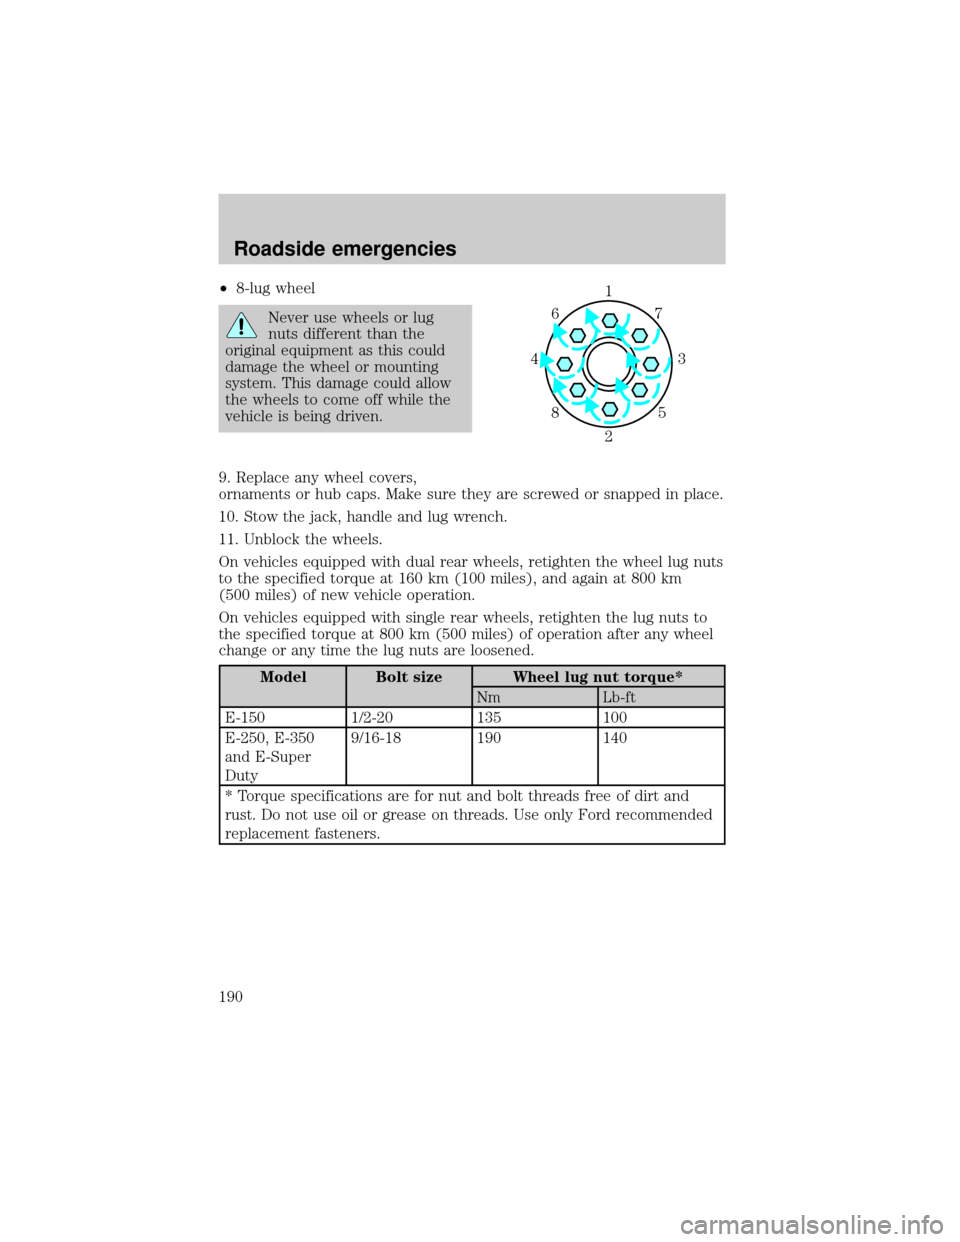
²8-lug wheel
Never use wheels or lug
nuts different than the
original equipment as this could
damage the wheel or mounting
system. This damage could allow
the wheels to come off while the
vehicle is being driven.
9. Replace any wheel covers,
ornaments or hub caps. Make sure they are screwed or snapped in place.
10. Stow the jack, handle and lug wrench.
11. Unblock the wheels.
On vehicles equipped with dual rear wheels, retighten the wheel lug nuts
to the specified torque at 160 km (100 miles), and again at 800 km
(500 miles) of new vehicle operation.
On vehicles equipped with single rear wheels, retighten the lug nuts to
the specified torque at 800 km (500 miles) of operation after any wheel
change or any time the lug nuts are loosened.
Model Bolt size Wheel lug nut torque*
Nm Lb-ft
E-150 1/2-20 135 100
E-250, E-350
and E-Super
Duty9/16-18 190 140
* Torque specifications are for nut and bolt threads free of dirt and
rust. Do not use oil or grease on threads. Use only Ford recommended
replacement fasteners.
1
3 4
27 6
5 8
Roadside emergencies
190
Page 201 of 272

Board membership
The Board consists of:
²three consumer representatives
²a Ford or Lincoln Mercury dealership representative
Consumer candidates for Board membership are recruited and trained by
an independent consulting firm. The dealership Board member is chosen
from Ford and Lincoln Mercury dealership management, recognized for
their business leadership qualities.
What the Board needs
To have your case reviewed you must complete the application in the
DSB brochure and mail it to the address provided on the application
form. Some states will require you to use certified mail, with return
receipt requested.
Your application is reviewed and, if it is determined to be eligible, you
will receive an acknowledgment indicating:
²The file number assigned to your application.
²The toll-free phone number of the DSB's independent administrator.
Your dealership and a Ford Motor Company representative will then be
asked to submit statements.
To properly review your case, the Board needs the following information:
²Legible copies of all documents and maintenance or repair orders
relevant to the case.
²The year, make, model, and Vehicle Identification Number (VIN) listed
on your vehicle ownership license.
²The date of repair(s) and mileage at the time of occurrence(s).
²The current mileage.
²The name of the dealer(s) who sold or serviced the vehicle.
²A brief description of your unresolved concern.
²A brief summary of the action taken by the dealer(s) and Ford Motor
Company.
²The names (if known) of all the people you contacted at the
dealership(s).
²A description of the action you expect to resolve your concern.
Customer assistance
201