FORD E SERIES 2004 4.G Manual PDF
Manufacturer: FORD, Model Year: 2004, Model line: E SERIES, Model: FORD E SERIES 2004 4.GPages: 240, PDF Size: 3.62 MB
Page 71 of 240
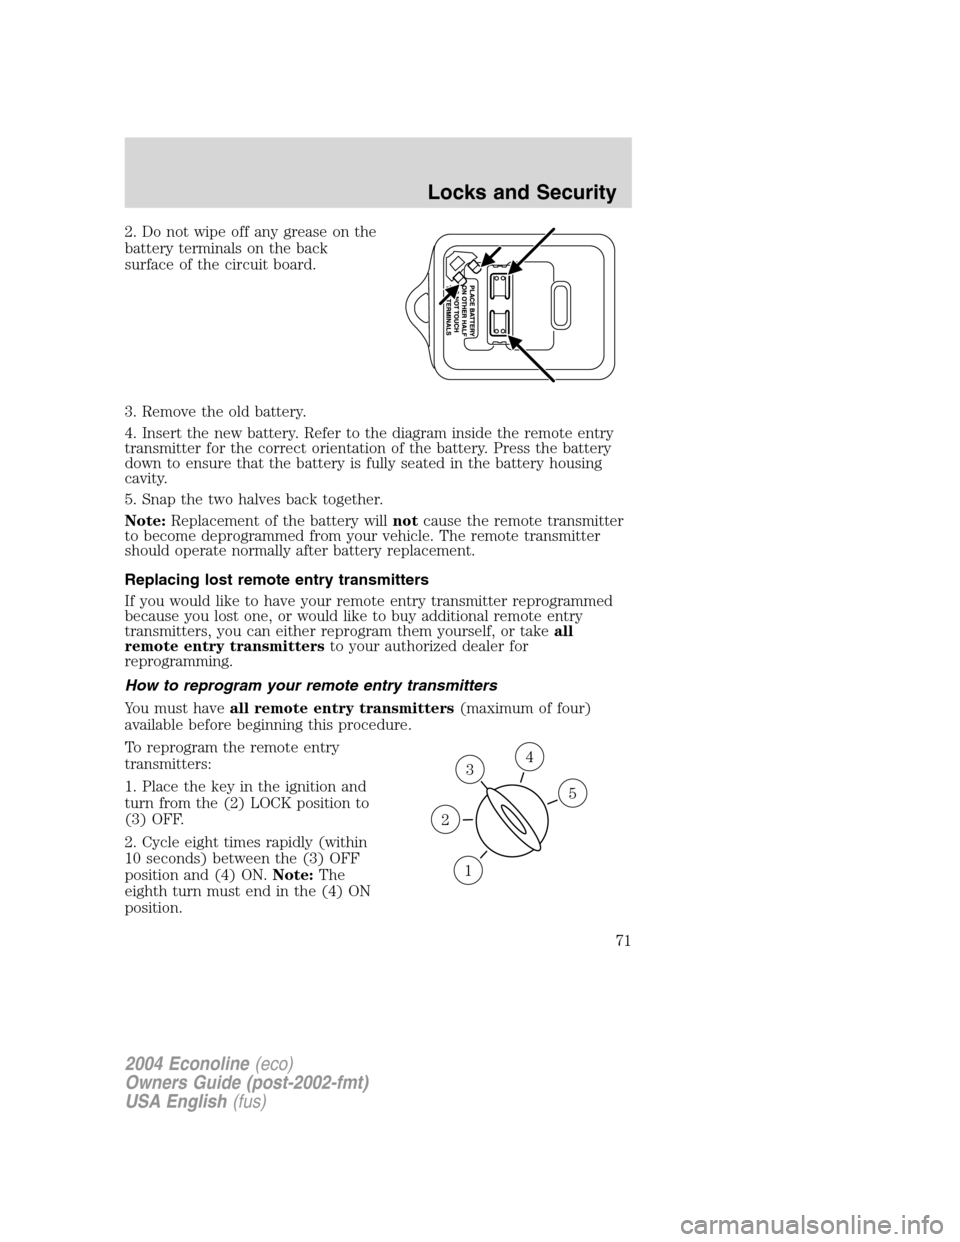
2. Do not wipe off any grease on the
battery terminals on the back
surface of the circuit board.
3. Remove the old battery.
4. Insert the new battery. Refer to the diagram inside the remote entry
transmitter for the correct orientation of the battery. Press the battery
down to ensure that the battery is fully seated in the battery housing
cavity.
5. Snap the two halves back together.
Note:Replacement of the battery willnotcause the remote transmitter
to become deprogrammed from your vehicle. The remote transmitter
should operate normally after battery replacement.
Replacing lost remote entry transmitters
If you would like to have your remote entry transmitter reprogrammed
because you lost one, or would like to buy additional remote entry
transmitters, you can either reprogram them yourself, or takeall
remote entry transmittersto your authorized dealer for
reprogramming.
How to reprogram your remote entry transmitters
You must haveall remote entry transmitters(maximum of four)
available before beginning this procedure.
To reprogram the remote entry
transmitters:
1. Place the key in the ignition and
turn from the (2) LOCK position to
(3) OFF.
2. Cycle eight times rapidly (within
10 seconds) between the (3) OFF
position and (4) ON.Note:The
eighth turn must end in the (4) ON
position.
3
1
2
5
4
2004 Econoline(eco)
Owners Guide (post-2002-fmt)
USA English(fus)
Locks and Security
71
Page 72 of 240
3. The doors will lock, then unlock, to confirm that the programming
mode has been activated.
4. Within 20 seconds press any button on the remote entry transmitter.
Note:If more than 20 seconds have passed you will need to start the
procedure over again.
5. The doors will lock, then unlock, to confirm that this remote entry
transmitter has been programmed.
6. Repeat Steps 4 and 5 to program each additional remote entry
transmitter (up to four transmitters).
7. Turn the ignition to the (3) OFF position after you have finished
programming all of the remote entry transmitters.
8. The doors will lock, then unlock, to confirm that the programming
mode has been exited.
Illuminated entry
The interior lamps illuminate when the remote entry system is used to
unlock the door(s) or sound the personal alarm.
The illuminated entry system will turn off the interior lights if:
•the ignition switch is turned to the ON or ACC position, or
•the remote transmitter lock control is pressed, or
•after 25 seconds of illumination.
The dome lamp control (if equipped) mustnotbe set to the OFF
position for the illuminated entry system to operate.
The inside lights will not turn off if:
•they have been turned on with the dimmer control, or
•any door is open.
2004 Econoline(eco)
Owners Guide (post-2002-fmt)
USA English(fus)
Locks and Security
72
Page 73 of 240
SEATING
Notes:
Reclining the seatback can cause an occupant to slide under the
seat’s safety belt, resulting in severe personal injuries in the
event of a collision.
Do not pile cargo higher than the seatbacks to reduce the risk of
injury in a collision or sudden stop.
Adjusting the front manual seat (if equipped)
Never adjust the driver’s seat or seatback when the vehicle is
moving.
Always drive and ride with your seatback upright and the lap
belt snug and low across the hips.
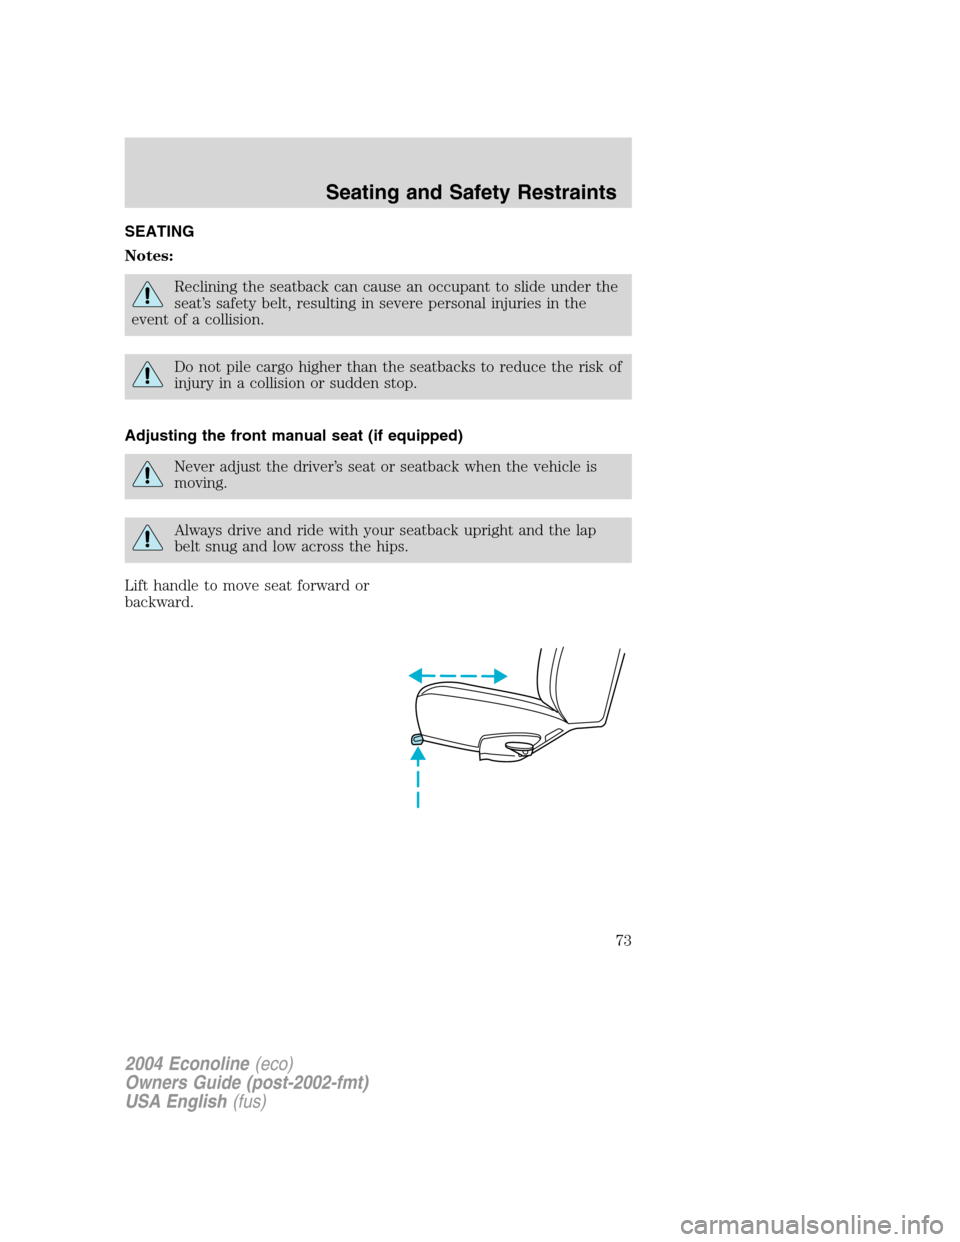
Lift handle to move seat forward or
backward.
2004 Econoline(eco)
Owners Guide (post-2002-fmt)
USA English(fus)
Seating and Safety Restraints
73
Page 74 of 240
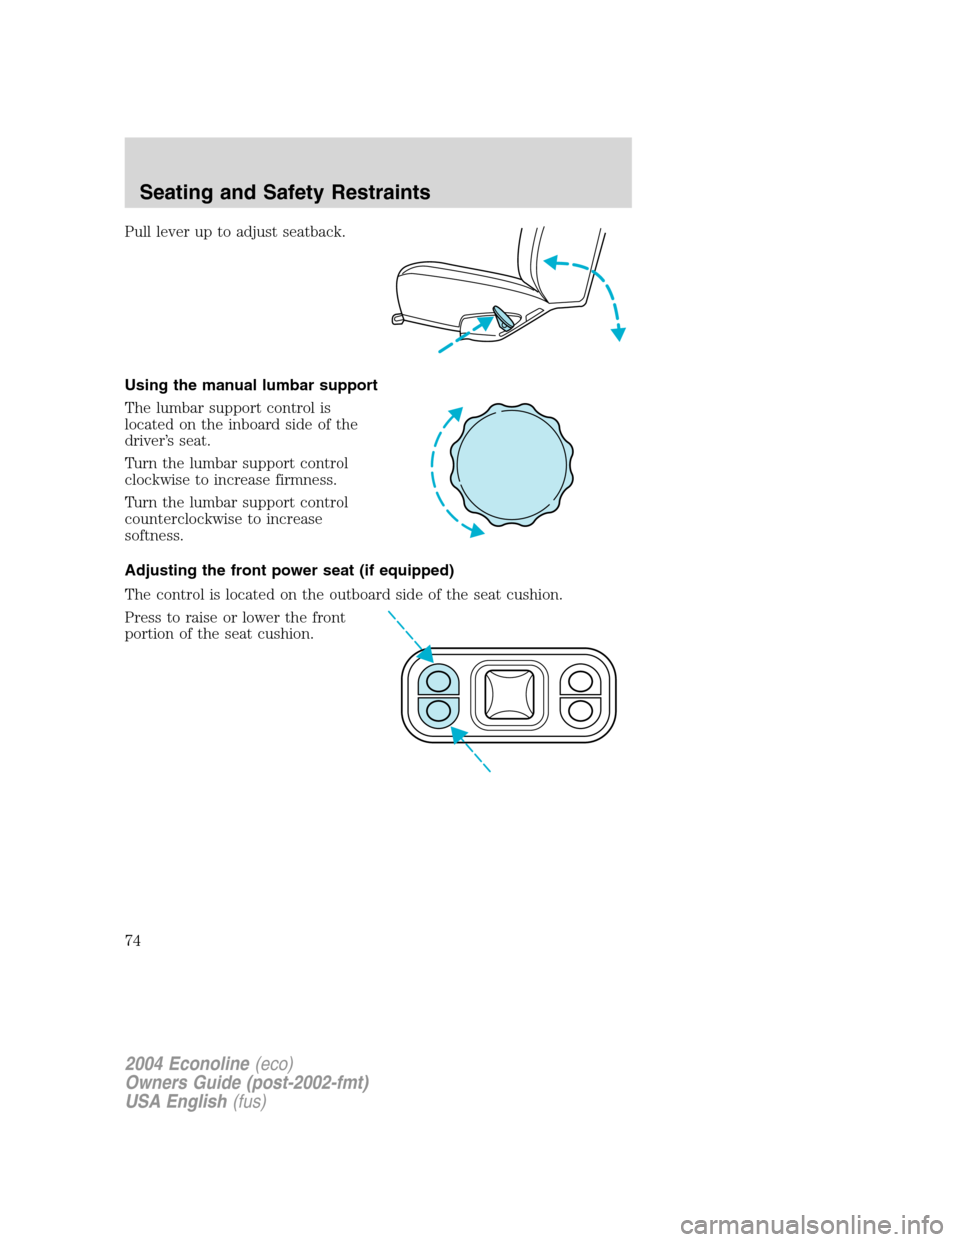
Pull lever up to adjust seatback.
Using the manual lumbar support
The lumbar support control is
located on the inboard side of the
driver’s seat.
Turn the lumbar support control
clockwise to increase firmness.
Turn the lumbar support control
counterclockwise to increase
softness.
Adjusting the front power seat (if equipped)
The control is located on the outboard side of the seat cushion.
Press to raise or lower the front
portion of the seat cushion.
2004 Econoline(eco)
Owners Guide (post-2002-fmt)
USA English(fus)
Seating and Safety Restraints
74
Page 75 of 240
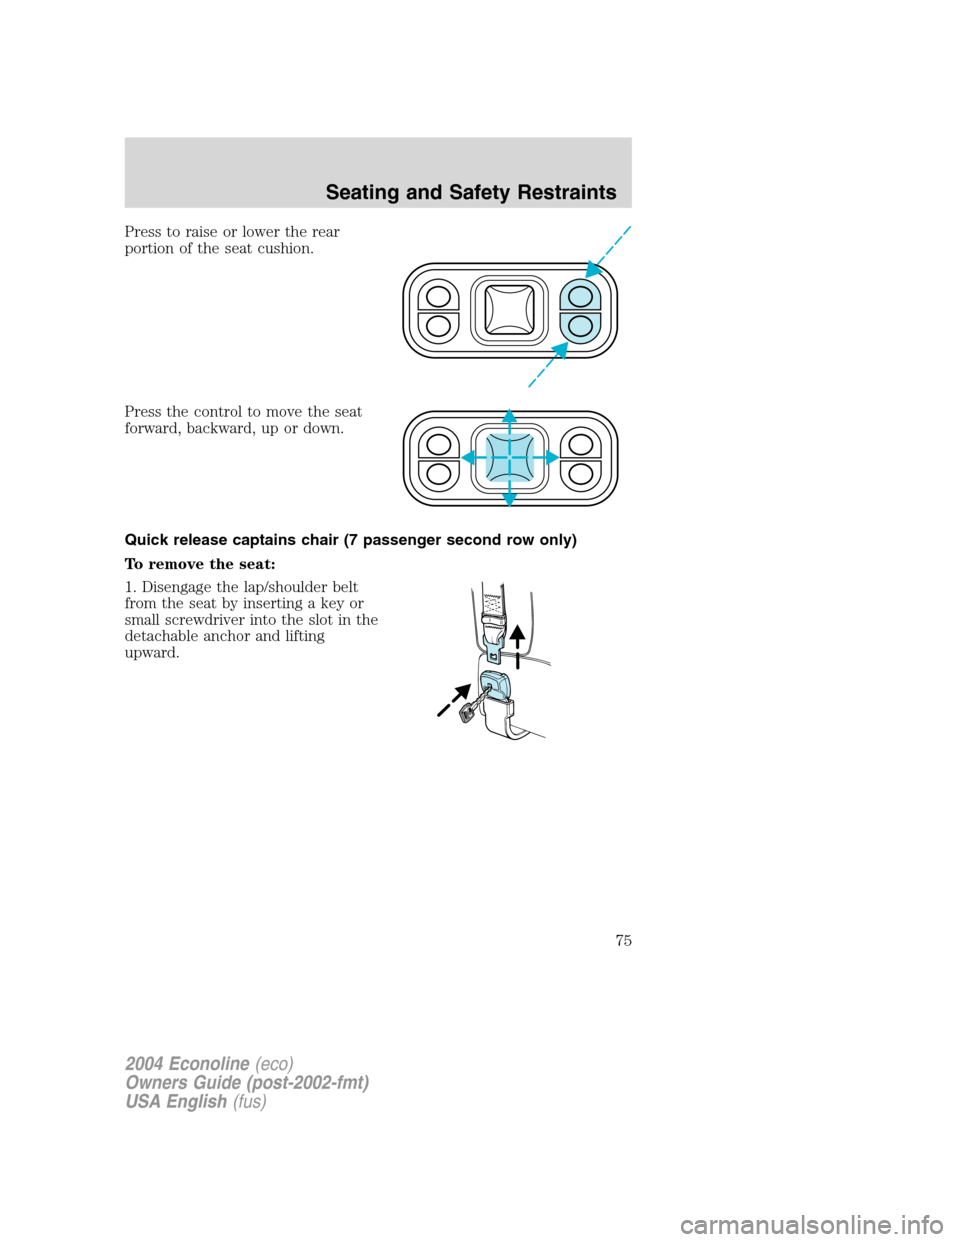
Press to raise or lower the rear
portion of the seat cushion.
Press the control to move the seat
forward, backward, up or down.
Quick release captains chair (7 passenger second row only)
To remove the seat:
1. Disengage the lap/shoulder belt
from the seat by inserting a key or
small screwdriver into the slot in the
detachable anchor and lifting
upward.
2004 Econoline(eco)
Owners Guide (post-2002-fmt)
USA English(fus)
Seating and Safety Restraints
75
Page 76 of 240
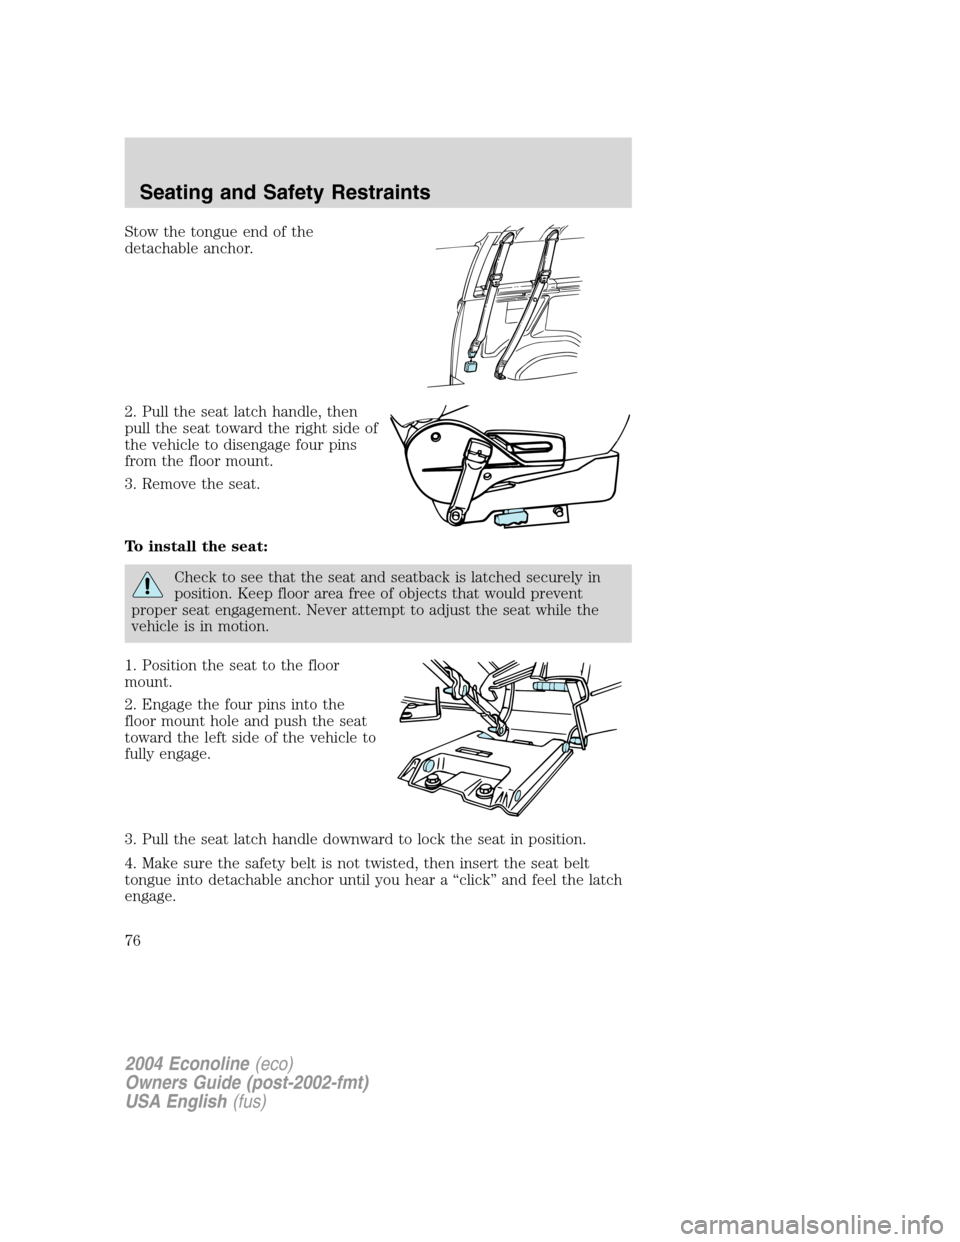
Stow the tongue end of the
detachable anchor.
2. Pull the seat latch handle, then
pull the seat toward the right side of
the vehicle to disengage four pins
from the floor mount.
3. Remove the seat.
To install the seat:
Check to see that the seat and seatback is latched securely in
position. Keep floor area free of objects that would prevent
proper seat engagement. Never attempt to adjust the seat while the
vehicle is in motion.
1. Position the seat to the floor
mount.
2. Engage the four pins into the
floor mount hole and push the seat
toward the left side of the vehicle to
fully engage.
3. Pull the seat latch handle downward to lock the seat in position.
4. Make sure the safety belt is not twisted, then insert the seat belt
tongue into detachable anchor until you hear a“click”and feel the latch
engage.
2004 Econoline(eco)
Owners Guide (post-2002-fmt)
USA English(fus)
Seating and Safety Restraints
76
Page 77 of 240
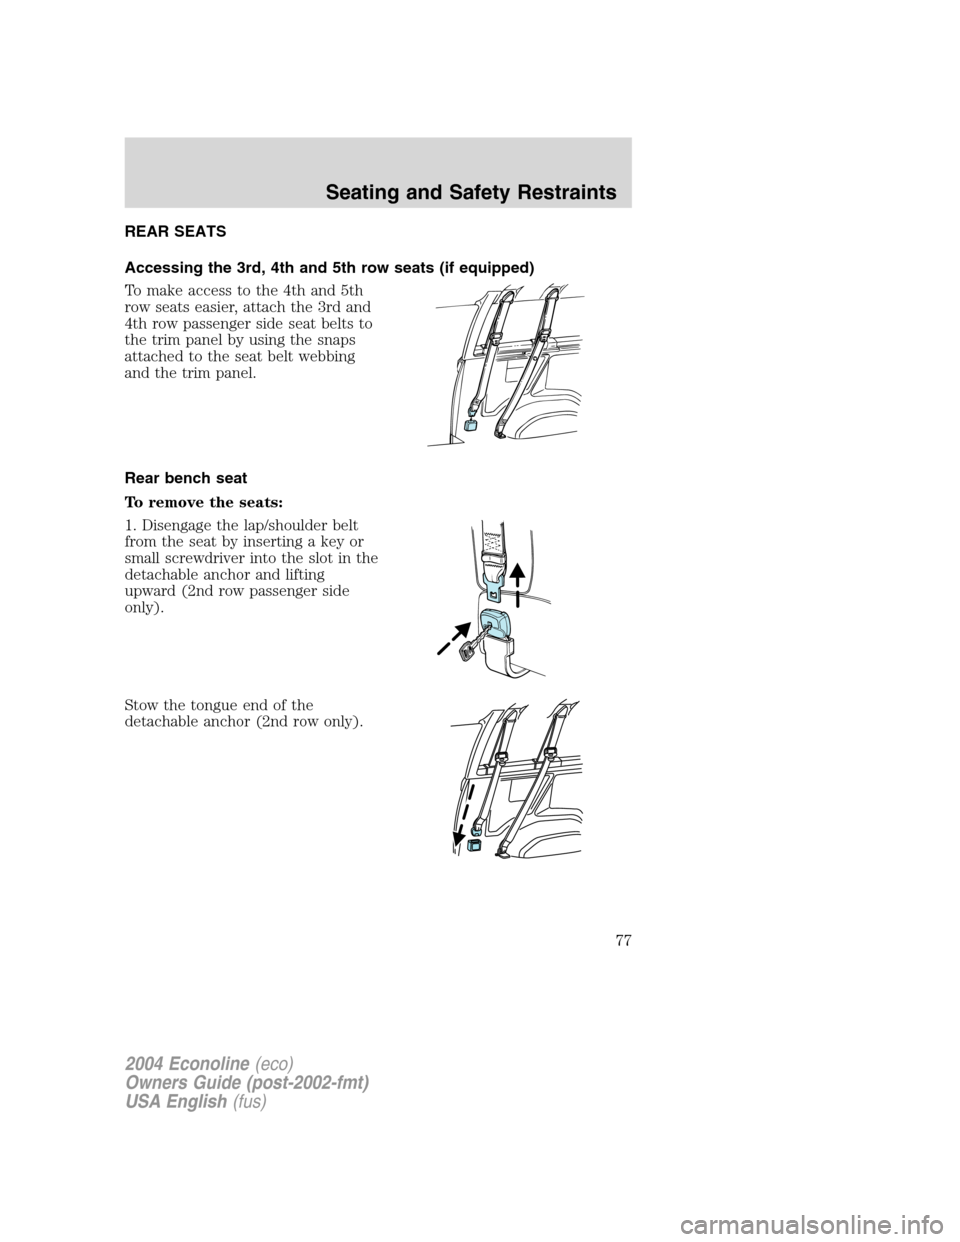
REAR SEATS
Accessing the 3rd, 4th and 5th row seats (if equipped)
To make access to the 4th and 5th
row seats easier, attach the 3rd and
4th row passenger side seat belts to
the trim panel by using the snaps
attached to the seat belt webbing
and the trim panel.
Rear bench seat
To remove the seats:
1. Disengage the lap/shoulder belt
from the seat by inserting a key or
small screwdriver into the slot in the
detachable anchor and lifting
upward (2nd row passenger side
only).
Stow the tongue end of the
detachable anchor (2nd row only).
2004 Econoline(eco)
Owners Guide (post-2002-fmt)
USA English(fus)
Seating and Safety Restraints
77
Page 78 of 240
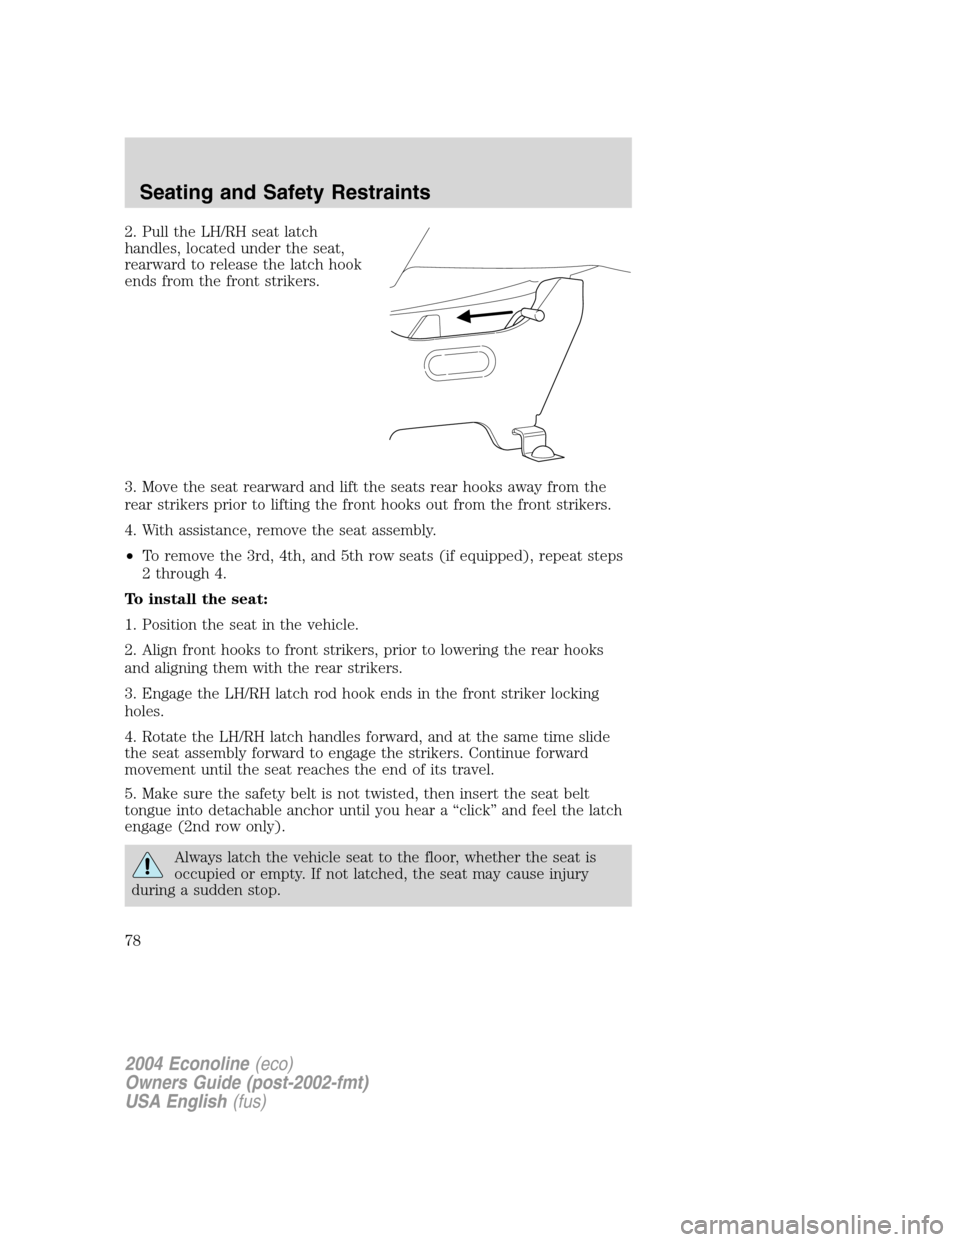
2. Pull the LH/RH seat latch
handles, located under the seat,
rearward to release the latch hook
ends from the front strikers.
3. Move the seat rearward and lift the seats rear hooks away from the
rear strikers prior to lifting the front hooks out from the front strikers.
4. With assistance, remove the seat assembly.
•To remove the 3rd, 4th, and 5th row seats (if equipped), repeat steps
2 through 4.
To install the seat:
1. Position the seat in the vehicle.
2. Align front hooks to front strikers, prior to lowering the rear hooks
and aligning them with the rear strikers.
3. Engage the LH/RH latch rod hook ends in the front striker locking
holes.
4. Rotate the LH/RH latch handles forward, and at the same time slide
the seat assembly forward to engage the strikers. Continue forward
movement until the seat reaches the end of its travel.
5. Make sure the safety belt is not twisted, then insert the seat belt
tongue into detachable anchor until you hear a“click”and feel the latch
engage (2nd row only).
Always latch the vehicle seat to the floor, whether the seat is
occupied or empty. If not latched, the seat may cause injury
during a sudden stop.
2004 Econoline(eco)
Owners Guide (post-2002-fmt)
USA English(fus)
Seating and Safety Restraints
78
Page 79 of 240
SAFETY RESTRAINTS
Safety restraints precautions
Always drive and ride with your seatback upright and the lap
belt snug and low across the hips.
To reduce the risk of injury, make sure children sit where they
can be properly restrained.
Never let a passenger hold a child on his or her lap while the
vehicle is moving. The passenger cannot protect the child from
injury in a collision.
All occupants of the vehicle, including the driver, should always
properly wear their safety belts, even when an air bag (SRS) is
provided.
It is extremely dangerous to ride in a cargo area, inside or
outside of a vehicle. In a collision, people riding in these areas
are more likely to be seriously injured or killed. Do not allow people to
ride in any area of your vehicle that is not equipped with seats and
safety belts. Be sure everyone in your vehicle is in a seat and using a
safety belt properly.
In a rollover crash, an unbelted person is significantly more likely
to die than a person wearing a safety belt.
Each seating position in your vehicle has a specific safety belt
assembly which is made up of one buckle and one tongue that
are designed to be used as a pair. 1) Use the shoulder belt on the
outside shoulder only. Never wear the shoulder belt under the arm. 2)
Never swing the safety belt around your neck over the inside shoulder.
3) Never use a single belt for more than one person.
Always transport children 12 years old and under in the back
seat and always properly use appropriate child restraints.
2004 Econoline(eco)
Owners Guide (post-2002-fmt)
USA English(fus)
Seating and Safety Restraints
79
Page 80 of 240
Safety belts and seats can become hot in a vehicle that has been
closed up in sunny weather; they could burn a small child. Check
seat covers and buckles before you place a child anywhere near them.
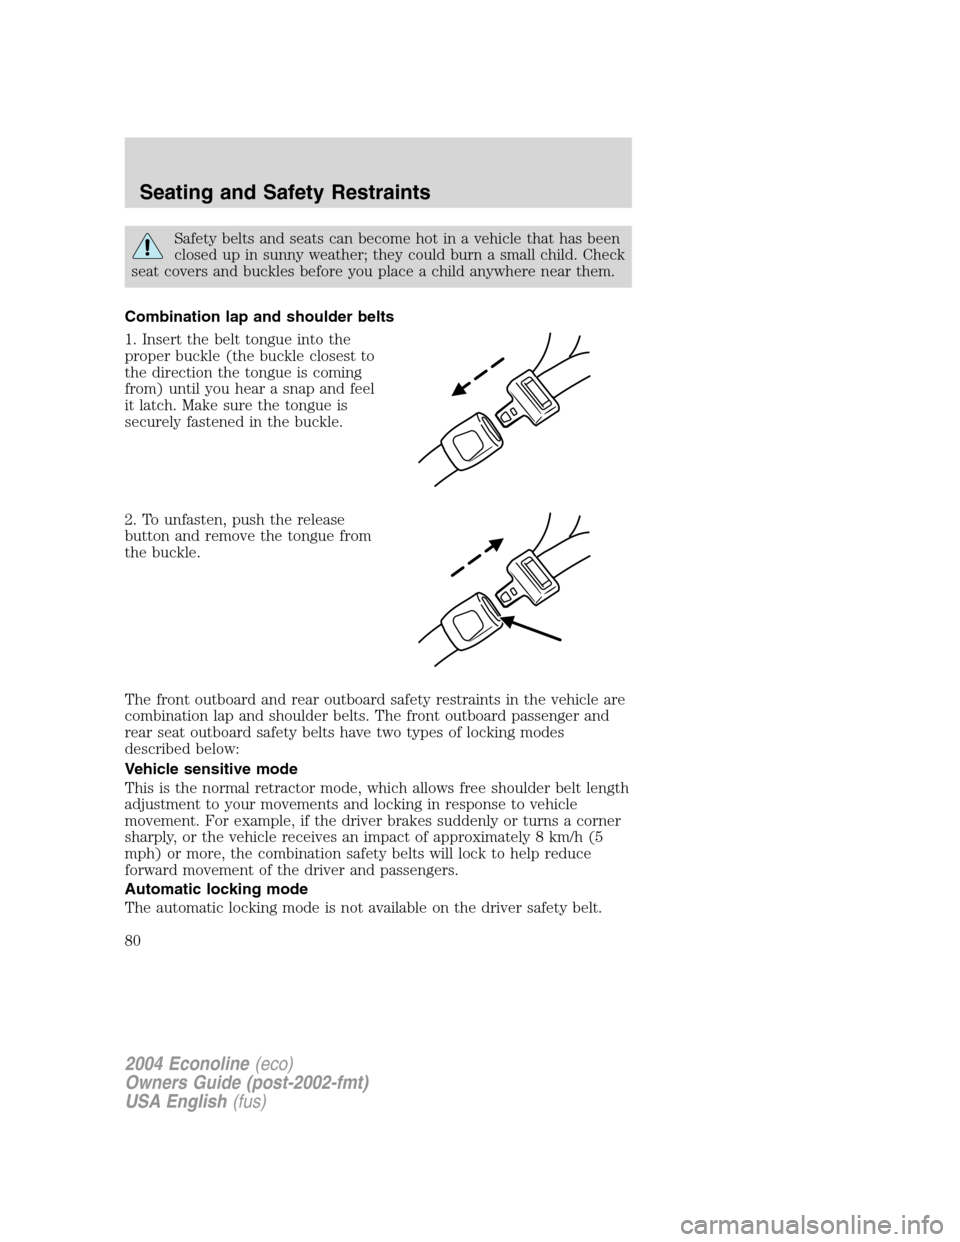
Combination lap and shoulder belts
1. Insert the belt tongue into the
proper buckle (the buckle closest to
the direction the tongue is coming
from) until you hear a snap and feel
it latch. Make sure the tongue is
securely fastened in the buckle.
2. To unfasten, push the release
button and remove the tongue from
the buckle.
The front outboard and rear outboard safety restraints in the vehicle are
combination lap and shoulder belts. The front outboard passenger and
rear seat outboard safety belts have two types of locking modes
described below:
Vehicle sensitive mode
This is the normal retractor mode, which allows free shoulder belt length
adjustment to your movements and locking in response to vehicle
movement. For example, if the driver brakes suddenly or turns a corner
sharply, or the vehicle receives an impact of approximately 8 km/h (5
mph) or more, the combination safety belts will lock to help reduce
forward movement of the driver and passengers.
Automatic locking mode
The automatic locking mode is not available on the driver safety belt.
2004 Econoline(eco)
Owners Guide (post-2002-fmt)
USA English(fus)
Seating and Safety Restraints
80