FORD E SERIES 2018 Service Manual
Manufacturer: FORD, Model Year: 2018, Model line: E SERIES, Model: FORD E SERIES 2018Pages: 323, PDF Size: 7.09 MB
Page 41 of 323
Reprogramming the RemoteControl
You must have all remote controls readilyaccessible before beginning thisprocedure. Any remote control that is notpresent during the programming procedurewill no longer operate your vehicle.
Note:You can program a maximum of fourcoded keys to your vehicle.
Note:Do not apply the brake pedal duringthis procedure.
1. Switch the ignition from off to on 8times within 10 seconds, finishing in theon position. The doors lock then unlockto confirm that programming hasstarted.
2.Press any button on the remote controlthat you want to program within 20seconds. The doors lock then unlockto confirm that programming wassuccessful.
3. Repeat step 2 to program eachadditional remote control.
4.After you have programmed all remotecontrols, switch the ignition off.
5. The doors lock then unlock to confirmthat programming is complete.
Changing the Remote ControlBattery
The remote control uses one coin-typethree-volt lithium battery CR2032 orequivalent.
Make sure that you dispose ofold batteries in anenvironmentally friendly way.Seek advice from your local authorityabout recycling old batteries.
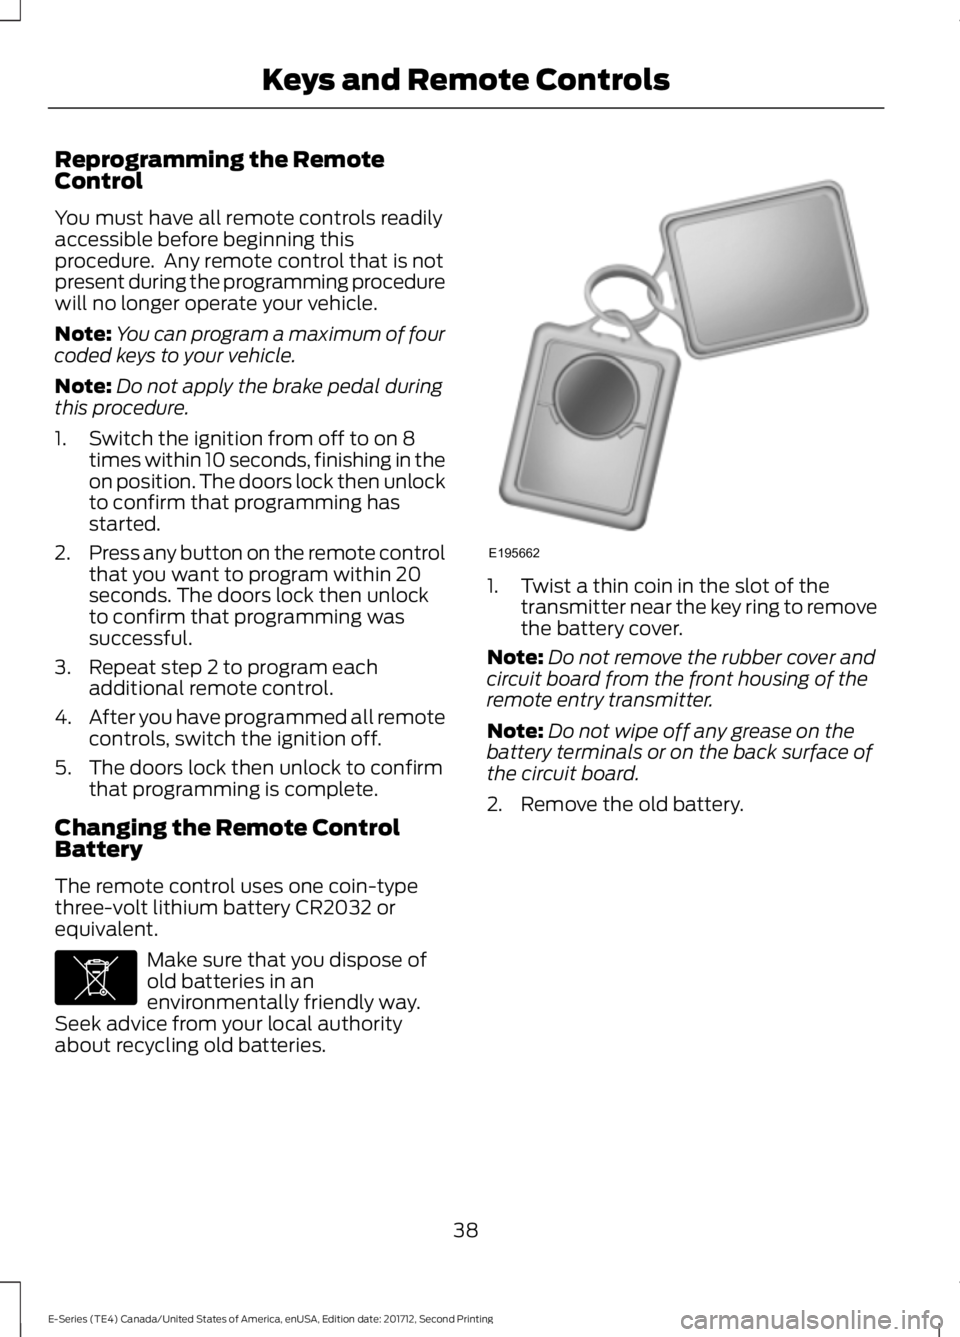
1. Twist a thin coin in the slot of thetransmitter near the key ring to removethe battery cover.
Note:Do not remove the rubber cover andcircuit board from the front housing of theremote entry transmitter.
Note:Do not wipe off any grease on thebattery terminals or on the back surface ofthe circuit board.
2. Remove the old battery.
38
E-Series (TE4) Canada/United States of America, enUSA, Edition date: 201712, Second Printing
Keys and Remote ControlsE107998 E195662
Page 42 of 323
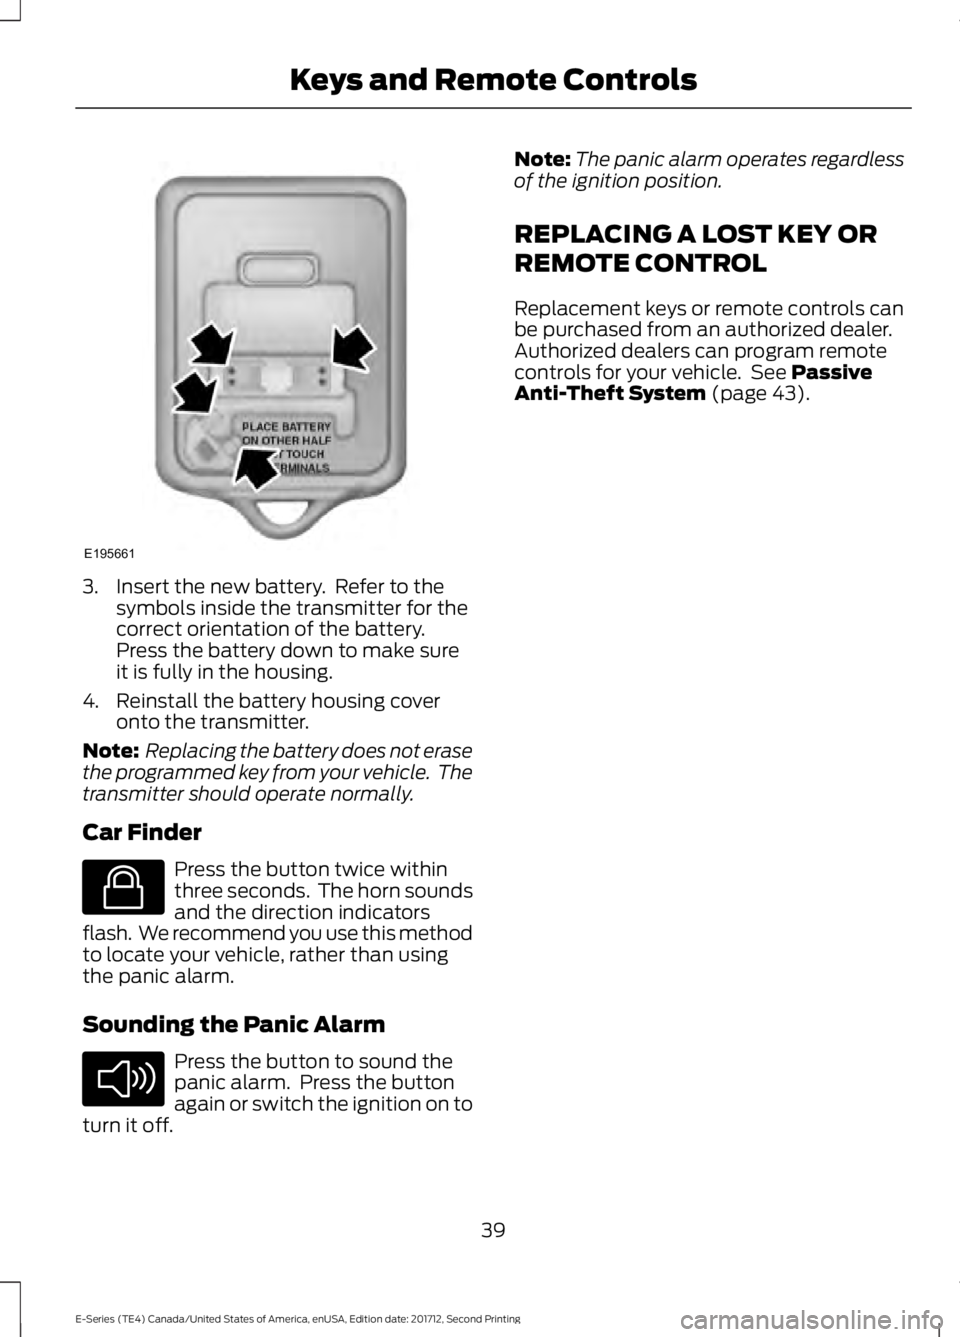
3. Insert the new battery. Refer to thesymbols inside the transmitter for thecorrect orientation of the battery.Press the battery down to make sureit is fully in the housing.
4. Reinstall the battery housing coveronto the transmitter.
Note: Replacing the battery does not erasethe programmed key from your vehicle. Thetransmitter should operate normally.
Car Finder
Press the button twice withinthree seconds. The horn soundsand the direction indicatorsflash. We recommend you use this methodto locate your vehicle, rather than usingthe panic alarm.
Sounding the Panic Alarm
Press the button to sound thepanic alarm. Press the buttonagain or switch the ignition on toturn it off.
Note:The panic alarm operates regardlessof the ignition position.
REPLACING A LOST KEY OR
REMOTE CONTROL
Replacement keys or remote controls canbe purchased from an authorized dealer.Authorized dealers can program remotecontrols for your vehicle. See PassiveAnti-Theft System (page 43).
39
E-Series (TE4) Canada/United States of America, enUSA, Edition date: 201712, Second Printing
Keys and Remote ControlsE195661 E138623 E138624
Page 43 of 323
LOCKING AND UNLOCKING
You can use the power door lock controlor the remote control to lock and unlockyour vehicle.
Power Door Locks (If Equipped)
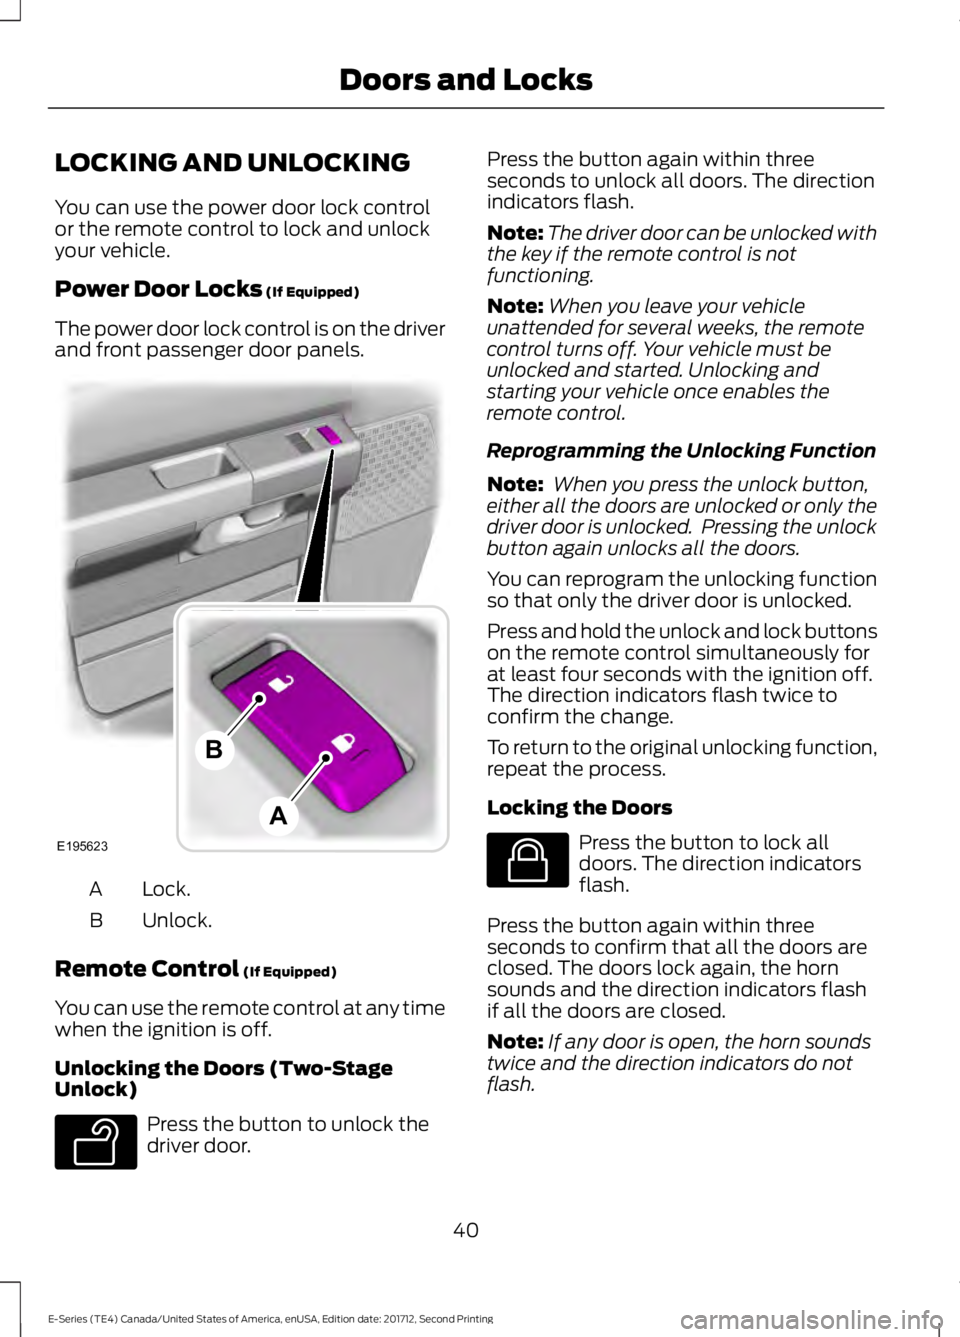
The power door lock control is on the driverand front passenger door panels.
Lock.A
Unlock.B
Remote Control (If Equipped)
You can use the remote control at any timewhen the ignition is off.
Unlocking the Doors (Two-StageUnlock)
Press the button to unlock thedriver door.
Press the button again within threeseconds to unlock all doors. The directionindicators flash.
Note:The driver door can be unlocked withthe key if the remote control is notfunctioning.
Note:When you leave your vehicleunattended for several weeks, the remotecontrol turns off. Your vehicle must beunlocked and started. Unlocking andstarting your vehicle once enables theremote control.
Reprogramming the Unlocking Function
Note: When you press the unlock button,either all the doors are unlocked or only thedriver door is unlocked. Pressing the unlockbutton again unlocks all the doors.
You can reprogram the unlocking functionso that only the driver door is unlocked.
Press and hold the unlock and lock buttonson the remote control simultaneously forat least four seconds with the ignition off.The direction indicators flash twice toconfirm the change.
To return to the original unlocking function,repeat the process.
Locking the Doors
Press the button to lock alldoors. The direction indicatorsflash.
Press the button again within threeseconds to confirm that all the doors areclosed. The doors lock again, the hornsounds and the direction indicators flashif all the doors are closed.
Note:If any door is open, the horn soundstwice and the direction indicators do notflash.
40
E-Series (TE4) Canada/United States of America, enUSA, Edition date: 201712, Second Printing
Doors and LocksE195623
A
B E138629 E138623
Page 44 of 323
Autolock Feature
The autolock feature locks all the doorswhen:
•All doors are closed.
•The ignition is on.
•You shift into any gear putting yourvehicle in motion.
•The ignition is on, all the doors areclosed and your vehicle has been inmotion at a speed greater than 12 mph(20 km/h).
Autounlock Feature
The autounlock feature unlocks all thedoors when:
•Your vehicle comes to a stop and youswitch the ignition off or to accessory.
•You open the driver door within 10minutes of switching the ignition off orto accessory.
Note:If you electronically lock your vehicleafter you switch the ignition off with thedriver door closed, the doors do notautounlock.
Enabling or Disabling Autolock andAutounlock
You can enable or disable the autolock andautounlock features independently of eachother.
To enable or disable autolock, do thefollowing:
1. Switch the ignition on.
2. Press the power door unlock controlthree times.
3. Switch the ignition off.
4. Press the power door unlock controlthree times.
5.Switch the ignition on. The horn soundsindicating your vehicle is inprogramming mode.
6. Press the power door unlock controland within five seconds, press thepower door lock control. The hornsounds once if disabled or twice ifenabled.
7.Switch the ignition off. The horn soundsindicating programming is complete.
Note:You can also switch this feature onor off using the information display. SeeInformation Displays (page 56).
To enable or disable autounlock, do thefollowing:
1. Switch the ignition on.
2. Press the power door unlock controlthree times.
3. Switch the ignition off.
4. Press the power door unlock controlthree times.
5.Switch the ignition on. The horn soundsindicating your vehicle is inprogramming mode.
6. Press the power door lock control andwithin five seconds, press the powerdoor unlock control. The horn soundsonce if disabled or twice if enabled.
7.Switch the ignition off. The horn soundsindicating programming is complete.
Note:You can also switch this feature onor off using the information display. SeeInformation Displays (page 56).
Illuminated Entry
The interior lamps and some exteriorlamps illuminate when you unlock thedoors with the remote control.
The lamps turn off if:
•The ignition is on.
•You press the remote control lockbutton.
•25 seconds have elapsed.
41
E-Series (TE4) Canada/United States of America, enUSA, Edition date: 201712, Second Printing
Doors and Locks
Page 45 of 323
The lamps do not turn off if:
•You switch them on with the lightingcontrol.
•Any door is open.
42
E-Series (TE4) Canada/United States of America, enUSA, Edition date: 201712, Second Printing
Doors and Locks
Page 46 of 323
PASSIVE ANTI-THEFT
SYSTEM (If Equipped)
Note:The system is not compatible withnon-Ford aftermarket remote start systems.Use of these systems may result in vehiclestarting problems and a loss of securityprotection.
Note:Metallic objects, electronic devicesor a second coded key on the same keychain may cause vehicle starting problemsif they are too close to the key when startingthe engine. Prevent these objects fromtouching the coded key while starting theengine. Switch the ignition off, move allobjects on the key chain away from thecoded key and restart the engine if aproblem occurs.
Note:Do not leave a duplicate coded keyin the vehicle. Always take your keys andlock all doors when leaving the vehicle.
SecuriLock®
The system is an engine immobilizationsystem. It is designed to help prevent theengine from being started unless acorrectly coded key for your vehicle is used.Using an incorrectly coded key mayprevent the engine from starting. Amessage may appear in the informationdisplay.
If you are unable to start the engine with acorrectly coded key, a malfunction hashappened and a message may appear inthe information display.
Automatic Arming
The engine immobilization system armsimmediately after you switch the ignitionoff.
Automatic Disarming
Switching the ignition on with a correctlycoded key disarms the engineimmobilization system.
Replacement Keys
The integrated keyhead transmitterfunctions as a programmed ignition keythat operates all the locks and starts yourvehicle, as well as a remote control.
If your keys are lost or stolen and you donot have a spare correctly coded key, youwill need to have your vehicle towed to anauthorized dealer. You need to erase thecoded keys from your vehicle and programnew coded keys.
Store an extra correctly coded key awayfrom the vehicle in a safe place to helpprevent any inconveniences. See anauthorized dealer to purchase additionalspare or replacement keys.
Note:Your vehicle comes with twointegrated keyhead transmitters.
Programming a Spare IntegratedKeyhead Transmitter
You can program your own integratedkeyhead transmitter or standardSecuriLock coded keys to your vehicle. Thisprocedure will program both the engineimmobilizer keycode and the remote entryportion of the remote control to yourvehicle
Only use integrated keyhead transmittersor standard SecuriLock keys.
You must have two previouslyprogrammed correctly coded keys and thenew unprogrammed key readily accessible.See an authorized dealer to have the sparekey programmed if two previouslyprogrammed correctly coded keys are notavailable.
Read and understand the entire procedurebefore you begin.
43
E-Series (TE4) Canada/United States of America, enUSA, Edition date: 201712, Second Printing
Security
Page 47 of 323
1.Insert the first previously programmedcorrectly coded key into the ignition.
2.Switch the ignition from off to on. Keepthe ignition on for at least threeseconds, but no more than 10 seconds.
3.Switch the ignition off and remove thefirst correctly coded key from theignition.
4. After three seconds but within 10seconds of switching the ignition off,insert the second previously correctlycoded key into the ignition.
5.Switch the ignition from off to on. Keepthe ignition on for at least threeseconds, but no more than 10 seconds.
6.Switch the ignition off and remove thesecond previously programmedcorrectly coded key from the ignition.
7. After three seconds but within 10seconds of switching the ignition offand removing the previouslyprogrammed correctly coded key,insert the new unprogrammed key intothe ignition.
8.Switch the ignition from off to on. Keepthe ignition on for at least six seconds.
9. Remove the newly programmedcorrectly coded key from the ignition.
If the key has been successfullyprogrammed it will start the engine andoperate the remote entry system (if thenew key is an integrated keyheadtransmitter).
If the key was not successfullyprogrammed, wait 10 seconds and repeatSteps 1 through 8. If you are stillunsuccessful, take your vehicle to anauthorized dealer.
Note:You can program a maximum of eightcoded keys to your vehicle. All eight can beintegrated keyhead transmitters.
44
E-Series (TE4) Canada/United States of America, enUSA, Edition date: 201712, Second Printing
Security
Page 48 of 323
ADJUSTING THE STEERING
WHEEL
WARNING
Do not adjust the steering wheelwhen your vehicle is moving.
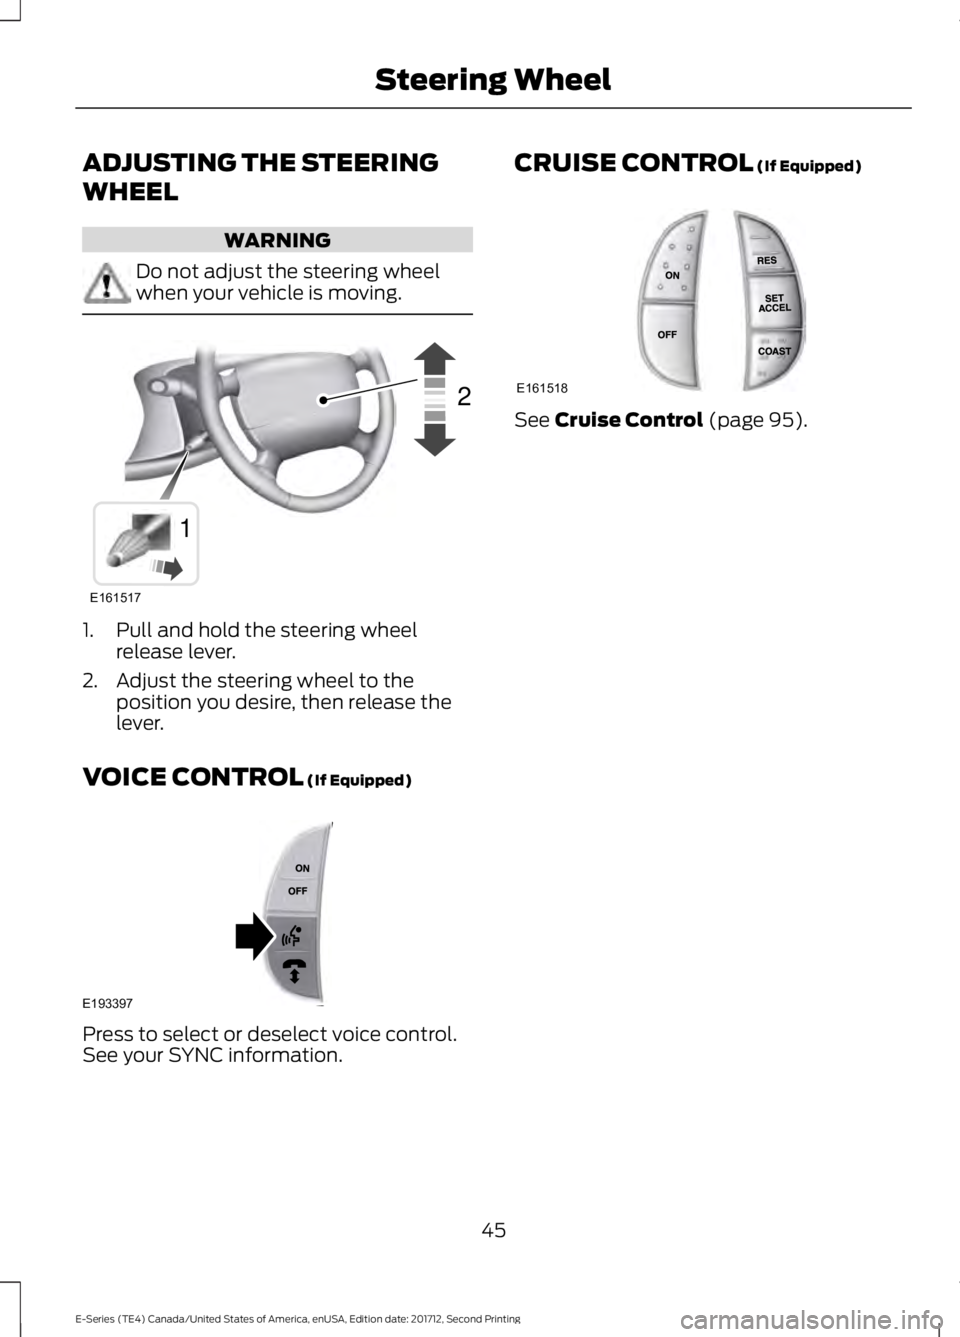
1. Pull and hold the steering wheelrelease lever.
2. Adjust the steering wheel to theposition you desire, then release thelever.
VOICE CONTROL (If Equipped)
Press to select or deselect voice control.See your SYNC information.
CRUISE CONTROL (If Equipped)
See Cruise Control (page 95).
45
E-Series (TE4) Canada/United States of America, enUSA, Edition date: 201712, Second Printing
Steering WheelE161517
12 E193397 E161518
Page 49 of 323
WINDSHIELD WIPERS
Note:Fully defrost the windshield beforeyou switch the windshield wipers on.
Note:Make sure you switch the windshieldwipers off before entering a car wash.
Note: If streaks or smears appear on thewindshield, clean the windshield and thewiper blades. If that does not resolve theissue, install new wiper blades.
Note: Do not operate the wipers on a drywindshield. This may scratch the glass,damage the wiper blades or cause the wipermotor to burn out. Always use thewindshield washers before wiping a drywindshield.
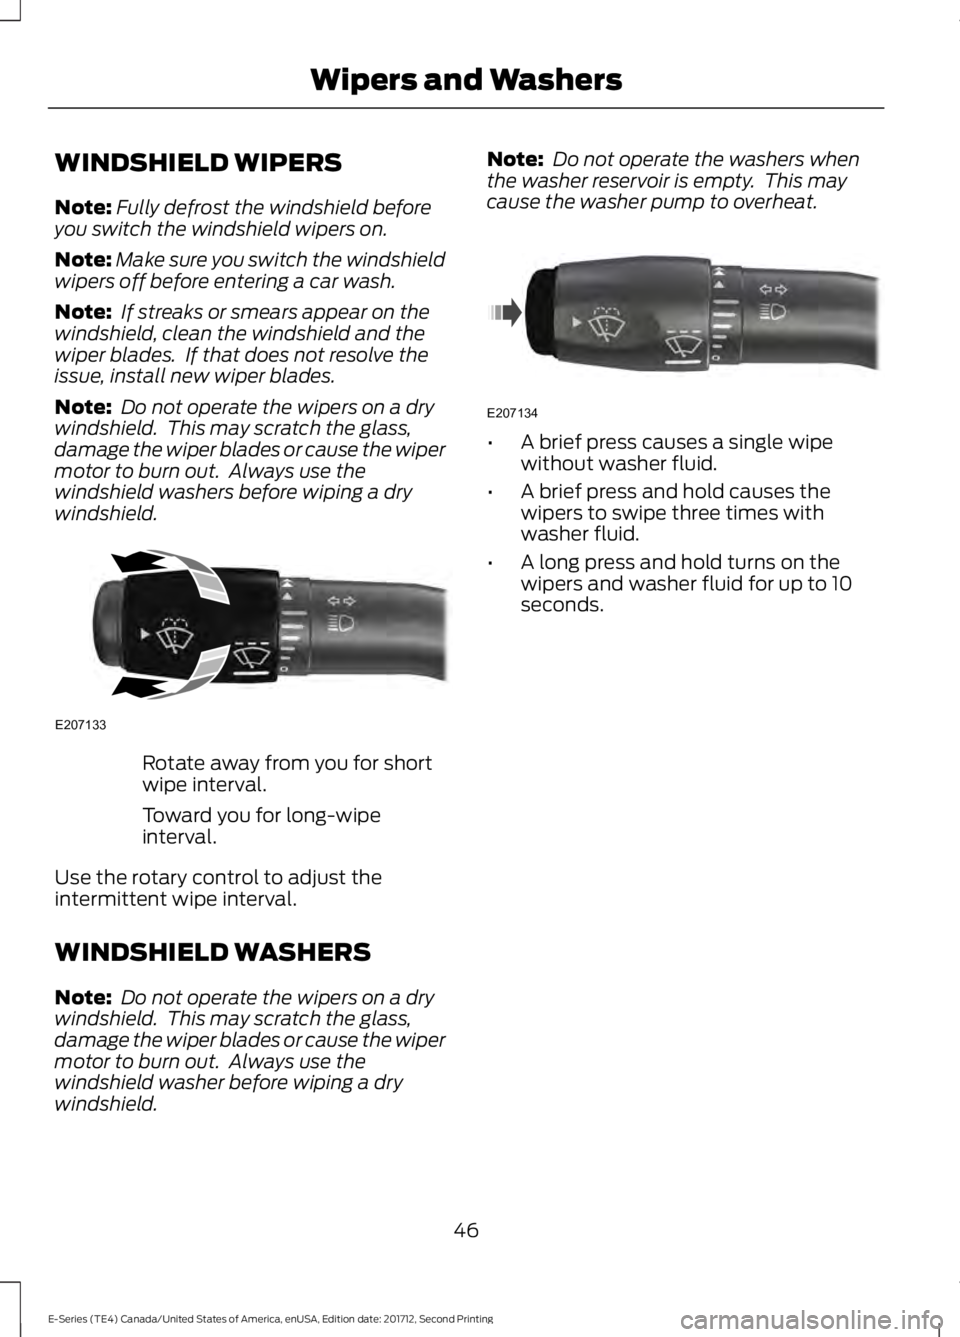
Rotate away from you for shortwipe interval.
Toward you for long-wipeinterval.
Use the rotary control to adjust theintermittent wipe interval.
WINDSHIELD WASHERS
Note: Do not operate the wipers on a drywindshield. This may scratch the glass,damage the wiper blades or cause the wipermotor to burn out. Always use thewindshield washer before wiping a drywindshield.
Note: Do not operate the washers whenthe washer reservoir is empty. This maycause the washer pump to overheat.
•A brief press causes a single wipewithout washer fluid.
•A brief press and hold causes thewipers to swipe three times withwasher fluid.
•A long press and hold turns on thewipers and washer fluid for up to 10seconds.
46
E-Series (TE4) Canada/United States of America, enUSA, Edition date: 201712, Second Printing
Wipers and WashersE207133 E207134
Page 50 of 323
GENERAL INFORMATION
Condensation in the Exterior FrontLamps and Rear Lamps
Exterior front lamps and rear lamps havevents to accommodate normal changesin air pressure.
Condensation can be a natural by-productof this design. When moist air enters thelamp assembly through the vents, there isa possibility that condensation can occurwhen the temperature is cold. Whennormal condensation occurs, a fine mistcan form on the interior of the lens. Thefine mist eventually clears and exitsthrough the vents during normal operation.
Clearing time may take as long as 48 hoursunder dry weather conditions.
Examples of acceptable condensation are:
•The presence of a fine mist (no streaks,drip marks or large droplets).
•A fine mist covers less than 50% of thelens.
Examples of unacceptable condensationare:
•A water puddle inside the lamp.
•Streaks, drip marks or large dropletspresent on the interior of the lens.
If you see any unacceptable condensation,have your vehicle checked by an authorizeddealer.
LIGHTING CONTROL
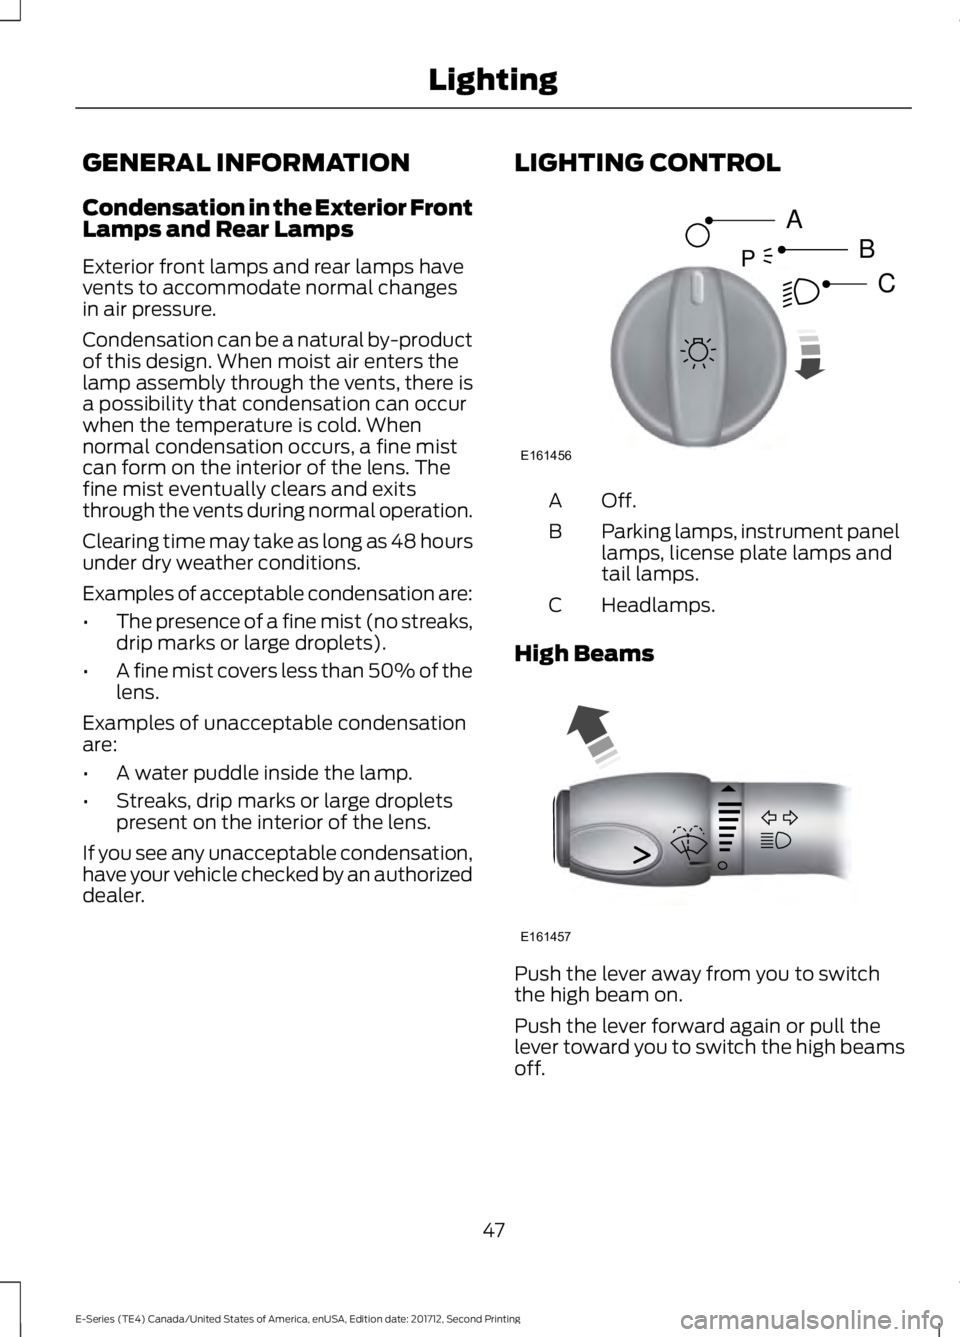
Off.A
Parking lamps, instrument panellamps, license plate lamps andtail lamps.
B
Headlamps.C
High Beams
Push the lever away from you to switchthe high beam on.
Push the lever forward again or pull thelever toward you to switch the high beamsoff.
47
E-Series (TE4) Canada/United States of America, enUSA, Edition date: 201712, Second Printing
LightingE161456
A
B
CP E161457