check engine FORD E SERIES 2019 Owner's Manual
[x] Cancel search | Manufacturer: FORD, Model Year: 2019, Model line: E SERIES, Model: FORD E SERIES 2019Pages: 329, PDF Size: 2.92 MB
Page 116 of 329
Points to Remember
Note:Do not attempt removal of the trailerbrake controller without consulting theWorkshop Manual. Damage to the unit mayresult.
•Adjust gain setting before using thetrailer brake controller for the first time.
•Adjust gain setting, using the procedureabove, whenever road, weather andtrailer or vehicle loading conditionschange from when the gain was initiallyset.
•Only use the manual control lever forproper adjustment of the gain duringtrailer setup. Misuse, such asapplication during trailer sway, couldcause instability of trailer or towvehicle.
•Avoid towing in adverse weatherconditions. The trailer brake controllerdoes not provide anti-lock control ofthe trailer wheels. Trailer wheels canlock up on slippery surfaces, resultingin reduced stability of trailer and towvehicle.
•The trailer brake controller is equippedwith a feature that reduces output atvehicle speeds below 11 mph (18 km/h)so trailer and vehicle braking is not jerkyor harsh. This feature is only availablewhen applying the brakes using yourvehicle's brake pedal, not thecontroller.
•The controller interacts with the brakecontrol system and powertrain controlsystem of your vehicle to provide thebest performance on different roadconditions.
•Your vehicle's brake system and thetrailer brake system workindependently of each other. Changingthe gain setting on the controller doesnot affect the operation of yourvehicle's brakes whether you attach atrailer or not.
•When you switch the engine off, thecontroller output is disabled and thedisplay and module shut down. Thecontroller module and display turn onwhen you switch the ignition on.
•The trailer brake controller is only afactory-installed or dealer-installeditem. Ford is not responsible forwarranty or performance of thecontroller due to misuse or customerinstallation.
Trailer Lamps
WARNING: Never connect anytrailer lamp wiring to the vehicle's taillamp wiring; this may damage theelectrical system resulting in fire. Contactyour authorized dealer as soon aspossible for assistance in proper trailertow wiring installation. Additionalelectrical equipment may be required.
Trailer lamps are required on most towedvehicles. Make sure all running lights, brakelights, direction indicators and hazard lightsare working.
Before Towing a Trailer
Practice turning, stopping and backing upto get the feel of your vehicle-trailercombination before starting on a trip.When turning, make wider turns so thetrailer wheels clear curbs and otherobstacles.
When Towing a Trailer
•Do not drive faster than 70 mph(113 km/h) during the first 500 mi(800 km).
•Do not make full-throttle starts.
•Check your hitch, electrical connectionsand trailer wheel lug nuts thoroughlyafter you have traveled 50 mi (80 km).
113
E-Series (TE4) Canada/United States of America, enUSA, Edition date: 201804, Second-Printing
Towing
Page 117 of 329
•When stopped in congested or heavytraffic during hot weather, place thegearshift in position P to aid engine andtransmission cooling and to help A/Cperformance.
•Switch off the speed control withheavy loads or in hilly terrain. Thespeed control may turn offautomatically when you are towing onlong, steep grades.
•Shift to a lower gear when driving downa long or steep hill. Do not apply thebrakes continuously, as they mayoverheat and become less effective.
•If your transmission is equipped with aGrade Assist or Tow/Haul feature, usethis feature when towing. This providesengine braking and helps eliminateexcessive transmission shifting foroptimum fuel economy andtransmission cooling.
•If your vehicle is equipped withAdvanceTrac with RSC, this systemmay turn on during typical corneringmaneuvers with a heavily loaded trailer.This is normal. Turning the corner at aslower speed while towing may reducethis tendency.
•If you are towing a trailer frequently inhot weather, hilly conditions, at thegross combined weight rating (or anycombination of these factors), considerrefilling your rear axle with syntheticgear lubricant. See Capacities andSpecifications (page 198).
•Allow more distance for stopping witha trailer attached. Anticipate stops andbrake gradually.
•Avoid parking on a grade. However, ifyou must park on a grade:
1. Turn the steering wheel to point yourvehicle tires away from traffic flow.
2. Set your vehicle parking brake.
3. Place the automatic transmission inposition P.
4. Place wheel chocks in front and backof the trailer wheels. (Chocks notincluded with vehicle.)
Your vehicle may be equipped with atemporary or conventional spare tire. A"temporary" spare tire is different in size(diameter or width), tread-type(All-Season or All Terrain) or is from adifferent manufacturer than the road tireson your vehicle. Consult information on thetire label or Safety Compliance label forlimitations when using.
Launching or Retrieving a Boat orPersonal Watercraft (PWC)
Note:Disconnect the wiring to the trailerbefore backing the trailer into the water.
Note:Reconnect the wiring to the trailerafter removing the trailer from the water.
When backing down a ramp during boatlaunching or retrieval:
•Do not allow the static water level torise above the bottom edge of the rearbumper.
•Do not allow waves to break higherthan 6 in (15 cm) above the bottomedge of the rear bumper.
Exceeding these limits may allow water toenter vehicle components:
•Causing internal damage to thecomponents.
•Affecting driveability, emissions andreliability.
Replace the rear axle lubricant anytimethe rear axle has been submerged in water.Water may have contaminated the rearaxle lubricant, which is not normallychecked or changed unless a leak issuspected or other axle repair is required.
114
E-Series (TE4) Canada/United States of America, enUSA, Edition date: 201804, Second-Printing
Towing
Page 119 of 329
BREAKING-IN
You need to break in new tires forapproximately 300 mi (480 km). Duringthis time, your vehicle may exhibit someunusual driving characteristics.
Avoid driving too fast during the first1,000 mi (1,600 km). Vary your speedfrequently and change up through thegears early. Do not labor the engine.
Do not tow during the first 1,000 mi(1,600 km).
REDUCED ENGINE
PERFORMANCE
WARNING: If you continue to driveyour vehicle when the engine isoverheating, the engine could stopwithout warning. Failure to follow thisinstruction could result in the loss ofcontrol of your vehicle.
If the engine coolant temperature gaugeneedle moves to the upper limit position,the engine is overheating. See Gauges(page 53).
You must only drive your vehicle for a shortdistance if the engine overheats. Thedistance you can travel depends onambient temperature, vehicle load andterrain. The engine continues to operatewith limited power for a short period oftime.
If the engine temperature continues to rise,the fuel supply to the engine reduces. Theair conditioning switches off and the enginecooling fan operates continually.
1. Gradually reduce your speed and stopyour vehicle as soon as it is safe to doso.
2. Immediately switch the engine off toprevent severe engine damage.
3. Wait for the engine to cool down.
4. Check the coolant level. See EngineCoolant Check (page 144).
5. Have your vehicle checked as soon aspossible.
ECONOMICAL DRIVING
Fuel economy is affected by several thingssuch as how you drive, the conditions youdrive under and how you maintain yourvehicle.
There are some things to keep in mind thatmay improve your fuel economy:
•Accelerate and slow down in a smooth,moderate fashion.
•Drive at steady speeds.
•Anticipate stops; slowing down mayeliminate the need to stop.
•Combine errands and minimizestop-and-go driving (When runningerrands, go to the furthest destinationfirst and then work your way backhome).
•Close the windows for high-speeddriving.
•Drive at reasonable speeds.
•Keep the tires properly inflated and useonly the recommended size.
•Use the recommended engine oil.
•Perform all regularly scheduledmaintenance.
There are also some things you may wantto avoid doing because they reduce yourfuel economy:
•Avoid sudden or hard accelerations.
•Avoid revving the engine before turningoff the car.
•Avoid long idle periods.
116
E-Series (TE4) Canada/United States of America, enUSA, Edition date: 201804, Second-Printing
Driving Hints
Page 120 of 329
•Do not warm up your vehicle on coldmornings.
•Reduce the use of air conditioning andheat.
•Avoid using speed control in hillyterrain.
•Do not rest your foot on the brakepedal while driving.
•Avoid carrying unnecessary weight.
•Avoid adding particular accessories toyour vehicle (e.g. bug deflectors,rollbars/light bars, running boards, skiracks).
•Avoid driving with the wheels out ofalignment.
DRIVING THROUGH WATER
WARNING: Do not drive throughflowing or deep water as you may losecontrol of your vehicle.
Note:Driving through standing water cancause vehicle damage.
Note:Engine damage can occur if waterenters the air filter.
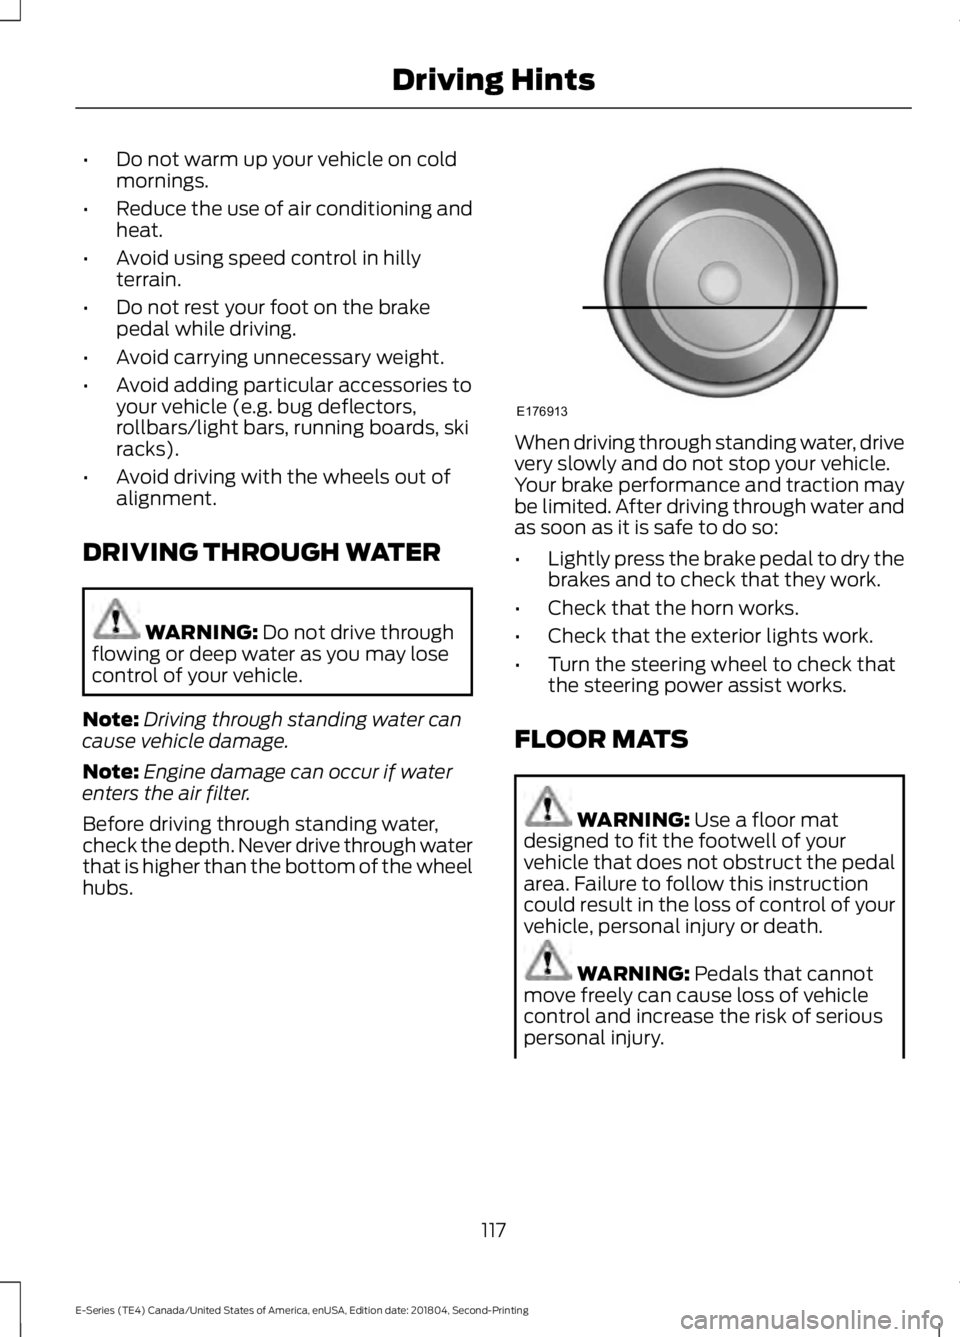
Before driving through standing water,check the depth. Never drive through waterthat is higher than the bottom of the wheelhubs.
When driving through standing water, drivevery slowly and do not stop your vehicle.Your brake performance and traction maybe limited. After driving through water andas soon as it is safe to do so:
•Lightly press the brake pedal to dry thebrakes and to check that they work.
•Check that the horn works.
•Check that the exterior lights work.
•Turn the steering wheel to check thatthe steering power assist works.
FLOOR MATS
WARNING: Use a floor matdesigned to fit the footwell of yourvehicle that does not obstruct the pedalarea. Failure to follow this instructioncould result in the loss of control of yourvehicle, personal injury or death.
WARNING: Pedals that cannotmove freely can cause loss of vehiclecontrol and increase the risk of seriouspersonal injury.
117
E-Series (TE4) Canada/United States of America, enUSA, Edition date: 201804, Second-Printing
Driving HintsE176913
Page 123 of 329
Vehicles Sold in Canada: GettingRoadside Assistance
To fully assist you should you have avehicle concern, Ford Motor Company ofCanada, Limited offers a complimentaryroadside assistance program. This programis eligible within Canada or the continentalUnited States.
The service is available 24 hours a day,seven days a week.
This program is separate from the NewVehicle Limited Warranty, but the coverageis concurrent with the powertrain coverageperiod of your vehicle. Canadian roadsidecoverage and benefits may differ from theU.S. coverage.
If you require more information, please callus in Canada at 1-800-665-2006, or visitour website at www.ford.ca.
HAZARD FLASHERS
Note:If used when the vehicle is notrunning, the battery loses charge. As a result,there may be insufficient power to restartyour vehicle.
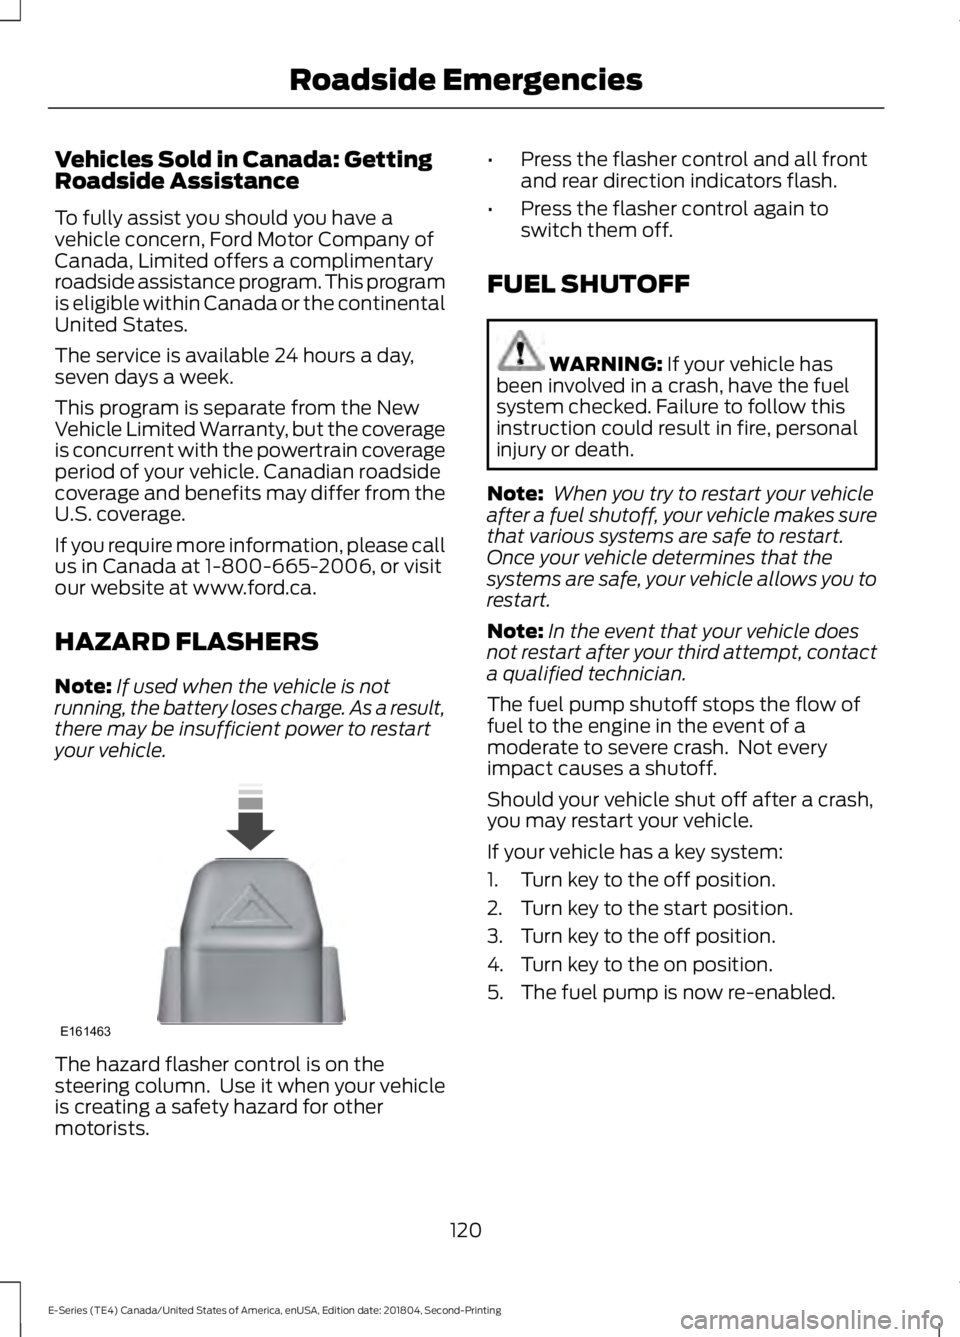
The hazard flasher control is on thesteering column. Use it when your vehicleis creating a safety hazard for othermotorists.
•Press the flasher control and all frontand rear direction indicators flash.
•Press the flasher control again toswitch them off.
FUEL SHUTOFF
WARNING: If your vehicle hasbeen involved in a crash, have the fuelsystem checked. Failure to follow thisinstruction could result in fire, personalinjury or death.
Note: When you try to restart your vehicleafter a fuel shutoff, your vehicle makes surethat various systems are safe to restart.Once your vehicle determines that thesystems are safe, your vehicle allows you torestart.
Note:In the event that your vehicle doesnot restart after your third attempt, contacta qualified technician.
The fuel pump shutoff stops the flow offuel to the engine in the event of amoderate to severe crash. Not everyimpact causes a shutoff.
Should your vehicle shut off after a crash,you may restart your vehicle.
If your vehicle has a key system:
1. Turn key to the off position.
2. Turn key to the start position.
3. Turn key to the off position.
4. Turn key to the on position.
5. The fuel pump is now re-enabled.
120
E-Series (TE4) Canada/United States of America, enUSA, Edition date: 201804, Second-Printing
Roadside EmergenciesE161463
Page 144 of 329
GENERAL INFORMATION
Have your vehicle serviced regularly to helpmaintain its roadworthiness and resalevalue. There is a large network ofauthorized dealers that are there to helpyou with their professional servicingexpertise. We believe that their speciallytrained technicians are best qualified toservice your vehicle properly and expertly.They are supported by a wide range ofhighly specialized tools developedspecifically for servicing your vehicle.
If your vehicle requires professional service,an authorized dealer can provide thenecessary parts and service. Check yourwarranty information to find out whichparts and services are covered.
Use only recommended fuels, lubricants,fluids and service parts conforming tospecifications. Motorcraft® parts aredesigned and built to provide the bestperformance in your vehicle.
Precautions
•Do not work on a hot engine.
•Make sure that nothing gets caught inmoving parts.
•Do not work on a vehicle with theengine running in an enclosed space,unless you are sure you have enoughventilation.
•Keep all open flames and other burningmaterial (such as cigarettes) awayfrom the battery and all fuel relatedparts.
Working with the Engine Off
1. Set the parking brake and shift thetransmission to park (P).
2. Switch off the engine.
3. Block the wheels.
Working with the Engine On
WARNING: To reduce the risk ofvehicle damage and personal burninjuries, do not start your engine with theair cleaner removed and do not removeit while the engine is running.
1. Set the parking brake and shift thetransmission to park (P).
2. Block the wheels.
OPENING AND CLOSING THE
HOOD
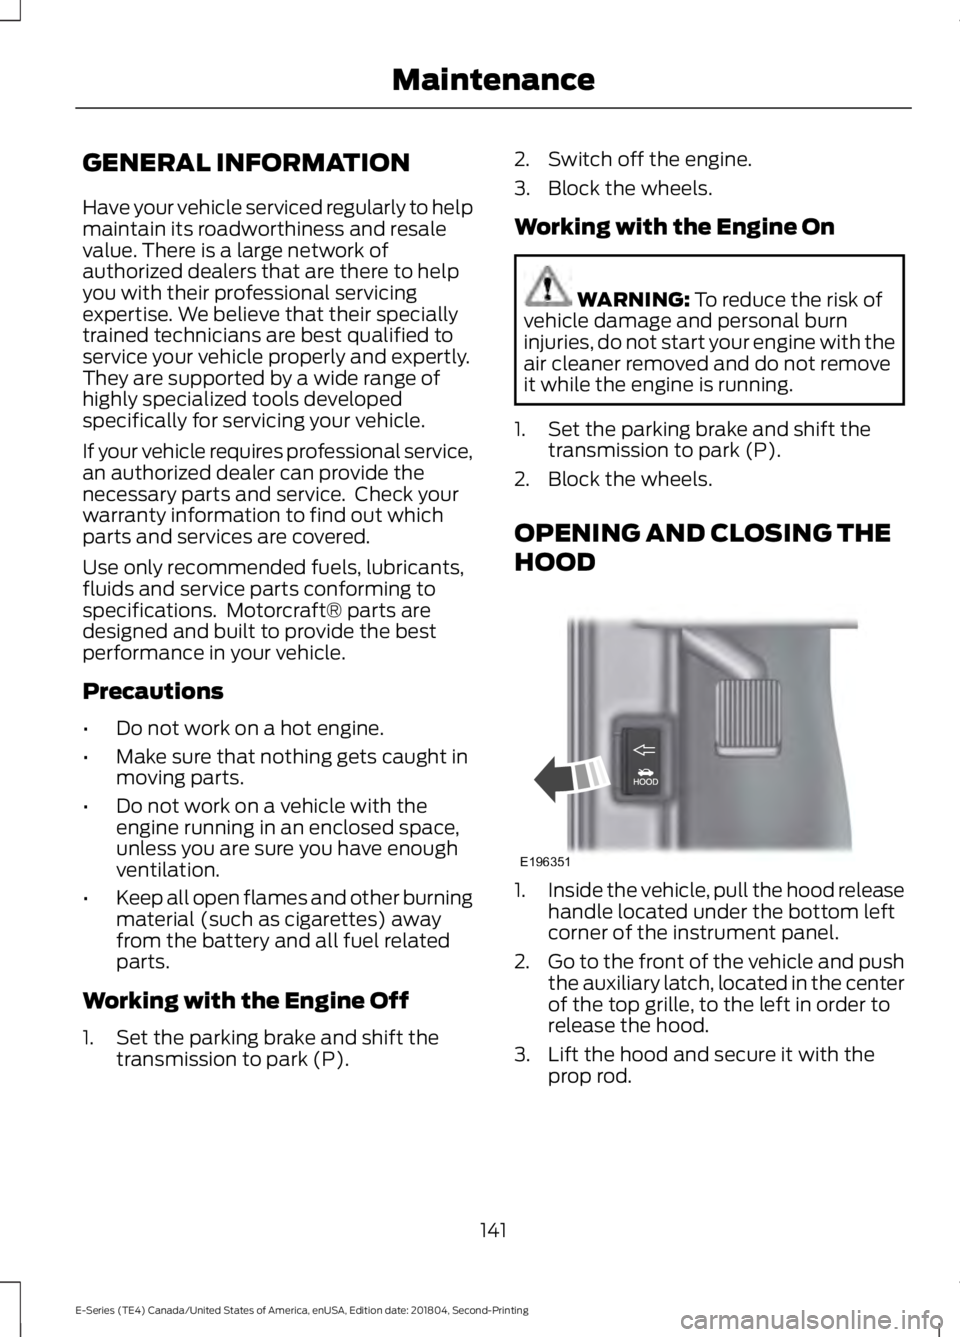
1.Inside the vehicle, pull the hood releasehandle located under the bottom leftcorner of the instrument panel.
2.Go to the front of the vehicle and pushthe auxiliary latch, located in the centerof the top grille, to the left in order torelease the hood.
3. Lift the hood and secure it with theprop rod.
141
E-Series (TE4) Canada/United States of America, enUSA, Edition date: 201804, Second-Printing
MaintenanceE196351
Page 145 of 329
UNDER HOOD OVERVIEW
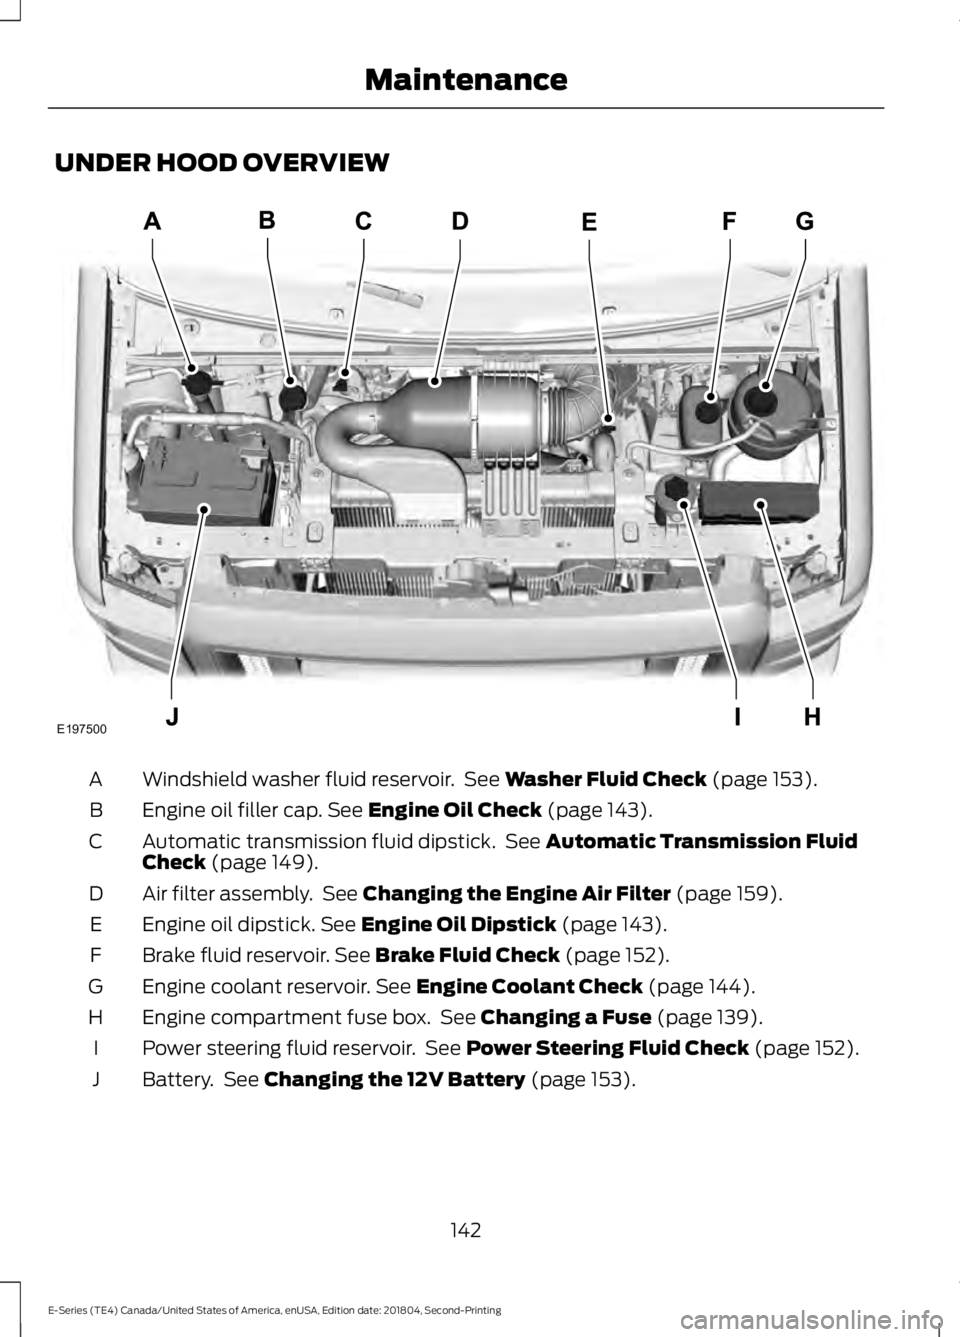
Windshield washer fluid reservoir. See Washer Fluid Check (page 153).A
Engine oil filler cap. See Engine Oil Check (page 143).B
Automatic transmission fluid dipstick. See Automatic Transmission FluidCheck (page 149).C
Air filter assembly. See Changing the Engine Air Filter (page 159).D
Engine oil dipstick. See Engine Oil Dipstick (page 143).E
Brake fluid reservoir. See Brake Fluid Check (page 152).F
Engine coolant reservoir. See Engine Coolant Check (page 144).G
Engine compartment fuse box. See Changing a Fuse (page 139).H
Power steering fluid reservoir. See Power Steering Fluid Check (page 152).I
Battery. See Changing the 12V Battery (page 153).J
142
E-Series (TE4) Canada/United States of America, enUSA, Edition date: 201804, Second-Printing
MaintenanceE197500
Page 146 of 329
ENGINE OIL DIPSTICK
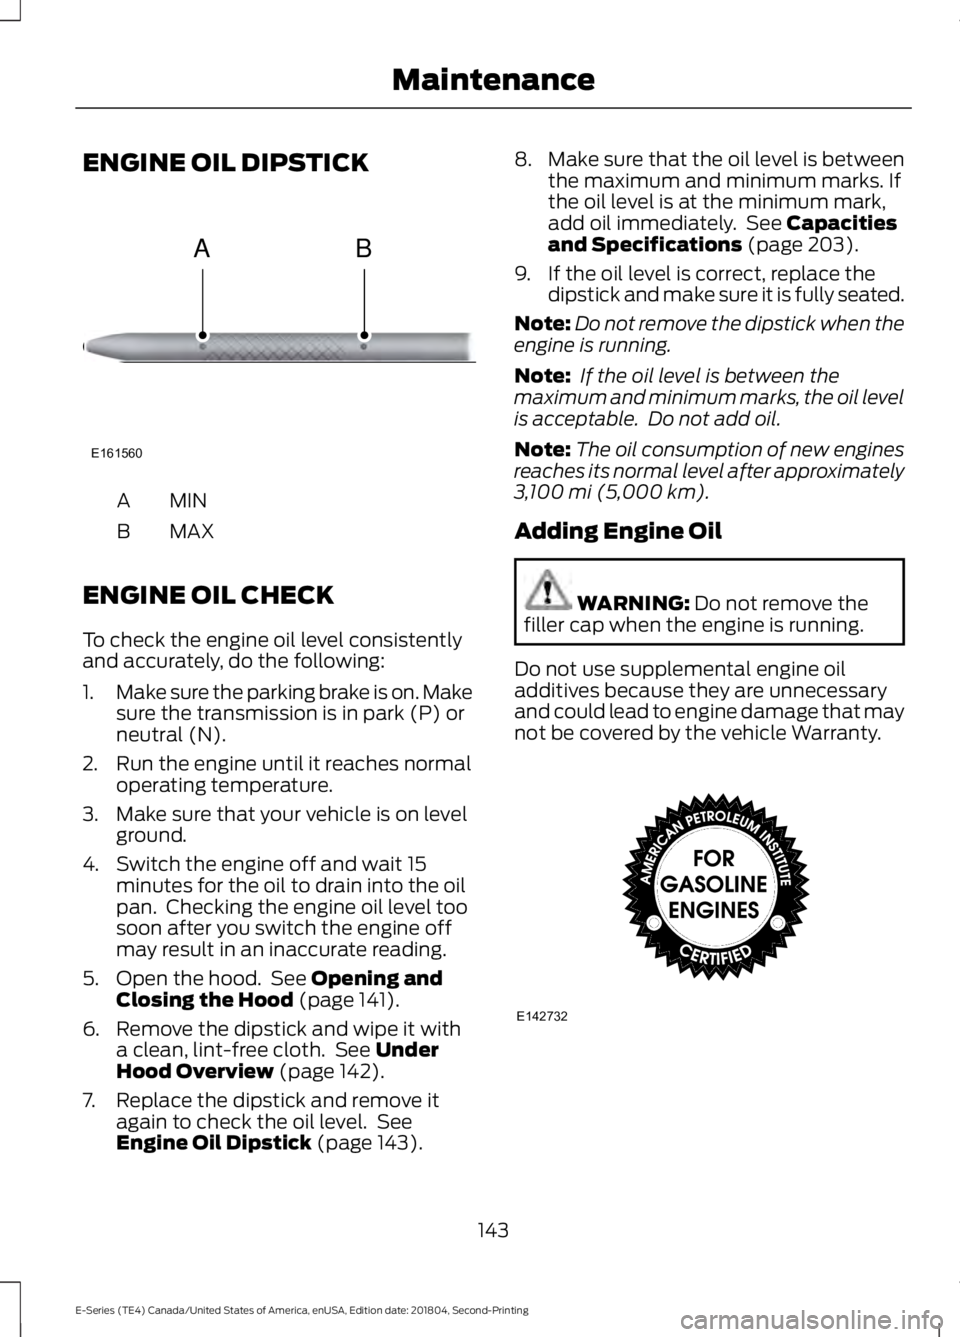
MINA
MAXB
ENGINE OIL CHECK
To check the engine oil level consistentlyand accurately, do the following:
1.Make sure the parking brake is on. Makesure the transmission is in park (P) orneutral (N).
2. Run the engine until it reaches normaloperating temperature.
3. Make sure that your vehicle is on levelground.
4. Switch the engine off and wait 15minutes for the oil to drain into the oilpan. Checking the engine oil level toosoon after you switch the engine offmay result in an inaccurate reading.
5. Open the hood. See Opening andClosing the Hood (page 141).
6. Remove the dipstick and wipe it witha clean, lint-free cloth. See UnderHood Overview (page 142).
7. Replace the dipstick and remove itagain to check the oil level. SeeEngine Oil Dipstick (page 143).
8.Make sure that the oil level is betweenthe maximum and minimum marks. Ifthe oil level is at the minimum mark,add oil immediately. See Capacitiesand Specifications (page 203).
9. If the oil level is correct, replace thedipstick and make sure it is fully seated.
Note:Do not remove the dipstick when theengine is running.
Note: If the oil level is between themaximum and minimum marks, the oil levelis acceptable. Do not add oil.
Note:The oil consumption of new enginesreaches its normal level after approximately3,100 mi (5,000 km).
Adding Engine Oil
WARNING: Do not remove thefiller cap when the engine is running.
Do not use supplemental engine oiladditives because they are unnecessaryand could lead to engine damage that maynot be covered by the vehicle Warranty.
143
E-Series (TE4) Canada/United States of America, enUSA, Edition date: 201804, Second-Printing
MaintenanceE161560
AB E142732
Page 147 of 329
Only use oils certified for gasoline enginesby the American Petroleum Institute (API).An oil with this trademark symbolconforms to the current engine andemission system protection standards andfuel economy requirements of theInternational Lubricants SpecificationAdvisory Committee (ILSAC).
To top up the engine oil level do thefollowing:
1. Clean the area surrounding the engineoil filler cap before you remove it.
2. Remove the engine oil filler cap. SeeUnder Hood Overview (page 142).Turn it counterclockwise and removeit.
3. Add engine oil that meets Fordspecifications. See Capacities andSpecifications (page 203). You mayhave to use a funnel to pour the engineoil into the opening.
4. Recheck the oil level.
5. If the oil level is correct, replace thedipstick and make sure it is fully seated.
6. Replace the engine oil filler cap. Turnit clockwise until you feel a strongresistance.
Note: Do not add oil further than themaximum mark. Oil levels above themaximum mark may cause engine damage.
Note:Make sure you install the oil filler capcorrectly.
Note:Soak up any spillage with anabsorbent cloth immediately.
OIL CHANGE INDICATOR
RESET
Resetting the Oil Life MonitoringSystem
Only reset the oil life monitoring systemafter changing the engine oil and oil filter.
To reset the oil life monitoring system dothe following:
1.Switch the ignition on. Do not start theengine.
2. Fully press the accelerator and brakepedals at the same time.
3.Keep the accelerator and brake pedalsfully pressed.
4. After three seconds, a messagedisplays confirming the reset procedureis in progress.
5. After 25 seconds, a message displaysconfirming the reset procedure iscomplete.
6. Release the accelerator and brakepedals.
7. Switch the ignition off.
ENGINE COOLANT CHECK
WARNING: Do not remove thecoolant reservoir cap when the engine ison or the cooling system is hot. Wait 10minutes for the cooling system to cooldown. Cover the coolant reservoir capwith a thick cloth to prevent thepossibility of scalding and slowly removethe cap. Failure to follow this instructioncould result in personal injury.
WARNING: Do not put coolant inthe windshield washer reservoir. Ifsprayed on the windshield, coolant couldmake it difficult to see through thewindshield.
144
E-Series (TE4) Canada/United States of America, enUSA, Edition date: 201804, Second-Printing
Maintenance
Page 148 of 329
WARNING: To reduce the risk ofpersonal injury, make sure the engine iscool before unscrewing the coolantpressure relief cap. The cooling systemis under pressure. Steam and hot liquidcan come out forcefully when you loosenthe cap slightly.
WARNING: Do not add coolantfurther than the MAX mark.
When the engine is cold, check theconcentration and level of the coolant atthe intervals listed in the scheduledmaintenance information. See ScheduledMaintenance (page 276).
Note:Make sure that the coolant level isbetween the MIN and MAX marks on thecoolant reservoir.
Note: Coolant expands when it is hot. Thelevel may extend beyond the MAX mark.
Maintain coolant concentration within48% to 50%, which equates to a freezepoint between -29°F (-34°C) and -35°F(-37°C). Coolant concentration should bechecked using a refractometer. We do notrecommend the use of hydrometers orcoolant test strips for measuring coolantconcentration.
Adding Coolant
WARNING: Do not add enginecoolant when the engine is hot. Failureto follow this instruction could result inpersonal injury.
WARNING: Do not remove thecoolant reservoir cap when the engine ison or the cooling system is hot. Wait 10minutes for the cooling system to cooldown. Cover the coolant reservoir capwith a thick cloth to prevent thepossibility of scalding and slowly removethe cap. Failure to follow this instructioncould result in personal injury.
Note: Automotive fluids are notinterchangeable. Do not use coolant orwindshield washer fluid outside of itsspecified function and vehicle location.
Note: Do not use stop leak pellets, coolingsystem sealants, or non-specified additivesas they can cause damage to the enginecooling or heating systems. Resultingcomponent damage may not be covered bythe vehicle Warranty.
It is very important to use predilutedcoolant approved to the correctspecification in order to avoid plugging thesmall passageways in the engine coolingsystem. See Capacities andSpecifications (page 198). Do not mixdifferent colors or types of coolant in yourvehicle. Mixing of engine coolants or usingan incorrect coolant may harm the engineor cooling system components and maynot be covered by the vehicle Warranty.
Note:If prediluted coolant is not available,use the approved concentrated coolantdiluting it to 50/50 with distilled water. SeeCapacities and Specifications (page 198).Using water that has not been deionizedmay contribute to deposit formation,corrosion and plugging of the small coolingsystem passageways.
145
E-Series (TE4) Canada/United States of America, enUSA, Edition date: 201804, Second-Printing
Maintenance