FORD E SERIES 2022 Owners Manual
Manufacturer: FORD, Model Year: 2022, Model line: E SERIES, Model: FORD E SERIES 2022Pages: 300, PDF Size: 3.18 MB
Page 221 of 300
Note:
The tire pressure monitoring system
indicator light illuminates when the spare
tire is in use. To restore the full function of
the monitoring system, all road wheels
equipped with tire pressure monitoring
sensors must be mounted on the vehicle.
Note: Do not use wheels or lug nuts
different than the original equipment, as this
may damage the wheel or mounting system.
If you get a flat tire when driving, do not
apply the brake heavily. Instead, gradually
decrease your speed. Hold the steering
wheel firmly and slowly move to a safe
place on the side of the road.
Have a flat serviced by an authorized
dealer in order to prevent damage to the
tire pressure monitoring system sensors.
See Tire Pressure Monitoring System
(page 212). Replace the spare tire with a
road tire as soon as possible. During
repairing or replacing of the flat tire, have
the authorized dealer inspect the tire
pressure monitoring system sensor for
damage.
Dissimilar Spare Wheel and Tire
Assembly Information WARNING:
Failure to follow these
guidelines could result in an increased
risk of loss of vehicle control, injury or
death.
If you have a dissimilar spare wheel and
tire, then it is intended for temporary use
only. This means that if you need to use it,
you should replace it as soon as possible
with a road wheel and tire assembly that
is the same size and type as the road tires
and wheels that were originally provided
by Ford. If the dissimilar spare tire or wheel
is damaged, it should be replaced rather
than repaired. A dissimilar spare wheel and tire assembly
is defined as a spare wheel and tire
assembly that is different in brand, size or
appearance from the road tires and wheels
and can be one of three types:
1.
T-type mini-spare:
This spare tire
begins with the letter T for tire size and
may have Temporary Use Only molded in
the sidewall.
2. Full-size dissimilar spare with label
on wheel:
This spare tire has a label on
the wheel that states: THIS WHEEL AND
TIRE ASSEMBLY FOR TEMPORARY USE
ONLY.
When driving with one of the dissimilar
spare tires listed above, do not:
• Exceed
50 mph (80 km/h).
• Load the vehicle beyond maximum
vehicle load rating listed on the Safety
Compliance Label.
• Tow a trailer.
• Use snow chains on the end of the
vehicle with the dissimilar spare tire.
• Use more than one dissimilar spare tire
at a time.
• Use commercial car washing
equipment.
• Try to repair the dissimilar spare tire.
Use of one of the dissimilar spare tires
listed above at any one wheel location can
lead to impairment of the following:
• Handling, stability and braking
performance.
• Comfort and noise.
• Ground clearance and parking at curbs.
• Winter weather driving capability.
• Wet weather driving capability.
• All-wheel driving capability.
3. Full-size dissimilar spare without
label on wheel
218
E-Series (TE4) Canada/United States of America, enUSA, Edition date: 202010, First-Printing Wheels and Tires
Page 222 of 300
When driving with the full-size dissimilar
spare wheel and tire assembly, do not:
•
Exceed 70 mph (113 km/h).
• Use more than one dissimilar spare
wheel and tire assembly at a time.
• Use commercial car washing
equipment.
• Use snow chains on the end of the
vehicle with the dissimilar spare wheel
and tire assembly.
The usage of a full-size dissimilar spare
wheel and tire assembly can lead to
impairment of the following:
• Handling, stability and braking
performance.
• Comfort and noise.
• Ground clearance and parking at curbs.
• Winter weather driving capability.
• Wet weather driving capability.
• All-wheel driving capability.
When driving with the full-size dissimilar
spare wheel and tire assembly additional
caution should be given to:
• Towing a trailer.
• Driving vehicles equipped with a
camper body.
• Driving vehicles with a load on the
cargo rack.
Drive cautiously when using a full-size
dissimilar spare wheel and tire assembly
and seek service as soon as possible.
Tire Change Procedure WARNING:
Do not work on your
vehicle when the jack is the only support
as your vehicle could slip off the jack.
Failure to follow this instruction could
result in personal injury or death. WARNING:
To help prevent your
vehicle from moving when changing a
wheel, shift the transmission into park
(P), set the parking brake and use an
appropriate block or wheel chock to
secure the wheel diagonally opposite to
the wheel being changed. For example,
when changing the front left wheel,
place an appropriate block or wheel
chock on the right rear wheel. WARNING:
Do not get under a
vehicle that is only supported by a
vehicle jack. WARNING:
Do not attempt to
change a tire on the side of the vehicle
close to moving traffic. Pull far enough
off the road to avoid the danger of being
hit when operating the jack or changing
the wheel. WARNING:
Always use the jack
provided as original equipment with your
vehicle. If using a jack other than the one
provided, make sure the jack capacity is
adequate for the vehicle weight,
including any vehicle cargo or
modifications. If you are unsure if the jack
capacity is adequate, contact the
authorized dealer.
Note: Passengers should not remain in your
vehicle when the vehicle is being jacked.
Removing the flat wheel and tire
1. Park on a level surface, set the parking
brake and activate the hazard flashers.
2. Place the transmission in park (P) and
turn the engine off.
219
E-Series (TE4) Canada/United States of America, enUSA, Edition date: 202010, First-Printing Wheels and Tires
Page 223 of 300
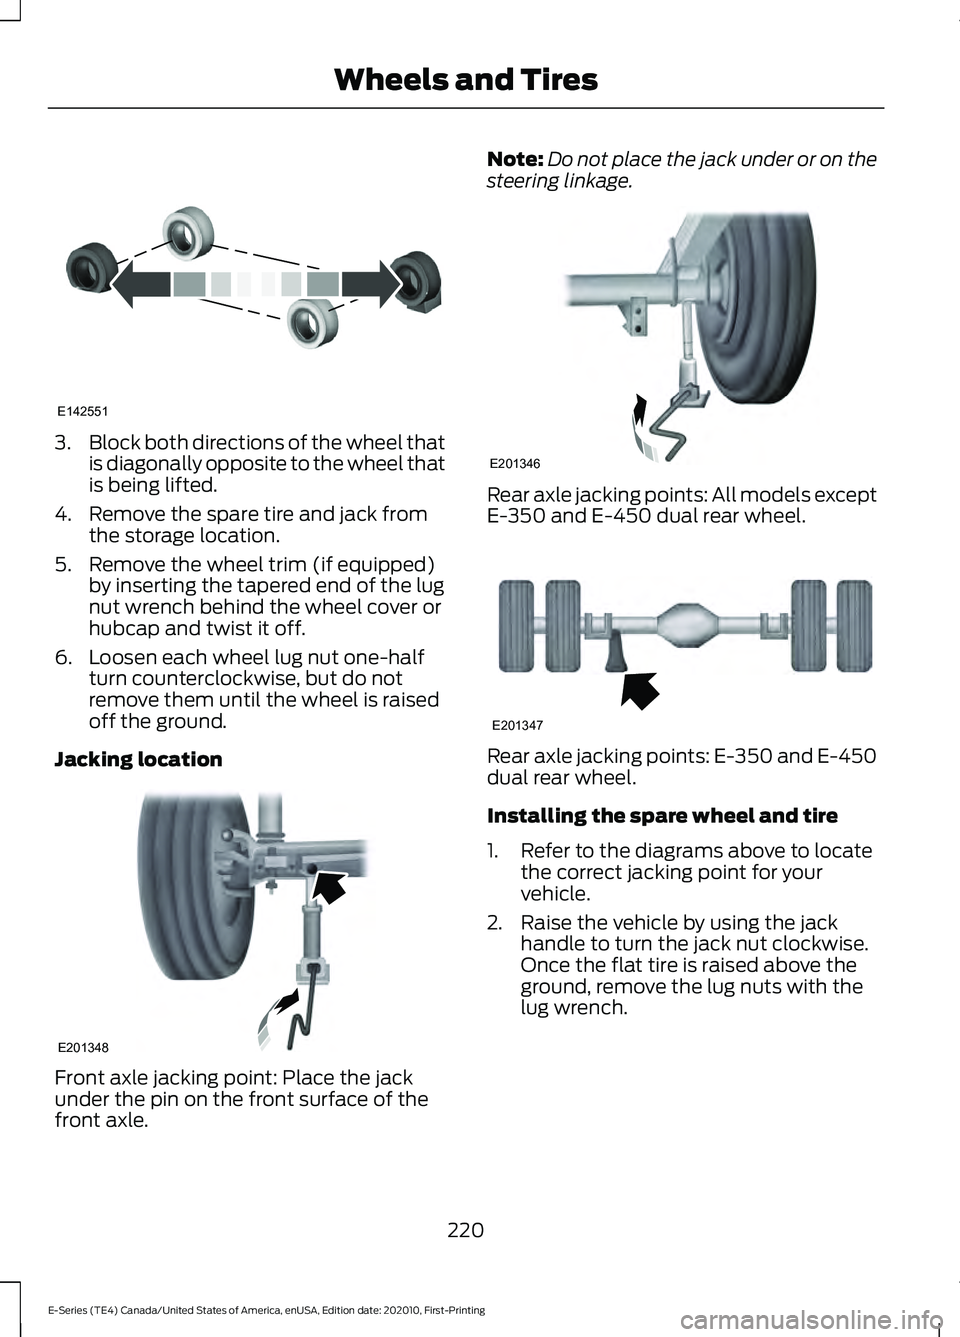
3.
Block both directions of the wheel that
is diagonally opposite to the wheel that
is being lifted.
4. Remove the spare tire and jack from the storage location.
5. Remove the wheel trim (if equipped) by inserting the tapered end of the lug
nut wrench behind the wheel cover or
hubcap and twist it off.
6. Loosen each wheel lug nut one-half turn counterclockwise, but do not
remove them until the wheel is raised
off the ground.
Jacking location Front axle jacking point: Place the jack
under the pin on the front surface of the
front axle. Note:
Do not place the jack under or on the
steering linkage. Rear axle jacking points: All models except
E-350 and E-450 dual rear wheel.
Rear axle jacking points: E-350 and E-450
dual rear wheel.
Installing the spare wheel and tire
1. Refer to the diagrams above to locate
the correct jacking point for your
vehicle.
2. Raise the vehicle by using the jack handle to turn the jack nut clockwise.
Once the flat tire is raised above the
ground, remove the lug nuts with the
lug wrench.
220
E-Series (TE4) Canada/United States of America, enUSA, Edition date: 202010, First-Printing Wheels and TiresE142551 E201348 E201346 E201347
Page 224 of 300
3. Replace the flat tire with the spare,
making sure the valve stem of the
spare is facing outward when replacing
a front wheel or the rear wheel position
on vehicles with single rear wheel
fitments. For vehicles with dual rear
wheels, the valve stem of the spare
must face outward when replacing an
inner wheel, but must face inward
when replacing an outboard wheel.
4. Reinstall the lug nuts until the wheel is
snug against the hub. Do not fully
tighten the lug nuts until the vehicle
has been lowered.
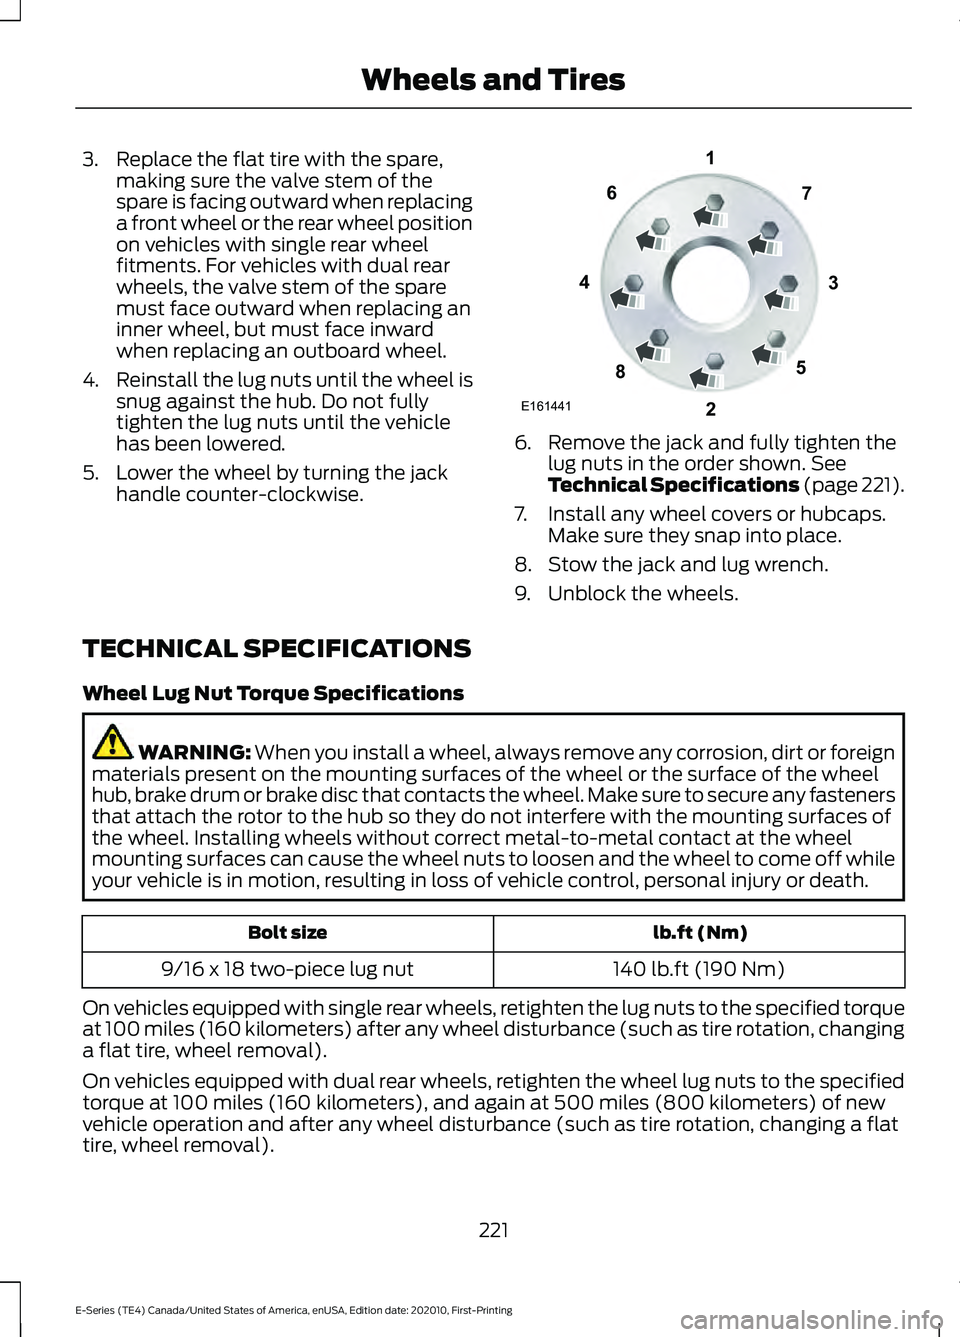
5. Lower the wheel by turning the jack handle counter-clockwise. 6. Remove the jack and fully tighten the
lug nuts in the order shown. See
Technical Specifications (page 221).
7. Install any wheel covers or hubcaps. Make sure they snap into place.
8. Stow the jack and lug wrench.
9. Unblock the wheels.
TECHNICAL SPECIFICATIONS
Wheel Lug Nut Torque Specifications WARNING: When you install a wheel, always remove any corrosion, dirt or foreign
materials present on the mounting surfaces of the wheel or the surface of the wheel
hub, brake drum or brake disc that contacts the wheel. Make sure to secure any fasteners
that attach the rotor to the hub so they do not interfere with the mounting surfaces of
the wheel. Installing wheels without correct metal-to-metal contact at the wheel
mounting surfaces can cause the wheel nuts to loosen and the wheel to come off while
your vehicle is in motion, resulting in loss of vehicle control, personal injury or death. lb.ft (Nm)
Bolt size
140 lb.ft (190 Nm)
9/16 x 18 two-piece lug nut
On vehicles equipped with single rear wheels, retighten the lug nuts to the specified torque
at 100 miles (160 kilometers) after any wheel disturbance (such as tire rotation, changing
a flat tire, wheel removal).
On vehicles equipped with dual rear wheels, retighten the wheel lug nuts to the specified
torque at 100 miles (160 kilometers), and again at 500 miles (800 kilometers) of new
vehicle operation and after any wheel disturbance (such as tire rotation, changing a flat
tire, wheel removal).
221
E-Series (TE4) Canada/United States of America, enUSA, Edition date: 202010, First-Printing Wheels and TiresE161441
13
4
27
6
5
8
Page 225 of 300
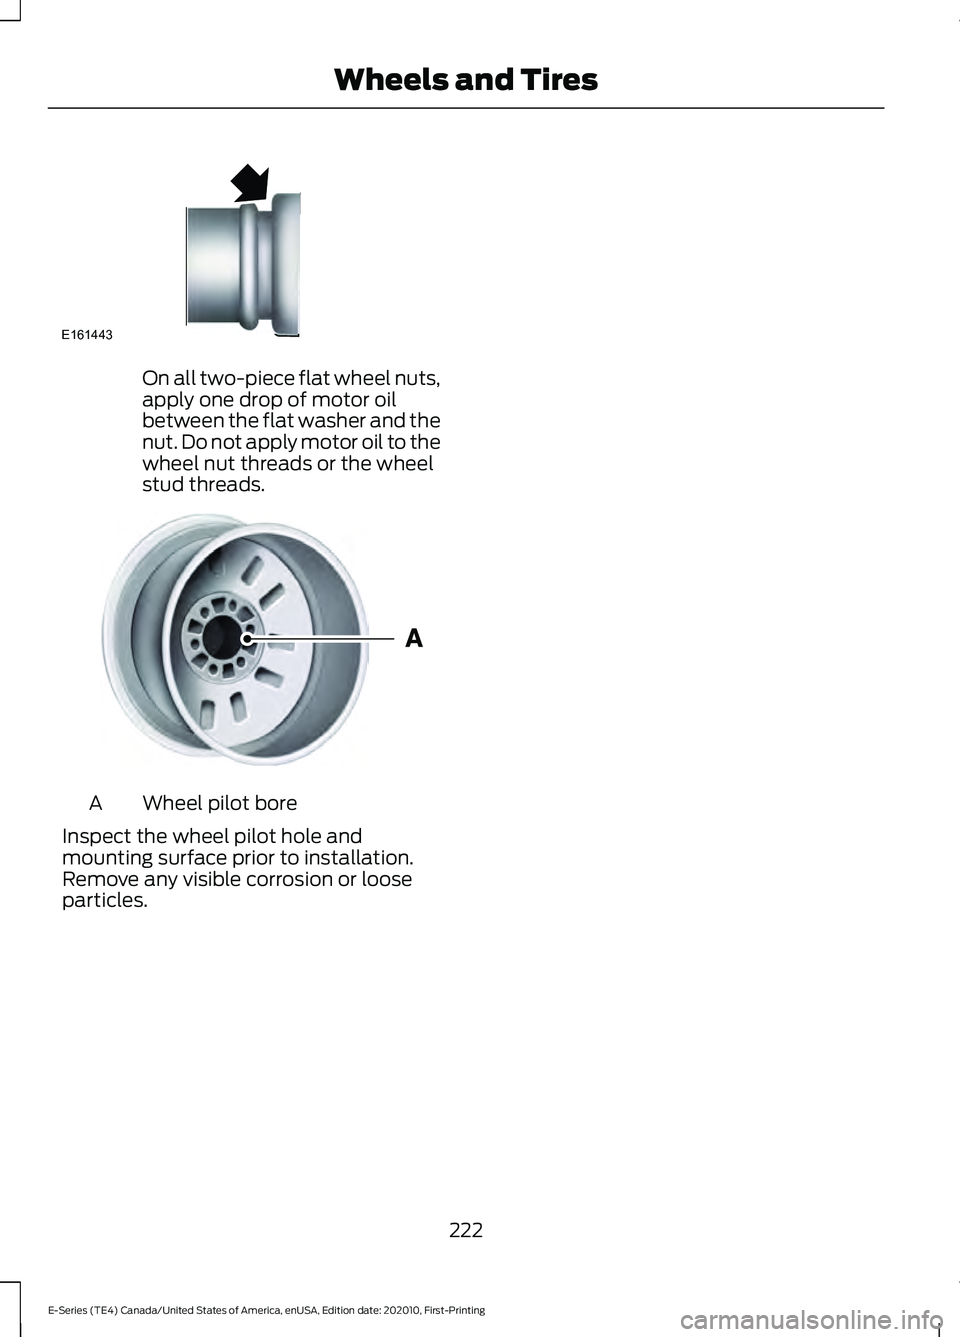
On all two-piece flat wheel nuts,
apply one drop of motor oil
between the flat washer and the
nut. Do not apply motor oil to the
wheel nut threads or the wheel
stud threads.
Wheel pilot bore
A
Inspect the wheel pilot hole and
mounting surface prior to installation.
Remove any visible corrosion or loose
particles.
222
E-Series (TE4) Canada/United States of America, enUSA, Edition date: 202010, First-Printing Wheels and TiresE161443 E145950
Page 226 of 300
ENGINE SPECIFICATIONS
7.3L V8 Engine
Engine
445 in³ (7,293 cm³)
Displacement.
Minimum 87 octane
Required fuel.
1-5-4-8-6-3-7-2
Firing order.
Coil near spark plug with spark plug wire
Ignition system.
0.049 in (1.25 mm) - 0.053 in (1.35 mm)
Spark plug gap.
10.5:1
Compression ratio.
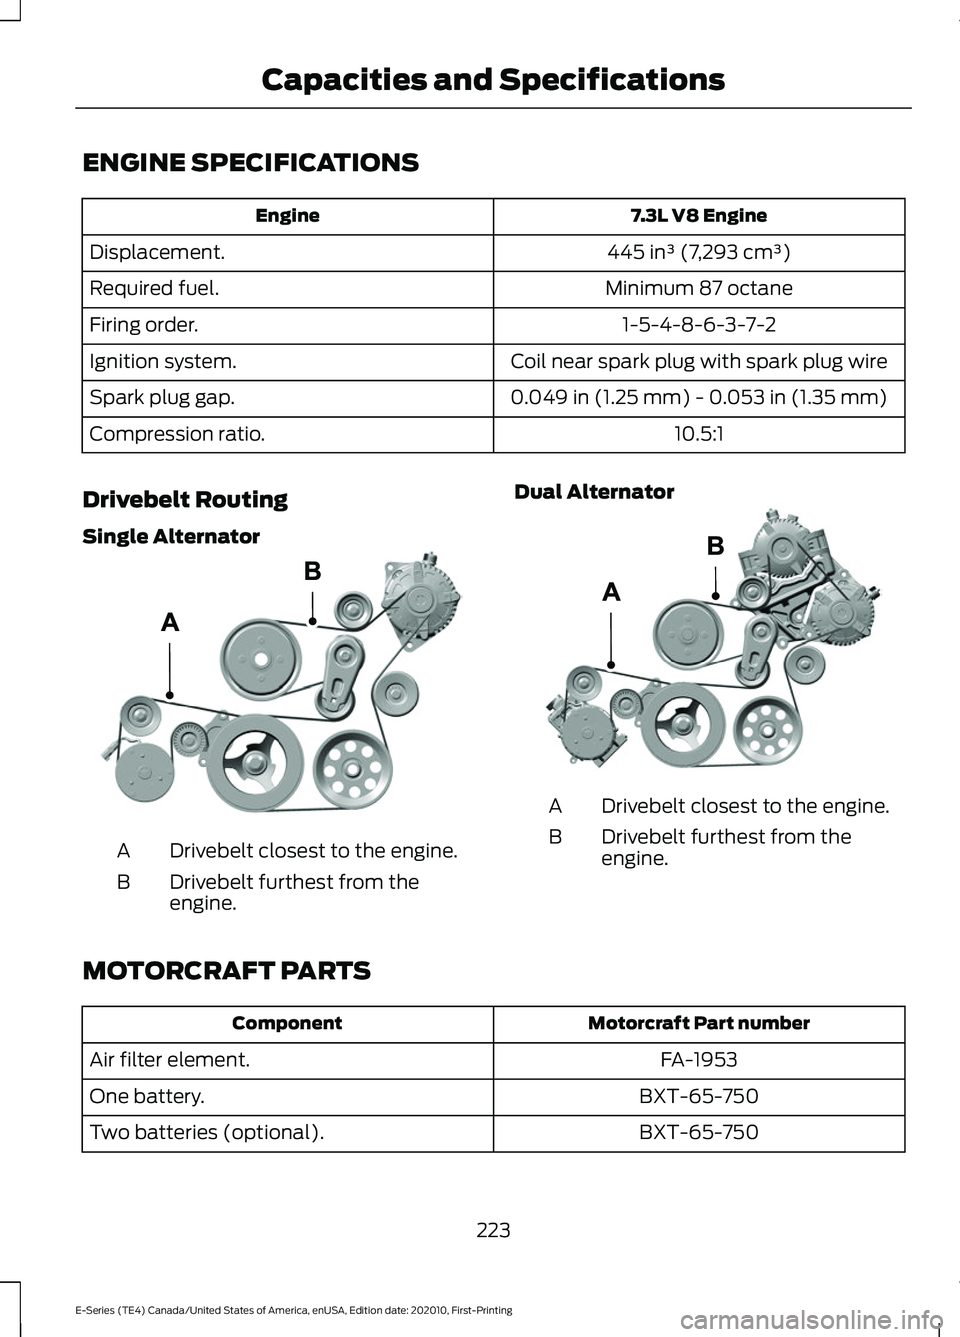
Drivebelt Routing
Single Alternator Drivebelt closest to the engine.
A
Drivebelt furthest from the
engine.
B Dual Alternator Drivebelt closest to the engine.
A
Drivebelt furthest from the
engine.
B
MOTORCRAFT PARTS Motorcraft Part number
Component
FA-1953
Air filter element.
BXT-65-750
One battery.
BXT-65-750
Two batteries (optional).
223
E-Series (TE4) Canada/United States of America, enUSA, Edition date: 202010, First-Printing Capacities and SpecificationsE305075 E298579
Page 227 of 300
Motorcraft Part number
Component
FL-820-S
Engine oil filter. 1
SP-589
Spark plug.
FT-187
Transmission fluid filter.
WW-2005
Windshield wiper blade.
1 If a Motorcraft oil filter is not available, use an oil filter that meets industry performance
specification SAE/USCAR-36.
We recommend Motorcraft parts that are available at your authorized dealer or at
www.fordparts.com. These parts are engineered for your vehicle, and meet or exceed our
specifications. Use of other parts could impact vehicle performance, emissions and
durability. Your warranty could be void for any damage related to use of other parts.
224
E-Series (TE4) Canada/United States of America, enUSA, Edition date: 202010, First-Printing Capacities and Specifications
Page 228 of 300
BULB SPECIFICATION CHART
Replacement bulbs are specified in the
chart below. Headlamp bulbs must be
marked with an authorized
“D.O.T.” for North America and an
“E” for Europe to
ensure lamp performance, light brightness
and pattern and safe visibility. The correct
bulbs will not damage the lamp assembly
or void the lamp assembly warranty and
will provide quality bulb illumination time.
Exterior Lamps Trade Name
Lamp
W5W
Front side marker lamp.
3157AK
Park lamp.
3157AK
Front direction indicator.
H13
Headlamp low beam.
H13
Headlamp high beam.
2825
Front clearance lamp (exterior mirror).
3157K
Brake, rear and direction indicator lamp.
3156
Reversing lamps.
Interior Lamps Trade Name
Lamp
906
Underhood Lamp.
578
Map lamp.
578
Dome lamp.
578
Cargo lamp.
To replace all instrument panel lights - see your authorized dealer.
225
E-Series (TE4) Canada/United States of America, enUSA, Edition date: 202010, First-Printing Capacities and Specifications
Page 229 of 300
ENGINE OIL CAPACITY AND
SPECIFICATION
Use oil that meets the defined
specification and viscosity grade.
If you do not use oil that meets the defined
specification and viscosity grade, it could
result in:
•
Component damage that your vehicle
warranty does not cover.
• Longer engine cranking periods.
• Increased emission levels.
• Reduced vehicle performance.
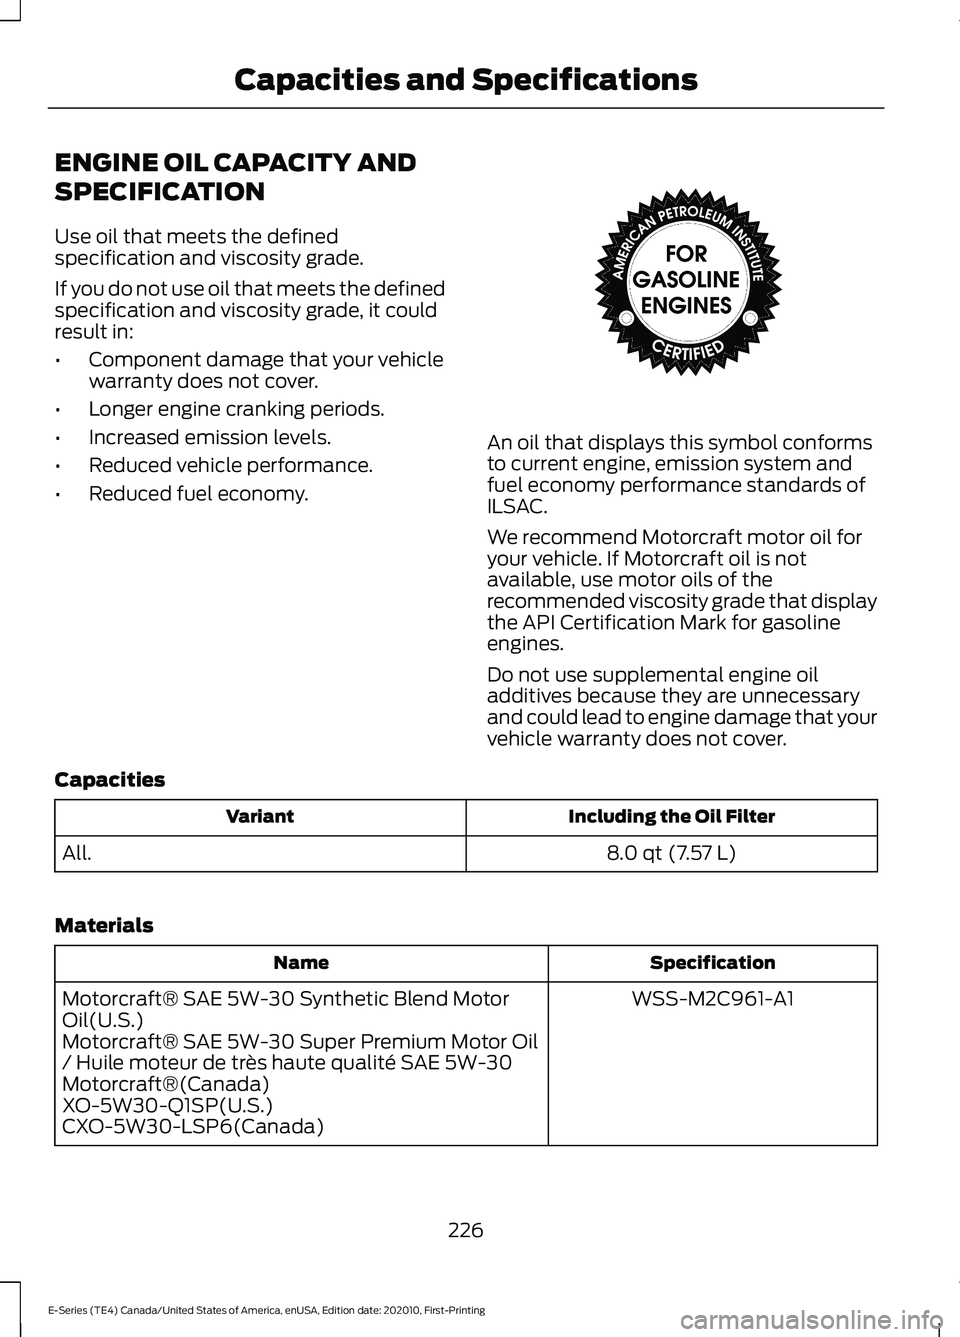
• Reduced fuel economy. An oil that displays this symbol conforms
to current engine, emission system and
fuel economy performance standards of
ILSAC.
We recommend Motorcraft motor oil for
your vehicle. If Motorcraft oil is not
available, use motor oils of the
recommended viscosity grade that display
the API Certification Mark for gasoline
engines.
Do not use supplemental engine oil
additives because they are unnecessary
and could lead to engine damage that your
vehicle warranty does not cover.
Capacities Including the Oil Filter
Variant
8.0 qt (7.57 L)
All.
Materials Specification
Name
WSS-M2C961-A1
Motorcraft® SAE 5W-30 Synthetic Blend Motor
Oil(U.S.)
Motorcraft® SAE 5W-30 Super Premium Motor Oil
/ Huile moteur de très haute qualité SAE 5W-30
Motorcraft®(Canada)
XO-5W30-Q1SP(U.S.)
CXO-5W30-LSP6(Canada)
226
E-Series (TE4) Canada/United States of America, enUSA, Edition date: 202010, First-Printing Capacities and SpecificationsE142732
Page 230 of 300
Alternative Engine Oil for
Extremely Cold Climates
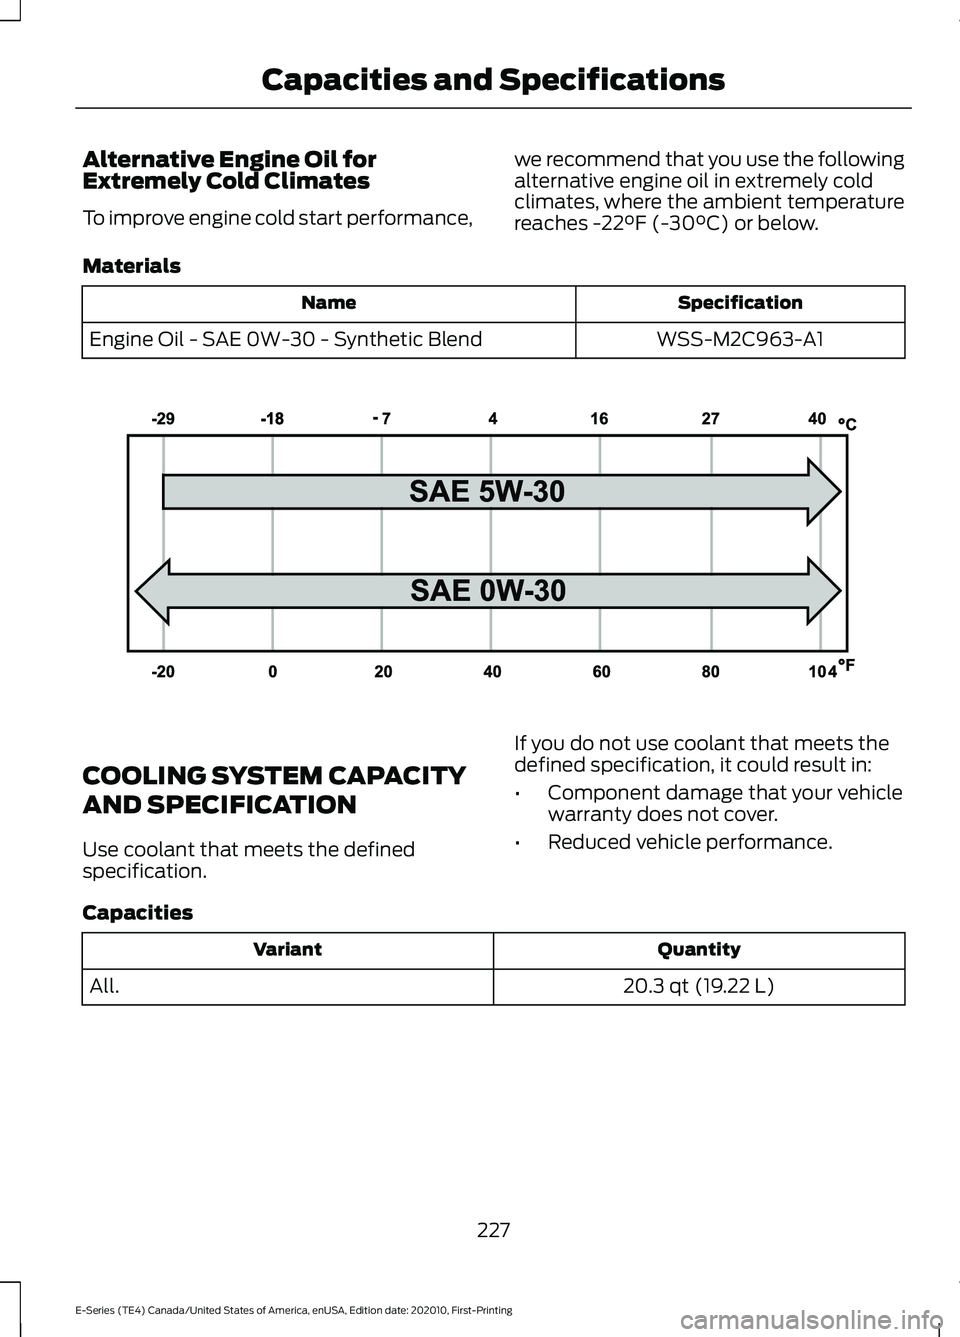
To improve engine cold start performance,
we recommend that you use the following
alternative engine oil in extremely cold
climates, where the ambient temperature
reaches -22°F (-30°C) or below.
Materials Specification
Name
WSS-M2C963-A1
Engine Oil - SAE 0W-30 - Synthetic Blend COOLING SYSTEM CAPACITY
AND SPECIFICATION
Use coolant that meets the defined
specification.
If you do not use coolant that meets the
defined specification, it could result in:
•
Component damage that your vehicle
warranty does not cover.
• Reduced vehicle performance.
Capacities Quantity
Variant
20.3 qt (19.22 L)
All.
227
E-Series (TE4) Canada/United States of America, enUSA, Edition date: 202010, First-Printing Capacities and SpecificationsE240523