FORD EDGE 2010 1.G Repair Manual
Manufacturer: FORD, Model Year: 2010, Model line: EDGE, Model: FORD EDGE 2010 1.GPages: 328, PDF Size: 2.29 MB
Page 61 of 328
To aid in side window defogging/demisting in cold weather:
1. Select
.
2. Select A/C.
3. Adjust the temperature control to maintain comfort.
4. Set the fan speed to the highest setting.
5. Direct the outer instrument panel vents towards the side windows.
REAR WINDOW DEFROSTER
R
The rear defroster control is located on the climate control panel and
works to clear the rear window of fog and thin ice.
The engine must be running to operate the rear window defroster.
Press the control to turn the rear window defroster on. An indicator light
on the button will illuminate when active. The rear window defroster
turns off automatically after 15 minutes or when the engine is turned off.
To manually turn off the rear window defroster at any time, press the
control again.
If your vehicle is equipped with both rear defroster and heated mirrors,
the same button will activate both.
Do not use razor blades or other sharp objects to clean the inside
of the rear window or to remove decals from the inside of the
rear window. This may cause damage to the heated grid lines and
will not be covered by your warranty.
CABIN AIR FILTER (IF EQUIPPED)
The cabin air filter element is designed to reduce the concentration of
airborne particles such as dust, spores and pollen in the air being
supplied to the interior of the vehicle. The presence of a particulate filter
element provides the following benefits:
•Improves your driving comfort by reducing particle concentration.
•Improves the interior compartment cleanliness.
•Protects the climate control components from particle deposits.
Note:A cabin air filter must be installed at all times to prevent foreign
objects from entering the system. Running the system without a filter in
place could result in degradation or damage to the system. If your
vehicle is not equipped with a cabin air filter, a protective screen has
been provided in its place and must remain installed at all times.
The access door for the filter is located behind the glove box. For
replacement intervals regarding the cabin air filter, see thescheduled
maintenance information. For more information regarding your filter,
see your authorized dealer.
Climate Controls
61
2010 Edge(edg)
Owners Guide(own2002), 1st Printing
USA(fus)
Page 62 of 328
HEADLAMP CONTROL
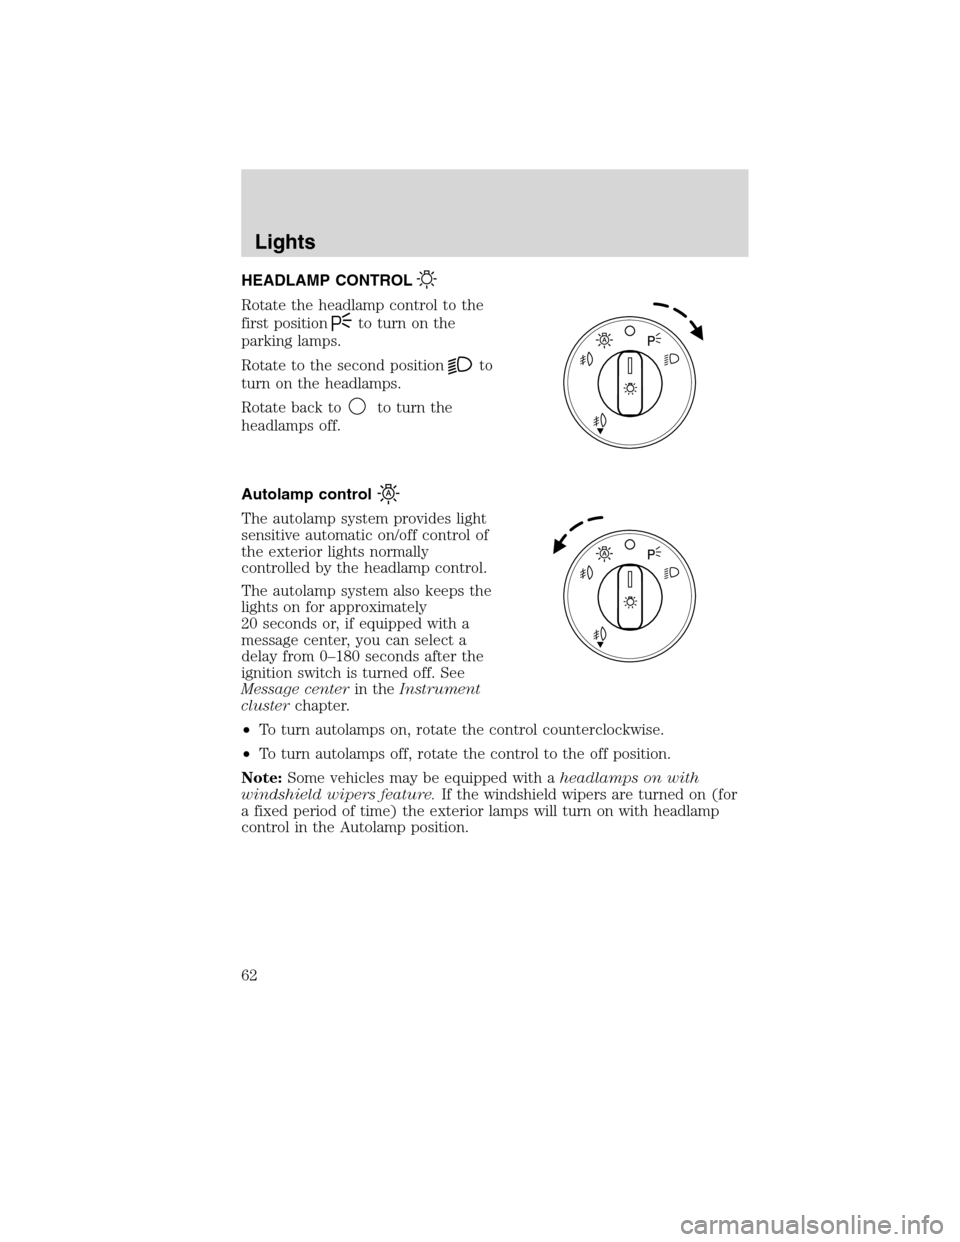
Rotate the headlamp control to the
first position
to turn on the
parking lamps.
Rotate to the second position
to
turn on the headlamps.
Rotate back to
to turn the
headlamps off.
Autolamp control
The autolamp system provides light
sensitive automatic on/off control of
the exterior lights normally
controlled by the headlamp control.
The autolamp system also keeps the
lights on for approximately
20 seconds or, if equipped with a
message center, you can select a
delay from 0–180 seconds after the
ignition switch is turned off. See
Message centerin theInstrument
clusterchapter.
•To turn autolamps on, rotate the control counterclockwise.
•To turn autolamps off, rotate the control to the off position.
Note:Some vehicles may be equipped with aheadlamps on with
windshield wipers feature.If the windshield wipers are turned on (for
a fixed period of time) the exterior lamps will turn on with headlamp
control in the Autolamp position.
Lights
62
2010 Edge(edg)
Owners Guide(own2002), 1st Printing
USA(fus)
Page 63 of 328
Fog lamp control (if equipped)
The headlamp control also operates
the fog lamps. The fog lamps can be
turned on when the headlamp
control is in the
,,or
positions and the high beams are
not turned on.
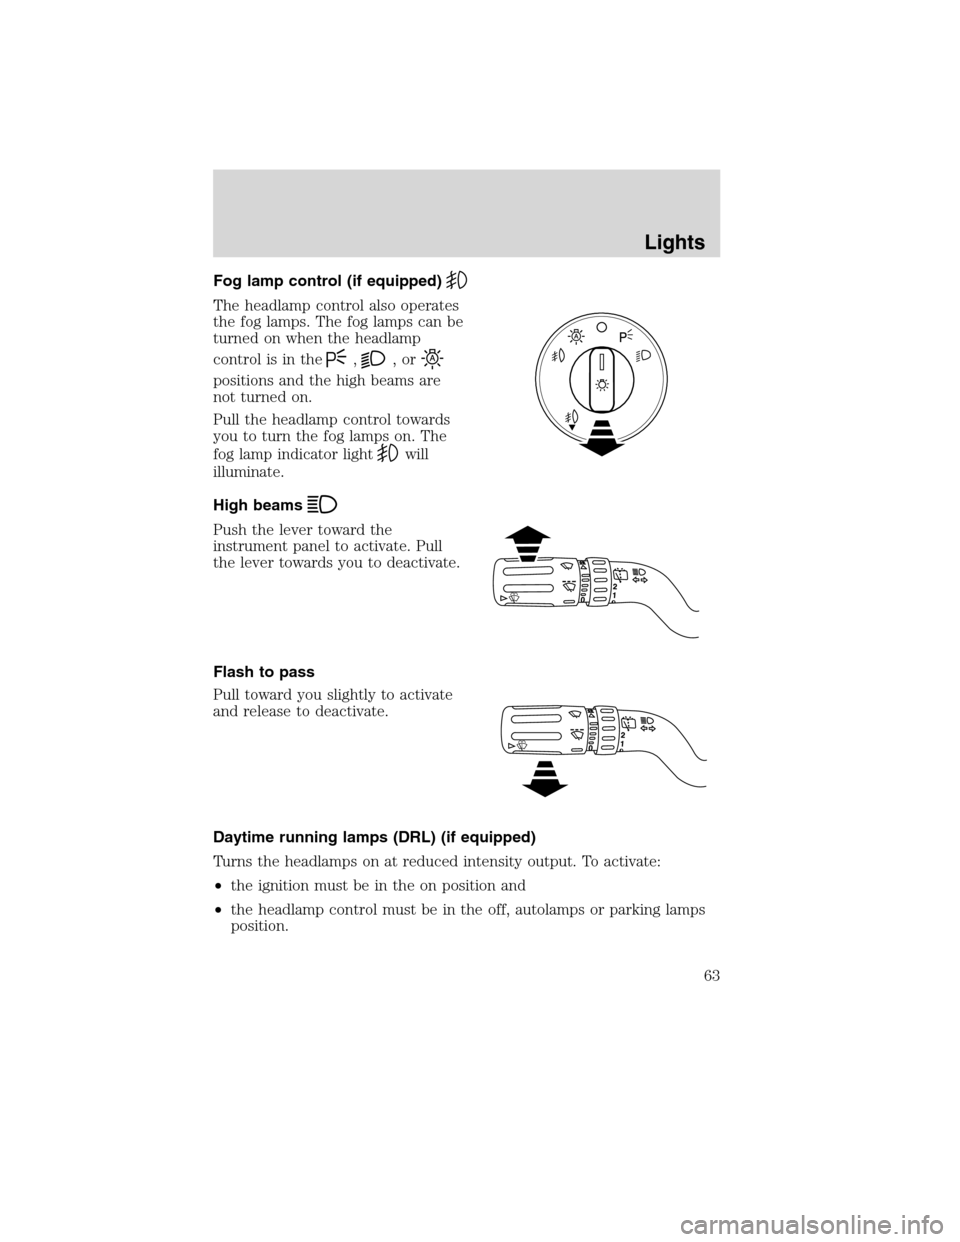
Pull the headlamp control towards
you to turn the fog lamps on. The
fog lamp indicator light
will
illuminate.
High beams
Push the lever toward the
instrument panel to activate. Pull
the lever towards you to deactivate.
Flash to pass
Pull toward you slightly to activate
and release to deactivate.
Daytime running lamps (DRL) (if equipped)
Turns the headlamps on at reduced intensity output. To activate:
•the ignition must be in the on position and
•the headlamp control must be in the off, autolamps or parking lamps
position.
Lights
63
2010 Edge(edg)
Owners Guide(own2002), 1st Printing
USA(fus)
Page 64 of 328
WARNING:Always remember to turn on your headlamps at
dusk or during inclement weather. The Daytime Running Lamp
(DRL) system does not activate the tail lamps and generally may not
provide adequate lighting during these conditions. Failure to activate
your headlamps under these conditions may result in a collision.
PANEL DIMMER CONTROL
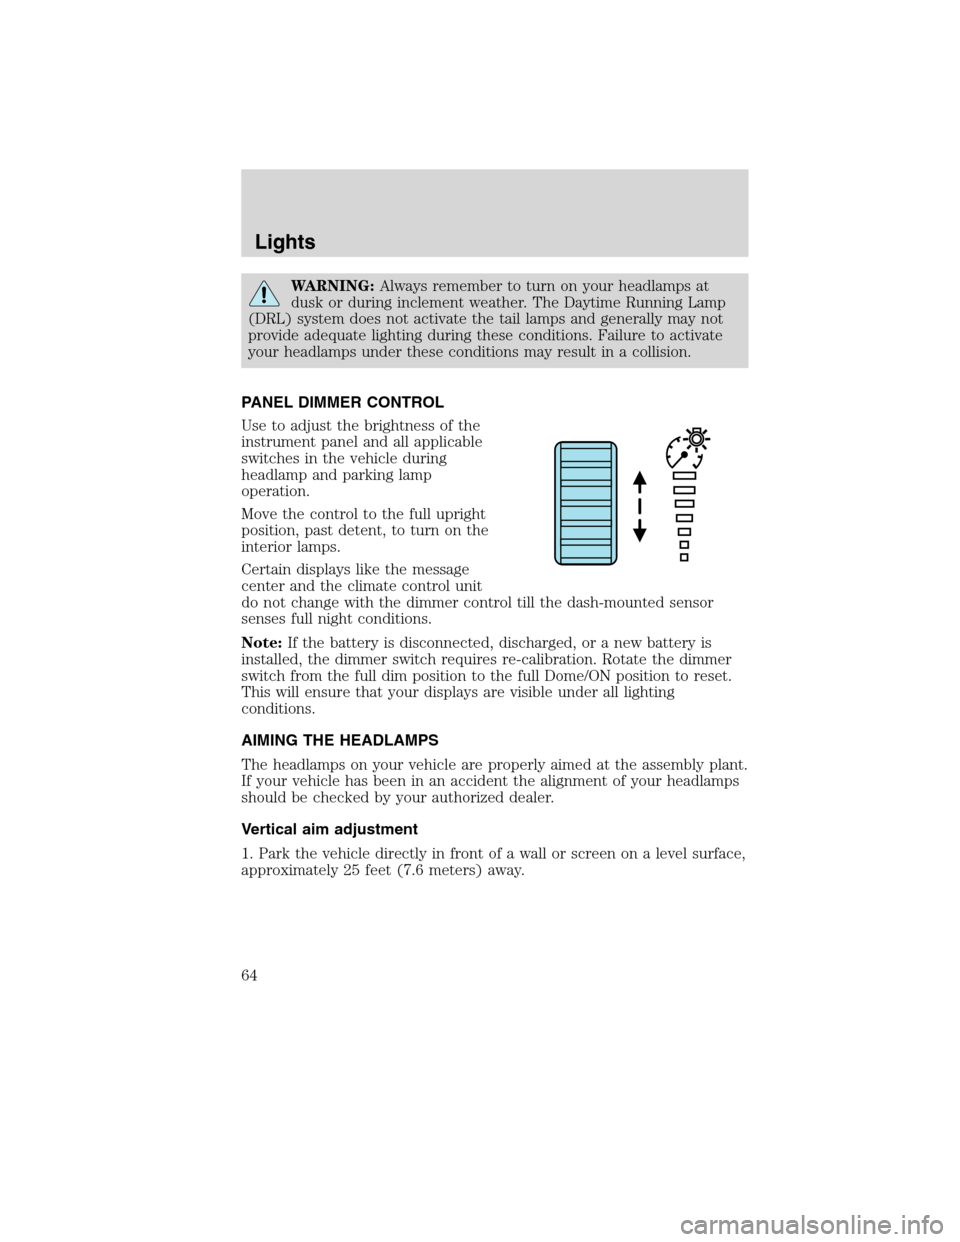
Use to adjust the brightness of the
instrument panel and all applicable
switches in the vehicle during
headlamp and parking lamp
operation.
Move the control to the full upright
position, past detent, to turn on the
interior lamps.
Certain displays like the message
center and the climate control unit
do not change with the dimmer control till the dash-mounted sensor
senses full night conditions.
Note:If the battery is disconnected, discharged, or a new battery is
installed, the dimmer switch requires re-calibration. Rotate the dimmer
switch from the full dim position to the full Dome/ON position to reset.
This will ensure that your displays are visible under all lighting
conditions.
AIMING THE HEADLAMPS
The headlamps on your vehicle are properly aimed at the assembly plant.
If your vehicle has been in an accident the alignment of your headlamps
should be checked by your authorized dealer.
Vertical aim adjustment
1. Park the vehicle directly in front of a wall or screen on a level surface,
approximately 25 feet (7.6 meters) away.
Lights
64
2010 Edge(edg)
Owners Guide(own2002), 1st Printing
USA(fus)
Page 65 of 328
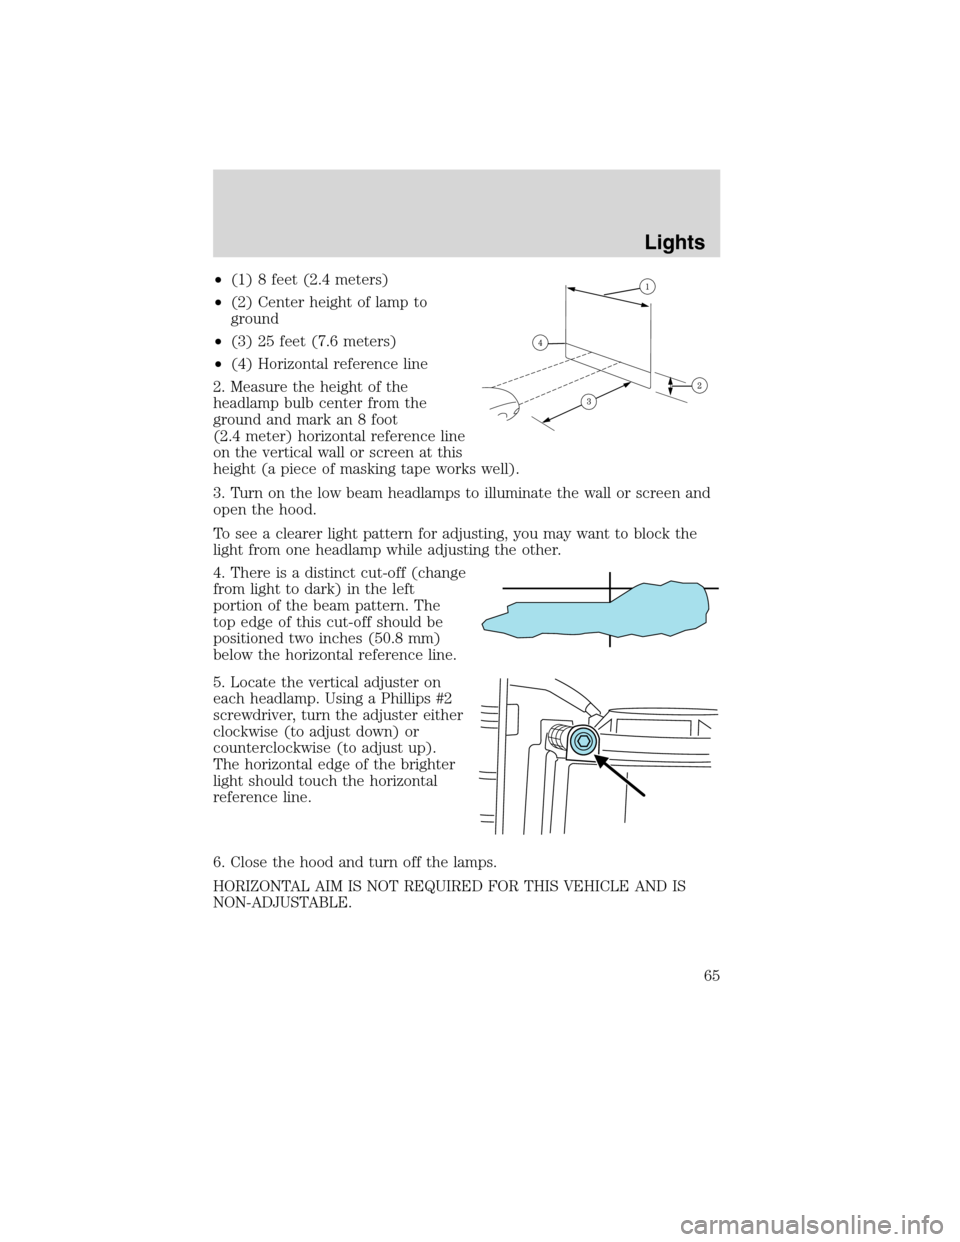
•(1) 8 feet (2.4 meters)
•(2) Center height of lamp to
ground
•(3) 25 feet (7.6 meters)
•(4) Horizontal reference line
2. Measure the height of the
headlamp bulb center from the
ground and mark an 8 foot
(2.4 meter) horizontal reference line
on the vertical wall or screen at this
height (a piece of masking tape works well).
3. Turn on the low beam headlamps to illuminate the wall or screen and
open the hood.
To see a clearer light pattern for adjusting, you may want to block the
light from one headlamp while adjusting the other.
4. There is a distinct cut-off (change
from light to dark) in the left
portion of the beam pattern. The
top edge of this cut-off should be
positioned two inches (50.8 mm)
below the horizontal reference line.
5. Locate the vertical adjuster on
each headlamp. Using a Phillips #2
screwdriver, turn the adjuster either
clockwise (to adjust down) or
counterclockwise (to adjust up).
The horizontal edge of the brighter
light should touch the horizontal
reference line.
6. Close the hood and turn off the lamps.
HORIZONTAL AIM IS NOT REQUIRED FOR THIS VEHICLE AND IS
NON-ADJUSTABLE.
Lights
65
2010 Edge(edg)
Owners Guide(own2002), 1st Printing
USA(fus)
Page 66 of 328
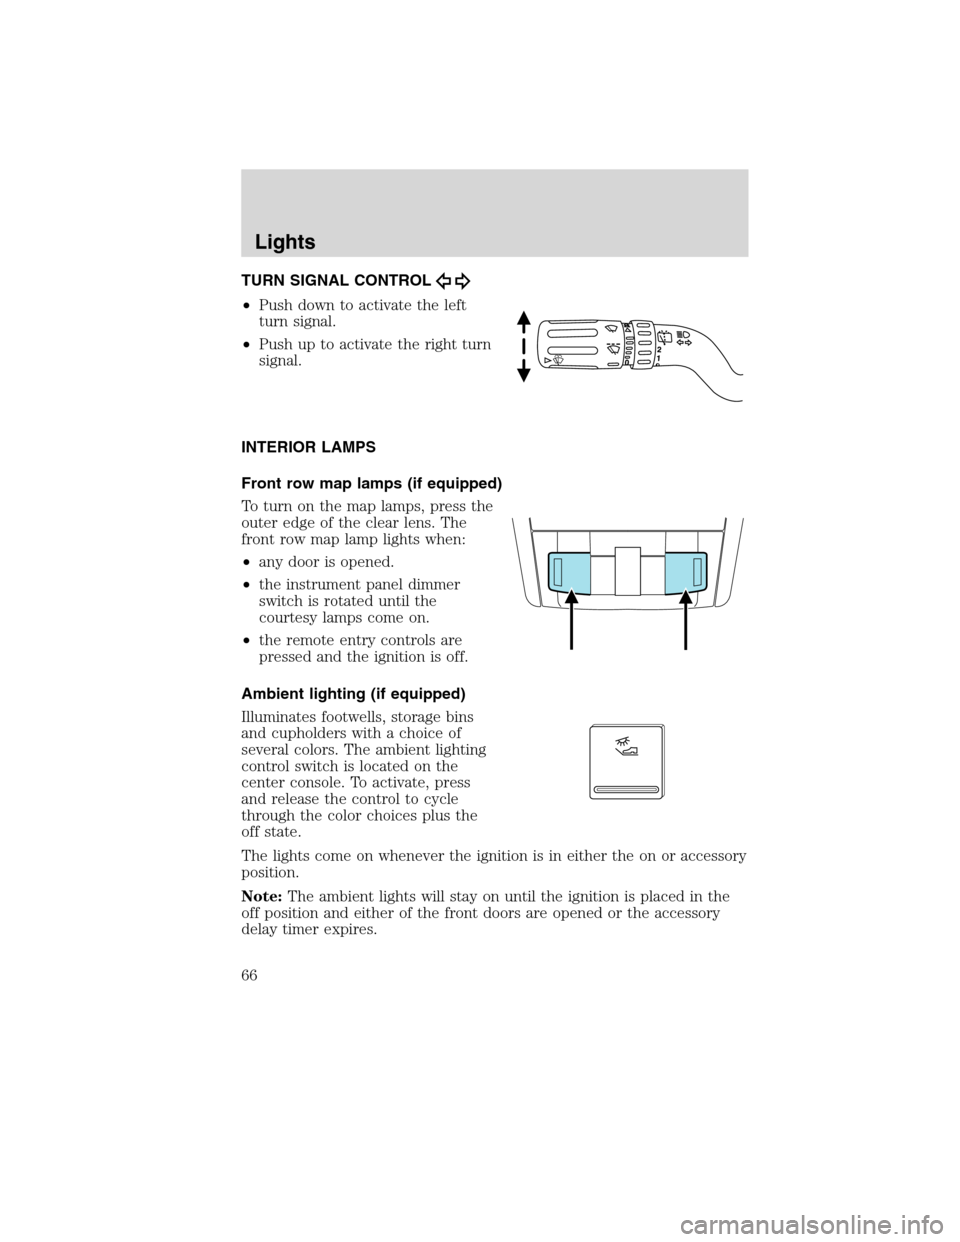
TURN SIGNAL CONTROL
•Push down to activate the left
turn signal.
•Push up to activate the right turn
signal.
INTERIOR LAMPS
Front row map lamps (if equipped)
To turn on the map lamps, press the
outer edge of the clear lens. The
front row map lamp lights when:
•any door is opened.
•the instrument panel dimmer
switch is rotated until the
courtesy lamps come on.
•the remote entry controls are
pressed and the ignition is off.
Ambient lighting (if equipped)
Illuminates footwells, storage bins
and cupholders with a choice of
several colors. The ambient lighting
control switch is located on the
center console. To activate, press
and release the control to cycle
through the color choices plus the
off state.
The lights come on whenever the ignition is in either the on or accessory
position.
Note:The ambient lights will stay on until the ignition is placed in the
off position and either of the front doors are opened or the accessory
delay timer expires.
Lights
66
2010 Edge(edg)
Owners Guide(own2002), 1st Printing
USA(fus)
Page 67 of 328
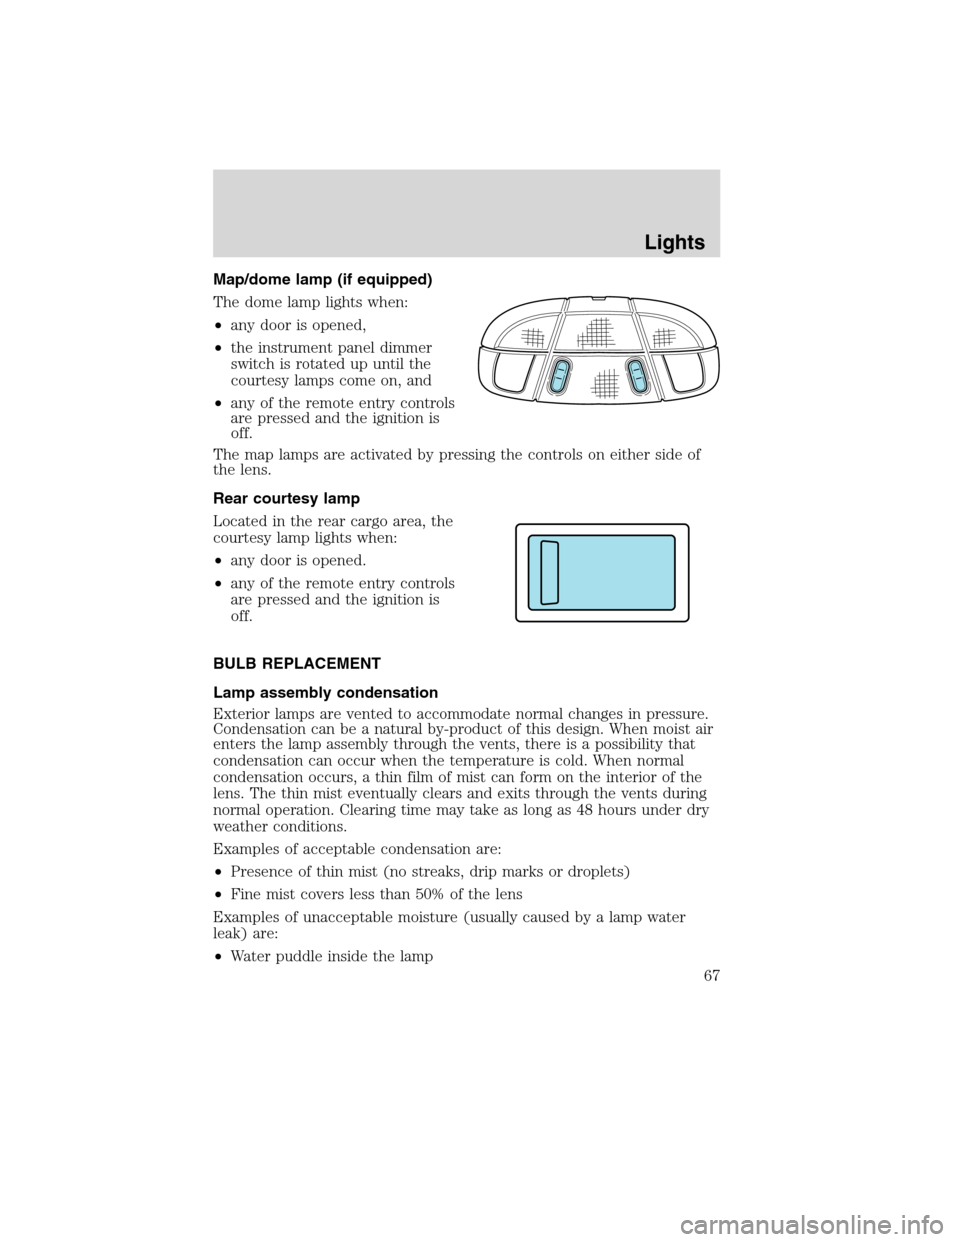
Map/dome lamp (if equipped)
The dome lamp lights when:
•any door is opened,
•the instrument panel dimmer
switch is rotated up until the
courtesy lamps come on, and
•any of the remote entry controls
are pressed and the ignition is
off.
The map lamps are activated by pressing the controls on either side of
the lens.
Rear courtesy lamp
Located in the rear cargo area, the
courtesy lamp lights when:
•any door is opened.
•any of the remote entry controls
are pressed and the ignition is
off.
BULB REPLACEMENT
Lamp assembly condensation
Exterior lamps are vented to accommodate normal changes in pressure.
Condensation can be a natural by-product of this design. When moist air
enters the lamp assembly through the vents, there is a possibility that
condensation can occur when the temperature is cold. When normal
condensation occurs, a thin film of mist can form on the interior of the
lens. The thin mist eventually clears and exits through the vents during
normal operation. Clearing time may take as long as 48 hours under dry
weather conditions.
Examples of acceptable condensation are:
•Presence of thin mist (no streaks, drip marks or droplets)
•Fine mist covers less than 50% of the lens
Examples of unacceptable moisture (usually caused by a lamp water
leak) are:
•Water puddle inside the lamp
Lights
67
2010 Edge(edg)
Owners Guide(own2002), 1st Printing
USA(fus)
Page 68 of 328
•Large water droplets, drip marks or streaks present on the interior of
the lens
Take your vehicle to dealer for service if any of the above conditions of
unacceptable moisture are present.
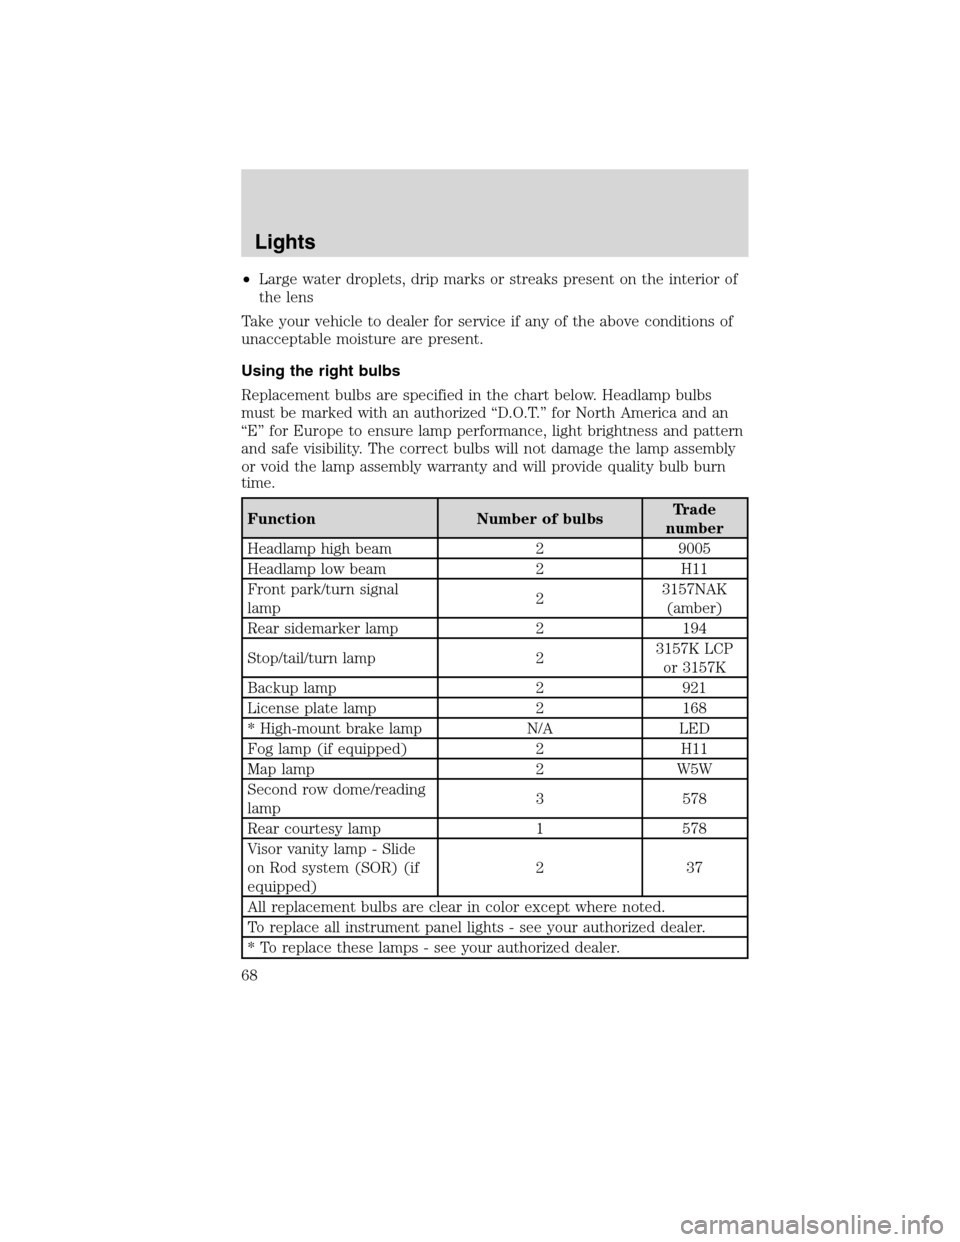
Using the right bulbs
Replacement bulbs are specified in the chart below. Headlamp bulbs
must be marked with an authorized “D.O.T.” for North America and an
“E” for Europe to ensure lamp performance, light brightness and pattern
and safe visibility. The correct bulbs will not damage the lamp assembly
or void the lamp assembly warranty and will provide quality bulb burn
time.
Function Number of bulbsTrade
number
Headlamp high beam 2 9005
Headlamp low beam 2 H11
Front park/turn signal
lamp23157NAK
(amber)
Rear sidemarker lamp 2 194
Stop/tail/turn lamp 23157K LCP
or 3157K
Backup lamp 2 921
License plate lamp 2 168
* High-mount brake lamp N/A LED
Fog lamp (if equipped) 2 H11
Map lamp 2 W5W
Second row dome/reading
lamp3 578
Rear courtesy lamp 1 578
Visor vanity lamp - Slide
on Rod system (SOR) (if
equipped)237
All replacement bulbs are clear in color except where noted.
To replace all instrument panel lights - see your authorized dealer.
* To replace these lamps - see your authorized dealer.
Lights
68
2010 Edge(edg)
Owners Guide(own2002), 1st Printing
USA(fus)
Page 69 of 328
Replacing interior bulbs
Check the operation of all bulbs frequently.
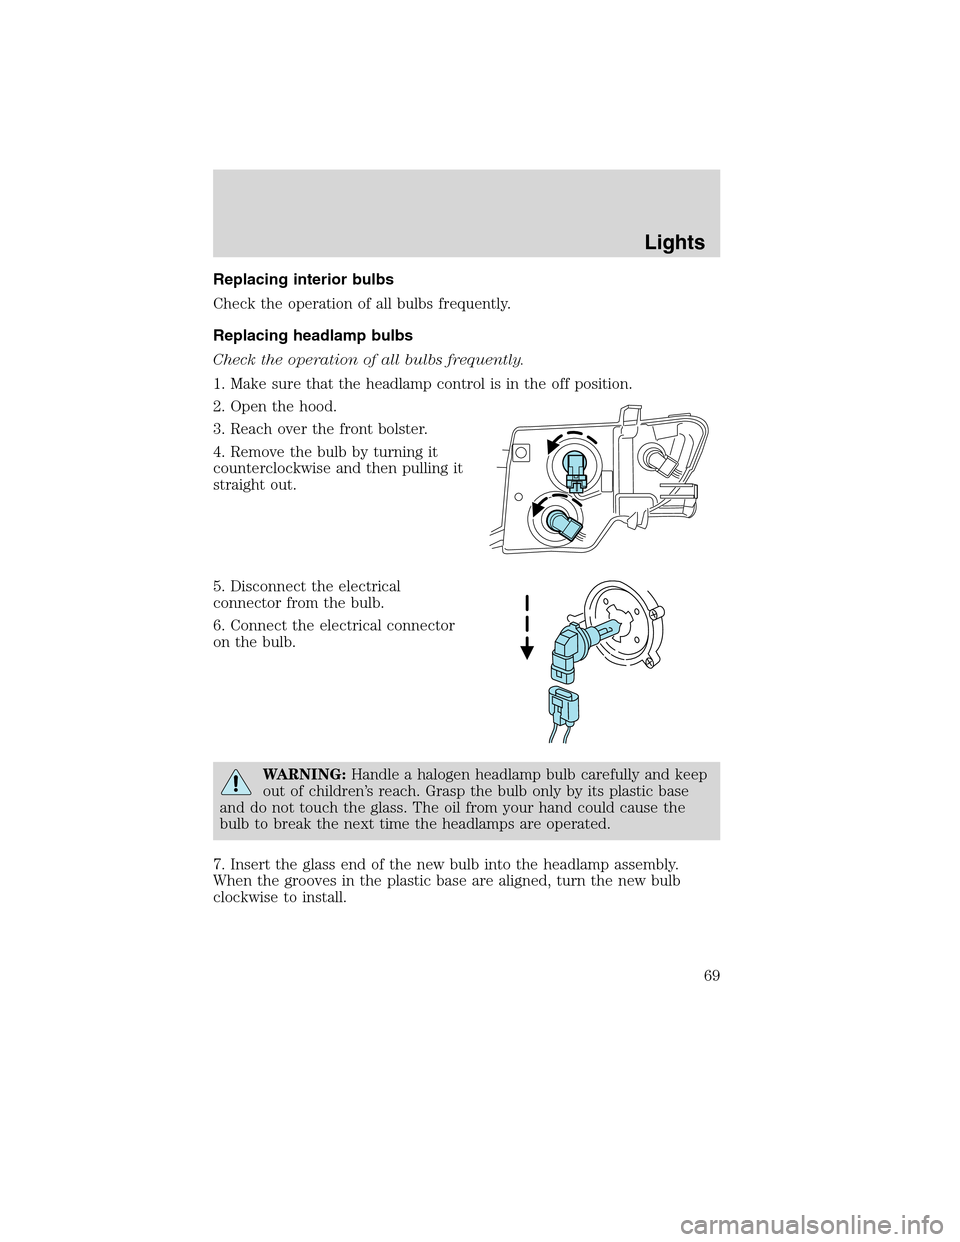
Replacing headlamp bulbs
Check the operation of all bulbs frequently.
1. Make sure that the headlamp control is in the off position.
2. Open the hood.
3. Reach over the front bolster.
4. Remove the bulb by turning it
counterclockwise and then pulling it
straight out.
5. Disconnect the electrical
connector from the bulb.
6. Connect the electrical connector
on the bulb.
WARNING:Handle a halogen headlamp bulb carefully and keep
out of children’s reach. Grasp the bulb only by its plastic base
and do not touch the glass. The oil from your hand could cause the
bulb to break the next time the headlamps are operated.
7. Insert the glass end of the new bulb into the headlamp assembly.
When the grooves in the plastic base are aligned, turn the new bulb
clockwise to install.
Lights
69
2010 Edge(edg)
Owners Guide(own2002), 1st Printing
USA(fus)
Page 70 of 328
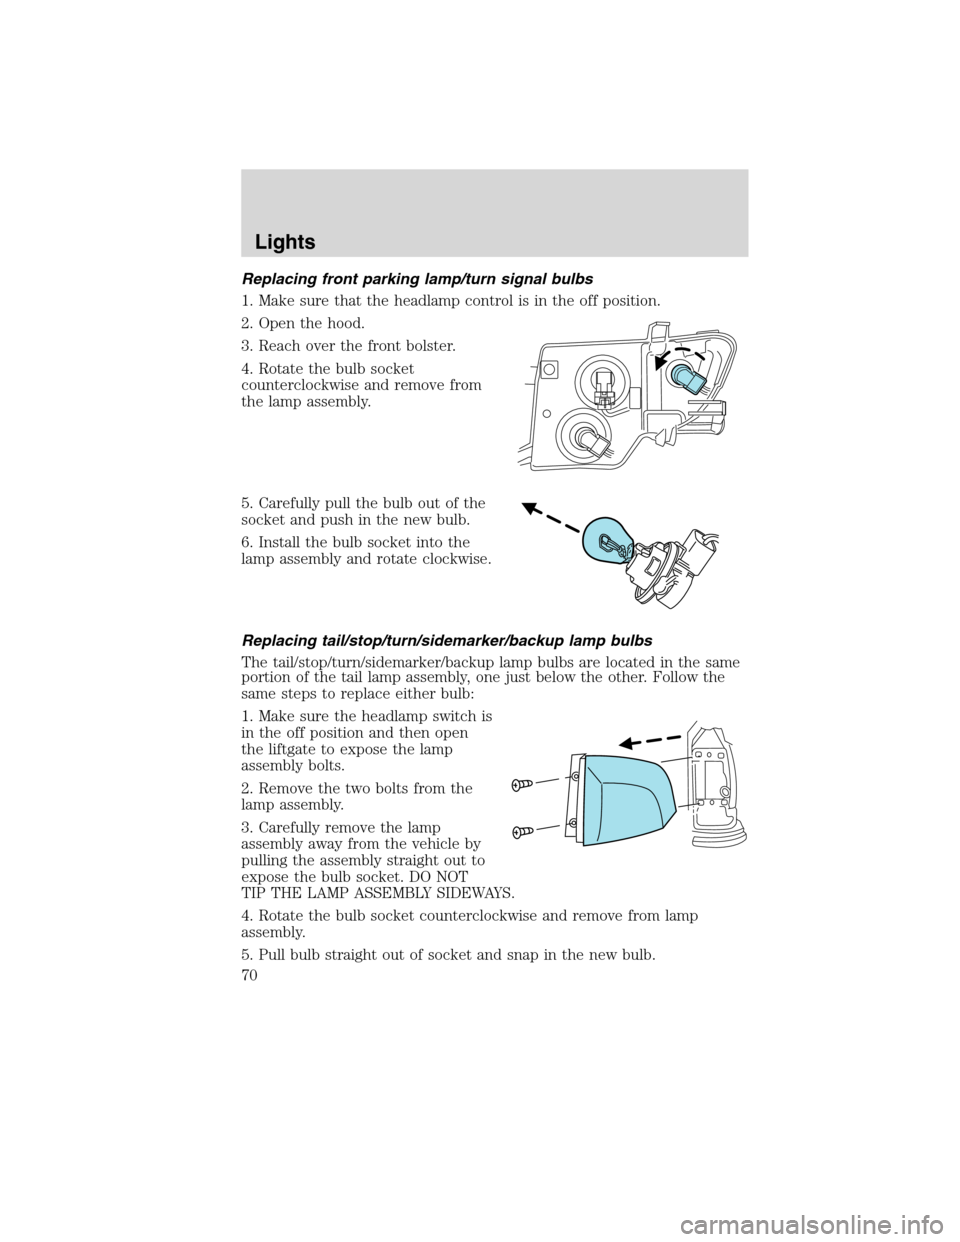
Replacing front parking lamp/turn signal bulbs
1. Make sure that the headlamp control is in the off position.
2. Open the hood.
3. Reach over the front bolster.
4. Rotate the bulb socket
counterclockwise and remove from
the lamp assembly.
5. Carefully pull the bulb out of the
socket and push in the new bulb.
6. Install the bulb socket into the
lamp assembly and rotate clockwise.
Replacing tail/stop/turn/sidemarker/backup lamp bulbs
The tail/stop/turn/sidemarker/backup lamp bulbs are located in the same
portion of the tail lamp assembly, one just below the other. Follow the
same steps to replace either bulb:
1. Make sure the headlamp switch is
in the off position and then open
the liftgate to expose the lamp
assembly bolts.
2. Remove the two bolts from the
lamp assembly.
3. Carefully remove the lamp
assembly away from the vehicle by
pulling the assembly straight out to
expose the bulb socket. DO NOT
TIP THE LAMP ASSEMBLY SIDEWAYS.
4. Rotate the bulb socket counterclockwise and remove from lamp
assembly.
5. Pull bulb straight out of socket and snap in the new bulb.
Lights
70
2010 Edge(edg)
Owners Guide(own2002), 1st Printing
USA(fus)