change time FORD EDGE 2014 1.G Quick Reference Guide
[x] Cancel search | Manufacturer: FORD, Model Year: 2014, Model line: EDGE, Model: FORD EDGE 2014 1.GPages: 8, PDF Size: 1.41 MB
Page 1 of 8

October 2013First Printing
Quick Reference Guide Edge
Litho in U.S.A.ET4J 19G217 AA
2 014
EdGE
Q Uick
R EFEREnc E
GUid E
Warning: driving while distracted can result in loss of vehicle control,
crash and injury. We strongly recommend that you use extreme caution when using any device that may take your focus off the road. Your primary responsibility is the safe operation of your vehicle. We recommend
against the use of any hand-held device while driving and encourage the use of voice-operated systems when possible. Make sure you are aware
of all applicable local laws that may affect the use of electronic devices while driving.
Learn more about your ne W Ford edge
Scan the country-appropriate QR code with your smartphone
(make sure you have a scanner app installed) and you can
access even more information about your vehicle.
fordowner.com (U . S .)ford.ca (ca n a d a)
This Quick Reference Guide is not intended to replace your
vehicle Owner’s Manual which contains more detailed
information concerning the features of your vehicle, as
well as important safety warnings designed to help reduce
the risk of injury to you and your passengers. Please read
your entire Owner’s Manual carefully as you begin learning
about your new vehicle and refer to the appropriate
chapters when questions arise. All information contained
in this Quick Reference Guide was accurate at the time of
duplication. We reserve the right to change features,
operation and/or functionality of any vehicle specification
at any time. Your Ford dealer is the best source for the
most current information. For detailed operating and
safety information, please consult your Owner’s Manual.
United States
Ford Customer Relationship Center
1-800-392-3673 (FORD)
(TDD for the hearing impaired:
1-800-232-5952)
fordowner.com
Canada
Ford Customer Relationship Centre
1-800-565-3673 (FORD)
ford.ca
Page 8 of 8

FU nc TiOn
* if equipped14
cOMFORT
*if equipped15
REAR VIEW CAMERA* The feature provides a video image of
the area behind the vehicle. The display
automatically appears in the touchscreen
when the vehicle is in r (Reverse) and
uses green, yellow and red guides to alert
you of your proximity to objects. For
non-touchscreen vehicles, the image will
appear in the 4.2-inch center stack display.
REVERSE SENSING SYSTEM*This system sounds a warning tone if there
is an obstacle near the vehicle’s rear bumper
when the vehicle is in r (Reverse) and is
traveling less than 3 mph (5 km/h). The
warning tone will increase in frequency
as the object gets closer.
note: Visibility aids do not replace the need
to watch where the vehicle is moving. Refer to
your Owner’s Manual for safety information,
more details and limitations.
SELECT SHIFT A UTOMATIC®
TRANSMISSION*
This transmission gives you the ability to
manually change gears if you’d like. To use,
move the gearshift lever from d (drive) to
S (Sport). Then, press + or – buttons
on the gearshift lever to make shifts. if
equipped with steering wheel paddles, pull
the right paddle (+) to upshift, pull the left
paddle (–) to downshift.
TILTING HEAD RESTRAINTSTo tilt the head
restraint, do the
following: Adjust
the seatback to an
upright driving or
riding position. Tilt
the head restraint
forward by gently
pulling the top of
the head restraint.
Once it is in its forward-most position, tilt
it forward once more to release it to its
upright position.
note: do not attempt to force the head restraint backward after its tilted. instead,
continue tilting it forward until the head
restraint releases to the upright position.
MYKEY®*Myk ey allows you to program certain driving
restrictions in order to promote good driving
habits. You can program things like; speed
restrictions, limited volume levels and safety
belt reminders. For complete information,
refer to the MyKey chapter in your
Owner’s Manual.
SECURICODETM KEYLESS
ENTRY SYSTEM*
The system allows you to lock or unlock the
doors using the touchpad. You will need
your five-digit factory code located on your
owner’s wallet card in the glove box. See the
Locks chapter in your Owner’s Manual for
more information on how to use SecuriCode.
HEATED FRONT SEATS*To access heated seats, press the climate
corner on your touchscreen. Press
repeatedly to cycle through the various heat
modes and off. if your vehicle is not equipped
with a touchscreen, press the hard button
.
EASYF OLD® REAR
FOLDING SEATS*
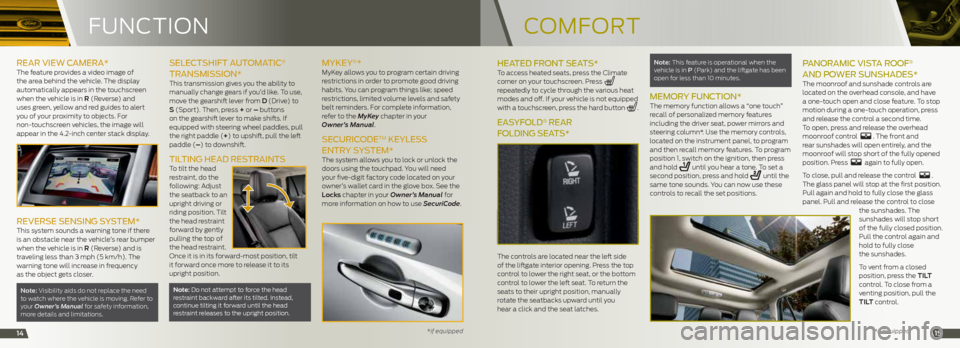
The controls are located near the left side
of the liftgate interior opening. Press the top
control to lower the right seat, or the bottom
control to lower the left seat. To return the
seats to their upright position, manually
rotate the seatbacks upward until you
hear a click and the seat latches.
note: This feature is operational when the
vehicle is in P (Park) and the liftgate has been
open for less than 10 minutes.
MEMORY FUNCTION*The memory function allows a “one touch”
recall of personalized memory features
including the driver seat, power mirrors and
steering column*. Use the memory controls,
located on the instrument panel, to program
and then recall memory features. To program
position 1, switch on the ignition, then press
and hold
until you hear a tone. To set a
second position, press and hold until the
same tone sounds. You can now use these
controls to recall the set positions.
P ANORAMIC VISTA R OOF®
AND P OWER S UNSHADES*
The moonroof and sunshade controls are
located on the overhead console, and have
a one-touch open and close feature. To stop
motion during a one-touch operation, press
and release the control a second time.
To open, press and release the overhead
moonroof control
. The front and
rear sunshades will open entirely, and the
moonroof will stop short of the fully opened
position. Press
again to fully open.
To close, pull and release the control
.
The glass panel will stop at the first position.
Pull again and hold to fully close the glass
panel. Pull and release the control to close the sunshades. The
sunshades will stop short
of the fully closed position.
Pull the control again and
hold to fully close
the sunshades.
To vent from a closed
position, press the tiL t
control. To close from a
venting position, pull the
tiL t control.