change time FORD EDGE 2018 Owners Manual
[x] Cancel search | Manufacturer: FORD, Model Year: 2018, Model line: EDGE, Model: FORD EDGE 2018Pages: 557, PDF Size: 7.02 MB
Page 2 of 557

The information contained in this publication was correct at the time of going to print. In the interest of
continuous development, we reserve the right to change specifications, design or equipment at any time
without notice or obligation. No part of this publication may be reproduced, transmitted, stored in a
retrieval system or translated into any language in any form by any means without our written permission.
Errors and omissions excepted.
© Ford Motor Company 2018
All rights reserved.
Part Number: 201706 20180606184131
California Proposition 65
WARNING: Operating, servicing and
maintaining a passenger vehicle or off-highway
motor vehicle can expose you to chemicals
including engine exhaust, carbon monoxide,
phthalates, and lead, which are known to the State
of California to cause cancer and birth defects or
other reproductive harm. To minimize exposure,
avoid breathing exhaust, do not idle the engine
except as necessary, service your vehicle in a
well-ventilated area and wear gloves or wash your
hands frequently when servicing your vehicle. For
more information go to
www.P65Warnings.ca.gov/passenger-vehicle. WARNING:
Battery posts, terminals and
related accessories contain lead and lead
compounds, chemicals known to the State of
California to cause cancer and reproductive harm.
Wash your hands after handling
.
Page 60 of 557
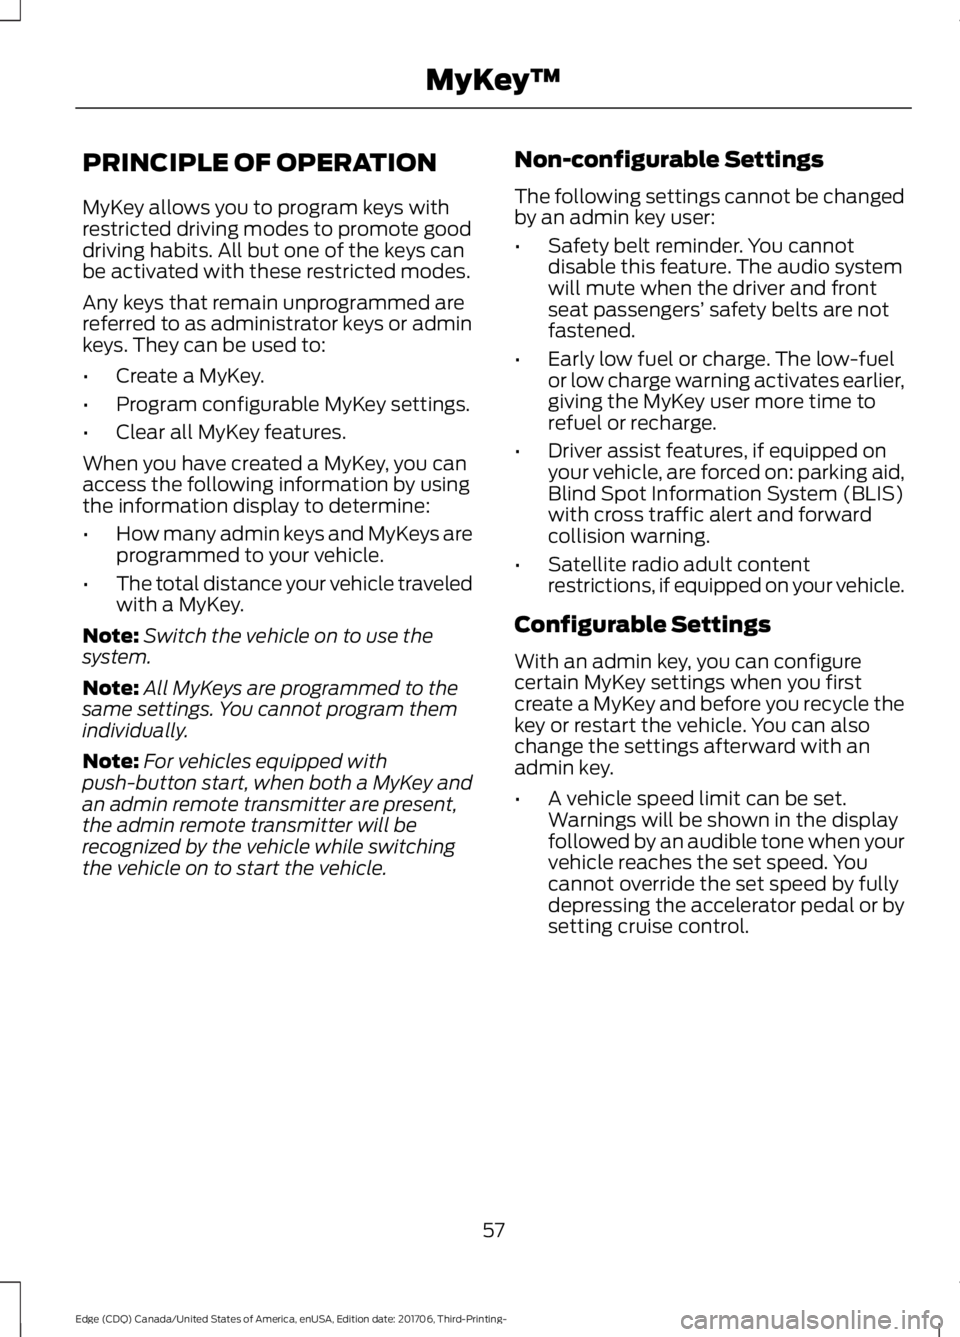
PRINCIPLE OF OPERATION
MyKey allows you to program keys with
restricted driving modes to promote good
driving habits. All but one of the keys can
be activated with these restricted modes.
Any keys that remain unprogrammed are
referred to as administrator keys or admin
keys. They can be used to:
•
Create a MyKey.
• Program configurable MyKey settings.
• Clear all MyKey features.
When you have created a MyKey, you can
access the following information by using
the information display to determine:
• How many admin keys and MyKeys are
programmed to your vehicle.
• The total distance your vehicle traveled
with a MyKey.
Note: Switch the vehicle on to use the
system.
Note: All MyKeys are programmed to the
same settings. You cannot program them
individually.
Note: For vehicles equipped with
push-button start, when both a MyKey and
an admin remote transmitter are present,
the admin remote transmitter will be
recognized by the vehicle while switching
the vehicle on to start the vehicle. Non-configurable Settings
The following settings cannot be changed
by an admin key user:
•
Safety belt reminder. You cannot
disable this feature. The audio system
will mute when the driver and front
seat passengers’ safety belts are not
fastened.
• Early low fuel or charge. The low-fuel
or low charge warning activates earlier,
giving the MyKey user more time to
refuel or recharge.
• Driver assist features, if equipped on
your vehicle, are forced on: parking aid,
Blind Spot Information System (BLIS)
with cross traffic alert and forward
collision warning.
• Satellite radio adult content
restrictions, if equipped on your vehicle.
Configurable Settings
With an admin key, you can configure
certain MyKey settings when you first
create a MyKey and before you recycle the
key or restart the vehicle. You can also
change the settings afterward with an
admin key.
• A vehicle speed limit can be set.
Warnings will be shown in the display
followed by an audible tone when your
vehicle reaches the set speed. You
cannot override the set speed by fully
depressing the accelerator pedal or by
setting cruise control.
57
Edge (CDQ) Canada/United States of America, enUSA, Edition date: 201706, Third-Printing- MyKey
™
Page 62 of 557
Note:
You can clear or change your MyKey
settings at any time during the same key
cycle as you created the MyKey. Once you
have switched the vehicle off, however, you
will need an admin key to change or clear
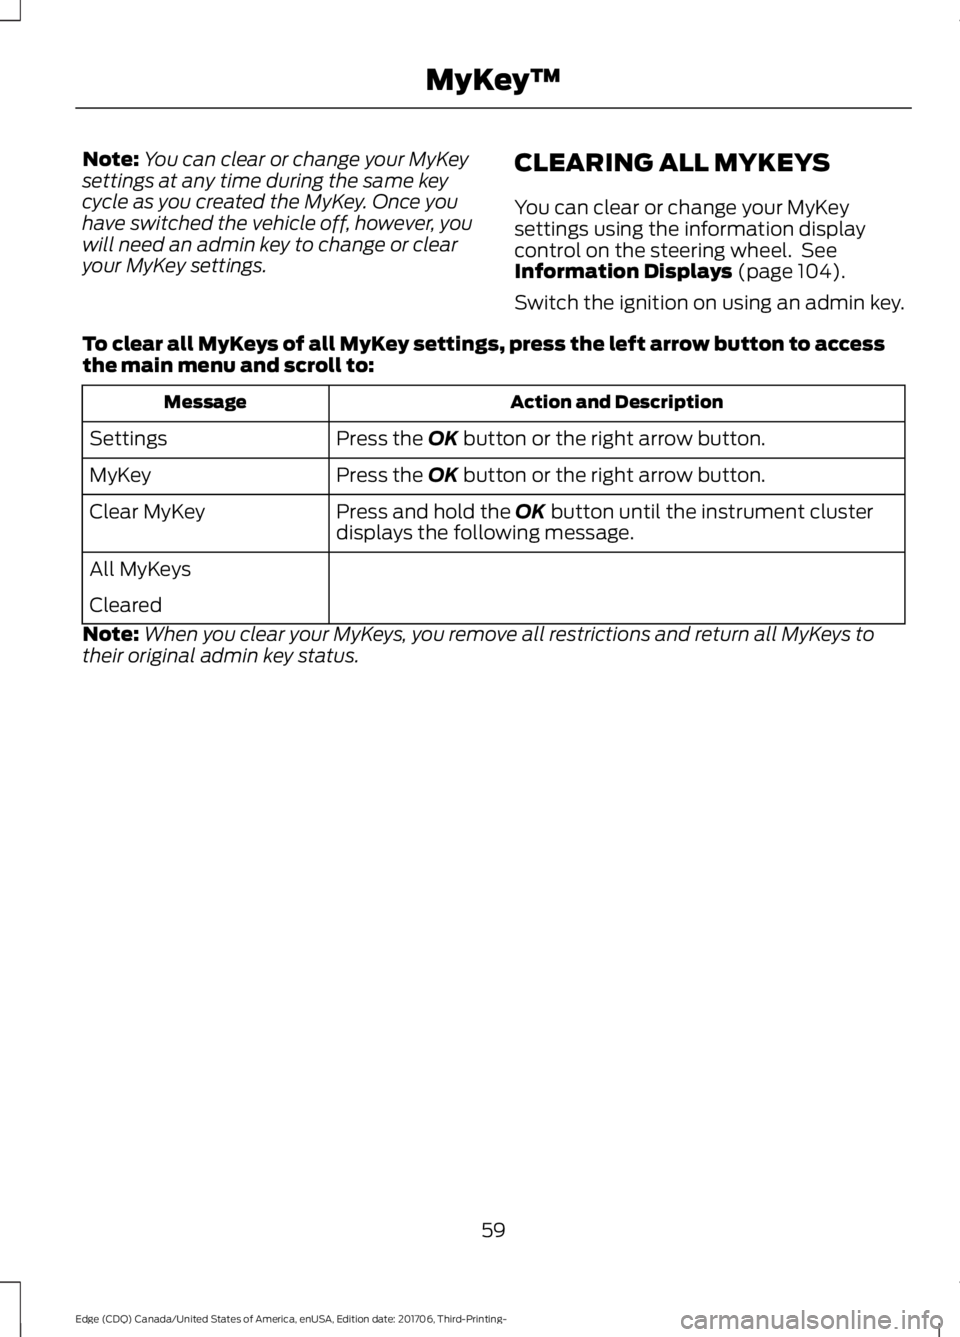
your MyKey settings. CLEARING ALL MYKEYS
You can clear or change your MyKey
settings using the information display
control on the steering wheel. See
Information Displays (page 104).
Switch the ignition on using an admin key.
To clear all MyKeys of all MyKey settings, press the left arrow button to access
the main menu and scroll to: Action and Description
Message
Press the
OK button or the right arrow button.
Settings
Press the
OK button or the right arrow button.
MyKey
Press and hold the
OK button until the instrument cluster
displays the following message.
Clear MyKey
All MyKeys
Cleared
Note: When you clear your MyKeys, you remove all restrictions and return all MyKeys to
their original admin key status.
59
Edge (CDQ) Canada/United States of America, enUSA, Edition date: 201706, Third-Printing- MyKey
™
Page 66 of 557
LOCKING AND UNLOCKING
You can use the power door lock control
or the remote control to lock and unlock
your vehicle.
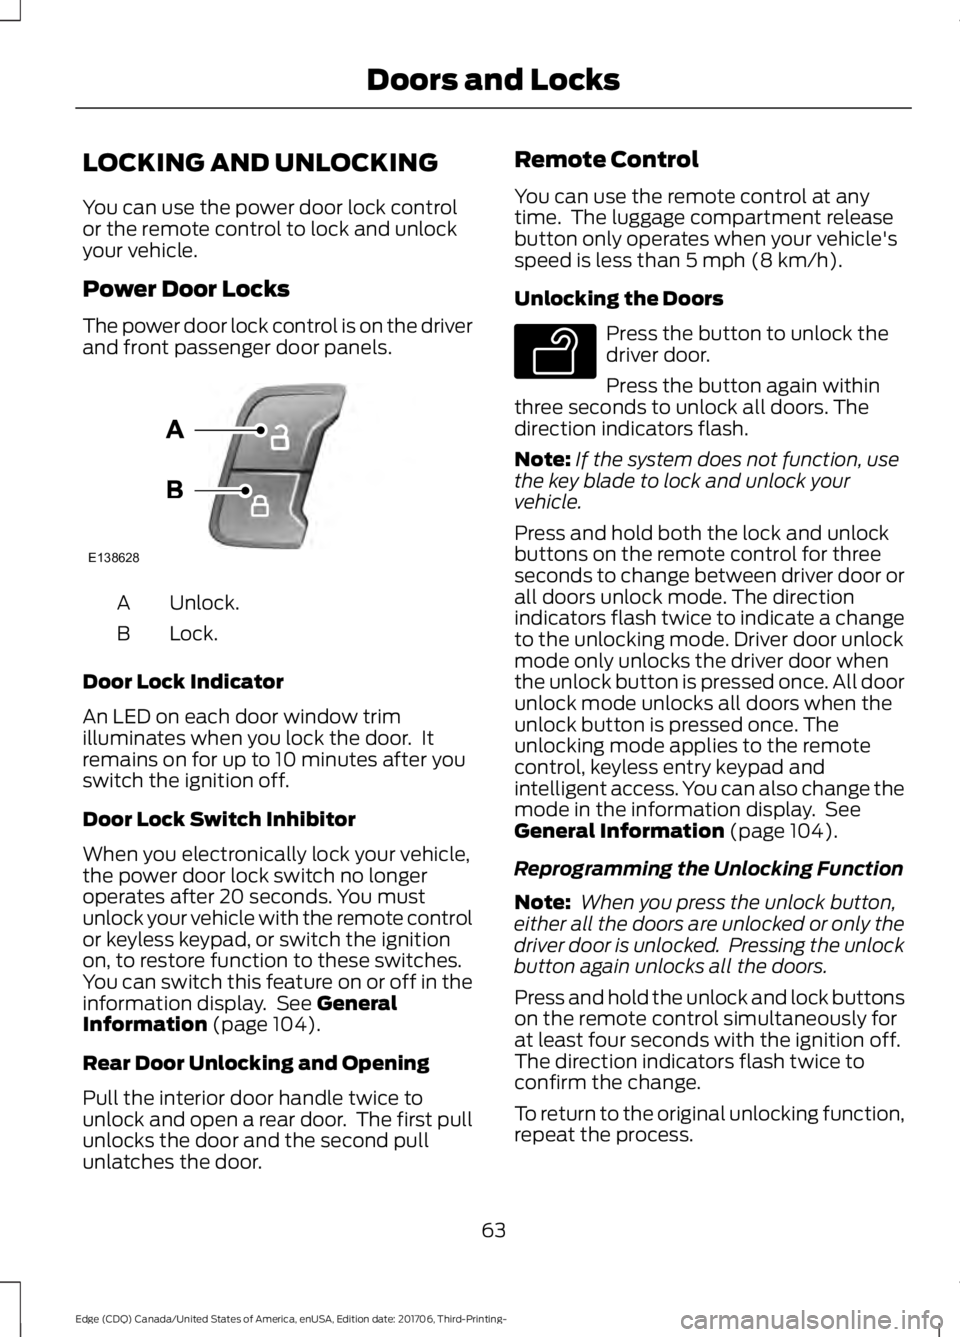
Power Door Locks
The power door lock control is on the driver
and front passenger door panels.
Unlock.
A
Lock.
B
Door Lock Indicator
An LED on each door window trim
illuminates when you lock the door. It
remains on for up to 10 minutes after you
switch the ignition off.
Door Lock Switch Inhibitor
When you electronically lock your vehicle,
the power door lock switch no longer
operates after 20 seconds. You must
unlock your vehicle with the remote control
or keyless keypad, or switch the ignition
on, to restore function to these switches.
You can switch this feature on or off in the
information display. See General
Information (page 104).
Rear Door Unlocking and Opening
Pull the interior door handle twice to
unlock and open a rear door. The first pull
unlocks the door and the second pull
unlatches the door. Remote Control
You can use the remote control at any
time. The luggage compartment release
button only operates when your vehicle's
speed is less than
5 mph (8 km/h).
Unlocking the Doors Press the button to unlock the
driver door.
Press the button again within
three seconds to unlock all doors. The
direction indicators flash.
Note: If the system does not function, use
the key blade to lock and unlock your
vehicle.
Press and hold both the lock and unlock
buttons on the remote control for three
seconds to change between driver door or
all doors unlock mode. The direction
indicators flash twice to indicate a change
to the unlocking mode. Driver door unlock
mode only unlocks the driver door when
the unlock button is pressed once. All door
unlock mode unlocks all doors when the
unlock button is pressed once. The
unlocking mode applies to the remote
control, keyless entry keypad and
intelligent access. You can also change the
mode in the information display. See
General Information
(page 104).
Reprogramming the Unlocking Function
Note: When you press the unlock button,
either all the doors are unlocked or only the
driver door is unlocked. Pressing the unlock
button again unlocks all the doors.
Press and hold the unlock and lock buttons
on the remote control simultaneously for
at least four seconds with the ignition off.
The direction indicators flash twice to
confirm the change.
To return to the original unlocking function,
repeat the process.
63
Edge (CDQ) Canada/United States of America, enUSA, Edition date: 201706, Third-Printing- Doors and LocksE138628 E138629
Page 88 of 557
GENERAL INFORMATION
Condensation in the Exterior Front
Lamps and Rear Lamps
Exterior front lamps and rear lamps have
vents to accommodate normal changes
in air pressure.
Condensation can be a natural by-product
of this design. When moist air enters the
lamp assembly through the vents, there is
a possibility that condensation can occur
when the temperature is cold. When
normal condensation occurs, a fine mist
can form on the interior of the lens. The
fine mist eventually clears and exits
through the vents during normal operation.
Clearing time may take as long as 48 hours
under dry weather conditions.
Examples of acceptable condensation are:
•
The presence of a fine mist (no streaks,
drip marks or large droplets).
• A fine mist covers less than 50% of the
lens.
Examples of unacceptable condensation
are:
• A water puddle inside the lamp.
• Streaks, drip marks or large droplets
present on the interior of the lens.
If you see any unacceptable condensation,
have your vehicle checked by an authorized
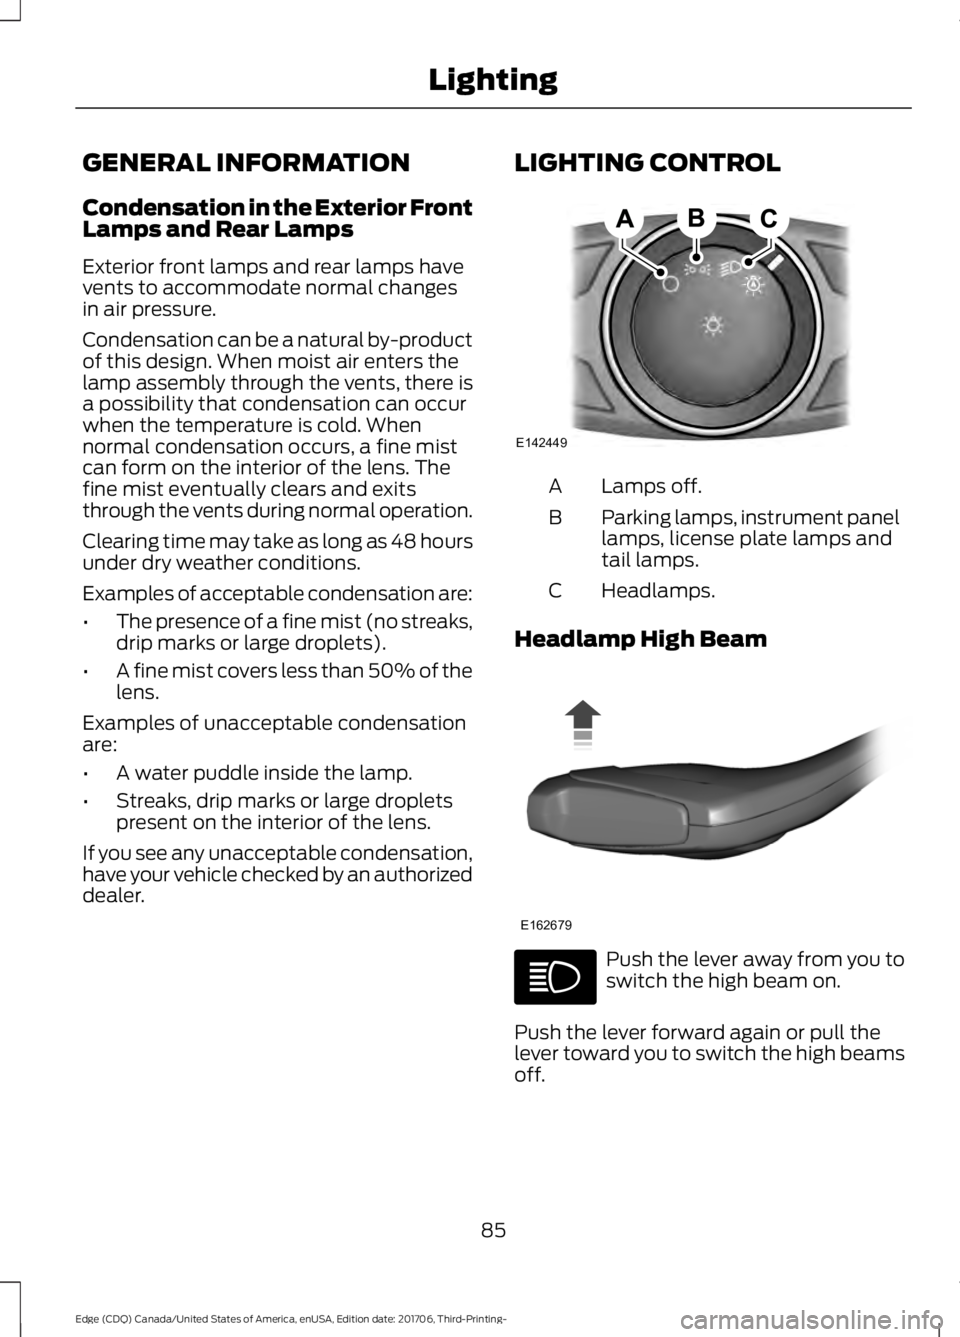
dealer. LIGHTING CONTROL Lamps off.
A
Parking lamps, instrument panel
lamps, license plate lamps and
tail lamps.
B
Headlamps.
C
Headlamp High Beam Push the lever away from you to
switch the high beam on.
Push the lever forward again or pull the
lever toward you to switch the high beams
off.
85
Edge (CDQ) Canada/United States of America, enUSA, Edition date: 201706, Third-Printing- LightingE142449 E162679
Page 92 of 557
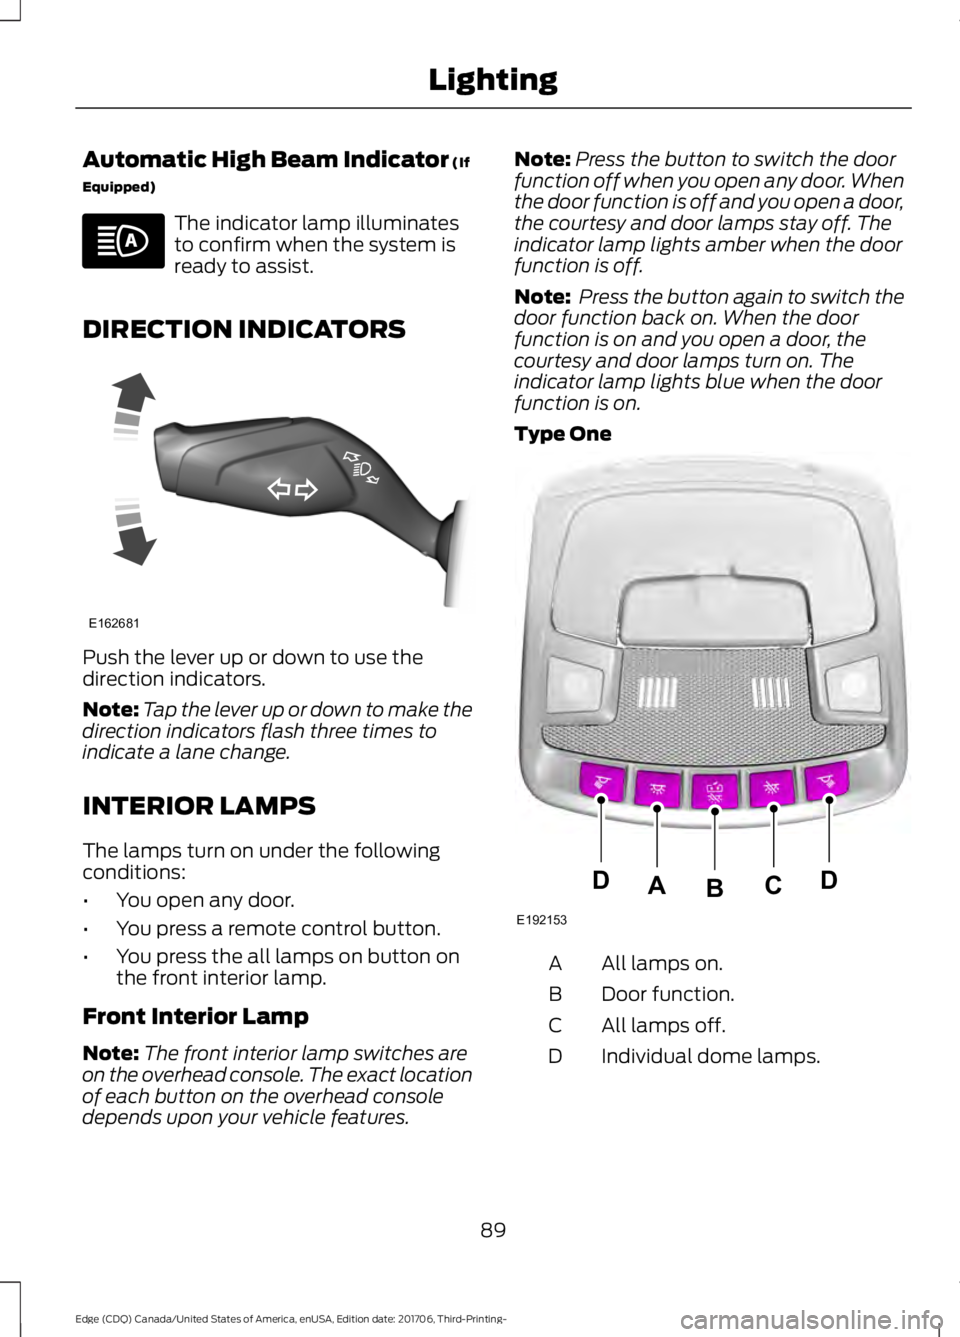
Automatic High Beam Indicator (If
Equipped) The indicator lamp illuminates
to confirm when the system is
ready to assist.
DIRECTION INDICATORS Push the lever up or down to use the
direction indicators.
Note:
Tap the lever up or down to make the
direction indicators flash three times to
indicate a lane change.
INTERIOR LAMPS
The lamps turn on under the following
conditions:
• You open any door.
• You press a remote control button.
• You press the all lamps on button on
the front interior lamp.
Front Interior Lamp
Note: The front interior lamp switches are
on the overhead console. The exact location
of each button on the overhead console
depends upon your vehicle features. Note:
Press the button to switch the door
function off when you open any door. When
the door function is off and you open a door,
the courtesy and door lamps stay off. The
indicator lamp lights amber when the door
function is off.
Note: Press the button again to switch the
door function back on. When the door
function is on and you open a door, the
courtesy and door lamps turn on. The
indicator lamp lights blue when the door
function is on.
Type One All lamps on.
A
Door function.
B
All lamps off.
C
Individual dome lamps.
D
89
Edge (CDQ) Canada/United States of America, enUSA, Edition date: 201706, Third-Printing- Lighting E162681 E192153
DDCAB
Page 157 of 557
4. Press and hold both the programmed
Genie button on the hand-held
transmitter and the button you want
to program. The indicator light on the
visor will flash rapidly when the
programming is successful.
Note: The Genie transmitter will transmit
for up to 30 seconds. If HomeLink does not
program within 30 seconds the Genie
transmitter will need to be pressed again. If
the Genie transmitter indicator light displays
green and red, release the button until the
indicator light turns off before pressing the
button again.
Once HomeLink has been programmed
successfully, the Genie transmitter must
be changed out of program mode. To do
this:
1. Press and hold the previously programmed Genie button on the
hand-held transmitter for 10 seconds.
The indicator light will change from red
to red and green.
2. Press the same button twice to confirm
the change. If done correctly the
indicator light will turn green.
Programming HomeLink to the Genie
Intellicode Garage Door Opener Motor
Note: You may need a ladder to access the
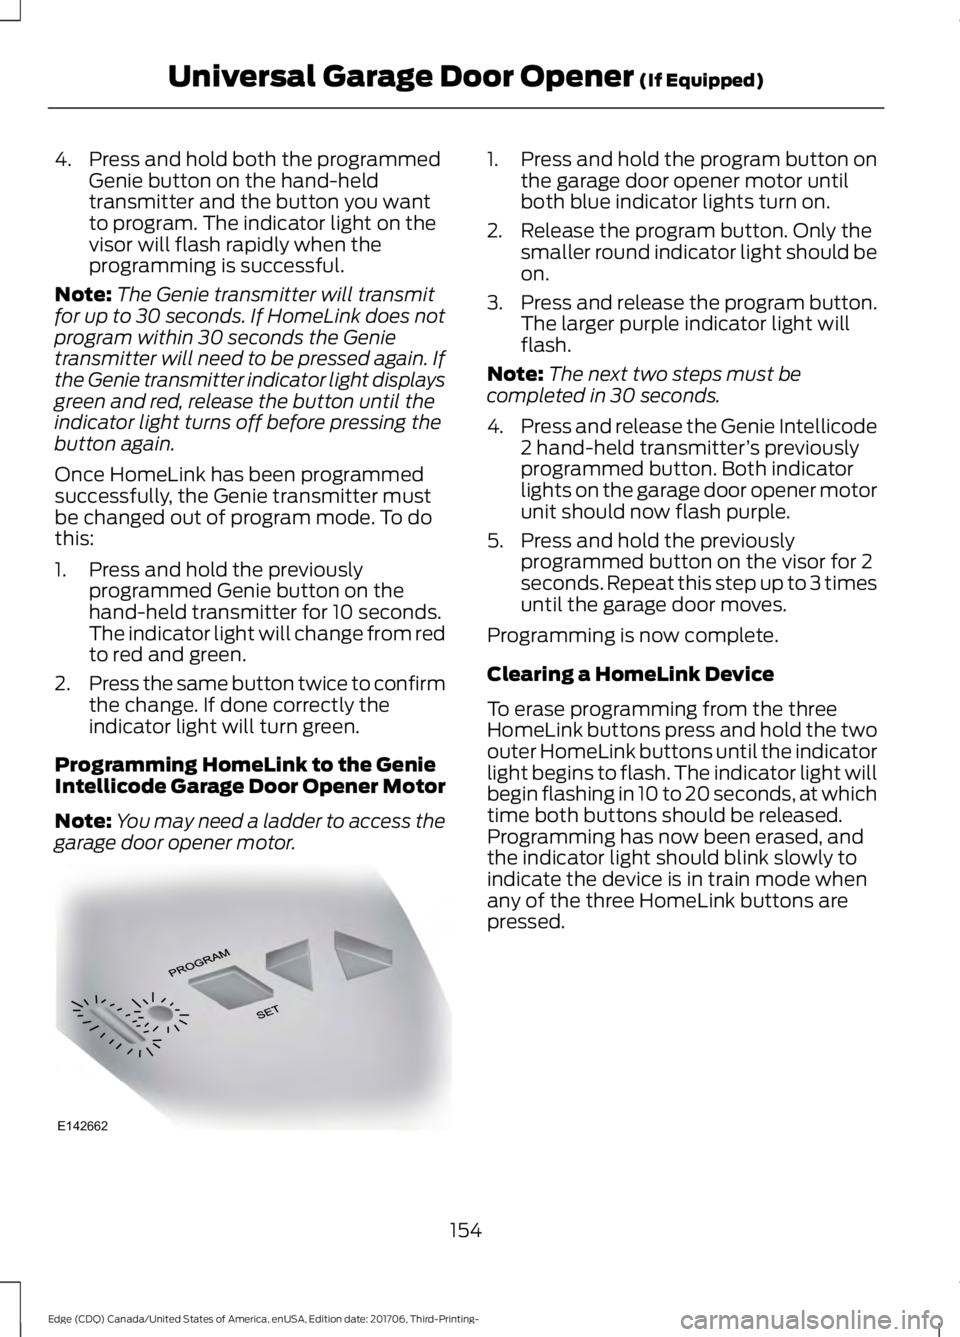
garage door opener motor. 1. Press and hold the program button on
the garage door opener motor until
both blue indicator lights turn on.
2. Release the program button. Only the smaller round indicator light should be
on.
3. Press and release the program button.
The larger purple indicator light will
flash.
Note: The next two steps must be
completed in 30 seconds.
4. Press and release the Genie Intellicode
2 hand-held transmitter ’s previously
programmed button. Both indicator
lights on the garage door opener motor
unit should now flash purple.
5. Press and hold the previously programmed button on the visor for 2
seconds. Repeat this step up to 3 times
until the garage door moves.
Programming is now complete.
Clearing a HomeLink Device
To erase programming from the three
HomeLink buttons press and hold the two
outer HomeLink buttons until the indicator
light begins to flash. The indicator light will
begin flashing in 10 to 20 seconds, at which
time both buttons should be released.
Programming has now been erased, and
the indicator light should blink slowly to
indicate the device is in train mode when
any of the three HomeLink buttons are
pressed.
154
Edge (CDQ) Canada/United States of America, enUSA, Edition date: 201706, Third-Printing- Universal Garage Door Opener (If Equipped)E142662
Page 168 of 557
If you have an instrument cluster
equipped with a grey
Auto-Start-Stop indicator light,
it illuminates when automatic engine stop
is not available due to not meeting one of
the above noted conditions.
Automatic Engine Restart
Any of the following conditions will result
in an automatic restart of the engine:
• Your foot is removed from the brake
pedal.
• You press the accelerator pedal.
• You press the accelerator and the
brake pedal at the same time.
• The driver safety belt becomes
unfastened or the driver door is ajar.
• The transmission is moved from drive
(D).
• Your vehicle is moving.
• The interior compartment does not
meet customer comfort when air
conditioning or heat is on.
• Fogging of the windows could occur
and the air conditioning is on.
• The battery is not within optimal
operating conditions.
• The maximum engine off time is
exceeded.
• The engine has stopped automatically
and you press the Auto-Start-Stop
button.
Any of the following conditions may result
in an automatic restart of the engine:
• The blower fan speed is increased or
the climate control temperature is
changed.
• An electrical accessory is turned on or
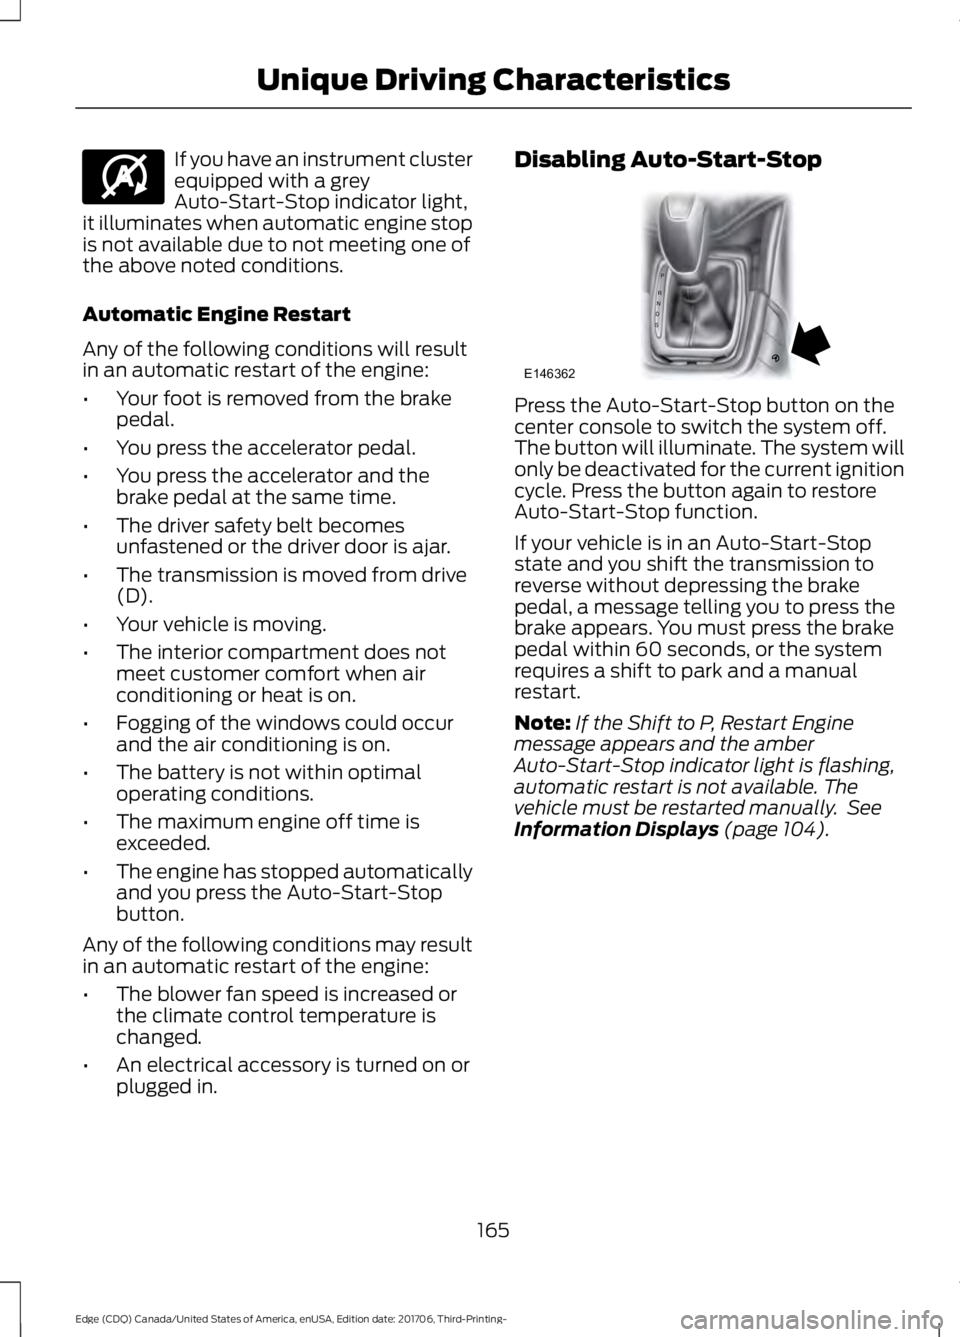
plugged in. Disabling Auto-Start-Stop
Press the Auto-Start-Stop button on the
center console to switch the system off.
The button will illuminate. The system will
only be deactivated for the current ignition
cycle. Press the button again to restore
Auto-Start-Stop function.
If your vehicle is in an Auto-Start-Stop
state and you shift the transmission to
reverse without depressing the brake
pedal, a message telling you to press the
brake appears. You must press the brake
pedal within 60 seconds, or the system
requires a shift to park and a manual
restart.
Note:
If the Shift to P, Restart Engine
message appears and the amber
Auto-Start-Stop indicator light is flashing,
automatic restart is not available. The
vehicle must be restarted manually. See
Information Displays (page 104).
165
Edge (CDQ) Canada/United States of America, enUSA, Edition date: 201706, Third-Printing- Unique Driving CharacteristicsE146361 P
R
N
D
S
E146362
Page 178 of 557
Illumination of the service engine soon
indicator, charging system warning light or
the temperature warning light, fluid leaks,
strange odors, smoke or loss of engine
power could indicate that the emission
control system is not working properly.
An improperly operating or damaged
exhaust system may allow exhaust to
enter the vehicle. Have a damaged or
improperly operating exhaust system
inspected and repaired immediately.
Do not make any unauthorized changes to
your vehicle or engine. By law, vehicle
owners and anyone who manufactures,
repairs, services, sells, leases, trades
vehicles, or supervises a fleet of vehicles
are not permitted to intentionally remove
an emission control device or prevent it
from working. Information about your
vehicle
’s emission system is on the Vehicle
Emission Control Information Decal
located on or near the engine. This decal
also lists engine displacement.
Please consult your warranty information
for complete details.
On-Board Diagnostics (OBD-II)
Your vehicle has a computer known as the
on-board diagnostics system (OBD-II) that
monitors the engine ’s emission control
system. The system protects the
environment by making sure that your
vehicle continues to meet government
emission standards. The OBD-II system
also assists a service technician in properly
servicing your vehicle. When the service engine soon
indicator illuminates, the OBD-II
system has detected a
malfunction. Temporary malfunctions may
cause the service engine soon indicator to
illuminate. Examples are: 1. Your vehicle has run out of fuel
—the
engine may misfire or run poorly.
2. Poor fuel quality or water in the fuel —the engine may misfire or run
poorly.
3. The fuel fill inlet may not have closed properly. See Refueling (page 169).
4. Driving through deep water —the
electrical system may be wet.
You can correct these temporary
malfunctions by filling the fuel tank with
good quality fuel, properly closing the fuel
fill inlet or letting the electrical system dry
out. After three driving cycles without these
or any other temporary malfunctions
present, the service engine soon indicator
should stay off the next time you start the
engine. A driving cycle consists of a cold
engine startup followed by mixed city and
highway driving. No additional vehicle
service is required.
If the service engine soon indicator remains
on, have your vehicle serviced at the first
available opportunity. Although some
malfunctions detected by the OBD-II may
not have symptoms that are apparent,
continued driving with the service engine
soon indicator on can result in increased
emissions, lower fuel economy, reduced
engine and transmission smoothness and
lead to more costly repairs.
Readiness for Inspection and
Maintenance (I/M) Testing
Some state and provincial and local
governments may have
Inspection/Maintenance (I/M) programs
to inspect the emission control equipment
on your vehicle. Failure to pass this
inspection could prevent you from getting
a vehicle registration. If the service engine soon
indicator is on or the bulb does
not work, your vehicle may need
service. See On-Board Diagnostics.
175
Edge (CDQ) Canada/United States of America, enUSA, Edition date: 201706, Third-Printing- Engine Emission Control
Page 181 of 557
Sport (S)
Moving the gearshift lever to sport (S):
•
Provides additional grade (engine)
braking and extends lower gear
operation to enhance performance for
uphill climbs, hilly terrain or
mountainous areas. This increases
engine RPM during engine braking.
• Provides additional lower gear
operation through the automatic
transmission shift strategy.
• Gears are selected more quickly and
at higher engine speeds.
SelectShift Automatic ™
Transmission
Your vehicle is equipped with a SelectShift
Automatic transmission gearshift lever.
The SelectShift Automatic transmission
gives you the ability to change gears up or
down (without a clutch) as desired.
In order to prevent the engine from running
at too low an RPM, which may cause it to
stall, SelectShift still automatically makes
some downshifts if it has determined that
you have not downshifted in time.
Although SelectShift makes some
downshifts for you, it still allows you to
downshift at any time as long as the
SelectShift determines that damage will
not be caused to the engine from
over-revving.
Note: Engine damage may occur if you
maintain excessive engine revving without
shifting.
SelectShift does not automatically upshift,
even if the engine is approaching the RPM
limit. It must be shifted manually by
pressing the + button.
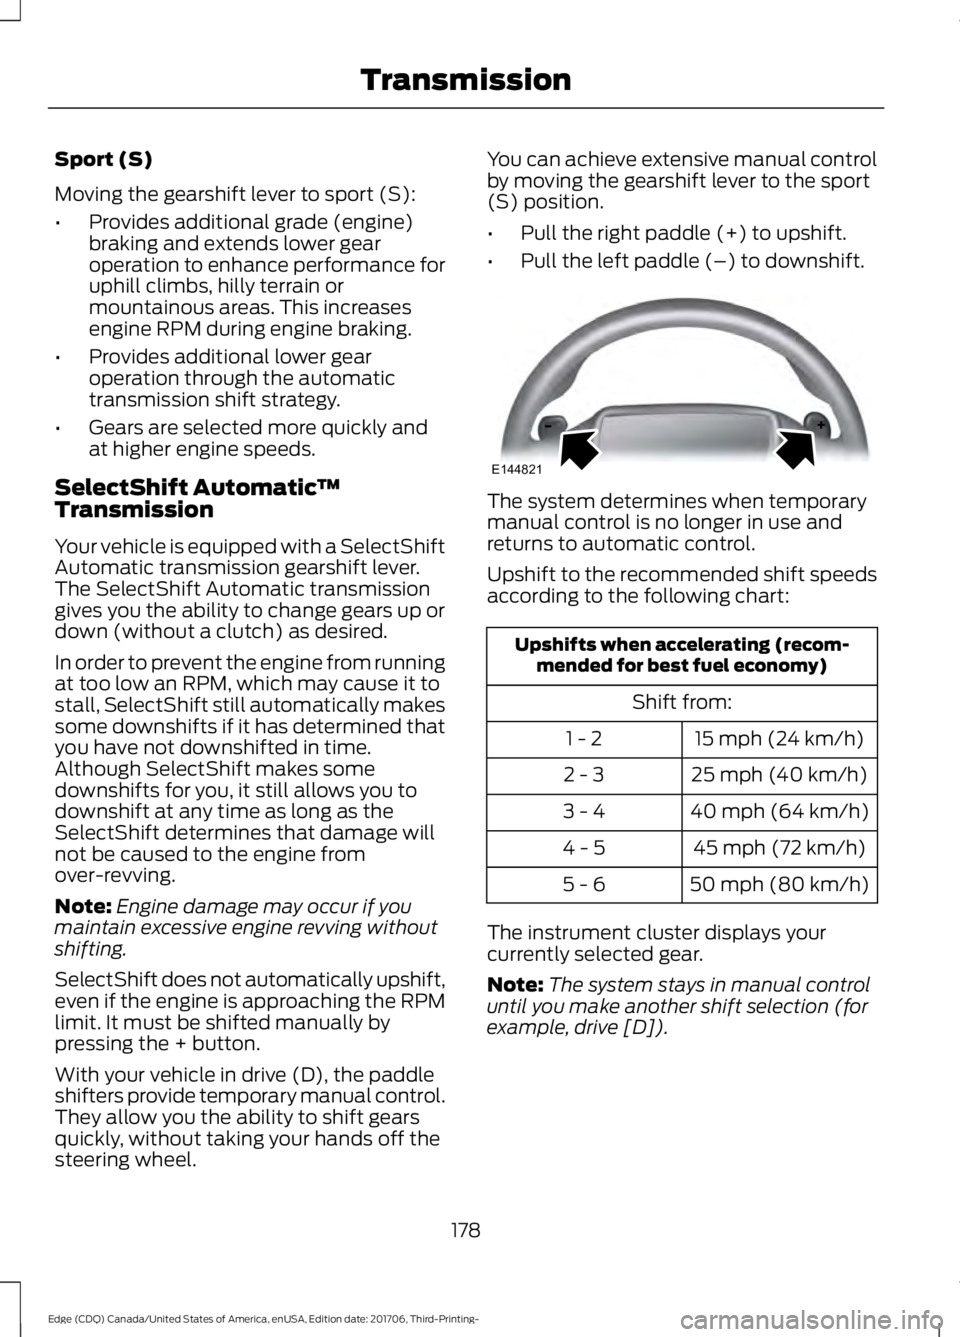
With your vehicle in drive (D), the paddle
shifters provide temporary manual control.
They allow you the ability to shift gears
quickly, without taking your hands off the
steering wheel. You can achieve extensive manual control
by moving the gearshift lever to the sport
(S) position.
•
Pull the right paddle (+) to upshift.
• Pull the left paddle (–) to downshift. The system determines when temporary
manual control is no longer in use and
returns to automatic control.
Upshift to the recommended shift speeds
according to the following chart:
Upshifts when accelerating (recom-
mended for best fuel economy)
Shift from:15 mph (24 km/h)
1 - 2
25 mph (40 km/h)
2 - 3
40 mph (64 km/h)
3 - 4
45 mph (72 km/h)
4 - 5
50 mph (80 km/h)
5 - 6
The instrument cluster displays your
currently selected gear.
Note: The system stays in manual control
until you make another shift selection (for
example, drive [D]).
178
Edge (CDQ) Canada/United States of America, enUSA, Edition date: 201706, Third-Printing- TransmissionE144821