FORD ESCAPE 2002 1.G Owners Manual
Manufacturer: FORD, Model Year: 2002, Model line: ESCAPE, Model: FORD ESCAPE 2002 1.GPages: 280, PDF Size: 2.75 MB
Page 101 of 280
To ensure proper sliding function of your rack, keep the rack
clear of debris. If debris is visible inside the roof c-channels or
side rails, spray the items clear with a water hose.
Do not load large or bulky items (i.e., plywood, mattresses) on
the rear of the vehicle so that they extend above the roof line. In
addition to blocking your rear view, they can also cause dangerous
driving situations and possibly cause damage to your vehicle. Use
additional care when driving with reduced visibility.
Only load cargo in the designated area. Loading outside of the
approved area could result in personal injury as well as vehicle
damage that may not be covered by warranty.
Driver Controls
101
Page 102 of 280
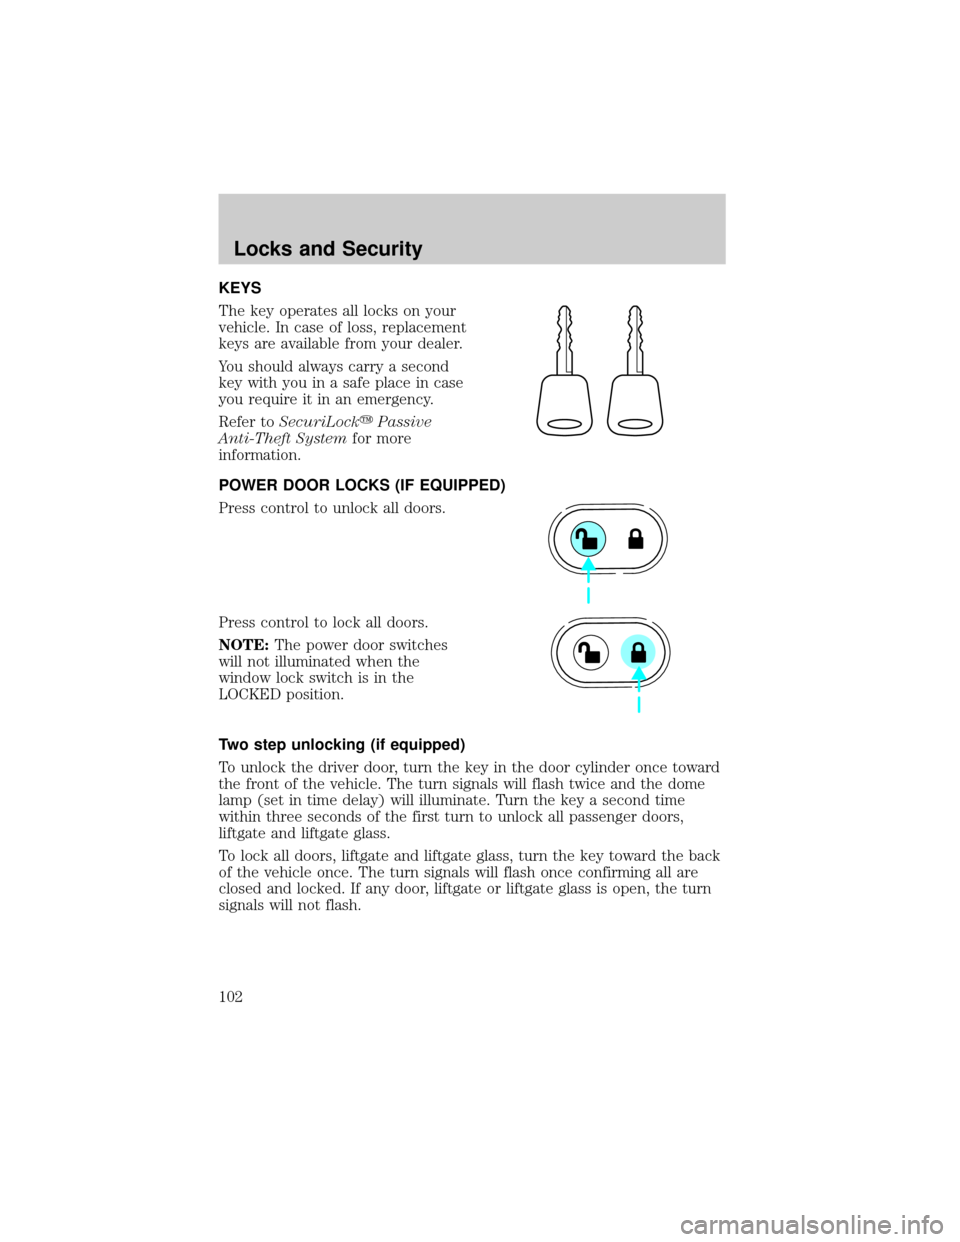
KEYS
The key operates all locks on your
vehicle. In case of loss, replacement
keys are available from your dealer.
You should always carry a second
key with you in a safe place in case
you require it in an emergency.
Refer toSecuriLockyPassive
Anti-Theft Systemfor more
information.
POWER DOOR LOCKS (IF EQUIPPED)
Press control to unlock all doors.
Press control to lock all doors.
NOTE:The power door switches
will not illuminated when the
window lock switch is in the
LOCKED position.
Two step unlocking (if equipped)
To unlock the driver door, turn the key in the door cylinder once toward
the front of the vehicle. The turn signals will flash twice and the dome
lamp (set in time delay) will illuminate. Turn the key a second time
within three seconds of the first turn to unlock all passenger doors,
liftgate and liftgate glass.
To lock all doors, liftgate and liftgate glass, turn the key toward the back
of the vehicle once. The turn signals will flash once confirming all are
closed and locked. If any door, liftgate or liftgate glass is open, the turn
signals will not flash.
Locks and Security
102
Page 103 of 280
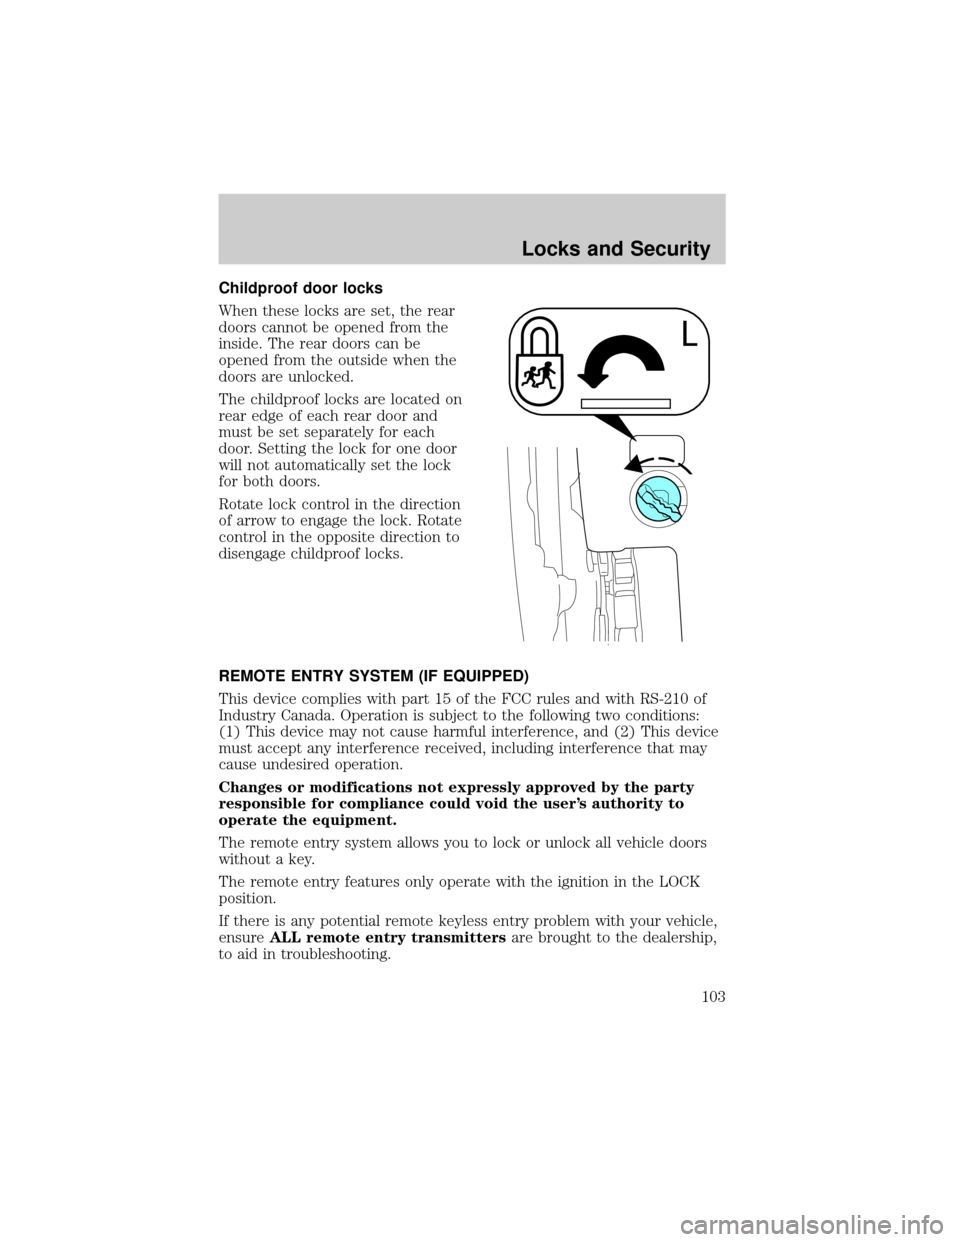
Childproof door locks
When these locks are set, the rear
doors cannot be opened from the
inside. The rear doors can be
opened from the outside when the
doors are unlocked.
The childproof locks are located on
rear edge of each rear door and
must be set separately for each
door. Setting the lock for one door
will not automatically set the lock
for both doors.
Rotate lock control in the direction
of arrow to engage the lock. Rotate
control in the opposite direction to
disengage childproof locks.
REMOTE ENTRY SYSTEM (IF EQUIPPED)
This device complies with part 15 of the FCC rules and with RS-210 of
Industry Canada. Operation is subject to the following two conditions:
(1) This device may not cause harmful interference, and (2) This device
must accept any interference received, including interference that may
cause undesired operation.
Changes or modifications not expressly approved by the party
responsible for compliance could void the user's authority to
operate the equipment.
The remote entry system allows you to lock or unlock all vehicle doors
without a key.
The remote entry features only operate with the ignition in the LOCK
position.
If there is any potential remote keyless entry problem with your vehicle,
ensureALL remote entry transmittersare brought to the dealership,
to aid in troubleshooting.
Locks and Security
103
Page 104 of 280
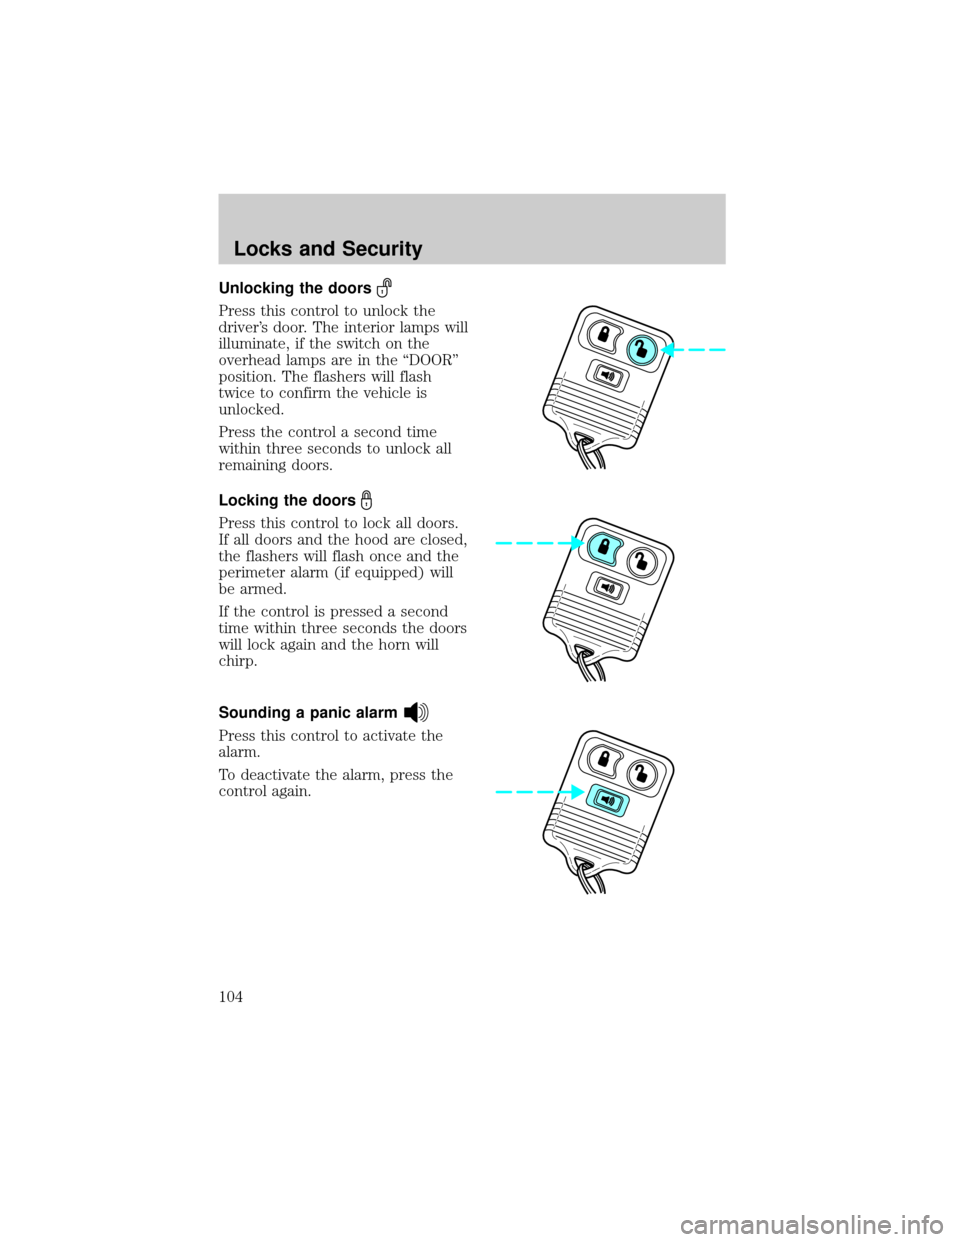
Unlocking the doors
Press this control to unlock the
driver's door. The interior lamps will
illuminate, if the switch on the
overhead lamps are in the ªDOORº
position. The flashers will flash
twice to confirm the vehicle is
unlocked.
Press the control a second time
within three seconds to unlock all
remaining doors.
Locking the doors
Press this control to lock all doors.
If all doors and the hood are closed,
the flashers will flash once and the
perimeter alarm (if equipped) will
be armed.
If the control is pressed a second
time within three seconds the doors
will lock again and the horn will
chirp.
Sounding a panic alarm
Press this control to activate the
alarm.
To deactivate the alarm, press the
control again.
Locks and Security
104
Page 105 of 280
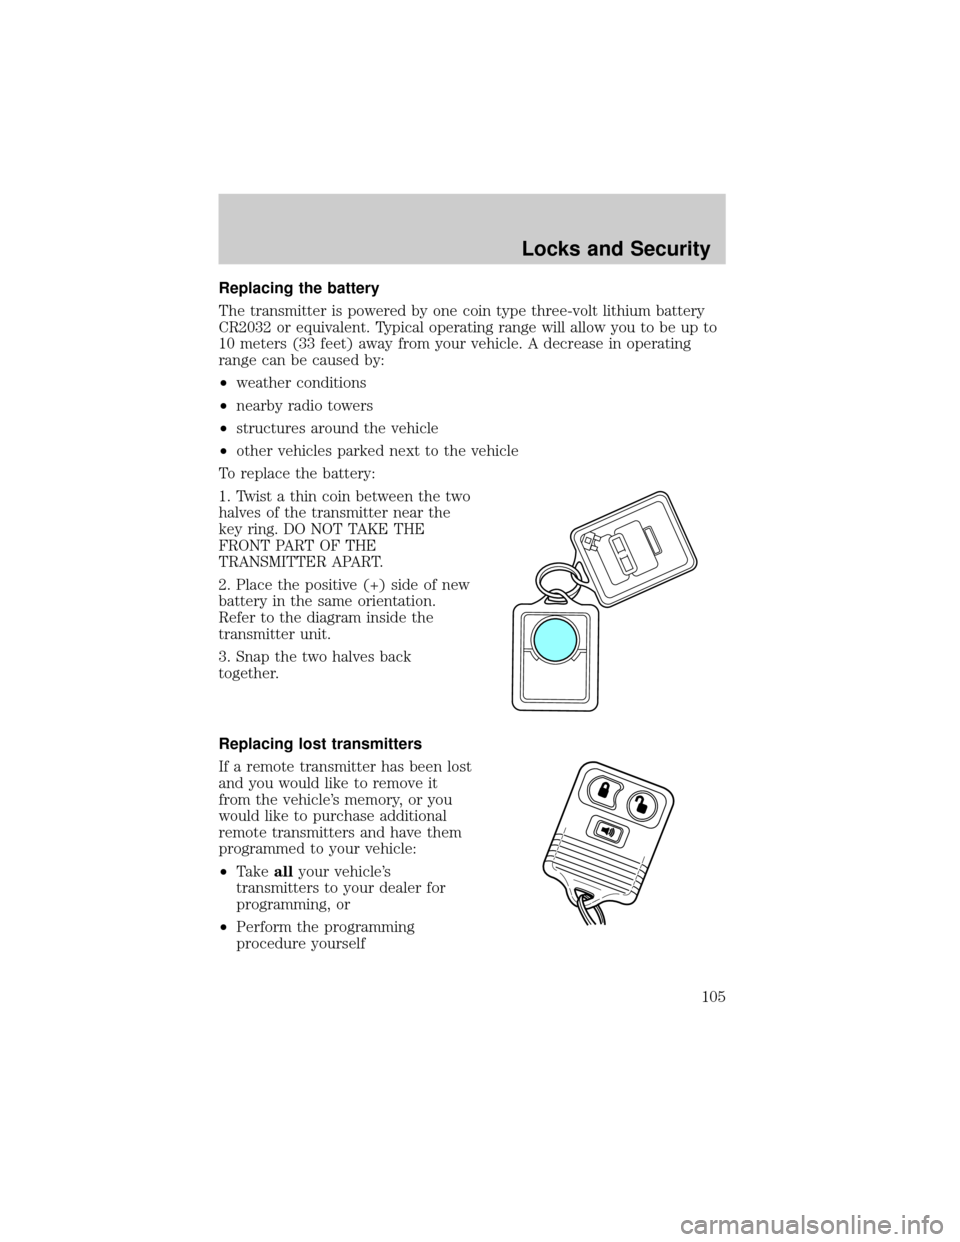
Replacing the battery
The transmitter is powered by one coin type three-volt lithium battery
CR2032 or equivalent. Typical operating range will allow you to be up to
10 meters (33 feet) away from your vehicle. A decrease in operating
range can be caused by:
²weather conditions
²nearby radio towers
²structures around the vehicle
²other vehicles parked next to the vehicle
To replace the battery:
1. Twist a thin coin between the two
halves of the transmitter near the
key ring. DO NOT TAKE THE
FRONT PART OF THE
TRANSMITTER APART.
2. Place the positive (+) side of new
battery in the same orientation.
Refer to the diagram inside the
transmitter unit.
3. Snap the two halves back
together.
Replacing lost transmitters
If a remote transmitter has been lost
and you would like to remove it
from the vehicle's memory, or you
would like to purchase additional
remote transmitters and have them
programmed to your vehicle:
²Takeallyour vehicle's
transmitters to your dealer for
programming, or
²Perform the programming
procedure yourself
Locks and Security
105
Page 106 of 280
Programming remote transmitters
It is necessary to haveall(maximum of four Ð original and/or new) of
your remote transmitters available prior to beginning this procedure.
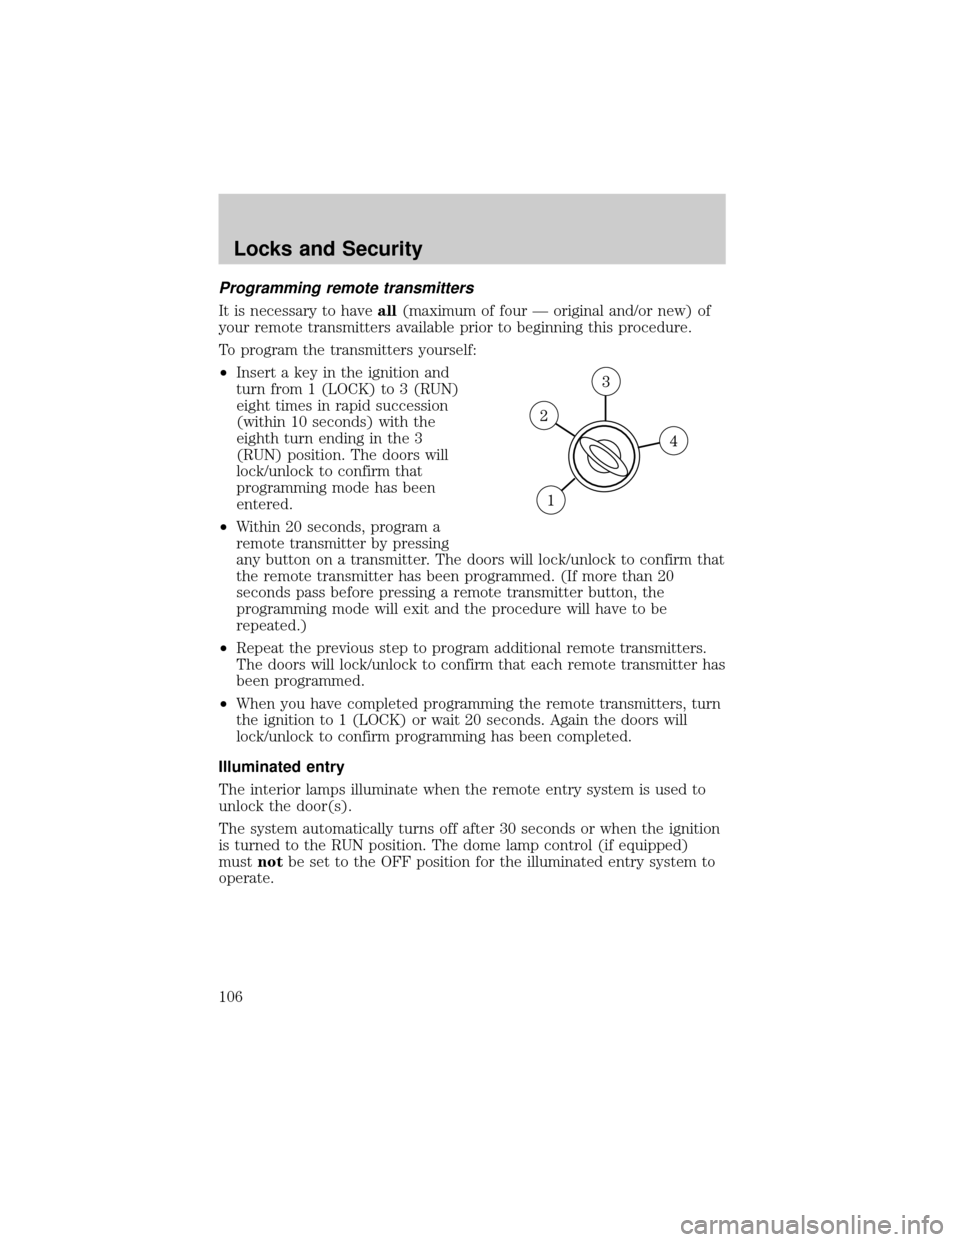
To program the transmitters yourself:
²Insert a key in the ignition and
turn from 1 (LOCK) to 3 (RUN)
eight times in rapid succession
(within 10 seconds) with the
eighth turn ending in the 3
(RUN) position. The doors will
lock/unlock to confirm that
programming mode has been
entered.
²Within 20 seconds, program a
remote transmitter by pressing
any button on a transmitter. The doors will lock/unlock to confirm that
the remote transmitter has been programmed. (If more than 20
seconds pass before pressing a remote transmitter button, the
programming mode will exit and the procedure will have to be
repeated.)
²Repeat the previous step to program additional remote transmitters.
The doors will lock/unlock to confirm that each remote transmitter has
been programmed.
²When you have completed programming the remote transmitters, turn
the ignition to 1 (LOCK) or wait 20 seconds. Again the doors will
lock/unlock to confirm programming has been completed.
Illuminated entry
The interior lamps illuminate when the remote entry system is used to
unlock the door(s).
The system automatically turns off after 30 seconds or when the ignition
is turned to the RUN position. The dome lamp control (if equipped)
mustnotbe set to the OFF position for the illuminated entry system to
operate.
Locks and Security
106
Page 107 of 280
The inside lights will not turn off if:
²they have been turned on in the dome lamp control or
²any door is open
The battery saver will shut off the interior lamps 40 minutes after the
ignition has been turned to the OFF position.
SECURILOCKYPASSIVE ANTI-THEFT SYSTEM
SecuriLockypassive anti-theft system is an engine immobilization
system. This system prevents the engine from being started unless a
coded key programmed to your vehicleis used.
The SecuriLockypassive anti-theft system is not compatible with
non-Ford aftermarket remote start systems. Use of these systems may
result in vehicle starting problems and a loss of security protection.
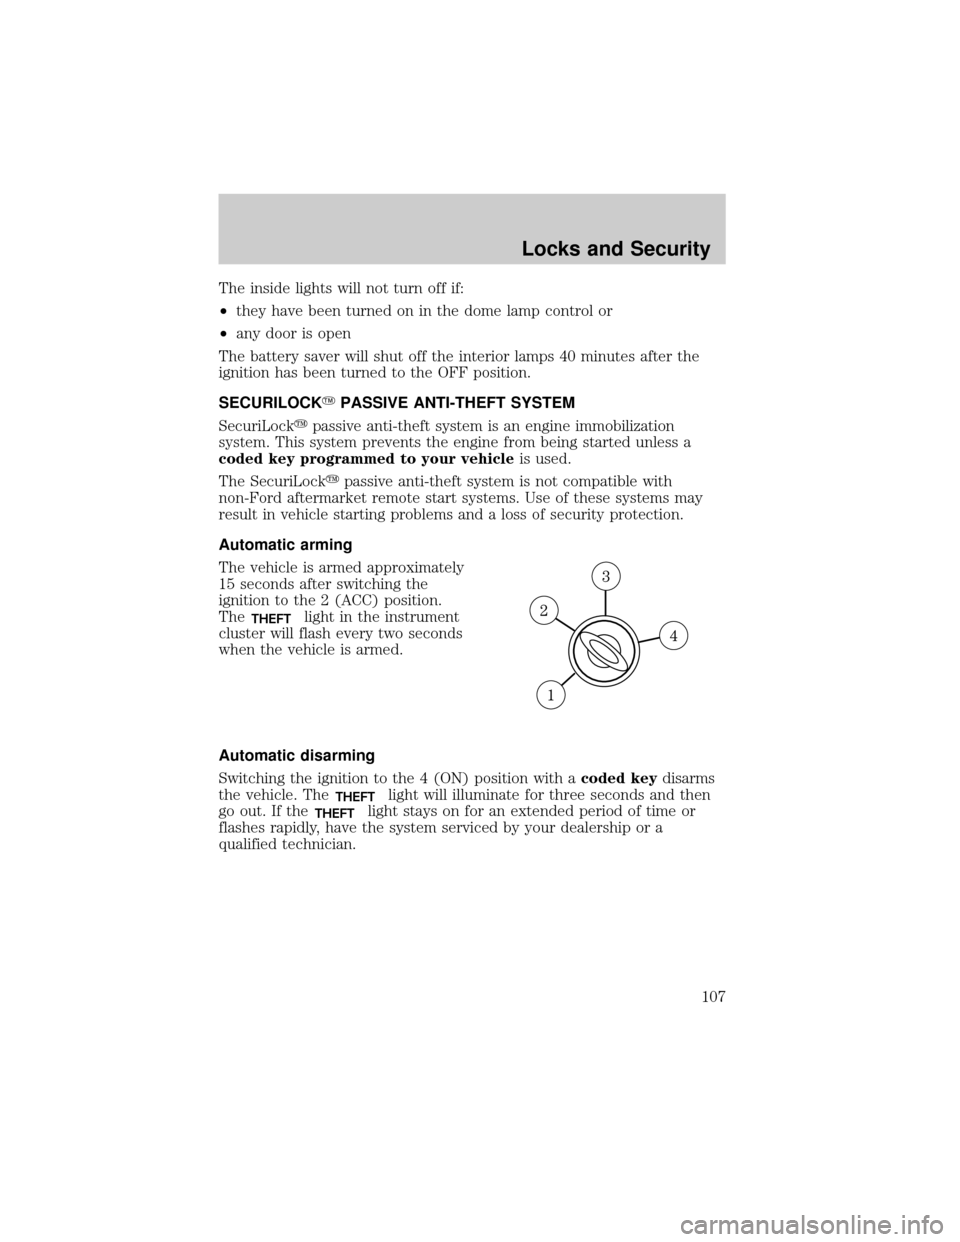
Automatic arming
The vehicle is armed approximately
15 seconds after switching the
ignition to the 2 (ACC) position.
The
THEFTlight in the instrument
cluster will flash every two seconds
when the vehicle is armed.
Automatic disarming
Switching the ignition to the 4 (ON) position with acoded keydisarms
the vehicle. The
THEFTlight will illuminate for three seconds and then
go out. If the
THEFTlight stays on for an extended period of time or
flashes rapidly, have the system serviced by your dealership or a
qualified technician.
Locks and Security
107
Page 108 of 280
Key information
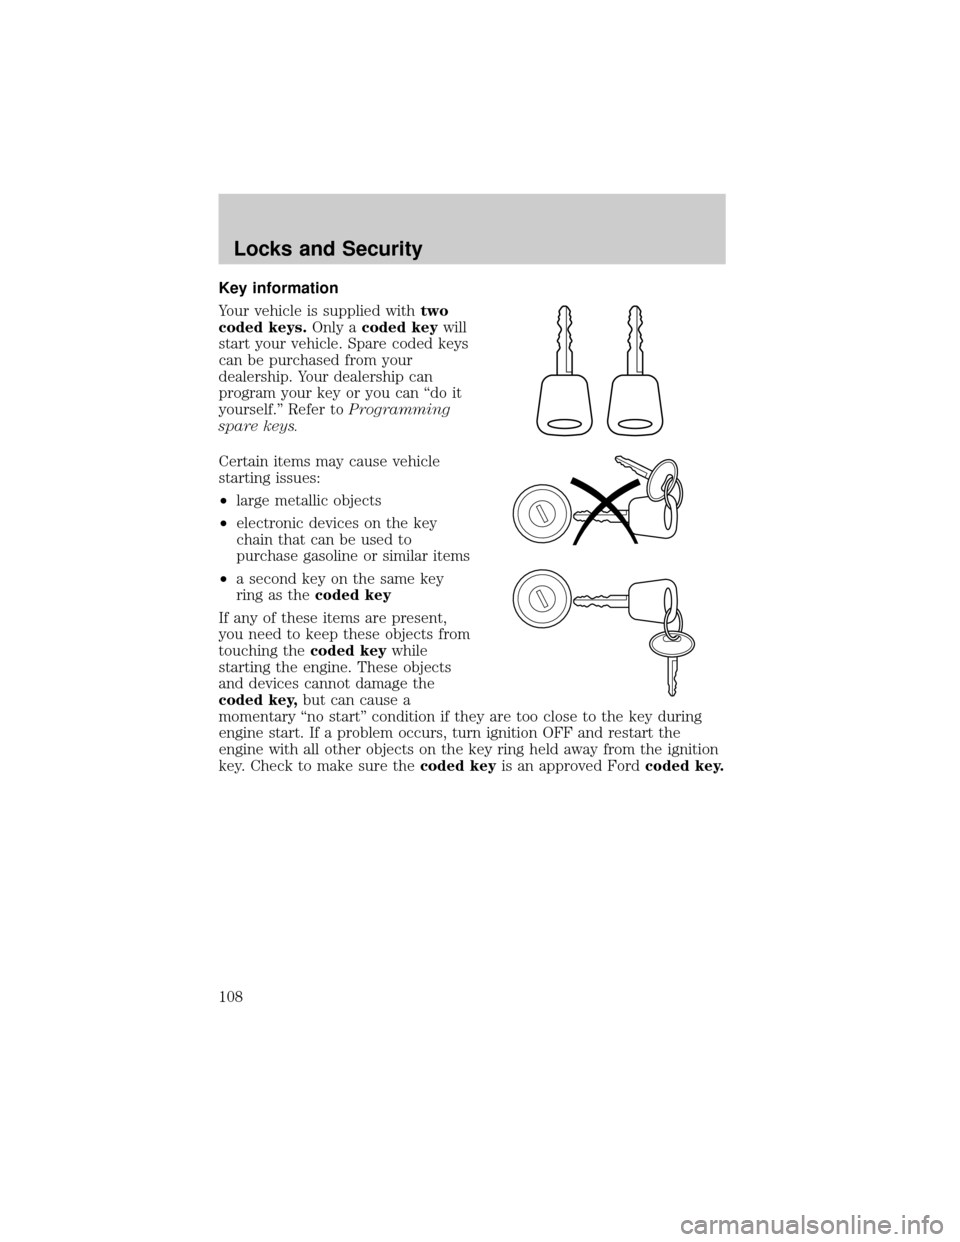
Your vehicle is supplied withtwo
coded keys.Only acoded keywill
start your vehicle. Spare coded keys
can be purchased from your
dealership. Your dealership can
program your key or you can ªdo it
yourself.º Refer toProgramming
spare keys.
Certain items may cause vehicle
starting issues:
²large metallic objects
²electronic devices on the key
chain that can be used to
purchase gasoline or similar items
²a second key on the same key
ring as thecoded key
If any of these items are present,
you need to keep these objects from
touching thecoded keywhile
starting the engine. These objects
and devices cannot damage the
coded key,but can cause a
momentary ªno startº condition if they are too close to the key during
engine start. If a problem occurs, turn ignition OFF and restart the
engine with all other objects on the key ring held away from the ignition
key. Check to make sure thecoded keyis an approved Fordcoded key.
Locks and Security
108
Page 109 of 280

If your keys are lost or stolen you
will need to do the following:
²Use your spare key to start the
vehicle, or
²Have your vehicle towed to a
dealership or a locksmith. The
key codes will need to be erased
from your vehicle and new key codes will need to be re-coded.
Replacing coded keys can be very costly and you may want to store an
extra programmed key away from the vehicle in a safe place to prevent
an unforeseen inconvenience.
The correctcoded keymust be used for your vehicle. The use of the
wrong type ofcoded keymay lead to a ªno startº condition.
If an unprogrammed key is used in the ignition it will cause a ªno
startº condition.
Programming spare keys
A maximum of eight keys can be coded to your vehicle. Only
SecuriLockykeys can be used. To program acoded keyyourself, you
will need two previously programmedcoded keys(keys that already
operate your vehicle's engine) and the new unprogrammed key(s) readily
accessible for timely implementation of each step in the procedure.
If two previously programmed coded keys are not available, you must
bring your vehicle to your dealership to have the spare coded key(s)
programmed.
Please read and understand the entire procedure before you begin.
Locks and Security
109
Page 110 of 280
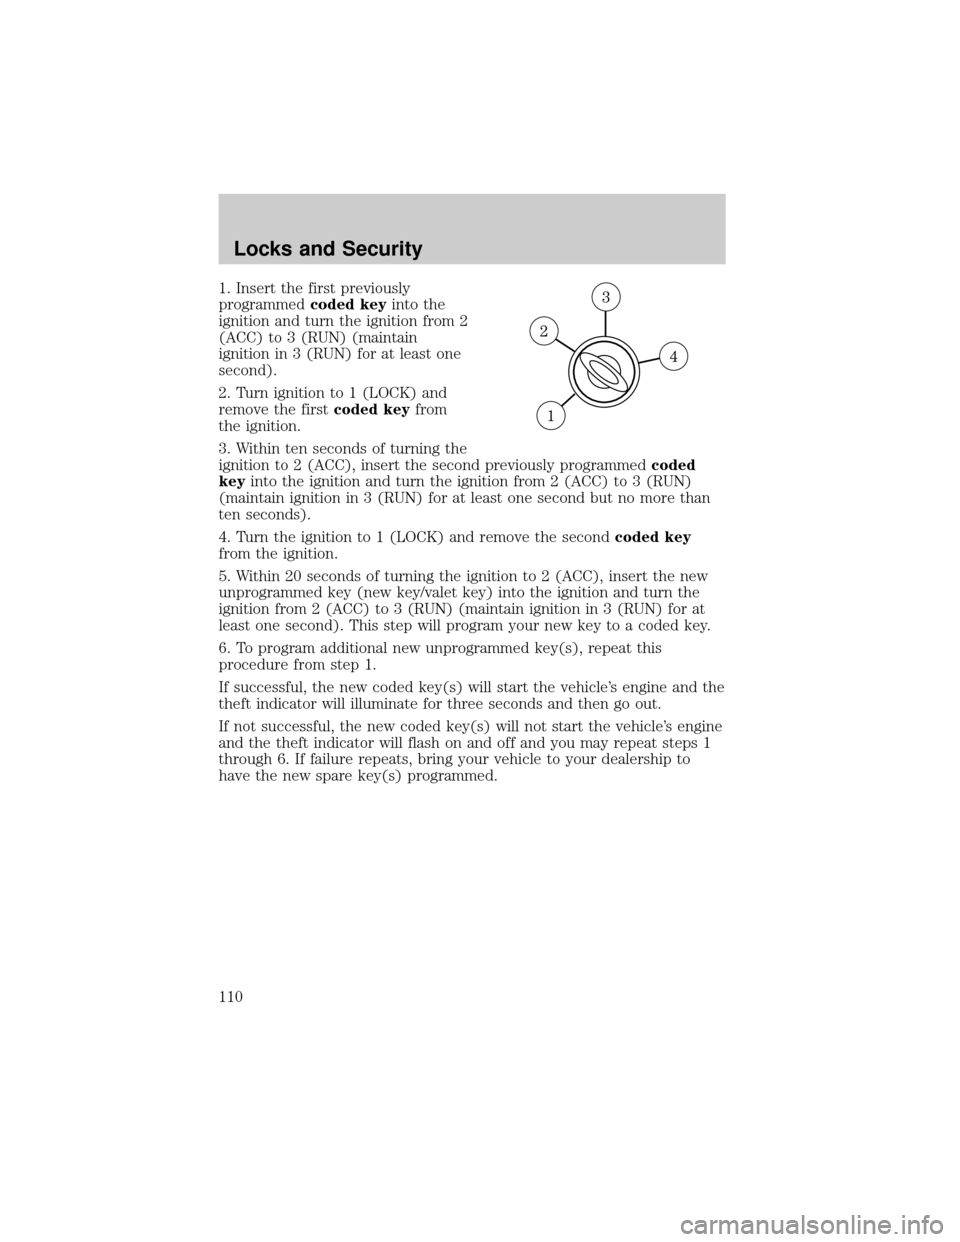
1. Insert the first previously
programmedcoded keyinto the
ignition and turn the ignition from 2
(ACC) to 3 (RUN) (maintain
ignition in 3 (RUN) for at least one
second).
2. Turn ignition to 1 (LOCK) and
remove the firstcoded keyfrom
the ignition.
3. Within ten seconds of turning the
ignition to 2 (ACC), insert the second previously programmedcoded
keyinto the ignition and turn the ignition from 2 (ACC) to 3 (RUN)
(maintain ignition in 3 (RUN) for at least one second but no more than
ten seconds).
4. Turn the ignition to 1 (LOCK) and remove the secondcoded key
from the ignition.
5. Within 20 seconds of turning the ignition to 2 (ACC), insert the new
unprogrammed key (new key/valet key) into the ignition and turn the
ignition from 2 (ACC) to 3 (RUN) (maintain ignition in 3 (RUN) for at
least one second). This step will program your new key to a coded key.
6. To program additional new unprogrammed key(s), repeat this
procedure from step 1.
If successful, the new coded key(s) will start the vehicle's engine and the
theft indicator will illuminate for three seconds and then go out.
If not successful, the new coded key(s) will not start the vehicle's engine
and the theft indicator will flash on and off and you may repeat steps 1
through 6. If failure repeats, bring your vehicle to your dealership to
have the new spare key(s) programmed.
Locks and Security
110