FORD ESCAPE 2002 1.G Owners Manual
ESCAPE 2002 1.G
FORD
FORD
https://www.carmanualsonline.info/img/11/4853/w960_4853-0.png
FORD ESCAPE 2002 1.G Owners Manual
Trending: jacking, overheating, recommended oil, fuse, service schedule, checking oil, fuel pressure
Page 111 of 280
PERIMETER ALARM SYSTEM (IF EQUIPPED)
The perimeter anti-theft system will help prevent your vehicle from
unauthorized entry.
If there is any potential perimeter anti-theft problem with your vehicle,
ensureALL remote entry transmittersare brought to the dealership,
to aid in troubleshooting.
Arming the system
When armed, this system will help protect your vehicle from
unauthorized entry. When unauthorized entry occurs, the system will
flash the headlamps, parking lamps and will sound the horn.
The system is ready to arm whenever the key is removed from the
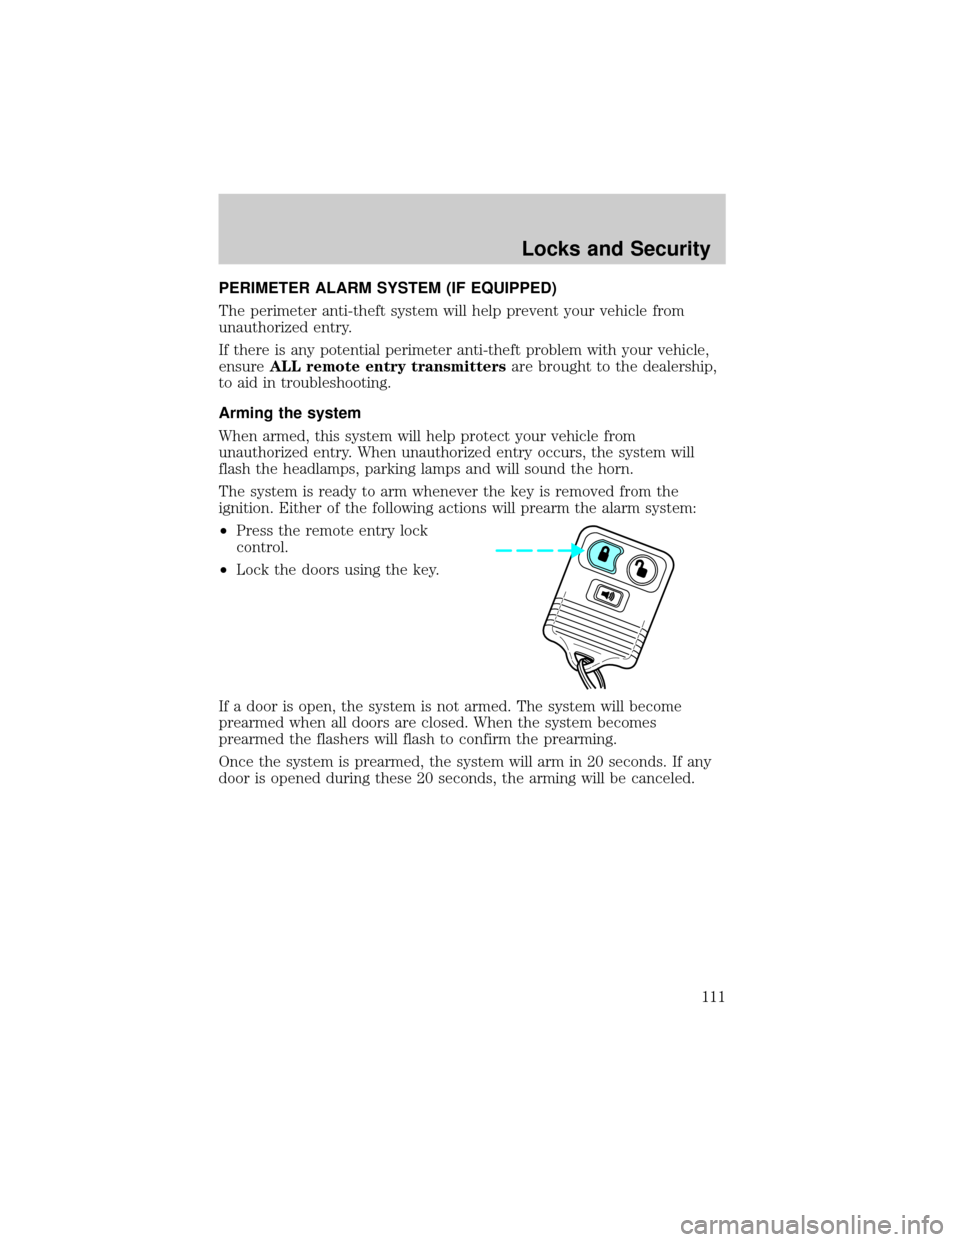
ignition. Either of the following actions will prearm the alarm system:
²Press the remote entry lock
control.
²Lock the doors using the key.
If a door is open, the system is not armed. The system will become
prearmed when all doors are closed. When the system becomes
prearmed the flashers will flash to confirm the prearming.
Once the system is prearmed, the system will arm in 20 seconds. If any
door is opened during these 20 seconds, the arming will be canceled.
Locks and Security
111
Page 112 of 280
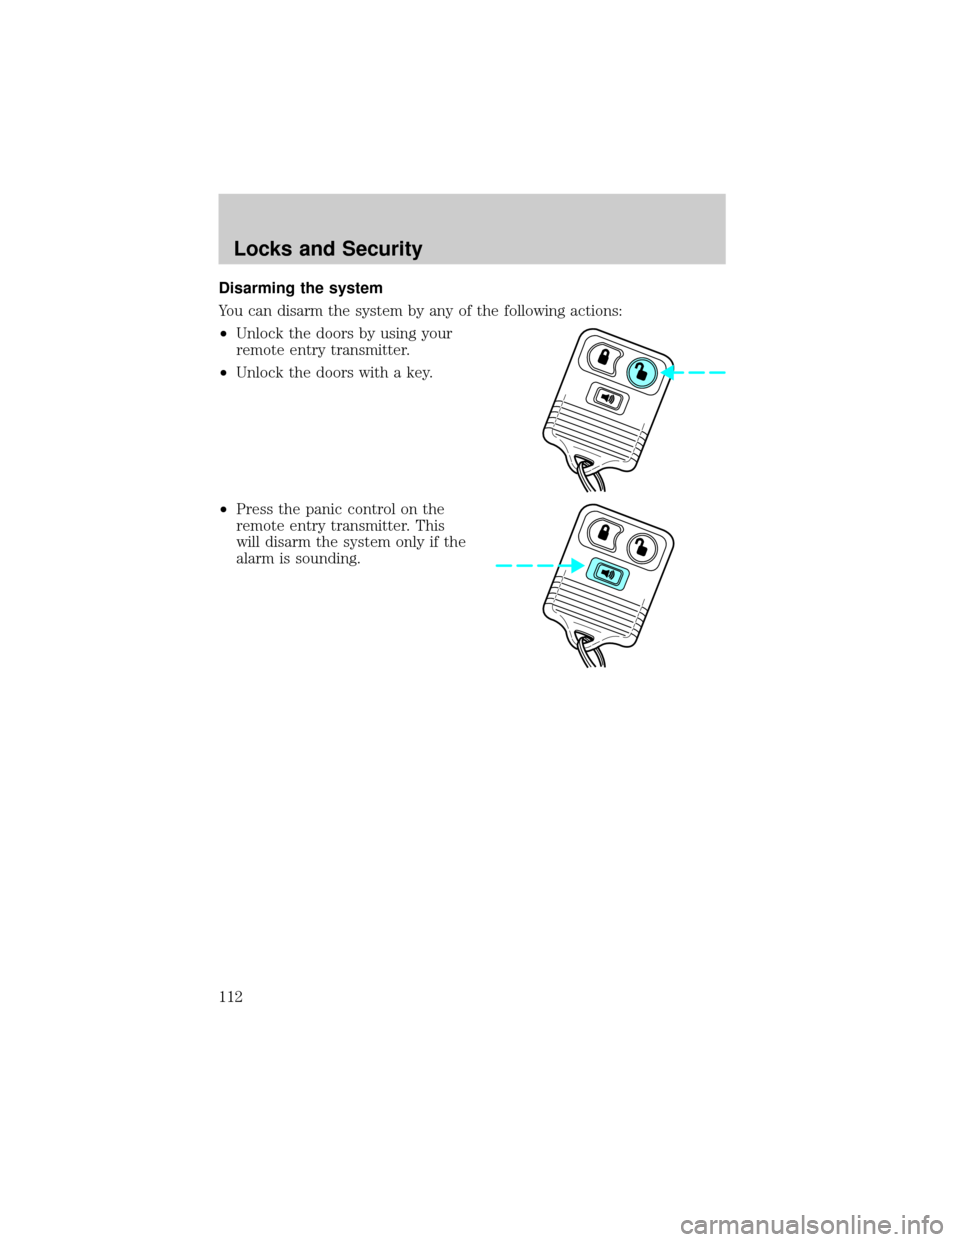
Disarming the system
You can disarm the system by any of the following actions:
²Unlock the doors by using your
remote entry transmitter.
²Unlock the doors with a key.
²Press the panic control on the
remote entry transmitter. This
will disarm the system only if the
alarm is sounding.
Locks and Security
112
Page 113 of 280
SEATING
Adjusting the front manual seat
Never adjust the driver's seat or seatback when the vehicle is
moving.
Do not pile cargo higher than the seatbacks to reduce the risk of
injuring people in a collision or sudden stop.
Always drive and ride with your seatback upright and the lap
belt snug and low across the hips.
Reclining the seatback can cause an occupant to slide under the
seat's safety belt, resulting in severe personal injuries in the
event of a collision.
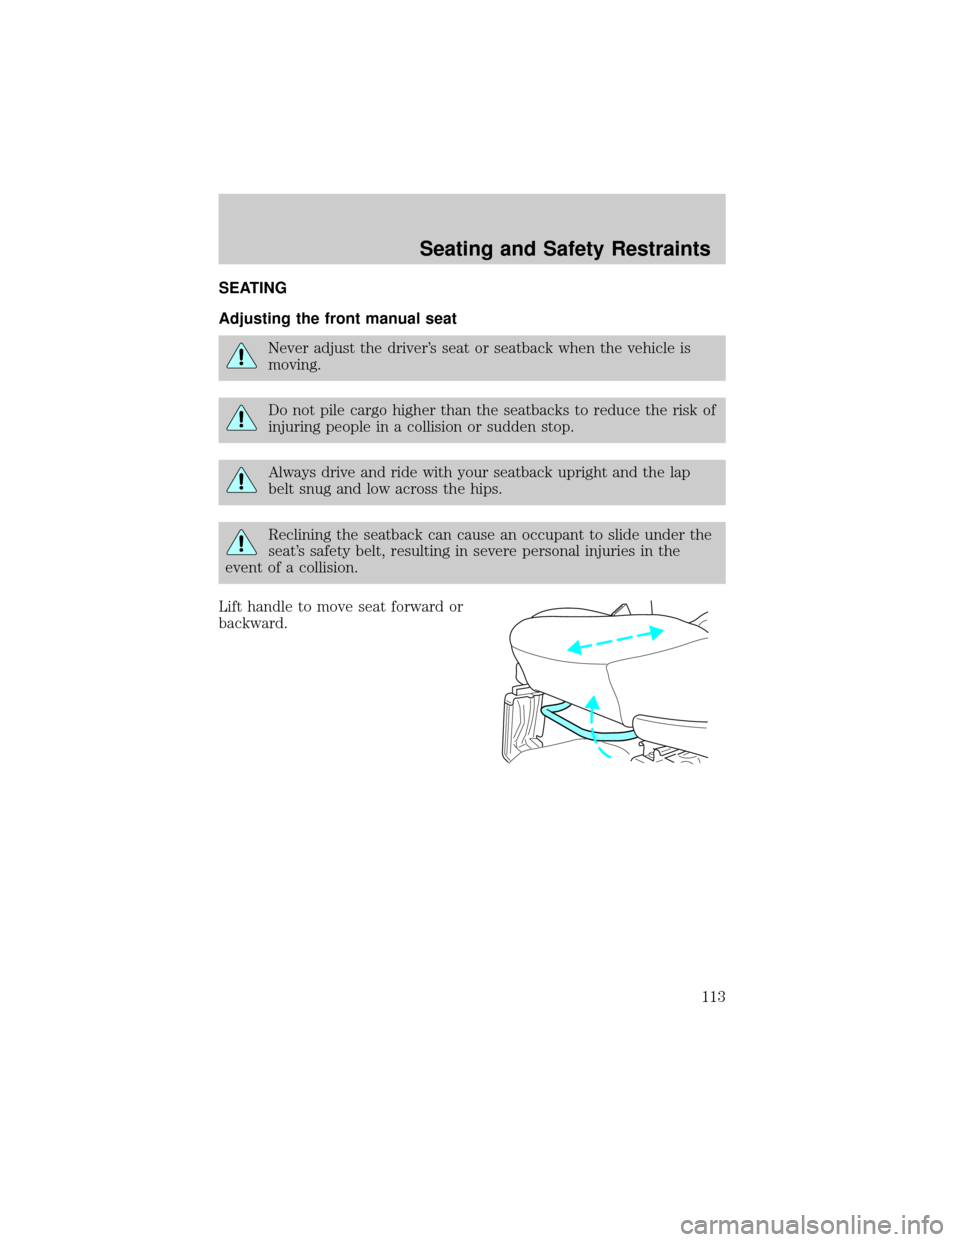
Lift handle to move seat forward or
backward.
Seating and Safety Restraints
113
Page 114 of 280
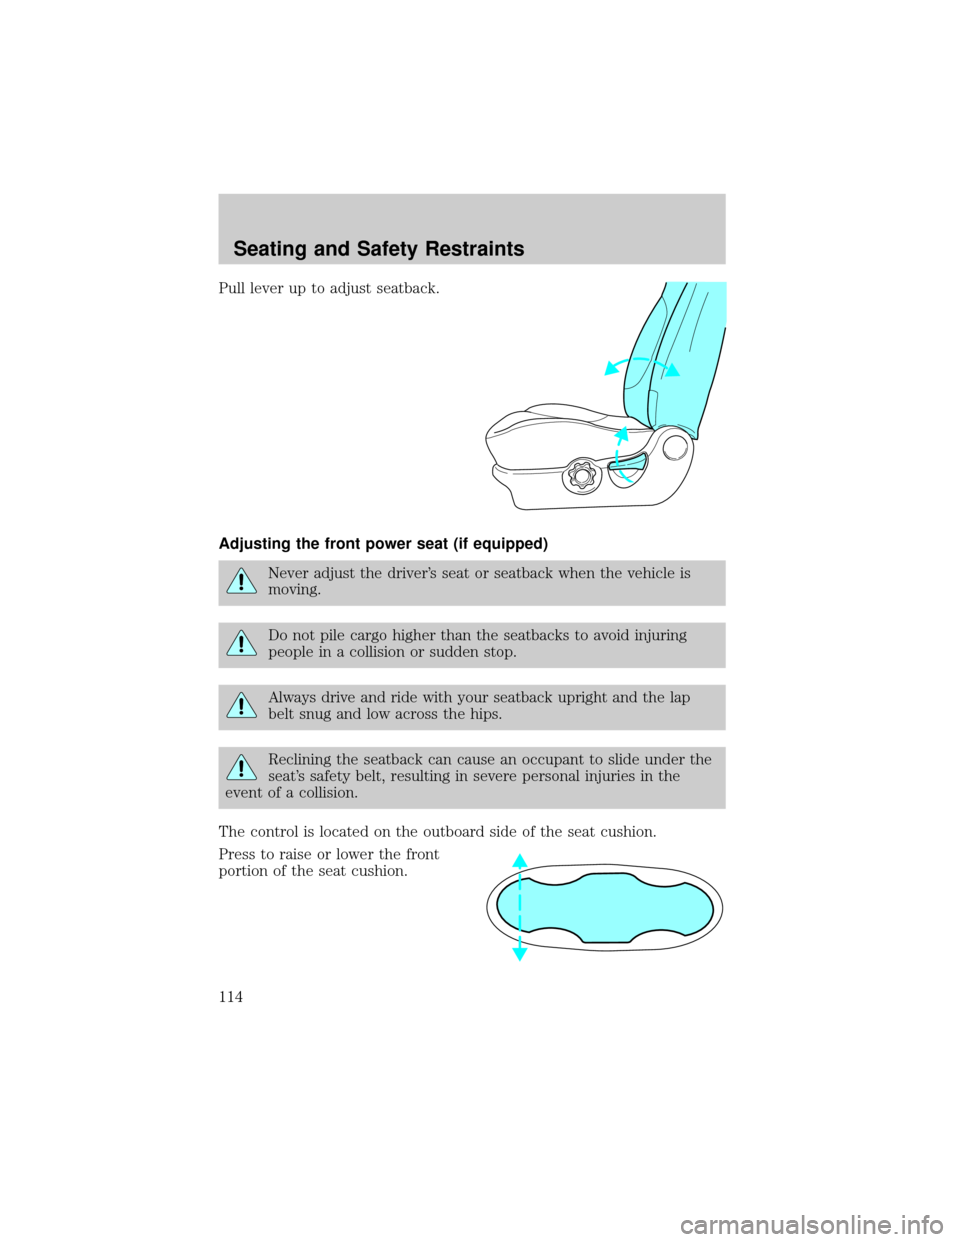
Pull lever up to adjust seatback.
Adjusting the front power seat (if equipped)
Never adjust the driver's seat or seatback when the vehicle is
moving.
Do not pile cargo higher than the seatbacks to avoid injuring
people in a collision or sudden stop.
Always drive and ride with your seatback upright and the lap
belt snug and low across the hips.
Reclining the seatback can cause an occupant to slide under the
seat's safety belt, resulting in severe personal injuries in the
event of a collision.
The control is located on the outboard side of the seat cushion.
Press to raise or lower the front
portion of the seat cushion.
Seating and Safety Restraints
114
Page 115 of 280
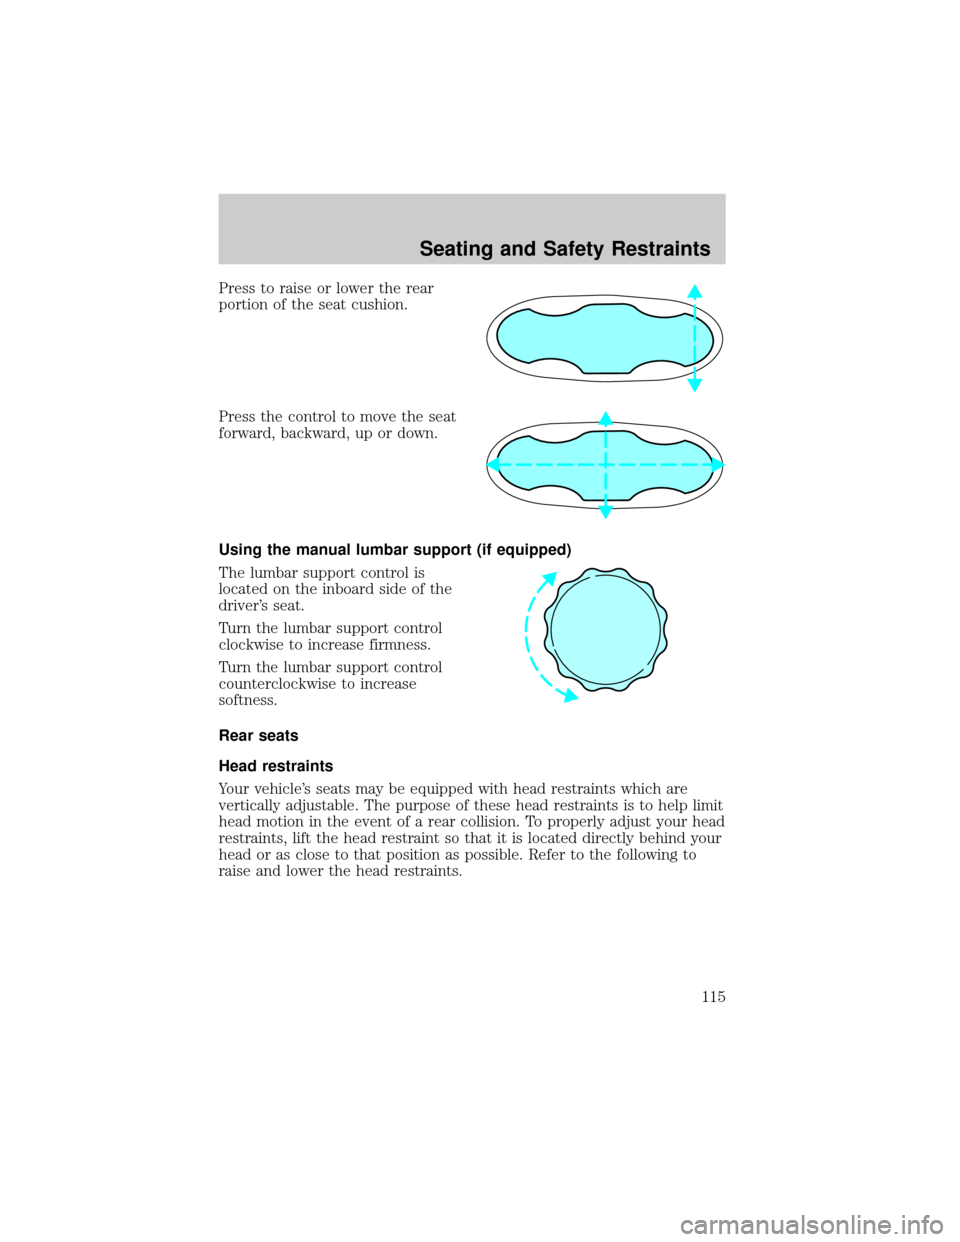
Press to raise or lower the rear
portion of the seat cushion.
Press the control to move the seat
forward, backward, up or down.
Using the manual lumbar support (if equipped)
The lumbar support control is
located on the inboard side of the
driver's seat.
Turn the lumbar support control
clockwise to increase firmness.
Turn the lumbar support control
counterclockwise to increase
softness.
Rear seats
Head restraints
Your vehicle's seats may be equipped with head restraints which are
vertically adjustable. The purpose of these head restraints is to help limit
head motion in the event of a rear collision. To properly adjust your head
restraints, lift the head restraint so that it is located directly behind your
head or as close to that position as possible. Refer to the following to
raise and lower the head restraints.
Seating and Safety Restraints
115
Page 116 of 280
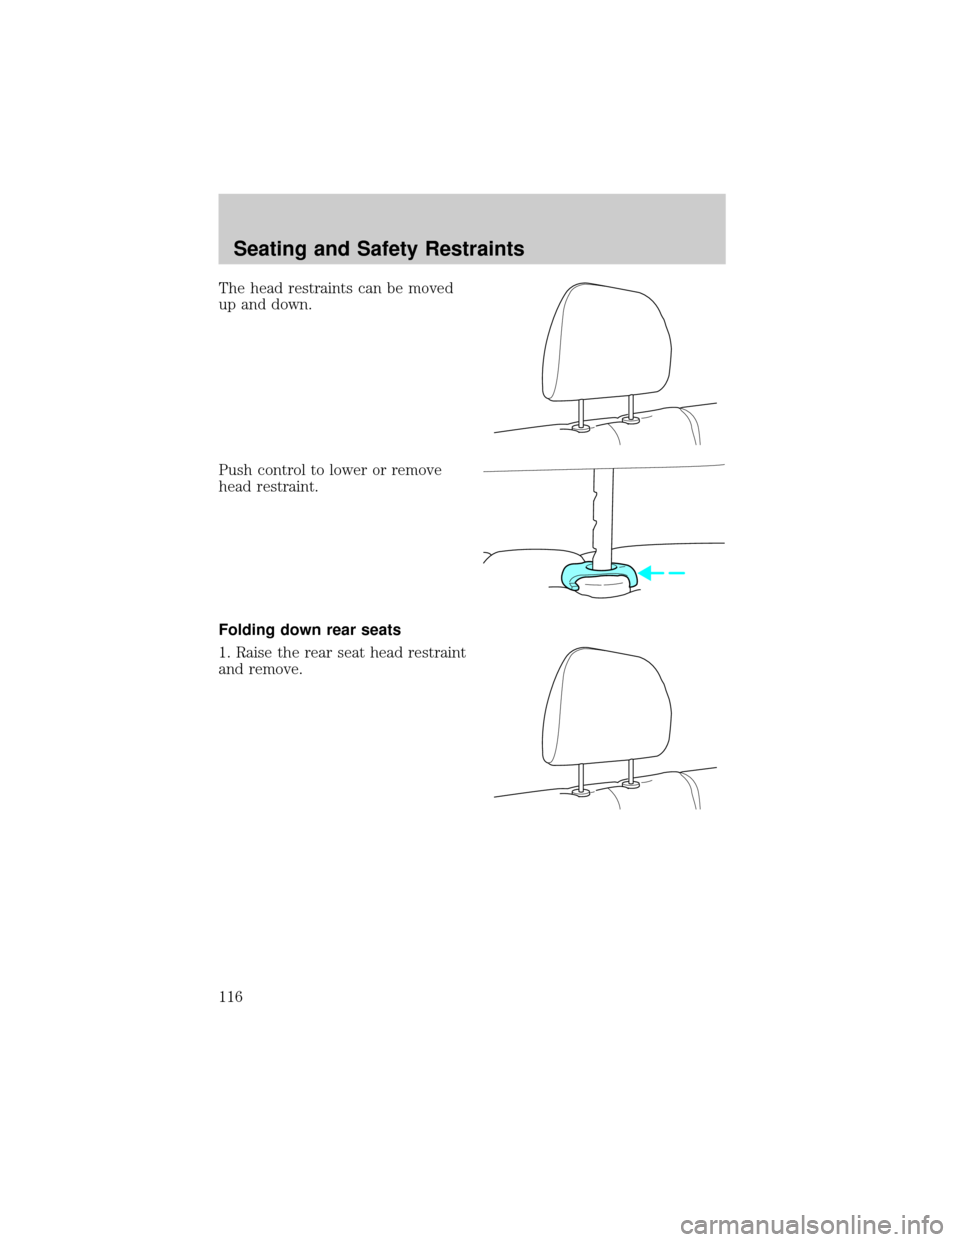
The head restraints can be moved
up and down.
Push control to lower or remove
head restraint.
Folding down rear seats
1. Raise the rear seat head restraint
and remove.
Seating and Safety Restraints
116
Page 117 of 280
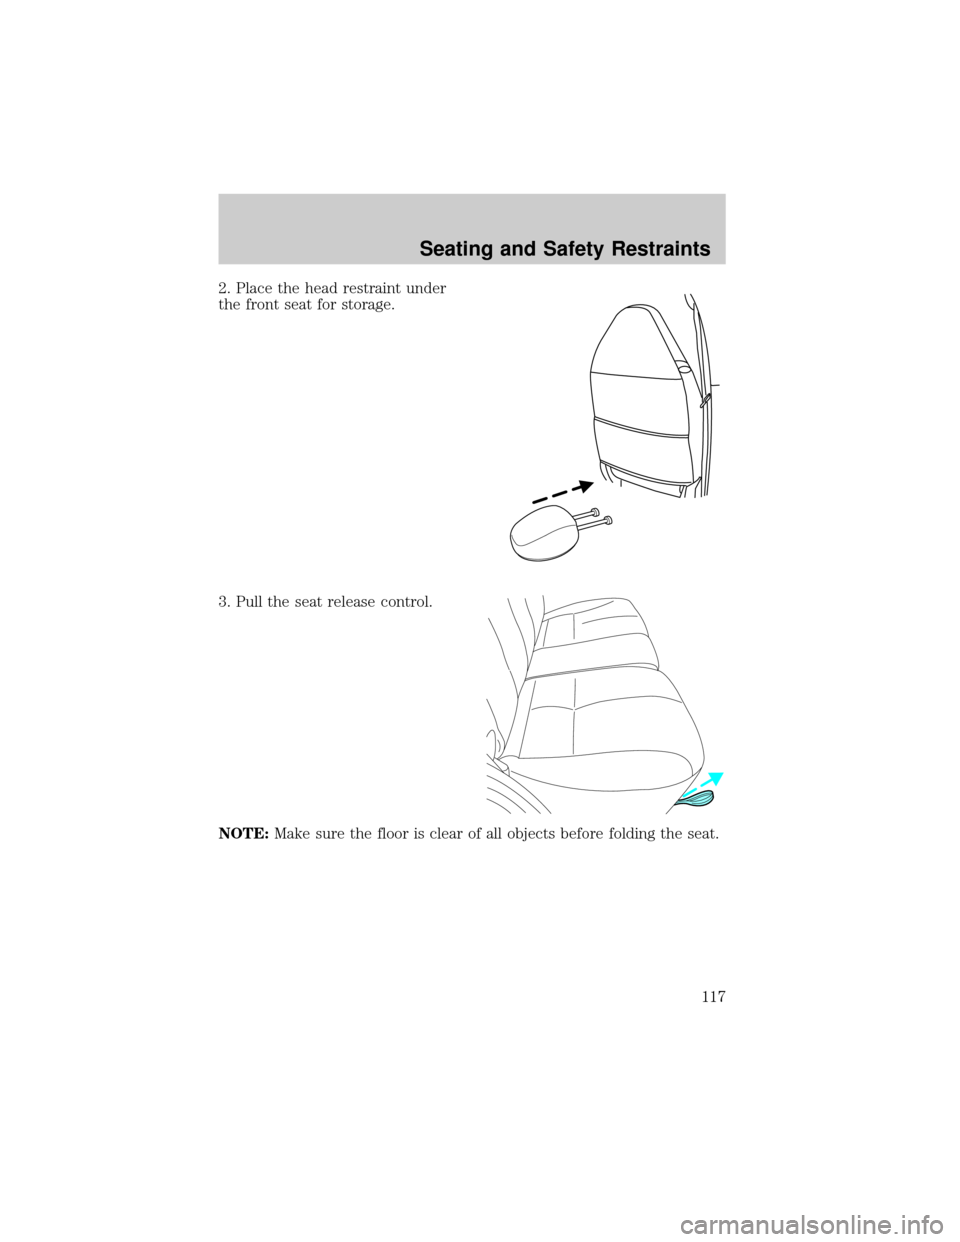
2. Place the head restraint under
the front seat for storage.
3. Pull the seat release control.
NOTE:Make sure the floor is clear of all objects before folding the seat.
Seating and Safety Restraints
117
Page 118 of 280
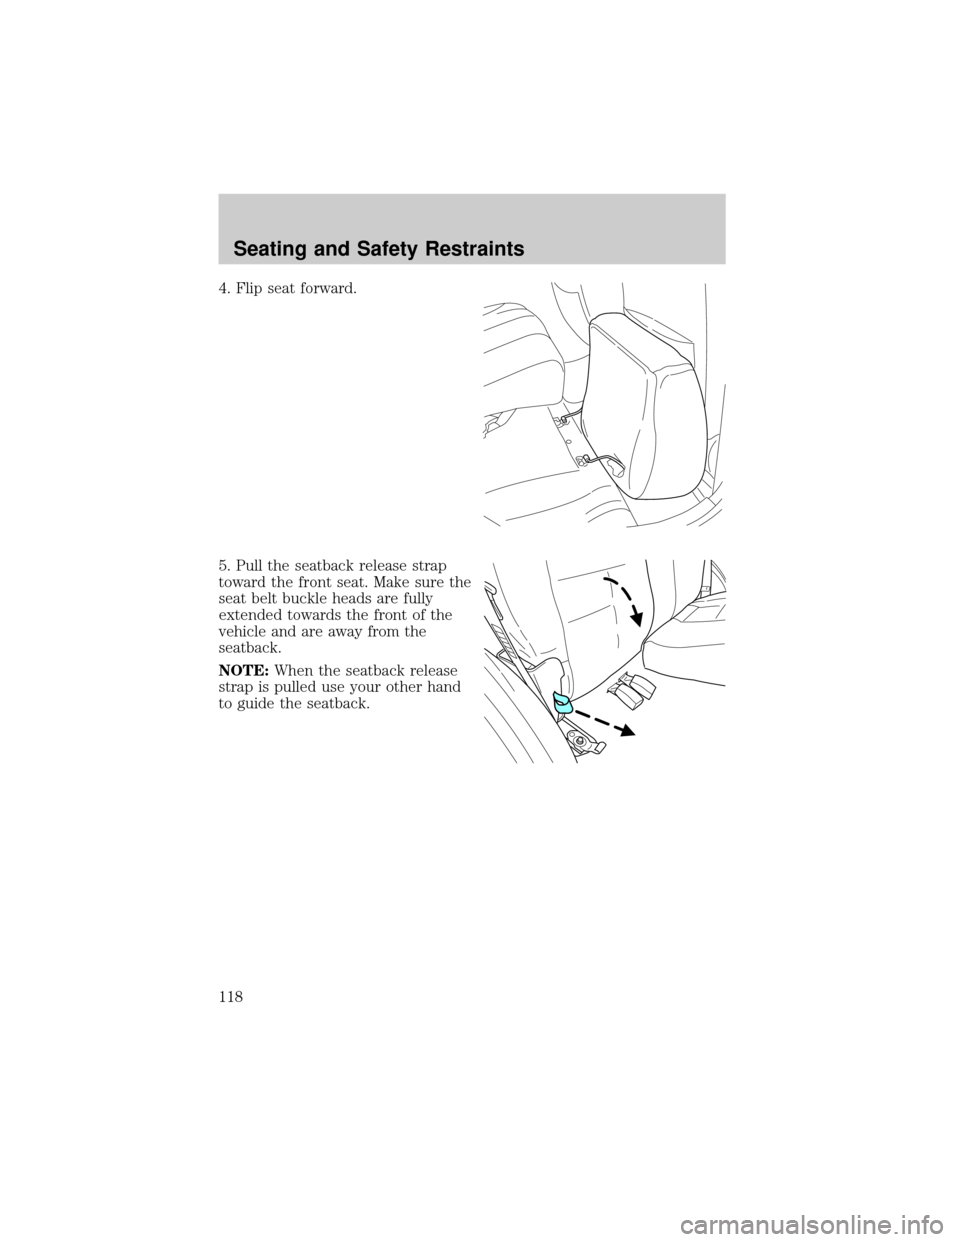
4. Flip seat forward.
5. Pull the seatback release strap
toward the front seat. Make sure the
seat belt buckle heads are fully
extended towards the front of the
vehicle and are away from the
seatback.
NOTE:When the seatback release
strap is pulled use your other hand
to guide the seatback.
Seating and Safety Restraints
118
Page 119 of 280
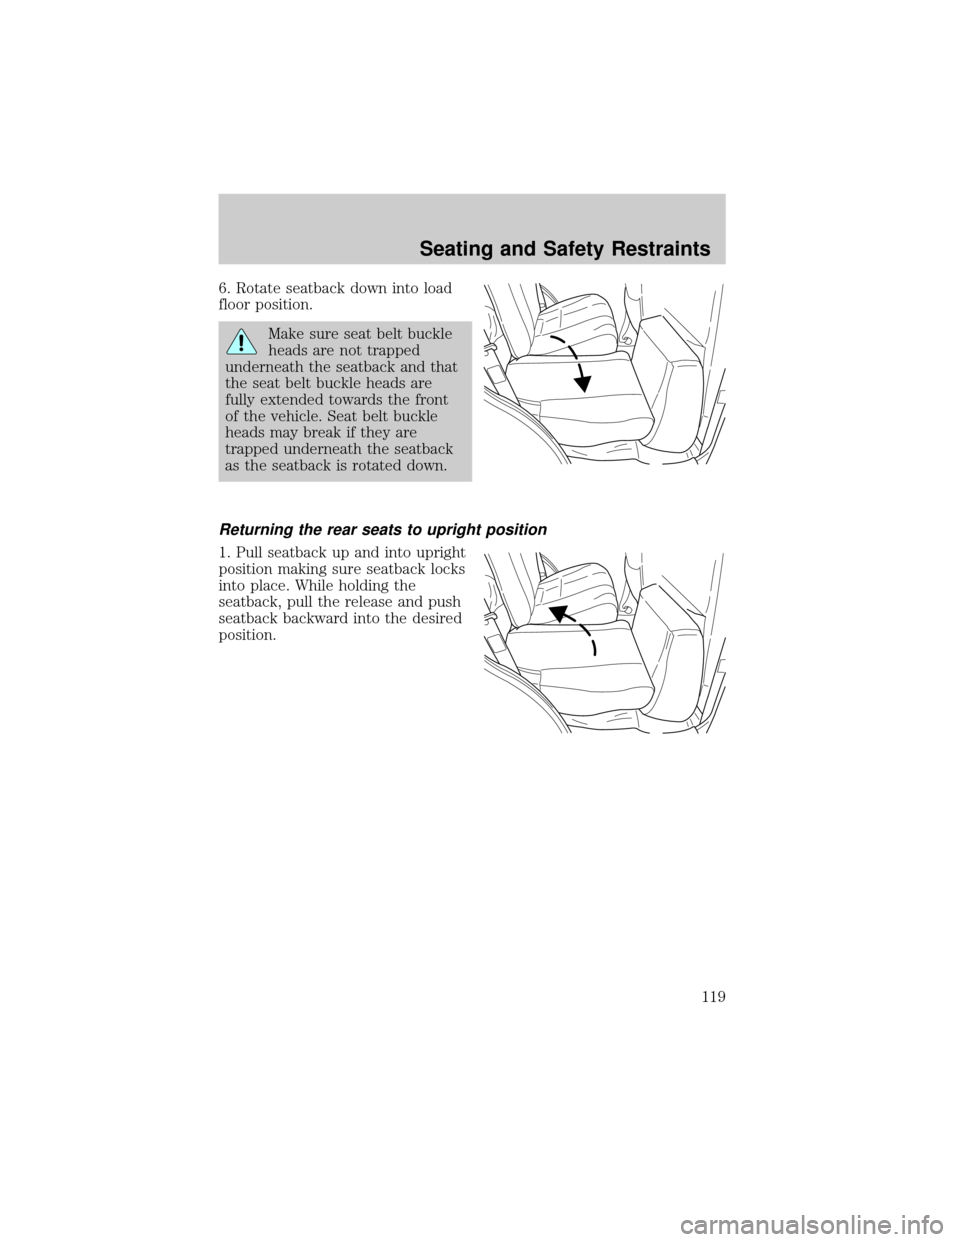
6. Rotate seatback down into load
floor position.
Make sure seat belt buckle
heads are not trapped
underneath the seatback and that
the seat belt buckle heads are
fully extended towards the front
of the vehicle. Seat belt buckle
heads may break if they are
trapped underneath the seatback
as the seatback is rotated down.
Returning the rear seats to upright position
1. Pull seatback up and into upright
position making sure seatback locks
into place. While holding the
seatback, pull the release and push
seatback backward into the desired
position.
Seating and Safety Restraints
119
Page 120 of 280
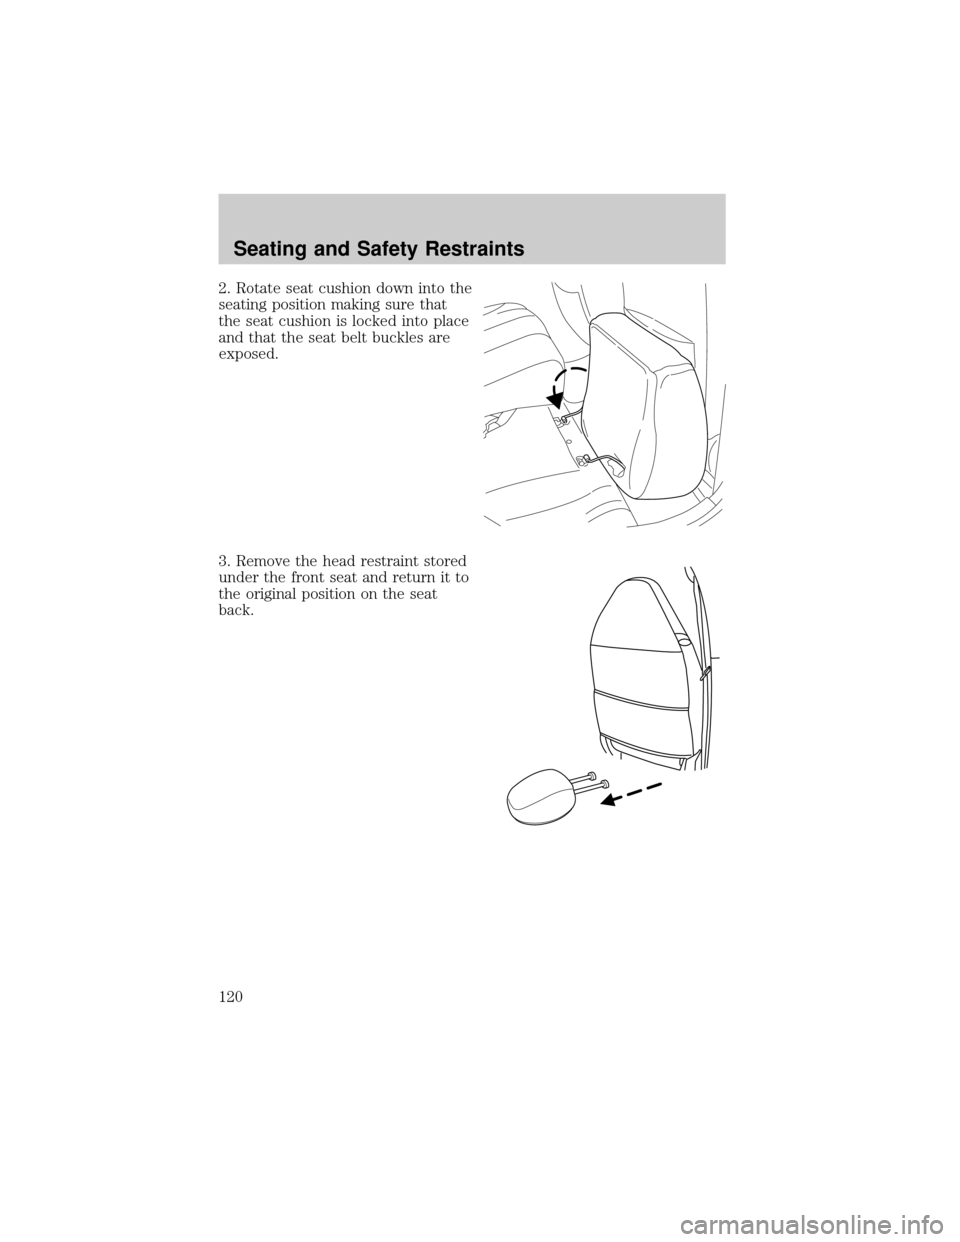
2. Rotate seat cushion down into the
seating position making sure that
the seat cushion is locked into place
and that the seat belt buckles are
exposed.
3. Remove the head restraint stored
under the front seat and return it to
the original position on the seat
back.
Seating and Safety Restraints
120
Trending: clutch, power steering fluid, lumbar support, ground clearance, emergency towing, oil capacities, fuel cap

