FORD ESCAPE 2013 3.G Owner's Manual
Manufacturer: FORD, Model Year: 2013, Model line: ESCAPE, Model: FORD ESCAPE 2013 3.GPages: 423, PDF Size: 4.59 MB
Page 21 of 423
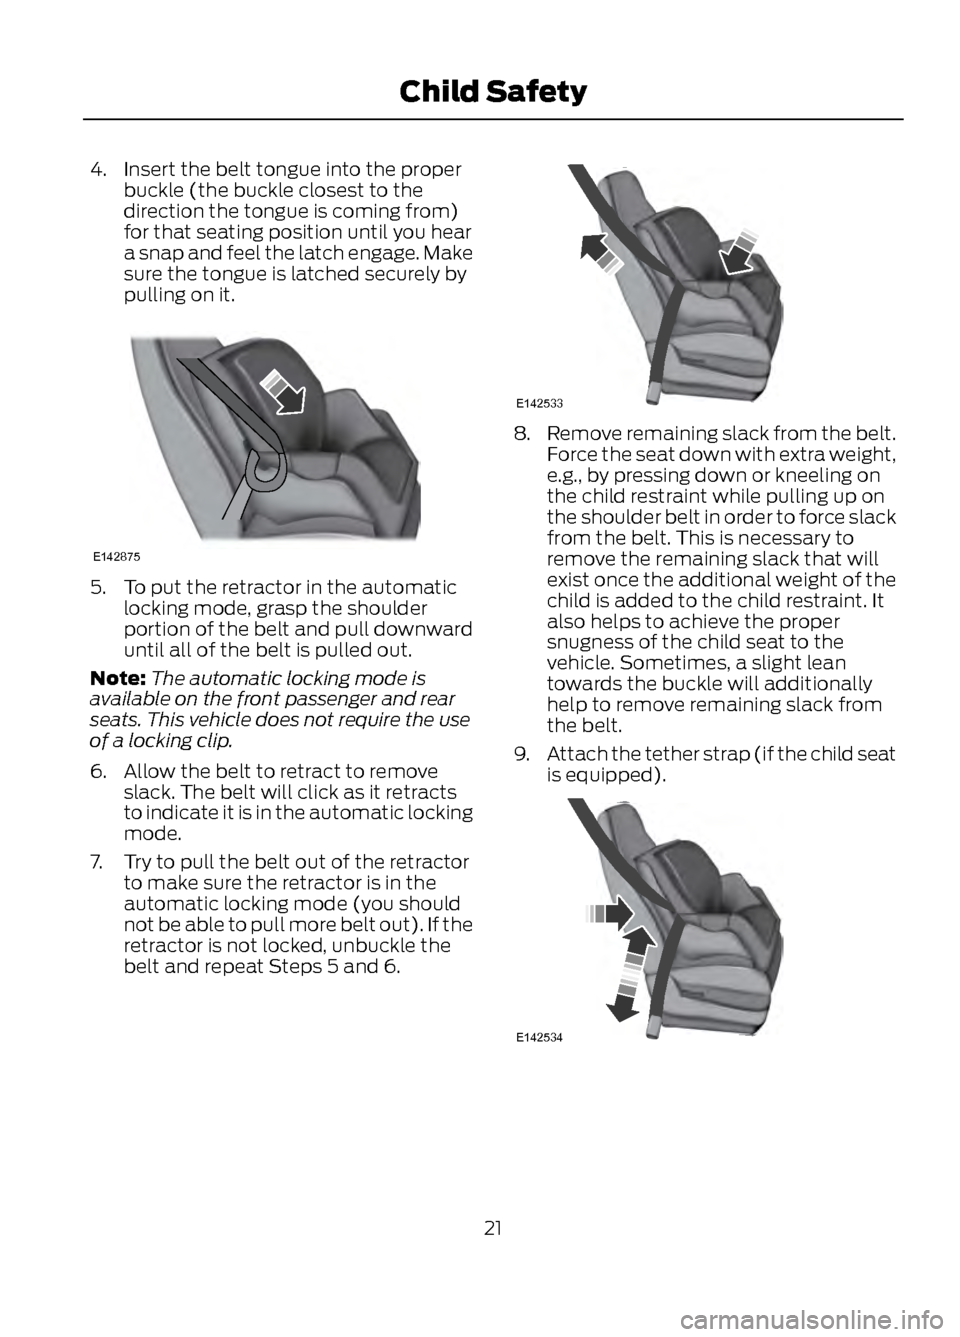
4. Insert the belt tongue into the properbuckle (the buckle closest to the
direction the tongue is coming from)
for that seating position until you hear
a snap and feel the latch engage. Make
sure the tongue is latched securely by
pulling on it.
5. To put the retractor in the automaticlocking mode, grasp the shoulder
portion of the belt and pull downward
until all of the belt is pulled out.
Note: The automatic locking mode is
available on the front passenger and rear
seats. This vehicle does not require the use
of a locking clip.
6. Allow the belt to retract to remove slack. The belt will click as it retracts
to indicate it is in the automatic locking
mode.
7. Try to pull the belt out of the retractor to make sure the retractor is in the
automatic locking mode (you should
not be able to pull more belt out). If the
retractor is not locked, unbuckle the
belt and repeat Steps 5 and 6.
8.Remove remaining slack from the belt.
Force the seat down with extra weight,
e.g., by pressing down or kneeling on
the child restraint while pulling up on
the shoulder belt in order to force slack
from the belt. This is necessary to
remove the remaining slack that will
exist once the additional weight of the
child is added to the child restraint. It
also helps to achieve the proper
snugness of the child seat to the
vehicle. Sometimes, a slight lean
towards the buckle will additionally
help to remove remaining slack from
the belt.
9. Attach the tether strap (if the child seat
is equipped).
21
Child Safety
E142875
E142533
E142534
Page 22 of 423
10. Before placing the child in the seat,forcibly move the seat forward and
back to make sure the seat is securely
held in place. To check this, grab the
seat at the belt path and attempt to
move it side to side and forward and
back. There should be no more than
1 inch (2.5 centimeters) of movement
for proper installation.
Ford recommends checking with a NHTSA
Certified Child Passenger Safety
Technician to make certain the child
restraint is properly installed. In Canada,
check with your local St. John Ambulance
office for referral to a Certified Passenger
Seat Technician.
Using Lower Anchors AND Tethers
FOR CHildren (LATCH)
WARNINGS
Never attach two child safety seats
to the same anchor. In a crash, one
anchor may not be strong enough to
hold two child safety seat attachments
and may break, causing serious injury or
death.
Depending on where you secure a
child restraint, and depending on the
child restraint design, you may block
access to certain safety belt buckle
assemblies or LATCH lower anchors,
rendering those features potentially
unusable. To avoid risk of injury, occupants
should only use seating positions where
they are able to be properly restrained.
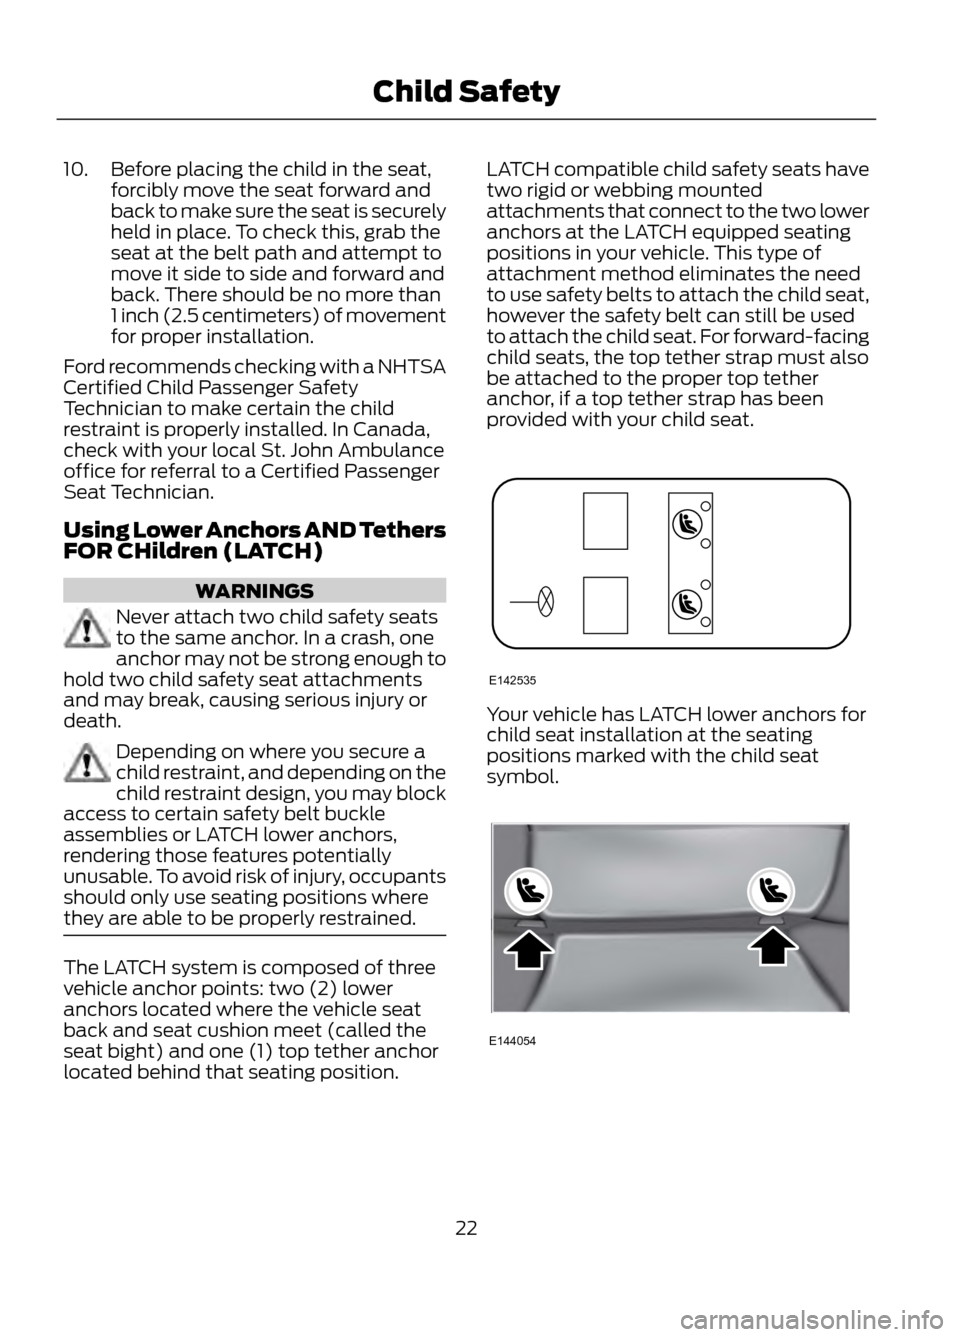
The LATCH system is composed of three
vehicle anchor points: two (2) lower
anchors located where the vehicle seat
back and seat cushion meet (called the
seat bight) and one (1) top tether anchor
located behind that seating position. LATCH compatible child safety seats have
two rigid or webbing mounted
attachments that connect to the two lower
anchors at the LATCH equipped seating
positions in your vehicle. This type of
attachment method eliminates the need
to use safety belts to attach the child seat,
however the safety belt can still be used
to attach the child seat. For forward-facing
child seats, the top tether strap must also
be attached to the proper top tether
anchor, if a top tether strap has been
provided with your child seat.
Your vehicle has LATCH lower anchors for
child seat installation at the seating
positions marked with the child seat
symbol.
22
Child Safety
E142535
E144054
Page 23 of 423
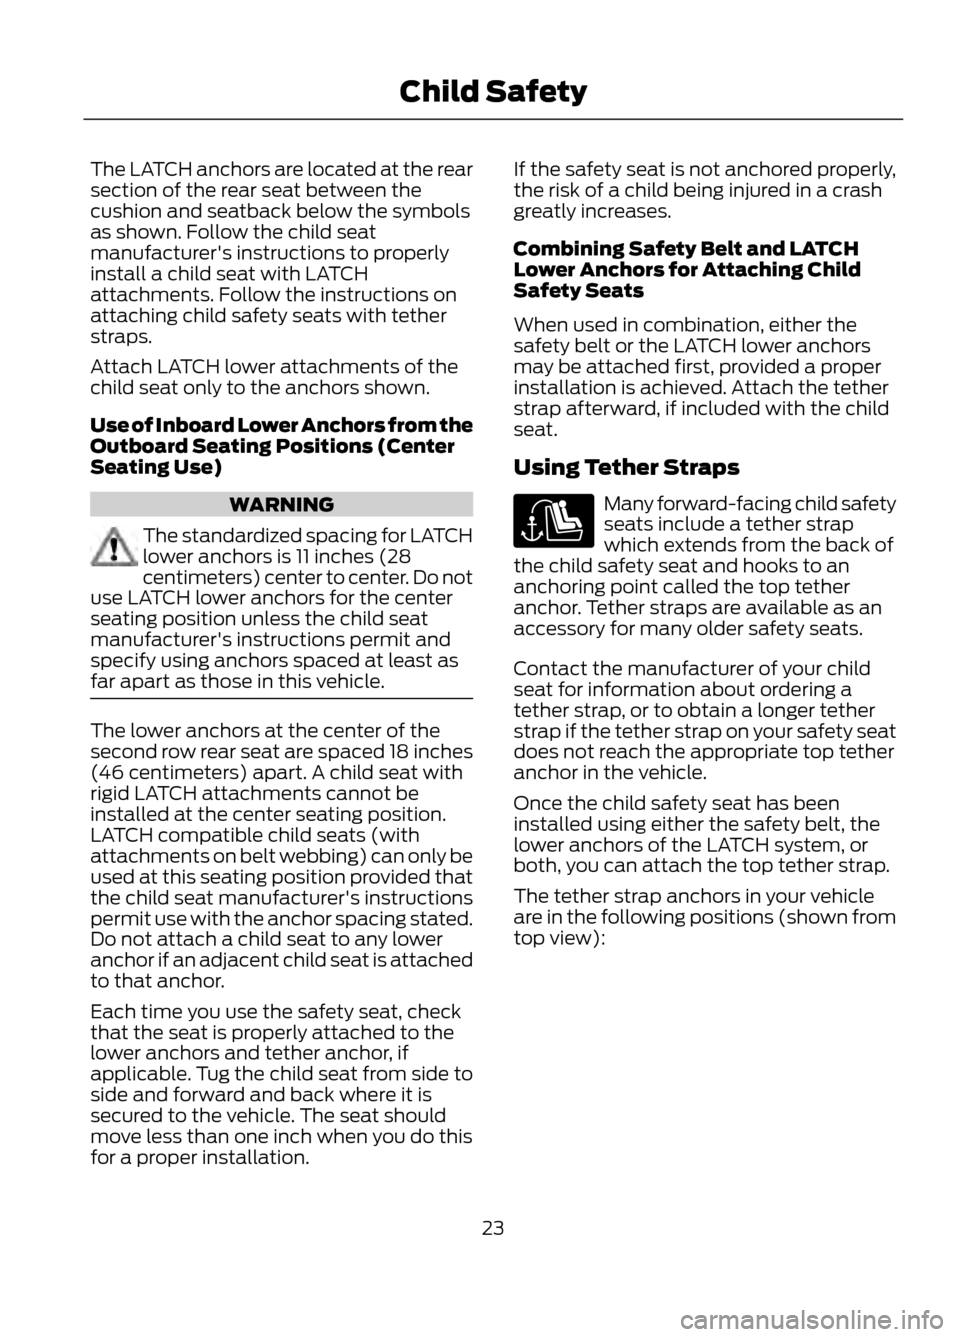
The LATCH anchors are located at the rear
section of the rear seat between the
cushion and seatback below the symbols
as shown. Follow the child seat
manufacturer's instructions to properly
install a child seat with LATCH
attachments. Follow the instructions on
attaching child safety seats with tether
straps.
Attach LATCH lower attachments of the
child seat only to the anchors shown.
Use of Inboard Lower Anchors from the
Outboard Seating Positions (Center
Seating Use)
WARNING
The standardized spacing for LATCH
lower anchors is 11 inches (28
centimeters) center to center. Do not
use LATCH lower anchors for the center
seating position unless the child seat
manufacturer's instructions permit and
specify using anchors spaced at least as
far apart as those in this vehicle.
The lower anchors at the center of the
second row rear seat are spaced 18 inches
(46 centimeters) apart. A child seat with
rigid LATCH attachments cannot be
installed at the center seating position.
LATCH compatible child seats (with
attachments on belt webbing) can only be
used at this seating position provided that
the child seat manufacturer's instructions
permit use with the anchor spacing stated.
Do not attach a child seat to any lower
anchor if an adjacent child seat is attached
to that anchor.
Each time you use the safety seat, check
that the seat is properly attached to the
lower anchors and tether anchor, if
applicable. Tug the child seat from side to
side and forward and back where it is
secured to the vehicle. The seat should
move less than one inch when you do this
for a proper installation. If the safety seat is not anchored properly,
the risk of a child being injured in a crash
greatly increases.
Combining Safety Belt and LATCH
Lower Anchors for Attaching Child
Safety Seats
When used in combination, either the
safety belt or the LATCH lower anchors
may be attached first, provided a proper
installation is achieved. Attach the tether
strap afterward, if included with the child
seat.
Using Tether Straps
Many forward-facing child safety
seats include a tether strap
which extends from the back of
the child safety seat and hooks to an
anchoring point called the top tether
anchor. Tether straps are available as an
accessory for many older safety seats.
Contact the manufacturer of your child
seat for information about ordering a
tether strap, or to obtain a longer tether
strap if the tether strap on your safety seat
does not reach the appropriate top tether
anchor in the vehicle.
Once the child safety seat has been
installed using either the safety belt, the
lower anchors of the LATCH system, or
both, you can attach the top tether strap.
The tether strap anchors in your vehicle
are in the following positions (shown from
top view):
23
Child Safety
Page 24 of 423
Perform the following steps to install a
child safety seat with tether anchors:
Note:If you install a child seat with rigid
LATCH attachments, do not tighten the
tether strap enough to lift the child seat off
the vehicle seat cushion when the child is
seated in it. Keep the tether strap just snug
without lifting the front of the child seat.
Keeping the child seat just touching the
vehicle seat gives the best protection in a
severe crash.
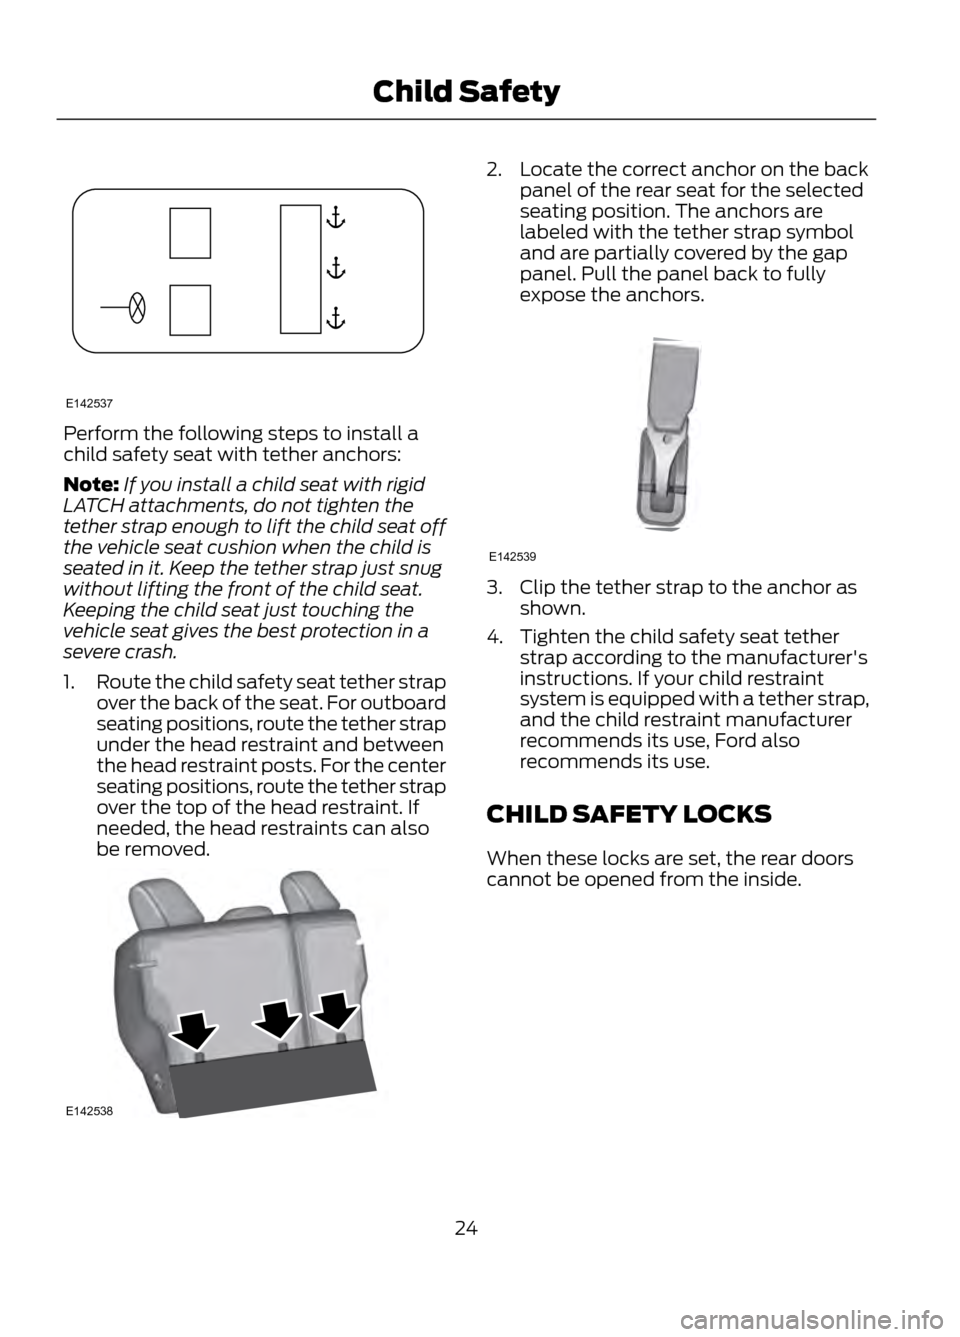
1. Route the child safety seat tether strap
over the back of the seat. For outboard
seating positions, route the tether strap
under the head restraint and between
the head restraint posts. For the center
seating positions, route the tether strap
over the top of the head restraint. If
needed, the head restraints can also
be removed.
2. Locate the correct anchor on the back
panel of the rear seat for the selected
seating position. The anchors are
labeled with the tether strap symbol
and are partially covered by the gap
panel. Pull the panel back to fully
expose the anchors.
3. Clip the tether strap to the anchor asshown.
4. Tighten the child safety seat tether strap according to the manufacturer's
instructions. If your child restraint
system is equipped with a tether strap,
and the child restraint manufacturer
recommends its use, Ford also
recommends its use.
CHILD SAFETY LOCKS
When these locks are set, the rear doors
cannot be opened from the inside.
24
Child Safety
E142537
E142538
E142539
Page 25 of 423
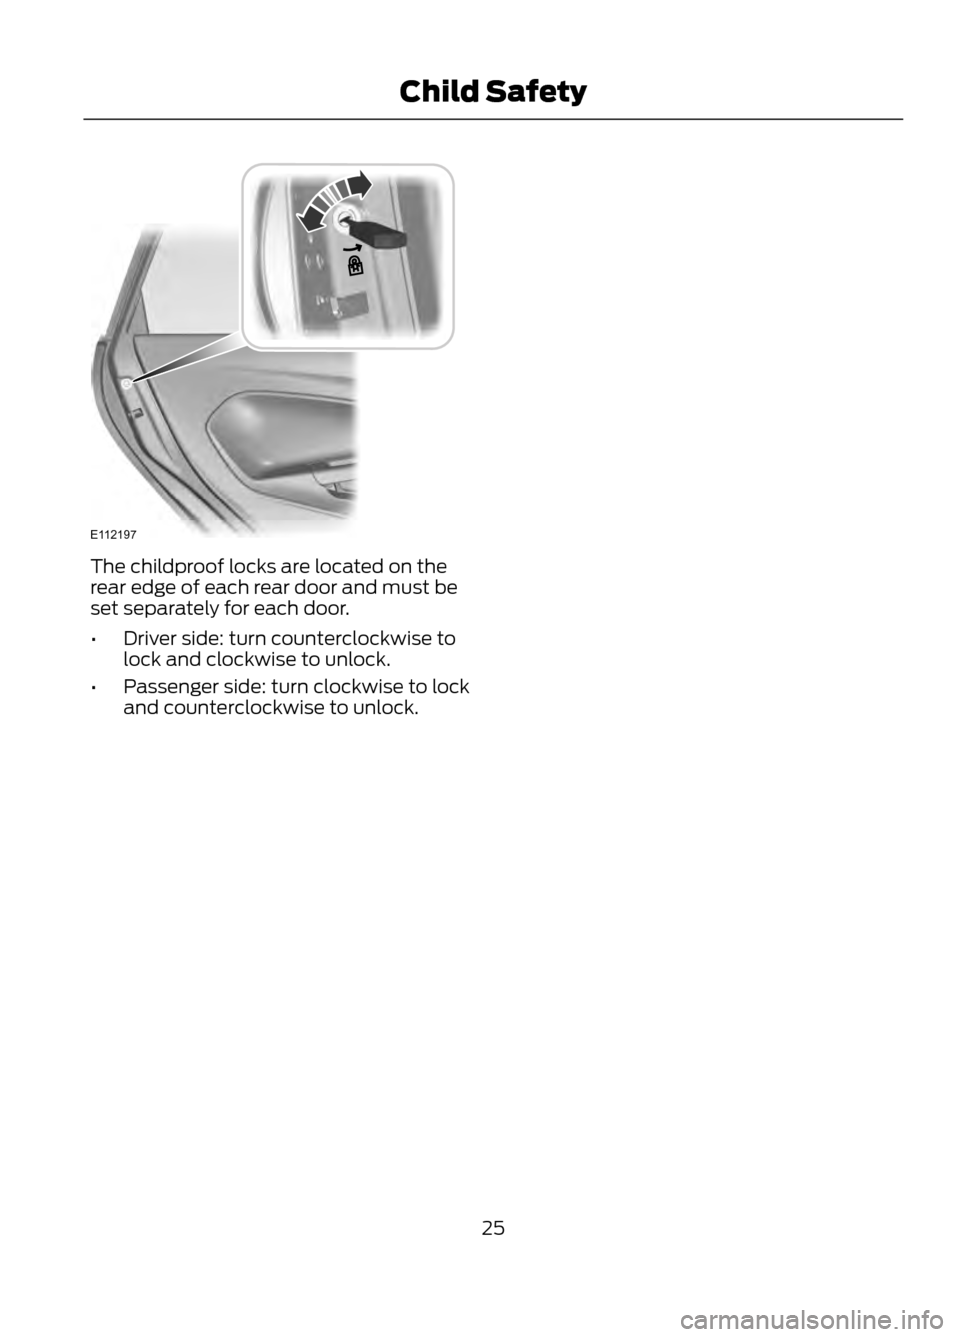
The childproof locks are located on the
rear edge of each rear door and must be
set separately for each door.
•Driver side: turn counterclockwise to
lock and clockwise to unlock.
• Passenger side: turn clockwise to lock
and counterclockwise to unlock.
25
Child Safety
E112197
Page 26 of 423
PRINCIPLE OF OPERATION
WARNINGS
Always drive and ride with your
seatback upright and the lap belt
snug and low across the hips.
To reduce the risk of injury, make
sure children sit where they can be
properly restrained.
Never let a passenger hold a child on
his or her lap while the vehicle is
moving. The passenger cannot
protect the child from injury in a collision.
All occupants of the vehicle,
including the driver, should always
properly wear their safety belts, even
when an airbag supplemental restraint
system is provided.
It is extremely dangerous to ride in a
cargo area, inside or outside of a
vehicle. In a collision, people riding in
these areas are more likely to be seriously
injured or killed. Do not allow people to ride
in any area of your vehicle that is not
equipped with seats and safety belts. Be
sure everyone in your vehicle is in a seat
and using a safety belt properly.
In a rollover crash, an unbelted
person is significantly more likely to
die than a person wearing a safety
belt.
Each seating position in your vehicle
has a specific safety belt assembly
which is made up of one buckle and
one tongue that are designed to be used
as a pair. 1) Use the shoulder belt on the
outside shoulder only. Never wear the
shoulder belt under the arm. 2) Never
swing the safety belt around your neck over
the inside shoulder. 3) Never use a single
belt for more than one person.
When possible, all children 12 years
old and under should be properly
restrained in a rear seating position.
WARNINGS
Safety belts and seats can become
hot in a vehicle that has been closed
up in sunny weather; they could burn
a small child. Check seat covers and
buckles before you place a child anywhere
near them.
Front and rear seat occupants,
including pregnant women, should
wear safety belts for optimum
protection in an accident.
All seating positions in this vehicle have
lap and shoulder safety belts. All
occupants of the vehicle should always
properly wear their safety belts, even when
an airbag supplemental restraint system
is provided.
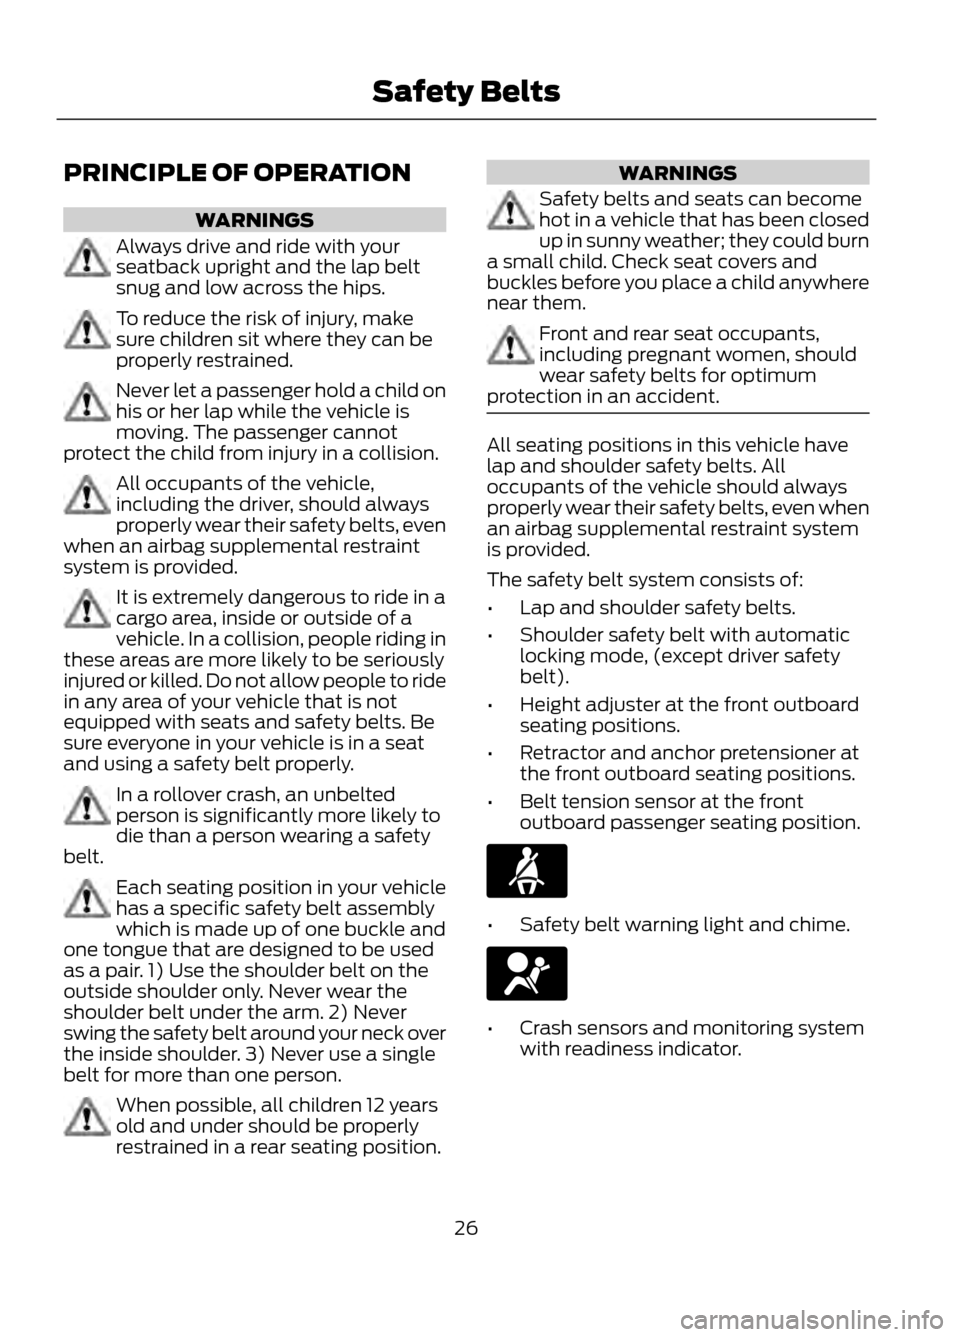
The safety belt system consists of:
• Lap and shoulder safety belts.
• Shoulder safety belt with automatic
locking mode, (except driver safety
belt).
• Height adjuster at the front outboard
seating positions.
• Retractor and anchor pretensioner at
the front outboard seating positions.
• Belt tension sensor at the front
outboard passenger seating position.
•Safety belt warning light and chime.
•Crash sensors and monitoring system
with readiness indicator.
26
Safety Belts
Page 27 of 423
The safety belt pretensioners are designed
to activate in frontal, near-frontal and side
collisions, and in rollovers. The safety belt
pretensioners on the retractor and anchor
at the front seating positions are designed
to tighten the safety belts firmly against
the occupant's body when activated. This
helps increase the effectiveness of the
safety belts. In frontal collisions, the safety
belt pretensioners can be activated alone
or, if the collision is of sufficient severity,
together with the front airbags.
FASTENING THE SAFETY
BELTS
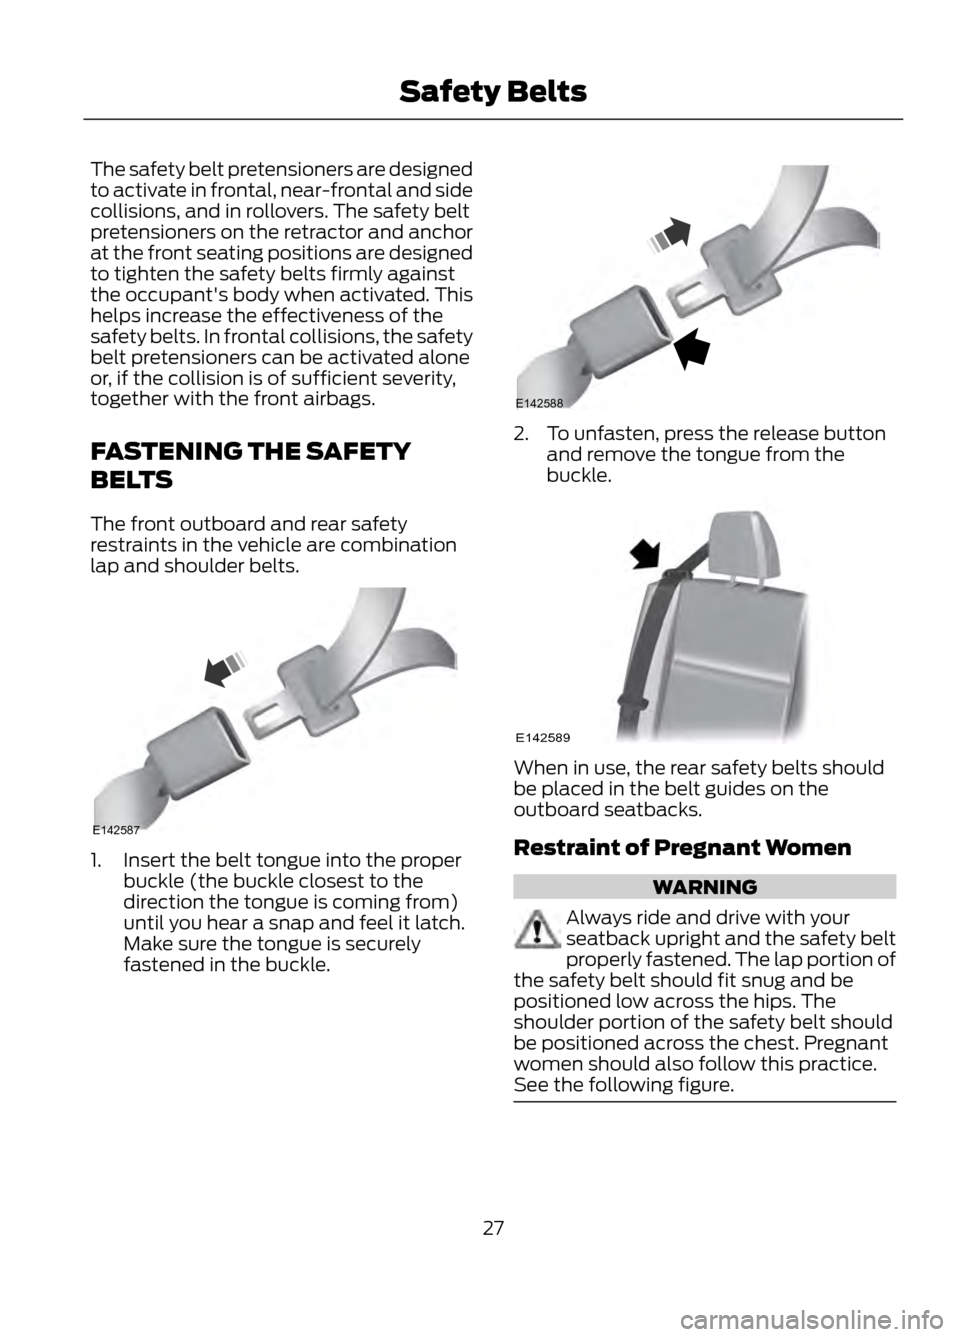
The front outboard and rear safety
restraints in the vehicle are combination
lap and shoulder belts.
1. Insert the belt tongue into the properbuckle (the buckle closest to the
direction the tongue is coming from)
until you hear a snap and feel it latch.
Make sure the tongue is securely
fastened in the buckle.
2. To unfasten, press the release buttonand remove the tongue from the
buckle.
When in use, the rear safety belts should
be placed in the belt guides on the
outboard seatbacks.
Restraint of Pregnant Women
WARNING
Always ride and drive with your
seatback upright and the safety belt
properly fastened. The lap portion of
the safety belt should fit snug and be
positioned low across the hips. The
shoulder portion of the safety belt should
be positioned across the chest. Pregnant
women should also follow this practice.
See the following figure.
27
Safety Belts
E142587
E142588
E142589
Page 28 of 423
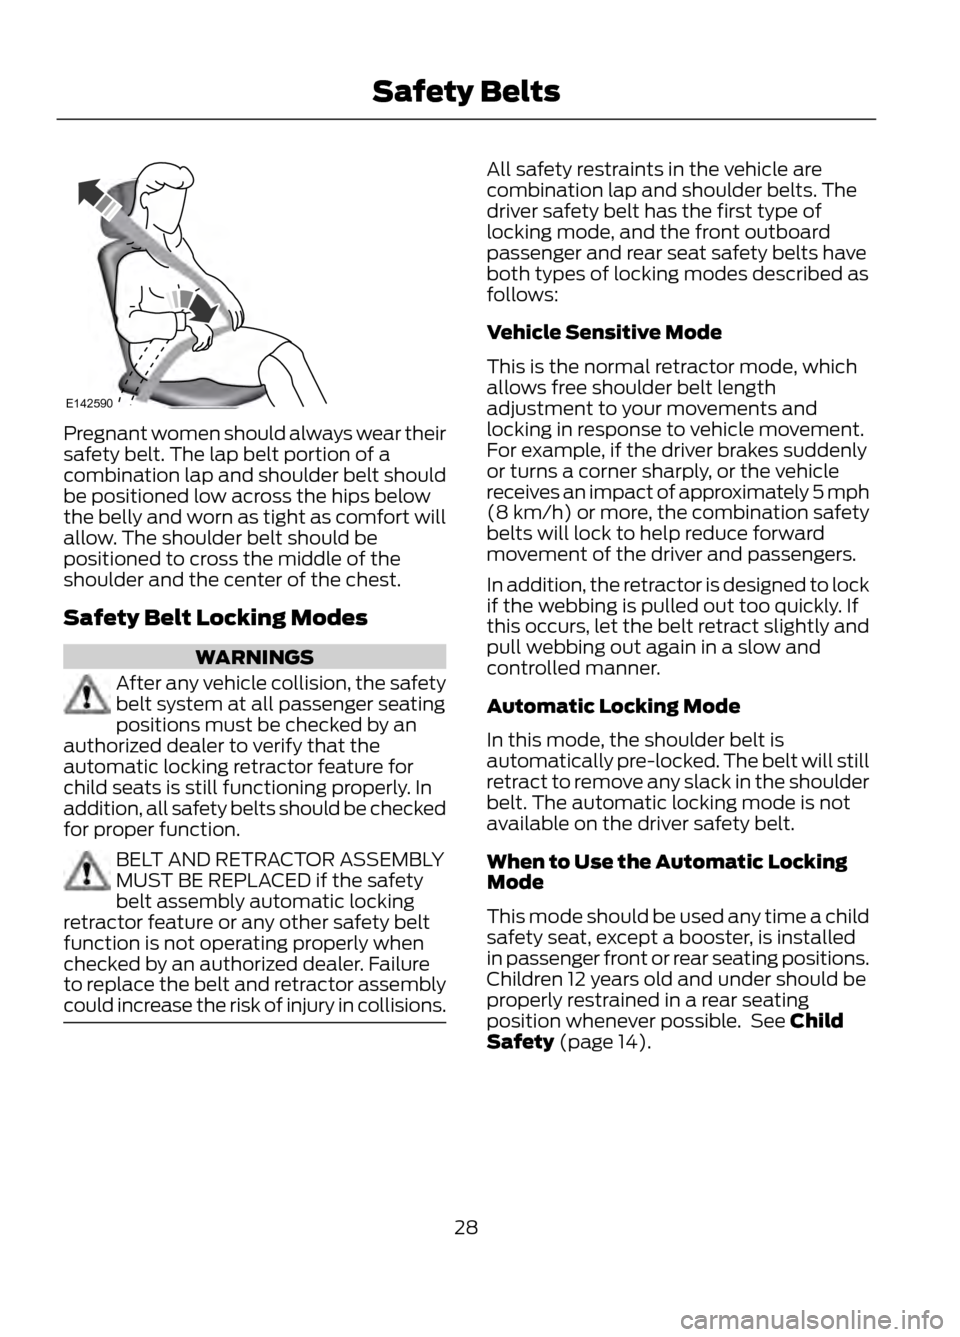
Pregnant women should always wear their
safety belt. The lap belt portion of a
combination lap and shoulder belt should
be positioned low across the hips below
the belly and worn as tight as comfort will
allow. The shoulder belt should be
positioned to cross the middle of the
shoulder and the center of the chest.
Safety Belt Locking Modes
WARNINGS
After any vehicle collision, the safety
belt system at all passenger seating
positions must be checked by an
authorized dealer to verify that the
automatic locking retractor feature for
child seats is still functioning properly. In
addition, all safety belts should be checked
for proper function.
BELT AND RETRACTOR ASSEMBLY
MUST BE REPLACED if the safety
belt assembly automatic locking
retractor feature or any other safety belt
function is not operating properly when
checked by an authorized dealer. Failure
to replace the belt and retractor assembly
could increase the risk of injury in collisions.
All safety restraints in the vehicle are
combination lap and shoulder belts. The
driver safety belt has the first type of
locking mode, and the front outboard
passenger and rear seat safety belts have
both types of locking modes described as
follows:
Vehicle Sensitive Mode
This is the normal retractor mode, which
allows free shoulder belt length
adjustment to your movements and
locking in response to vehicle movement.
For example, if the driver brakes suddenly
or turns a corner sharply, or the vehicle
receives an impact of approximately 5 mph
(8 km/h) or more, the combination safety
belts will lock to help reduce forward
movement of the driver and passengers.
In addition, the retractor is designed to lock
if the webbing is pulled out too quickly. If
this occurs, let the belt retract slightly and
pull webbing out again in a slow and
controlled manner.
Automatic Locking Mode
In this mode, the shoulder belt is
automatically pre-locked. The belt will still
retract to remove any slack in the shoulder
belt. The automatic locking mode is not
available on the driver safety belt.
When to Use the Automatic Locking
Mode
This mode should be used any time a child
safety seat, except a booster, is installed
in passenger front or rear seating positions.
Children 12 years old and under should be
properly restrained in a rear seating
position whenever possible. See Child
Safety (page 14).
28
Safety Belts
E142590
Page 29 of 423
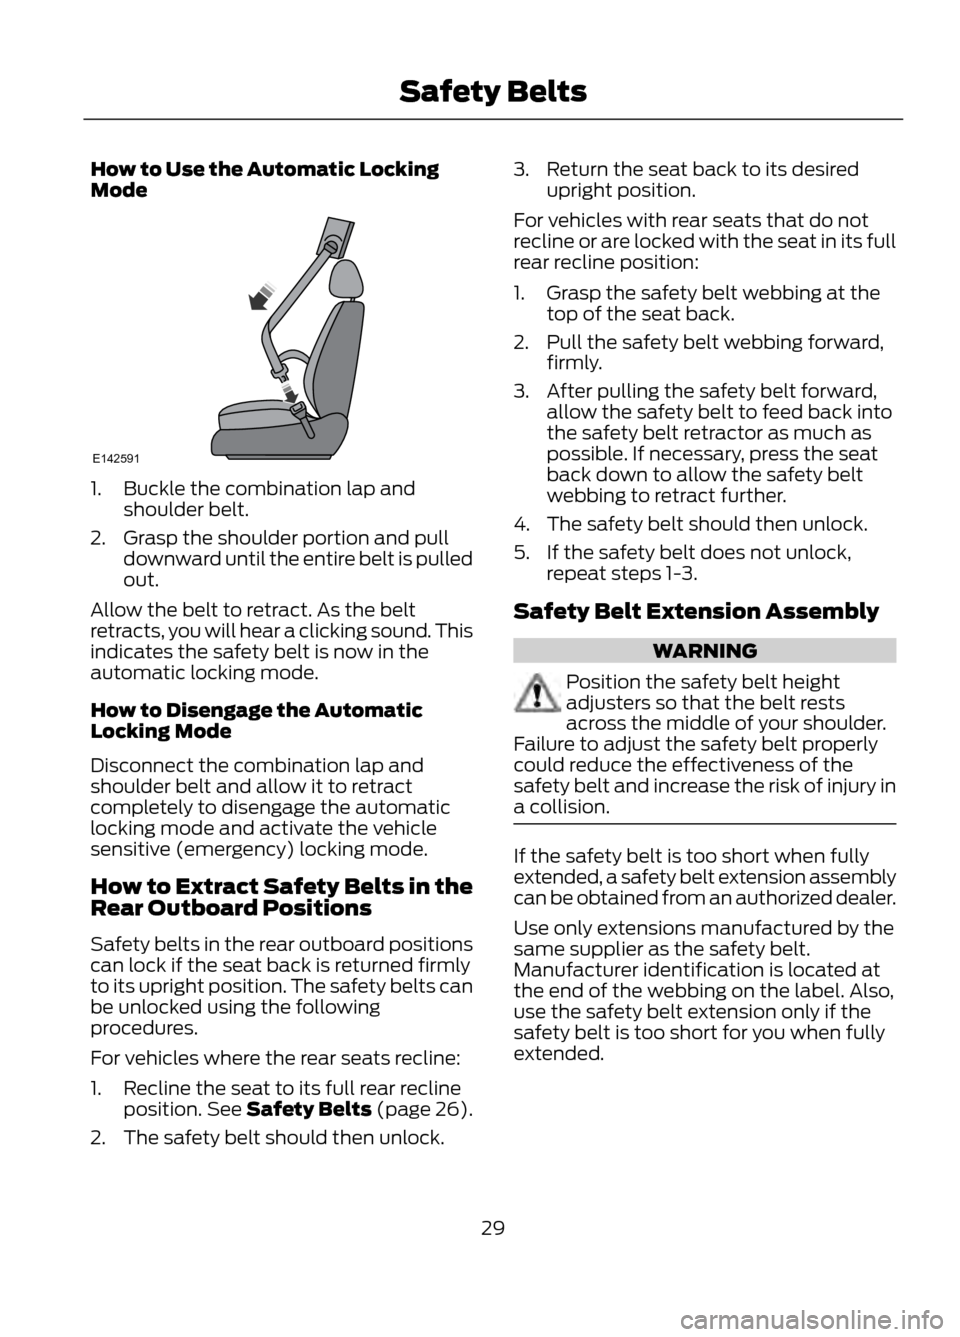
How to Use the Automatic Locking
Mode
1. Buckle the combination lap andshoulder belt.
2. Grasp the shoulder portion and pull downward until the entire belt is pulled
out.
Allow the belt to retract. As the belt
retracts, you will hear a clicking sound. This
indicates the safety belt is now in the
automatic locking mode.
How to Disengage the Automatic
Locking Mode
Disconnect the combination lap and
shoulder belt and allow it to retract
completely to disengage the automatic
locking mode and activate the vehicle
sensitive (emergency) locking mode.
How to Extract Safety Belts in the
Rear Outboard Positions
Safety belts in the rear outboard positions
can lock if the seat back is returned firmly
to its upright position. The safety belts can
be unlocked using the following
procedures.
For vehicles where the rear seats recline:
1. Recline the seat to its full rear recline position. See Safety Belts (page 26).
2. The safety belt should then unlock. 3. Return the seat back to its desired
upright position.
For vehicles with rear seats that do not
recline or are locked with the seat in its full
rear recline position:
1. Grasp the safety belt webbing at the top of the seat back.
2. Pull the safety belt webbing forward, firmly.
3. After pulling the safety belt forward, allow the safety belt to feed back into
the safety belt retractor as much as
possible. If necessary, press the seat
back down to allow the safety belt
webbing to retract further.
4. The safety belt should then unlock.
5. If the safety belt does not unlock, repeat steps 1-3.
Safety Belt Extension Assembly
WARNING
Position the safety belt height
adjusters so that the belt rests
across the middle of your shoulder.
Failure to adjust the safety belt properly
could reduce the effectiveness of the
safety belt and increase the risk of injury in
a collision.
If the safety belt is too short when fully
extended, a safety belt extension assembly
can be obtained from an authorized dealer.
Use only extensions manufactured by the
same supplier as the safety belt.
Manufacturer identification is located at
the end of the webbing on the label. Also,
use the safety belt extension only if the
safety belt is too short for you when fully
extended.
29
Safety Belts
E142591
Page 30 of 423
SAFETY BELT HEIGHT
ADJUSTMENT
WARNING
Position the safety belt height
adjusters so that the belt rests
across the middle of your shoulder.
Failure to adjust the safety belt properly
could reduce the effectiveness of the
safety belt and increase the risk of injury in
a collision.
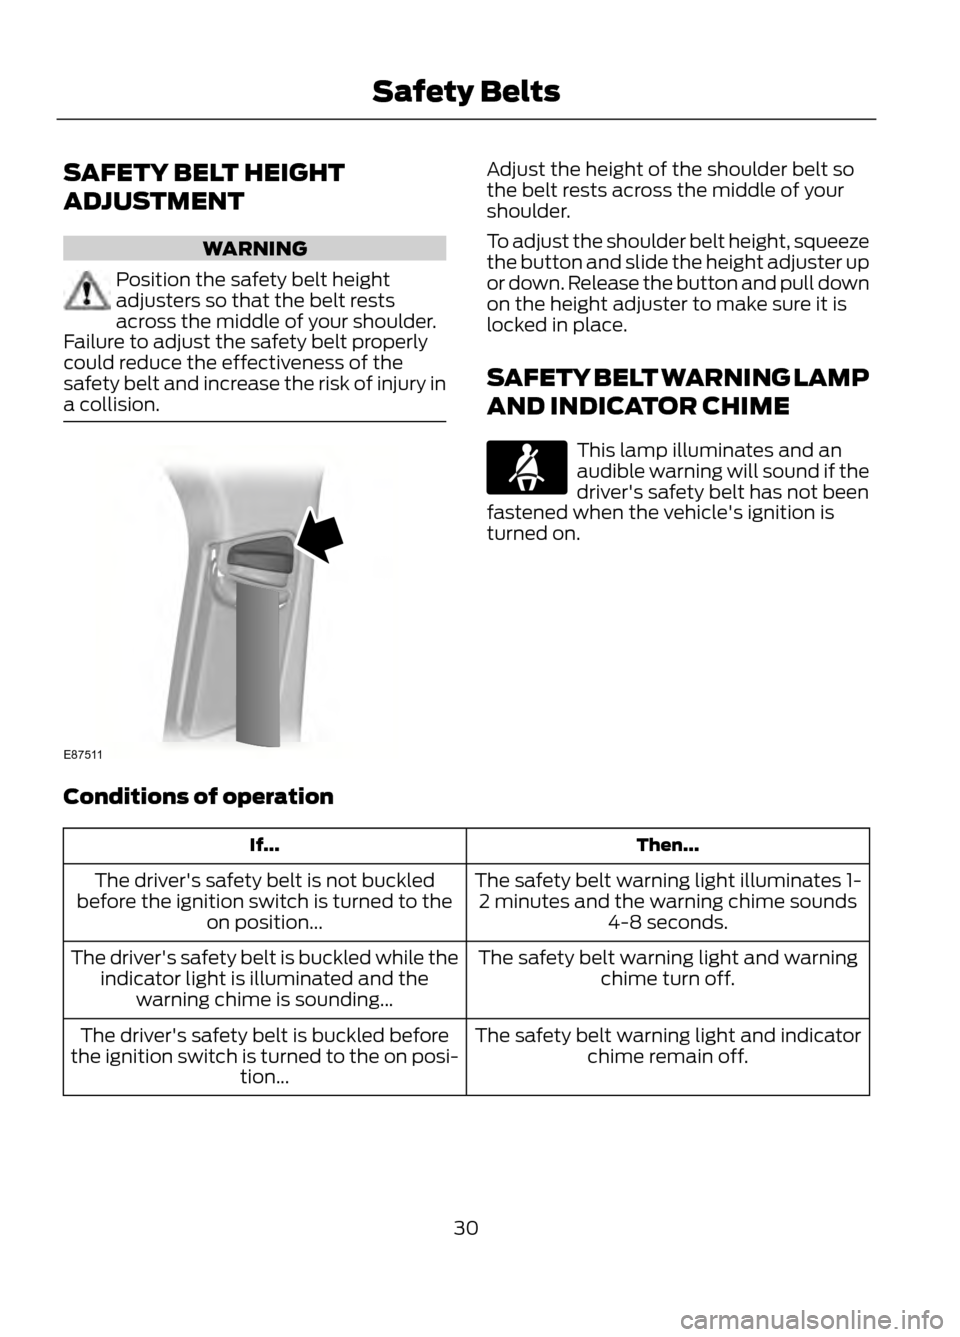
Adjust the height of the shoulder belt so
the belt rests across the middle of your
shoulder.
To adjust the shoulder belt height, squeeze
the button and slide the height adjuster up
or down. Release the button and pull down
on the height adjuster to make sure it is
locked in place.
SAFETY BELT WARNING LAMP
AND INDICATOR CHIME
This lamp illuminates and an
audible warning will sound if the
driver's safety belt has not been
fastened when the vehicle's ignition is
turned on.
Conditions of operation
Then...
If...
The safety belt warning light illuminates 1-2 minutes and the warning chime sounds 4-8 seconds.
The driver's safety belt is not buckled
before the ignition switch is turned to the on position...
The safety belt warning light and warningchime turn off.
The driver's safety belt is buckled while the
indicator light is illuminated and the warning chime is sounding...
The safety belt warning light and indicatorchime remain off.
The driver's safety belt is buckled before
the ignition switch is turned to the on posi- tion...
30
Safety Belts
E87511