remote control FORD ESCAPE 2020 Owner's Manual
[x] Cancel search | Manufacturer: FORD, Model Year: 2020, Model line: ESCAPE, Model: FORD ESCAPE 2020Pages: 553, PDF Size: 7.73 MB
Page 80 of 553
2.
Switch the ignition from off to on. Keep
the ignition on for at least 3 seconds,
but no more than 10 seconds.
3. Switch the ignition off and remove the
first coded key from the ignition.
4. After at least 3 seconds but within 10 seconds of switching the ignition off,
insert the second previously coded key
into the ignition.
5. Switch the ignition from off to on. Keep
the ignition on for at least 3 seconds,
but no more than 10 seconds.
6. Switch the ignition off and remove the
second previously programmed coded
key from the ignition.
7. After at least 3 seconds but within 10 seconds of switching the ignition off
and removing the previously
programmed coded key, insert the new
unprogrammed key into the ignition.
8. Switch the ignition from off to on. Keep
the ignition on for at least six seconds.
9. Remove the newly programmed coded
key from the ignition.
If you have successfully programmed the
new integrated keyhead transmitter, it will
start your vehicle and operate the remote
entry system.
If programming was unsuccessful, wait 10
seconds and repeat steps 1 through 9. If
you are still unsuccessful, take your vehicle
to your authorized dealer.
Programming a Spare Intelligent
Access Key
Note: You can program a maximum of four
coded keys to your vehicle. Make all four
intelligent access keys.
You can program your own intelligent
access keys to your vehicle. This procedure
programs both the vehicle immobilizer
keycode and the remote control to your
vehicle. You must have two previously
programmed intelligent access keys inside
your vehicle and the new unprogrammed
intelligent access key readily accessible.
If two previously programmed keys are not
available, contact an authorized dealer to
have the spare key programmed.
Make sure that the ignition is switched off
before beginning this procedure. Make sure
that you close all the doors before
beginning and that they remain closed
throughout the procedure. Carry out all
steps within 30 seconds of starting the
sequence. Stop and wait for at least one
minute before starting again if you carry
out any steps out of sequence.
Read and understand the entire procedure
before you begin.
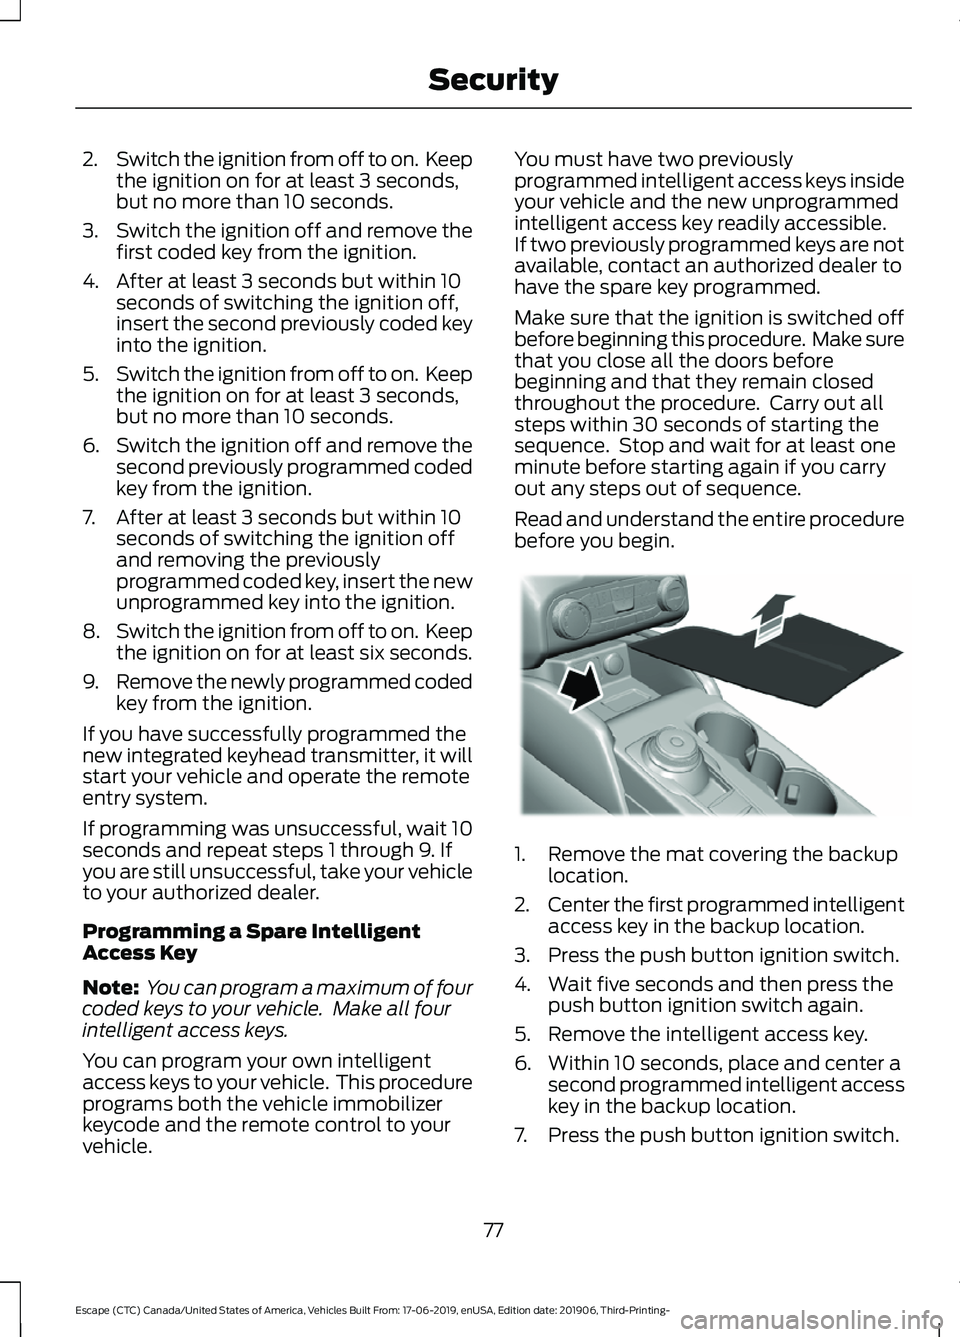
1. Remove the mat covering the backup
location.
2. Center the first programmed intelligent
access key in the backup location.
3. Press the push button ignition switch.
4. Wait five seconds and then press the push button ignition switch again.
5. Remove the intelligent access key.
6. Within 10 seconds, place and center a second programmed intelligent access
key in the backup location.
7. Press the push button ignition switch.
77
Escape (CTC) Canada/United States of America, Vehicles Built From: 17-06-2019, enUSA, Edition date: 201906, Third-Printing- SecurityE306769
Page 81 of 553
8. Wait five seconds and then press the
push button ignition switch again.
9. Remove the intelligent access key.
10. Within 10 seconds, center the unprogrammed intelligent access key
in the backup location.
11. Press the push button ignition switch.
Keep the ignition on for at least six
seconds.
12. Remove the newly programmed intelligent access key.
Programming is now complete. Check that
the remote control functions operate and
your vehicle starts with the new intelligent
access key.
If programming was unsuccessful, wait 10
seconds and repeat steps 1 through 12. If
programming remains unsuccessful,
contact an authorized dealer.
ANTI-THEFT ALARM (IF EQUIPPED)
The system will warn you of an
unauthorized entry to your vehicle. It will
be triggered if any door, the luggage
compartment or the hood is opened
without using the key, remote control or
keyless entry keypad.
The direction indicators will flash and the
horn will sound if unauthorized entry is
attempted while the alarm is armed.
Take all remote controls to an authorized
dealer if there is any potential alarm
problem with your vehicle.
Arming the Alarm
The alarm is ready to arm when there is
not a key in the ignition. Electronically lock
the vehicle to arm the alarm. The message indicator flashes
when theft protection is active. Disarming the Alarm
Disarm the alarm by any of the following
actions:
•
Unlock the doors or luggage
compartment with the remote control
or keyless entry keypad.
• Switch the ignition on or start the
vehicle.
• Use a key in the driver ’s door to unlock
the vehicle, then switch the ignition on
within 12 seconds.
Note: Pressing the panic button on the
remote control will stop the horn and signal
indicators, but will not disarm the system.
78
Escape (CTC) Canada/United States of America, Vehicles Built From: 17-06-2019, enUSA, Edition date: 201906, Third-Printing- Security
Page 92 of 553
Note:
The brightness of the daytime running
lamps may decrease when the front fog
lamps are switched on.
Front Fog Lamp Indicator It illuminates when you switch
the front fog lamps on.
DIRECTION INDICATORS
Switching the Direction Indicators
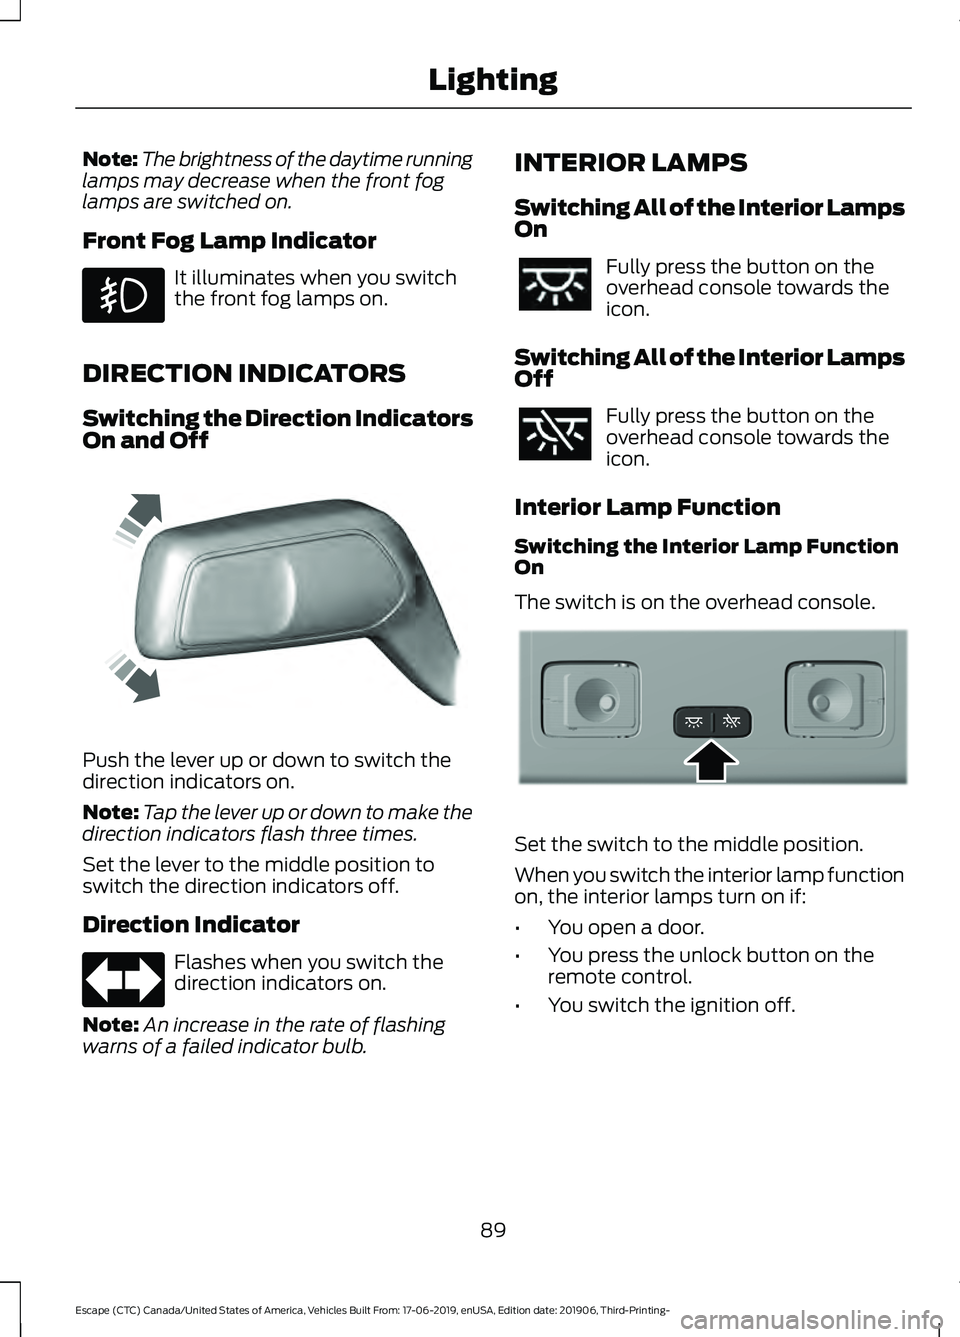
On and Off Push the lever up or down to switch the
direction indicators on.
Note:
Tap the lever up or down to make the
direction indicators flash three times.
Set the lever to the middle position to
switch the direction indicators off.
Direction Indicator Flashes when you switch the
direction indicators on.
Note: An increase in the rate of flashing
warns of a failed indicator bulb. INTERIOR LAMPS
Switching All of the Interior Lamps
On Fully press the button on the
overhead console towards the
icon.
Switching All of the Interior Lamps
Off Fully press the button on the
overhead console towards the
icon.
Interior Lamp Function
Switching the Interior Lamp Function
On
The switch is on the overhead console. Set the switch to the middle position.
When you switch the interior lamp function
on, the interior lamps turn on if:
•
You open a door.
• You press the unlock button on the
remote control.
• You switch the ignition off.
89
Escape (CTC) Canada/United States of America, Vehicles Built From: 17-06-2019, enUSA, Edition date: 201906, Third-Printing- Lighting E242676 E299443
Page 112 of 553
Service Engine Soon
It illuminates when you switch
the ignition on prior to engine
start to check the bulb and to
indicate whether your vehicle is ready for
Inspection and Maintenance (I/M) testing.
Normally, it illuminates until the engine is
cranked and automatically turns off if no
system errors are present. However, if after
15 seconds it flashes eight times, this
indicates that your vehicle is not ready for
Inspection and Maintenance (I/M) testing.
See Catalytic Converter (page 193).
If it illuminates when the engine is running
this indicates a system error. The On Board
Diagnostics system has detected an error
in the vehicle emission control system.
If it flashes, engine misfire may be
occurring. Continuing to drive your vehicle
may cause reduced power or the engine
to stop. Failure to respond to the warning
lamp may cause component damage not
covered by the vehicle Warranty. Have
your vehicle checked as soon as possible.
Stability Control It flashes when the system is
active. If it remains illuminated
or does not illuminate when you
switch the ignition on, this indicates a
system error. During a system error the
system switches off. Have the system
checked by an authorized dealer
immediately. See
Using Stability
Control (page 224).
Stability Control Off Illuminates when you switch the
system off. It goes out when you
switch the system back on or
when you switch the ignition off. See
Using Stability Control
(page 224). Stop Safely Now Illuminates if your vehicle has an
electrical component fault or
failure that will cause your
vehicle to shutdown or enter into a limited
operating mode. You may also see a
message.
Vehicle Plugged in Illuminates when your vehicle is
plugged in. A corresponding
message may display after
attempting to start your vehicle.
AUDIBLE WARNINGS AND
INDICATORS
Key in Ignition Warning
(If Equipped)
Sounds when you open the driver door and
you have left the key in the ignition.
Keyless Warning
Sounds the horn twice when you exit your
vehicle with the remote control, after the
last door is closed and your keyless vehicle
is in RUN, indicating your vehicle is still on.
Headlamps On Warning
Sounds when you remove the key from the
ignition and open the driver door and you
have left the headlamps or parking lamps
on.
109
Escape (CTC) Canada/United States of America, Vehicles Built From: 17-06-2019, enUSA, Edition date: 201906, Third-Printing- Instrument Cluster E138639 E130458 E144693 E228962
Page 150 of 553
REMOTE START (IF EQUIPPED)
The climate control system adjusts the
interior temperature during remote start.
You can switch this feature on or off and
adjust the settings using the touchscreen.
See
Settings (page 468).
You cannot adjust the climate control
setting during remote start operation.
Switch the ignition on to make
adjustments.
Based on your remote start settings, the
following vehicle-dependent features may
or may not remain on after remote starting
your vehicle:
• Climate controlled seats.
• Heated steering wheel.
• Heated mirrors.
• Heated rear window.
• Windshield wiper de-icer.
Note: For dual zone climate controlled
seats, the passenger seat setting defaults
to match the driver seat during remote start.
Automatic Settings
If
Auto is on, the system sets the interior
temperature to 72°F (22°C) and heats or
cools the vehicle interior as required to
achieve comfort.
Note: In cold weather, the heated rear
window and heated mirrors turn on.
Last Settings
If
Last Settings is on, the system uses the
settings last selected before you turned
off the vehicle.
Heated and Cooled Features
In Auto mode, certain heated features may
switch on during cold weather, and cooled
features during hot weather.
147
Escape (CTC) Canada/United States of America, Vehicles Built From: 17-06-2019, enUSA, Edition date: 201906, Third-Printing- Climate Control
Page 156 of 553
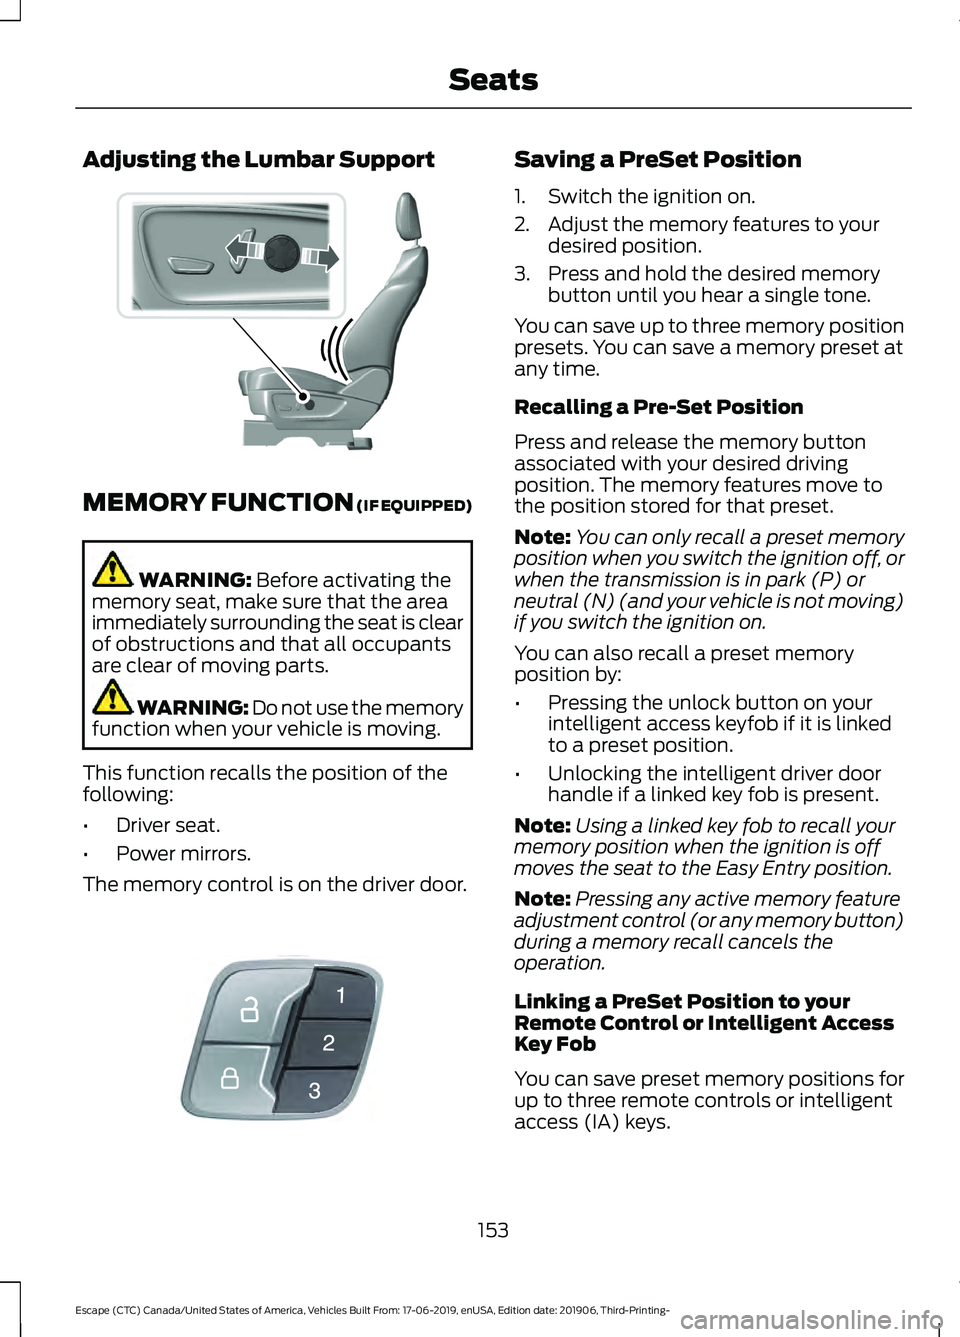
Adjusting the Lumbar Support
MEMORY FUNCTION (IF EQUIPPED)
WARNING:
Before activating the
memory seat, make sure that the area
immediately surrounding the seat is clear
of obstructions and that all occupants
are clear of moving parts. WARNING:
Do not use the memory
function when your vehicle is moving.
This function recalls the position of the
following:
• Driver seat.
• Power mirrors.
The memory control is on the driver door. Saving a PreSet Position
1. Switch the ignition on.
2. Adjust the memory features to your
desired position.
3. Press and hold the desired memory button until you hear a single tone.
You can save up to three memory position
presets. You can save a memory preset at
any time.
Recalling a Pre-Set Position
Press and release the memory button
associated with your desired driving
position. The memory features move to
the position stored for that preset.
Note: You can only recall a preset memory
position when you switch the ignition off, or
when the transmission is in park (P) or
neutral (N) (and your vehicle is not moving)
if you switch the ignition on.
You can also recall a preset memory
position by:
• Pressing the unlock button on your
intelligent access keyfob if it is linked
to a preset position.
• Unlocking the intelligent driver door
handle if a linked key fob is present.
Note: Using a linked key fob to recall your
memory position when the ignition is off
moves the seat to the Easy Entry position.
Note: Pressing any active memory feature
adjustment control (or any memory button)
during a memory recall cancels the
operation.
Linking a PreSet Position to your
Remote Control or Intelligent Access
Key Fob
You can save preset memory positions for
up to three remote controls or intelligent
access (IA) keys.
153
Escape (CTC) Canada/United States of America, Vehicles Built From: 17-06-2019, enUSA, Edition date: 201906, Third-Printing- SeatsE298774 E142554
Page 157 of 553
1.
With the ignition on, move the memory
positions to the desired positions.
2. Press and hold the desired preset button for about five seconds. A tone
sounds after about two seconds.
Continue holding until you hear a
second tone.
3. Within three seconds, press the lock button on the remote control you are
linking.
To unlink a remote control, follow the
same procedure – except in step 3, press
the unlock button on the remote control.
Note: If more than one linked remote
control or intelligent access key is in range,
the memory function moves to the settings
of the first key to initiate a memory recall.
Easy Entry and Exit Feature
If you enable the easy entry and exit
feature, it moves the driver seat position
rearward up to 2 in (5 cm) when you switch
the ignition off.
The driver seat returns to its previous
position when you switch the ignition on.
You can enable or disable this feature
through the information display.
See Information Displays (page 110).
REAR SEATS
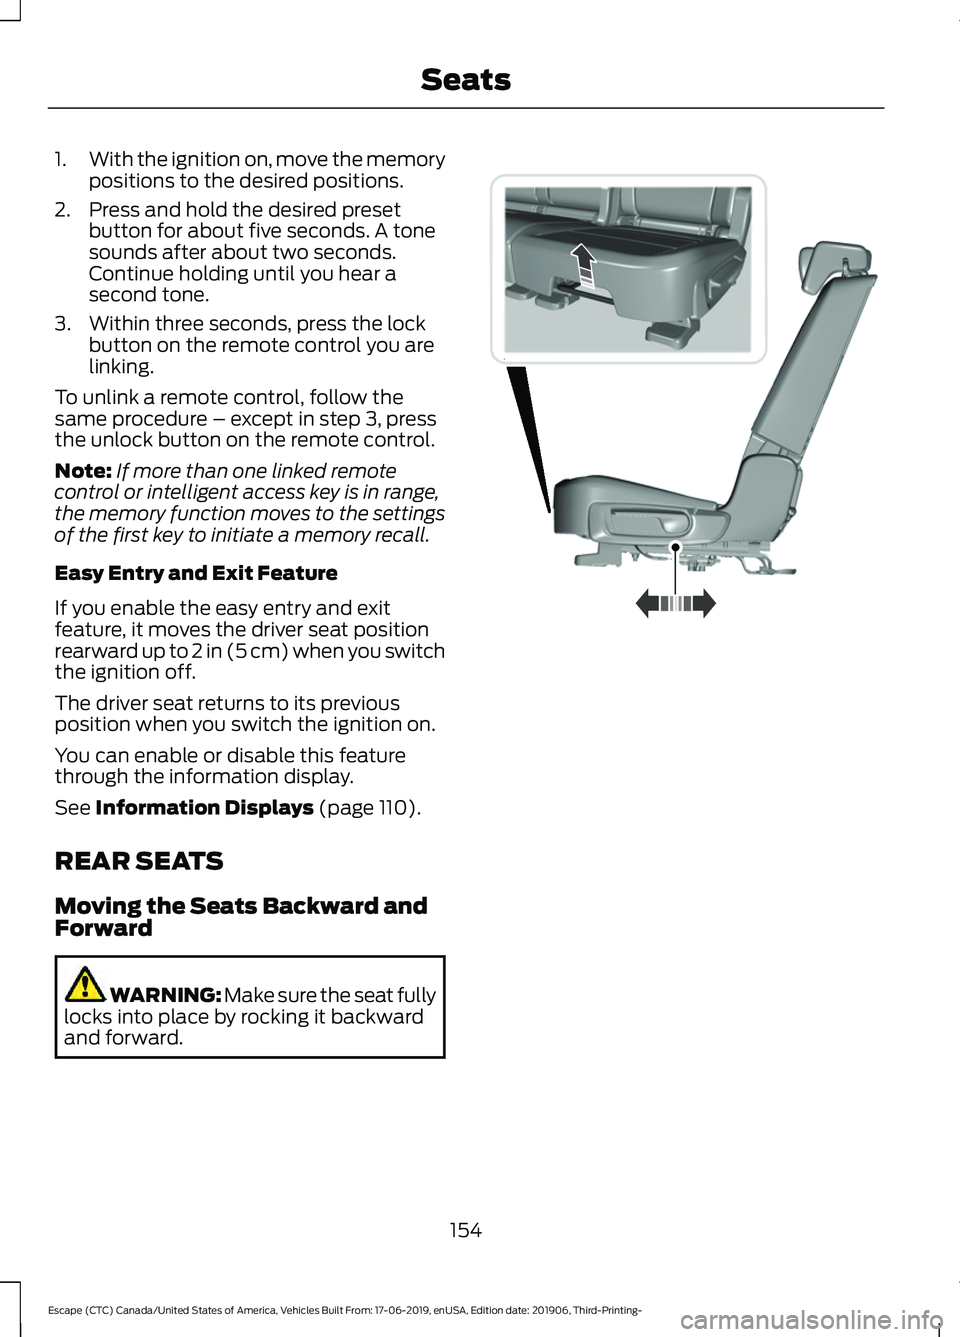
Moving the Seats Backward and
Forward WARNING: Make sure the seat fully
locks into place by rocking it backward
and forward. 154
Escape (CTC) Canada/United States of America, Vehicles Built From: 17-06-2019, enUSA, Edition date: 201906, Third-Printing- SeatsE298125
Page 162 of 553
UNIVERSAL GARAGE DOOR
OPENER
HomeLink Wireless Control
System
WARNING: Do not use the system
with any garage door opener that does
not have the safety stop and reverse
feature as required by U.S. Federal
Safety Standards (this includes any
garage door opener manufactured
before April 1, 1982). A garage door
opener which cannot detect an object,
signaling the door to stop and reverse,
does not meet current federal safety
standards. Using a garage door opener
without these features increases the risk
of serious injury or death.
Note: Make sure that the garage door and
security device are free from obstruction
when you are programming. Do not program
the system with the vehicle in the garage.
Note: Make sure you keep the original
remote control transmitter for use in other
vehicles as well as for future system
programming.
Note: We recommend that upon the sale
or lease termination of your vehicle, you
erase the programmed function buttons for
security reasons. See Erasing the Function
Button Codes
later in this section.
Note: You can program a maximum of
three devices. To change or replace any of
the three devices after it has been initially
programmed, you must first erase the
current settings. See Erasing the Function
Button Codes
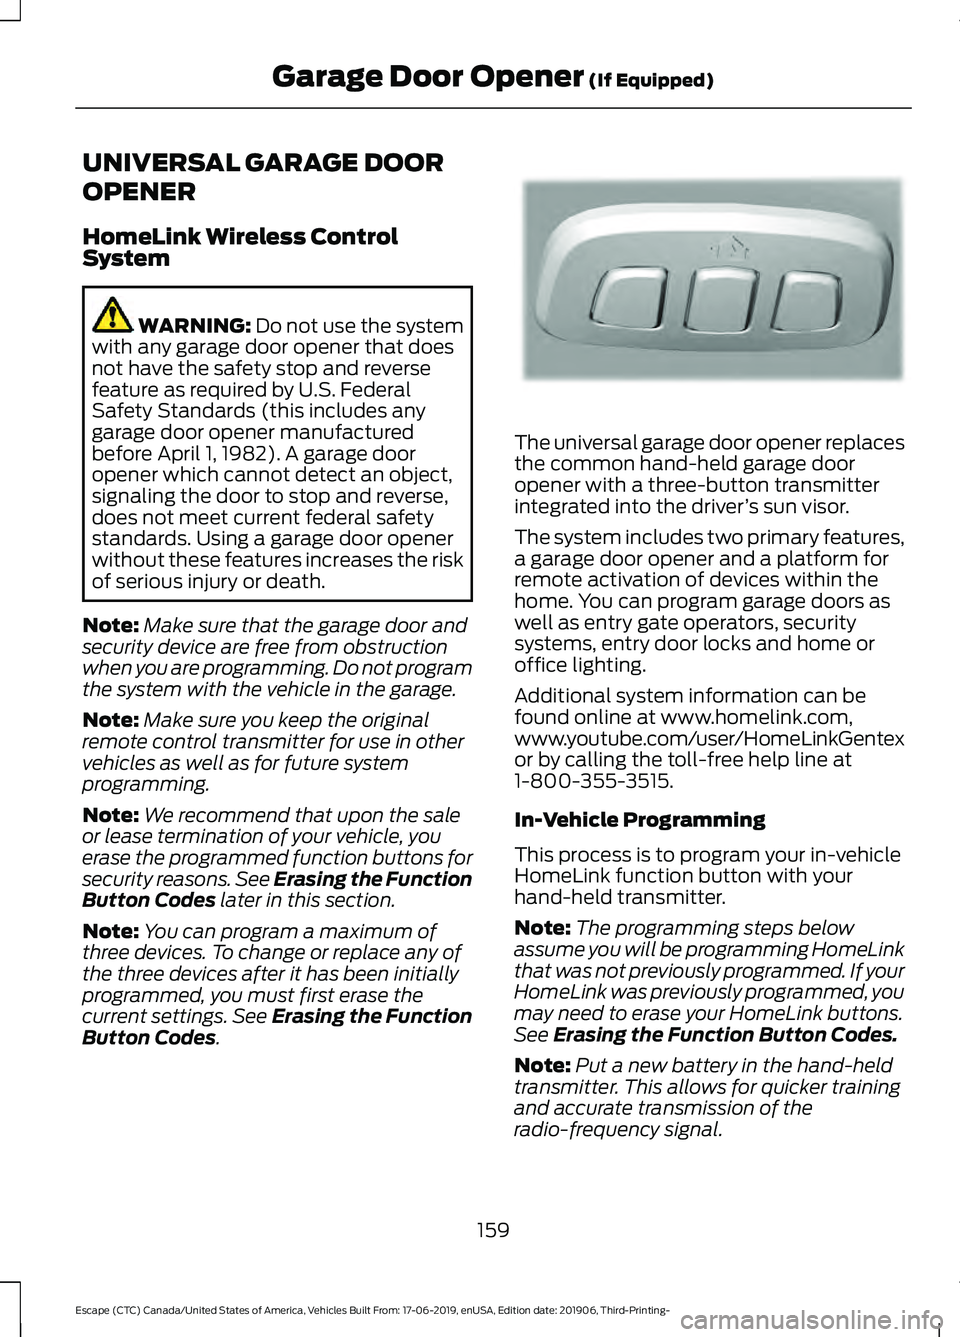
. The universal garage door opener replaces
the common hand-held garage door
opener with a three-button transmitter
integrated into the driver
’s sun visor.
The system includes two primary features,
a garage door opener and a platform for
remote activation of devices within the
home. You can program garage doors as
well as entry gate operators, security
systems, entry door locks and home or
office lighting.
Additional system information can be
found online at www.homelink.com,
www.youtube.com/user/HomeLinkGentex
or by calling the toll-free help line at
1-800-355-3515.
In-Vehicle Programming
This process is to program your in-vehicle
HomeLink function button with your
hand-held transmitter.
Note: The programming steps below
assume you will be programming HomeLink
that was not previously programmed. If your
HomeLink was previously programmed, you
may need to erase your HomeLink buttons.
See Erasing the Function Button Codes.
Note: Put a new battery in the hand-held
transmitter. This allows for quicker training
and accurate transmission of the
radio-frequency signal.
159
Escape (CTC) Canada/United States of America, Vehicles Built From: 17-06-2019, enUSA, Edition date: 201906, Third-Printing- Garage Door Opener
(If Equipped)E188211
Page 168 of 553
Do not place items with a magnetic strip,
for example passports, parking tickets or
credit cards, near the charging area when
charging a device. Damage may occur to
the magnetic strip.
Do not place metal objects, for example
remote controls, coins and candy
wrappers, on or near the charging area
when charging a device. Metal objects may
heat up and degrade the charging
performance.
Note:
The device controls the rate of
charge, or charging power. During charging,
the device and the charger may heat up, this
is normal. If the battery gets hotter than
usual, the charger may stop charging. The charging area is on the
center console or lower
instrument panel.
You can charge a device if the vehicle is
on, when in accessory mode, or anytime
SYNC is on.
To begin charging, place the device on the
center of the charging surface with the
charging side down. The charging stops
after your device reaches a full charge.
Note:
If the system detects a foreign object
or if the device is misaligned on the charging
area, a message appears in the display.
Note: Software and firmware updates may
affect device compatibility, including the
use of unofficial software or firmware. You
should verify charging functionality with your
specific devices when in your vehicle. Description
Behavior
Message
This message appears whenwireless charging begins.
Message on screen display
or pop-up window.
Wireless Charger Active
The system stops chargingyour device if the system detects the phone is
misaligned, or a foreign
metal object is on the char- ging surface.
Pop-up window.
Charging Terminated
Phone misaligned or object
between phone and charger
detected. Correct the condi- tion to resume charging.
165
Escape (CTC) Canada/United States of America, Vehicles Built From: 17-06-2019, enUSA, Edition date: 201906, Third-Printing- Auxiliary Power PointsE297549
Page 207 of 553
AUTOMATIC TRANSMISSION
- EXCLUDING: PLUG-IN
HYBRID ELECTRIC VEHICLE
(PHEV)
WARNING: Always fully apply the
parking brake and make sure you shift
into park (P). Failure to follow this
instruction could result in personal injury
or death. WARNING:
Do not apply the brake
pedal and accelerator pedal
simultaneously. Applying both pedals
simultaneously for more than a few
seconds will limit engine performance,
which may result in difficulty maintaining
speed in traffic and could lead to serious
injury. WARNING:
When your vehicle is
stationary, keep the brake pedal fully
pressed when shifting gears. Failure to
follow this instruction could result in
personal injury, death or property
damage.
Note: You may not be able to shift out of
park (P) unless the remote control is inside
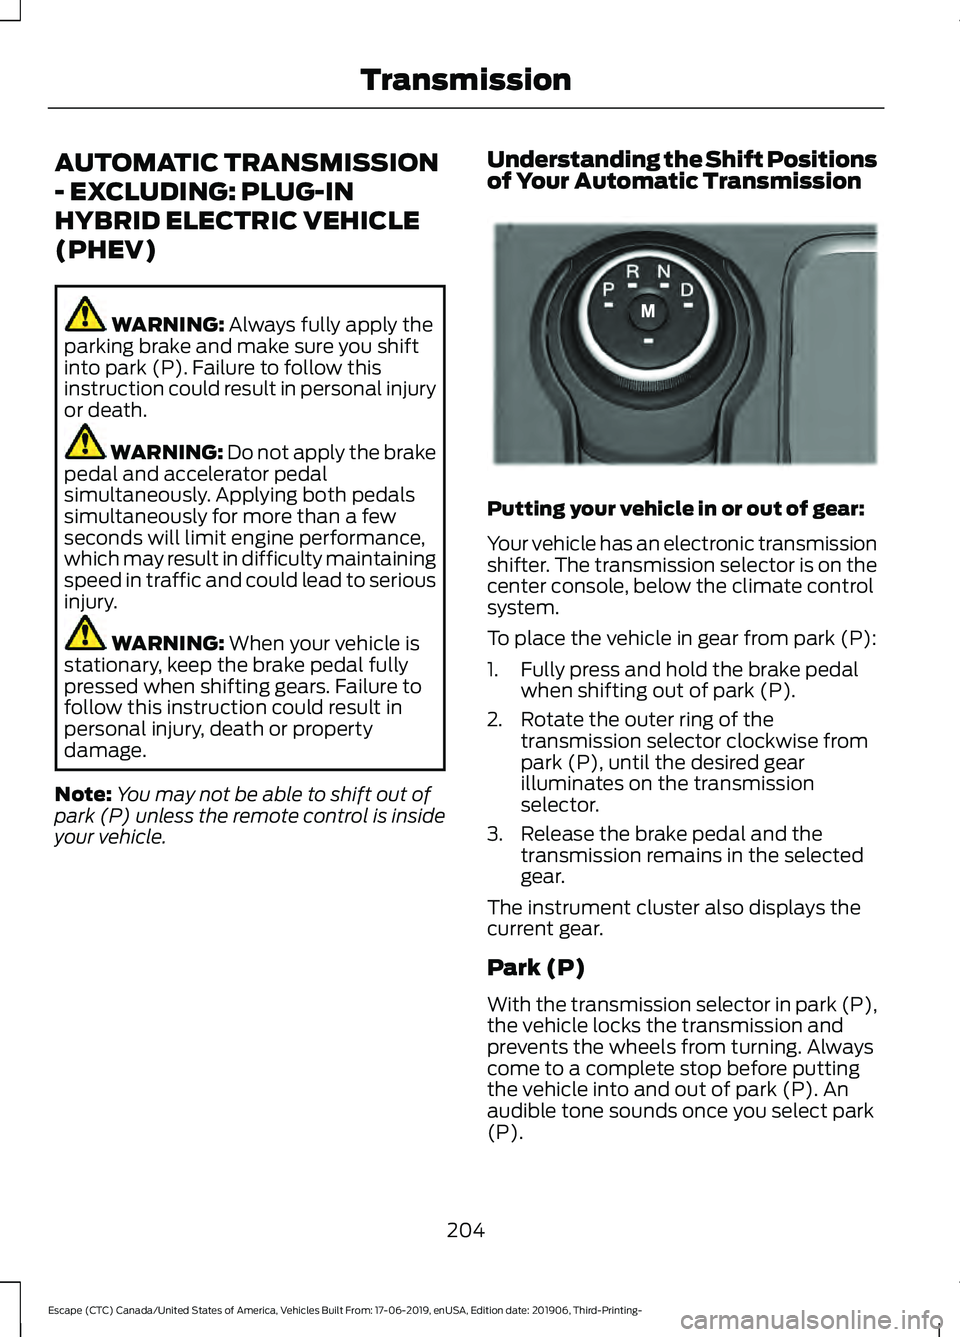
your vehicle. Understanding the Shift Positions
of Your Automatic Transmission Putting your vehicle in or out of gear:
Your vehicle has an electronic transmission
shifter. The transmission selector is on the
center console, below the climate control
system.
To place the vehicle in gear from park (P):
1. Fully press and hold the brake pedal
when shifting out of park (P).
2. Rotate the outer ring of the transmission selector clockwise from
park (P), until the desired gear
illuminates on the transmission
selector.
3. Release the brake pedal and the transmission remains in the selected
gear.
The instrument cluster also displays the
current gear.
Park (P)
With the transmission selector in park (P),
the vehicle locks the transmission and
prevents the wheels from turning. Always
come to a complete stop before putting
the vehicle into and out of park (P). An
audible tone sounds once you select park
(P).
204
Escape (CTC) Canada/United States of America, Vehicles Built From: 17-06-2019, enUSA, Edition date: 201906, Third-Printing- TransmissionE303655