plug in FORD ESCAPE 2022 User Guide
[x] Cancel search | Manufacturer: FORD, Model Year: 2022, Model line: ESCAPE, Model: FORD ESCAPE 2022Pages: 585, PDF Size: 6.15 MB
Page 121 of 585
POWER GAUGE - HYBRID
ELECTRIC VEHICLE (HEV)/
PLUG-IN HYBRID ELECTRIC
VEHICLE (PHEV), VEHICLES
WITH: 6.5 INCH INSTRUMENT
CLUSTER DISPLAY SCREEN
(IF
EQUIPPED)
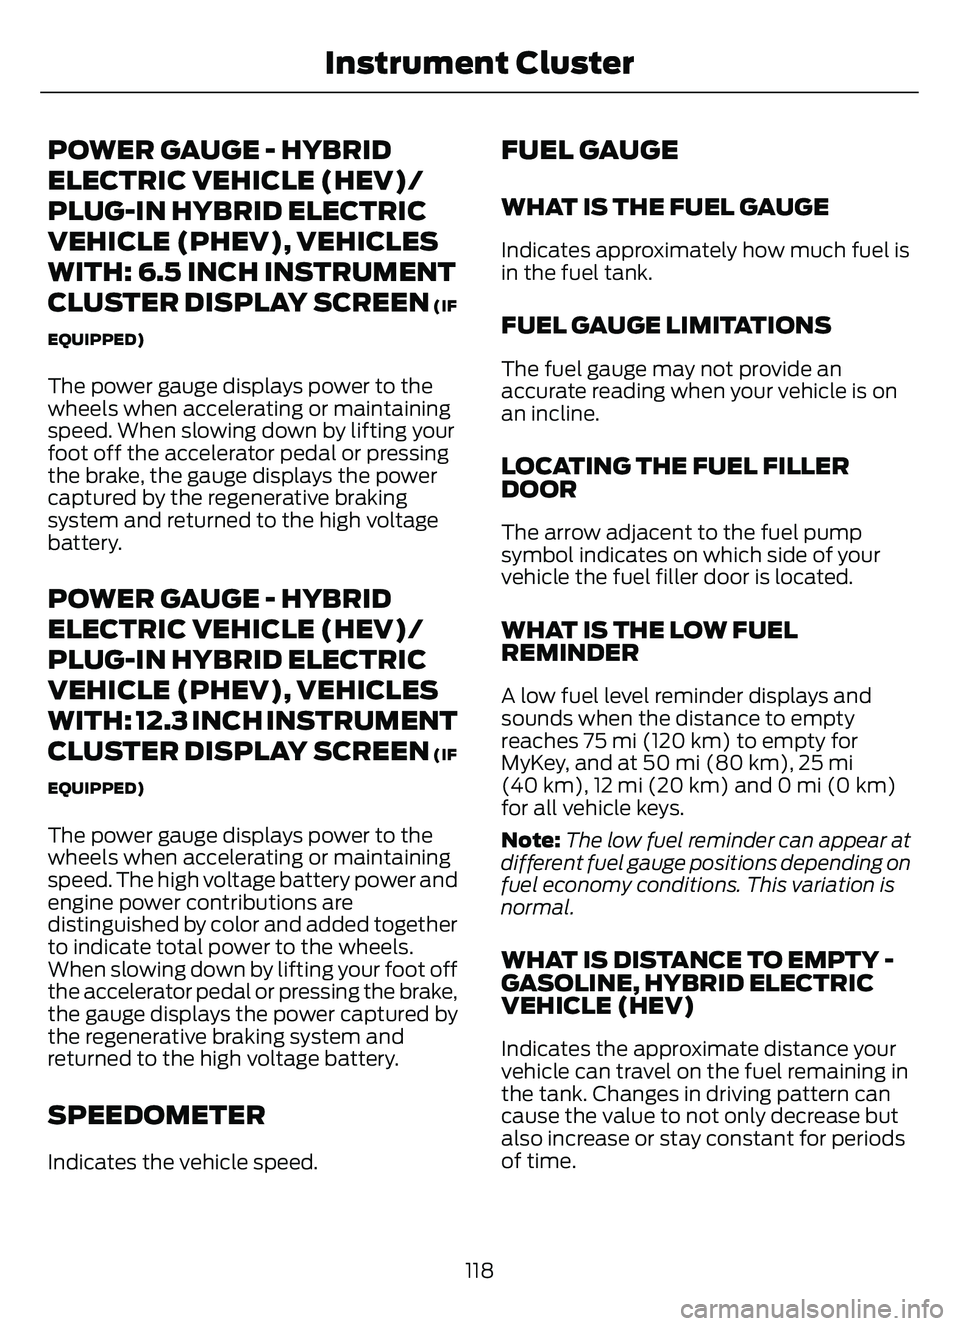
The power gauge displays power to the
wheels when accelerating or maintaining
speed. When slowing down by lifting your
foot off the accelerator pedal or pressing
the brake, the gauge displays the power
captured by the regenerative braking
system and returned to the high voltage
battery.
POWER GAUGE - HYBRID
ELECTRIC VEHICLE (HEV)/
PLUG-IN HYBRID ELECTRIC
VEHICLE (PHEV), VEHICLES
WITH: 12.3 INCH INSTRUMENT
CLUSTER DISPLAY SCREEN
(IF
EQUIPPED)
The power gauge displays power to the
wheels when accelerating or maintaining
speed. The high voltage battery power and
engine power contributions are
distinguished by color and added together
to indicate total power to the wheels.
When slowing down by lifting your foot off
the accelerator pedal or pressing the brake,
the gauge displays the power captured by
the regenerative braking system and
returned to the high voltage battery.
SPEEDOMETER
Indicates the vehicle speed.
FUEL GAUGE
WHAT IS THE FUEL GAUGE
Indicates approximately how much fuel is
in the fuel tank.
FUEL GAUGE LIMITATIONS
The fuel gauge may not provide an
accurate reading when your vehicle is on
an incline.
LOCATING THE FUEL FILLER
DOOR
The arrow adjacent to the fuel pump
symbol indicates on which side of your
vehicle the fuel filler door is located.
WHAT IS THE LOW FUEL
REMINDER
A low fuel level reminder displays and
sounds when the distance to empty
reaches 75 mi (120 km) to empty for
MyKey, and at 50 mi (80 km), 25 mi
(40 km), 12 mi (20 km) and 0 mi (0 km)
for all vehicle keys.
Note: The low fuel reminder can appear at
different fuel gauge positions depending on
fuel economy conditions. This variation is
normal.
WHAT IS DISTANCE TO EMPTY -
GASOLINE, HYBRID ELECTRIC
VEHICLE (HEV)
Indicates the approximate distance your
vehicle can travel on the fuel remaining in
the tank. Changes in driving pattern can
cause the value to not only decrease but
also increase or stay constant for periods
of time.
118
Instrument Cluster
Page 122 of 585
VEHICLE RANGE DISPLAY -
PLUG-IN HYBRID ELECTRIC
VEHICLE (PHEV)
E308653E308653
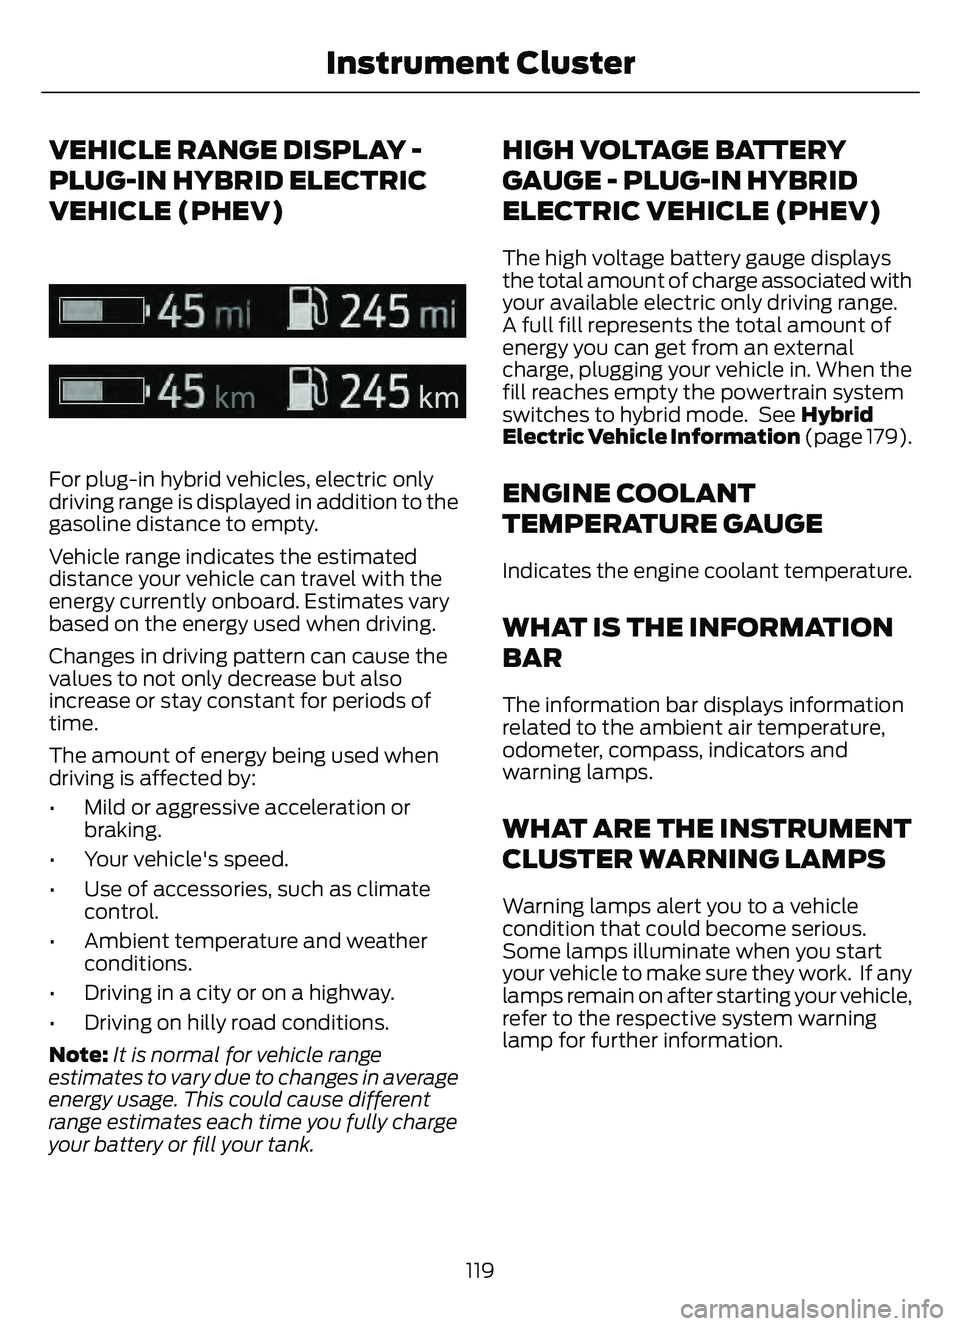
For plug-in hybrid vehicles, electric only
driving range is displayed in addition to the
gasoline distance to empty.
Vehicle range indicates the estimated
distance your vehicle can travel with the
energy currently onboard. Estimates vary
based on the energy used when driving.
Changes in driving pattern can cause the
values to not only decrease but also
increase or stay constant for periods of
time.
The amount of energy being used when
driving is affected by:
• Mild or aggressive acceleration orbraking.
• Your vehicle's speed.
• Use of accessories, such as climate control.
• Ambient temperature and weather conditions.
• Driving in a city or on a highway.
• Driving on hilly road conditions.
Note: It is normal for vehicle range
estimates to vary due to changes in average
energy usage. This could cause different
range estimates each time you fully charge
your battery or fill your tank.
HIGH VOLTAGE BATTERY
GAUGE - PLUG-IN HYBRID
ELECTRIC VEHICLE (PHEV)
The high voltage battery gauge displays
the total amount of charge associated with
your available electric only driving range.
A full fill represents the total amount of
energy you can get from an external
charge, plugging your vehicle in. When the
fill reaches empty the powertrain system
switches to hybrid mode. See Hybrid
Electric Vehicle Information (page 179).
ENGINE COOLANT
TEMPERATURE GAUGE
Indicates the engine coolant temperature.
WHAT IS THE INFORMATION
BAR
The information bar displays information
related to the ambient air temperature,
odometer, compass, indicators and
warning lamps.
WHAT ARE THE INSTRUMENT
CLUSTER WARNING LAMPS
Warning lamps alert you to a vehicle
condition that could become serious.
Some lamps illuminate when you start
your vehicle to make sure they work. If any
lamps remain on after starting your vehicle,
refer to the respective system warning
lamp for further information.
119
Instrument Cluster
Page 124 of 585
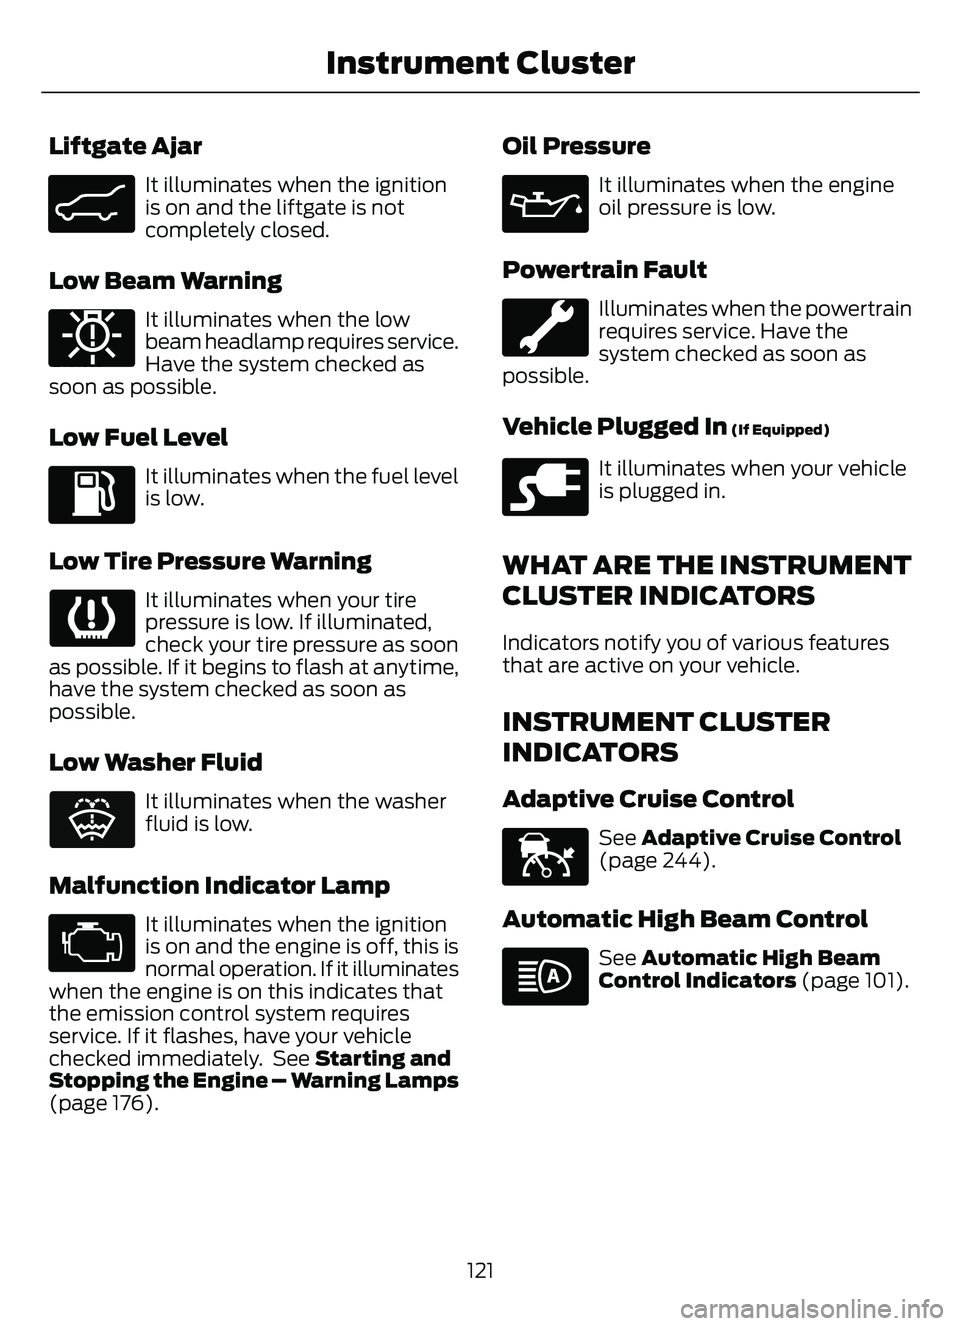
Liftgate Ajar
E162453
It illuminates when the ignition
is on and the liftgate is not
completely closed.
Low Beam Warning
E181350
It illuminates when the low
beam headlamp requires service.
Have the system checked as
soon as possible.
Low Fuel Level
It illuminates when the fuel level
is low.
Low Tire Pressure Warning
It illuminates when your tire
pressure is low. If illuminated,
check your tire pressure as soon
as possible. If it begins to flash at anytime,
have the system checked as soon as
possible.
Low Washer Fluid
E132353
It illuminates when the washer
fluid is low.
Malfunction Indicator Lamp
It illuminates when the ignition
is on and the engine is off, this is
normal operation. If it illuminates
when the engine is on this indicates that
the emission control system requires
service. If it flashes, have your vehicle
checked immediately. See Starting and
Stopping the Engine – Warning Lamps
(page 176).
Oil Pressure
It illuminates when the engine
oil pressure is low.
Powertrain Fault
Illuminates when the powertrain
requires service. Have the
system checked as soon as
possible.
Vehicle Plugged In (If Equipped)
E228962
It illuminates when your vehicle
is plugged in.
WHAT ARE THE INSTRUMENT
CLUSTER INDICATORS
Indicators notify you of various features
that are active on your vehicle.
INSTRUMENT CLUSTER
INDICATORS
Adaptive Cruise Control
E144524
See Adaptive Cruise Control
(page 244).
Automatic High Beam Control
See Automatic High Beam
Control Indicators (page 101).
121
Instrument Cluster
Page 125 of 585
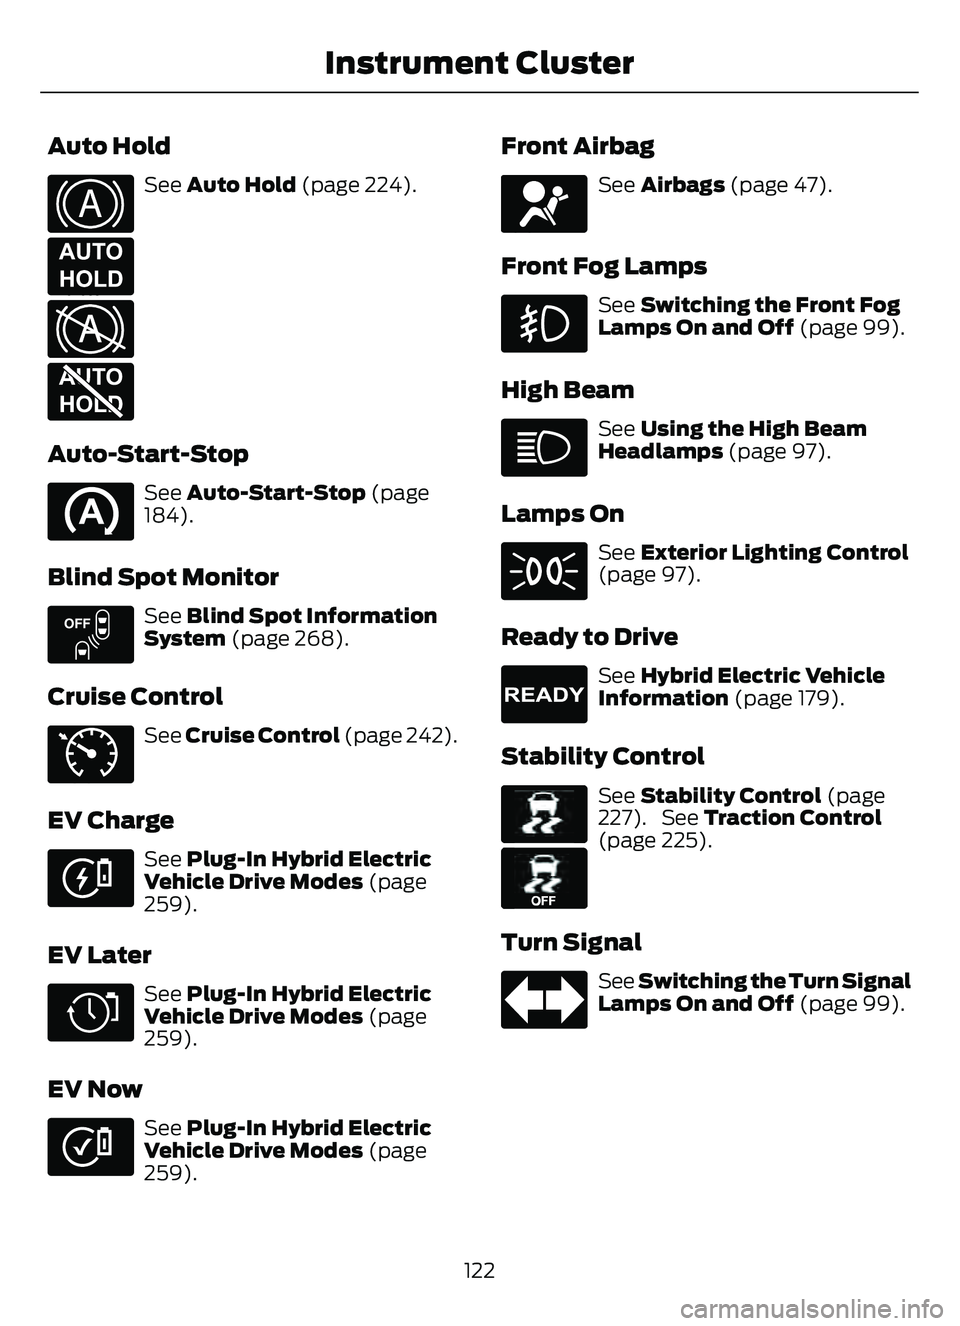
Auto Hold
E322410E322410
E197933
EE322411
E197934
See Auto Hold (page 224).
Auto-Start-Stop
See Auto-Start-Stop (page
184).
Blind Spot Monitor
E151262
See Blind Spot Information
System (page 268).
Cruise Control
E71340
See Cruise Control (page 242).
EV Charge
E281479
See Plug-In Hybrid Electric
Vehicle Drive Modes (page
259).
EV Later
E281477
See Plug-In Hybrid Electric
Vehicle Drive Modes (page
259).
EV Now
E281476
See Plug-In Hybrid Electric
Vehicle Drive Modes (page
259).
Front Airbag
E67017
See Airbags (page 47).
Front Fog Lamps
See Switching the Front Fog
Lamps On and Off (page 99).
High Beam
See Using the High Beam
Headlamps (page 97).
Lamps On
See Exterior Lighting Control
(page 97).
Ready to Drive
E224090
See Hybrid Electric Vehicle
Information (page 179).
Stability Control
E138639
E130458
See Stability Control (page
227). See Traction Control
(page 225).
Turn Signal
See Switching the Turn Signal
Lamps On and Off (page 99).
122
Instrument Cluster
Page 130 of 585
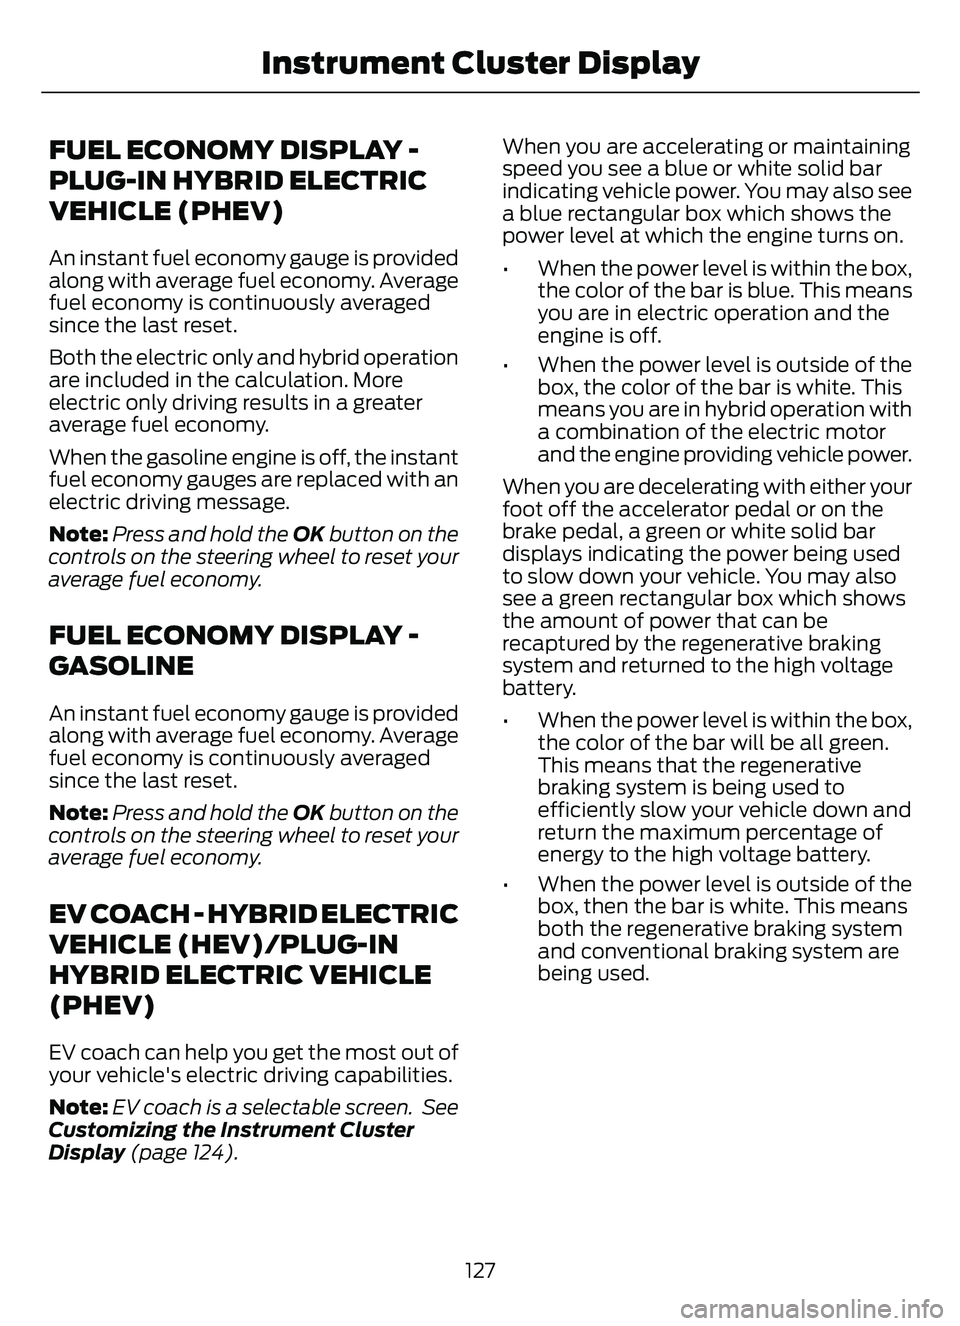
FUEL ECONOMY DISPLAY -
PLUG-IN HYBRID ELECTRIC
VEHICLE (PHEV)
An instant fuel economy gauge is provided
along with average fuel economy. Average
fuel economy is continuously averaged
since the last reset.
Both the electric only and hybrid operation
are included in the calculation. More
electric only driving results in a greater
average fuel economy.
When the gasoline engine is off, the instant
fuel economy gauges are replaced with an
electric driving message.
Note:Press and hold the OK button on the
controls on the steering wheel to reset your
average fuel economy.
FUEL ECONOMY DISPLAY -
GASOLINE
An instant fuel economy gauge is provided
along with average fuel economy. Average
fuel economy is continuously averaged
since the last reset.
Note: Press and hold the OK button on the
controls on the steering wheel to reset your
average fuel economy.
EV COACH - HYBRID ELECTRIC
VEHICLE (HEV)/PLUG-IN
HYBRID ELECTRIC VEHICLE
(PHEV)
EV coach can help you get the most out of
your vehicle's electric driving capabilities.
Note: EV coach is a selectable screen. See
Customizing the Instrument Cluster
Display (page 124). When you are accelerating or maintaining
speed you see a blue or white solid bar
indicating vehicle power. You may also see
a blue rectangular box which shows the
power level at which the engine turns on.
• When the power level is within the box,
the color of the bar is blue. This means
you are in electric operation and the
engine is off.
• When the power level is outside of the box, the color of the bar is white. This
means you are in hybrid operation with
a combination of the electric motor
and the engine providing vehicle power.
When you are decelerating with either your
foot off the accelerator pedal or on the
brake pedal, a green or white solid bar
displays indicating the power being used
to slow down your vehicle. You may also
see a green rectangular box which shows
the amount of power that can be
recaptured by the regenerative braking
system and returned to the high voltage
battery.
• When the power level is within the box, the color of the bar will be all green.
This means that the regenerative
braking system is being used to
efficiently slow your vehicle down and
return the maximum percentage of
energy to the high voltage battery.
• When the power level is outside of the box, then the bar is white. This means
both the regenerative braking system
and conventional braking system are
being used.
127
Instrument Cluster Display
Page 131 of 585
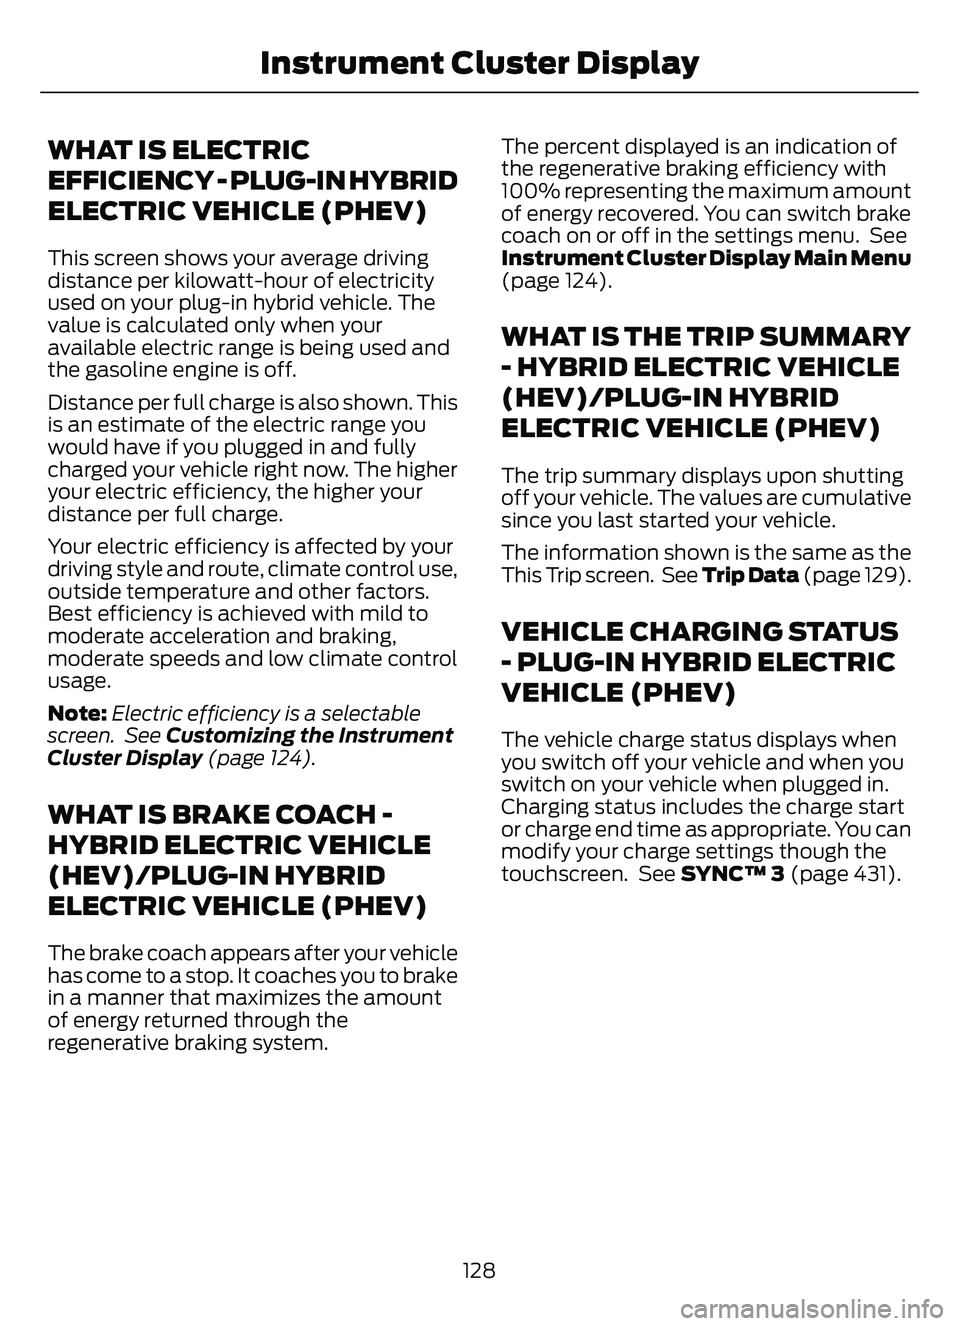
WHAT IS ELECTRIC
EFFICIENCY - PLUG-IN HYBRID
ELECTRIC VEHICLE (PHEV)
This screen shows your average driving
distance per kilowatt-hour of electricity
used on your plug-in hybrid vehicle. The
value is calculated only when your
available electric range is being used and
the gasoline engine is off.
Distance per full charge is also shown. This
is an estimate of the electric range you
would have if you plugged in and fully
charged your vehicle right now. The higher
your electric efficiency, the higher your
distance per full charge.
Your electric efficiency is affected by your
driving style and route, climate control use,
outside temperature and other factors.
Best efficiency is achieved with mild to
moderate acceleration and braking,
moderate speeds and low climate control
usage.
Note:Electric efficiency is a selectable
screen. See Customizing the Instrument
Cluster Display (page 124).
WHAT IS BRAKE COACH -
HYBRID ELECTRIC VEHICLE
(HEV)/PLUG-IN HYBRID
ELECTRIC VEHICLE (PHEV)
The brake coach appears after your vehicle
has come to a stop. It coaches you to brake
in a manner that maximizes the amount
of energy returned through the
regenerative braking system. The percent displayed is an indication of
the regenerative braking efficiency with
100% representing the maximum amount
of energy re
covered. You can switch brake
coach on or off in the settings menu. See
Instrument Cluster Display Main Menu
(page 124).
WHAT IS THE TRIP SUMMARY
- HYBRID ELECTRIC VEHICLE
(HEV)/PLUG-IN HYBRID
ELECTRIC VEHICLE (PHEV)
The trip summary displays upon shutting
off your vehicle. The values are cumulative
since you last started your vehicle.
The information shown is the same as the
This Trip screen. See Trip Data (page 129).
VEHICLE CHARGING STATUS
- PLUG-IN HYBRID ELECTRIC
VEHICLE (PHEV)
The vehicle charge status displays when
you switch off your vehicle and when you
switch on your vehicle when plugged in.
Charging status includes the charge start
or charge end time as appropriate. You can
modify your charge settings though the
touchscreen. See SYNC™ 3 (page 431).
128
Instrument Cluster Display
Page 166 of 585
Note:If programming a garage door opener
or gate operator, it is advised to unplug the
device during the “cycling” process to
prevent possible overheating.
PROGRAMMING THE GARAGE
DOOR OPENER TO YOUR
HAND-HELD TRANSMITTER
This process is to program your in-vehicle
HomeLink function button with your
hand-held transmitter.
Note: The programming steps below
assume you will be programming HomeLink
that was not previously programmed. If your
HomeLink was previously programmed, you
may need to erase your HomeLink buttons.
See Clearing the Garage Door Opener
(page 164).
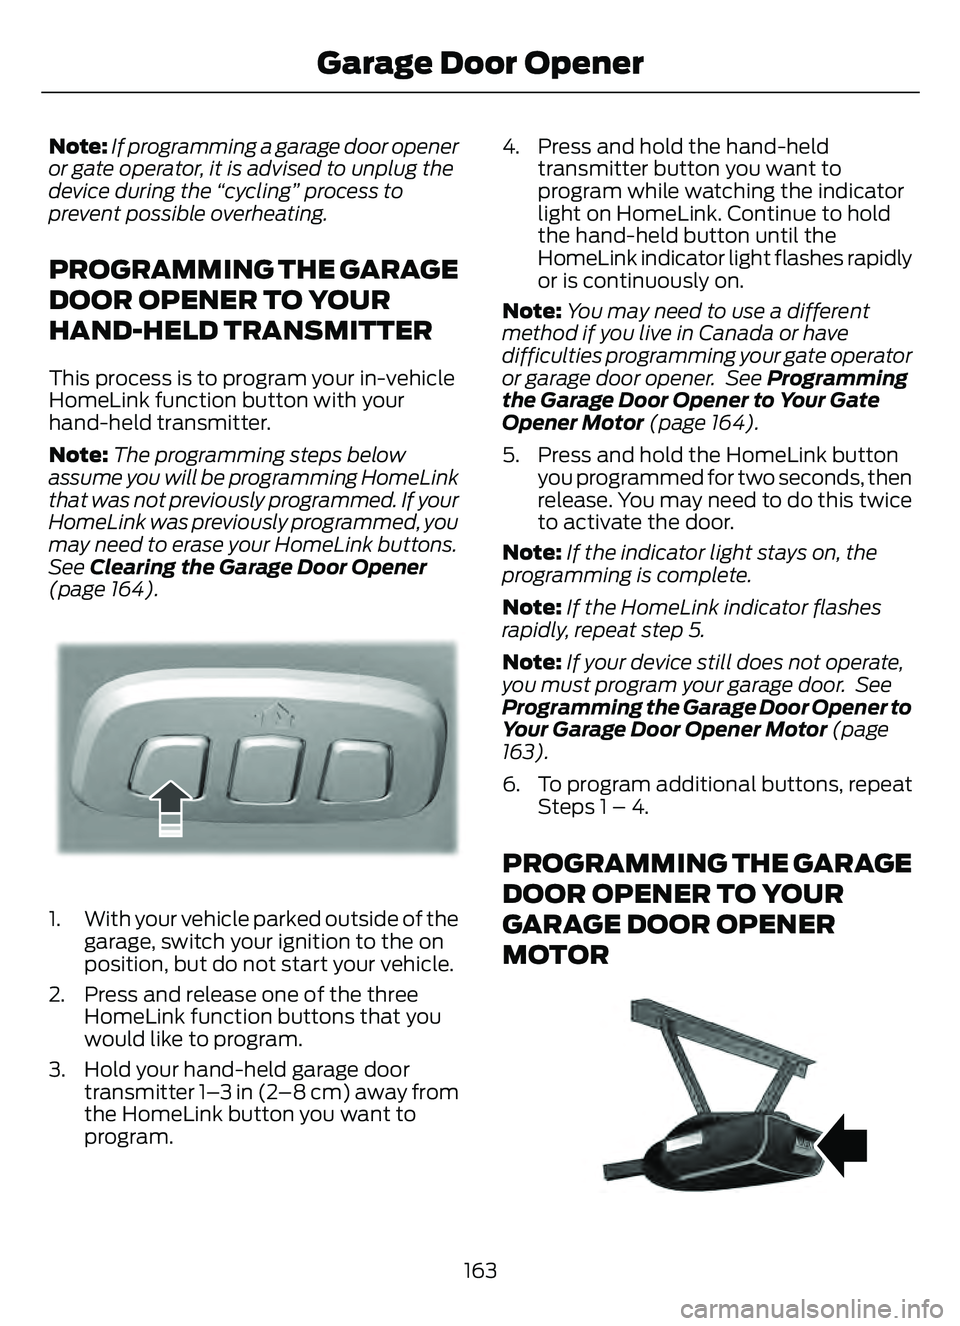
E188212E188212
1. With your vehicle parked outside of the garage, switch your ignition to the on
position, but do not start your vehicle.
2. Press and release one of the three HomeLink function buttons that you
would like to program.
3. Hold your hand-held garage door transmitter 1–3 in (2–8 cm) away from
the HomeLink button you want to
program. 4. Press and hold the hand-held
transmitter button you want to
program while watching the indicator
light on HomeLink. Continue to hold
the hand-held button until the
HomeLink indicator light flashes rapidly
or is continuously on.
Note: You may need to use a different
method if you live in Canada or have
difficulties programming your gate operator
or garage door opener. See Programming
the Garage Door Opener to Your Gate
Opener Motor (page 164).
5. Press and hold the HomeLink button you programmed for two seconds, then
release. You may need to do this twice
to activate the door.
Note: If the indicator light stays on, the
programming is complete.
Note: If the HomeLink indicator flashes
rapidly, repeat step 5.
Note: If your device still does not operate,
you must program your garage door. See
Programming the Garage Door Opener to
Your Garage Door Opener Motor (page
163).
6. To program additional buttons, repeat Steps 1 – 4.
PROGRAMMING THE GARAGE
DOOR OPENER TO YOUR
GARAGE DOOR OPENER
MOTOR
E142659
163
Garage Door Opener
Page 167 of 585
1. Press the learn button on the garagedoor opener motor, you have 30
seconds to complete the next two
steps.
2. Return to your vehicle.
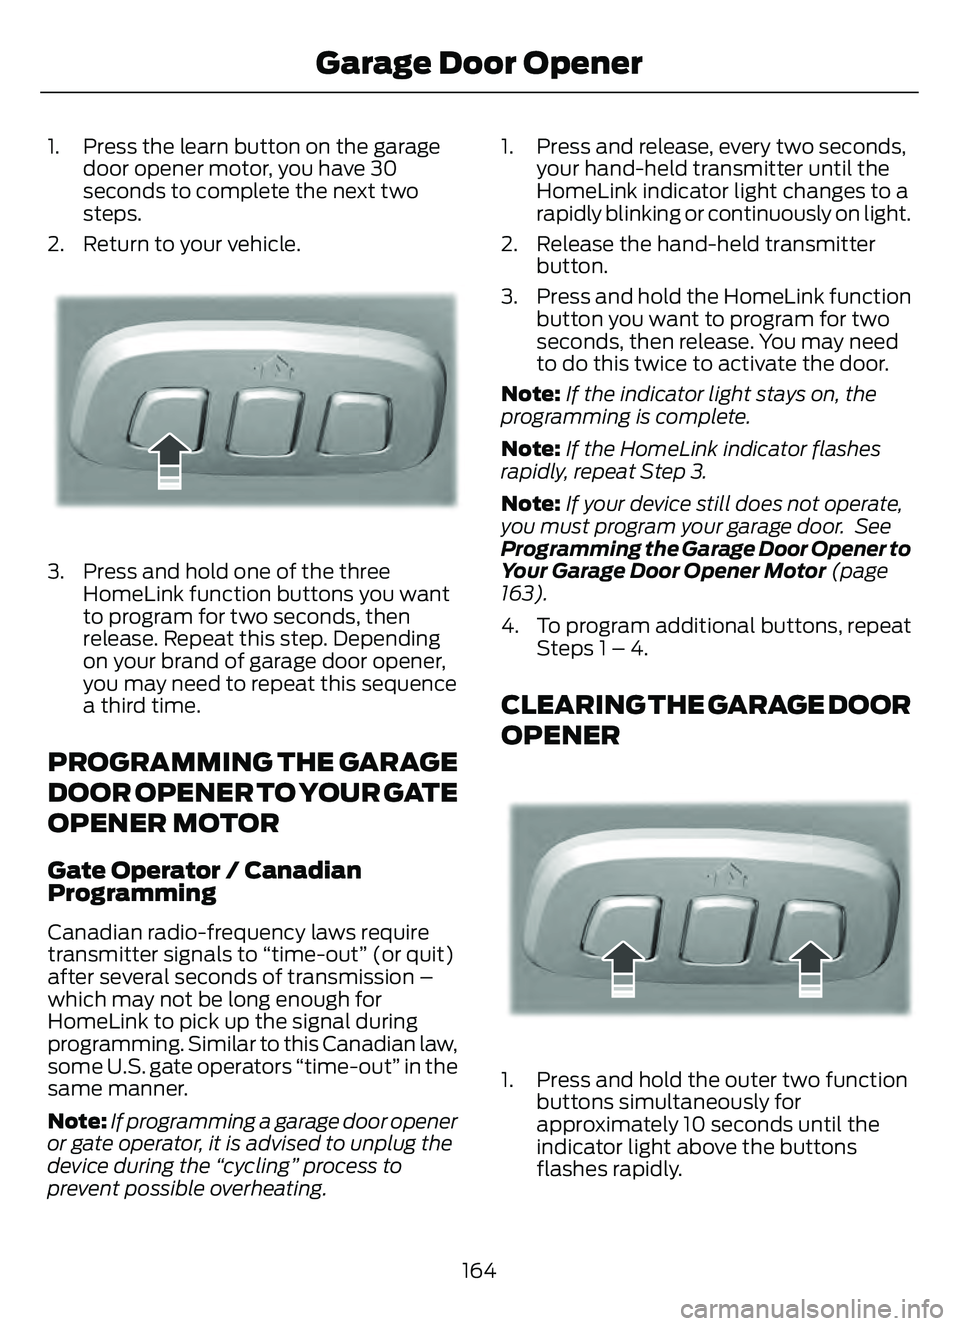
E188212E188212
3. Press and hold one of the three HomeLink function buttons you want
to program for two seconds, then
release. Repeat this step. Depending
on your brand of garage door opener,
you may need to repeat this sequence
a third time.
PROGRAMMING THE GARAGE
DOOR OPENER TO YOUR GATE
OPENER MOTOR
Gate Operator / Canadian
Programming
Canadian radio-frequency laws require
transmitter signals to “time-out” (or quit)
after several seconds of transmission –
which may not be long enough for
HomeLink to pick up the signal during
programming. Similar to this Canadian law,
some U.S. gate operators “time-out” in the
same manner.
Note: If programming a garage door opener
or gate operator, it is advised to unplug the
device during the “cycling” process to
prevent possible overheating. 1. Press and release, every two seconds,
your hand-held transmitter until the
HomeLink indicator light changes to a
rapidly blinking or continuously on light.
2. Release the hand-held transmitter button.
3. Press and hold the HomeLink function button you want to program for two
seconds, then release. You may need
to do this twice to activate the door.
Note: If the indicator light stays on, the
programming is complete.
Note: If the HomeLink indicator flashes
rapidly, repeat Step 3.
Note: If your device still does not operate,
you must program your garage door. See
Programming the Garage Door Opener to
Your Garage Door Opener Motor (page
163).
4. To program additional buttons, repeat Steps 1 – 4.
CLEARING THE GARAGE DOOR
OPENER
E188213E188213
1. Press and hold the outer two functionbuttons simultaneously for
approximately 10 seconds until the
indicator light above the buttons
flashes rapidly.
164
Garage Door Opener
Page 171 of 585
WHAT IS THE POWER OUTLET
The power outlet can power devices using
a 12 V outlet adapter.
POWER OUTLET
PRECAUTIONS
When you switch the vehicle on, you can
use the socket to power 12 V appliances
with a maximum current rating of 15 A. Do
not use the power point over the vehicle
capacity of 12 V DC 180 W or a fuse could
blow. Do not plug in any device that
supplies power to the vehicle through the
power points. This could result in damage
to vehicle systems. Do not hang any
accessory from the accessory plug. Always
keep the power point caps closed when
not in use. Do not insert objects other than
an accessory plug into the power point.
To prevent the battery from running out of
charge:
• Do not use the power point longer thannecessary when the vehicle is off.
• Do not leave devices plugged in overnight or when you park your vehicle
for extended periods.
LOCATING THE POWER
OUTLETS
Power outlets may be in the following
locations:
• On the lower instrument panel.
• Inside the center console.
• On the front of the center console.
• On the rear of the center console.
• In the cargo area.
• On the passenger side floor panel.
• 3rd row on the quarter trim panels.
168
Power Outlet - Vehicles With: 12V Power Outlet
Page 177 of 585
ENGINE BLOCK HEATER (IF
EQUIPPED)
ENGINE BLOCK HEATER
PRECAUTIONS
WARNING: Failure to follow engine
block heater instructions could result in
property damage or serious personal
injury.
WARNING: Do not use your heater
with ungrounded electrical systems or
two-pronged adapters. There is a risk of
electrical shock.
WARNING: Do not fully close the
hood, or allow it to drop under its own
weight when using the engine block
heater. This could damage the power
cable and may cause an electrical short
resulting in fire, injury and property
damage.
We recommend that you do the following
for a safe and correct operation:
• Use a 16-gauge outdoor extension cord that is product certified by
Underwriter’s Laboratory (UL) or
Canadian Standards Association
(CSA). This extension cord must be
suitable for use outdoors, in cold
temperatures, and be clearly marked
Suitable for Use with Outdoor
Appliances. Do not use an indoor
extension cord outdoors. This could
result in an electric shock or become a
fire hazard.
• Use as short an extension cord as possible.
• Do not use multiple extension cords. • Make sure that when in operation, the
extension cord plug and engine block
heater cord plug connections are free
and clear of water. This could cause an
electric shock or fire.
• If the engine block heater cord is under the hood, do not remove the wiring
from its original location. Do not close
the hood on the extension wiring.
• Park your vehicle in a clean area, clear of combustible materials.
• Firmly connect the engine block heater cord and the extension cord.
• Check the extension cord for heat anywhere when the system has been
operating for approximately 30
minutes.
• Unplug and properly stow the system before starting and driving your vehicle.
The protective cover seals the
terminals of the engine block heater
cord plug when not in use.
• Check the engine block heater system for proper operation before winter.
HOW DOES THE ENGINE BLOCK
HEATER WORK
The engine block heater warms the engine
coolant. This allows the climate control
system to quickly respond. The equipment
includes a heater element installed in the
engine block and a wire harness. You can
connect the system to a grounded
220-240 volt AC electrical source.
Note: The engine block heater is most
effective when outdoor temperatures are
below 0°F (-18°C).
USING THE ENGINE BLOCK
HEATER
Make sure the receptacle terminals are
clean and dry prior to use. Clean them with
a dry cloth if necessary.
174
Starting and Stopping the Engine