FORD EXPEDITION 1997 1.G Owners Manual
Manufacturer: FORD, Model Year: 1997, Model line: EXPEDITION, Model: FORD EXPEDITION 1997 1.GPages: 224, PDF Size: 2.2 MB
Page 141 of 224

Slot number Amperage Description
6 5 amp Generic electronic module
(GEM), shift interlock, air
suspension module,
heated backlite (HBL)
relay, steering sensor, trip
computer, compass
7 5 amp Console blower, auxiliary
blower relay coil
8 5 amp GEM, radio, RAP module
9 - Not used
10 - Not used
11 30 amp Front wiper motor, washer
motor
12 5 amp OBDII scan tool connector
13 15 amp Brake on/off switch, brake
pressure switch
14 15 amp Interior lamps, delayed
accessory relay, rear wiper
relays
15 5 amp GEM, passive anti-theft
system (PATS) module
16 20 amp High beam headlamps,
high beam indicator
17 10 amp Heated mirrors, heated
mirror switch
18 5 amp Instrument and switch
illumination
19 10 amp Airbag diagnostic monitor,
instrument cluster
20 5 amp GEM, air suspension
module
21 15 amp Starter relay, junction box
fuse #20
Roadside emergencies
142
Page 142 of 224

Slot number Amperage Description
22 10 amp Airbag diagnostic monitor
23 10 amp Electronic flasher, 4WD
vacuum solenoids, trailer
tow battery charge relay,
console climate door
actuator, auxiliary blend
and mode door actuators,
auxiliary pot switching
module
24 10 amp I/P blower relay, junction
fuse box #7
25 5 amp 4WABS module, 4WABS
red lamps relay
26 10 amp Right low beam head
lamp, DRL module
27 5 amp Foglamp relay, main lamp
switch
28 10 amp Left low beam headlamp
29 5 amp Auto lamp module,
instrument cluster,
transmission control
indicator light and switch
30 30 amp Ignition coils, PCM relay,
PATS module, radio
capacitors
31 - Not used
Slot number Amperage Description
1 - Interior lamp relay
2 - Battery saver relay
3 - HBL relay
4 - One touch down relay
5 - Accessory delay relay
Roadside emergencies
143
Page 143 of 224

CHANGING THE TIRES
If you get a flat tire while driving,
do not apply the brake heavily.
Instead, gradually decrease your
speed. Hold the steering wheel
firmly and slowly move to a safe
place on the side of the road:
²Park on a level spot.
²Turn off the ignition.
²Set the parking brake.
²Activate the hazard flashers.
Spare tire information
Your vehicle is equipped with a
spare tire that may be used as a
spare or as a regular tire. The
spare is identical to the other tires
on your vehicle, although the
wheel cover may not match.
Location of the spare tire and
tools
The spare tire and tools for your
vehicle are stowed in the following
locations:
Tool Location
Spare tire Under the vehicle, just in front of the rear
bumper.
Jack, wheel nut
wrench, instructions,
work glovesBehind the access panel located on the right
rear quarter panel interior trim.
Jack handle On the top of the raditator support at the front
of the engine compartment.
exd_flat-tires_changing
exd_spare_location
exd_location_spare_tools
Roadside emergencies
144
Page 144 of 224
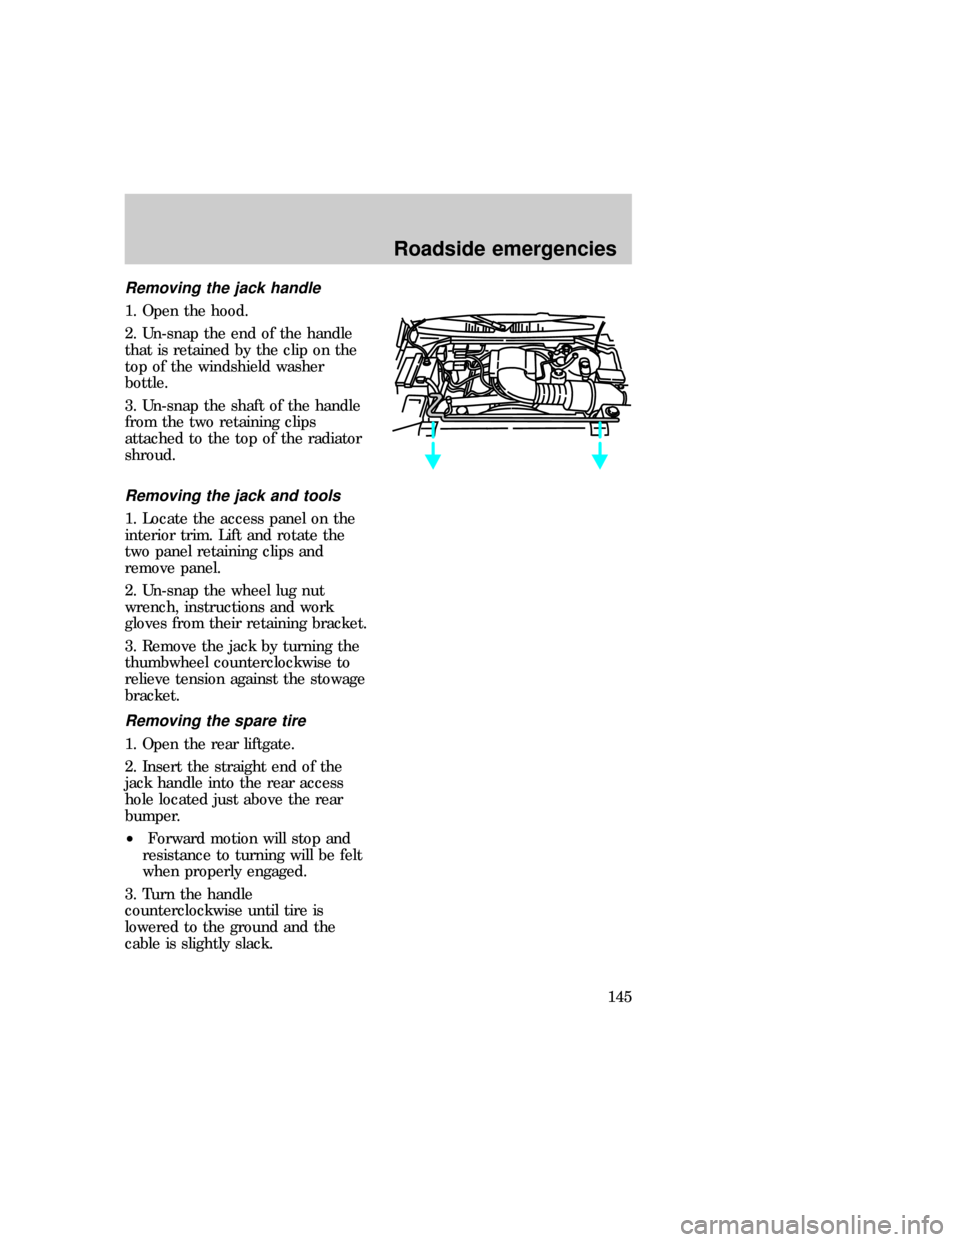
Removing the jack handle
1. Open the hood.
2. Un-snap the end of the handle
that is retained by the clip on the
top of the windshield washer
bottle.
3. Un-snap the shaft of the handle
from the two retaining clips
attached to the top of the radiator
shroud.
Removing the jack and tools
1. Locate the access panel on the
interior trim. Lift and rotate the
two panel retaining clips and
remove panel.
2. Un-snap the wheel lug nut
wrench, instructions and work
gloves from their retaining bracket.
3. Remove the jack by turning the
thumbwheel counterclockwise to
relieve tension against the stowage
bracket.
Removing the spare tire
1. Open the rear liftgate.
2. Insert the straight end of the
jack handle into the rear access
hole located just above the rear
bumper.
²Forward motion will stop and
resistance to turning will be felt
when properly engaged.
3. Turn the handle
counterclockwise until tire is
lowered to the ground and the
cable is slightly slack.
exd_removing_jack_handle
exd_removing_tools
exd_removing_spare
Roadside emergencies
145
Page 145 of 224
4. Remove the end of the cable
from the wheel and slide the spare
out from under the vehicle.
To re-install the spare tire or tools,
reverse the removal procedure.
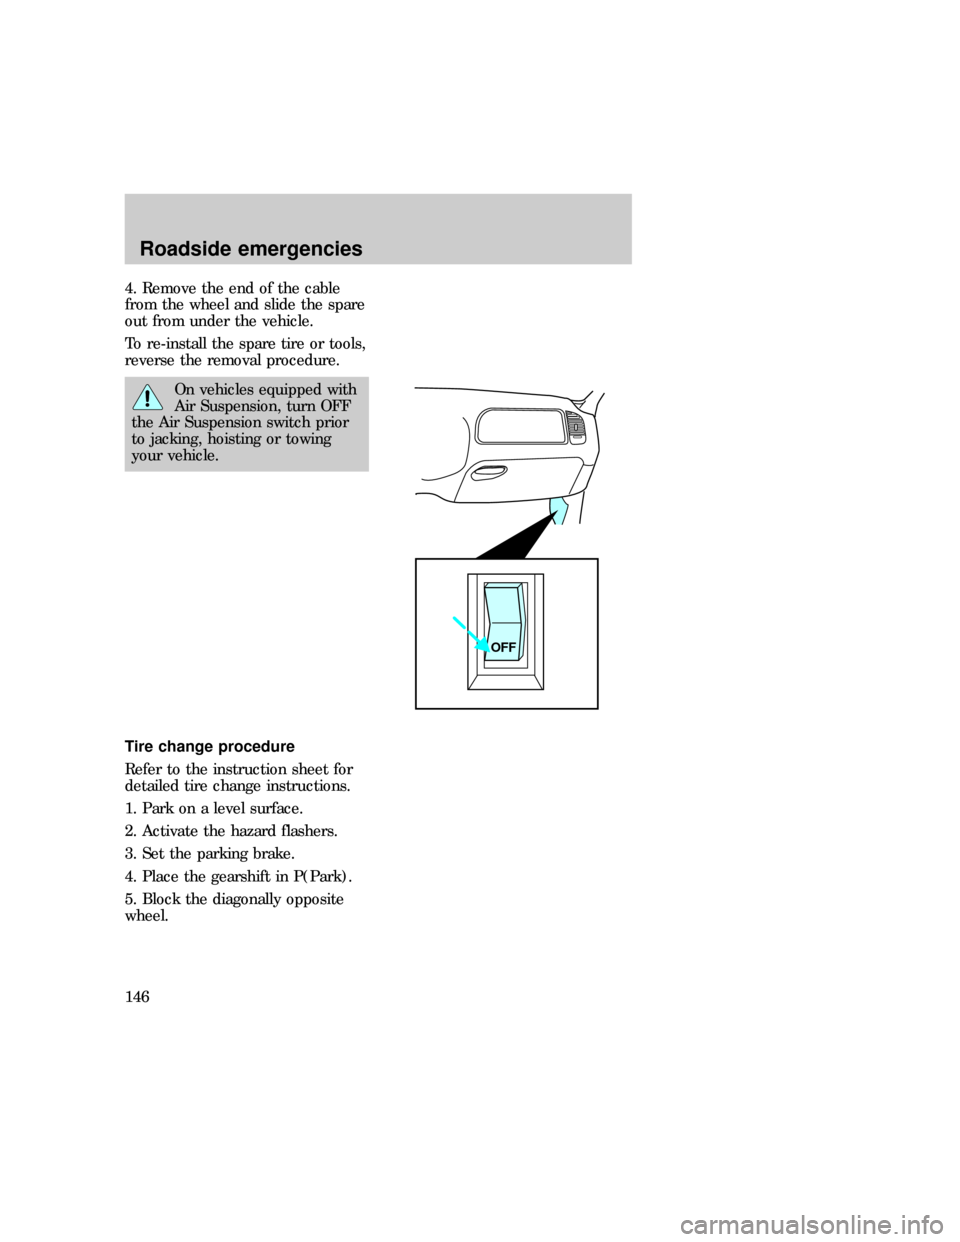
On vehicles equipped with
Air Suspension, turn OFF
the Air Suspension switch prior
to jacking, hoisting or towing
your vehicle.
Tire change procedure
Refer to the instruction sheet for
detailed tire change instructions.
1. Park on a level surface.
2. Activate the hazard flashers.
3. Set the parking brake.
4. Place the gearshift in P(Park).
5. Block the diagonally opposite
wheel.
OFF
exd_change_proc
exd_removing_flat
Roadside emergencies
146
Page 146 of 224

Removing flat tire and installing
spare
6. Use the tip of the lug wrench to
remove any wheel trim. Insert the
tapered end of the lug wrench
behind the wheel covers or
hubcaps and twist off.
7. Loosen the wheel nuts with the
lug wrench. Do not remove the lug
nuts until the tire has been raised
off the ground.
8. Insert the jack handle into the
jack and use the handle to slide
the jack under the vehicle.
9. Position the jack according to
the following guides and turn the
jack handle clockwise until the
wheel is completely off the ground.
²When one of the back wheels is
off the ground, the transmission
alone will not prevent the
vehicle from moving or slipping
off the jack, even if the vehicle
is in P (Park). To prevent the
vehicle from moving when you
change the tire, be sure that the
parking brake is set and the
diagonally opposite wheel is
blocked. If the vehicle slips off
the jack, someone could be
seriously injured.
Roadside emergencies
147
Page 147 of 224
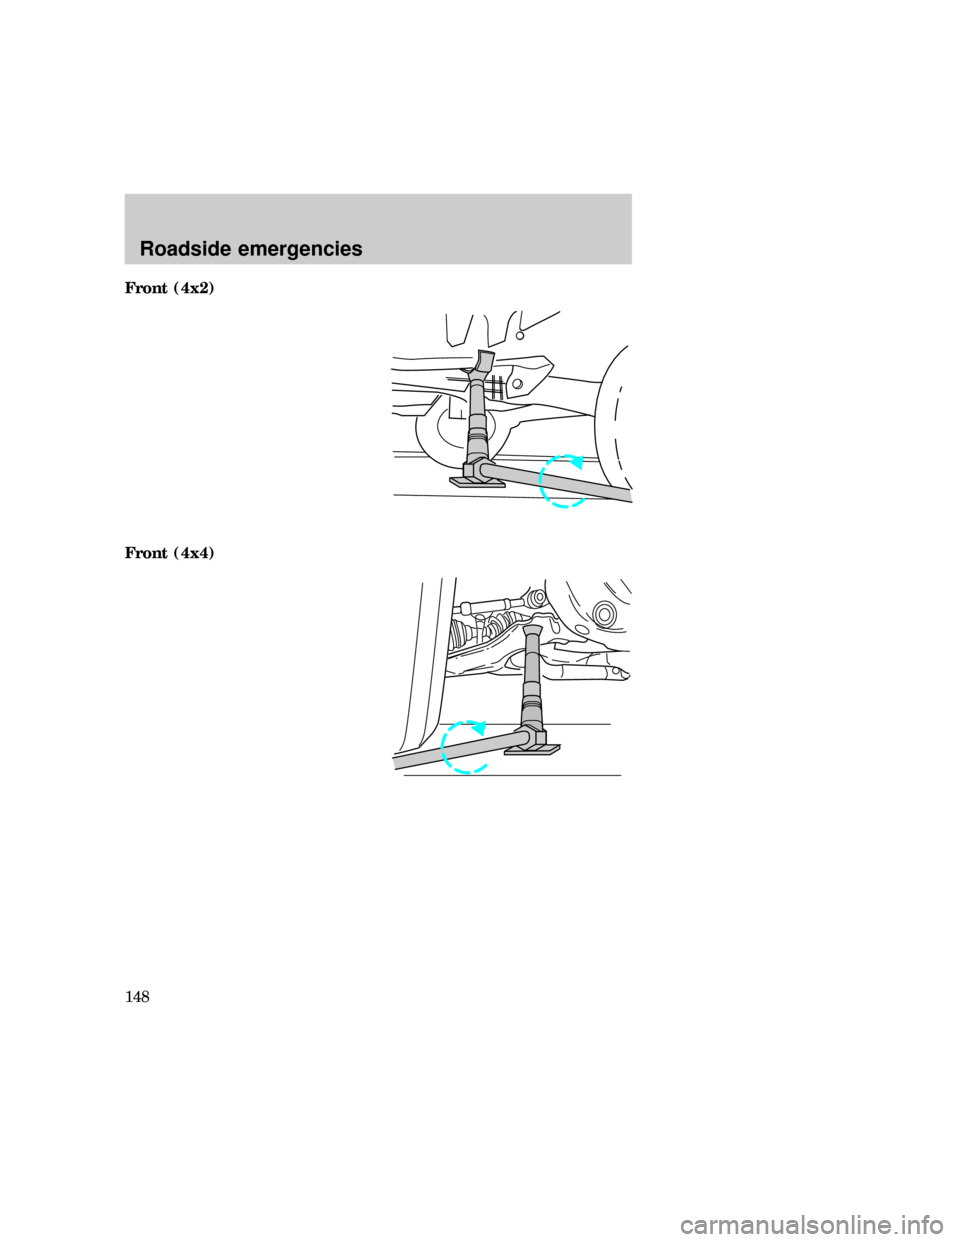
Front (4x2)
Front (4x4)
Roadside emergencies
148
Page 148 of 224
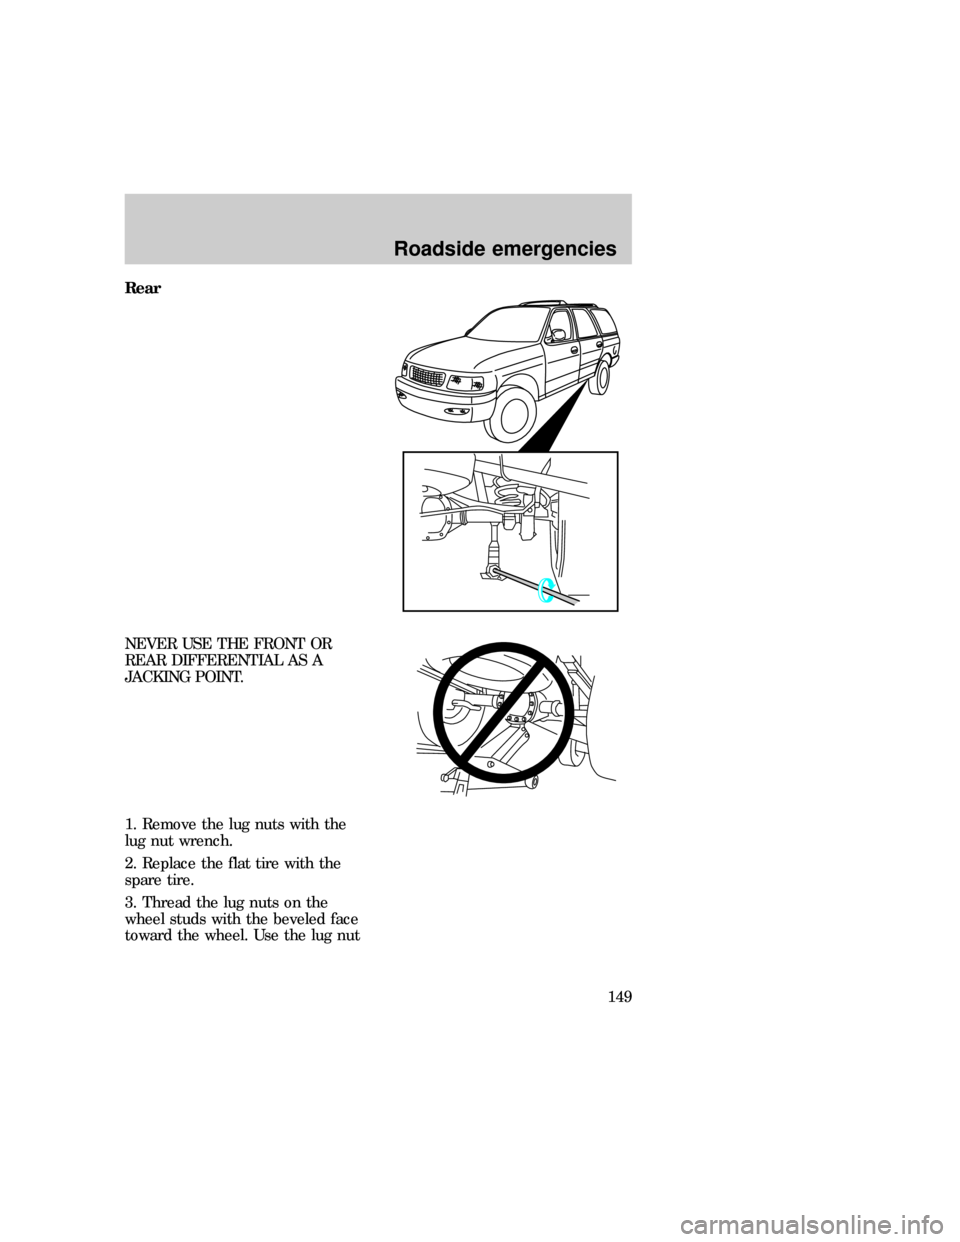
Rear
NEVER USE THE FRONT OR
REAR DIFFERENTIAL AS A
JACKING POINT.
1. Remove the lug nuts with the
lug nut wrench.
2. Replace the flat tire with the
spare tire.
3. Thread the lug nuts on the
wheel studs with the beveled face
toward the wheel. Use the lug nut
Roadside emergencies
149
Page 149 of 224
wrench to screw the lug nut snug
against the wheel, but do not
tighten.
4. Lower the vehicle by turning the
jack handle counterclockwise.
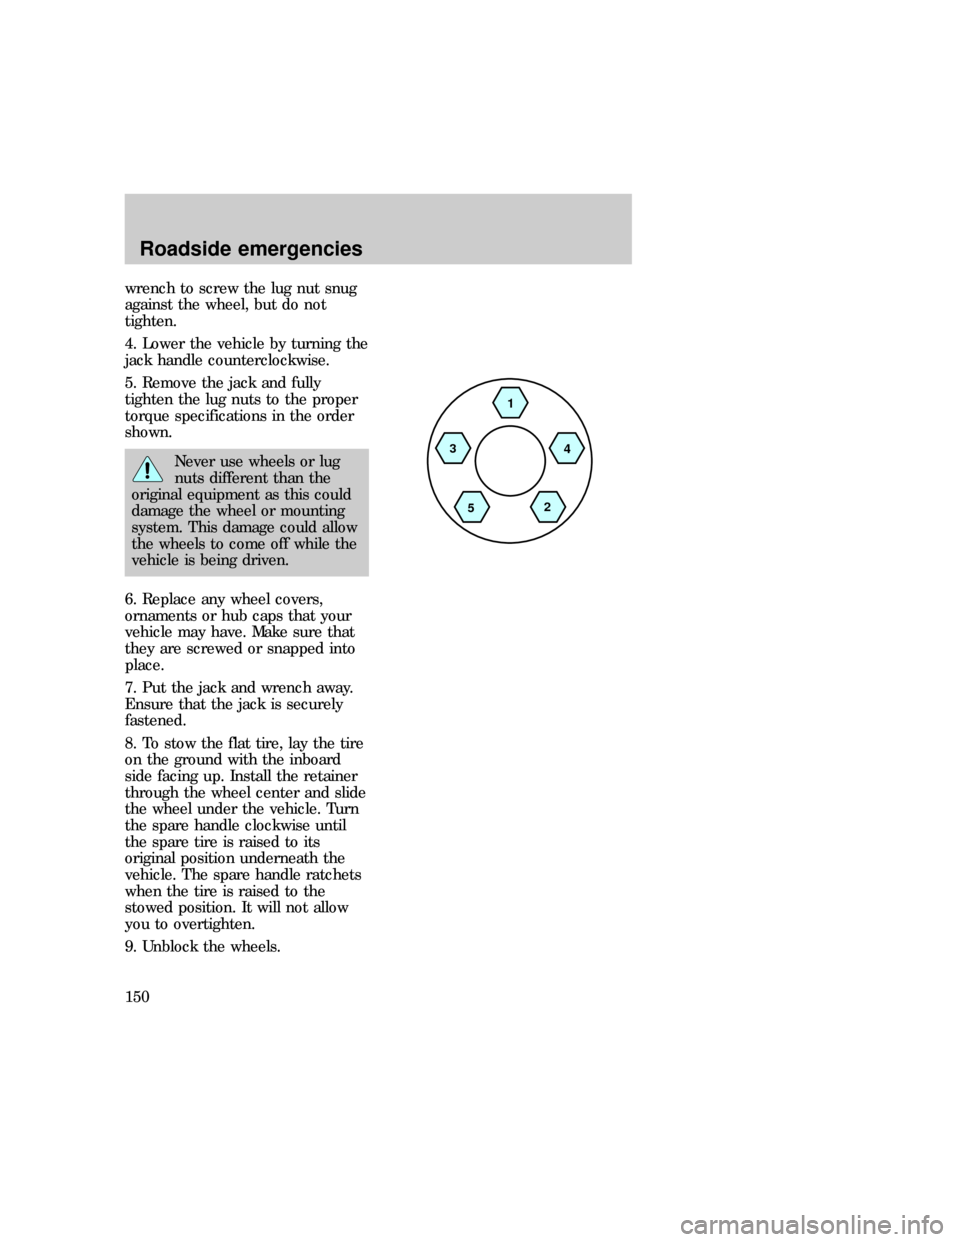
5. Remove the jack and fully
tighten the lug nuts to the proper
torque specifications in the order
shown.
Never use wheels or lug
nuts different than the
original equipment as this could
damage the wheel or mounting
system. This damage could allow
the wheels to come off while the
vehicle is being driven.
6. Replace any wheel covers,
ornaments or hub caps that your
vehicle may have. Make sure that
they are screwed or snapped into
place.
7. Put the jack and wrench away.
Ensure that the jack is securely
fastened.
8. To stow the flat tire, lay the tire
on the ground with the inboard
side facing up. Install the retainer
through the wheel center and slide
the wheel under the vehicle. Turn
the spare handle clockwise until
the spare tire is raised to its
original position underneath the
vehicle. The spare handle ratchets
when the tire is raised to the
stowed position. It will not allow
you to overtighten.
9. Unblock the wheels.
1
4
2
5 3
Roadside emergencies
150
Page 150 of 224
10. On vehicles equipped with air
suspension, turn ON the air
suspension switch.
11. Retighten the wheel lug nuts to
the specified torque at 800 km
(500 miles) of new vehicle
operation, after any wheel change
or any time the lug nuts are
loosened.
Failure to retighten wheel
lug nuts at mileages
specified could allow wheels to
come off while the vehicle is in
motion.
JUMP STARTING YOUR
BATTERY
Jump starting your vehicle
The gases around the
battery can explode if
exposed to flames, sparks, or lit
cigarettes. An explosion could
result in injury or vehicle
damage.
Do not push-start your
vehicle. You could damage
the catalytic converter. For
further information, seeJumper
Cablesin the Index.
Batteries contain sulfuric
acid which burns skin,
eyes, and clothing.
exd_jumping_title
com_jump-starting.01
com_connecting_cables.01
Roadside emergencies
151