ECU FORD EXPEDITION 2005 2.G Quick Reference Guide
[x] Cancel search | Manufacturer: FORD, Model Year: 2005, Model line: EXPEDITION, Model: FORD EXPEDITION 2005 2.GPages: 12, PDF Size: 0.99 MB
Page 4 of 12

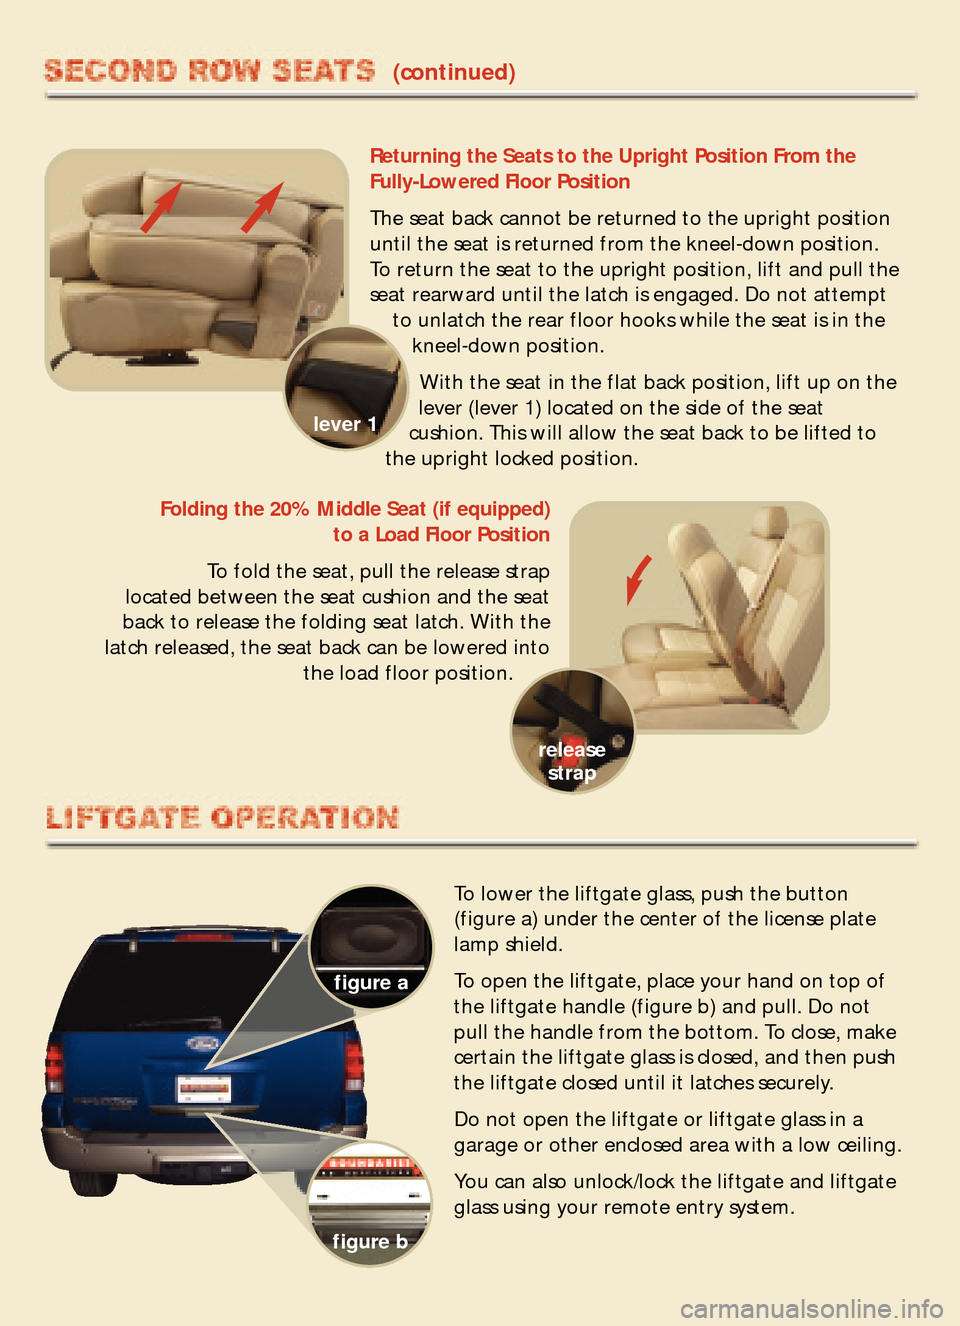
To lower the liftgate glass, push the button
(figure a) under the center of the license platelamp shield.
To open the liftgate, place your hand on top of
the liftgate handle (figure b) and pull. Do not
pull the handle from the bottom. To close, make
certain the liftgate glass is closed, and then push
the liftgate closed until it latches securely.
Do not open the liftgate or liftgate glass in a
garage or other enclosed area with a low ceiling.
You can also unlock/lock the liftgate and liftgate
glass using your remote entry system.
(continued)
Folding the 20% Middle Seat (if equipped)
to a Load Floor Position
To fold the seat, pull the release strap
located between the seat cushion and the seat
back to release the folding seat latch. With the
latch released, the seat back can be lowered into
the load floor position.
release
strap
figure a
figure bReturning the Seats to the Upright Position From the
Fully�Lowered Floor Position
The seat back cannot be returned to the upright position
until the seat is returned from the kneel�down position.
To return the seat to the upright position, lift and pull the
seat rearward until the latch is engaged. Do not attempt
to unlatch the rear floor hooks while the seat is in the
kneel�down position.
With the seat in the flat back position, lift up on the
lever (lever 1) located on the side of the seat
cushion. This will allow the seat back to be lifted to
the upright locked position.
lever 1
Page 8 of 12

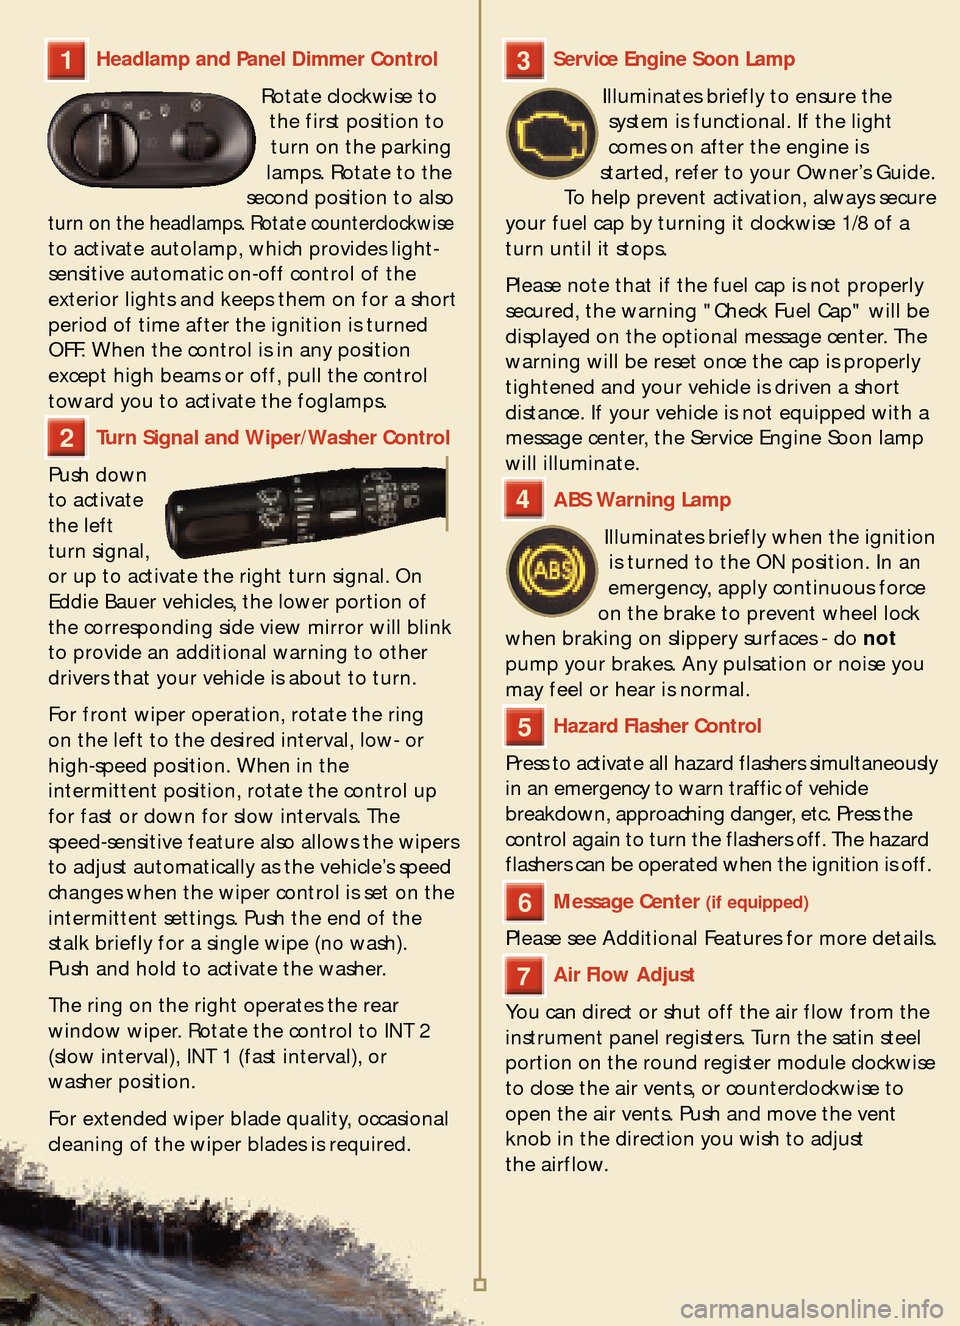
Service Engine Soon Lamp
Illuminates briefly to ensure the
system is functional. If the light
comes on after the engine is
started, refer to your Owner’s Guide.
To help prevent activation, always secure
your fuel cap by turning it clockwise 1/8 of a
turn until it stops.
Please note that if the fuel cap is not properly
secured, the warning "Check Fuel Cap" will be
displayed on the optional message center. The
warning will be reset once the cap is properly
tightened and your vehicle is driven a shortdistance. If your vehicle is not equipped with a
message center, the Service Engine Soon lampwill illuminate.
ABS Warning Lamp
Illuminates briefly when the ignition
is turned to the ON position. In an
emergency, apply continuous force
on the brake to prevent wheel lock
when braking on slippery surfaces � do
notpump your brakes. Any pulsation or noise you
may feel or hear is normal.
Hazard Flasher Control
Press to activate all hazard flashers simultaneously
in an emergency to warn traffic of vehicle
breakdown, approaching danger, etc. Press the
control again to turn the flashers off. The hazard
flashers can be operated when the ignition is off.
Message Center (if equipped)
Please see Additional Features for more details.
Air Flow Adjust
You can direct or shut off the air flow from the
instrument panel registers. Turn the satin steel
portion on the round register module clockwise
to close the air vents, or counterclockwise toopen the air vents. Push and move the vent
knob in the direction you wish to adjust
the airflow.
1
4
5
6
3
7
Headlamp and Panel Dimmer Control
Rotate clockwise to
the first position to
turn on the parking
lamps. Rotate to the
second position to also
turn on the headlamps. Rotate counterclockwiseto activate autolamp, which provides light�
sensitive automatic on�off control of the
exterior lights and keeps them on for a short
period of time after the ignition is turned
OFF. When the control is in any position
except high beams or off, pull the control
toward you to activate the foglamps.
Turn Signal and Wiper/Washer Control
Push down
to activatethe left
turn signal,
or up to activate the right turn signal. On
Eddie Bauer vehicles, the lower portion of
the corresponding side view mirror will blink
to provide an additional warning to other
drivers that your vehicle is about to turn.
For front wiper operation, rotate the ring
on the left to the desired interval, low� orhigh�speed position. When in the
intermittent position, rotate the control up
for fast or down for slow intervals. The
speed�sensitive feature also allows the wipers
to adjust automatically as the vehicle’s speed
changes when the wiper control is set on the
intermittent settings. Push the end of thestalk briefly for a single wipe (no wash).
Push and hold to activate the washer.
The ring on the right operates the rear
window wiper. Rotate the control to INT 2
(slow interval), INT 1 (fast interval), or washer position.
For extended wiper blade quality, occasional
cleaning of the wiper blades is required.
2