mirror controls FORD EXPEDITION 2017 3.G Owners Manual
[x] Cancel search | Manufacturer: FORD, Model Year: 2017, Model line: EXPEDITION, Model: FORD EXPEDITION 2017 3.GPages: 500, PDF Size: 4.83 MB
Page 5 of 500
Adjusting the Steering Wheel - Vehicles
With: Power Adjustable Steering
Column..........................................................66
Audio Control
...................................................67
Voice Control
...................................................68
Cruise Control
.................................................69
Information Display Control
......................69
Heated Steering Wheel
...............................69
Pedals
Adjusting the Pedals
.....................................70
Wipers and Washers
Windshield Wipers
..........................................71
Autowipers.........................................................71
Windshield Washers
......................................72
Rear Window Wiper and Washers...........72
Lighting
General Information......................................73
Lighting Control...............................................73
Autolamps........................................................74
Instrument Lighting Dimmer......................75
Daytime Running Lamps.............................75
Front Fog Lamps............................................76
Direction Indicators........................................76
Interior Lamps
..................................................77
Ambient Lighting
............................................78
Windows and Mirrors
Power Windows
..............................................79
Exterior Mirrors
...............................................80
Interior Mirror....................................................81
Childminder Mirror
..........................................81
Rear Quarter Windows
................................82
Sun Visors
.........................................................82
Moonroof...........................................................82
Instrument Cluster
Gauges...............................................................84 Warning Lamps and Indicators.................87
Audible Warnings and Indicators............90
Information Displays
General Information
.......................................91
Information Messages................................102
Climate Control
Manual Climate Control..............................112
Manual Climate Control - Vehicles With: Electronic Manual Temperature
Control (EMTC)
..........................................113
Automatic Climate Control........................115
Hints on Controlling the Interior Climate..........................................................116
Rear Passenger Climate Controls
...........119
Heated Windows and Mirrors..................120
Remote Start
.................................................120
Seats
Sitting in the Correct Position...................121
Head Restraints
..............................................121
Manual Seats.................................................123
Power Seats
....................................................124
Memory Function
..........................................125
Rear Seats
.......................................................126
Heated Seats
..................................................133
Climate Controlled Seats..........................134
Universal Garage Door Opener
Universal Garage Door Opener...............136
Auxiliary Power Points
Auxiliary Power Points.................................141
Storage Compartments
Center Console
..............................................143
Overhead Console........................................143
2
Expedition (TB7) Canada/United States of America, enUSA, Edition date: 03/2016, First Printing Table of Contents
Page 49 of 500
2. Press the remote start button twice.
The exterior lamps flash twice.
The horn sounds if the system fails to start,
unless quiet start is on. Quiet start runs the
blower fan at a slower speed to reduce
noise. You can switch this feature on or off
in the information display. See General
Information (page 91).
Note: If you remote start your vehicle with
an integrated keyhead transmitter, you must
switch the ignition on before driving your
vehicle. If you remote start your vehicle with
an intelligent access transmitter, you must
press the push button ignition switch on the
instrument panel once while applying the
brake pedal before driving your vehicle.
The power windows do not work during
remote start and the radio does not turn
on automatically.
The parking lamps remain on and the
vehicle runs for 5, 10 or 15 minutes,
depending on the setting.
Extending the Engine Running Time
To extend the engine running time duration
of your vehicle during remote start, repeat
steps 1 and 2 while the engine is running.
If the duration is set to 10 minutes, the
duration extends by another 10 minutes.
For example, if your vehicle had been
running from the first remote start for 5
minutes, your vehicle continues to run now
for a total of 20 minutes. You can extend
the remote start up to a maximum of 35
minutes.
Wait at least five seconds before remote
starting after the engine stops running.
Turning Your Vehicle Off After Remote
Starting Press the button once. The
parking lamps turn off. You may have to be closer to your vehicle
to remotely switch off your vehicle after
remote starting. This is due to the added
noise of your running vehicle.
You can switch this feature on or off in the
information display. See
General
Information (page 91).
Memory Feature
(If Equipped)
You can use the remote control to recall
memory settings for the driver seat, power
mirrors, power steering column and power
adjustable foot pedals. Press the unlock
button on the remote control or unlock
your vehicle with the intelligent access key
to recall the memory positions. You can
program the remote control or intelligent
access key to recall memory positions. See
Memory Function
(page 125).
REPLACING A LOST KEY OR
REMOTE CONTROL
Replacement keys or remote controls can
be purchased from an authorized dealer.
Authorized dealers can program remote
controls for your vehicle. See
Passive
Anti-Theft System (page 61).
46
Expedition (TB7) Canada/United States of America, enUSA, Edition date: 03/2016, First Printing Keys and Remote ControlsE138625
Page 82 of 500
POWER WINDOWS
WARNINGS
Do not leave children unattended in
your vehicle and do not let them play
with the power windows. They may
seriously injure themselves. When closing the power windows,
you should verify they are free of
obstructions and make sure that
children and pets are not in the proximity
of the window openings. Note:
You may hear a pulsing noise when
just one of the windows is open. Lower the
opposite window slightly to reduce this
noise.
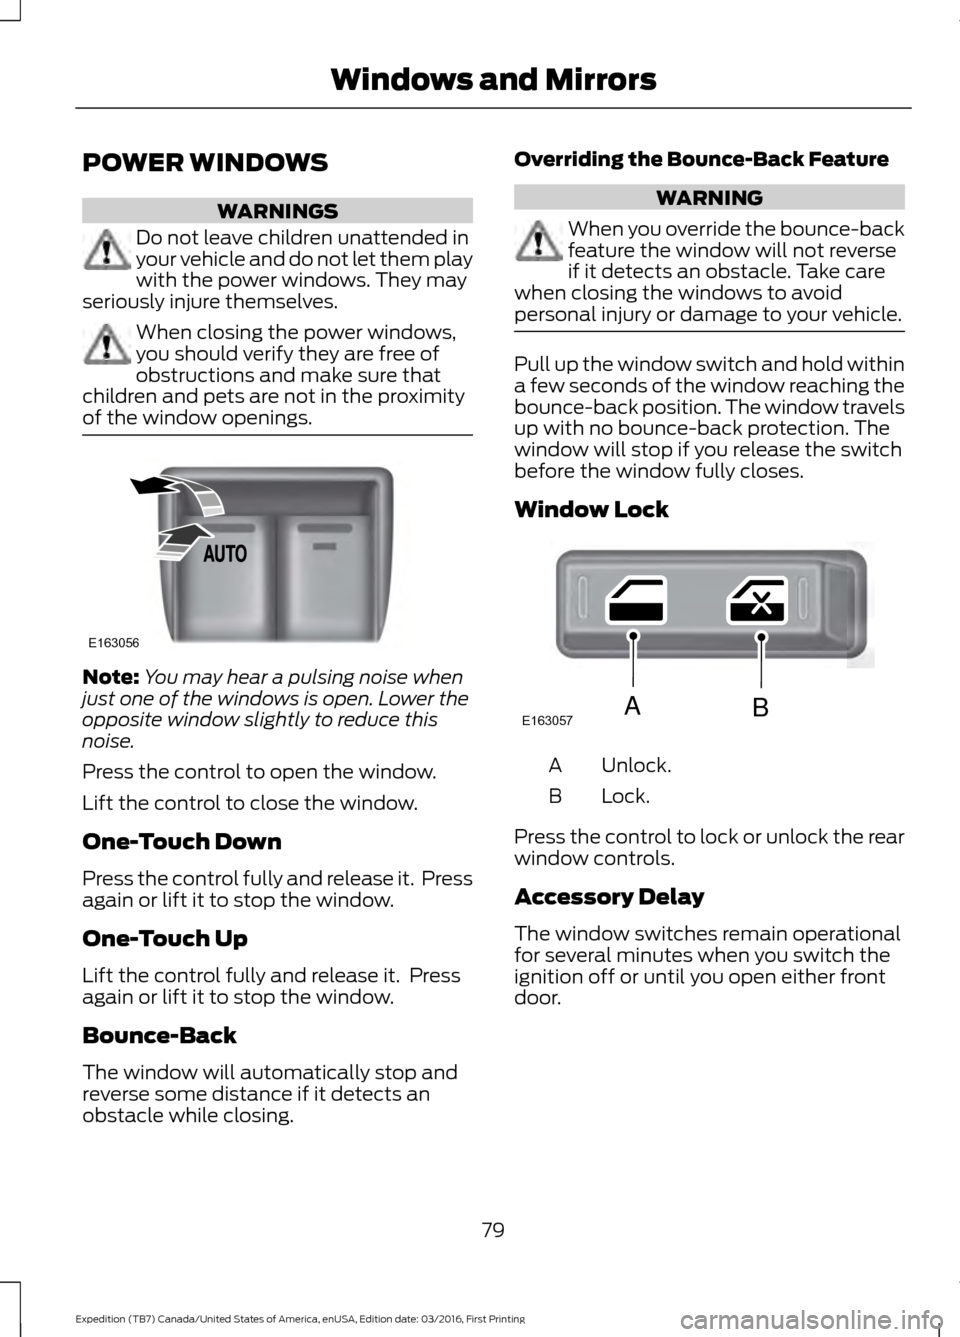
Press the control to open the window.
Lift the control to close the window.
One-Touch Down
Press the control fully and release it. Press
again or lift it to stop the window.
One-Touch Up
Lift the control fully and release it. Press
again or lift it to stop the window.
Bounce-Back
The window will automatically stop and
reverse some distance if it detects an
obstacle while closing. Overriding the Bounce-Back Feature WARNING
When you override the bounce-back
feature the window will not reverse
if it detects an obstacle. Take care
when closing the windows to avoid
personal injury or damage to your vehicle. Pull up the window switch and hold within
a few seconds of the window reaching the
bounce-back position. The window travels
up with no bounce-back protection. The
window will stop if you release the switch
before the window fully closes.
Window Lock
Unlock.
A
Lock.
B
Press the control to lock or unlock the rear
window controls.
Accessory Delay
The window switches remain operational
for several minutes when you switch the
ignition off or until you open either front
door.
79
Expedition (TB7) Canada/United States of America, enUSA, Edition date: 03/2016, First Printing Windows and MirrorsE163056 E163057AB
Page 86 of 500
WARNINGS
When closing the moonroof, you
should verify that it is free of
obstructions and make sure that
children and pets are not in the proximity
of the roof opening. You can manually open or close the sliding
shade when the moonroof is closed. Pull
the shade toward the front of your vehicle
to close it.
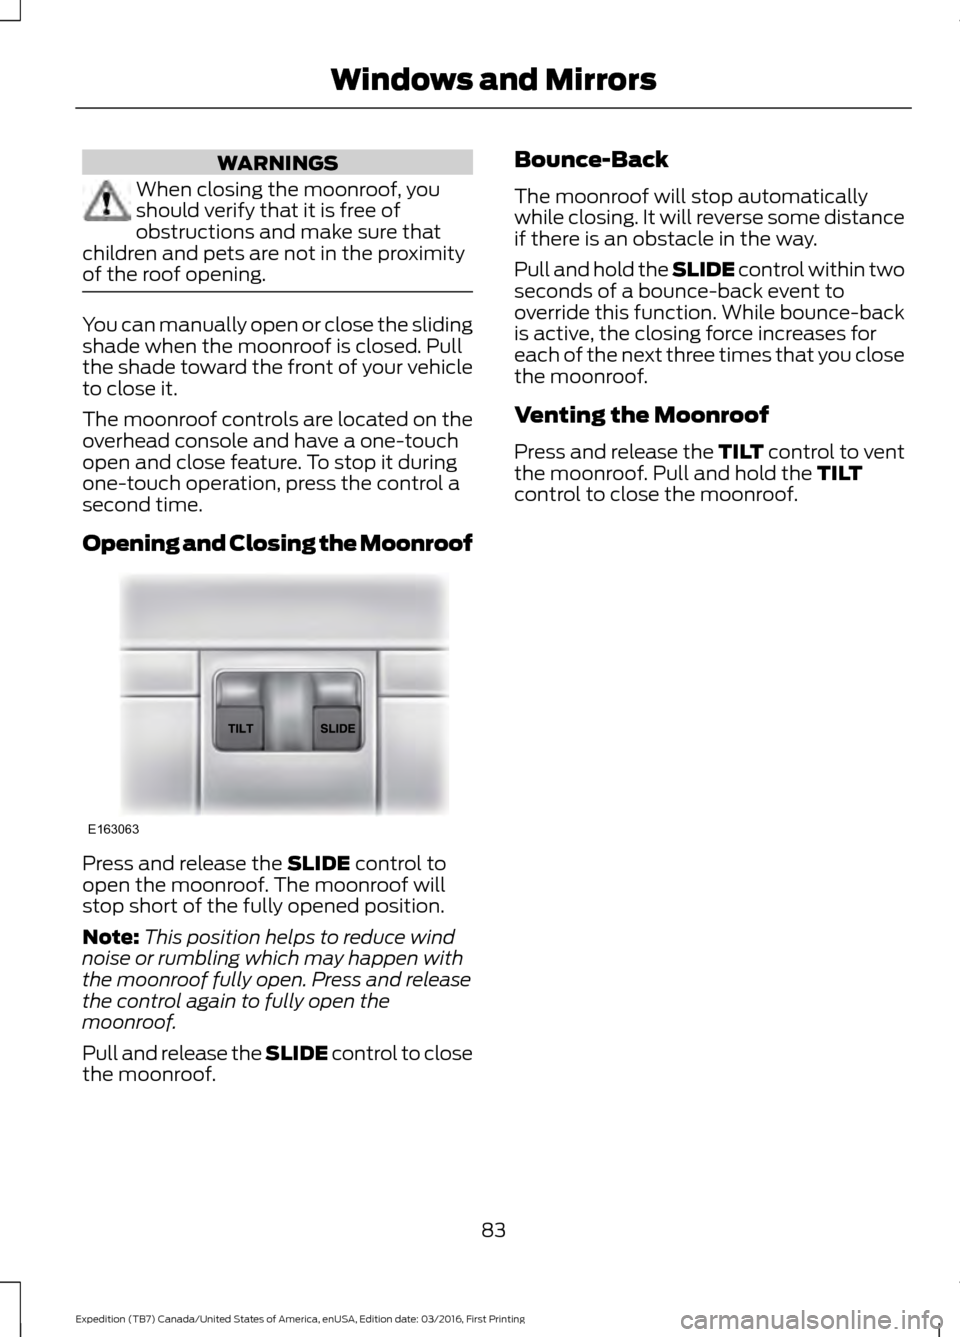
The moonroof controls are located on the
overhead console and have a one-touch
open and close feature. To stop it during
one-touch operation, press the control a
second time.
Opening and Closing the Moonroof
Press and release the SLIDE control to
open the moonroof. The moonroof will
stop short of the fully opened position.
Note: This position helps to reduce wind
noise or rumbling which may happen with
the moonroof fully open. Press and release
the control again to fully open the
moonroof.
Pull and release the SLIDE control to close
the moonroof. Bounce-Back
The moonroof will stop automatically
while closing. It will reverse some distance
if there is an obstacle in the way.
Pull and hold the SLIDE control within two
seconds of a bounce-back event to
override this function. While bounce-back
is active, the closing force increases for
each of the next three times that you close
the moonroof.
Venting the Moonroof
Press and release the TILT control to vent
the moonroof. Pull and hold the
TILT
control to close the moonroof.
83
Expedition (TB7) Canada/United States of America, enUSA, Edition date: 03/2016, First Printing Windows and MirrorsE163063
Page 123 of 500
HEATED WINDOWS AND
MIRRORS
Heated Rear Window
Note:
Make sure the engine is running
before operating the heated windows. Press the button to clear the
heated rear window of thin ice
and fog. The heated rear window
will automatically turn off after a short
period of time. Start the engine before you
switch the heated rear window on.
Note: Do not use razor blades or other
sharp objects to clean or remove decals
from the inside of the heated rear window.
The vehicle warranty does not cover
damage caused to the heated rear window
grid lines.
Heated Exterior Mirror (If Equipped)
When you switch the heated rear window
on, the heated exterior mirrors will
automatically turn on.
Note: Do not remove ice from the mirrors
with a scraper or adjust the mirror glass
when it is frozen in place.
Note: Do not clean the mirror housing or
glass with harsh abrasives, fuel or other
petroleum-based cleaning products.
REMOTE START
(If Equipped)
The remote start feature allows you to
pre-condition the interior of your vehicle.
The climate control system works to
achieve comfort according to your previous
settings.
Note: You cannot adjust the system during
remote start operation. Turn the ignition on to return the system
to its previous settings. You can now make
adjustments normally, but you need to turn
certain vehicle-dependent features back
on, such as:
•
Heated seats.
• Cooled seats.
• Heated steering wheel.
• Heated mirrors.
• Heated rear window.
You can adjust the default remote start
settings using the information display
controls. See
Information Displays
(page 91).
Automatic Settings
In hot weather, the system is set to
72°F
(22°C). The cooled seats are set to high
(if available, and selected to AUTO in the
information display).
In moderate weather, the system either
heats or cools (based on previous
settings). The rear defroster, heated
mirrors and heated seats do not
automatically turn on.
In cold weather, the system is set to
72°F
(22°C). The heated seats are set to high
(if available, and selected to AUTO in the
information display). The rear defroster
and heated mirrors automatically turn on.
120
Expedition (TB7) Canada/United States of America, enUSA, Edition date: 03/2016, First Printing Climate ControlE184884
Page 129 of 500
Note:
Using a linked key fob to recall your
memory position when the ignition is off
moves the seat and steering column to the
Easy Entry position.
Note: Pressing any active memory feature
control - power seat, mirror (or steering
column switch) (or any memory button)
during a memory recall cancels the
operation.
Linking a PreSet Position to your
Remote Control or Intelligent Access
Key Fob
Your vehicle can save the preset memory
positions for up to two remote controls.
1. With the ignition on, move the memory
positions to the desired positions.
2. Press and hold the desired preset button for about five seconds. A tone
sounds after about two seconds.
Continue holding until you hear a
second tone.
3. Within three seconds, press the lock button on the remote control you are
linking.
To unlink a remote control, follow the
same procedure – except in step 3, press
the unlock button on the remote control.
Note: If more than one linked remote
control or intelligent access key is in range,
the memory function moves to the settings
of the first key to initiate a memory recall.
Easy Entry and Exit Feature (If
Equipped)
This feature adjusts the position of the seat
and steering column to allow easier exit
and entry to the vehicle.
The driver seat automatically moves 2
inches (5 centimeters) rearward when the
transmission is in park (P) and you remove
the key from the ignition or you switch the
ignition off. The driver seat returns to the previous
position when you put the key in the
ignition or switch the ignition on.
You can enable or disable this feature in
the information display. See Information
Displays
(page 91).
REAR SEATS
Folding Down the Second Row
40% Seat WARNINGS
Use caution when folding the
seatback to the flat back position as
the system will move forward when
you lift the release handle. Before returning the seatback to its
original position, make sure that
cargo or any objects are not trapped
behind the seatback. After returning the
seatback to its original position, pull on the
seatback to make sure that it has fully
latched. An unlatched seat may become
dangerous in the event of a sudden stop
or crash. Make sure that the head restraint is in the
down position and no objects such as
books, purses or briefcases are on the floor
in front of the second row seats before
folding them down.
Move the front passenger seat forward so
that the second row seat head restraint
clears the front seat.
126
Expedition (TB7) Canada/United States of America, enUSA, Edition date: 03/2016, First Printing Seats
Page 400 of 500
Note: The heated steering wheel may remain on after remote starting the
vehicle, based on your remote start settings. The heated steering wheel may
also turn on when you start your vehicle, if it was on when you switched your
vehicle off.
Note:
For steering wheels with wood trim, the heating feature will not heat the
wheel between the 10 and 2 o'clock positions.
Defrost:
A pop up appears on the screen to display the defrost options.
C
MAX Defrost: Touch the button to maximize defrosting. Air flows through the
windshield vents, the fan automatically adjusts to the highest speed and the
driver and passenger temperatures are set to HI. You can use this setting to
defog or clear a thin covering of ice from the windshield. The heated rear window
also automatically turns on when you select MAX Defrost.
Defrost:
Distributes air through the windshield defroster vents and demister
vents.
Heated rear window:
Turns the heated rear window on and off. See Heated
Windows and Mirrors (page 120).
AUTO:
Touch the button to switch on automatic operation. Select the desired
temperature using the temperature control. The system adjusts fan speed, air
distribution, air conditioning operation, and selects outside air or recirculated
air to heat or cool the vehicle in order to maintain the desired temperature.
D
Power:
Touch the button to switch the system on and off. Switching off the
climate control system prevents outside air from entering the vehicle.
E
DUAL:
This button lights up when the passenger controls are active. To switch
the off and link the passenger temperature to the driver temperature, touch the
DUAL button.
F
Note:
the passenger side temperature and the DUAL indication automatically
turn on when you or your passenger adjust the passenger temperature.
Passenger temperature:
Touch up or down to adjust the temperature.
G
Fan speed:
Touch up or down to increase or decrease the volume of air that
circulates in your vehicle.
H
Note:
You cannot adjust the fan speed when the system is set to AUTO or MAX
A/C.
Rear:
A pop up appears on the screen to display the rear control options.
I
Touch the power icon to switch the rear climate control functions off and on.
Touch Rear Climate to allow the rear seat passengers to adjust the rear climate
settings. Touch it again to prevent the rear seat passengers from adjusting the
settings. Rear Control automatically turns off when you use the touchscreen
to adjust the rear climate settings.
Touch + or – to adjust the temperature.
397
Expedition (TB7) Canada/United States of America, enUSA, Edition date: 03/2016, First Printing SYNC™ 3
(If Equipped)
Page 494 of 500
I
Ignition Switch...............................................144
In California (U.S. Only).............................227
Information Display Control......................69
Information Displays......................................91
General Information............................................. 91
Information Messages................................102 4WD Messages...................................................... 111
AdvanceTrac ™ / Traction Control
Messages.......................................................... 103
Alarm Messages................................................. 103
Battery and Charging System Messages.......................................................... 103
Blind Spot Information System Messages.......................................................... 104
Brake System Messages.................................. 104
Door Messages.................................................... 104
Engine Messages................................................ 105
Fuel Messages..................................................... 105
Keys and Intelligent Access Messages.......................................................... 105
Maintenance Messages................................... 106
MyKey ™ Messages............................................ 107
Off Road Messages............................................ 107
Park Aid Messages............................................. 108
Power Steering Messages.............................. 108
Remote Start Messages.................................. 109
Suspension System Messages..................... 109
Tire Messages...................................................... 109
Trailer Messages................................................. 109
Transmission Messages.................................... 110
Installing Child Restraints.............................17 Child Seats............................................................... 17
Combining Seatbelt and LATCH Lower Anchors for Attaching Child Safety
Seats..................................................................... 21
Using Lap and Shoulder Belts ......................... 18
Using Lower Anchors and Tethers for CHildren (LATCH)........................................... 20
Using Tether Straps.............................................. 21
Instrument Cluster
........................................84
Instrument Lighting Dimmer......................75
Interior Lamps..................................................77
Front Row Map and Dome Lamps.................77
Front Row Map Lamps........................................ 77
Rear Cargo Lamp.................................................. 78
Second Row Map Lamps................................... 77Interior Mirror....................................................81
Auto-Dimming Mirror........................................... 81
Introduction.........................................................7
J
Jump Starting the Vehicle.........................223 Connecting the Jumper Cables.................... 223
Jump Starting...................................................... 224
Preparing Your Vehicle..................................... 223
Removing the Jumper Cables....................... 224
K
Keyless Entry
...................................................58
SECURICODE™ KEYLESS ENTRY
KEYPAD.............................................................. 58
Unlocking and Locking the Doors.................. 60
Keyless Starting
............................................144
Ignition Modes..................................................... 145
Keys and Remote Controls
.........................42
Principle of Operation......................................... 42
L
Lighting Control
...............................................73
Headlamp Flasher................................................ 74
High Beams............................................................. 73
Lighting...............................................................73 General Information............................................ 73
Limited Slip Differential
..............................172
Load Carriers See: Roof Racks and Load Carriers..............197
Load Carrying
.................................................196
Load Limit.......................................................198
Special Loading Instructions for Owners of
Pick-up Trucks and Utility-type
Vehicles............................................................ 202
Vehicle Loading - with and without a Trailer................................................................. 198
Locking and Unlocking.................................52 Activating Intelligent Access............................ 52
Autolock................................................................... 53
Auto Relock............................................................ 53
Autounlock............................................................. 54
Battery Saver......................................................... 54
Enabling or Disabling Autolock and Autounlock........................................................ 54
491
Expedition (TB7) Canada/United States of America, enUSA, Edition date: 03/2016, First Printing Index