length FORD EXPEDITION 2023 User Guide
[x] Cancel search | Manufacturer: FORD, Model Year: 2023, Model line: EXPEDITION, Model: FORD EXPEDITION 2023Pages: 658, PDF Size: 16.16 MB
Page 377 of 658
Note:You need to complete at least a 90°turn, and longer trailers could require a 180°turn. Camera trailer tracking requires thesystem to locate the hitch ball as well asdetermine the trailer length. Some trailerscould require you to drive straight then turnmultiple times before calibration completes.The touchscreen provides instructions andnotifies you when calibration completes.
Note:For best results, do not calibrate thesystem at night when calibrating.
SWITCHING TRAILER BACKUP
ASSISTANCE ON AND OFF
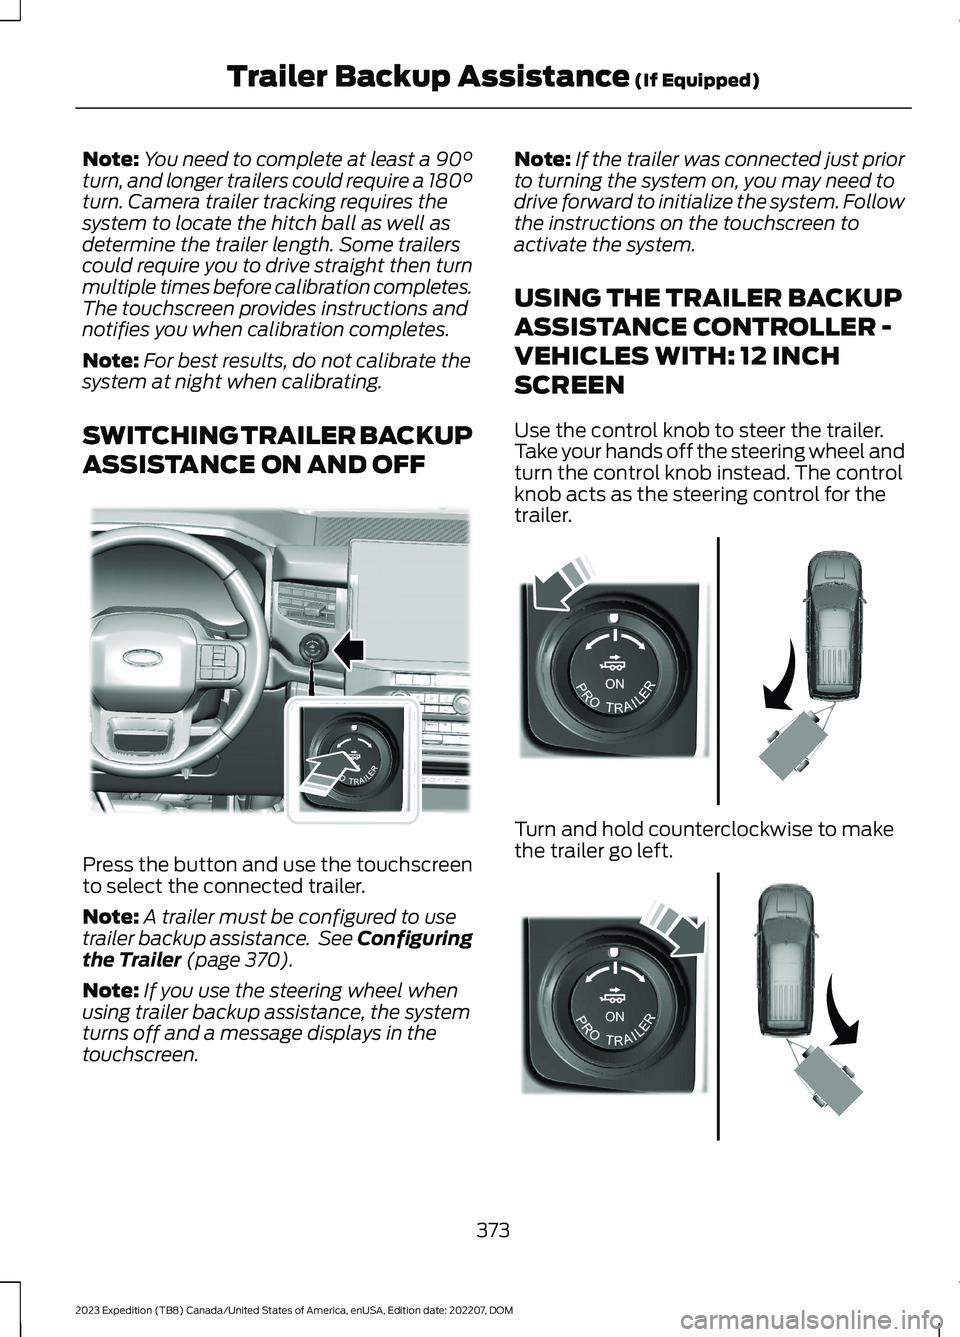
Press the button and use the touchscreento select the connected trailer.
Note:A trailer must be configured to usetrailer backup assistance. See Configuringthe Trailer (page 370).
Note:If you use the steering wheel whenusing trailer backup assistance, the systemturns off and a message displays in thetouchscreen.
Note:If the trailer was connected just priorto turning the system on, you may need todrive forward to initialize the system. Followthe instructions on the touchscreen toactivate the system.
USING THE TRAILER BACKUP
ASSISTANCE CONTROLLER -
VEHICLES WITH: 12 INCH
SCREEN
Use the control knob to steer the trailer.Take your hands off the steering wheel andturn the control knob instead. The controlknob acts as the steering control for thetrailer.
Turn and hold counterclockwise to makethe trailer go left.
373
2023 Expedition (TB8) Canada/United States of America, enUSA, Edition date: 202207, DOMTrailer Backup Assistance (If Equipped)E349261 E349262 E349263
Page 379 of 658
Note:The more you turn the knob, thesharper the trailer turns.
Note:Quickly turning and releasing theknob results in a jerky movement of thevehicle.
Note:You may have to use the knob tocorrect the trailer direction when attemptingto move the trailer straight back under someconditions.
Note:If you want the trailer to turn sharperyou can change the trailer angle limit. SeeUsing the Trailer Backup AssistanceViews (page 376).
USING THE TRAILER BACKUP
ASSISTANCE VIEWS -
VEHICLES WITH: 12 INCH
SCREEN
Up to three camera views could beavailable when using trailer backupassistance. Use the view that helps you themost when reversing your vehicle andtrailer.
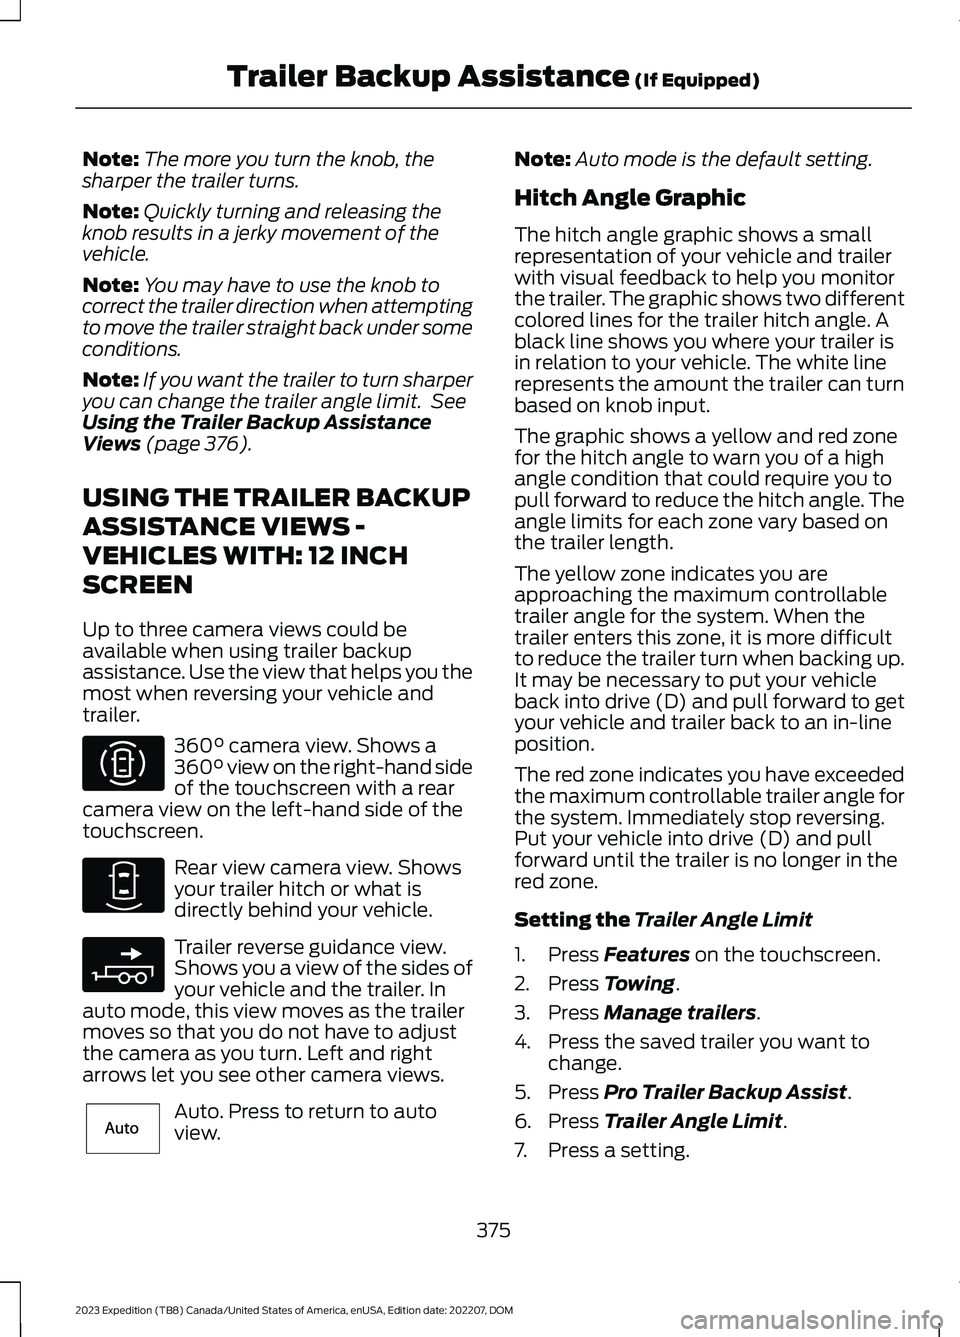
360° camera view. Shows a360° view on the right-hand sideof the touchscreen with a rearcamera view on the left-hand side of thetouchscreen.
Rear view camera view. Showsyour trailer hitch or what isdirectly behind your vehicle.
Trailer reverse guidance view.Shows you a view of the sides ofyour vehicle and the trailer. Inauto mode, this view moves as the trailermoves so that you do not have to adjustthe camera as you turn. Left and rightarrows let you see other camera views.
Auto. Press to return to autoview.
Note:Auto mode is the default setting.
Hitch Angle Graphic
The hitch angle graphic shows a smallrepresentation of your vehicle and trailerwith visual feedback to help you monitorthe trailer. The graphic shows two differentcolored lines for the trailer hitch angle. Ablack line shows you where your trailer isin relation to your vehicle. The white linerepresents the amount the trailer can turnbased on knob input.
The graphic shows a yellow and red zonefor the hitch angle to warn you of a highangle condition that could require you topull forward to reduce the hitch angle. Theangle limits for each zone vary based onthe trailer length.
The yellow zone indicates you areapproaching the maximum controllabletrailer angle for the system. When thetrailer enters this zone, it is more difficultto reduce the trailer turn when backing up.It may be necessary to put your vehicleback into drive (D) and pull forward to getyour vehicle and trailer back to an in-lineposition.
The red zone indicates you have exceededthe maximum controllable trailer angle forthe system. Immediately stop reversing.Put your vehicle into drive (D) and pullforward until the trailer is no longer in thered zone.
Setting the Trailer Angle Limit
1.Press Features on the touchscreen.
2.Press Towing.
3.Press Manage trailers.
4.Press the saved trailer you want tochange.
5.Press Pro Trailer Backup Assist.
6.Press Trailer Angle Limit.
7.Press a setting.
375
2023 Expedition (TB8) Canada/United States of America, enUSA, Edition date: 202207, DOMTrailer Backup Assistance (If Equipped)E310996 E310967 E310965 E315644
Page 380 of 658
Normal Control Angle
Default setting. This provides a balancedlimit that returns from a turn to straightbacking with minimal change to the trailerdirection.
Max Control Angle
Increases the trailer angle limit close to themaximum controllable angle to allowsharper turns but also causes more changein the trailer direction when straighteningout from a turn.
USING THE TRAILER BACKUP
ASSISTANCE VIEWS -
VEHICLES WITH: 15 INCH
SCREEN
Up to three camera views could beavailable when using trailer backupassistance. Use the view that helps you themost when reversing your vehicle andtrailer.
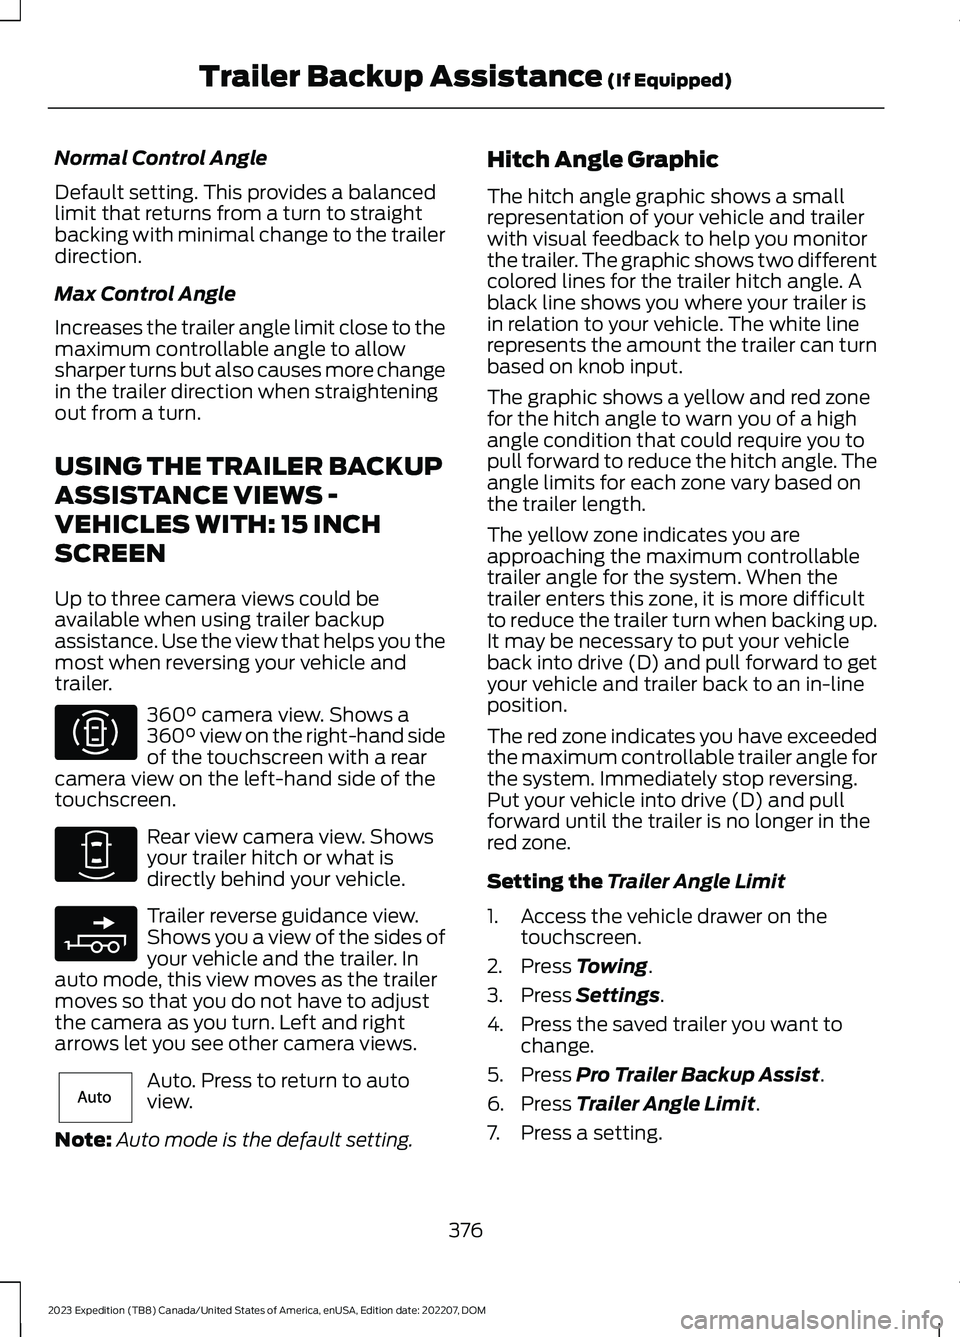
360° camera view. Shows a360° view on the right-hand sideof the touchscreen with a rearcamera view on the left-hand side of thetouchscreen.
Rear view camera view. Showsyour trailer hitch or what isdirectly behind your vehicle.
Trailer reverse guidance view.Shows you a view of the sides ofyour vehicle and the trailer. Inauto mode, this view moves as the trailermoves so that you do not have to adjustthe camera as you turn. Left and rightarrows let you see other camera views.
Auto. Press to return to autoview.
Note:Auto mode is the default setting.
Hitch Angle Graphic
The hitch angle graphic shows a smallrepresentation of your vehicle and trailerwith visual feedback to help you monitorthe trailer. The graphic shows two differentcolored lines for the trailer hitch angle. Ablack line shows you where your trailer isin relation to your vehicle. The white linerepresents the amount the trailer can turnbased on knob input.
The graphic shows a yellow and red zonefor the hitch angle to warn you of a highangle condition that could require you topull forward to reduce the hitch angle. Theangle limits for each zone vary based onthe trailer length.
The yellow zone indicates you areapproaching the maximum controllabletrailer angle for the system. When thetrailer enters this zone, it is more difficultto reduce the trailer turn when backing up.It may be necessary to put your vehicleback into drive (D) and pull forward to getyour vehicle and trailer back to an in-lineposition.
The red zone indicates you have exceededthe maximum controllable trailer angle forthe system. Immediately stop reversing.Put your vehicle into drive (D) and pullforward until the trailer is no longer in thered zone.
Setting the Trailer Angle Limit
1.Access the vehicle drawer on thetouchscreen.
2.Press Towing.
3.Press Settings.
4.Press the saved trailer you want tochange.
5.Press Pro Trailer Backup Assist.
6.Press Trailer Angle Limit.
7.Press a setting.
376
2023 Expedition (TB8) Canada/United States of America, enUSA, Edition date: 202207, DOMTrailer Backup Assistance (If Equipped)E310996 E310967 E310965 E315644
Page 385 of 658
What does it mean if the trailer is at itsmaximum angle or the systemdeactivated by trailer angle?
You are at the maximum controllabletrailer angle for the system. Place yourvehicle in drive (D) and pull forward toget the truck and trailer back to anin-line position. If this messageconsistently displays, this couldindicate the sticker is incorrectlyapplied, the trailer needs to berecalibrated or the drawbar or thetrailer dimensions are outside of thesupported range. The system isdesigned to work with drawbars thathave a license plate to hitch ball centermeasurement of 9–18 in (23–46 cm)when installed. The system is designedto work with trailers that have a hitchpoint to center of the axle or axlesmeasurement of 6–33 ft(1.85–10.05 m). Do not attempt to usedrawbars or trailers that have a lengthoutside of this range as the systemperformance degrades and couldcause improper system function.Check that the correct trailer isselected on the touchscreen. Verifythe sticker is correctly applied andcheck that the drawbar and the trailerdimensions are within the allowedrange. Then, delete the trailer from thesystem and repeat the setup processto calibrate the trailer.
What does it mean when the systemtells you to take control of the steeringwheel?
The system is no longer steering thevehicle and you must take oversteering. There are four reasons thesystem could display this message.The first reason the system coulddisplay this message is that you havetouched the steering wheel when thesystem is steering. The second reasonthe system could display this messageis that you have exceeded themaximum speed for the feature. Thethird reason the system could displaythis message is that the trailer is notdetected. The final reason the systemcould display this message is that aninternal condition for system operationis not met that requires your vehicle toreturn to manual control of thesteering.
What does it mean if the system doesnot detect a trailer?
The system requires a clear view of thesticker placed on the trailer. You mustkeep the camera lens and sticker cleanfor the system to correctly operate. Ifthe system cannot initially detect thetrailer, it could be necessary for you tochange the lighting conditions bymoving your vehicle and trailer orwaiting until the conditions change.See Applying the Trailer ReversingAid Sticker (page 371). Some trailersare not compatible with the stickerand camera system.
Note:The system is designed to be usedwith the same trailer connection every timeyou choose the trailer from the touchscreen.When using a different drawbar or adifferent pinhole on drawbars with morethan one, connecting the drawbar to yourvehicle affects the trailer position and youmay need to repeat the trailer setup andcalibration process.
381
2023 Expedition (TB8) Canada/United States of America, enUSA, Edition date: 202207, DOMTrailer Backup Assistance (If Equipped)
Page 388 of 658
Use the sticker placement card and a tapemeasure to determine the appropriate areato place the sticker. The sticker is in theback cover pocket of your quick start guide.Make sure the entire sticker is within thegreen zone between the two arcs ordistance markers on the diagram, and isalso visible in the rear view camera display.
Once you have found the correct location,place the sticker.
Note:Make sure nothing can obstruct therear view camera's view of the sticker suchas a jack handle or wiring.
Note:Position the sticker on a flat, dry andclean horizontal surface. For best results,apply the sticker when temperatures areabove 32°F (0°C).
Note:Do not move stickers after placingthem. Do not re-use any stickers if removed.
Note:You can purchase additional stickersthrough your authorized dealer.
CALIBRATING THE SYSTEM
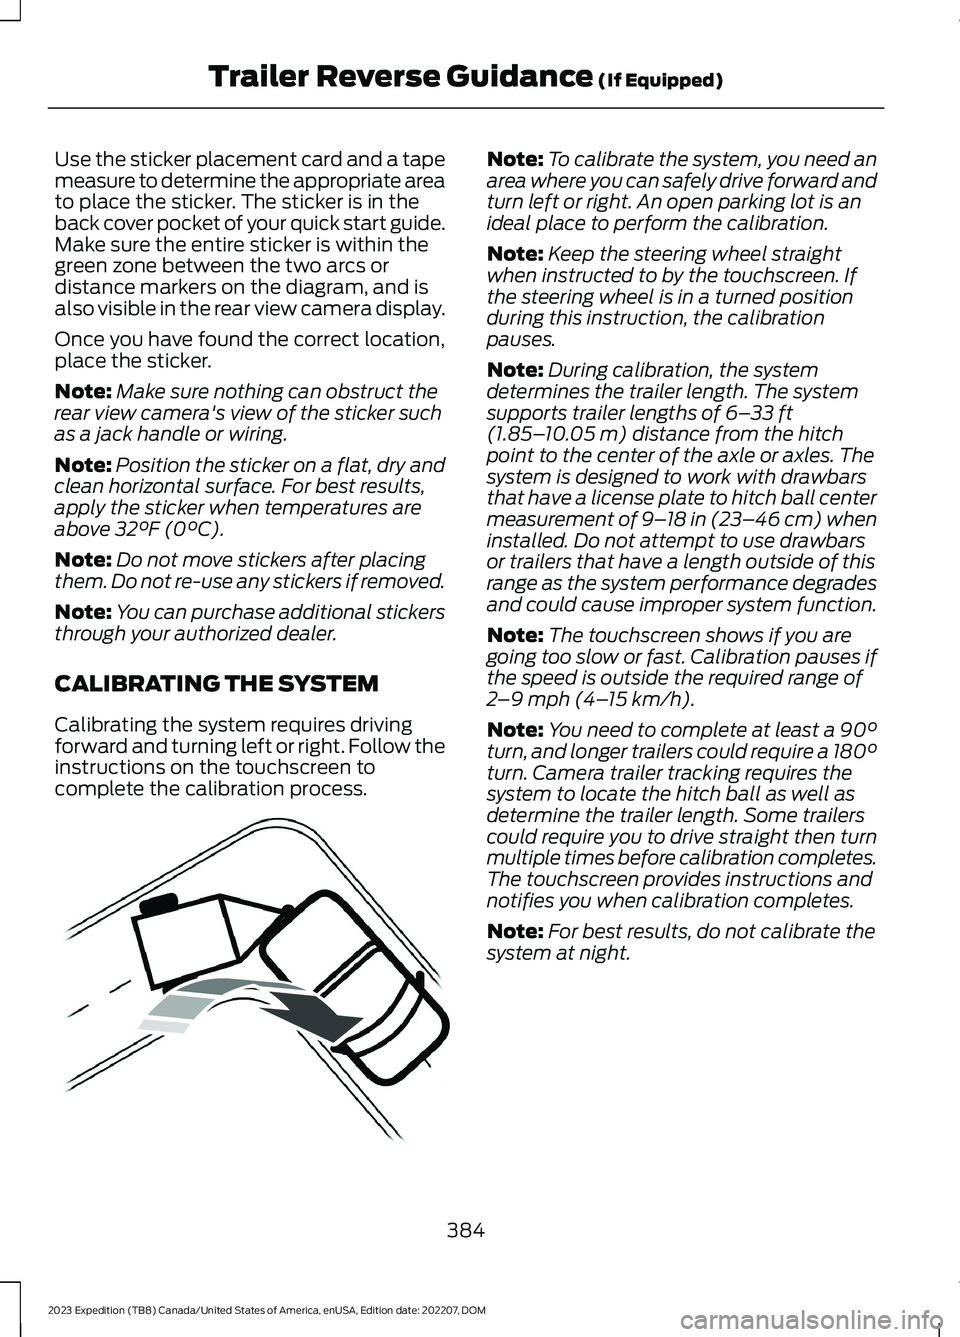
Calibrating the system requires drivingforward and turning left or right. Follow theinstructions on the touchscreen tocomplete the calibration process.
Note:To calibrate the system, you need anarea where you can safely drive forward andturn left or right. An open parking lot is anideal place to perform the calibration.
Note:Keep the steering wheel straightwhen instructed to by the touchscreen. Ifthe steering wheel is in a turned positionduring this instruction, the calibrationpauses.
Note:During calibration, the systemdetermines the trailer length. The systemsupports trailer lengths of 6–33 ft(1.85–10.05 m) distance from the hitchpoint to the center of the axle or axles. Thesystem is designed to work with drawbarsthat have a license plate to hitch ball centermeasurement of 9–18 in (23–46 cm) wheninstalled. Do not attempt to use drawbarsor trailers that have a length outside of thisrange as the system performance degradesand could cause improper system function.
Note:The touchscreen shows if you aregoing too slow or fast. Calibration pauses ifthe speed is outside the required range of2–9 mph (4–15 km/h).
Note:You need to complete at least a 90°turn, and longer trailers could require a 180°turn. Camera trailer tracking requires thesystem to locate the hitch ball as well asdetermine the trailer length. Some trailerscould require you to drive straight then turnmultiple times before calibration completes.The touchscreen provides instructions andnotifies you when calibration completes.
Note:For best results, do not calibrate thesystem at night.
384
2023 Expedition (TB8) Canada/United States of America, enUSA, Edition date: 202207, DOMTrailer Reverse Guidance (If Equipped)E352329
Page 389 of 658
SWITCHING TRAILER
REVERSE GUIDANCE ON AND
OFF
Shift into reverse (R), press the rearcamera button to expand the menu, pressthe trailer icon and use the touchscreen toselect the connected trailer.
Note:If the trailer was connected just priorto turning the system on, you may need todrive forward to initialize the system. Followthe instructions on the touchscreen toactivate the system.
USING TRAILER REVERSE
GUIDANCE VIEWS
Up to three camera views could beavailable when using trailer reverseguidance. Use the view that helps you themost when reversing your vehicle andtrailer.
360° camera view. Shows a360° view on the right-hand sideof the touchscreen with a rearcamera view on the left-hand side of thetouchscreen.
Rear view camera view. Showsyour trailer hitch or what isdirectly behind your vehicle.
Trailer reverse guidance view.Shows you a view of the sides ofyour vehicle and the trailer. Inauto mode, this view moves as the trailermoves so that you do not have to adjustthe camera as you turn. Left and rightarrows let you see other camera views.
Straight backup mode. Showswhich way to turn your steeringwheel to keep the trailer straight.Use this view when you want to keep yourtrailer completely in line with your vehicle.
Note: It may be helpful to shift your vehicleinto drive (D), pull forward and straightenout the vehicle and trailer before engagingstraight backup mode.
This takes you back to the 360°camera system and out of thetrailer reverse guidance feature.
Auto. Press to return to autoview.
Note:Auto mode is the default setting.
Hitch Angle Graphic
The hitch angle graphic shows a smallrepresentation of your vehicle and trailerwith visual feedback to help you monitorthe trailer. The graphic shows two differentcolored lines for the trailer hitch angle. Ablack line shows you where your trailer isin relation to your vehicle. The white linerepresents the amount the trailer can turnbased on steering wheel position.
The graphic shows a yellow and red zonefor the hitch angle to warn you of a highangle condition that could require you topull forward to reduce the hitch angle. Theangle limits for each zone vary based onthe trailer length.
The yellow zone indicates you areapproaching the maximum controllabletrailer angle for the system. When thetrailer enters this zone, it is more difficultto reduce the trailer turn when backing up.It may be necessary to put your vehicleback into drive (D) and pull forward to getyour vehicle and trailer back to an in-lineposition.
The red zone indicates you have exceededthe maximum controllable trailer angle forthe system. Immediately stop reversing.Put your vehicle into drive (D) and pullforward until the trailer is no longer in thered zone.
385
2023 Expedition (TB8) Canada/United States of America, enUSA, Edition date: 202207, DOMTrailer Reverse Guidance (If Equipped)E310996 E310967 E310965 E224484 E224486 E315644
Page 390 of 658
TRAILER REVERSE GUIDANCE – TROUBLESHOOTING
TRAILER REVERSE GUIDANCE – INFORMATION MESSAGES
DescriptionMessage
Displays when the system turns on and isinitializing.Detecting Trailer Please Wait…
A condition exists that prevents the systemfrom turning on. If the message continuesto display, visit your authorized dealer tohave your vehicle checked.
Trailer Reverse Guidance System is NotAvailable
The steering system needs to learn internalparameters to fully enable the feature.Drive your vehicle straight forward above25 mph (40 km/h) for approximately 5minutes.
Trailer Reverse Guidance Driving Requiredto Initialize Steering Press OK to Exit
Displays when you exceed the maximumcontrollable trailer angle for the system.Place your vehicle in drive (D) and pullforward to get your vehicle and trailer backto an in-line position, then activate thesystem by selecting the connected trailerand following the instructions on thetouchscreen.
Stop now. Deactivated by trailer angle.
If this message consistently displays, youmay need to repeat the trailer setup andcalibration. Delete the trailer from thesystem and repeat the setup and calibra-tion process.
Displays when the system does not detectthe trailer. Check that the sticker is correctlyapplied and the trailer length is within theallowed range. You can also move thetrailer forward or backward to change thetrailer position and lighting conditions.
Trailer Reverse Guidance Trailer NotDetected. Refer to Owner's Manual. PressOK to Exit
If these messages continue to display, visityour authorized dealer to have your vehiclechecked.
386
2023 Expedition (TB8) Canada/United States of America, enUSA, Edition date: 202207, DOMTrailer Reverse Guidance (If Equipped)
Page 402 of 658
WARNING: The recovery hook canbecome hot. Let the recovery hook cooldown before removing it. Failure to doso could result in personal injury.
Your vehicle has frame-mounted frontrecovery hooks.
Note:Do not apply a load to the recoveryhooks that is greater than the gross vehicleweight rating of your vehicle.
Before using recovery hooks:
•Make sure all attaching points aresecure and capable of withstandingthe applied load.
•Do not use chains, cables or tow strapswith metal hook ends.
•Only use recovery straps that have aminimum breaking strength two tothree times the gross vehicle weight ofthe stuck vehicle.
•Make sure the recovery strap is in goodcondition and free of visible cuts, tearsor damage.
•Use a damper device such as a tarp,heavy blanket or piece of carpet, andplace it over the recovery strap to helpabsorb the energy in the event thestrap breaks.
•Make sure the stuck vehicle is notloaded heavier than its gross vehicleweight rating specified on thecertification label.
•Align the tow vehicle and stuck vehiclein a straight line, within 10 degrees.
•Keep bystanders to the sides of thevehicle, at a distance of at least twicethe length of the recovery strap. Thishelps avoid injury from the hazard of arecovery hook or strap breaking, or avehicle lurching into their path.
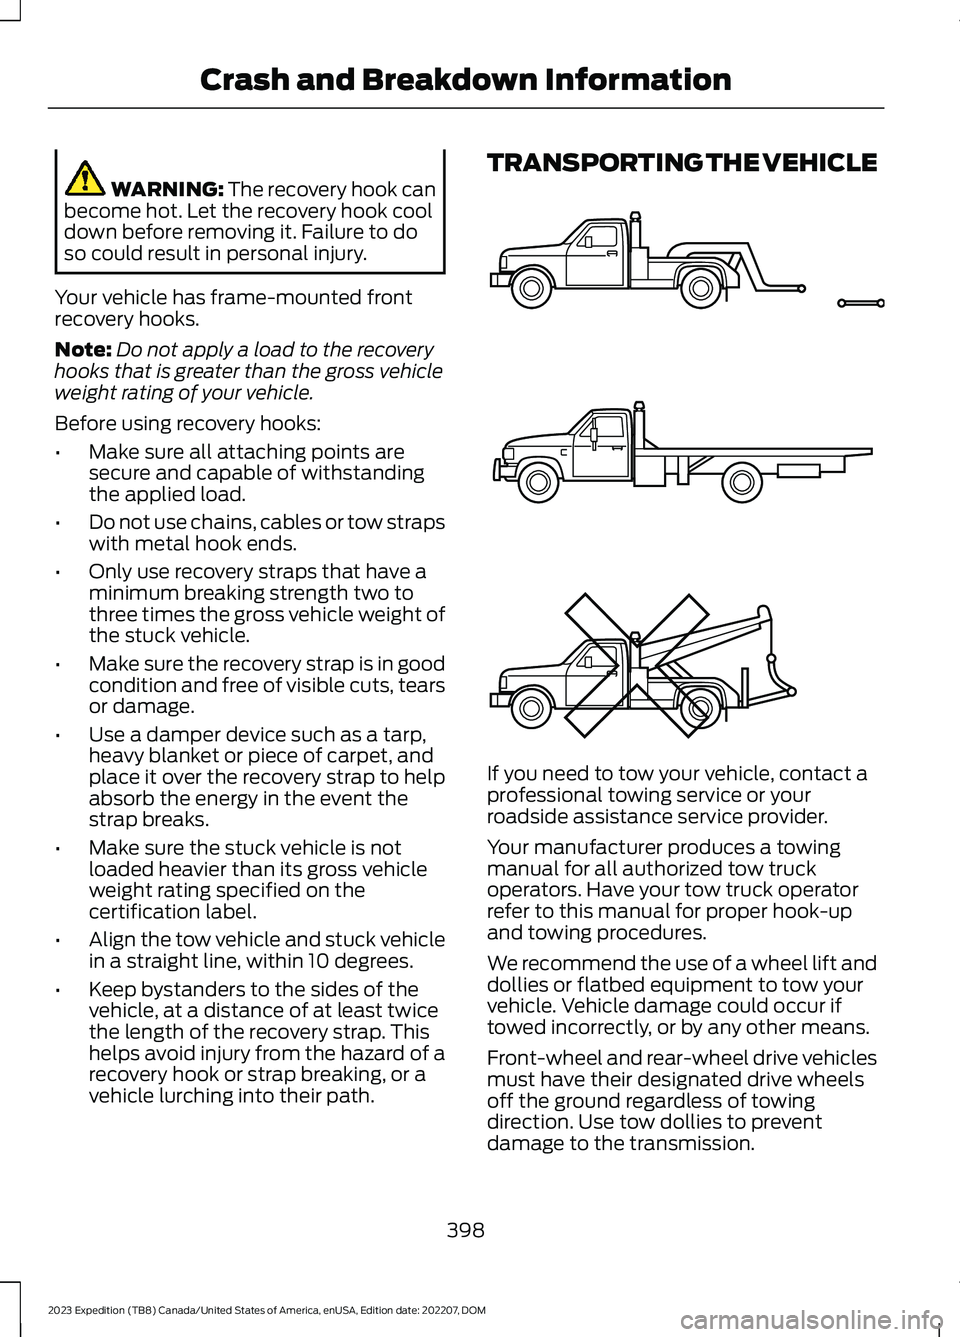
TRANSPORTING THE VEHICLE
If you need to tow your vehicle, contact aprofessional towing service or yourroadside assistance service provider.
Your manufacturer produces a towingmanual for all authorized tow truckoperators. Have your tow truck operatorrefer to this manual for proper hook-upand towing procedures.
We recommend the use of a wheel lift anddollies or flatbed equipment to tow yourvehicle. Vehicle damage could occur iftowed incorrectly, or by any other means.
Front-wheel and rear-wheel drive vehiclesmust have their designated drive wheelsoff the ground regardless of towingdirection. Use tow dollies to preventdamage to the transmission.
398
2023 Expedition (TB8) Canada/United States of America, enUSA, Edition date: 202207, DOMCrash and Breakdown InformationE143886
Page 553 of 658
BBB AUTO LINE Application: Using theinformation that follows, call or write torequest a program application. You will beasked for your name and address, generalinformation about your new vehicle,information about your warranty concerns,and any steps you have already taken totry to resolve them. A Customer ClaimForm will be mailed that needs to becompleted, signed and returned to the BBBalong with proof of ownership. Uponreceipt, the BBB reviews the claim foreligibility under the Program SummaryGuidelines.
You can get more information bycalling BBB AUTO LINE at1-800-955-5100, or writing to:
BBB AUTO LINE a Division of BBBNational Programs, Inc.1676 International Drive, Suite 550McLean, VA 22102
BBB AUTO LINE applications can also berequested by calling the Ford MotorCompany Customer Relationship Centerat 1-800-392-3673.
For additional information, refer to theBetter Business Bureau website.
Note:Ford Motor Company reserves theright to change eligibility limitations, modifyprocedures, or to discontinue this processat any time without notice and withoutobligation.
THE MEDIATION AND
ARBITRATION PROGRAM -
CANADA
For vehicles delivered to authorizedCanadian dealers. In those cases whereyou continue to feel that the efforts by Fordof Canada and the authorized dealer toresolve a factory-related vehicle serviceconcern have been unsatisfactory, Ford ofCanada participates in an impartial thirdparty mediation/arbitration programadministered by the Canadian MotorVehicle Arbitration Plan (CAMVAP).
The CAMVAP program is a straightforwardand relatively speedy alternative to resolvea disagreement when all other efforts toproduce a settlement have failed. Thisprocedure is without cost to you and isdesigned to eliminate the need for lengthyand expensive legal proceedings.
In the CAMVAP program, impartialthird-party arbitrators conduct hearings atmutually convenient times and places inan informal environment. These impartialarbitrators review the positions of theparties, make decisions and, whenappropriate, render awards to resolvedisputes. CAMVAP decisions are fast, fair,and final as the arbitrator’s award isbinding on both you and Ford of Canada.
CAMVAP services are available in allCanadian territories and provinces. Formore information, without charge orobligation, call your CAMVAP ProvincialAdministrator directly at 1-800-207-0685or visit www.camvap.ca.
ORDERING A CANADIAN
FRENCH OWNER'S MANUAL
You can obtain a French owner's manualfrom an authorized dealer or by contactingHelm, LLC at:
549
2023 Expedition (TB8) Canada/United States of America, enUSA, Edition date: 202207, DOMCustomer Information
Page 636 of 658
Blind Spot Information System.............320Blind Spot Information System –Troubleshooting............................................324Blind Spot Information System With TrailerCoverage...........................................................322Blind Spot Information SystemIndicators.....................................................323Blind Spot Information SystemLimitations..................................................320Blind Spot Information SystemPrecautions.................................................320Blind Spot Information SystemRequirements............................................320Blind Spot Information System –Troubleshooting........................................324Blind Spot Information System –Information Messages................................324Blind Spot Information System WithTrailer Coverage.........................................322Blind Spot Information System With TrailerCoverage Limitations...................................322Selecting a Trailer..............................................323Setting a Trailer Length....................................322What Is Blind Spot Information System withTrailer Coverage.............................................322BlueCruise Alerts.........................................300BlueCruise AutomaticCancellation...............................................300BlueCruise.......................................................297BlueCruise – Troubleshooting.......................301BlueCruise Indicators................................300BlueCruise Limitations..............................298BlueCruise Precautions.............................297BlueCruise Requirements........................298BlueCruise Settings....................................299BlueCruise – Troubleshooting.................301BlueCruise – Information Messages...........301Bluetooth®....................................................520Body Control Module Fuse Box.............408Accessing the Body Control Module FuseBox.....................................................................408Identifying the Fuses in the Body ControlModule Fuse Box..........................................408Locating the Body Control Module FuseBox.....................................................................408Bonnet LockSee: Opening and Closing the Hood...........412Booster Seats..................................................45
Brake Fluid Specification..........................230Brake Over Accelerator..............................229Brake Precautions.......................................229Brakes..............................................................229Anti-Lock Braking System..............................229Brakes – Troubleshooting..............................230Brakes – Troubleshooting........................230Brakes – Frequently Asked Questions........231Brakes – Warning Lamps...............................230Breaking-In....................................................389
C
Calculating Payload....................................347Calculating the Load Limit.......................347Canceling the Set Speed..........................250Capacities and Specifications................463Catalytic Converter.......................................212Catalytic Converter –Troubleshooting.............................................212Catalytic Converter Precautions.............212Catalytic Converter –Troubleshooting.........................................212Catalytic Converter – WarningLamps.................................................................212Center Console...............................................191Locking the Center Console.............................191Opening the Center Console...........................191Center Display Limitations......................499Center Display Overview..........................499Center Display Precautions.....................499Changing a Flat Tire...................................456Changing a Road Wheel...........................456Changing the 12V Battery.........................420Changing the Fuel Filter.............................419Changing the Language.............................142Changing the Measurement Unit...........142Changing the Remote Control Battery -Vehicles With: Flip Key..............................69Changing the Remote Control Battery -Vehicles With: Push Button Start..........70Changing the Temperature Unit.............142Changing the Tire Pressure Unit.............142Changing the Vehicle Wi-Fi HotspotName or Password - Vehicles With: 12Inch Screen.................................................479
632
2023 Expedition (TB8) Canada/United States of America, enUSA, Edition date: 202207, DOMIndex