FORD EXPEDITION EL 2016 Owners Manual
Manufacturer: FORD, Model Year: 2016, Model line: EXPEDITION EL, Model: FORD EXPEDITION EL 2016Pages: 421, PDF Size: 7.39 MB
Page 251 of 421
3. Refill with engine coolant as soon aspossible.
Water alone, without engine coolant, cancause engine damage from corrosion,overheating or freezing.
Do not use the following as a coolantsubstitute:
•Alcohol.
•Methanol.
•Brine.
•Any engine coolant mixed with alcoholor methanol antifreeze or coolant.
Alcohol and other liquids can cause enginedamage from overheating or freezing.
Do not add extra inhibitors or additives tothe coolant. These can be harmful andcompromise the corrosion protection ofthe engine coolant.
When adding coolant:
1. Unscrew the cap slowly. Any pressurewill escape as you unscrew the cap.
2.Add prediluted engine coolant meetingthe correct specification. SeeCapacities and Specifications (page303).
3. Check the coolant level in the coolantreservoir the next few times you driveyour vehicle.
4. If necessary, add enough predilutedengine coolant to bring the coolantlevel to the proper level.
Recycled Engine Coolant
We do not recommend the use of recycledengine coolant as an approved recyclingprocess is not yet available.
Used engine coolant should be disposedof in an appropriate manner. Follow yourcommunity’s regulations and standardsfor recycling and disposing of automotivefluids.
Severe Climates
If you drive in extremely cold climates:
•It may be necessary to have anauthorized dealer increase the coolantconcentration above 50%.
•A coolant concentration of 60%provides improved freeze pointprotection. Engine coolantconcentrations above 60% decreasethe overheat protection characteristicsof the engine coolant and may causeengine damage.
If you drive in extremely hot climates:
•It may be necessary to have anauthorized dealer decrease the coolantconcentration to 40%.
•A coolant concentration of 40%provides improved overheat protection.Engine coolant concentrations below40% decrease the freeze and corrosionprotection characteristics of the enginecoolant and may cause enginedamage.
Vehicles driven year-round in non-extremeclimates should use prediluted enginecoolant for optimum cooling system andengine protection.
What You Should Know About Fail-Safe Cooling
If you deplete the engine coolant supply,fail-safe cooling allows you to temporarilydrive your vehicle before you incurincremental component damage. Thefail-safe distance depends on ambienttemperatures, vehicle load and terrain.
How Fail-Safe Cooling Works
If the engine begins to overheat, the enginecoolant temperature gauge will move tothe red (hot) area and:
the coolant temperature warninglight will illuminate
248
Expedition (TB7) Canada/United States of America, enUSA, First Printing
Maintenance
Page 252 of 421
the service engine soon indicatorwill illuminate.
If the engine reaches a presetover-temperature condition, the engineautomatically switches to alternatingcylinder operation. Each disabled cylinderacts as an air pump and cools the engine.
When this occurs, your vehicle will stilloperate. However:
•The engine power will be limited.
•This will disable the air conditioningsystem.
Continued operation increases the enginetemperature, causing the engine tocompletely shut down. Your steering andbraking effort increases in this situation.
When the engine temperature cools, youcan re-start your engine. Take your vehicleto an authorized dealer as soon as possibleto minimize engine damage.
When Fail-Safe Mode Is Activated
WARNINGS
Fail-safe mode is for use duringemergencies only. Operate yourvehicle in fail-safe mode only as longas necessary to bring your vehicle to restin a safe location and seek immediaterepairs. When in fail-safe mode, yourvehicle will have limited power, will not beable to maintain high-speed operation, andmay completely shut down withoutwarning, potentially losing engine power,power steering assist, and power brakeassist, which may increase the possibilityof a crash resulting in serious injury.
Never remove the coolant reservoircap while the engine is running or hot.
You have limited engine power when in thefail-safe mode, so drive your vehicle withcaution. Your vehicle will not maintainhigh-speed operation and the engine willoperate poorly.
Remember that the engine is capable ofautomatically shutting down to preventengine damage. In this situation:
1. Pull off the road as soon as safelypossible and switch off the engine.
2. Tow your vehicle to an authorizeddealer.
3. If this is not possible, wait a shortperiod for the engine to cool.
4.Check the coolant level and add if low.
5. Re-start the engine and drive yourvehicle to an authorized dealer.
Note:Driving your vehicle without repairincreases the chance of engine damage.Contact an authorized dealer as soon aspossible.
Engine Fluid TemperatureManagement (If Equipped)
WARNINGS
To reduce the risk of crash and injury,be prepared that the vehicle speedmay reduce and the vehicle may notbe able to accelerate with full power untilthe fluid temperatures reduce.
Never remove the coolant reservoircap while the engine is running or hot.
Your vehicle can pull a trailer, but becauseof the added load, your vehicle’s enginemay temporarily reach highertemperatures during severe operatingconditions such as ascending a long orsteep grade while pulling a trailer in hightemperatures.
249
Expedition (TB7) Canada/United States of America, enUSA, First Printing
Maintenance
Page 253 of 421
At this time, you may notice your enginecoolant temperature gauge needle movetoward the H and the POWER REDUCEDTO LOWER TEMP message may appearin the information display.
You may notice a reduction in vehiclespeed caused by reduced engine power.In order to manage the engine fluidtemperatures, your vehicle may enter thismode if certain high-temperature andhigh-load conditions take place. Theamount of speed reduction depends onmany factors such as vehicle loading,towing, grade and ambient temperature.If this occurs, there is no need to pull offthe road. You can continue to drive yourvehicle while this message is active.
The air conditioning may also cycle on andoff during severe operating conditions toprotect overheating of the engine. Whenthe engine coolant temperature decreasesto a normal operating temperature, the airconditioning will turn on once again.
If the engine coolant temperature gaugemoves fully into the red (hot) area, or if thecoolant temperature warning or serviceengine soon messages appear in yourinformation display:
1. Pull off the road as soon as safelypossible and shift the transmission intoP.
2. Leave the engine running until thecoolant temperature gauge needlemoves away from the red (hot) area.After several minutes, if thetemperature does not drop, follow theremaining steps.
3.Switch the engine off and wait for it tocool before checking the coolant level.
4. If the coolant level is normal, restartyour engine and continue.
5. If the coolant is low, add coolant, andrestart the engine. See Adding EngineCoolant or How Fail-Safe CoolingWorks in this chapter for moreinformation.
AUTOMATIC TRANSMISSION
FLUID CHECK
If required, have an authorized dealer checkand change the transmission fluid at thecorrect service interval. See ScheduledMaintenance (page 372).
The automatic transmission does not havea transmission fluid dipstick.
Refer to your scheduled maintenanceinformation for scheduled intervals for fluidchecks and changes. Your transmissiondoes not consume fluid. However, if thetransmission slips, shifts slowly or if younotice a sign of leaking fluid, contact anauthorized dealer.
Do not use supplemental transmissionfluid additives, treatments or cleaningagents. The use of these materials mayaffect transmission operation and resultin damage to internal transmissioncomponents.
250
Expedition (TB7) Canada/United States of America, enUSA, First Printing
Maintenance
Page 254 of 421
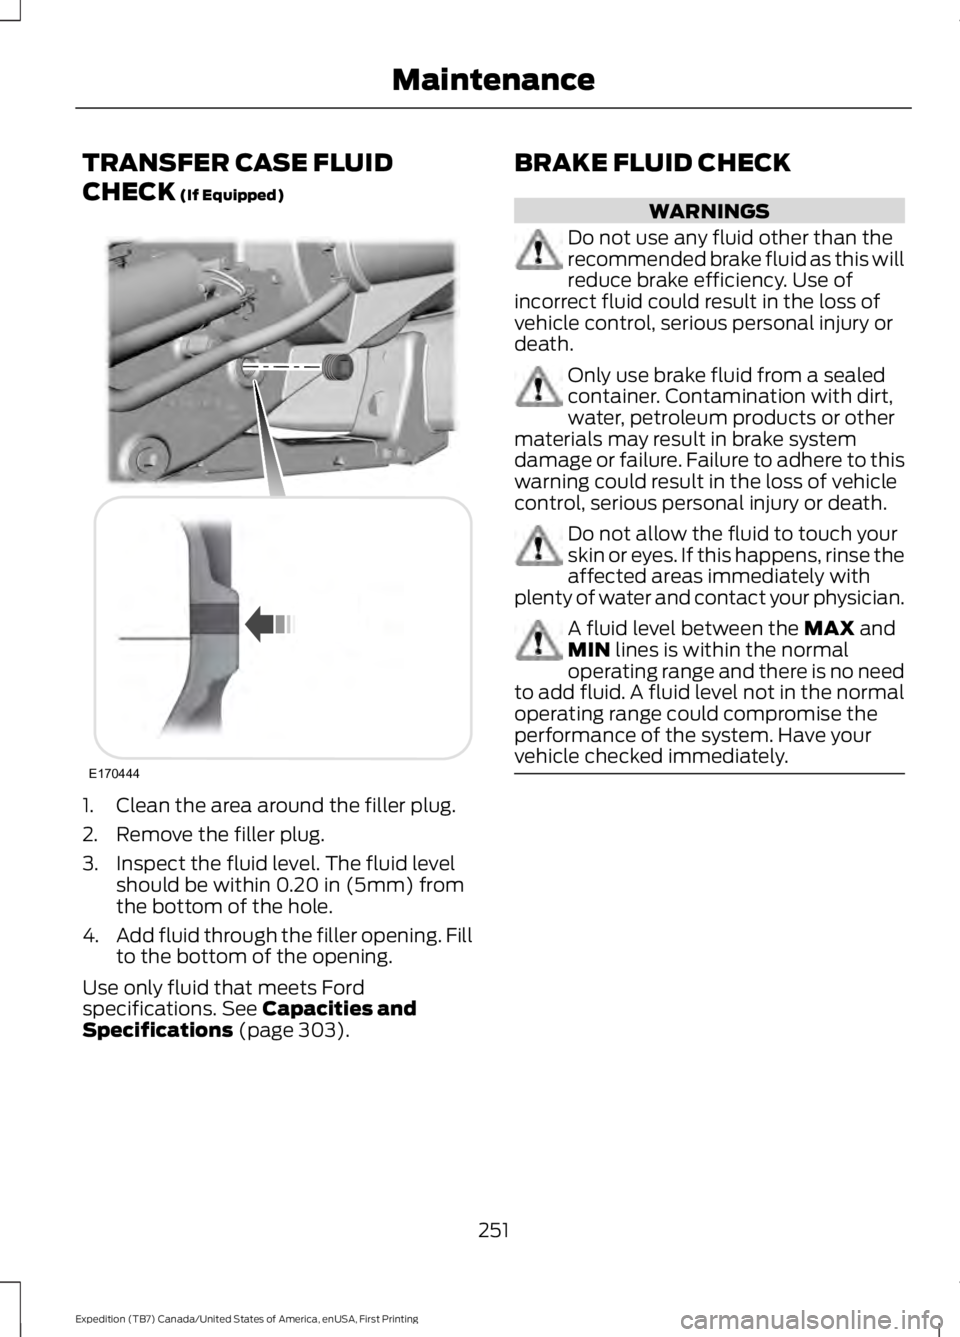
TRANSFER CASE FLUID
CHECK (If Equipped)
1. Clean the area around the filler plug.
2. Remove the filler plug.
3. Inspect the fluid level. The fluid levelshould be within 0.20 in (5mm) fromthe bottom of the hole.
4.Add fluid through the filler opening. Fillto the bottom of the opening.
Use only fluid that meets Fordspecifications. See Capacities andSpecifications (page 303).
BRAKE FLUID CHECK
WARNINGS
Do not use any fluid other than therecommended brake fluid as this willreduce brake efficiency. Use ofincorrect fluid could result in the loss ofvehicle control, serious personal injury ordeath.
Only use brake fluid from a sealedcontainer. Contamination with dirt,water, petroleum products or othermaterials may result in brake systemdamage or failure. Failure to adhere to thiswarning could result in the loss of vehiclecontrol, serious personal injury or death.
Do not allow the fluid to touch yourskin or eyes. If this happens, rinse theaffected areas immediately withplenty of water and contact your physician.
A fluid level between the MAX andMIN lines is within the normaloperating range and there is no needto add fluid. A fluid level not in the normaloperating range could compromise theperformance of the system. Have yourvehicle checked immediately.
251
Expedition (TB7) Canada/United States of America, enUSA, First Printing
MaintenanceE170444
Page 255 of 421
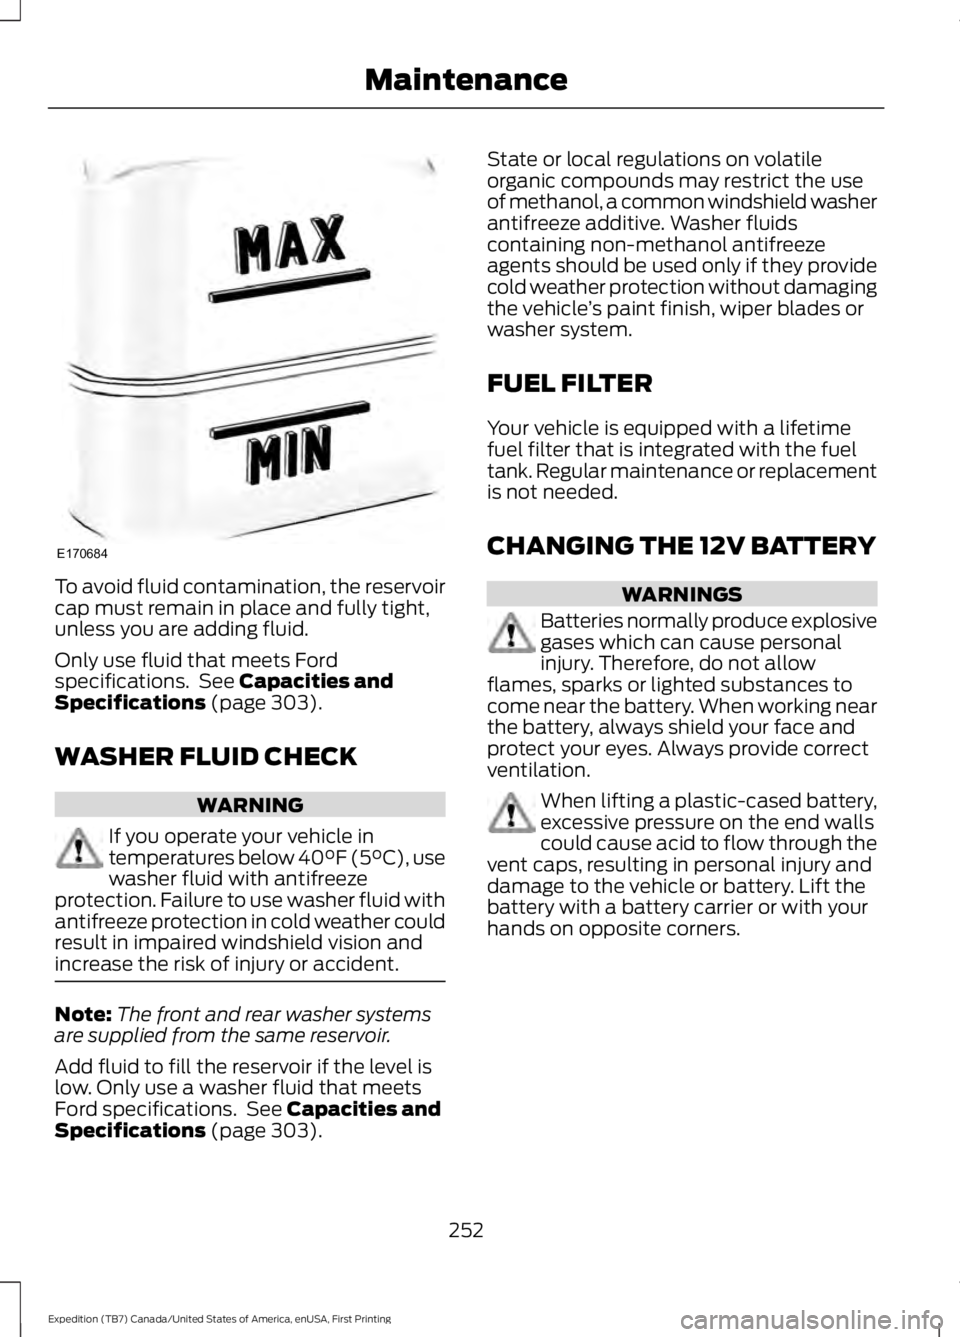
To avoid fluid contamination, the reservoircap must remain in place and fully tight,unless you are adding fluid.
Only use fluid that meets Fordspecifications. See Capacities andSpecifications (page 303).
WASHER FLUID CHECK
WARNING
If you operate your vehicle intemperatures below 40°F (5°C), usewasher fluid with antifreezeprotection. Failure to use washer fluid withantifreeze protection in cold weather couldresult in impaired windshield vision andincrease the risk of injury or accident.
Note:The front and rear washer systemsare supplied from the same reservoir.
Add fluid to fill the reservoir if the level islow. Only use a washer fluid that meetsFord specifications. See Capacities andSpecifications (page 303).
State or local regulations on volatileorganic compounds may restrict the useof methanol, a common windshield washerantifreeze additive. Washer fluidscontaining non-methanol antifreezeagents should be used only if they providecold weather protection without damagingthe vehicle’s paint finish, wiper blades orwasher system.
FUEL FILTER
Your vehicle is equipped with a lifetimefuel filter that is integrated with the fueltank. Regular maintenance or replacementis not needed.
CHANGING THE 12V BATTERY
WARNINGS
Batteries normally produce explosivegases which can cause personalinjury. Therefore, do not allowflames, sparks or lighted substances tocome near the battery. When working nearthe battery, always shield your face andprotect your eyes. Always provide correctventilation.
When lifting a plastic-cased battery,excessive pressure on the end wallscould cause acid to flow through thevent caps, resulting in personal injury anddamage to the vehicle or battery. Lift thebattery with a battery carrier or with yourhands on opposite corners.
252
Expedition (TB7) Canada/United States of America, enUSA, First Printing
MaintenanceE170684
Page 256 of 421
WARNINGS
Keep batteries out of reach ofchildren. Batteries contain sulfuricacid. Avoid contact with skin, eyes orclothing. Shield your eyes when workingnear the battery to protect against possiblesplashing of acid solution. In case of acidcontact with skin or eyes, flushimmediately with water for a minimum of15 minutes and get prompt medicalattention. If acid is swallowed, call aphysician immediately.
Battery posts, terminals and relatedaccessories contain lead and leadcompounds. Wash hands afterhandling.
This vehicle may be fitted with morethan one battery. Removing thebattery cables from only one batterydoes not disconnect your vehicle electricalsystem. Make sure you disconnect thebattery cables from all batteries whendisconnecting power. Failure to do so maycause serious personal injury or propertydamage.
Your vehicle is fitted with a Motorcraftmaintenance-free battery which normallydoes not require additional water.
When a battery replacement is required,you must use a recommendedreplacement battery that matches theelectrical requirements of the vehicle.
Note:After cleaning or replacing thebattery, make sure you reinstall the batterycover or shield.
Note:If you add electrical accessories orcomponents to the vehicle, it may adverselyaffect the low voltage battery performanceand durability. This may also affect theperformance of other electrical systems inthe vehicle.
For longer, trouble-free operation, keep thetop of the battery clean and dry.
If you see any corrosion on the battery orterminals, remove the cables from theterminals and clean with a wire brush. Youcan neutralize the acid with a solution ofbaking soda and water.
Because your vehicle’s engine iselectronically controlled by a computer,some control conditions are maintainedby power from the battery. When thebattery is disconnected or a new batteryis installed, the engine must relearn its idleand fuel trim strategy for optimumdriveability and performance. Flexible fuelvehicles (FFV) must also relearn theethanol content of the fuel for optimumdriveability and performance.
To restore the settings, do the following:
1. Apply the parking brake.
2. Shift into park (P) or neutral (N).
3. Switch off all accessories.
4. Press the brake pedal and start yourvehicle.
5. Run the engine until it reaches normaloperating temperature. While theengine is warming up, complete thefollowing: Reset the clock. See AudioSystem (page 312). Reset the powerwindows bounce-back feature. SeeWindows and Mirrors (page 80).Reset the radio station presets. SeeAudio System (page 312).
6.Allow the engine to idle for at least oneminute.
7.Drive the vehicle at least 10 mi (16 km)to completely relearn the idle trim andfuel trim strategy.
Note:If you do not allow the engine torelearn the idle and fuel trim strategy, theidle quality of your vehicle may be adverselyaffected until the engine computereventually relearns the idle trim and fueltrim strategy.
253
Expedition (TB7) Canada/United States of America, enUSA, First Printing
Maintenance
Page 257 of 421
Note:For flexible fuel vehicles, if you areoperating on E85, you may experience poorstarts or an inability to start the engine anddriveability problems until the fuel trim andethanol content have been relearned.
Make sure that you dispose of old batteriesin an environmentally friendly way. Seekadvice from your local authority aboutrecycling old batteries.
If storing your vehicle for more than 30days without recharging the battery, werecommend that you disconnect thebattery cables to maintain battery chargefor quick starting.
Battery Management System (If
Equipped)
The battery management system monitorsbattery conditions and takes actions toextend battery life. If excessive batterydrain is detected, the system temporarilydisables some electrical systems toprotect the battery.
Systems included are:
•Heated rear window.
•Heated seats.
•Climate control.
•Heated steering wheel.
•Audio unit.
•Navigation system.
A message may appear in the informationdisplays to alert you that batteryprotection actions are active. Thesemessages are only for notification that anaction is taking place, and not intended toindicate an electrical problem or that thebattery requires replacement.
After battery replacement, or in somecases after charging the battery with anexternal charger, the battery managementsystem requires eight hours of vehicle sleeptime to relearn the battery state of charge.During this time your vehicle must remainfully locked with the ignition switched off.
Note:Prior to relearning the battery stateof charge, the battery management systemmay temporarily disable some electricalsystems.
Electrical Accessory Installation
To make sure the battery managementsystem works correctly, do not connect anelectrical device ground connectiondirectly to the battery negative post. Thiscan cause inaccurate measurements ofthe battery condition and potentialincorrect system operation.
Note:If you add electrical accessories orcomponents to the vehicle, it may adverselyaffect battery performance and durability.This may also affect the performance ofother electrical systems in the vehicle.
CHECKING THE WIPER
BLADES
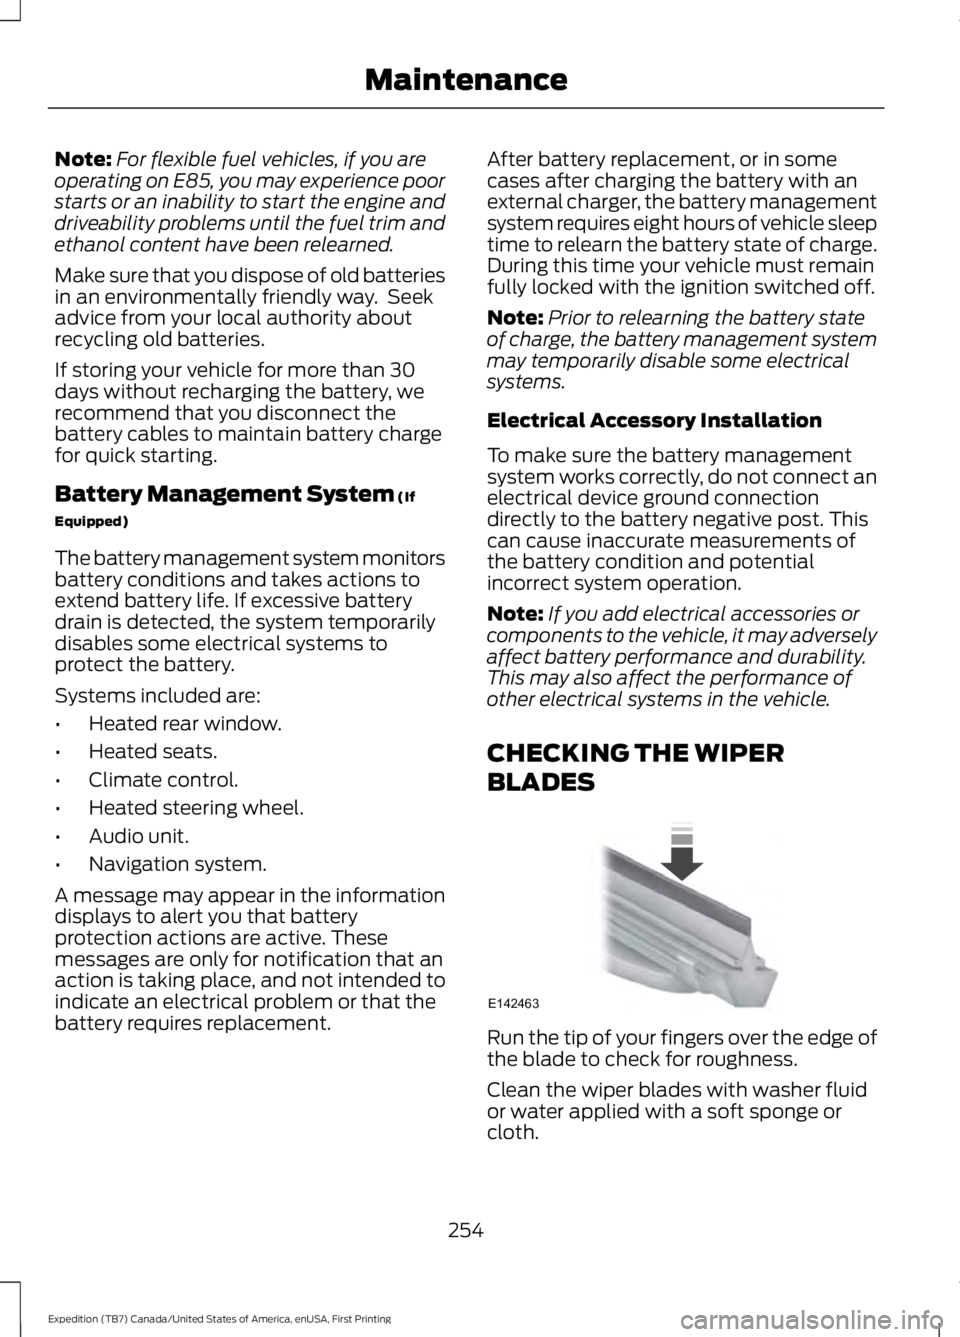
Run the tip of your fingers over the edge ofthe blade to check for roughness.
Clean the wiper blades with washer fluidor water applied with a soft sponge orcloth.
254
Expedition (TB7) Canada/United States of America, enUSA, First Printing
MaintenanceE142463
Page 258 of 421
CHANGING THE WIPER
BLADES
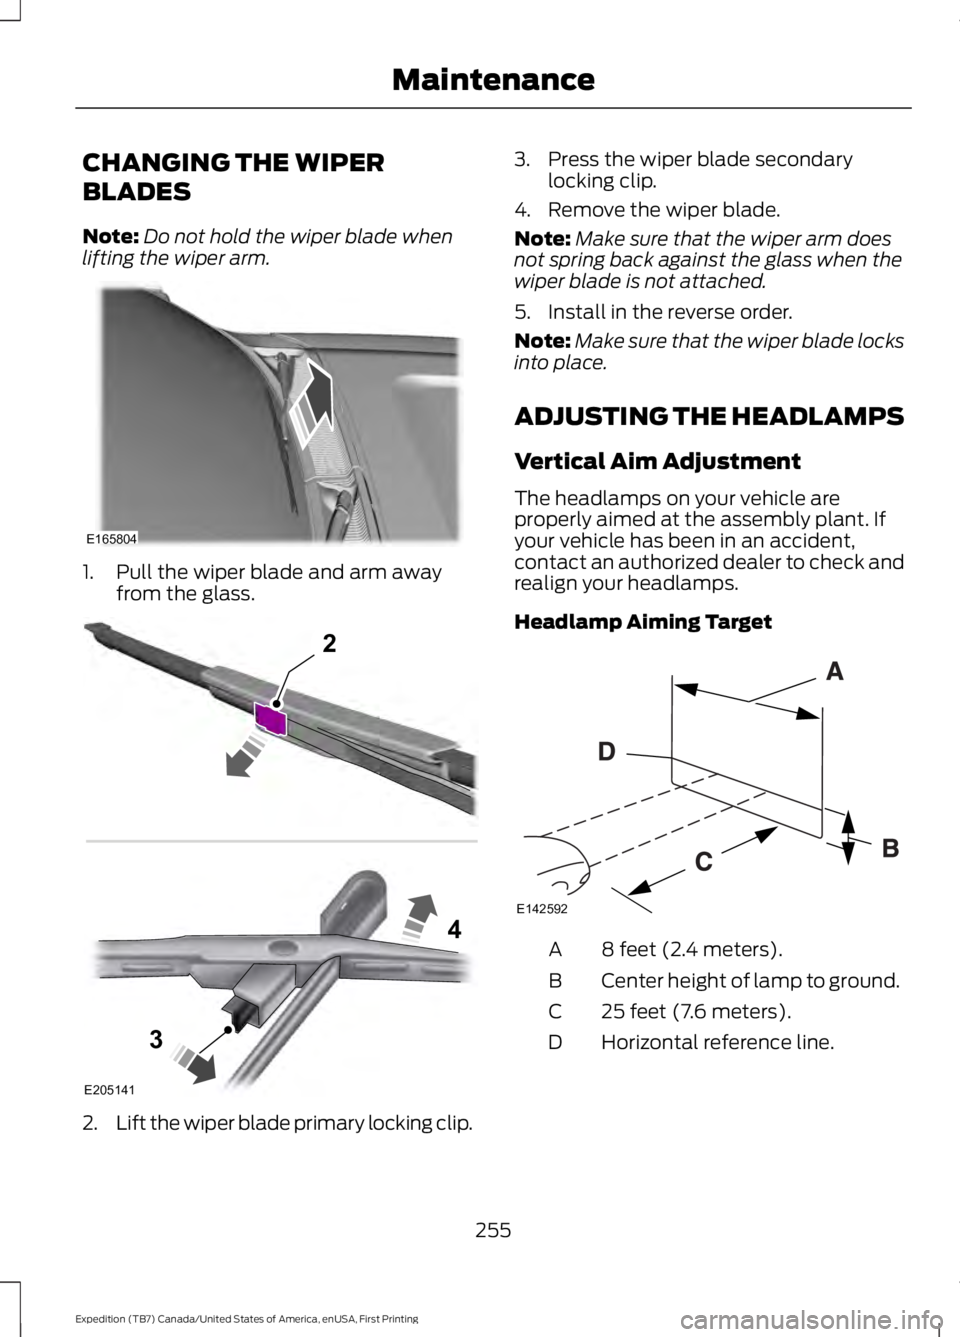
Note:Do not hold the wiper blade whenlifting the wiper arm.
1. Pull the wiper blade and arm awayfrom the glass.
2.Lift the wiper blade primary locking clip.
3. Press the wiper blade secondarylocking clip.
4. Remove the wiper blade.
Note:Make sure that the wiper arm doesnot spring back against the glass when thewiper blade is not attached.
5. Install in the reverse order.
Note:Make sure that the wiper blade locksinto place.
ADJUSTING THE HEADLAMPS
Vertical Aim Adjustment
The headlamps on your vehicle areproperly aimed at the assembly plant. Ifyour vehicle has been in an accident,contact an authorized dealer to check andrealign your headlamps.
Headlamp Aiming Target
8 feet (2.4 meters).A
Center height of lamp to ground.B
25 feet (7.6 meters).C
Horizontal reference line.D
255
Expedition (TB7) Canada/United States of America, enUSA, First Printing
MaintenanceE165804 E205141
2
3
4 E142592
Page 259 of 421
Vertical Aim Adjustment
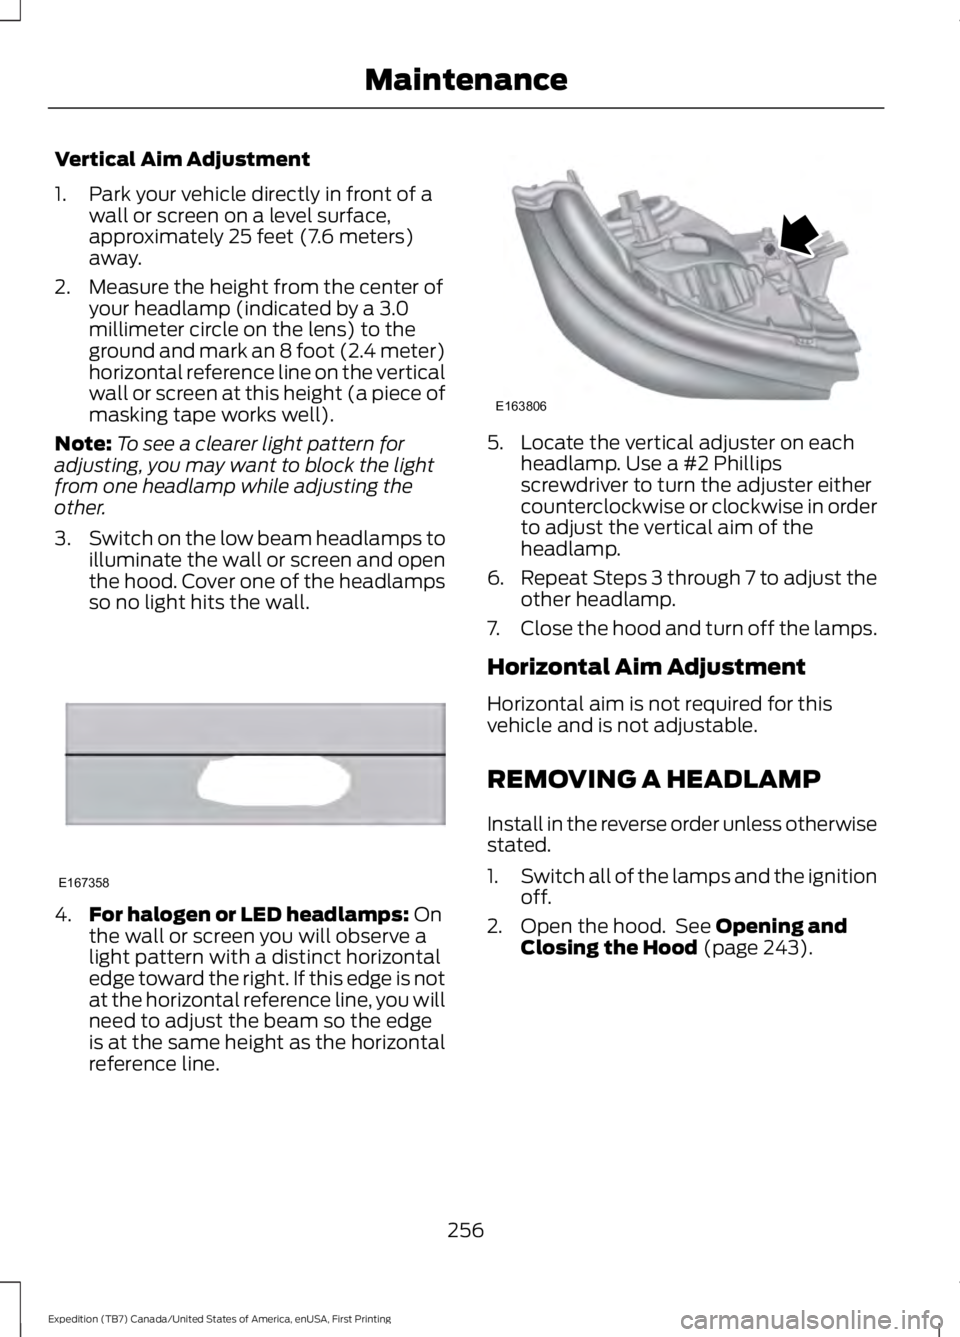
1. Park your vehicle directly in front of awall or screen on a level surface,approximately 25 feet (7.6 meters)away.
2. Measure the height from the center ofyour headlamp (indicated by a 3.0millimeter circle on the lens) to theground and mark an 8 foot (2.4 meter)horizontal reference line on the verticalwall or screen at this height (a piece ofmasking tape works well).
Note:To see a clearer light pattern foradjusting, you may want to block the lightfrom one headlamp while adjusting theother.
3.Switch on the low beam headlamps toilluminate the wall or screen and openthe hood. Cover one of the headlampsso no light hits the wall.
4.For halogen or LED headlamps: Onthe wall or screen you will observe alight pattern with a distinct horizontaledge toward the right. If this edge is notat the horizontal reference line, you willneed to adjust the beam so the edgeis at the same height as the horizontalreference line.
5. Locate the vertical adjuster on eachheadlamp. Use a #2 Phillipsscrewdriver to turn the adjuster eithercounterclockwise or clockwise in orderto adjust the vertical aim of theheadlamp.
6.Repeat Steps 3 through 7 to adjust theother headlamp.
7.Close the hood and turn off the lamps.
Horizontal Aim Adjustment
Horizontal aim is not required for thisvehicle and is not adjustable.
REMOVING A HEADLAMP
Install in the reverse order unless otherwisestated.
1.Switch all of the lamps and the ignitionoff.
2. Open the hood. See Opening andClosing the Hood (page 243).
256
Expedition (TB7) Canada/United States of America, enUSA, First Printing
MaintenanceE167358 E163806
Page 260 of 421
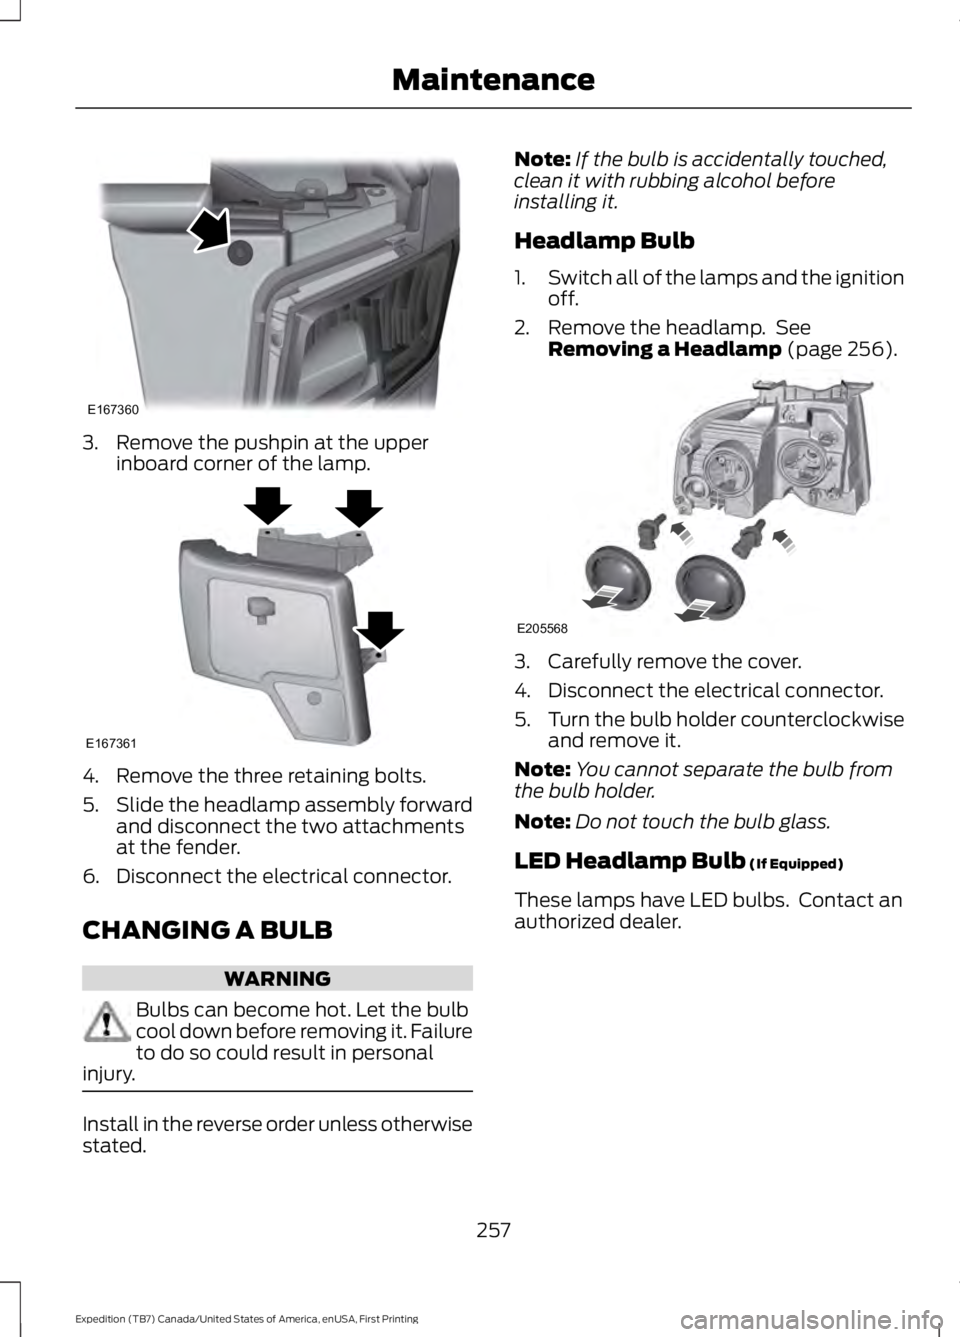
3. Remove the pushpin at the upperinboard corner of the lamp.
4. Remove the three retaining bolts.
5.Slide the headlamp assembly forwardand disconnect the two attachmentsat the fender.
6. Disconnect the electrical connector.
CHANGING A BULB
WARNING
Bulbs can become hot. Let the bulbcool down before removing it. Failureto do so could result in personalinjury.
Install in the reverse order unless otherwisestated.
Note:If the bulb is accidentally touched,clean it with rubbing alcohol beforeinstalling it.
Headlamp Bulb
1.Switch all of the lamps and the ignitionoff.
2. Remove the headlamp. SeeRemoving a Headlamp (page 256).
3. Carefully remove the cover.
4. Disconnect the electrical connector.
5.Turn the bulb holder counterclockwiseand remove it.
Note:You cannot separate the bulb fromthe bulb holder.
Note:Do not touch the bulb glass.
LED Headlamp Bulb (If Equipped)
These lamps have LED bulbs. Contact anauthorized dealer.
257
Expedition (TB7) Canada/United States of America, enUSA, First Printing
MaintenanceE167360 E167361 E205568