FORD EXPEDITION EL 2017 Owners Manual
Manufacturer: FORD, Model Year: 2017, Model line: EXPEDITION EL, Model: FORD EXPEDITION EL 2017Pages: 500, PDF Size: 6.13 MB
Page 161 of 500
position for 15 seconds without crankingthe engine. If the service engine soonindicator blinks eight times, it means thatthe vehicle is not ready for I/M testing; ifthe service engine soon indicator stays onsolid, it means that your vehicle is readyfor I/M testing.
The OBD-II system checks the emissioncontrol system during normal driving. Acomplete check may take several days.
If the vehicle is not ready for I/M testing,you can perform the following driving cycleconsisting of mixed city and highwaydriving:
1. 15 minutes of steady driving on anexpressway or highway followed by 20minutes of stop-and-go driving with atleast four 30-second idle periods.
2. Allow your vehicle to sit for at leasteight hours with the ignition off. Then,start the vehicle and complete theabove driving cycle. The vehicle mustwarm up to its normal operatingtemperature. Once started, do not turnoff the vehicle until the above drivingcycle is complete.
If the vehicle is still not ready for I/Mtesting, you need to repeat the abovedriving cycle.
158
Expedition (TB7) Canada/United States of America, enUSA, Edition date: 03/2016, First Printing
Fuel and Refueling
Page 162 of 500
AUTOMATIC TRANSMISSION
WARNINGS
Always set the parking brake fullyand make sure you shift the gearshiftlever to park (P). Switch the ignitionoff and remove the key whenever you leaveyour vehicle.
Do not use the tow/haul featurewhen driving in icy or slipperyconditions as the increased enginebraking can cause the rear wheels to slideand your vehicle to swing around with thepossible loss of vehicle control.
Understanding the Shift Positionsof your Automatic Transmission
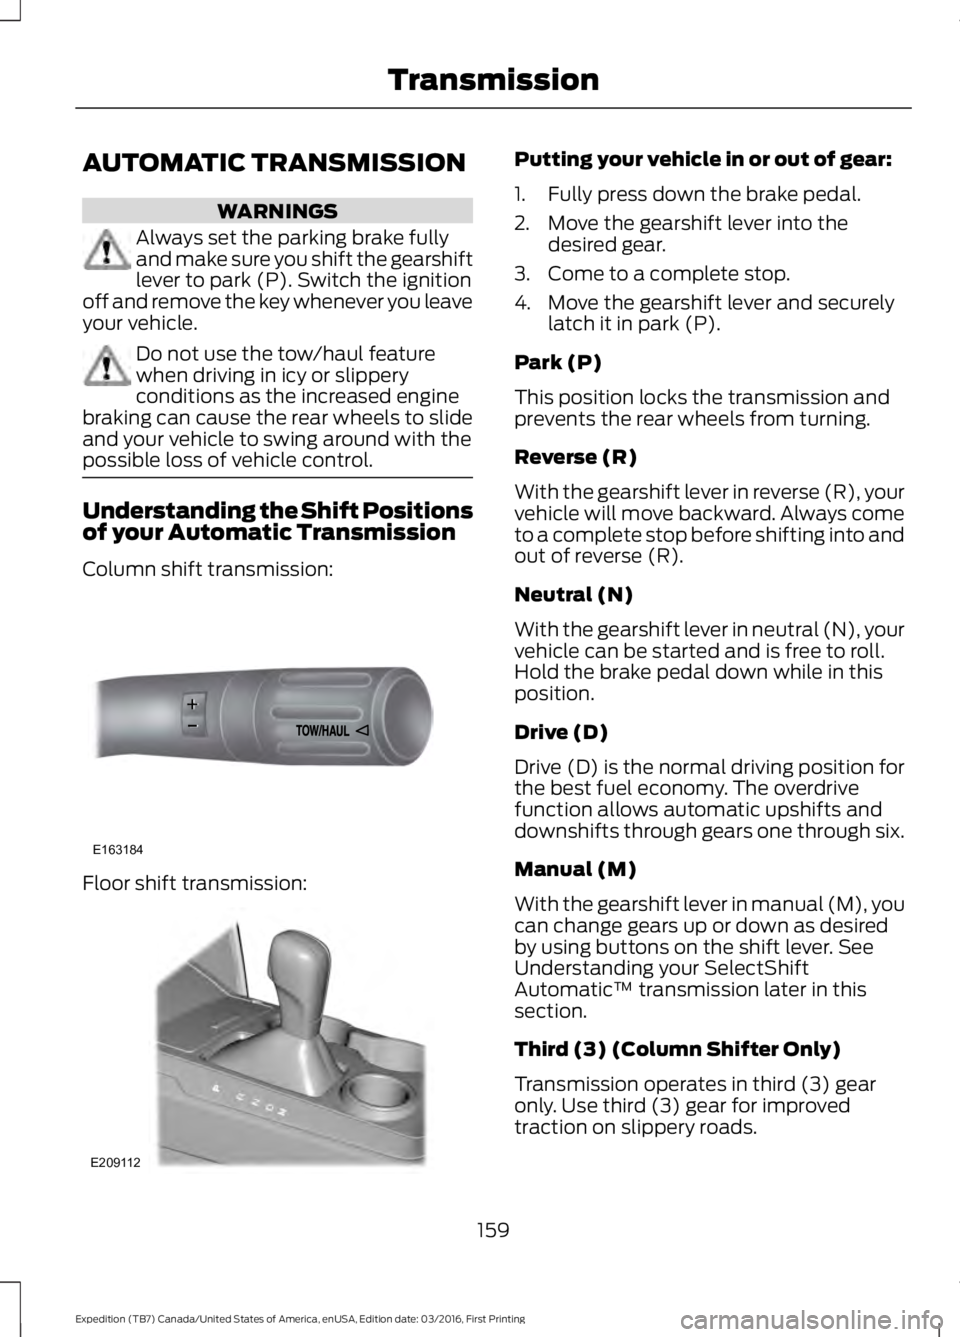
Column shift transmission:
Floor shift transmission:
Putting your vehicle in or out of gear:
1. Fully press down the brake pedal.
2. Move the gearshift lever into thedesired gear.
3. Come to a complete stop.
4. Move the gearshift lever and securelylatch it in park (P).
Park (P)
This position locks the transmission andprevents the rear wheels from turning.
Reverse (R)
With the gearshift lever in reverse (R), yourvehicle will move backward. Always cometo a complete stop before shifting into andout of reverse (R).
Neutral (N)
With the gearshift lever in neutral (N), yourvehicle can be started and is free to roll.Hold the brake pedal down while in thisposition.
Drive (D)
Drive (D) is the normal driving position forthe best fuel economy. The overdrivefunction allows automatic upshifts anddownshifts through gears one through six.
Manual (M)
With the gearshift lever in manual (M), youcan change gears up or down as desiredby using buttons on the shift lever. SeeUnderstanding your SelectShiftAutomatic™ transmission later in thissection.
Third (3) (Column Shifter Only)
Transmission operates in third (3) gearonly. Use third (3) gear for improvedtraction on slippery roads.
159
Expedition (TB7) Canada/United States of America, enUSA, Edition date: 03/2016, First Printing
TransmissionE163184 E209112
Page 163 of 500
Second (2)
Transmission operates in second (2) gearonly. Use second (2) gear to start-up onslippery roads.
First (1)
•Transmission operates in first (1) gearonly.
•Provides maximum engine braking.
•Allows upshifts by moving gearshiftlever.
•Will not downshift into first (1) gear athigh speeds; allows for first (1) gearwhen vehicle reaches slower speeds.
Tow/Haul Mode
WARNING
Do not use the tow/haul featurewhen driving in icy or slipperyconditions as the increased enginebraking can cause the rear wheels to slideand your vehicle to swing around with thepossible loss of vehicle control.
To activate tow/haul, press thebutton on the gearshift leveronce. The TOW HAUL indicatorlight will illuminate in the instrumentcluster.
The tow/haul feature:
•Delays upshifts to reduce the frequencyof transmission shifting.
•Provides engine braking in all forwardgears, which will slow your vehicle andassist you in controlling your vehiclewhen descending a grade.
•Depending on driving conditions andload conditions, may downshift thetransmission, slow your vehicle andcontrol your vehicle speed whendescending a hill, without pressing theaccelerator pedal. The amount ofdownshift braking provided will varybased upon the amount the brakepedal is pressed.
The tow/haul feature improvestransmission operation when towing atrailer or a heavy load. All transmissiongear ranges are available when usingtow/haul.
To deactivate the tow/haul feature andreturn to normal driving mode, press thebutton on the gearshift lever twice. TheTOW HAUL light will deactivate. Tow/haulwill also deactivate when you power downyour vehicle.
Forced Downshifts
•Allowed in drive (D) with the tow/haulfeature on or off.
•Press the accelerator to the floor.
•Allows transmission to select anappropriate gear.
160
Expedition (TB7) Canada/United States of America, enUSA, Edition date: 03/2016, First Printing
TransmissionE161509
Page 164 of 500
Automatic Transmission AdaptiveLearning
This feature may increase durability andprovide consistent shift feel over the lifeof your vehicle. A new vehicle ortransmission may have firm shifts, softshifts or both. This operation is considerednormal and will not affect function ordurability of the transmission. Over time,the adaptive learning process will fullyupdate transmission operation.
SelectShift™ AutomaticTransmission (If Equipped)
This feature gives you the ability to changegears up or down as desired.
As long as the engine speed does notexceed the maximum allowable limit youcan downshift. SelectShift automaticallydownshifts at low engine speeds in orderto prevent engine stalls.
Note:Engine damage may occur if youmaintain excessive engine revving withoutshifting.
SelectShift does not automatically upshift,even if the engine is approaching the RPMlimit, unless the accelerator pedal is at fulltravel. Take notice of the shift indicatorlamp, which alerts you when to shift tomake sure you achieve the highest level ofefficiency and fuel economy.
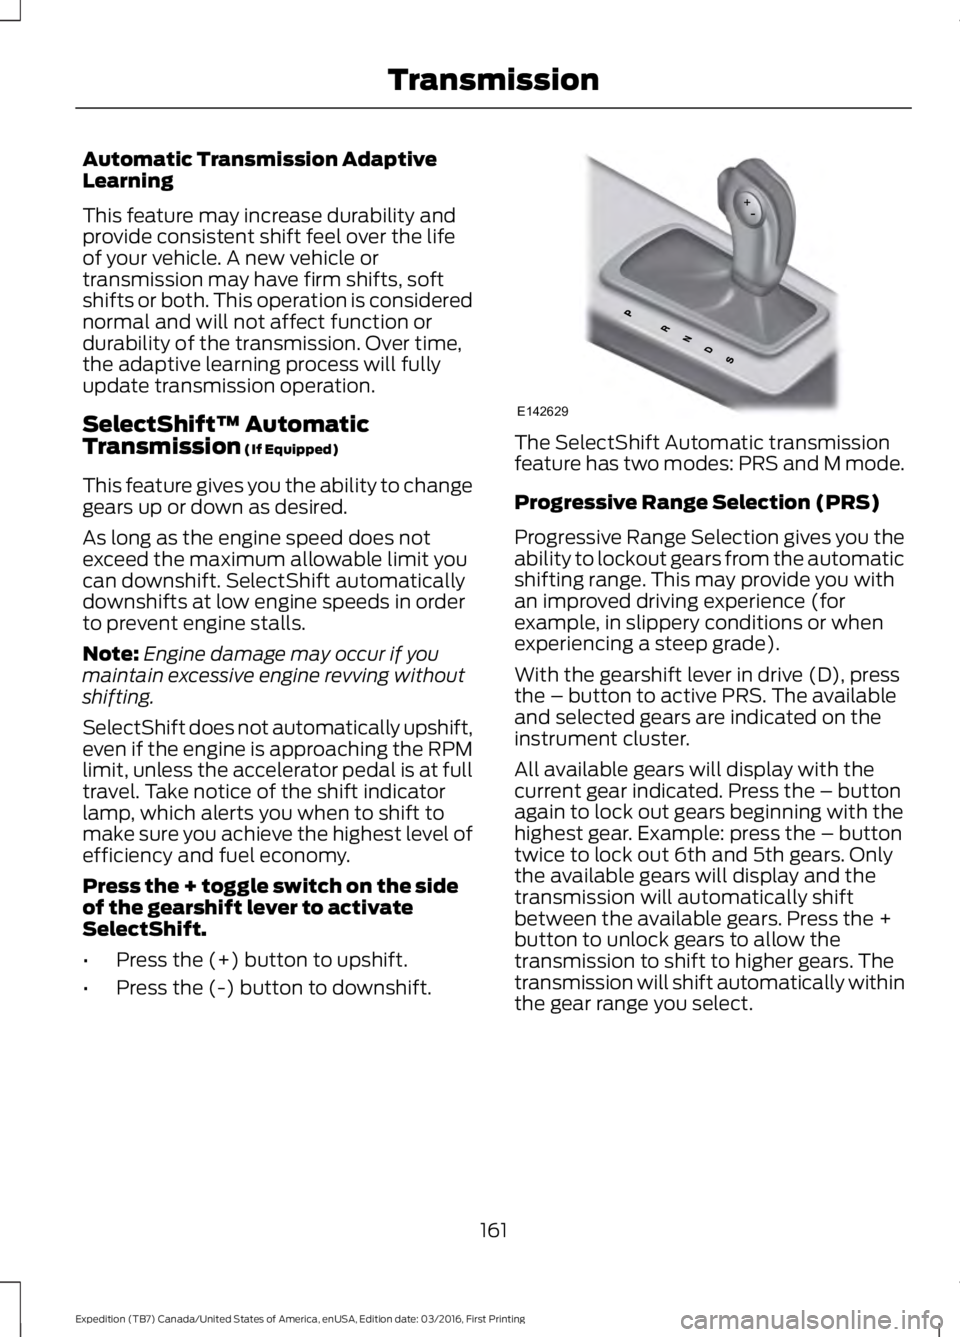
Press the + toggle switch on the sideof the gearshift lever to activateSelectShift.
•Press the (+) button to upshift.
•Press the (-) button to downshift.
The SelectShift Automatic transmissionfeature has two modes: PRS and M mode.
Progressive Range Selection (PRS)
Progressive Range Selection gives you theability to lockout gears from the automaticshifting range. This may provide you withan improved driving experience (forexample, in slippery conditions or whenexperiencing a steep grade).
With the gearshift lever in drive (D), pressthe – button to active PRS. The availableand selected gears are indicated on theinstrument cluster.
All available gears will display with thecurrent gear indicated. Press the – buttonagain to lock out gears beginning with thehighest gear. Example: press the – buttontwice to lock out 6th and 5th gears. Onlythe available gears will display and thetransmission will automatically shiftbetween the available gears. Press the +button to unlock gears to allow thetransmission to shift to higher gears. Thetransmission will shift automatically withinthe gear range you select.
161
Expedition (TB7) Canada/United States of America, enUSA, Edition date: 03/2016, First Printing
TransmissionE142629
Page 165 of 500
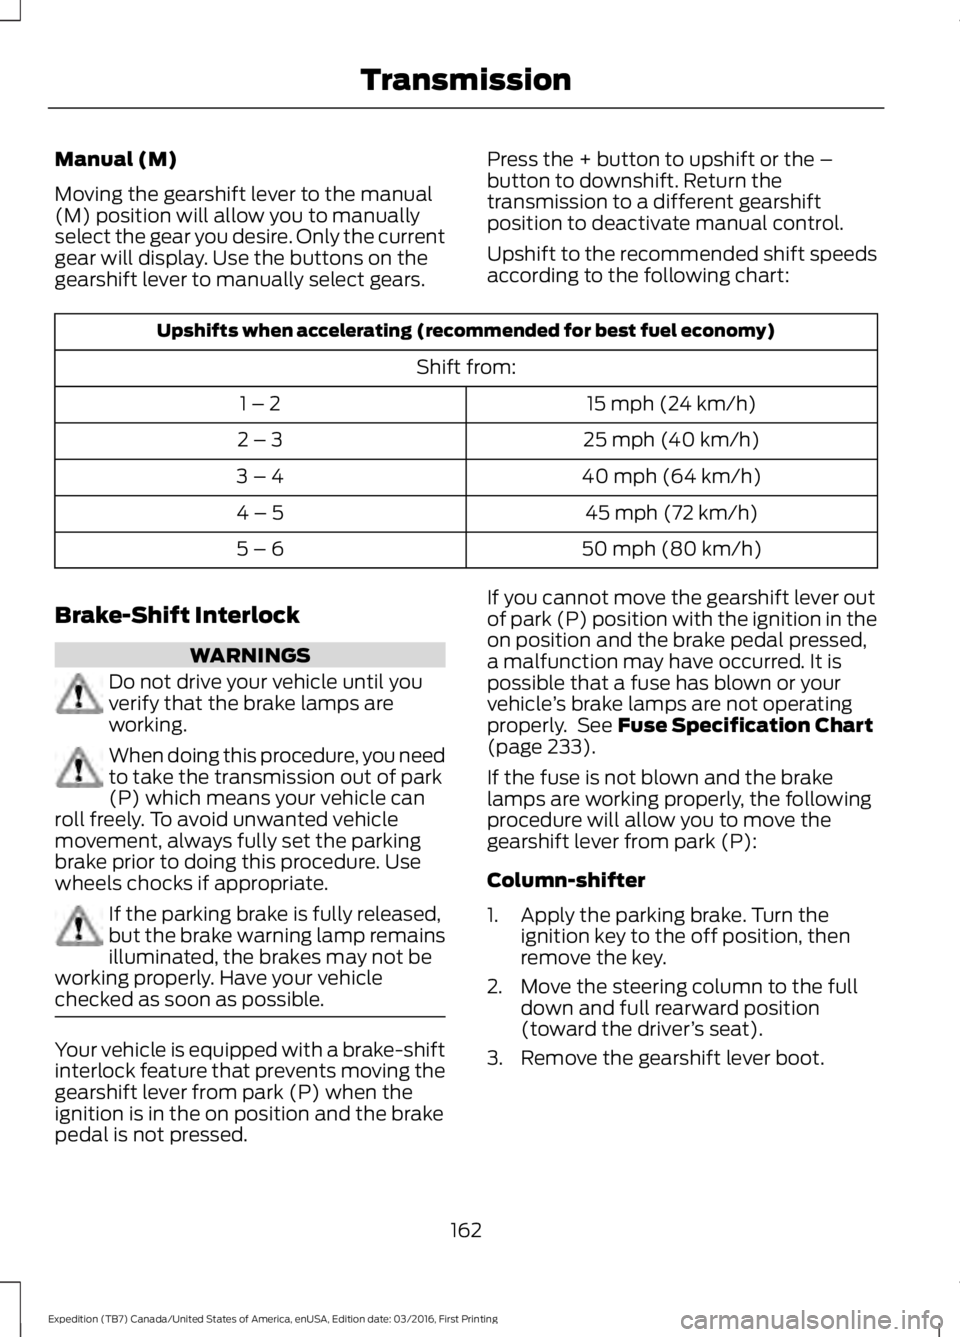
Manual (M)
Moving the gearshift lever to the manual(M) position will allow you to manuallyselect the gear you desire. Only the currentgear will display. Use the buttons on thegearshift lever to manually select gears.
Press the + button to upshift or the –button to downshift. Return thetransmission to a different gearshiftposition to deactivate manual control.
Upshift to the recommended shift speedsaccording to the following chart:
Upshifts when accelerating (recommended for best fuel economy)
Shift from:
15 mph (24 km/h)1 – 2
25 mph (40 km/h)2 – 3
40 mph (64 km/h)3 – 4
45 mph (72 km/h)4 – 5
50 mph (80 km/h)5 – 6
Brake-Shift Interlock
WARNINGS
Do not drive your vehicle until youverify that the brake lamps areworking.
When doing this procedure, you needto take the transmission out of park(P) which means your vehicle canroll freely. To avoid unwanted vehiclemovement, always fully set the parkingbrake prior to doing this procedure. Usewheels chocks if appropriate.
If the parking brake is fully released,but the brake warning lamp remainsilluminated, the brakes may not beworking properly. Have your vehiclechecked as soon as possible.
Your vehicle is equipped with a brake-shiftinterlock feature that prevents moving thegearshift lever from park (P) when theignition is in the on position and the brakepedal is not pressed.
If you cannot move the gearshift lever outof park (P) position with the ignition in theon position and the brake pedal pressed,a malfunction may have occurred. It ispossible that a fuse has blown or yourvehicle’s brake lamps are not operatingproperly. See Fuse Specification Chart(page 233).
If the fuse is not blown and the brakelamps are working properly, the followingprocedure will allow you to move thegearshift lever from park (P):
Column-shifter
1. Apply the parking brake. Turn theignition key to the off position, thenremove the key.
2. Move the steering column to the fulldown and full rearward position(toward the driver’s seat).
3. Remove the gearshift lever boot.
162
Expedition (TB7) Canada/United States of America, enUSA, Edition date: 03/2016, First Printing
Transmission
Page 166 of 500
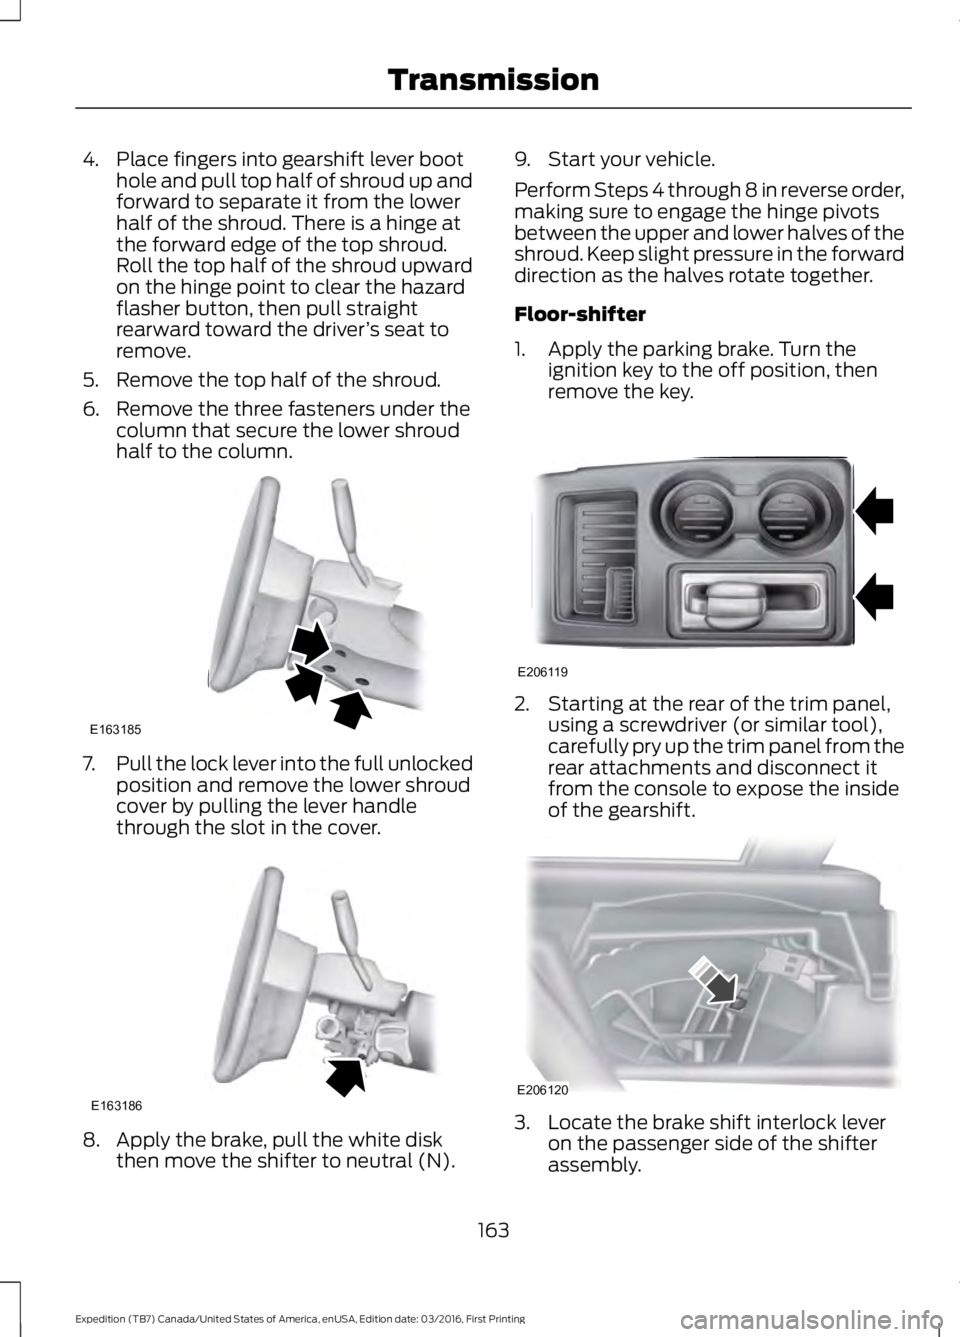
4. Place fingers into gearshift lever boothole and pull top half of shroud up andforward to separate it from the lowerhalf of the shroud. There is a hinge atthe forward edge of the top shroud.Roll the top half of the shroud upwardon the hinge point to clear the hazardflasher button, then pull straightrearward toward the driver’s seat toremove.
5. Remove the top half of the shroud.
6. Remove the three fasteners under thecolumn that secure the lower shroudhalf to the column.
7.Pull the lock lever into the full unlockedposition and remove the lower shroudcover by pulling the lever handlethrough the slot in the cover.
8. Apply the brake, pull the white diskthen move the shifter to neutral (N).
9. Start your vehicle.
Perform Steps 4 through 8 in reverse order,making sure to engage the hinge pivotsbetween the upper and lower halves of theshroud. Keep slight pressure in the forwarddirection as the halves rotate together.
Floor-shifter
1. Apply the parking brake. Turn theignition key to the off position, thenremove the key.
2. Starting at the rear of the trim panel,using a screwdriver (or similar tool),carefully pry up the trim panel from therear attachments and disconnect itfrom the console to expose the insideof the gearshift.
3. Locate the brake shift interlock leveron the passenger side of the shifterassembly.
163
Expedition (TB7) Canada/United States of America, enUSA, Edition date: 03/2016, First Printing
TransmissionE163185 E163186 E206119 E206120
Page 167 of 500
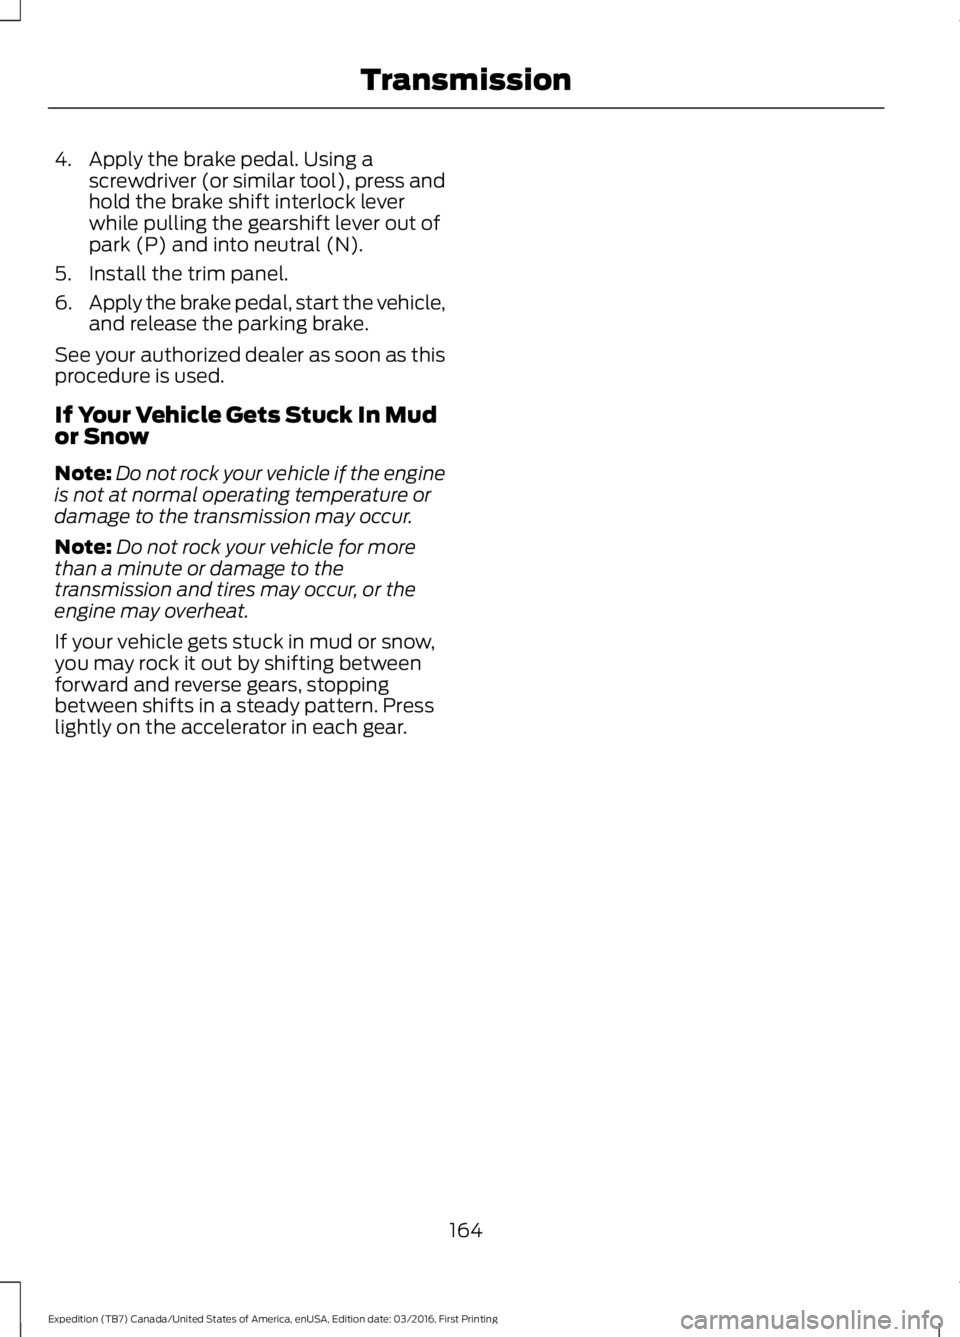
4. Apply the brake pedal. Using ascrewdriver (or similar tool), press andhold the brake shift interlock leverwhile pulling the gearshift lever out ofpark (P) and into neutral (N).
5. Install the trim panel.
6.Apply the brake pedal, start the vehicle,and release the parking brake.
See your authorized dealer as soon as thisprocedure is used.
If Your Vehicle Gets Stuck In Mudor Snow
Note:Do not rock your vehicle if the engineis not at normal operating temperature ordamage to the transmission may occur.
Note:Do not rock your vehicle for morethan a minute or damage to thetransmission and tires may occur, or theengine may overheat.
If your vehicle gets stuck in mud or snow,you may rock it out by shifting betweenforward and reverse gears, stoppingbetween shifts in a steady pattern. Presslightly on the accelerator in each gear.
164
Expedition (TB7) Canada/United States of America, enUSA, Edition date: 03/2016, First Printing
Transmission
Page 168 of 500
USING FOUR-WHEEL DRIVE
WARNING
For important information regardingsafe operation of this type of vehicle,see General Information in theWheels and Tires chapter.
Note:Do not use 4H or 4L mode on dry,hard surfaced roads. Doing so will produceexcessive noise, increase tire wear and maydamage drive components. 4H and 4L modeis only intended for consistently slippery orloose surfaces.
Note:If 4L mode is selected while yourvehicle is moving above 3 mph (5 km/h),the 4WD system will not perform a shift.This is normal and should be no reason forconcern. Refer to Shifting to or from 4L forproper operation.
4WD Indicator Lights
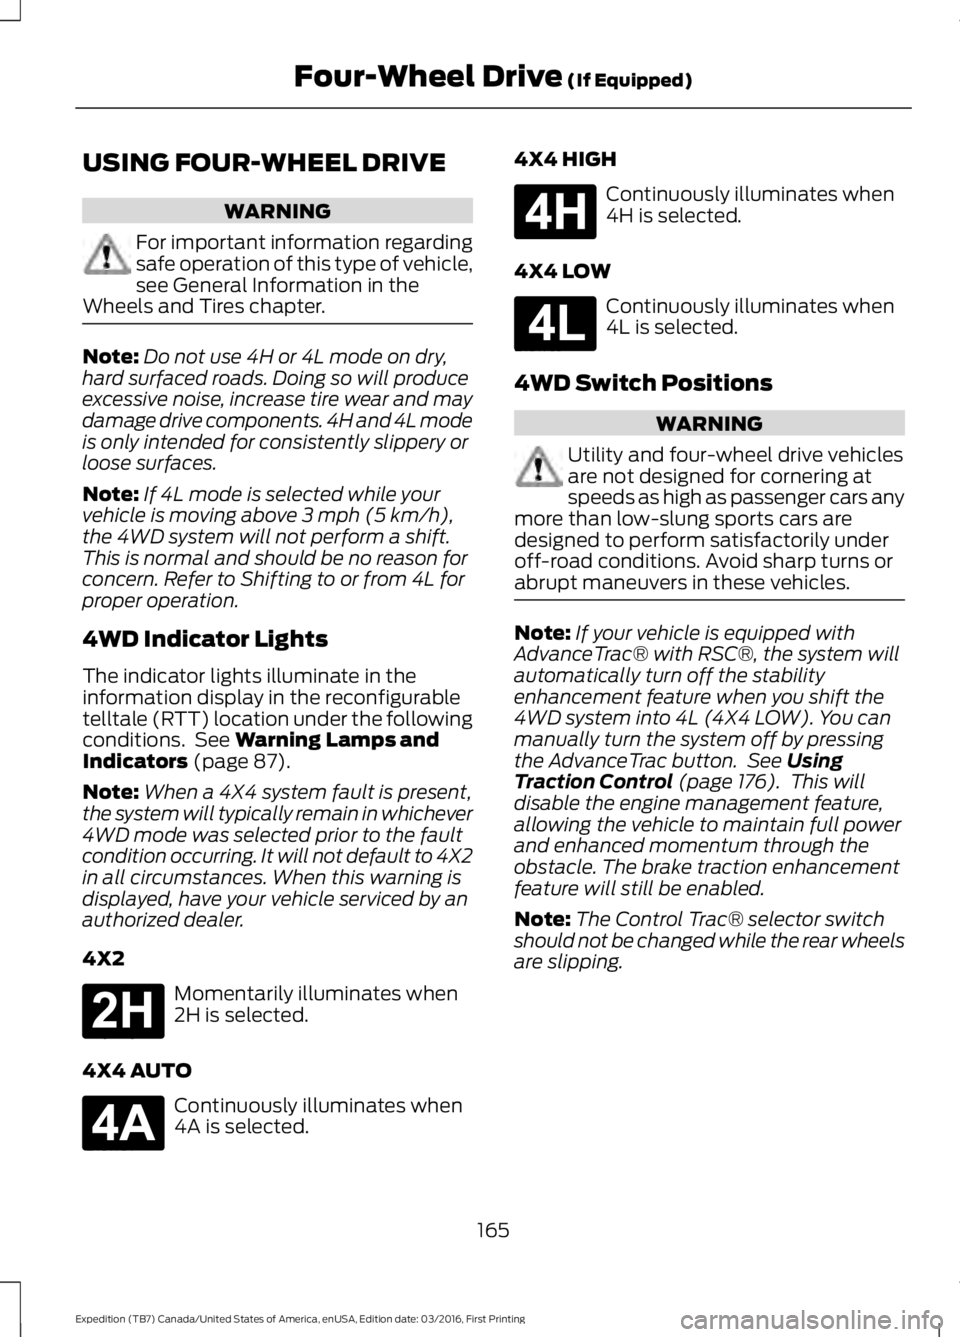
The indicator lights illuminate in theinformation display in the reconfigurabletelltale (RTT) location under the followingconditions. See Warning Lamps andIndicators (page 87).
Note:When a 4X4 system fault is present,the system will typically remain in whichever4WD mode was selected prior to the faultcondition occurring. It will not default to 4X2in all circumstances. When this warning isdisplayed, have your vehicle serviced by anauthorized dealer.
4X2
Momentarily illuminates when2H is selected.
4X4 AUTO
Continuously illuminates when4A is selected.
4X4 HIGH
Continuously illuminates when4H is selected.
4X4 LOW
Continuously illuminates when4L is selected.
4WD Switch Positions
WARNING
Utility and four-wheel drive vehiclesare not designed for cornering atspeeds as high as passenger cars anymore than low-slung sports cars aredesigned to perform satisfactorily underoff-road conditions. Avoid sharp turns orabrupt maneuvers in these vehicles.
Note:If your vehicle is equipped withAdvanceTrac® with RSC®, the system willautomatically turn off the stabilityenhancement feature when you shift the4WD system into 4L (4X4 LOW). You canmanually turn the system off by pressingthe AdvanceTrac button. See UsingTraction Control (page 176). This willdisable the engine management feature,allowing the vehicle to maintain full powerand enhanced momentum through theobstacle. The brake traction enhancementfeature will still be enabled.
Note:The Control Trac® selector switchshould not be changed while the rear wheelsare slipping.
165
Expedition (TB7) Canada/United States of America, enUSA, Edition date: 03/2016, First Printing
Four-Wheel Drive (If Equipped)E181778 E181781 E181779 E181780
Page 169 of 500
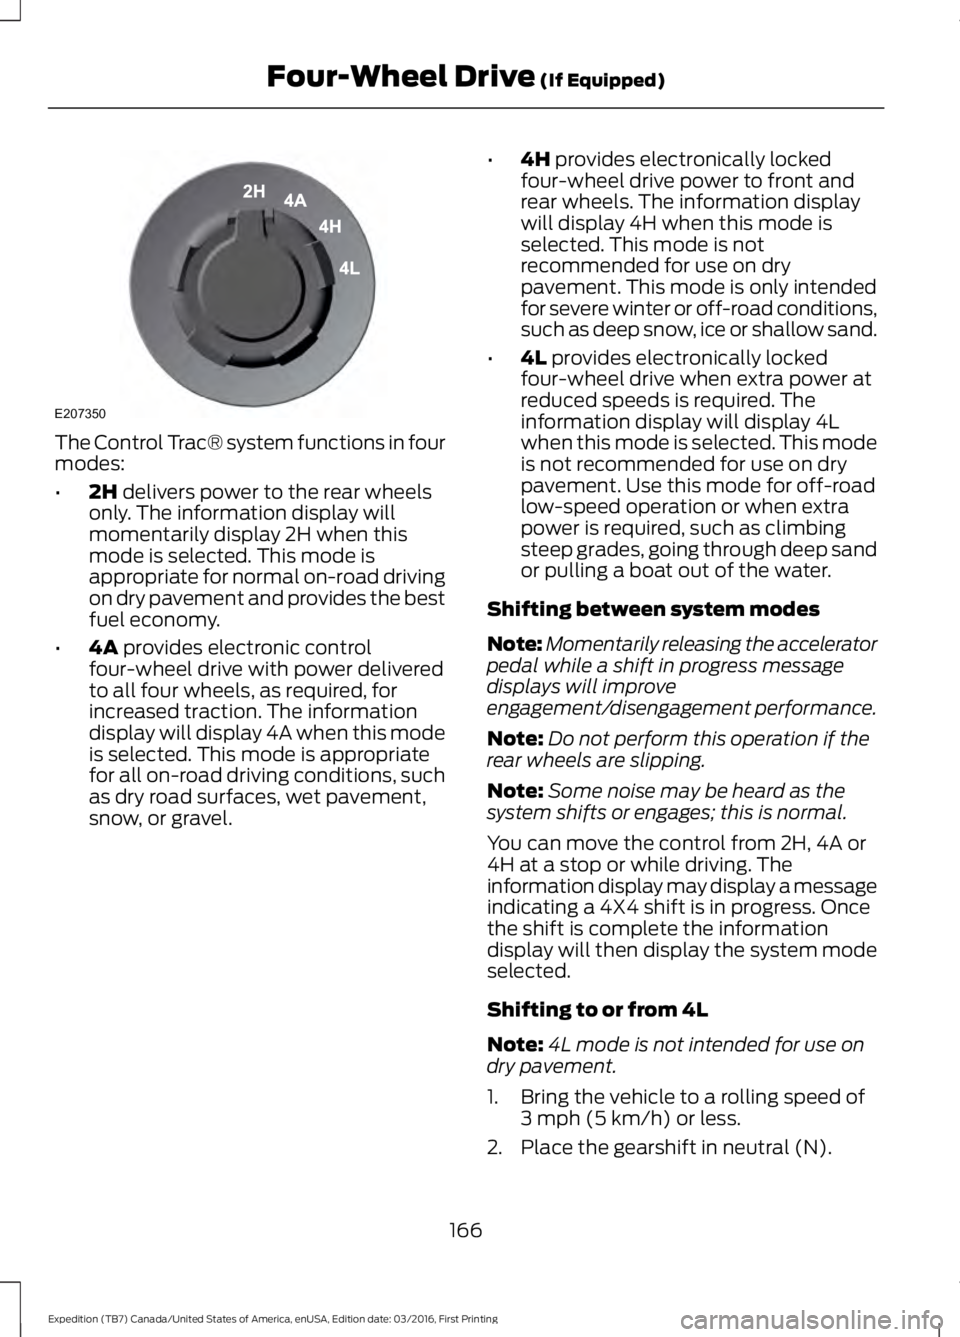
The Control Trac® system functions in fourmodes:
•2H delivers power to the rear wheelsonly. The information display willmomentarily display 2H when thismode is selected. This mode isappropriate for normal on-road drivingon dry pavement and provides the bestfuel economy.
•4A provides electronic controlfour-wheel drive with power deliveredto all four wheels, as required, forincreased traction. The informationdisplay will display 4A when this modeis selected. This mode is appropriatefor all on-road driving conditions, suchas dry road surfaces, wet pavement,snow, or gravel.
•4H provides electronically lockedfour-wheel drive power to front andrear wheels. The information displaywill display 4H when this mode isselected. This mode is notrecommended for use on drypavement. This mode is only intendedfor severe winter or off-road conditions,such as deep snow, ice or shallow sand.
•4L provides electronically lockedfour-wheel drive when extra power atreduced speeds is required. Theinformation display will display 4Lwhen this mode is selected. This modeis not recommended for use on drypavement. Use this mode for off-roadlow-speed operation or when extrapower is required, such as climbingsteep grades, going through deep sandor pulling a boat out of the water.
Shifting between system modes
Note:Momentarily releasing the acceleratorpedal while a shift in progress messagedisplays will improveengagement/disengagement performance.
Note:Do not perform this operation if therear wheels are slipping.
Note:Some noise may be heard as thesystem shifts or engages; this is normal.
You can move the control from 2H, 4A or4H at a stop or while driving. Theinformation display may display a messageindicating a 4X4 shift is in progress. Oncethe shift is complete the informationdisplay will then display the system modeselected.
Shifting to or from 4L
Note:4L mode is not intended for use ondry pavement.
1. Bring the vehicle to a rolling speed of3 mph (5 km/h) or less.
2. Place the gearshift in neutral (N).
166
Expedition (TB7) Canada/United States of America, enUSA, Edition date: 03/2016, First Printing
Four-Wheel Drive (If Equipped)E207350
Page 170 of 500
3. Move the 4WD switch to the desiredmode.
The information display will display amessage indicating a 4X4 shift is inprogress. The information display will thendisplay the system mode selected.
If any of the above shift conditions are notmet, the shift will not occur and theinformation display will display informationguiding the driver through the proper rangeof shifting procedures.
If SHIFT DELAYED PULL FORWARD isdisplayed in the information display,transfer case gear tooth blockage ispresent. To alleviate this condition, placethe transmission in a forward gear, movethe vehicle forward approximately 5 ft(2 m), and shift the transmission back toneutral (N) to allow the transfer case tocomplete the range shift.
How Your Vehicle Differs FromOther Vehicles
WARNING
Vehicles with a higher center ofgravity such as utility and four-wheeldrive vehicles handle differently thanvehicles with a lower center of gravity.Utility and four-wheel drive vehicles arenot designed for cornering at speeds ashigh as passenger cars any more thanlow-slung sports cars are designed toperform satisfactorily under off-roadconditions. Avoid sharp turns, excessivespeed and abrupt maneuvers in thesevehicles. Failure to drive cautiously couldresult in an increased risk of loss of vehiclecontrol, vehicle rollover, personal injury anddeath.
Truck and utility vehicles can differ fromsome other vehicles. Your vehicle may behigher to allow it to travel over roughterrain without getting hung up ordamaging underbody components.
The differences that make your vehicle soversatile also make it handle differentlythan an ordinary passenger car.
Maintain steering wheel control at alltimes, especially in rough terrain. Sincesudden changes in terrain can result inabrupt steering wheel motion, make sureyou grip the steering wheel from theoutside. Do not grip the spokes.
Drive cautiously to avoid vehicle damagefrom concealed objects such as rocks andstumps.
You should either know the terrain orexamine maps of the area before driving.Map out your route before driving in thearea. To maintain steering and brakingcontrol of your vehicle, you must have allfour wheels on the ground and they mustbe rolling, not sliding or spinning.
Driving Off-Road With Truck andUtility Vehicles
Note:On some models, the initial shift fromtwo-wheel drive to four-wheel drive whileyour vehicle is moving can cause somemomentary clunk and ratcheting sounds.This is the front drivetrain coming up tospeed and the automatic locking hubsengaging and is not cause for concern.
Note:Your vehicle may be equipped witha front air dam that can become damaged(due to reduced ground clearance) whentaking your vehicle off-road. You mayremove this air dam by removing eight bolts.
Four-wheel drive vehicles are speciallyequipped for driving on sand, snow, mudand rough terrain and have operatingcharacteristics that are somewhatdifferent from conventional vehicles, bothon and off the road.
167
Expedition (TB7) Canada/United States of America, enUSA, Edition date: 03/2016, First Printing
Four-Wheel Drive (If Equipped)