load FORD EXPLORER 2014 5.G User Guide
[x] Cancel search | Manufacturer: FORD, Model Year: 2014, Model line: EXPLORER, Model: FORD EXPLORER 2014 5.GPages: 586, PDF Size: 9.07 MB
Page 208 of 586
D (Drive) with Overdrive
The normal driving position for the best fuel economy. Transmission
operates in gears one through six.
The automatic transmission shift strategy has the ability to detect hilly
terrain or mountainous areas and will provide a limited amount of grade
assist features automatically. Refer toD(Drive) with Grade assist or
SelectShift for more information.
D (Drive) with Tow on
Press theTOWswitch located on the instrument panel by the headlamp
control to activate tow. TheTOW/HAULmessage will illuminate in the
instrument cluster.
The tow feature improves transmission operation when towing a trailer
or a heavy load. All transmission gear ranges are available when using
tow.
The tow feature delays upshifts to reduce frequency of transmission
shifting. Tow also provides engine braking in all forward gears when the
transmission is in theD(Overdrive) position. This engine braking will
slow the vehicle and assist the driver in controlling the vehicle when
descending a grade. Depending on driving conditions and load
conditions, the transmission may downshift, slow the vehicle and control
the vehicle speed when descending a hill, without the accelerator pedal
being pressed. The amount of downshift braking provided will vary based
upon the amount the brake pedal is depressed.
Press theTOWbutton to deactivate the tow feature and return to
normal driving mode. The tow light will no longer be illuminated.
When you shut-off and restart the engine, the transmission will
automatically return to normalD(Overdrive) mode (tow off).
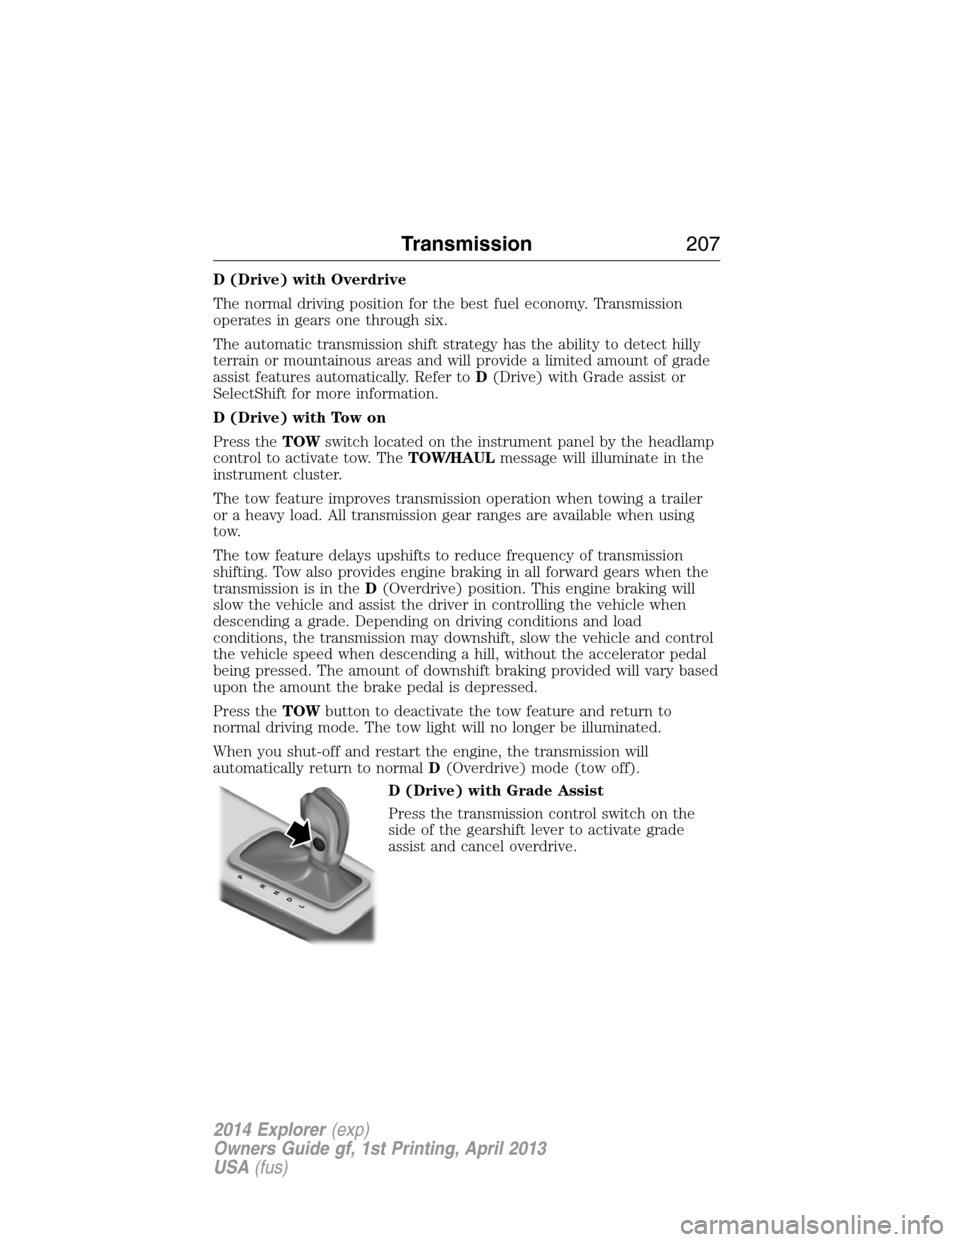
D (Drive) with Grade Assist
Press the transmission control switch on the
side of the gearshift lever to activate grade
assist and cancel overdrive.
PRNDL
Transmission207
2014 Explorer(exp)
Owners Guide gf, 1st Printing, April 2013
USA(fus)
Page 221 of 586
4WD vehicles have advantages over 2WD vehicles in snow and ice but
can skid like any other vehicle.
Should you start to slide while driving on snowy or icy roads, turn the
steering wheel in the direction of the slide until you regain control.
Avoid sudden applications of power and quick changes of direction on
snow and ice. Apply the accelerator slowly and steadily when starting
from a full stop.
Avoid sudden braking as well. Although a 4WD vehicle may accelerate
better than a two-wheel drive vehicle in snow and ice, it won’t stop any
faster, because as in other vehicles, braking occurs at all four wheels.
Do not become overconfident as to road conditions.
Make sure you allow sufficient distance between you and other vehicles
for stopping. Drive slower than usual and consider using one of the lower
gears. In emergency stopping situations, avoid locking of the wheels. Use
a “squeeze” technique, push on the brake pedal with a steadily increasing
force which allows the wheels to brake yet continue to roll so that you
may steer in the direction you want to travel. If you lock the wheels,
release the brake pedal and repeat the squeeze technique. Since your
vehicle is equipped with a Four Wheel Anti-Lock Brake System (ABS),
apply the brake steadily. Do not “pump” the brakes. Refer toBrakes
chapter for additional information on the operation of the anti-lock brake
system.
Maintenance and modifications
The suspension and steering systems on your vehicle have been designed
and tested to provide predictable performance whether loaded or empty
and durable load carrying capability. For this reason, Ford Motor
Company strongly recommends that you do not make modifications such
as adding or removing parts (such as lift kits or stabilizer bars) or by
using replacement parts not equivalent to the original factory equipment.
Any modifications to a vehicle that raise the center of gravity can make it
more likely the vehicle will roll over as a result of a loss of control. Ford
Motor Company recommends that caution be used with any vehicle
equipped with a high load or device (such as ladder racks or pickup box
cover).
Failure to maintain your vehicle properly may void the warranty, increase
your repair cost, reduce vehicle performance and operational capabilities
and adversely affect driver and passenger safety. Frequent inspection of
vehicle chassis components is recommended if the vehicle is subjected to
heavy off-road usage.
220Four-Wheel Drive (If Equipped)
2014 Explorer(exp)
Owners Guide gf, 1st Printing, April 2013
USA(fus)
Page 233 of 586
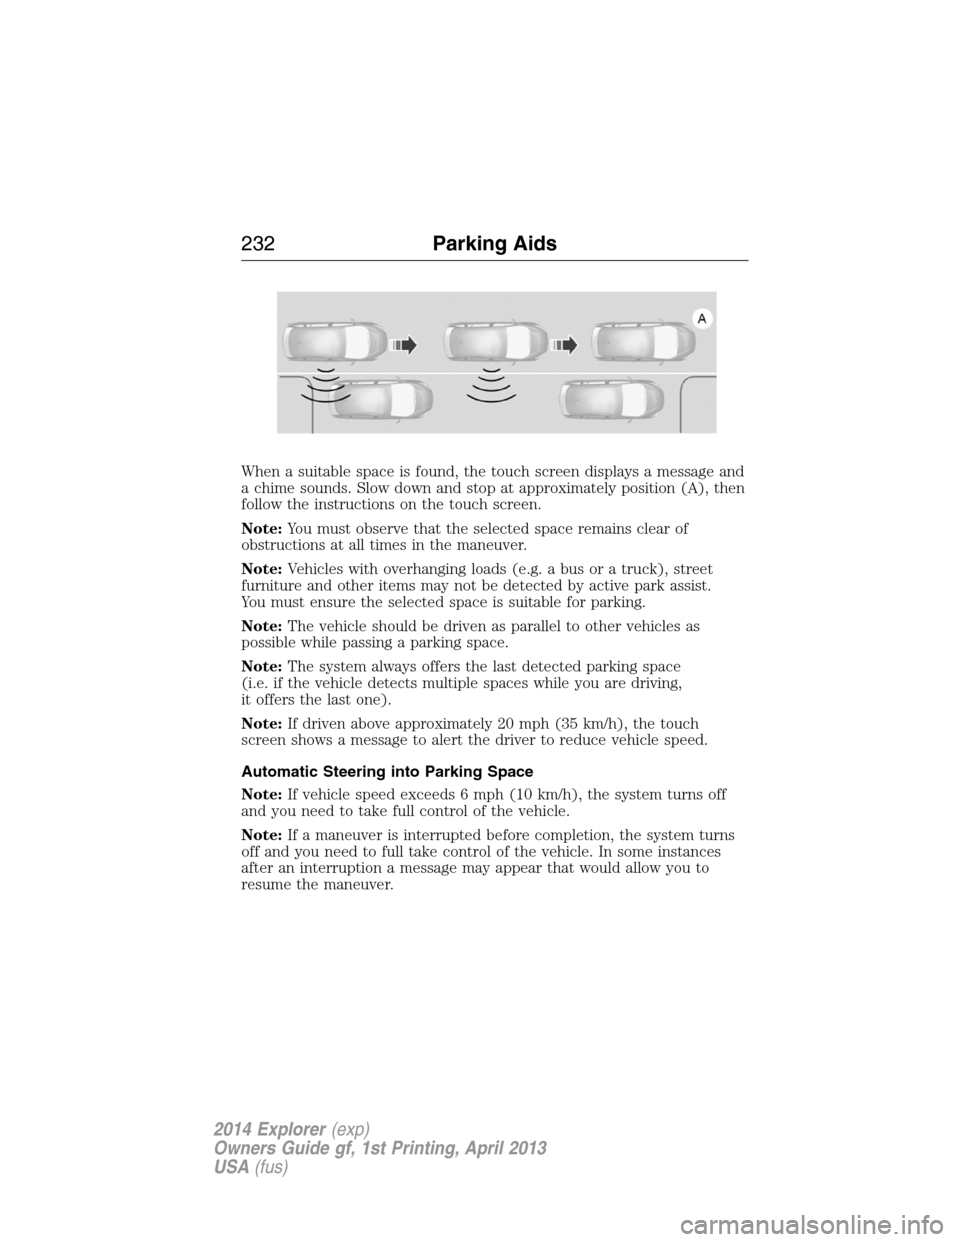
When a suitable space is found, the touch screen displays a message and
a chime sounds. Slow down and stop at approximately position (A), then
follow the instructions on the touch screen.
Note:You must observe that the selected space remains clear of
obstructions at all times in the maneuver.
Note:Vehicles with overhanging loads (e.g. a bus or a truck), street
furniture and other items may not be detected by active park assist.
You must ensure the selected space is suitable for parking.
Note:The vehicle should be driven as parallel to other vehicles as
possible while passing a parking space.
Note:The system always offers the last detected parking space
(i.e. if the vehicle detects multiple spaces while you are driving,
it offers the last one).
Note:If driven above approximately 20 mph (35 km/h), the touch
screen shows a message to alert the driver to reduce vehicle speed.
Automatic Steering into Parking Space
Note:If vehicle speed exceeds 6 mph (10 km/h), the system turns off
and you need to take full control of the vehicle.
Note:If a maneuver is interrupted before completion, the system turns
off and you need to full take control of the vehicle. In some instances
after an interruption a message may appear that would allow you to
resume the maneuver.
232Parking Aids
2014 Explorer(exp)
Owners Guide gf, 1st Printing, April 2013
USA(fus)
Page 247 of 586
Low Speed Automatic Cancellation
The system is not functional at vehicle speeds below 16 mph (26 km/h).
An audible alarm sounds and the automatic braking released if your
vehicle drops below this speed.
Hilly Condition Usage
Note:An audible alarm sounds and the system shuts down if it is
applying brakes for an extended period of time. This allows the brakes to
cool down. The system will function normally again when the brakes
have cooled down.
You should select a lower gear position when the system is active in
situations such as prolonged downhill driving on steep grades, for
example driving in mountainous areas. Your vehicle needs additional
engine braking in these situations to reduce the load on the vehicle’s
regular brake system to prevent them from overheating.
Switching Off Adaptive Cruise Control
Note:The set speed memory will erase when you switch the system off.
Press and releaseOFFor turn off the ignition.
Detection Issues
The radar sensor has a limited field of vision. It may not detect vehicles
at all or detect a vehicle later than expected in some situations. The lead
vehicle graphic will not illuminate if the system does not detect a vehicle
in front of you.
246Cruise Control
2014 Explorer(exp)
Owners Guide gf, 1st Printing, April 2013
USA(fus)
Page 256 of 586
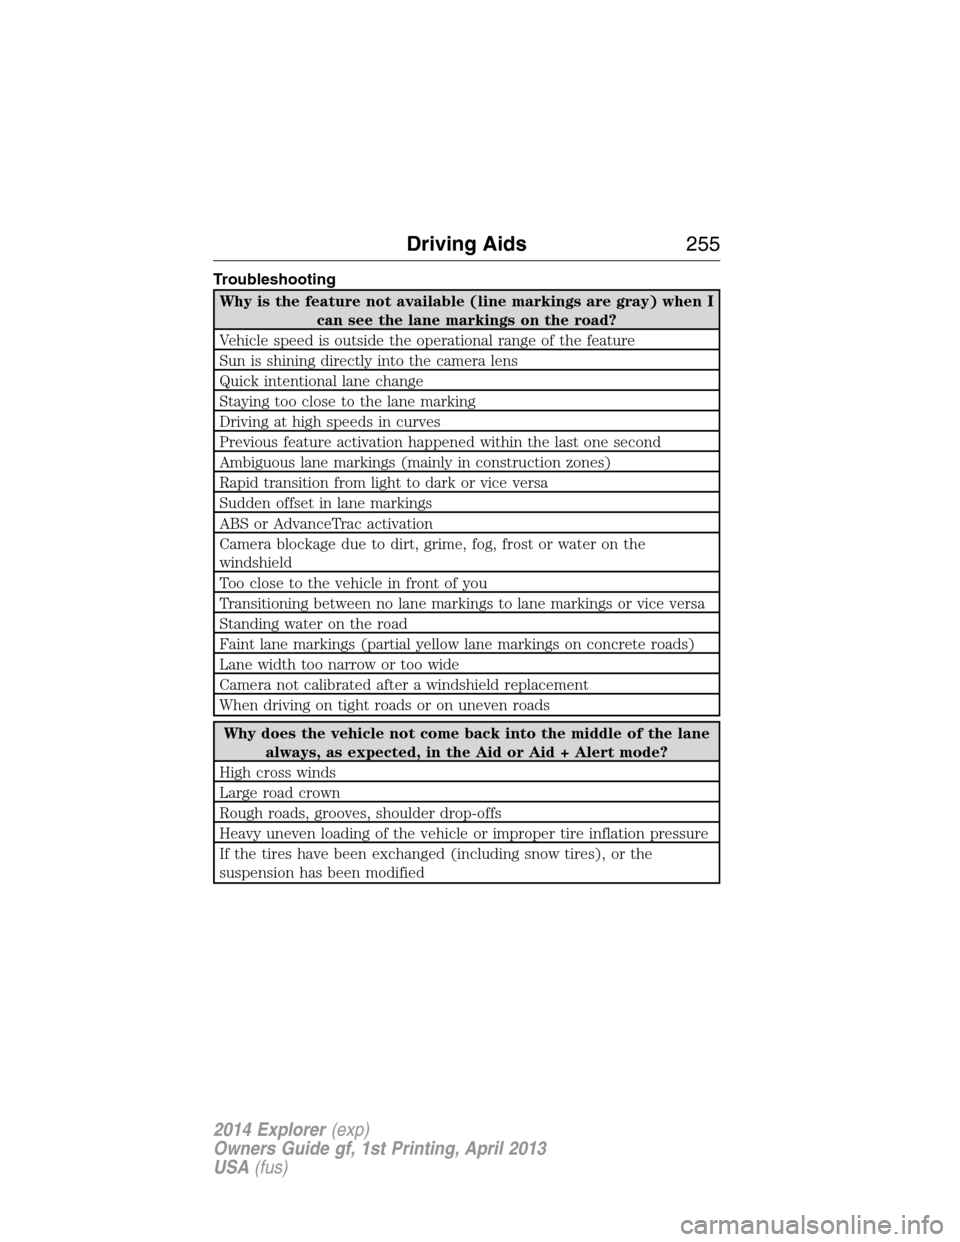
Troubleshooting
Why is the feature not available (line markings are gray) when I
can see the lane markings on the road?
Vehicle speed is outside the operational range of the feature
Sun is shining directly into the camera lens
Quick intentional lane change
Staying too close to the lane marking
Driving at high speeds in curves
Previous feature activation happened within the last one second
Ambiguous lane markings (mainly in construction zones)
Rapid transition from light to dark or vice versa
Sudden offset in lane markings
ABS or AdvanceTrac activation
Camera blockage due to dirt, grime, fog, frost or water on the
windshield
Too close to the vehicle in front of you
Transitioning between no lane markings to lane markings or vice versa
Standing water on the road
Faint lane markings (partial yellow lane markings on concrete roads)
Lane width too narrow or too wide
Camera not calibrated after a windshield replacement
When driving on tight roads or on uneven roads
Why does the vehicle not come back into the middle of the lane
always, as expected, in the Aid or Aid + Alert mode?
High cross winds
Large road crown
Rough roads, grooves, shoulder drop-offs
Heavy uneven loading of the vehicle or improper tire inflation pressure
If the tires have been exchanged (including snow tires), or the
suspension has been modified
Driving Aids255
2014 Explorer(exp)
Owners Guide gf, 1st Printing, April 2013
USA(fus)
Page 267 of 586
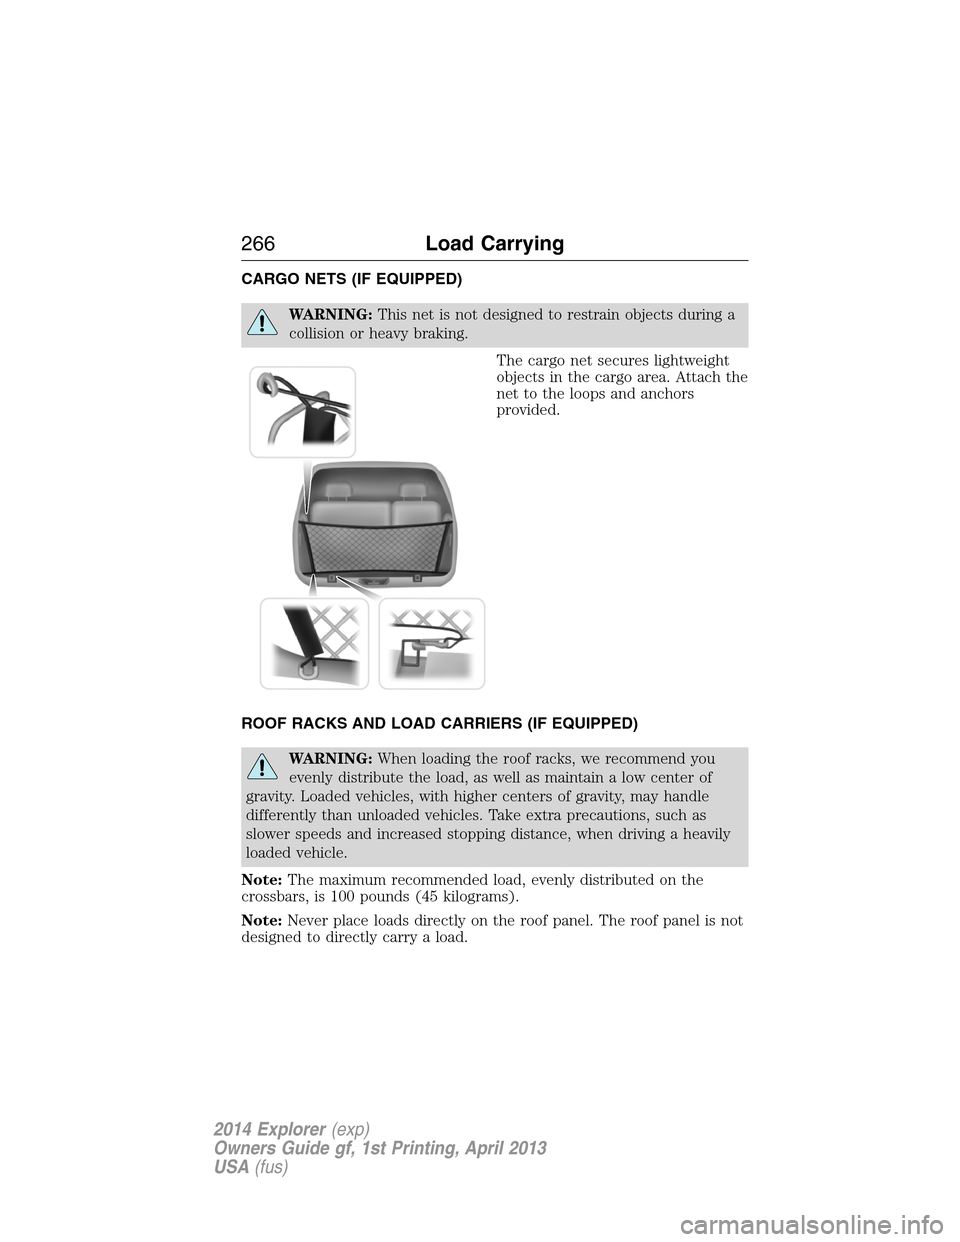
CARGO NETS (IF EQUIPPED)
WARNING:This net is not designed to restrain objects during a
collision or heavy braking.
The cargo net secures lightweight
objects in the cargo area. Attach the
net to the loops and anchors
provided.
ROOF RACKS AND LOAD CARRIERS (IF EQUIPPED)
WARNING:When loading the roof racks, we recommend you
evenly distribute the load, as well as maintain a low center of
gravity. Loaded vehicles, with higher centers of gravity, may handle
differently than unloaded vehicles. Take extra precautions, such as
slower speeds and increased stopping distance, when driving a heavily
loaded vehicle.
Note:The maximum recommended load, evenly distributed on the
crossbars, is 100 pounds (45 kilograms).
Note:Never place loads directly on the roof panel. The roof panel is not
designed to directly carry a load.
266Load Carrying
2014 Explorer(exp)
Owners Guide gf, 1st Printing, April 2013
USA(fus)
Page 268 of 586
For correct roof rack system function, you must place loads directly on
crossbars affixed to the roof rack side rails. We recommend you use Ford
Genuine Accessory crossbars designed specifically for your vehicle.
Make sure that you securely fasten the load. Check the tightness of the
load before driving and at each fuel stop.
Adjusting the Crossbars (If Equipped)
Note:Wind noise can be minimized by either removing or repositioning
the crossbars when they are not is use. Position the rear crossbar fully
rearward and the front crossbar 10 inches (25 centimeters) from the
front end-cap.
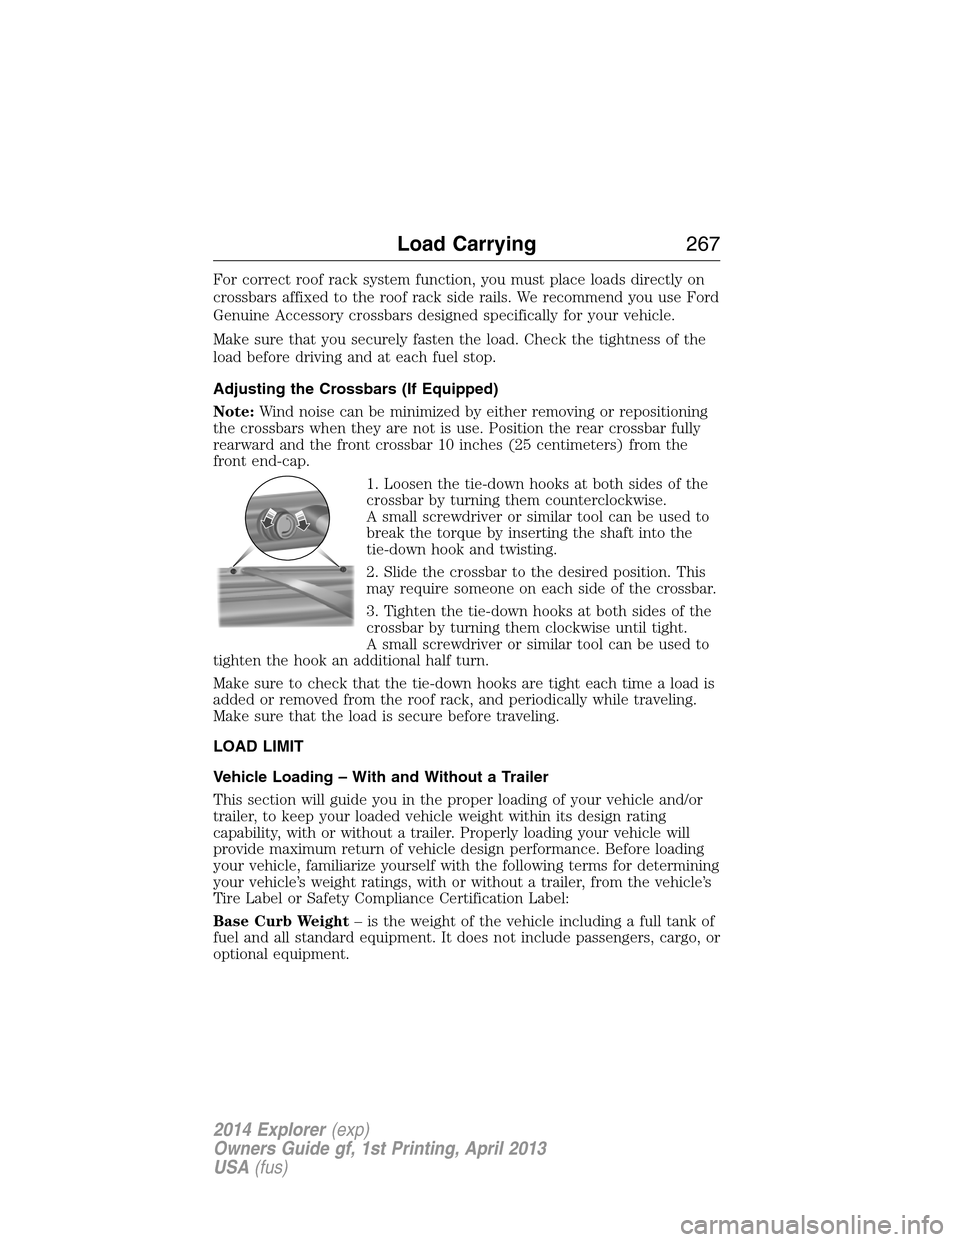
1. Loosen the tie-down hooks at both sides of the
crossbar by turning them counterclockwise.
A small screwdriver or similar tool can be used to
break the torque by inserting the shaft into the
tie-down hook and twisting.
2. Slide the crossbar to the desired position. This
may require someone on each side of the crossbar.
3. Tighten the tie-down hooks at both sides of the
crossbar by turning them clockwise until tight.
A small screwdriver or similar tool can be used to
tighten the hook an additional half turn.
Make sure to check that the tie-down hooks are tight each time a load is
added or removed from the roof rack, and periodically while traveling.
Make sure that the load is secure before traveling.
LOAD LIMIT
Vehicle Loading – With and Without a Trailer
This section will guide you in the proper loading of your vehicle and/or
trailer, to keep your loaded vehicle weight within its design rating
capability, with or without a trailer. Properly loading your vehicle will
provide maximum return of vehicle design performance. Before loading
your vehicle, familiarize yourself with the following terms for determining
your vehicle’s weight ratings, with or without a trailer, from the vehicle’s
Tire Label or Safety Compliance Certification Label:
Base Curb Weight– is the weight of the vehicle including a full tank of
fuel and all standard equipment. It does not include passengers, cargo, or
optional equipment.
Load Carrying267
2014 Explorer(exp)
Owners Guide gf, 1st Printing, April 2013
USA(fus)
Page 269 of 586
Vehicle Curb Weight– is the weight of your new vehicle when you
picked it up from your authorized dealer plus any aftermarket
equipment.
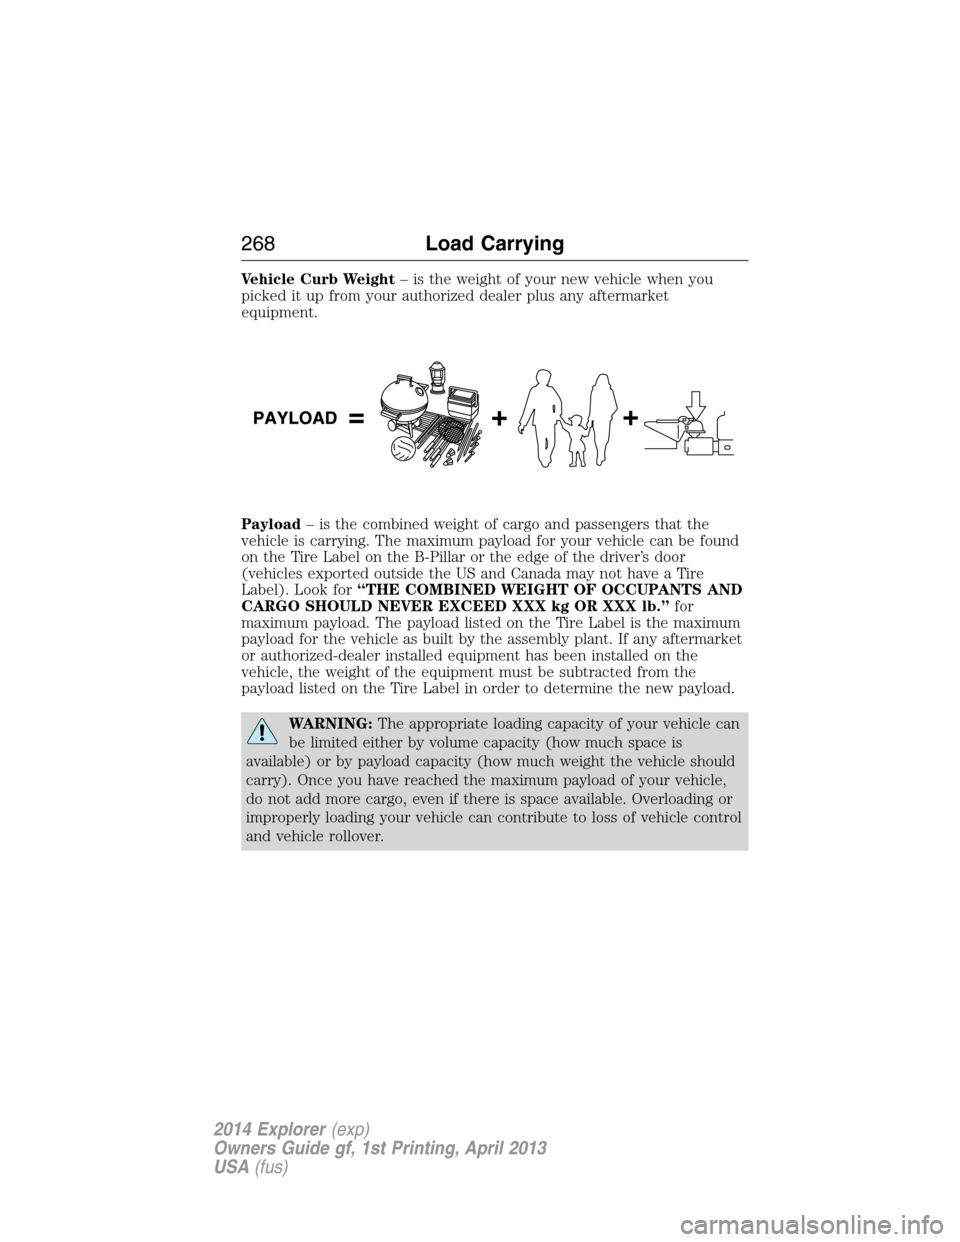
Payload– is the combined weight of cargo and passengers that the
vehicle is carrying. The maximum payload for your vehicle can be found
on the Tire Label on the B-Pillar or the edge of the driver’s door
(vehicles exported outside the US and Canada may not have a Tire
Label). Look for“THE COMBINED WEIGHT OF OCCUPANTS AND
CARGO SHOULD NEVER EXCEED XXX kg OR XXX lb.”for
maximum payload. The payload listed on the Tire Label is the maximum
payload for the vehicle as built by the assembly plant. If any aftermarket
or authorized-dealer installed equipment has been installed on the
vehicle, the weight of the equipment must be subtracted from the
payload listed on the Tire Label in order to determine the new payload.
WARNING:The appropriate loading capacity of your vehicle can
be limited either by volume capacity (how much space is
available) or by payload capacity (how much weight the vehicle should
carry). Once you have reached the maximum payload of your vehicle,
do not add more cargo, even if there is space available. Overloading or
improperly loading your vehicle can contribute to loss of vehicle control
and vehicle rollover.
268Load Carrying
2014 Explorer(exp)
Owners Guide gf, 1st Printing, April 2013
USA(fus)
Page 270 of 586
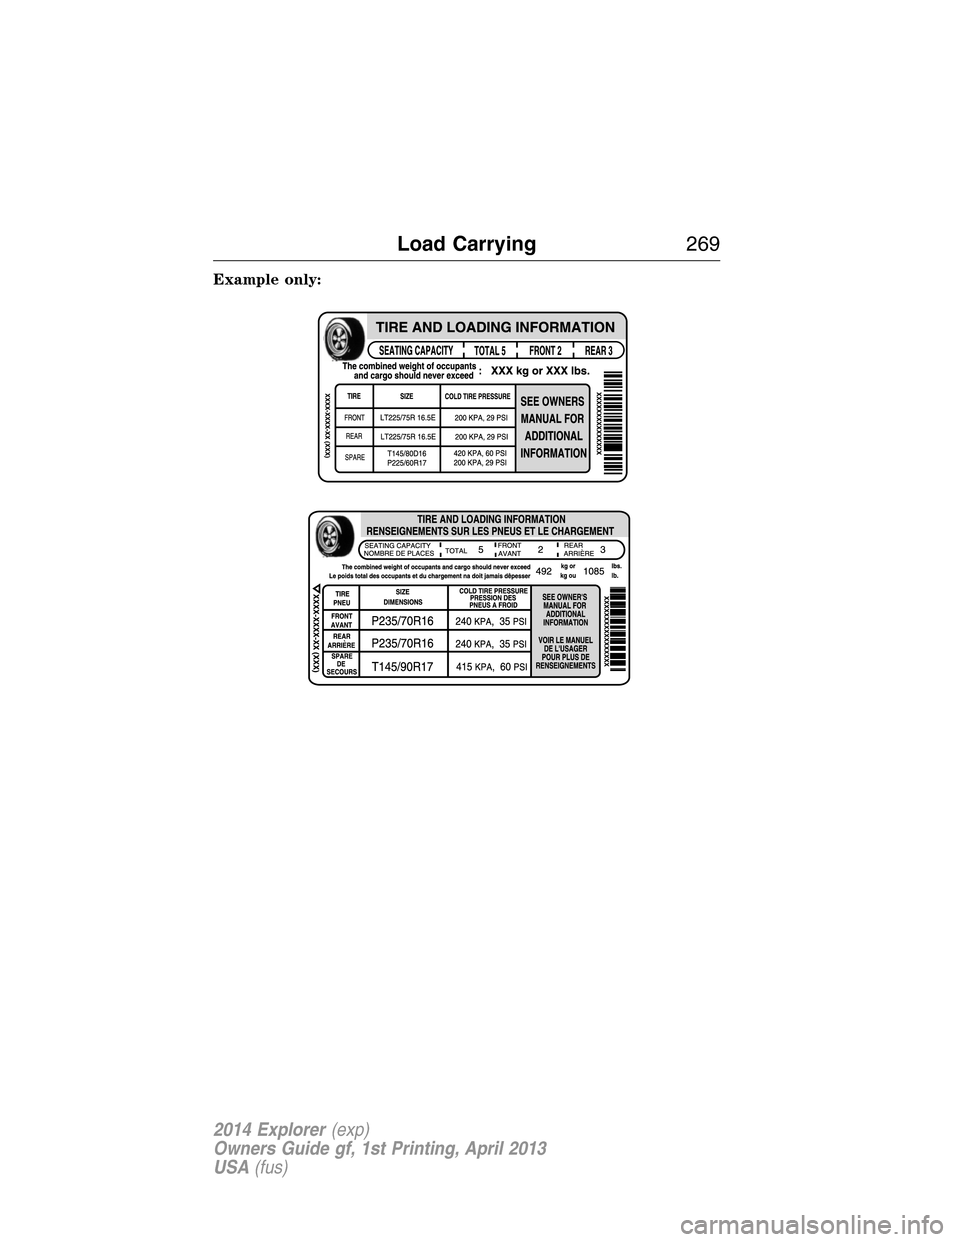
Example only:
Load Carrying269
2014 Explorer(exp)
Owners Guide gf, 1st Printing, April 2013
USA(fus)
Page 271 of 586
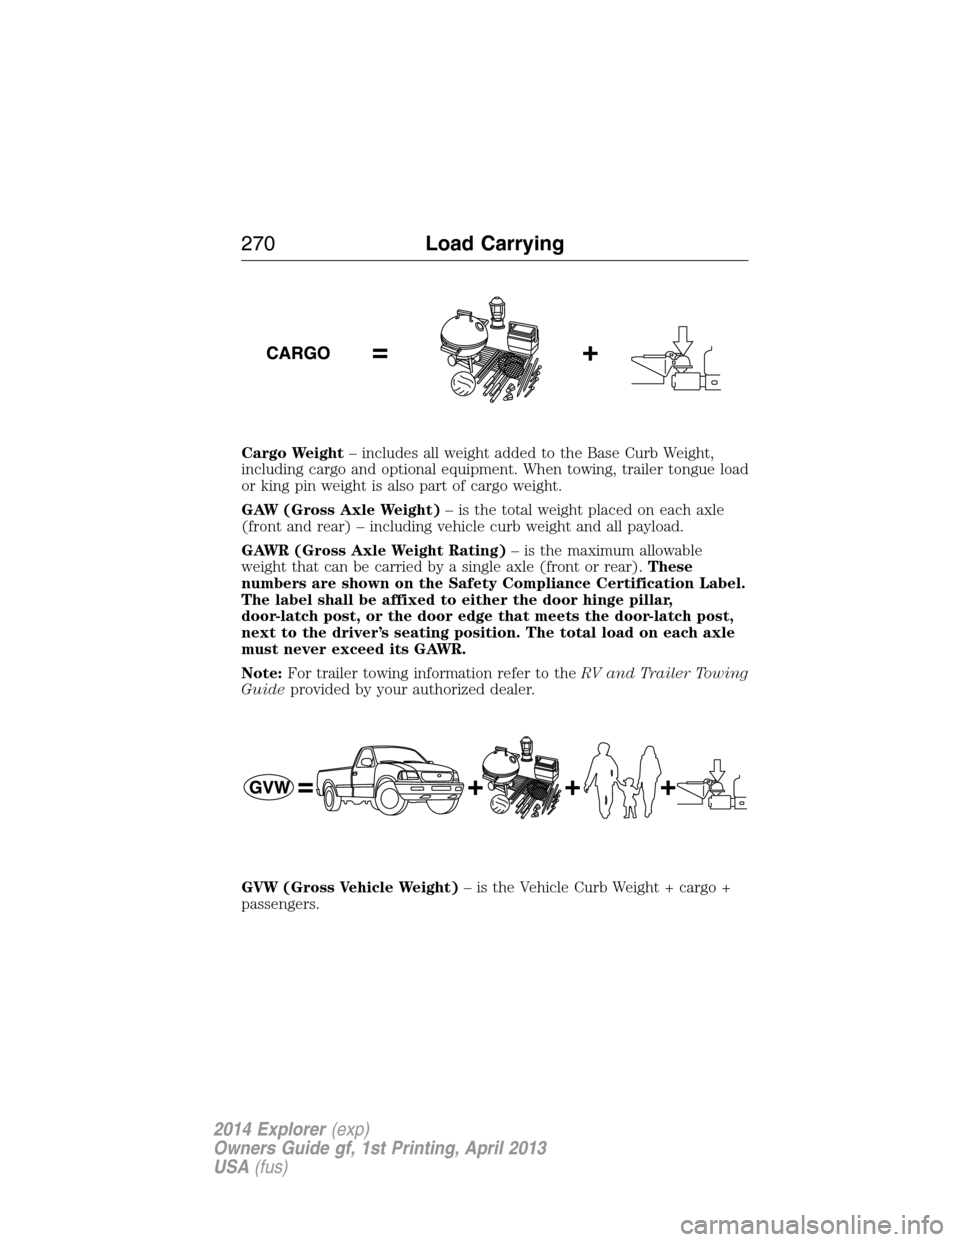
Cargo Weight– includes all weight added to the Base Curb Weight,
including cargo and optional equipment. When towing, trailer tongue load
or king pin weight is also part of cargo weight.
GAW (Gross Axle Weight)– is the total weight placed on each axle
(front and rear) – including vehicle curb weight and all payload.
GAWR (Gross Axle Weight Rating)– is the maximum allowable
weight that can be carried by a single axle (front or rear).These
numbers are shown on the Safety Compliance Certification Label.
The label shall be affixed to either the door hinge pillar,
door-latch post, or the door edge that meets the door-latch post,
next to the driver’s seating position. The total load on each axle
must never exceed its GAWR.
Note:For trailer towing information refer to theRV and Trailer Towing
Guideprovided by your authorized dealer.
GVW (Gross Vehicle Weight)– is the Vehicle Curb Weight + cargo +
passengers.
270Load Carrying
2014 Explorer(exp)
Owners Guide gf, 1st Printing, April 2013
USA(fus)