headrest FORD EXPLORER 2015 5.G Quick Reference Guide
[x] Cancel search | Manufacturer: FORD, Model Year: 2015, Model line: EXPLORER, Model: FORD EXPLORER 2015 5.GPages: 10, PDF Size: 3.91 MB
Page 7 of 10

CLIMATE CONTROLLED
FRONT SEATS*
On touchscreen-equipped vehicles,
press the Climate corner on your
touchscreen. Press the
or
seat icon repeatedly to cycle through
the various modes and off.
For non-touchscreen vehicles, use the
hard button controls (indicated by the
same symbols). Press the controls
repeatedly to cycle through the various
modes and off. More lights indicate
warmer or cooler settings.
MEMORY FUNCTION*
Allows one-touch recall of memory
positions for the driver seat, power
mirrors, steering column* and power-
adjustable pedals. Use the memory
controls on the driver’s door to program and then recall memory positions. To
program position 1, press and hold the
1 button until you hear a tone. Use this
same procedure to set positions 2 and
3 using the respective buttons. You can
now use these controls to recall the set
memory positions.
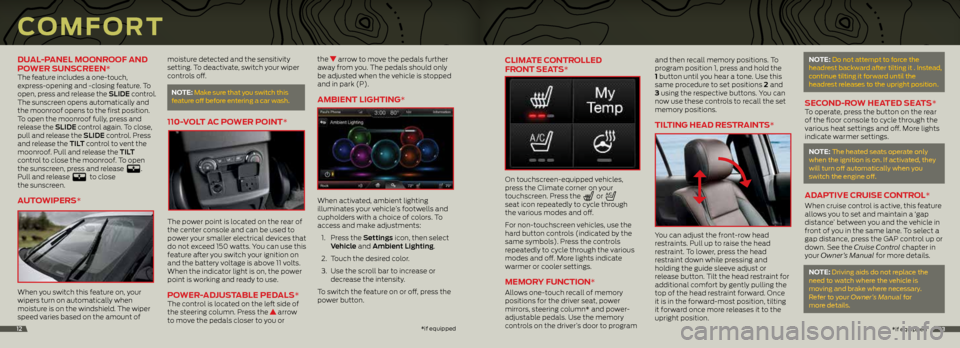
TILTING HEAD RESTRAINTS*
You can adjust the front-row head
restraints. Pull up to raise the head
restraint. To lower, press the head
restraint down while pressing and
holding the guide sleeve adjust or
release button. Tilt the head restraint for
additional comfort by gently pulling the
top of the head restraint forward. Once
it is in the forward-most position, tilting
it forward once more releases it to the
upright position.
NOTE: Do not attempt to force the
headrest backward after tilting it . Instead,
continue tilting it forward until the
headrest releases to the upright position.
SECOND-ROW HEATED SEATS*To operate, press the button on the rear
of the floor console to cycle through the
various heat settings and off. More lights
indicate warmer settings.
NOTE: The heated seats operate only
when the ignition is on. If activated, they
will turn off automatically when you
switch the engine off.
ADAPTIVE CRUISE CONTROL*
When cruise control is active, this feature
allows you to set and maintain a ‘gap
distance’ between you and the vehicle in
front of you in the same lane. To select a
gap distance, press the GAP control up or
down. See the Cruise Control chapter in
your Owner’s Manual for more details.
NOTE: Driving aids do not replace the
need to watch where the vehicle is
moving and brake where necessary.
Refer to your Owner’s Manual for
more details.
*
if equipped13
DUAL-PANEL MOONROOF AND
POWER SUNSCREEN*
The feature includes a one-touch,
express-opening and -closing feature. To
open, press and release the SLIDE control.
The sunscreen opens automatically and
the moonroof opens to the first position.
To open the moonroof fully, press and
release the SLIDE control again. To close,
pull and release the SLIDE control. Press
and release the TILT control to vent the
moonroof. Pull and release the TILT
control to close the moonroof. To open
the sunscreen, press and release
.
Pull and release to close
the sunscreen.
AUTOWIPERS*
When you switch this feature on, your
wipers turn on automatically when
moisture is on the windshield. The wiper
speed varies based on the amount of
moisture detected and the sensitivity
setting. To deactivate, switch your wiper
controls off.
NOTE:
Make sure that you switch this
feature off before entering a car wash.
110-VOLT AC POWER POINT*
The power point is located on the rear of
the center console and can be used to
power your smaller electrical devices that
do not exceed 150 watts. You can use this
feature after you switch your ignition on
and the battery voltage is above 11 volts.
When the indicator light is on, the power
point is working and ready to use.
POWER-ADJUSTABLE PEDALS*The control is located on the left side of
the steering column. Press the arrow
to move the pedals closer to you or the
arrow to move the pedals further
away from you. The pedals should only
be adjusted when the vehicle is stopped
and in park (P).
AMBIENT LIGHTING*
When activated, ambient lighting
illuminates your vehicle’s footwells and
cupholders with a choice of colors. To
access and make adjustments:
1. Press the Settings icon, then select
Vehicle and Ambient Lighting.
2. Touch the desired color.
3. Use the scroll bar to increase or
decrease the intensity.
To switch the feature on or off, press the
power button.
COMFORT
* if equipped12
Page 8 of 10

14
COMFORT CONTINUED
FLAT-FOLDING THIRD-ROW SEAT*
NOTE: Make sure that the area under the
seat is free of objects before stowing it.
To fold and stow the third-row seat:
1. Remove all objects from the seat and
floor stowage tub area.
2. Fold the head restraint by pulling the
head restraint release strap.
3. From the rear of the vehicle, fold the
seatback by pulling and holding the
red strap while pushing the seatback
forward. Release the strap once the
seatback starts rotating forward. 4.
To fold the seat fully into the floor,
release the seat latches by pulling two
straps at the same time: the short black
strap (next to the red strap) and the
headrest release strap. To unfold the third-row seat:
NOTE: Make sure that the area is free of
objects before unstowing it.
1. Unlatch and lift the seat out of the tub
in the floor by squeezing and pulling
up on the handle. When the seat is in
a vertical position, push the seat over,
letting it fall onto the latches.
2. To return the seatback to the upright
position, pull the red strap, then while
holding the red strap, pull the long
strap located on the seat back to
raise the seatback.
3. Pull the head restraints up to their
normal position.
NOTE: Push and pull on the seat to make
sure it latches to the vehicle floor. An
unlatched seat may become dangerous
in the event of a sudden stop or crash.
*if equipped15*if equipped
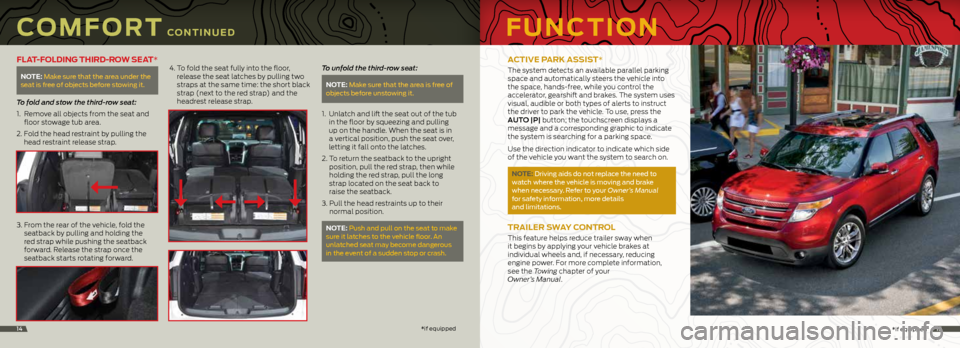
ACTIVE PARK ASSIST*
The system detects an available parallel parking
space and automatically steers the vehicle into
the space, hands-free, while you control the
accelerator, gearshift and brakes. The system uses
visual, audible or both types of alerts to instruct
the driver to park the vehicle. To use, press the
AUTO |P| button; the touchscreen displays a
message and a corresponding graphic to indicate
the system is searching for a parking space.
Use the direction indicator to indicate which side
of the vehicle you want the system to search on.
NOTE: Driving aids do not replace the need to
watch where the vehicle is moving and brake
when necessary. Refer to your Owner’s Manual
for safety information, more details
and limitations.
TRAILER SWAY CONTROL
This feature helps reduce trailer sway when
it begins by applying your vehicle brakes at
individual wheels and, if necessary, reducing
engine power. For more complete information,
see the Towing chapter of your
Owner’s Manual.
FUNCTION