headlamp FORD EXPLORER 2021 Owners Manual
[x] Cancel search | Manufacturer: FORD, Model Year: 2021, Model line: EXPLORER, Model: FORD EXPLORER 2021Pages: 577, PDF Size: 9.79 MB
Page 5 of 577
Clearing All MyKeys
......................................66
Checking MyKey System Status .............
66
Using MyKey With Remote Start Systems ........................................................
67
MyKey – Troubleshooting ..........................
67
Doors and Locks
Locking and Unlocking ...............................
69
Keyless Entry ...................................................
72
Liftgate
Power Liftgate ................................................
74
Security
Passive Anti-Theft System ........................
78
Anti-Theft Alarm ...........................................
78
Steering Wheel
Adjusting the Steering Wheel - Vehicles With: Manual Adjustable Steering
Column .........................................................
80
Adjusting the Steering Wheel - Vehicles With: Power Adjustable Steering
Column .........................................................
80
Audio Control ..................................................
82
Voice Control ..................................................
82
Cruise Control - Vehicles With: Adaptive Cruise Control With Stop and Go .......
82
Cruise Control - Vehicles With: Cruise Control ..........................................................
83
Information Display Control ......................
83
Heated Steering Wheel ..............................
83
Horn ....................................................................
83
Wipers and Washers
Windshield Wipers .......................................
84
Autowipers ......................................................
84
Windshield Washers ....................................
85
Rear Window Wiper and Washers .........
86Lighting
General Information
.....................................
87
Lighting Control .............................................
87
Autolamps .......................................................
88
Instrument Lighting Dimmer ....................
88
Headlamp Exit Delay ...................................
88
Daytime Running Lamps - Vehicles With: Configurable Daytime Running Lamps
........................................................................\
..
89
Daytime Running Lamps - Vehicles With: Daytime Running Lamps (DRL) .........
89
Front Fog Lamps ...........................................
89
Adaptive Headlamps ..................................
90
Direction Indicators ......................................
90
Interior Lamps .................................................
91
Ambient Lighting - Vehicles With: 8 Inch Information and Entertainment Display
Screen ...........................................................
92
Ambient Lighting - Vehicles With: 10.1 Inch Information and Entertainment
Display Screen ...........................................
92
Automatic High Beam Control
What Is Automatic High Beam Control ........................................................................\
..
94
Switching Automatic High Beam Control On and Off ...................................................
94
Automatic High Beam Control Indicators ........................................................................\
..
94
Overriding Automatic High Beam Control ........................................................................\
..
95
Windows and Mirrors
Power Windows ............................................
96
Global Opening ..............................................
97
Exterior Mirrors - Excluding: ST ................
97
Exterior Mirrors - ST .....................................
98
Interior Mirror ................................................
100
Sun Visors ......................................................
100
Moonroof .........................................................
101
2
Explorer (CTW), enUSA, Edition date: 202007, Second-Printing Table of Contents
Page 9 of 577
Essential Towing Checks
.........................292
Towing the Vehicle on Four Wheels .....
294
Driving Hints
Reduced Engine Performance ...............
295
Economical Driving ....................................
295
Cold Weather Precautions ......................
296
Breaking-In ...................................................
296
Driving Through Water .............................
296
Floor Mats ......................................................
297
Roadside Emergencies
Roadside Assistance .................................
298
Hazard Flashers ..........................................
299
Fuel Shutoff .................................................
299
Jump Starting the Vehicle ......................
300
Collision, Damage or Fire Event ............
302
Post-Crash Alert System .........................
303
Transporting the Vehicle .........................
303
Customer Assistance
Getting the Services You Need .............
305
In California (U.S. Only) ...........................
306
The Better Business Bureau (BBB) Auto Line Program (U.S. Only) .....................
307
Utilizing the Mediation/Arbitration Program (Canada Only) .....................
308
Getting Assistance Outside the U.S. and Canada ......................................................
308
Ordering Additional Owner's Literature ........................................................................\
.
310
Reporting Safety Defects (U.S. Only) ........................................................................\
.
310
Reporting Safety Defects (Canada Only) ........................................................................\
.
310
Fuses
Fuse Specification Chart ...........................
312
Changing a Fuse .........................................
320Maintenance
General Information
...................................
322
Opening and Closing the Hood .............
322
Under Hood Overview - 2.3L EcoBoost™ ........................................................................\
323
Under Hood Overview - 3.0L ..................
324
Under Hood Overview - 3.3L ..................
325
Engine Oil Dipstick - 2.3L EcoBoost™ ........................................................................\
326
Engine Oil Dipstick - 3.0L ........................
326
Engine Oil Dipstick - 3.3L .........................
326
Engine Oil Check .........................................
326
Oil Change Indicator Reset ......................
327
Changing the Engine Air Filter - 2.3L EcoBoost™ ...............................................
328
Changing the Engine Air Filter - 3.0L ........................................................................\
329
Changing the Engine Air Filter - 3.3L ....
330
Engine Coolant Check ................................
331
Automatic Transmission Fluid Check ........................................................................\
335
Brake Fluid Check .......................................
335
Power Steering Fluid Check ....................
336
Changing the 12V Battery ........................
336
Adjusting the Headlamps .......................
338
Washer Fluid Check ...................................
340
Fuel Filter .......................................................
340
Checking the Wiper Blades ....................
340
Changing the Front Wiper Blades ........
340
Changing the Rear Wiper Blades ...........
341
Changing a Bulb ...........................................
341
Vehicle Care
General Information ..................................
343
Cleaning Products ......................................
343
Cleaning the Exterior .................................
344
Waxing ............................................................
345
Cleaning the Engine ...................................
345
Cleaning the Windows and Wiper Blades ........................................................................\
346
6
Explorer (CTW), enUSA, Edition date: 202007, Second-Printing Table of Contents
Page 18 of 577
WARNING: Do not connect
wireless plug-in devices to the data link
connector. Unauthorized third parties
could gain access to vehicle data and
impair the performance of safety related
systems. Only allow repair facilities that
follow our service and repair instructions
to connect their equipment to the data
link connector.
We respect your privacy and are
committed to protecting it. The
information contained in this manual was
correct at the time of publication, but as
technology rapidly changes, we
recommend that you visit the local Ford
website for the latest information.
Your vehicle has electronic control units
that have data recording functionality and
the ability to permanently or temporarily
store data. This data could include
information on the condition and status of
your vehicle, vehicle maintenance
requirements, events and malfunctions.
The types of data that can be recorded are
described in this section. Some of the data
recorded is stored in event logs or error
logs.
Note: Error logs are reset following a service
or repair.
Note: We may provide information in
response to requests from law enforcement,
other government authorities and third
parties acting with lawful authority or
through a legal process. Such information
could be used by them in legal proceedings.
Data recorded includes, for example:
• Operating states of system
components, for example fuel level,
tire pressure and battery charge level.
• Vehicle and component status, for
example wheel speed, deceleration,
lateral acceleration and seatbelt
status. •
Events or errors in essential systems,
for example headlamps and brakes.
• System responses to driving situations,
for example airbag deployment and
stability control.
• Environmental conditions, for example
temperature.
Some of this data, when used in
combination with other information, for
example an accident report, damage to a
vehicle or eyewitness statements, could
be associated with a specific person.
Services That We Provide
If you use our services, we collect and use
data, for example account information,
vehicle location and driving characteristics,
that could identify you. We transmit this
data through a dedicated, protected
connection. We only collect and use data
to enable your use of our services to which
you have subscribed, with your consent or
where permitted by law. For additional
information, see the terms and conditions
of the services to which you have
subscribed.
For additional information about our
privacy policy, refer to the local Ford
website.
Services That Third Parties
Provide
We recommend that you review the terms
and conditions and data privacy
information for any services equipped with
your vehicle or to which you subscribe. We
take no responsibility for services that third
parties provide.
15
Explorer (CTW), enUSA, Edition date: 202007, Second-Printing Data Privacy
Page 75 of 577
Illuminated Exit
The interior lamps and some exterior
lamps illuminate when all doors close and
you switch the ignition off.
The lamps turn off if all the doors remain
closed and:
•
25 seconds have elapsed.
• You lock your vehicle from the outside.
Battery Saver
If you leave the courtesy lamps, interior
lamps or headlamps on, the battery saver
shuts them off 10 minutes after you switch
the ignition off.
Battery Saver for Intelligent Access
Keys (If Equipped)
If you leave the ignition switched on and
the engine is not running, the battery saver
turns the ignition off when it detects a
certain amount of battery drain, or after
45 minutes have elapsed.
KEYLESS ENTRY (IF EQUIPPED)
SECURICODE™ Keyless Entry
Keypad
The keypad is near the driver window. It
illuminates when touched.
Note: If you enter your entry code too fast
on the keypad, the unlock function may not
work. Enter your entry code again more
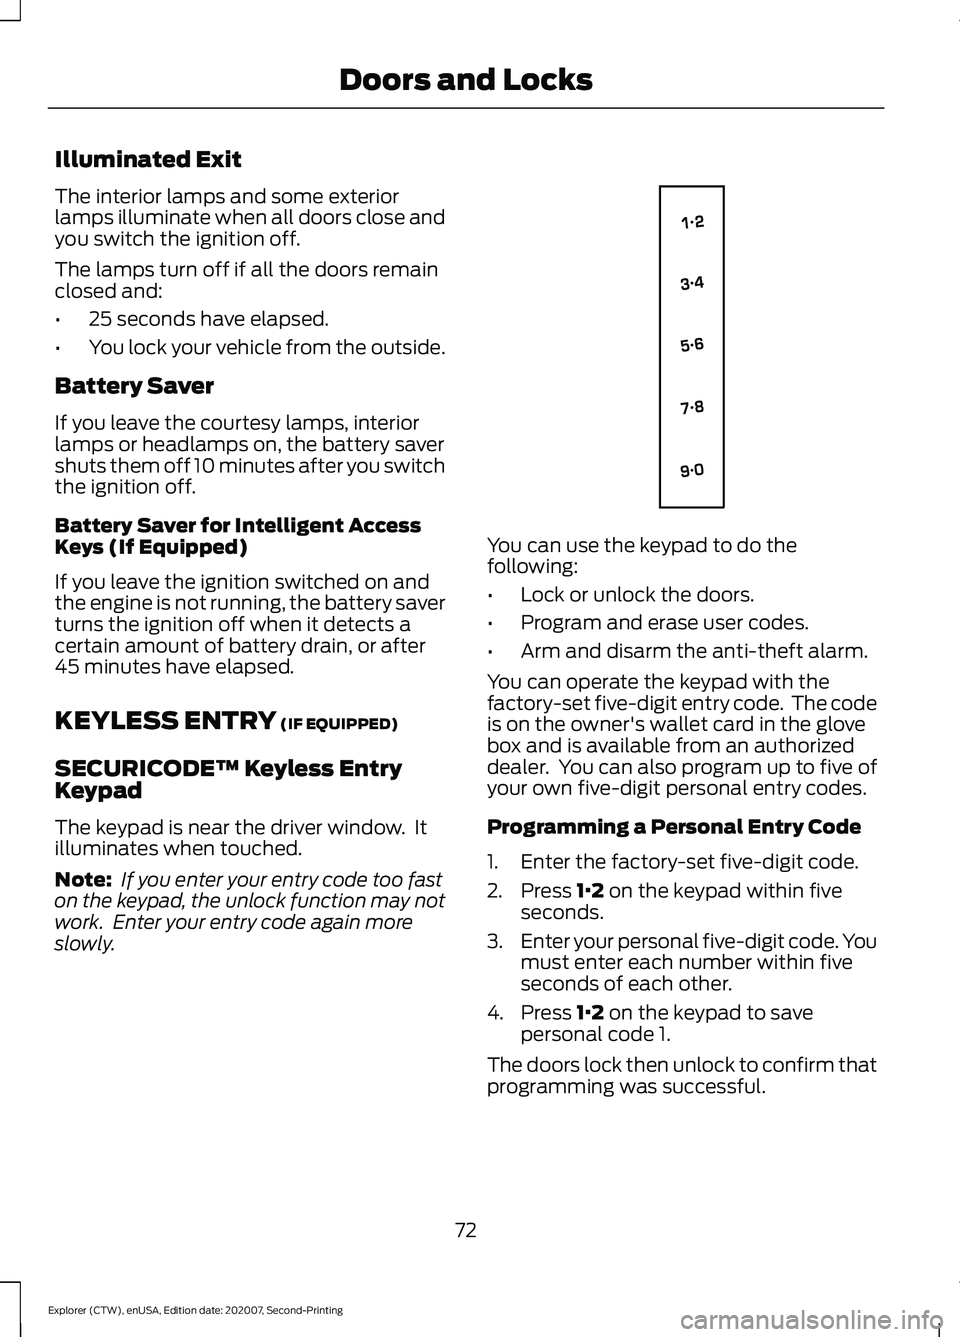
slowly. You can use the keypad to do the
following:
•
Lock or unlock the doors.
• Program and erase user codes.
• Arm and disarm the anti-theft alarm.
You can operate the keypad with the
factory-set five-digit entry code. The code
is on the owner's wallet card in the glove
box and is available from an authorized
dealer. You can also program up to five of
your own five-digit personal entry codes.
Programming a Personal Entry Code
1. Enter the factory-set five-digit code.
2. Press
1·2 on the keypad within five
seconds.
3. Enter your personal five-digit code. You
must enter each number within five
seconds of each other.
4. Press
1·2 on the keypad to save
personal code 1.
The doors lock then unlock to confirm that
programming was successful.
72
Explorer (CTW), enUSA, Edition date: 202007, Second-Printing Doors and LocksE138637
Page 88 of 577
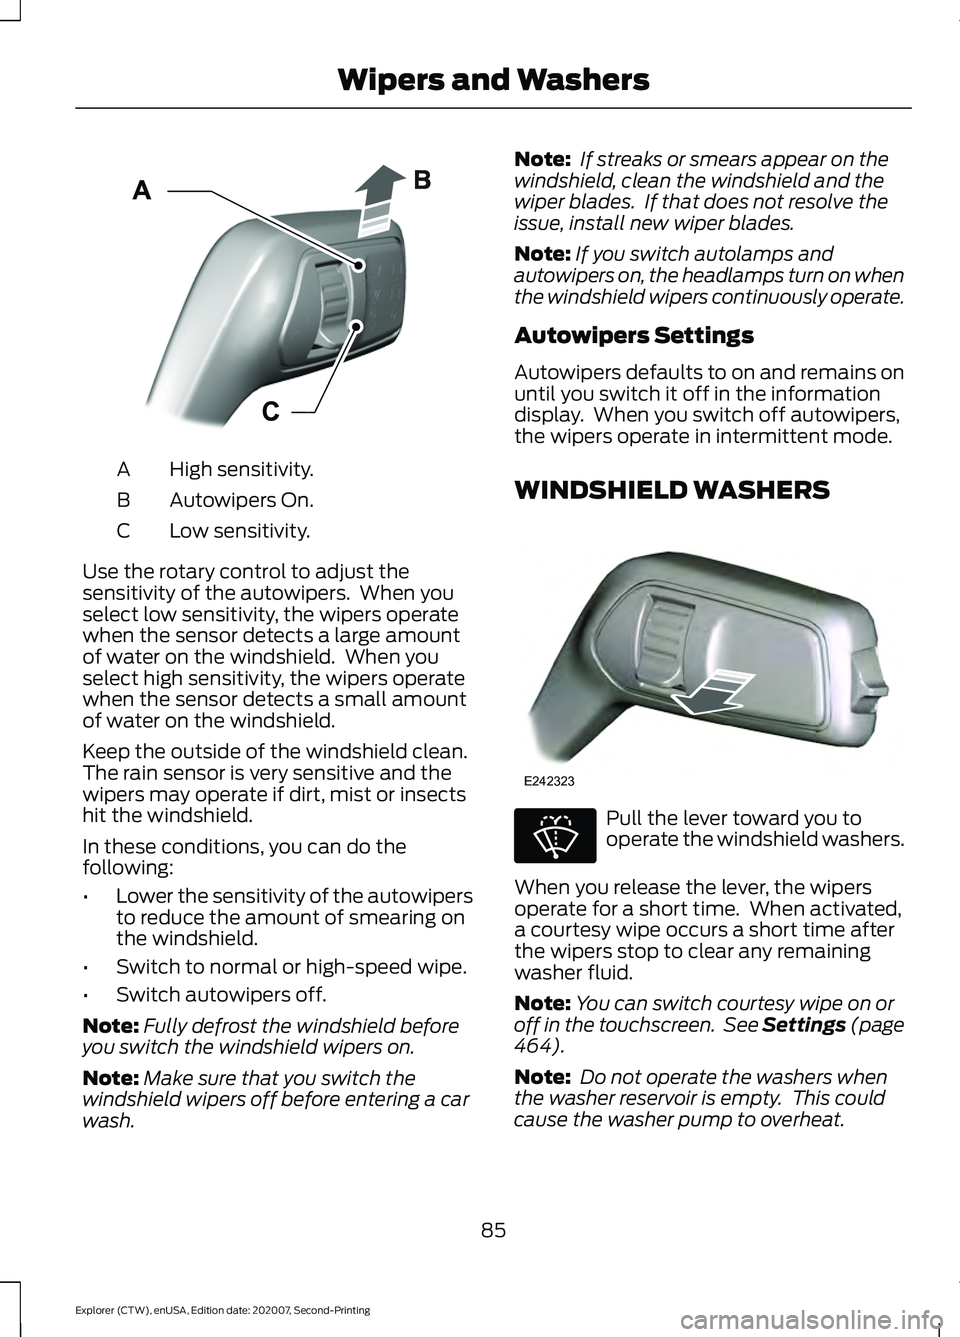
High sensitivity.
A
Autowipers On.
B
Low sensitivity.
C
Use the rotary control to adjust the
sensitivity of the autowipers. When you
select low sensitivity, the wipers operate
when the sensor detects a large amount
of water on the windshield. When you
select high sensitivity, the wipers operate
when the sensor detects a small amount
of water on the windshield.
Keep the outside of the windshield clean.
The rain sensor is very sensitive and the
wipers may operate if dirt, mist or insects
hit the windshield.
In these conditions, you can do the
following:
• Lower the sensitivity of the autowipers
to reduce the amount of smearing on
the windshield.
• Switch to normal or high-speed wipe.
• Switch autowipers off.
Note: Fully defrost the windshield before
you switch the windshield wipers on.
Note: Make sure that you switch the
windshield wipers off before entering a car
wash. Note:
If streaks or smears appear on the
windshield, clean the windshield and the
wiper blades. If that does not resolve the
issue, install new wiper blades.
Note: If you switch autolamps and
autowipers on, the headlamps turn on when
the windshield wipers continuously operate.
Autowipers Settings
Autowipers defaults to on and remains on
until you switch it off in the information
display. When you switch off autowipers,
the wipers operate in intermittent mode.
WINDSHIELD WASHERS Pull the lever toward you to
operate the windshield washers.
When you release the lever, the wipers
operate for a short time. When activated,
a courtesy wipe occurs a short time after
the wipers stop to clear any remaining
washer fluid.
Note: You can switch courtesy wipe on or
off in the touchscreen. See Settings (page
464).
Note: Do not operate the washers when
the washer reservoir is empty. This could
cause the washer pump to overheat.
85
Explorer (CTW), enUSA, Edition date: 202007, Second-Printing Wipers and WashersE295997 E242323 E270967
Page 90 of 577
GENERAL INFORMATION
Condensation in the Exterior Front
Lamps and Rear Lamps
Exterior front lamps and rear lamps have
vents to accommodate normal changes
in air pressure.
Condensation can be a natural by-product
of this design. When moist air enters the
lamp assembly through the vents, there is
a possibility that condensation can occur
when the temperature is cold. When
normal condensation occurs, a fine mist
can form on the interior of the lens. The
fine mist eventually clears and exits
through the vents during normal operation.
Clearing time may take as long as 48 hours
under dry weather conditions.
Examples of acceptable condensation are:
•
The presence of a fine mist (no streaks,
drip marks or large droplets).
• A fine mist covers less than 50% of the
lens.
Examples of unacceptable condensation
are:
• A water puddle inside the lamp.
• Streaks, drip marks or large droplets
present on the interior of the lens.
If you see any unacceptable condensation,
have your vehicle checked by an authorized
dealer.
LIGHTING CONTROL
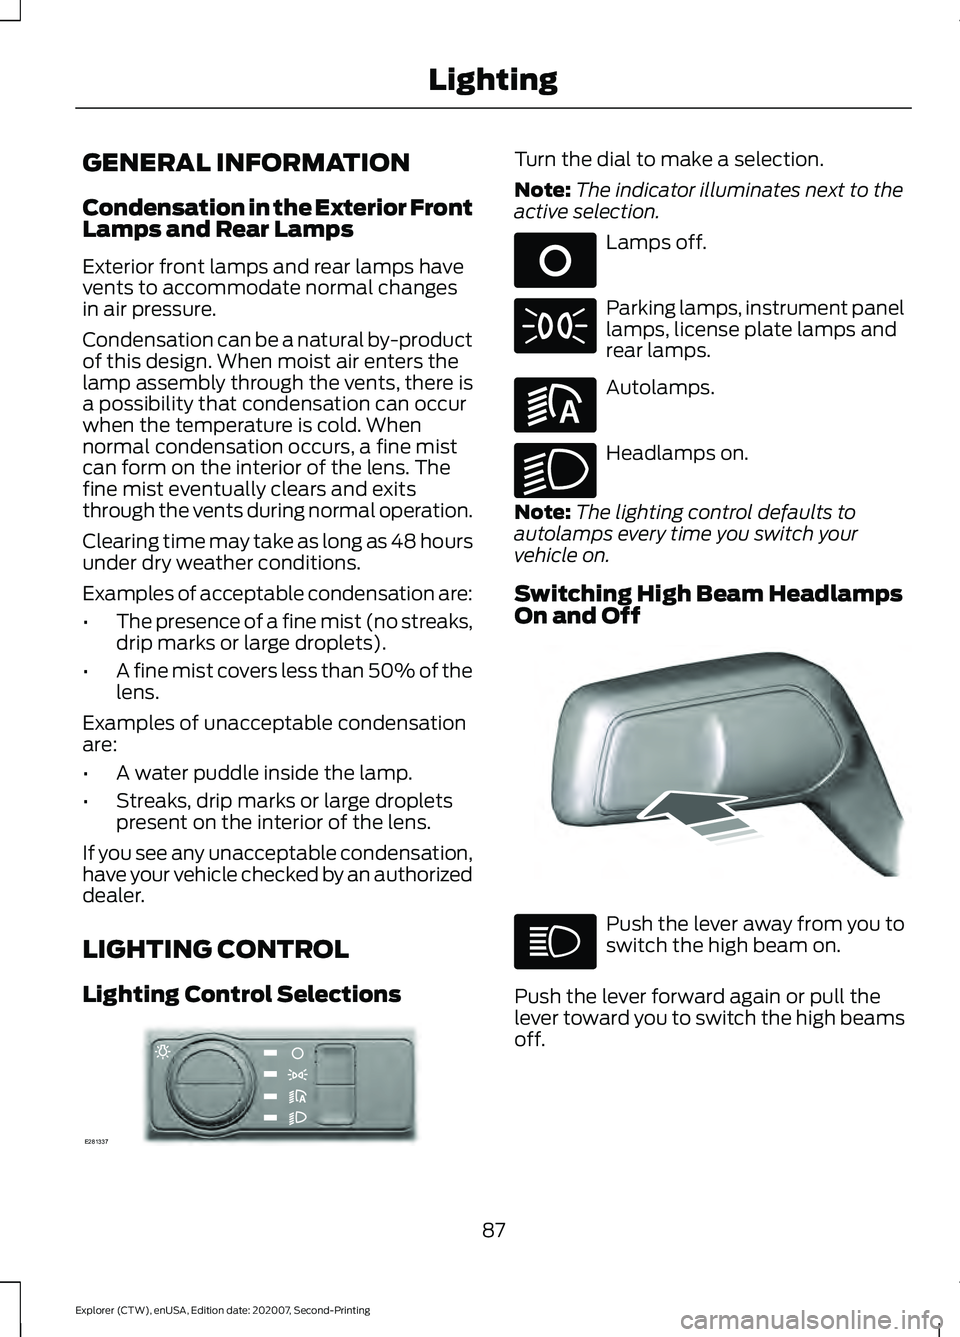
Lighting Control Selections Turn the dial to make a selection.
Note:
The indicator illuminates next to the
active selection. Lamps off.
Parking lamps, instrument panel
lamps, license plate lamps and
rear lamps.
Autolamps.
Headlamps on.
Note: The lighting control defaults to
autolamps every time you switch your
vehicle on.
Switching High Beam Headlamps
On and Off Push the lever away from you to
switch the high beam on.
Push the lever forward again or pull the
lever toward you to switch the high beams
off.
87
Explorer (CTW), enUSA, Edition date: 202007, Second-Printing LightingE281337 E265031 E281240 E270968 E248603
Page 91 of 577
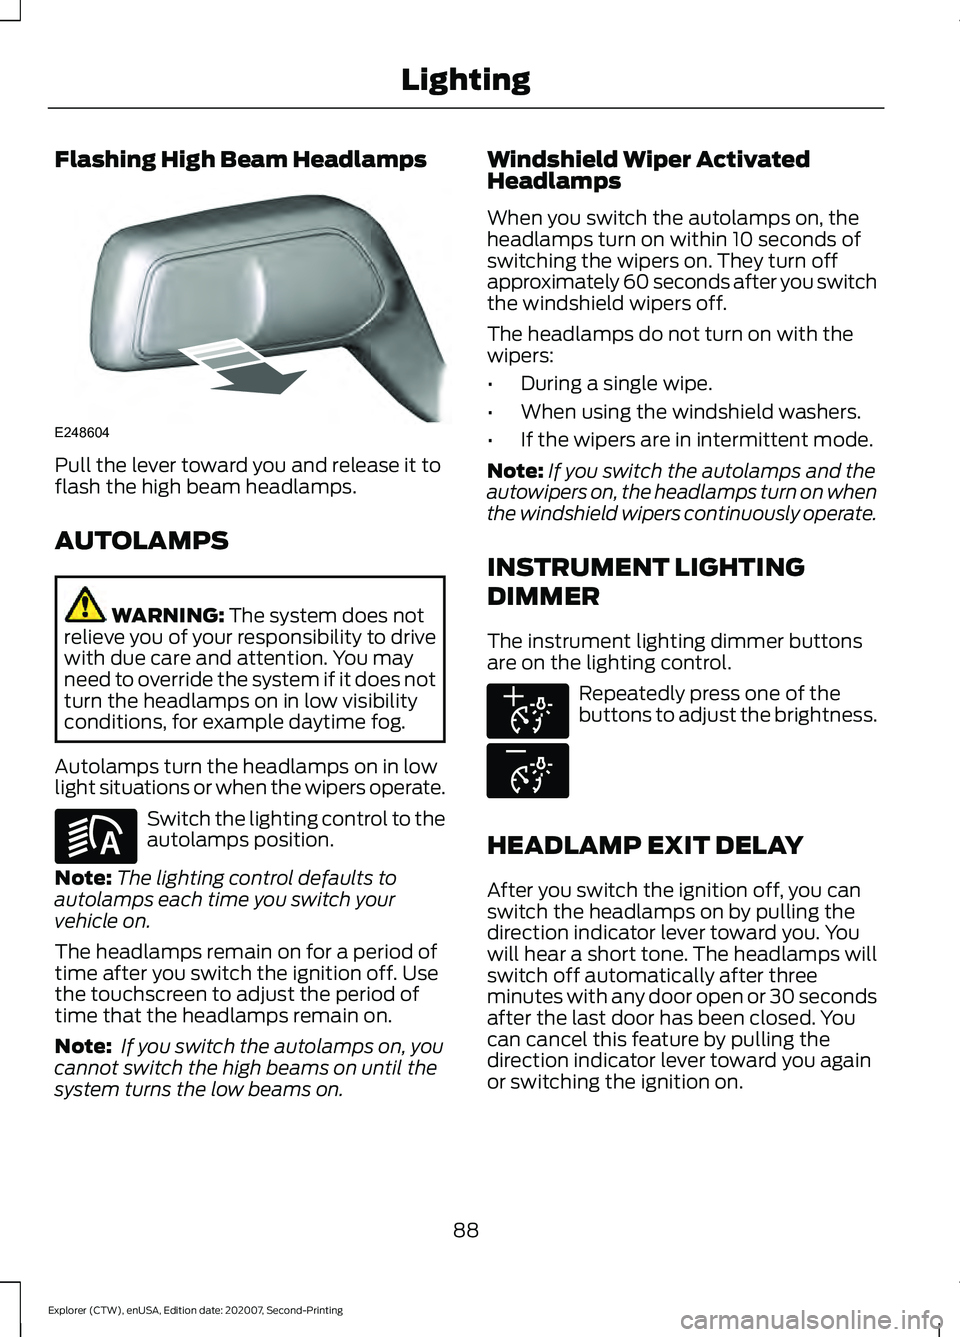
Flashing High Beam Headlamps
Pull the lever toward you and release it to
flash the high beam headlamps.
AUTOLAMPS
WARNING: The system does not
relieve you of your responsibility to drive
with due care and attention. You may
need to override the system if it does not
turn the headlamps on in low visibility
conditions, for example daytime fog.
Autolamps turn the headlamps on in low
light situations or when the wipers operate. Switch the lighting control to the
autolamps position.
Note: The lighting control defaults to
autolamps each time you switch your
vehicle on.
The headlamps remain on for a period of
time after you switch the ignition off. Use
the touchscreen to adjust the period of
time that the headlamps remain on.
Note: If you switch the autolamps on, you
cannot switch the high beams on until the
system turns the low beams on. Windshield Wiper Activated
Headlamps
When you switch the autolamps on, the
headlamps turn on within 10 seconds of
switching the wipers on. They turn off
approximately 60 seconds after you switch
the windshield wipers off.
The headlamps do not turn on with the
wipers:
•
During a single wipe.
• When using the windshield washers.
• If the wipers are in intermittent mode.
Note: If you switch the autolamps and the
autowipers on, the headlamps turn on when
the windshield wipers continuously operate.
INSTRUMENT LIGHTING
DIMMER
The instrument lighting dimmer buttons
are on the lighting control. Repeatedly press one of the
buttons to adjust the brightness.
HEADLAMP EXIT DELAY
After you switch the ignition off, you can
switch the headlamps on by pulling the
direction indicator lever toward you. You
will hear a short tone. The headlamps will
switch off automatically after three
minutes with any door open or 30 seconds
after the last door has been closed. You
can cancel this feature by pulling the
direction indicator lever toward you again
or switching the ignition on.
88
Explorer (CTW), enUSA, Edition date: 202007, Second-Printing LightingE248604 E281240 E291299 E296433
Page 92 of 577
DAYTIME RUNNING LAMPS -
VEHICLES WITH:
CONFIGURABLE DAYTIME
RUNNING LAMPS
WARNING: The daytime running
lamps system does not activate the rear
lamps and may not provide adequate
lighting during low visibility driving
conditions. Make sure you switch the
headlamps on, as appropriate, during all
low visibility conditions. Failure to do so
may result in a crash.
Switch the daytime running lamps on or
off using the touchscreen:
1. Select
Settings. See Settings (page
464).
2. Select
Vehicle.
3. Select
Lighting.
The daytime running lamps turn on when:
1. The lamps are on in the information display.
2. You switch the ignition on.
3. The transmission is not in park (P) for vehicles with automatic transmissions
or you release the parking brake for
vehicles with manual transmissions.
4. The lighting control is in the autolamps
position.
5. The headlamps are off.
The other lighting control switch positions
do not turn on the daytime running lamps.
If the daytime running lamps are off in the
information display, the lamps stay off in
all switch positions. DAYTIME RUNNING LAMPS -
VEHICLES WITH: DAYTIME
RUNNING LAMPS (DRL) WARNING:
The daytime running
lamps system does not activate the rear
lamps and may not provide adequate
lighting during low visibility driving
conditions. Make sure you switch the
headlamps on, as appropriate, during all
low visibility conditions. Failure to do so
may result in a crash.
The system turns the lamps on in daylight
conditions.
To switch the system on, switch the
lighting control to any position except
headlamps.
FRONT FOG LAMPS
(IF EQUIPPED)
Switching the Front Fog Lamps On
or Off
Only switch the front fog lamps on during
reduced visibility.
You can switch the front fog lamps on if
any of the following occur:
• You set the lighting control to the
parking lamps position.
• You set the lighting control to the
headlamps position.
• You set the lighting control to the
autolamps position and the headlamps
are on.
The front fog lamp button is on the lighting
control. Press the button to switch the
front fog lamps on or off.
89
Explorer (CTW), enUSA, Edition date: 202007, Second-Printing Lighting
Page 93 of 577
Note:
The brightness of the daytime running
lamps may decrease when the front fog
lamps are switched on.
Front Fog Lamp Indicator It illuminates when you switch
the front fog lamps on.
ADAPTIVE HEADLAMPS (IF
EQUIPPED)
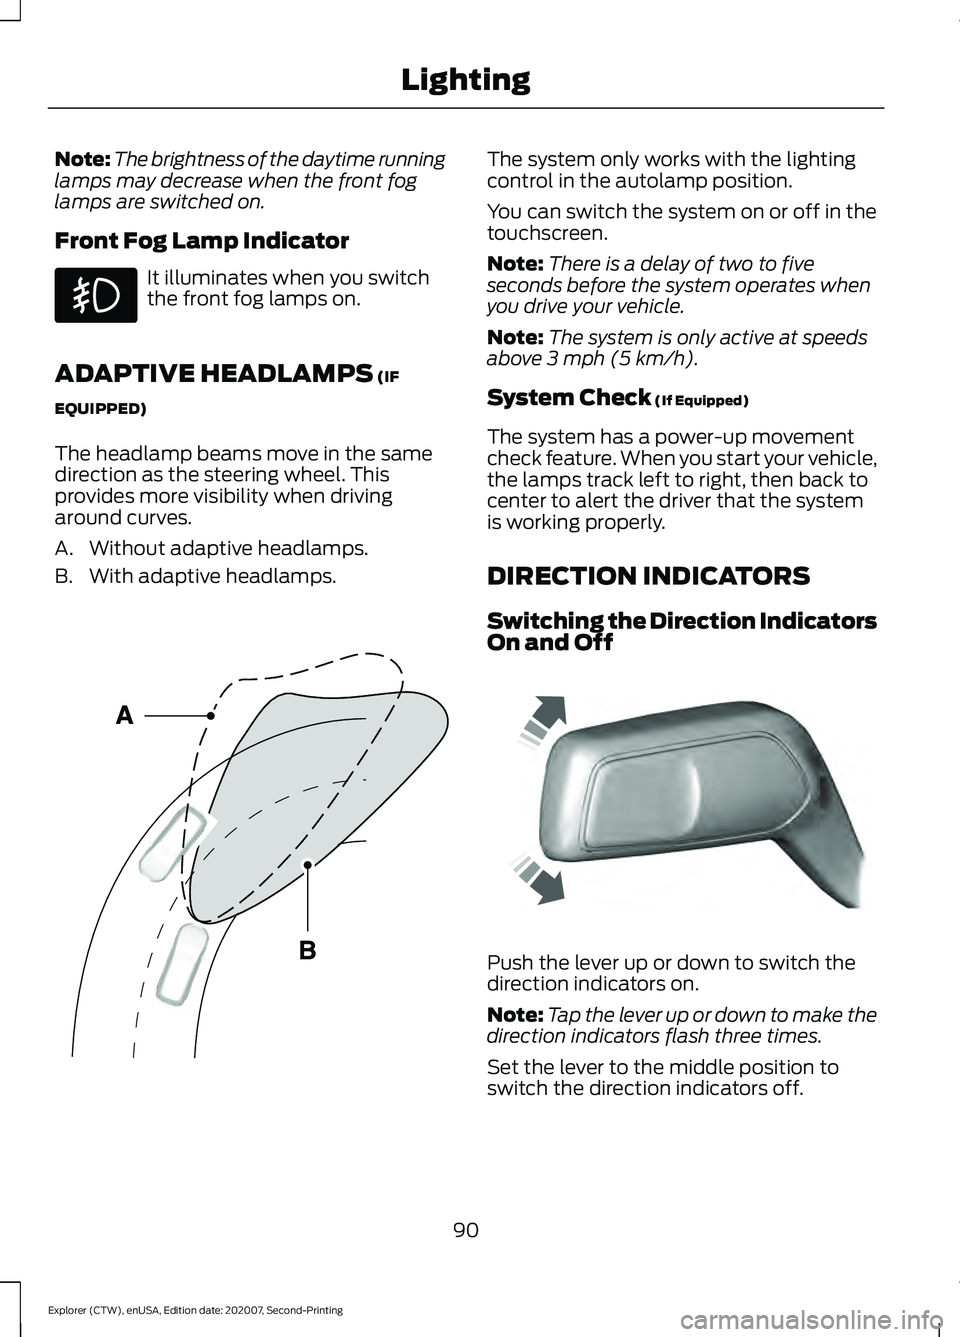
The headlamp beams move in the same
direction as the steering wheel. This
provides more visibility when driving
around curves.
A. Without adaptive headlamps.
B. With adaptive headlamps. The system only works with the lighting
control in the autolamp position.
You can switch the system on or off in the
touchscreen.
Note:
There is a delay of two to five
seconds before the system operates when
you drive your vehicle.
Note: The system is only active at speeds
above 3 mph (5 km/h).
System Check
(If Equipped)
The system has a power-up movement
check feature. When you start your vehicle,
the lamps track left to right, then back to
center to alert the driver that the system
is working properly.
DIRECTION INDICATORS
Switching the Direction Indicators
On and Off Push the lever up or down to switch the
direction indicators on.
Note:
Tap the lever up or down to make the
direction indicators flash three times.
Set the lever to the middle position to
switch the direction indicators off.
90
Explorer (CTW), enUSA, Edition date: 202007, Second-Printing Lighting E161714 E242676
Page 97 of 577
WHAT IS AUTOMATIC HIGH
BEAM CONTROL
The system turns on high beams if it is dark
enough and no other traffic is present. If it
detects an approaching vehicle
’s
headlamps or tail lamps, or street lighting
ahead, the system turns the high beams
off. Low beams remain on.
A camera sensor, centrally mounted
behind the windshield of your vehicle,
continuously monitors conditions to turn
the high beams on and off.
SWITCHING AUTOMATIC HIGH
BEAM CONTROL ON AND OFF WARNING: Do not use the system
in poor visibility, for example fog, heavy
rain, spray or snow.
1. Press
Settings on the touchscreen.
2. Press
Vehicle.
3. Press
Lighting.
Activating the Automatic High
Beam Control Switch the lighting control to the
autolamps position. See
Autolamps
(page 88).
Note: The lighting control defaults to
autolamps each time you switch your
vehicle on.
When active, the high beams turn on if:
• The ambient light level is low enough.
• There is no traffic in front of your
vehicle.
• The vehicle speed is greater than
approximately
32 mph (51 km/h). When active, the high beams turn off if:
•
The ambient light level is high enough
that high beams are not required.
• The system detects an approaching
vehicle's headlamps or tail lamps.
• The system detects severe rain, snow
or fog.
• The camera is blocked.
• The vehicle speed falls below
approximately
27 mph (44 km/h).
Note: The deactivation speed is lower on
curves.
Note: High beam reactivation may be
delayed in certain curvy road situations.
Note: The system may not operate properly
if the sensor is blocked. Keep the windshield
free from obstruction or damage.
Note: The system may not operate properly
in cold or inclement conditions. You can
switch on the high beams by overriding the
system.
Note: If the system detects a blockage, for
example bird droppings, bug splatter, snow
or ice, the system goes into low beam mode
until you clear the blockage. A message may
appear in the information display if the
camera is blocked.
Note: Using much larger tires or equipping
vehicle accessories such as snowplows can
modify your vehicle's ride height and
degrade automatic high beam control
performance.
AUTOMATIC HIGH BEAM
CONTROL INDICATORS The indicator illuminates to
confirm when the system is
ready to assist.
94
Explorer (CTW), enUSA, Edition date: 202007, Second-Printing Automatic High Beam ControlE281240