instrument panel FORD EXPLORER 2021 Owners Manual
[x] Cancel search | Manufacturer: FORD, Model Year: 2021, Model line: EXPLORER, Model: FORD EXPLORER 2021Pages: 577, PDF Size: 9.79 MB
Page 4 of 577
Introduction
About This Manual
..........................................9
Symbols Glossary ............................................
9
Perchlorate ........................................................
11
Ford Credit .........................................................
11
Replacement Parts Recommendation ........................................................................\
....
12
Special Notices ...............................................
12
Mobile Communications Equipment ........................................................................\
....
13
Export Unique Options ................................
14
Data Privacy
Data Privacy .....................................................
15
Service Data .....................................................
16
Event Data ........................................................
16
Settings Data ...................................................
17
Connected Vehicle Data ..............................
17
Mobile Device Data .......................................
18
Emergency Call System Data ....................
18
Environment
Protecting the Environment .......................
19
At a Glance
At a Glance - ST ............................................
20
Instrument Panel ............................................
21
Child Safety
General Information .....................................
23
Installing Child Restraints ..........................
25
Booster Seats .................................................
33
Child Restraint Positioning ........................
35
Child Safety Locks ........................................
36
Seatbelts
Principle of Operation .................................
38
Fastening the Seatbelts .............................
39
Seatbelt Height Adjustment ......................
41Seatbelt Warning Lamp and Indicator
Chime .............................................................
41
Seatbelt Reminder ........................................
42
Child Restraint and Seatbelt Maintenance ...............................................
43
Seatbelt Extensions .....................................
44
Personal Safety System ™
Personal Safety System ™.........................
45
Supplementary Restraints System
Principle of Operation .................................
46
Driver and Passenger Airbags ...................
47
Front Passenger Sensing System ...........
48
Side Airbags ....................................................
50
Driver and Passenger Knee Airbags ........
51
Safety Canopy ™.............................................
51
Crash Sensors and Airbag Indicator .......
52
Airbag Disposal ..............................................
53
Pedestrian Protection - Hybrid Electric Vehicle (HEV)
Pedestrian Alert System ............................
54
911 Assist
What Is 911 Assist ..........................................
55
Emergency Call Requirements ................
55
Emergency Call Limitations ......................
56
Keys and Remote Controls
General Information on Radio Frequencies .................................................
57
Remote Control ..............................................
57
Replacing a Lost Key or Remote Control ........................................................................\
..
63
MyKey ™
Principle of Operation .................................
64
Creating a MyKey ..........................................
65
1
Explorer (CTW), enUSA, Edition date: 202007, Second-Printing Table of Contents
Page 10 of 577
Cleaning the Interior
..................................346
Cleaning the Instrument Panel and Instrument Cluster Lens .......................
347
Cleaning Leather Seats .............................
347
Repairing Minor Paint Damage .............
348
Cleaning the Wheels .................................
348
Vehicle Storage ...........................................
348
Body Styling Kits ........................................
350
Wheels and Tires
General Information ...................................
351
Tire Care .........................................................
353
Using Summer Tires ..................................
366
Using Snow Chains ....................................
366
Tire Pressure Monitoring System .........
368
Changing a Road Wheel ...........................
374
Technical Specifications .........................
380
Capacities and Specifications
Engine Specifications - 2.3L EcoBoost™ ........................................................................\
382
Engine Specifications - 3.0L ..................
383
Engine Specifications - 3.0L, ST ...........
383
Engine Specifications - 3.3L, Gasoline ........................................................................\
385
Engine Specifications - 3.3L, Hybrid Electric Vehicle (HEV) ..........................
386
Transmission Specifications - ST ........
386
Motorcraft Parts - 2.3L EcoBoost™ .....
388
Motorcraft Parts - 3.0L ............................
389
Motorcraft Parts - 3.3L .............................
390
Vehicle Identification Number ................
391
Capacities and Specifications - 2.3L EcoBoost™ ................................................
391
Capacities and Specifications - 3.0L .......................................................................
398
Capacities and Specifications - 3.3L, Gasoline .....................................................
405
Capacities and Specifications - 3.3L, Hybrid Electric Vehicle (HEV) .............
412Bulb Specification Chart
..........................
419
Connected Vehicle
What Is a Connected Vehicle ..................
421
Connected Vehicle Requirements .........
421
Connected Vehicle Limitations ..............
421
Connecting the Vehicle to a Mobile Network .......................................................
421
Connecting the Vehicle to a Wi-Fi Network - Vehicles With: SYNC 3 ......
421
Connected Vehicle – Troubleshooting - Vehicles With: Modem ..........................
422
Connected Vehicle – Troubleshooting - Vehicles With: SYNC 3 ..........................
423
Vehicle Wi-Fi Hotspot
Creating a Vehicle Wi-Fi Hotspot .........
425
Changing the Vehicle Wi-Fi Hotspot Name or Password ................................
425
Audio System
General Information ..................................
426
Audio Unit .....................................................
426
Digital Radio ..................................................
427
Satellite Radio .............................................
429
USB Port ........................................................
432
SYNC™ 3
General Information ..................................
433
Using Voice Recognition ..........................
435
Entertainment ..............................................
441
Climate ............................................................
451
Phone ..............................................................
453
Navigation .....................................................
455
Electric Vehicle Information ...................
460
Apps .................................................................
461
Settings ..........................................................
464
SYNC™ 3 Troubleshooting ....................
466
7
Explorer (CTW), enUSA, Edition date: 202007, Second-Printing Table of Contents
Page 24 of 577
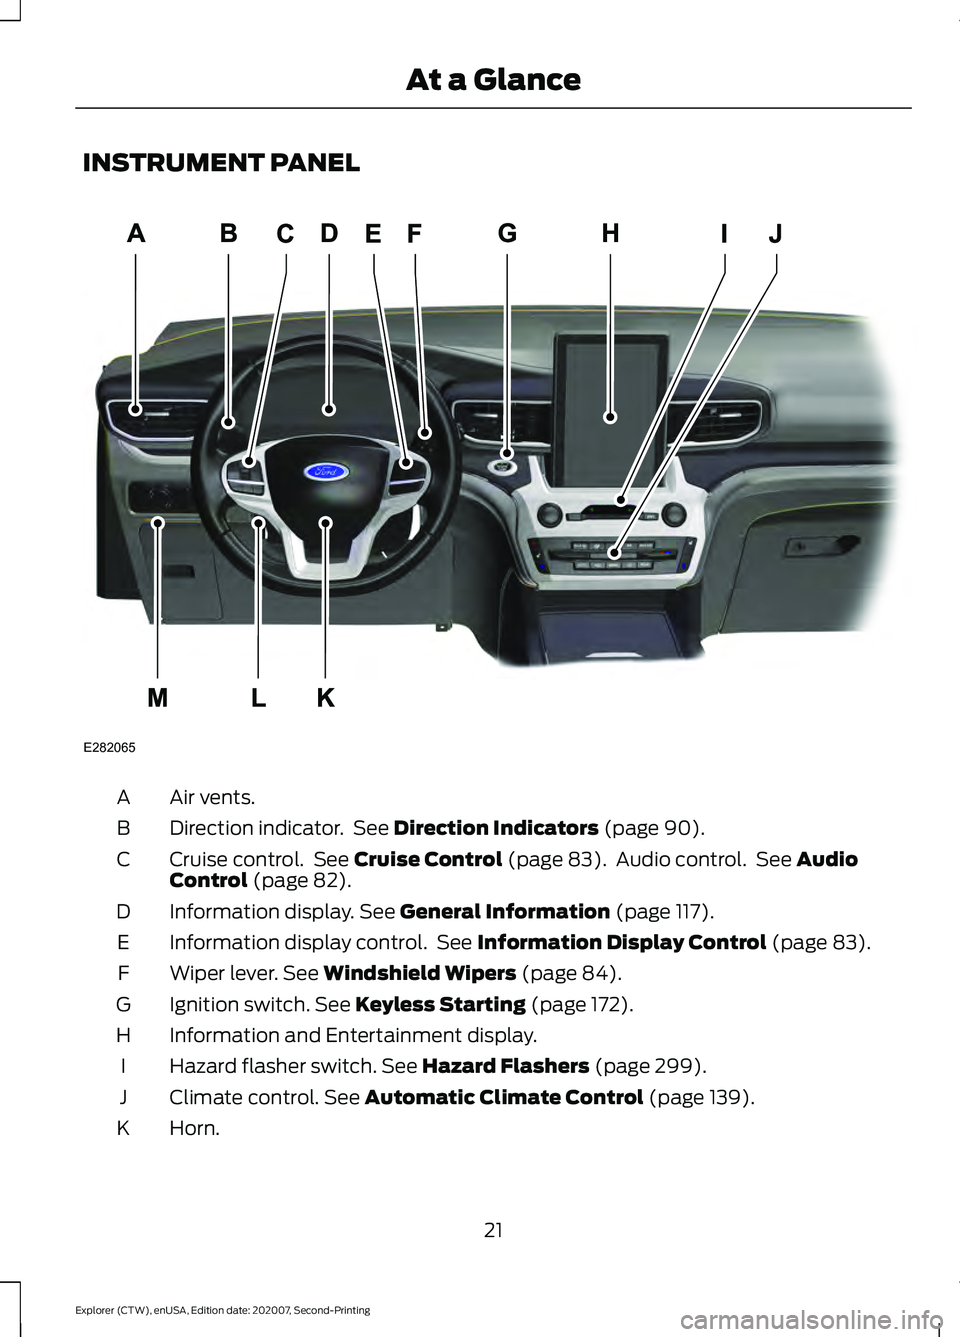
INSTRUMENT PANEL
Air vents.
A
Direction indicator. See Direction Indicators (page 90).
B
Cruise control. See
Cruise Control (page 83). Audio control. See Audio
Control (page 82).
C
Information display.
See General Information (page 117).
D
Information display control. See
Information Display Control (page 83).
E
Wiper lever.
See Windshield Wipers (page 84).
F
Ignition switch.
See Keyless Starting (page 172).
G
Information and Entertainment display.
H
Hazard flasher switch.
See Hazard Flashers (page 299).
I
Climate control.
See Automatic Climate Control (page 139).
J
Horn.
K
21
Explorer (CTW), enUSA, Edition date: 202007, Second-Printing At a GlanceE282065
A
Page 54 of 577
The system consists of the following:
•
A label or embossed side panel
indicating that your vehicle has side
airbags.
• Side airbags inside the driver and front
passenger seat backrests. Crash sensors and monitoring
system with readiness indicator.
See Crash Sensors and Airbag
Indicator (page 52).
The design and development of the side
airbag system included recommended
testing procedures that were developed
by a group of automotive safety experts
known as the Side Airbag Technical
Working Group. These recommended
testing procedures help reduce the risk of
injuries related to the deployment of side
airbags.
DRIVER AND PASSENGER
KNEE AIRBAGS
Driver and passenger knee airbags are
located under or within the instrument
panel. During a crash, the restraints control
module may activate the driver and
passenger knee airbags (individually or
both) based on crash severity and
respective occupant conditions. Under
certain crash and occupant conditions, the
driver and passenger knee airbags may
deploy (individually or both) but the
corresponding front airbag may not
activate. As with front and side airbags, it
is important to be properly seated and
restrained to reduce the risk of death or
serious injury. Make sure the knee airbags are
operating properly. See
Crash
Sensors and Airbag Indicator
(page
52). SAFETY CANOPY™ WARNING:
Do not place objects
or mount equipment on or near the
headliner at the siderail that may come
into contact with a deploying curtain
airbag. Failure to follow these
instructions may increase the risk of
personal injury in the event of a crash. WARNING:
Do not lean your head
on the door. The curtain airbag could
injure you as it deploys from the
headliner. WARNING:
Do not attempt to
service, repair, or modify the
supplementary restraint system or
associated components. Failure to
follow this instruction could result in
personal injury or death. WARNING:
All occupants of your
vehicle, including the driver, should
always properly wear their seatbelts,
even when an airbag supplemental
restraint system is provided. Failure to
properly wear your seatbelt could
seriously increase the risk of injury or
death. WARNING:
To reduce risk of injury,
do not obstruct or place objects in the
deployment path of the airbag. WARNING:
If a supplementary
restraint system component has
deployed, it will not function again. Have
the system and associated components
inspected as soon as possible. Failure to
follow this instruction could result in
personal injury or death.
51
Explorer (CTW), enUSA, Edition date: 202007, Second-Printing Supplementary Restraints SystemE67017 E67017
Page 78 of 577
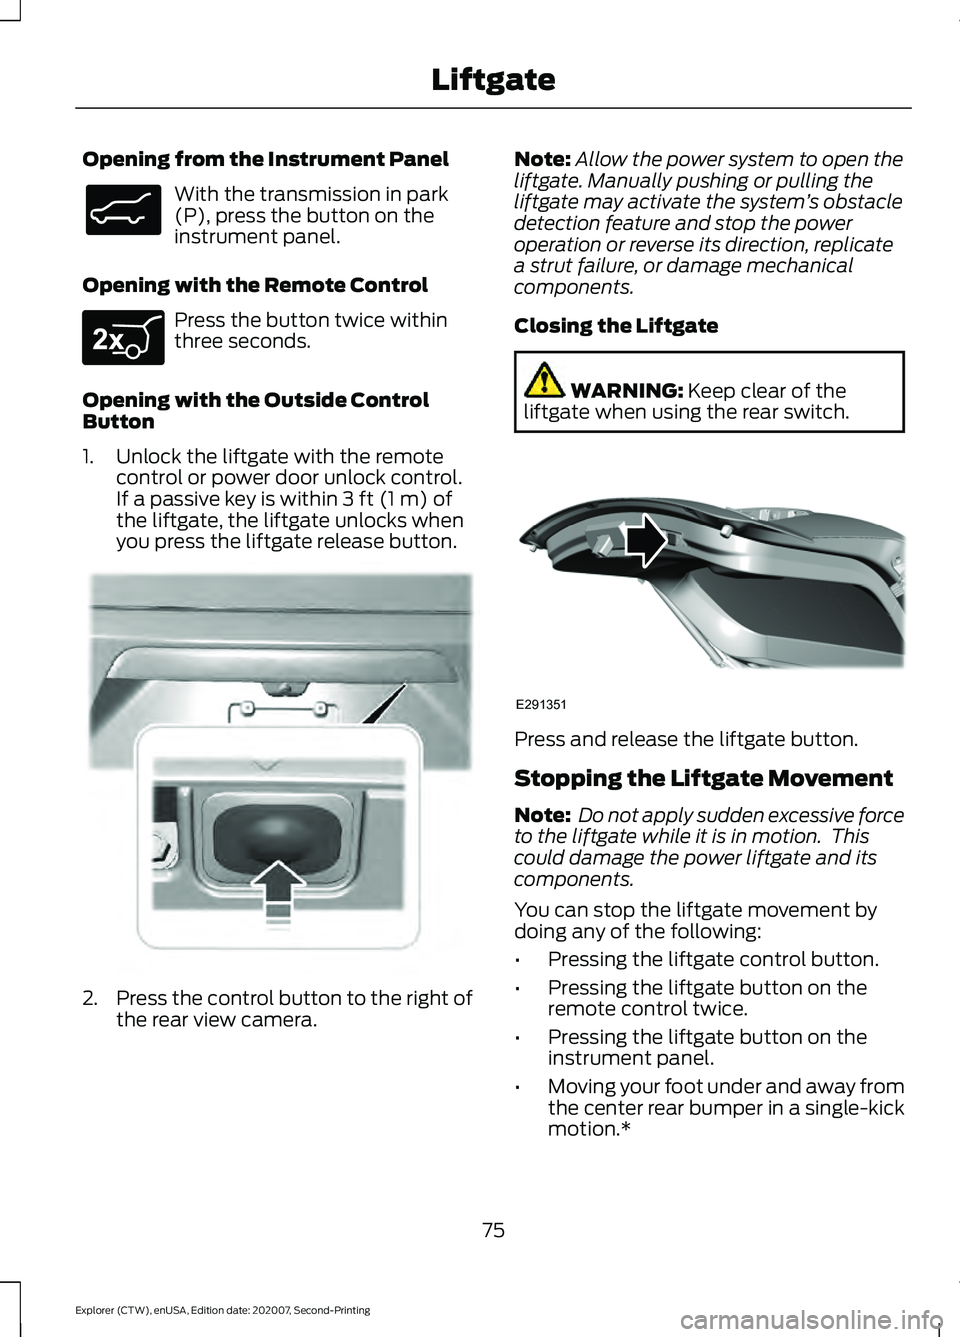
Opening from the Instrument Panel
With the transmission in park
(P), press the button on the
instrument panel.
Opening with the Remote Control Press the button twice within
three seconds.
Opening with the Outside Control
Button
1. Unlock the liftgate with the remote control or power door unlock control.
If a passive key is within 3 ft (1 m) of
the liftgate, the liftgate unlocks when
you press the liftgate release button. 2.
Press the control button to the right of
the rear view camera. Note:
Allow the power system to open the
liftgate. Manually pushing or pulling the
liftgate may activate the system ’s obstacle
detection feature and stop the power
operation or reverse its direction, replicate
a strut failure, or damage mechanical
components.
Closing the Liftgate WARNING:
Keep clear of the
liftgate when using the rear switch. Press and release the liftgate button.
Stopping the Liftgate Movement
Note:
Do not apply sudden excessive force
to the liftgate while it is in motion. This
could damage the power liftgate and its
components.
You can stop the liftgate movement by
doing any of the following:
• Pressing the liftgate control button.
• Pressing the liftgate button on the
remote control twice.
• Pressing the liftgate button on the
instrument panel.
• Moving your foot under and away from
the center rear bumper in a single-kick
motion.*
75
Explorer (CTW), enUSA, Edition date: 202007, Second-Printing LiftgateE138633 E267940 E291352 E291351
Page 90 of 577
GENERAL INFORMATION
Condensation in the Exterior Front
Lamps and Rear Lamps
Exterior front lamps and rear lamps have
vents to accommodate normal changes
in air pressure.
Condensation can be a natural by-product
of this design. When moist air enters the
lamp assembly through the vents, there is
a possibility that condensation can occur
when the temperature is cold. When
normal condensation occurs, a fine mist
can form on the interior of the lens. The
fine mist eventually clears and exits
through the vents during normal operation.
Clearing time may take as long as 48 hours
under dry weather conditions.
Examples of acceptable condensation are:
•
The presence of a fine mist (no streaks,
drip marks or large droplets).
• A fine mist covers less than 50% of the
lens.
Examples of unacceptable condensation
are:
• A water puddle inside the lamp.
• Streaks, drip marks or large droplets
present on the interior of the lens.
If you see any unacceptable condensation,
have your vehicle checked by an authorized
dealer.
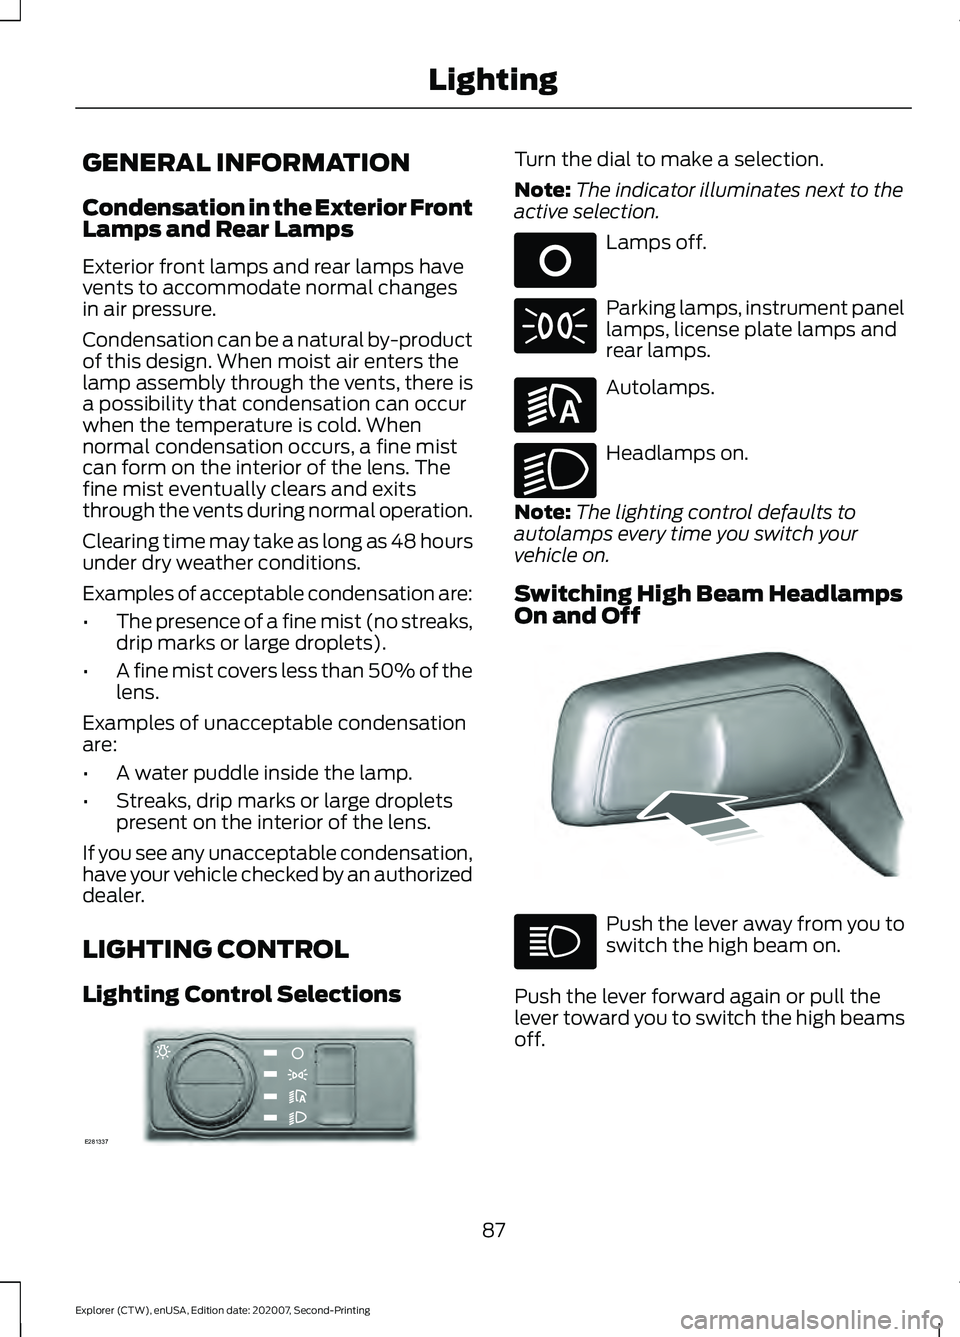
LIGHTING CONTROL
Lighting Control Selections Turn the dial to make a selection.
Note:
The indicator illuminates next to the
active selection. Lamps off.
Parking lamps, instrument panel
lamps, license plate lamps and
rear lamps.
Autolamps.
Headlamps on.
Note: The lighting control defaults to
autolamps every time you switch your
vehicle on.
Switching High Beam Headlamps
On and Off Push the lever away from you to
switch the high beam on.
Push the lever forward again or pull the
lever toward you to switch the high beams
off.
87
Explorer (CTW), enUSA, Edition date: 202007, Second-Printing LightingE281337 E265031 E281240 E270968 E248603
Page 142 of 577
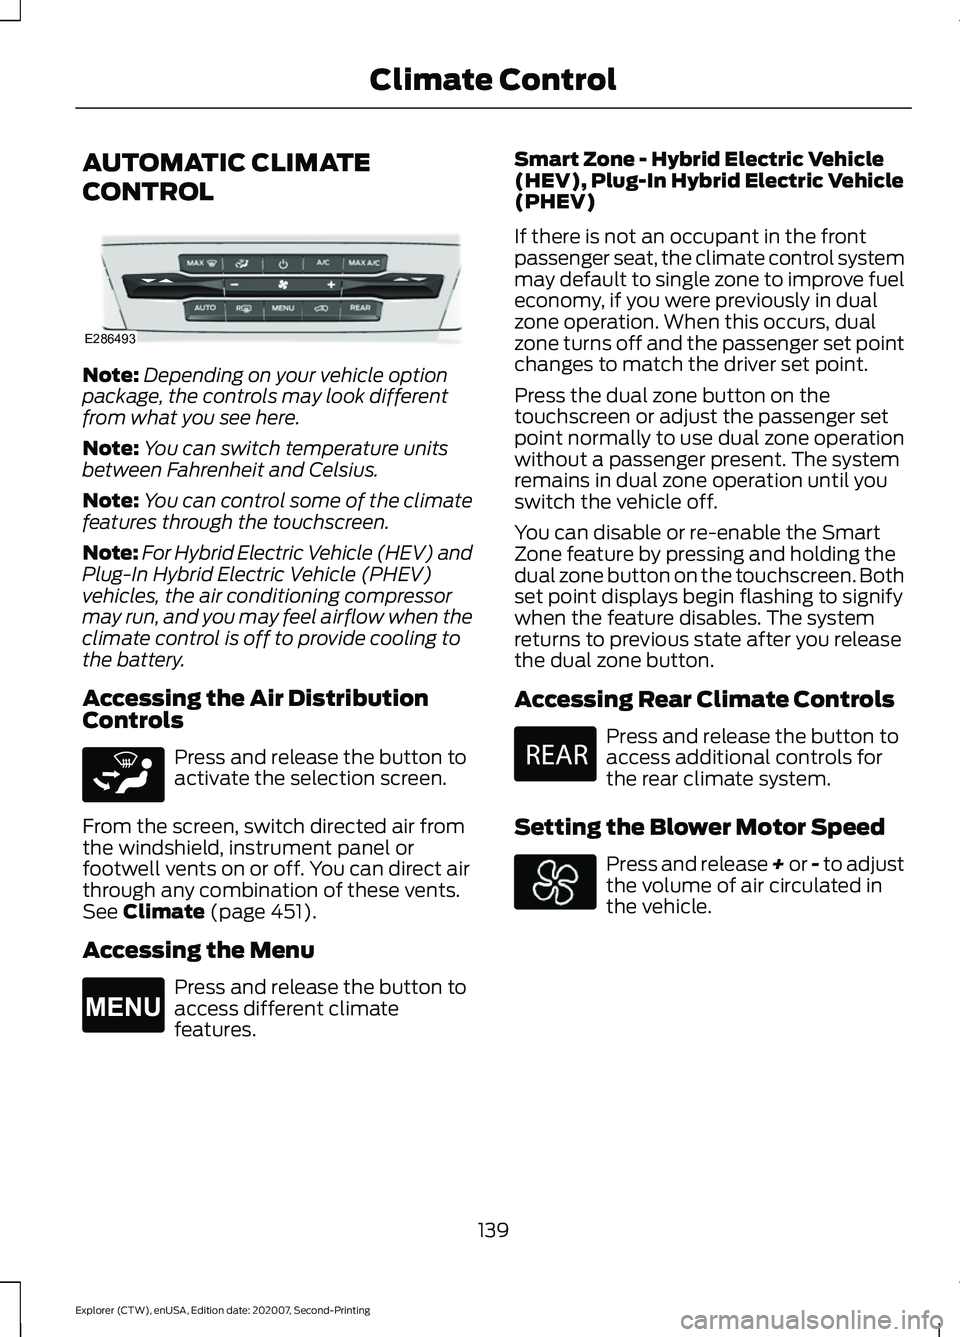
AUTOMATIC CLIMATE
CONTROL
Note:
Depending on your vehicle option
package, the controls may look different
from what you see here.
Note: You can switch temperature units
between Fahrenheit and Celsius.
Note: You can control some of the climate
features through the touchscreen.
Note: For Hybrid Electric Vehicle (HEV) and
Plug-In Hybrid Electric Vehicle (PHEV)
vehicles, the air conditioning compressor
may run, and you may feel airflow when the
climate control is off to provide cooling to
the battery.
Accessing the Air Distribution
Controls Press and release the button to
activate the selection screen.
From the screen, switch directed air from
the windshield, instrument panel or
footwell vents on or off. You can direct air
through any combination of these vents.
See Climate (page 451).
Accessing the Menu Press and release the button to
access different climate
features. Smart Zone - Hybrid Electric Vehicle
(HEV), Plug-In Hybrid Electric Vehicle
(PHEV)
If there is not an occupant in the front
passenger seat, the climate control system
may default to single zone to improve fuel
economy, if you were previously in dual
zone operation. When this occurs, dual
zone turns off and the passenger set point
changes to match the driver set point.
Press the dual zone button on the
touchscreen or adjust the passenger set
point normally to use dual zone operation
without a passenger present. The system
remains in dual zone operation until you
switch the vehicle off.
You can disable or re-enable the Smart
Zone feature by pressing and holding the
dual zone button on the touchscreen. Both
set point displays begin flashing to signify
when the feature disables. The system
returns to previous state after you release
the dual zone button.
Accessing Rear Climate Controls
Press and release the button to
access additional controls for
the rear climate system.
Setting the Blower Motor Speed Press and release + or - to adjust
the volume of air circulated in
the vehicle.
139
Explorer (CTW), enUSA, Edition date: 202007, Second-Printing Climate ControlE286493 E265283 E265038 E270447
Page 144 of 577
Switching the Air Conditioning On
and Off
Press and release the button.
Use air conditioning with recirculated air
to improve cooling performance and
efficiency.
Note: In certain conditions, for example,
maximum defrost, the air conditioning
compressor may continue to operate even
though you switch off the air conditioning.
Note: The A/C LED light may turn on and
off based on the temperature setting or the
current conditions.
Switching the Climate Control On
and Off Press and release the button.
Switching Maximum Air
Conditioning On and Off Press and release the button for
maximum cooling.
The driver and passenger temperatures
are set to LO, recirculated air flows through
the instrument panel air vents, air
conditioning turns on and the blower motor
adjusts to the highest speed.
Switching Maximum Defrost On
and Off Press and release the button for
maximum defrosting.
The driver and passenger temperatures
are set to HI, air flows through the
windshield air vents, and the blower motor
adjusts to the highest speed. Note:
Depending on your region, air
conditioning turns on.
You can also use this setting to defog and
clear the windshield of a thin covering of
ice.
Note: To prevent window fogging, you
cannot select recirculated air when
maximum defrost is on.
Note: The heated rear window also turns
on when you select maximum defrost.
Switching Recirculated Air On and
Off Press and release the button to
switch between outside air and
recirculated air.
The air currently in the passenger
compartment recirculates. This may
reduce the time needed to cool the interior,
when used with A/C, and reduce unwanted
odors from entering your vehicle.
Note: Recirculated air may turn off, or
prevent you from switching on, in all air flow
modes except
MAX A/C to reduce the risk
of fogging. Recirculation may also turn on
and off in various air distribution control
combinations during hot weather to improve
cooling efficiency.
HINTS ON CONTROLLING THE
INTERIOR CLIMATE
General Hints
Note: Prolonged use of recirculated air may
cause the windows to fog up.
Note: You may feel a small amount of air
from the footwell air vents regardless of the
air distribution setting.
Note: To reduce humidity build-up inside
your vehicle, do not drive with the system
switched off or with recirculated air always
switched on.
141
Explorer (CTW), enUSA, Edition date: 202007, Second-Printing Climate Control
Page 145 of 577
Note:
Do not place objects under the front
seats as this may interfere with the airflow
to the rear seats.
Note: Remove any snow, ice or leaves from
the air intake area at the base of the
windshield.
Note: To improve the time to reach a
comfortable temperature in hot weather,
drive with the windows open until you feel
cold air through the air vents.
Automatic Climate Control
Note: Adjusting the settings when your
vehicle interior is extremely hot or cold is
not necessary. Automatic mode is best
recommended to maintain set temperature.
Note: The system adjusts to heat or cool
the interior to the temperature you select
as quickly as possible.
Note: For the system to function efficiently,
the instrument panel and side air vents
should be fully open.
Note: If you select AUTO during cold
outside temperatures, the system directs
air flow to the windshield and side window
air vents. In addition, the blower motor may
run at a slower speed until the engine warms
up.
Note: If you select
AUTO during hot
temperatures and the inside of the vehicle
is hot, the system uses recirculated air to
maximize interior cooling. Blower motor
speed may also reduce until the air cools.
Quickly Heating the Interior
1. Press and release
AUTO.
2. Adjust the temperature function to the
setting you prefer.
Recommended Settings for
Heating
1. Press and release
AUTO. 2.
Adjust the temperature function to the
setting you prefer. Use
72°F (22°C) as
a starting point, then adjust the setting
as necessary.
Quickly Cooling the Interior
1. Press and release
MAX A/C.
Recommended Settings for
Cooling
1. Press and release
AUTO.
2. Adjust the temperature function to the
setting you prefer. Use
72°F (22°C) as
a starting point, then adjust the setting
as necessary.
Defogging the Side Windows in
Cold Weather
1. Press and release defrost or maximum
defrost.
2. Adjust the temperature control to the setting you prefer. Use
72°F (22°C) as
a starting point, then adjust the setting
as necessary.
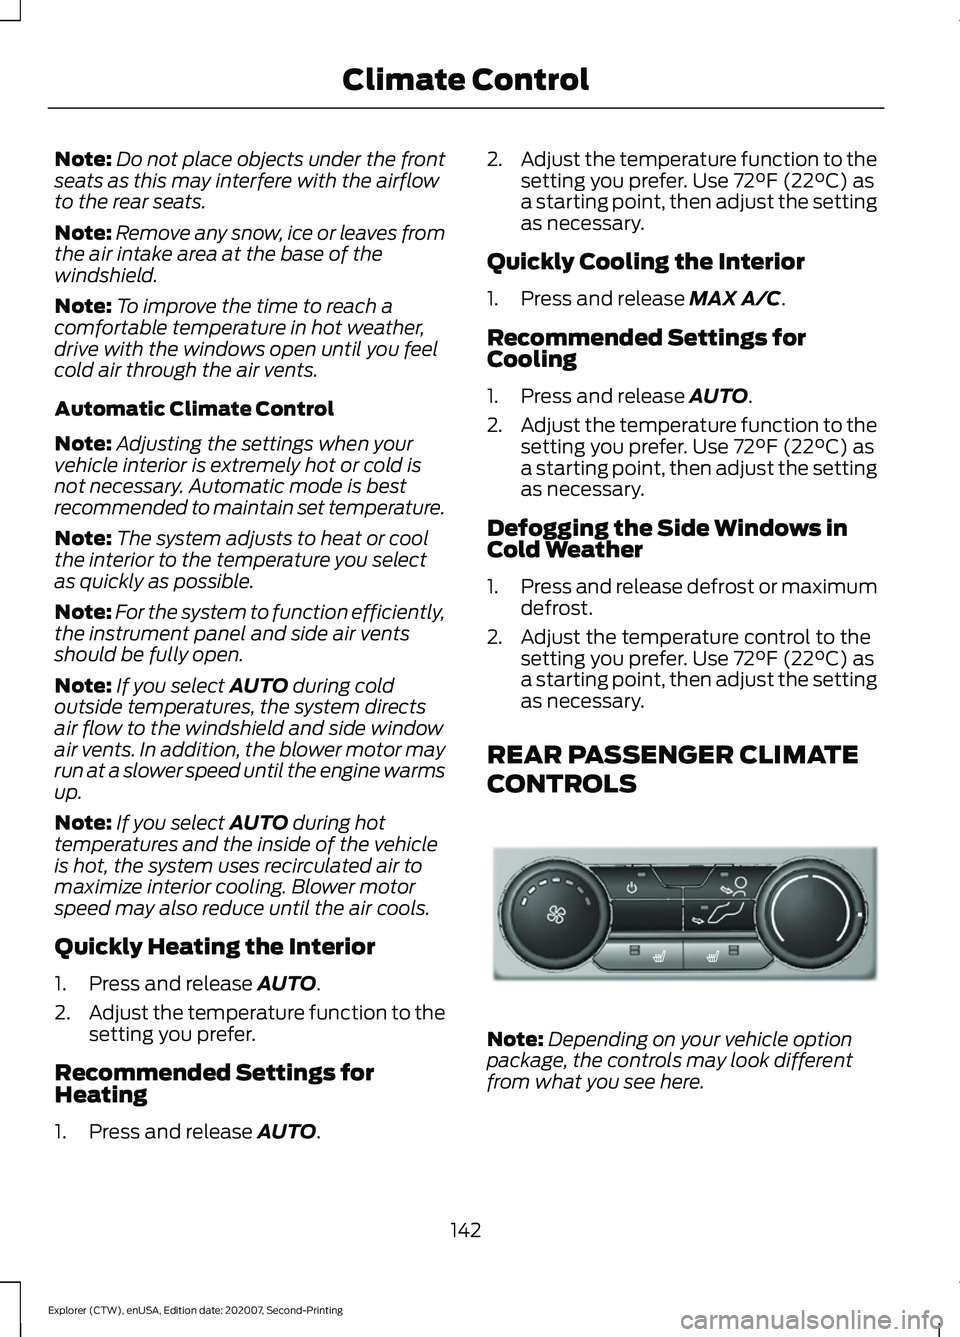
REAR PASSENGER CLIMATE
CONTROLS Note:
Depending on your vehicle option
package, the controls may look different
from what you see here.
142
Explorer (CTW), enUSA, Edition date: 202007, Second-Printing Climate ControlE289989
Page 170 of 577
12 Volt DC Power Point
WARNING: Do not plug optional
electrical accessories into the cigar
lighter socket. Incorrect use of the cigar
lighter can cause damage not covered
by the vehicle warranty, and can result
in fire or serious injury.
Note: When you switch the ignition on, you
can use the socket to power 12 volt
appliances with a maximum current rating
of 15 amps.
Note: If the power supply does not work
after you switch the ignition off, switch the
ignition on.
Note: Do not hang any accessory from the
accessory plug.
Note: Do not use the power point over the
vehicle capacity of 12 volt DC 180 watts or
a fuse may blow.
Note: Always keep the power point caps
closed when not in use.
Do not insert objects other than an
accessory plug into the power point. This
damages the power point and may blow
the fuse.
Run the vehicle for full capacity use of the
power point.
To prevent the battery from running out of
charge:
• Do not use the power point longer than
necessary when the vehicle is not
running.
• Do not leave devices plugged in
overnight or when you park your vehicle
for extended periods. USB Port and Power Point
Locations
USB Ports and Power Points may be in the
following locations:
•
On the lower instrument panel.
• Inside the center console.
• On the front of the center console.
• On the rear of the center console.
• In the cargo area.
• On the passenger side floor panel.
• 3rd row on the quarter trim panels.
Note: Some of the USB ports may not have
data transfer capabilities.
Note: Incorrect use of the USB ports can
cause damage not covered by the vehicle
warranty.
110 Volt AC Power Point
(If Equipped) WARNING:
Do not keep electrical
devices plugged in the power point
whenever the device is not in use. Do not
use any extension cord with the 110 volt
AC power point, since it will defeat the
safety protection design. Doing so may
cause the power point to overload due
to powering multiple devices that can
reach beyond the 150 watt load limit and
could result in fire or serious injury.
Note: The power point turns off when you
switch off the ignition, when the vehicle is
not in accessory mode or when the battery
voltage drops below 11 volts.
You can use the power point for electric
devices that require up to 150 watts. It is
on the rear of the center console.
167
Explorer (CTW), enUSA, Edition date: 202007, Second-Printing Auxiliary Power Points