ignition FORD F150 2001 10.G Owner's Manual
[x] Cancel search | Manufacturer: FORD, Model Year: 2001, Model line: F150, Model: FORD F150 2001 10.GPages: 224, PDF Size: 1.45 MB
Page 66 of 224

4. Turn the ignition to OFF and remove the second coded key from the
ignition.
5. Within 10 seconds of turning the ignition to OFF, insert the new
unprogrammed key (new key/valet key) into the ignition and turn the
ignition from OFF to ON (maintain ignition in ON for at least one
second). This step will program your new key to a coded key.
6. To program additional new unprogrammed key(s), repeat this
procedure from step 1.
If the programming procedure was successful, the new coded key(s) will
start the vehicle's engine. The theft indicator (located on the instrument
panel) will light for three seconds and then go out.
If the programming procedure was not successful, the new coded key(s)
will not operate the vehicle's engine. The theft indicator will flash on and
off. Wait at least one minute and then repeat the procedure from step 1.
If failure repeats, bring your vehicle to your dealership to have the new
spare key(s) programmed.
REMOTE ENTRY SYSTEM (IF EQUIPPED)
Your vehicle is equipped with a remote entry system which allows you to:
²unlock the vehicle doors without a key.
²lock all the vehicle doors without a key.
²activate the personal alarm.
The remote entry features only operate with the ignition in the OFF
position.
If there is any potential remote keyless entry problem with your vehicle,
ensureALL key fobs(remote entry transmitters) are brought to the
dealership, to aid in troubleshooting.
Controls and features
66
Page 67 of 224
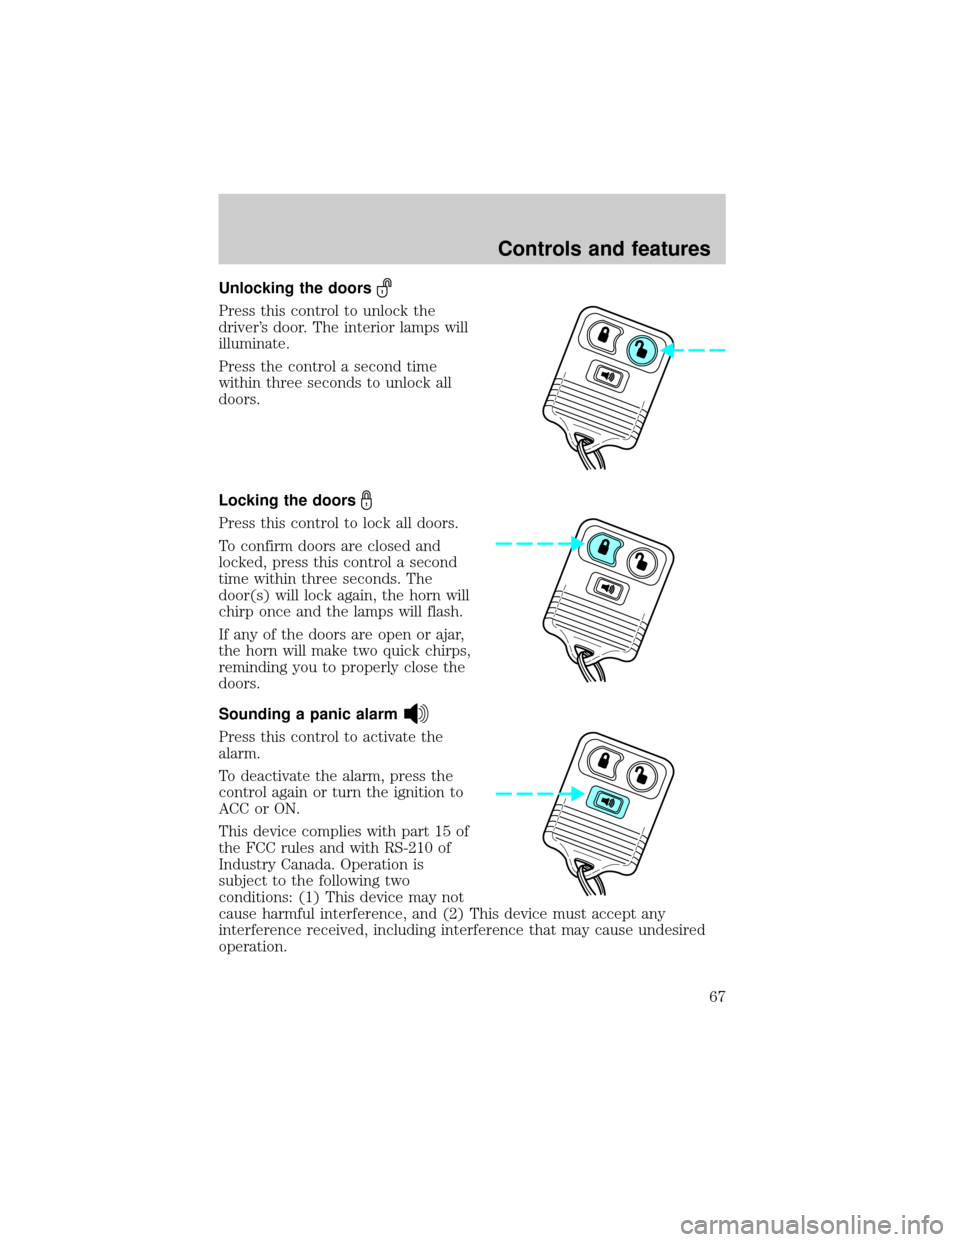
Unlocking the doors
Press this control to unlock the
driver's door. The interior lamps will
illuminate.
Press the control a second time
within three seconds to unlock all
doors.
Locking the doors
Press this control to lock all doors.
To confirm doors are closed and
locked, press this control a second
time within three seconds. The
door(s) will lock again, the horn will
chirp once and the lamps will flash.
If any of the doors are open or ajar,
the horn will make two quick chirps,
reminding you to properly close the
doors.
Sounding a panic alarm
Press this control to activate the
alarm.
To deactivate the alarm, press the
control again or turn the ignition to
ACC or ON.
This device complies with part 15 of
the FCC rules and with RS-210 of
Industry Canada. Operation is
subject to the following two
conditions: (1) This device may not
cause harmful interference, and (2) This device must accept any
interference received, including interference that may cause undesired
operation.
Controls and features
67
Page 69 of 224
Replacing lost transmitters
If a remote transmitter has been lost
and you would like to remove it
from the vehicle's memory, or you
would like to purchase additional
remote transmitters and have them
programmed to your vehicle:
²Takeallyour vehicle's
transmitters to your dealer for
programming, or
²Perform the programming
procedure yourself
Programming remote transmitters
It is necessary to haveall(maximum of four Ð original and/or new) of
your remote transmitters available prior to beginning this procedure.
To program the transmitters yourself:
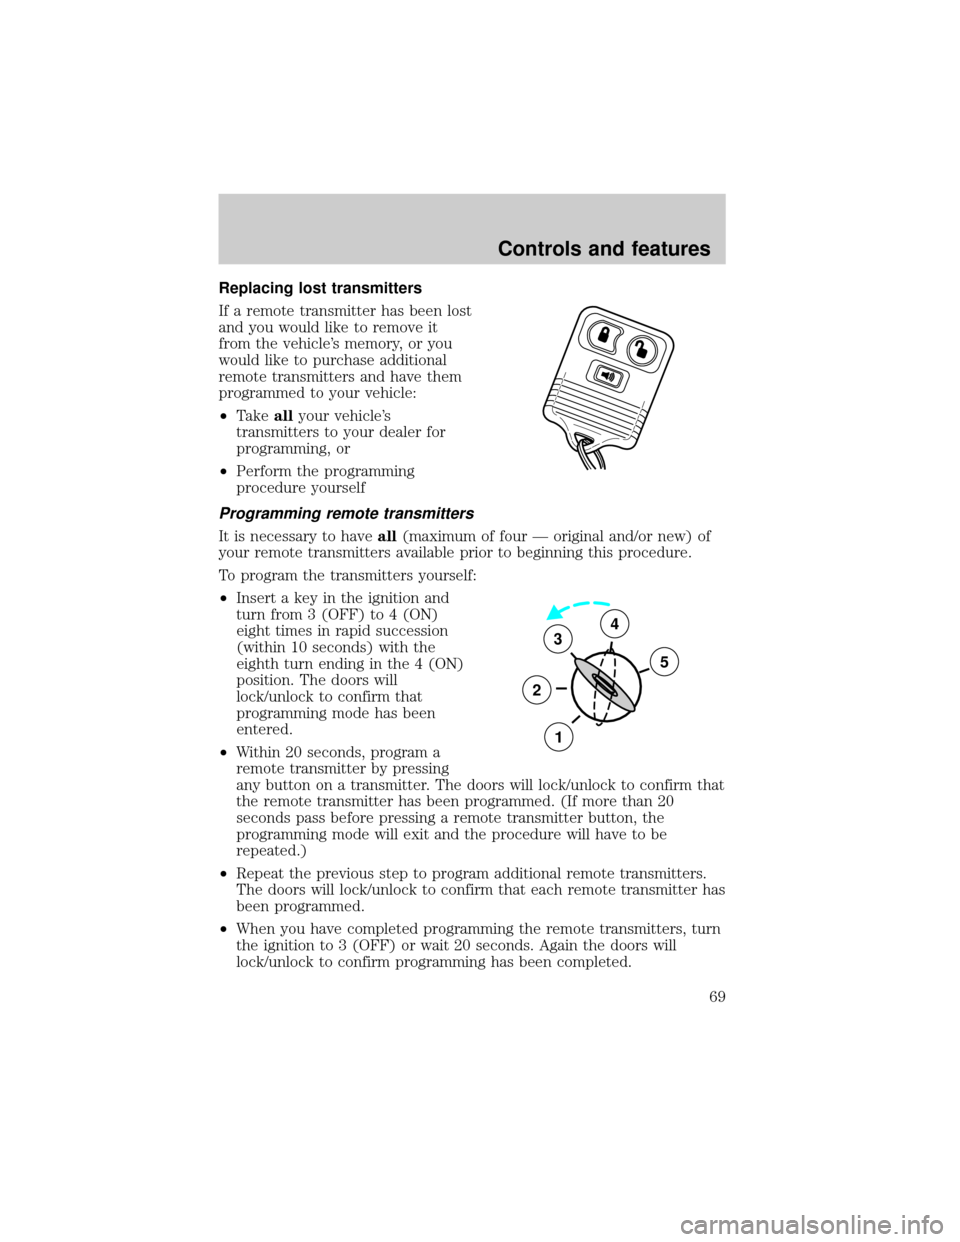
²Insert a key in the ignition and
turn from 3 (OFF) to 4 (ON)
eight times in rapid succession
(within 10 seconds) with the
eighth turn ending in the 4 (ON)
position. The doors will
lock/unlock to confirm that
programming mode has been
entered.
²Within 20 seconds, program a
remote transmitter by pressing
any button on a transmitter. The doors will lock/unlock to confirm that
the remote transmitter has been programmed. (If more than 20
seconds pass before pressing a remote transmitter button, the
programming mode will exit and the procedure will have to be
repeated.)
²Repeat the previous step to program additional remote transmitters.
The doors will lock/unlock to confirm that each remote transmitter has
been programmed.
²When you have completed programming the remote transmitters, turn
the ignition to 3 (OFF) or wait 20 seconds. Again the doors will
lock/unlock to confirm programming has been completed.
3
2
1
5
4
Controls and features
69
Page 70 of 224

Reprogramming transmitters
Your dealer will be able to reprogram remote transmitter(s) to your
vehicle. Installation of a new battery to your remote transmitter doesnot
cause the remote transmitter to become deprogrammed.
Autolock (if equipped)
This feature automatically locks all doors when:
²all vehicle doors are closed
²the ignition is in the ON position
²you shift into or through R (Reverse)
²the brake pedal is released
Relock
The autolock feature repeats when:
²any door is opened and closed
²the ignition switch is in the ON position, and
²the brake pedal is released
Deactivating/activating the autolock feature
Before following the procedure, make sure that the ignition is OFF and
all vehicle doors are closed.
You must complete steps 1-7 within 30 seconds or the procedure will
have to be repeated. If the procedure needs to be repeated, you must
wait 30 seconds.
1. Turn the ignition key to ON.
2. Press the power door unlock control three times.
3. Turn the ignition key from ON to OFF.
4. Press the power door unlock control three times.
5. Turn the ignition back to ON. The horn will chirp.
6. Press the unlock control, then press the lock control. The horn will
chirp once if autolock was deactivated or twice (one short and one long
chirp) if autolock was activated.
7. Turn the ignition to OFF. The horn will chirp once to confirm the
procedure is complete.
Controls and features
70
Page 71 of 224
Illuminated entry
The illuminated entry system will turn on the interior lights when the
remote transmitter unlock control is pressed.
The illuminated entry system will turn off the interior lights if the
ignition switch is turned to the ON position, or if the remote transmitter
lock control is pressed, or after 25 seconds of illumination.
The inside lights will not turn off if:
²they have been turned on with the dimmer control or
²any door is open.
The battery save feature will turn off the interior lights 45 minutes after
the last door is closed, even if the dimmer control is on.
Keyless entry system (if equipped)
With the keyless entry keypad, you can:
²lock or unlock the vehicle doors without using the key.
Your vehicle has a factory set 5 digit code that operates the keyless entry
system. You can also program your own 5 digit personal entry code. The
factory-set code is located:
²on the owner's wallet card in the glove compartment
²taped to the computer module.
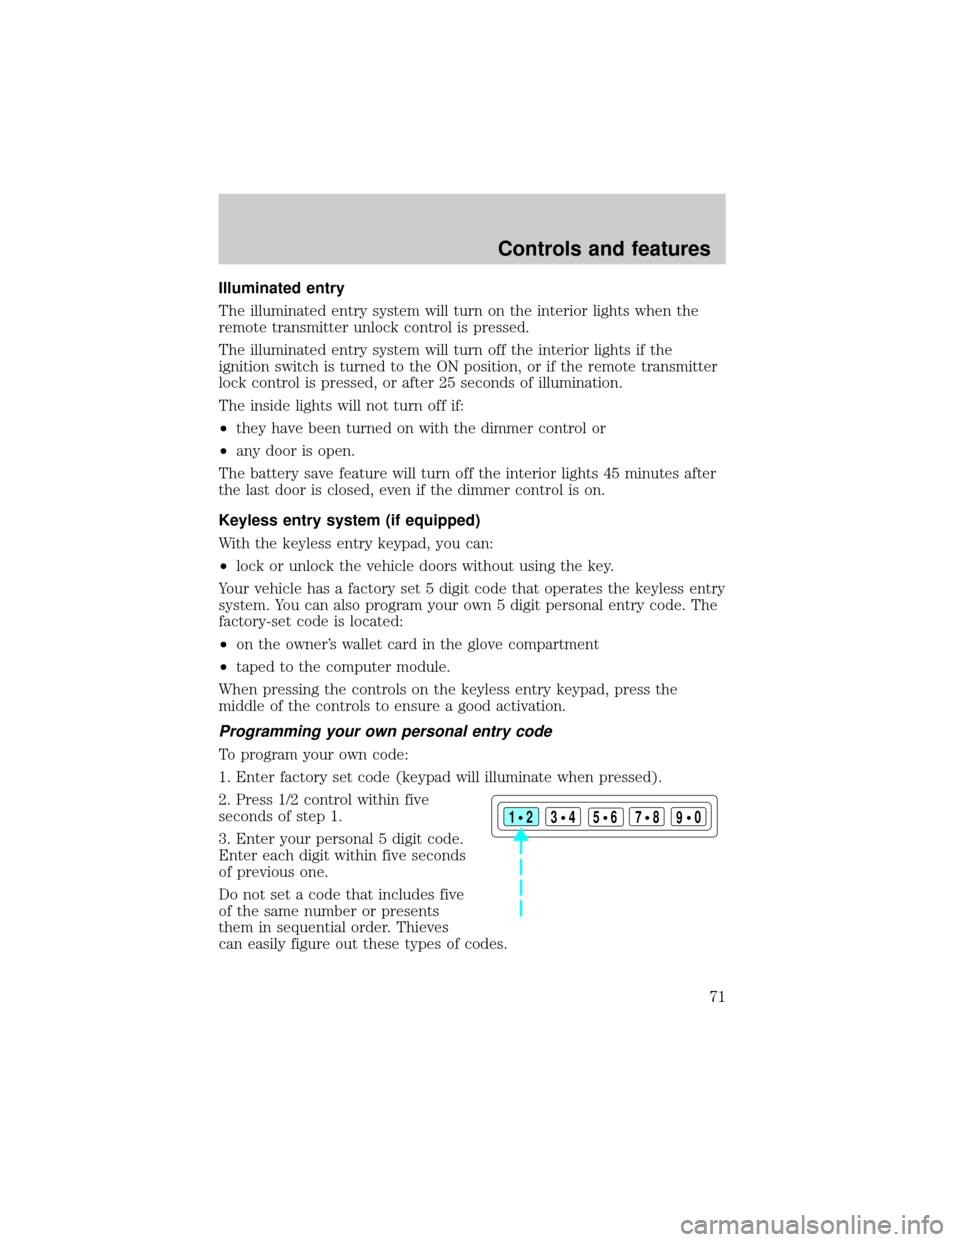
When pressing the controls on the keyless entry keypad, press the
middle of the controls to ensure a good activation.
Programming your own personal entry code
To program your own code:
1. Enter factory set code (keypad will illuminate when pressed).
2. Press 1/2 control within five
seconds of step 1.
3. Enter your personal 5 digit code.
Enter each digit within five seconds
of previous one.
Do not set a code that includes five
of the same number or presents
them in sequential order. Thieves
can easily figure out these types of codes.
123
45678
90
Controls and features
71
Page 72 of 224
Your personal code does not replace the permanent code that the
dealership gave you. You can use either code to unlock your vehicle. If a
second personal code is entered, the module will erase it in favor of the
new code.
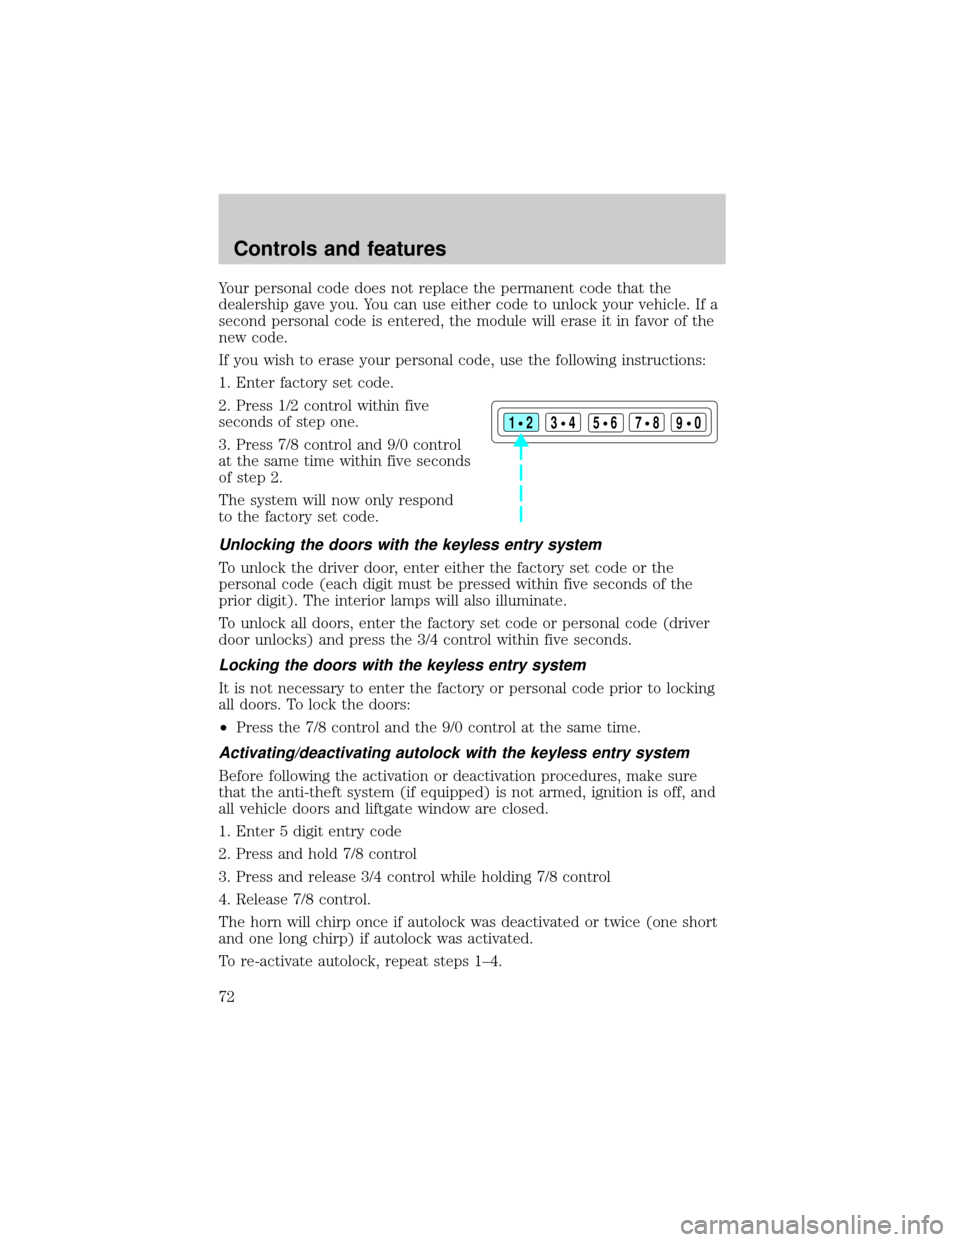
If you wish to erase your personal code, use the following instructions:
1. Enter factory set code.
2. Press 1/2 control within five
seconds of step one.
3. Press 7/8 control and 9/0 control
at the same time within five seconds
of step 2.
The system will now only respond
to the factory set code.
Unlocking the doors with the keyless entry system
To unlock the driver door, enter either the factory set code or the
personal code (each digit must be pressed within five seconds of the
prior digit). The interior lamps will also illuminate.
To unlock all doors, enter the factory set code or personal code (driver
door unlocks) and press the 3/4 control within five seconds.
Locking the doors with the keyless entry system
It is not necessary to enter the factory or personal code prior to locking
all doors. To lock the doors:
²Press the 7/8 control and the 9/0 control at the same time.
Activating/deactivating autolock with the keyless entry system
Before following the activation or deactivation procedures, make sure
that the anti-theft system (if equipped) is not armed, ignition is off, and
all vehicle doors and liftgate window are closed.
1. Enter 5 digit entry code
2. Press and hold 7/8 control
3. Press and release 3/4 control while holding 7/8 control
4. Release 7/8 control.
The horn will chirp once if autolock was deactivated or twice (one short
and one long chirp) if autolock was activated.
To re-activate autolock, repeat steps 1±4.
123
45678
90
Controls and features
72
Page 85 of 224
The belt should fit snugly and as low as possible around your hips. Do
not wear the lap belt around your waist.
Safety belt extension assembly
If the safety belt assembly is too short, even when fully extended, 20 cm
(8 inches) can be added to the safety belt assembly by adding a safety
belt extension assembly (part number 611C22). Safety belt extension
assemblies can be obtained from your dealer at no cost.
Use only extensions manufactured by the same supplier as the safety
belt. Manufacturer identification is located at the end of the webbing on
the label. Also, use the safety belt extension only if the safety belt is too
short for you when fully extended. Do not use extensions to change the
fit of the shoulder belt across the torso.
Safety belt warning light and indicator chime
The seat belt warning light illuminates in the instrument cluster and a
chime sounds to remind the occupants to fasten their safety belts.
Conditions of operation
If... Then...
The driver's safety belt is not
buckled before the ignition
switch is turned to the ON
position...The safety belt warning light
illuminates1-2 minutes and the
warning chime sounds 4-8 seconds.
The driver's safety belt is
buckled while the indicator
light is illuminated and the
warning chime is sounding...The safety belt warning light and
warning chime turn off.
The driver's safety belt is
buckled before the ignition
switch is turned to the ON
position...The safety belt warning light and
indicator chime remain off.
Seating and safety restraints
85
Page 86 of 224

Belt minder
The Belt Minder feature is a supplemental warning to the safety belt
warning function. This feature provides additional reminders to the
driver that the driver's safety belt is unbuckled by intermittently
sounding a chime and illuminating the safety belt warning lamp in the
instrument cluster.
If... Then...
The driver's safety belt is not
buckled approximately 5
seconds after the safety belt
warning light has turned off...The Belt Minder feature is activated -
the safety belt warning light
illuminates and the warning chime
sounds for 6 seconds every 30
seconds, repeating for approximately
5 minutes or until safety belt is
buckled.
The driver's safety belt is
buckled while the safety belt
indicator light is illuminated
and the safety belt warning
chime is sounding...The Belt Minder feature will not
activate.
The driver's safety belt is
buckled before the ignition
switch is turned to the ON
position...The Belt Minder feature will not
activate.
The purpose of the Belt Minder is to remind occasional wearers to wear
safety belts all of the time.
Seating and safety restraints
86
Page 88 of 224
One time disable
Anytime the safety belt is buckled and then unbuckled during an ignition
ON cycle, Belt Minder will be disabled for that ignition cycle only.
Deactivating/activating the belt minder feature
Read steps1-9thoroughly before proceeding with the
deactivation/activation programming procedure.
The Belt Minder feature can be deactivated/activated by performing the
following procedure:
Before following the procedure, make sure that:
²the parking brake is set
²the gearshift is in P (Park) (automatic transmission) or the neutral
position (manual transmission).
²the ignition switch is in the OFF position
²all vehicle doors are closed
²the driver's safety belt is unbuckled
²the parklamps/headlamps are in OFF position (If vehicle is equipped
with Autolamps, this will not affect the procedure.)
To reduce the risk of injury, do not deactivate/activate the Belt
Minder feature while driving the vehicle.
1. Turn the ignition switch to the RUN (or ON) position. (DO NOT
START THE ENGINE)
2. Wait until the safety belt warning light turns off. (Approximately 1±2
minutes)
²Steps 3±5 must be completed within 60 seconds or the procedure will
have to be repeated.
3. Buckle then unbuckle the safety belt three times, ending with the
safety belt unbuckled. This can be done before or during Belt Minder
warning activation.
4. Turn on the parklamps/headlamps, turn off the parklamps/headlamps.
5. Buckle then unbuckle the safety belt three times, ending with the
safety belt unbuckled.
²After step 5 the safety belt warning light will be turned on for three
seconds.
Seating and safety restraints
88
Page 94 of 224
²one or more impact and safing sensors and diagnostic monitor (RCM),
²a readiness light and tone,
²and the electrical wiring which connects the components.
The RCM (restraints control module) monitors its own internal circuits
and the supplemental air bag electrical system warning (including the
impact sensors, the system wiring, the air bag system readiness light, the
air bag back up power and the air bag ignitors).
Determining if the system is operational
The SRS uses a readiness light in the instrument cluster or a tone to
indicate the condition of the system. Refer to theAir bag readiness
section in theInstrumentationchapter. Routine maintenance of the air
bag is not required.
A difficulty with the system is indicated by one or more of the following:
²The readiness light will either
flash or stay lit.
²The readiness light will not
illuminate immediately after
ignition is turned on.
²A series of five beeps will be heard. The tone pattern will repeat
periodically until the problem and light are repaired.
If any of these things happen, even intermittently, have the SRS serviced
at your dealership or by a qualified technician immediately. Unless
serviced, the system may not function properly in the event of a
collision.
Disposal of air bags and air bag equipped vehicles
(including pretensioners)
For disposal of air bags or air bag equipped vehicles, see your local
dealership or qualified technician. Air bags MUST BE disposed of by
qualified personnel.
SAFETY RESTRAINTS FOR CHILDREN
See the following sections for directions on how to properly use safety
restraints for children. Also seeAir Bag Supplemental Restraint
System (SRS)in this chapter for special instructions about using air
bags.
Seating and safety restraints
94