clutch FORD F150 2002 10.G Owners Manual
[x] Cancel search | Manufacturer: FORD, Model Year: 2002, Model line: F150, Model: FORD F150 2002 10.GPages: 320, PDF Size: 2.95 MB
Page 91 of 320
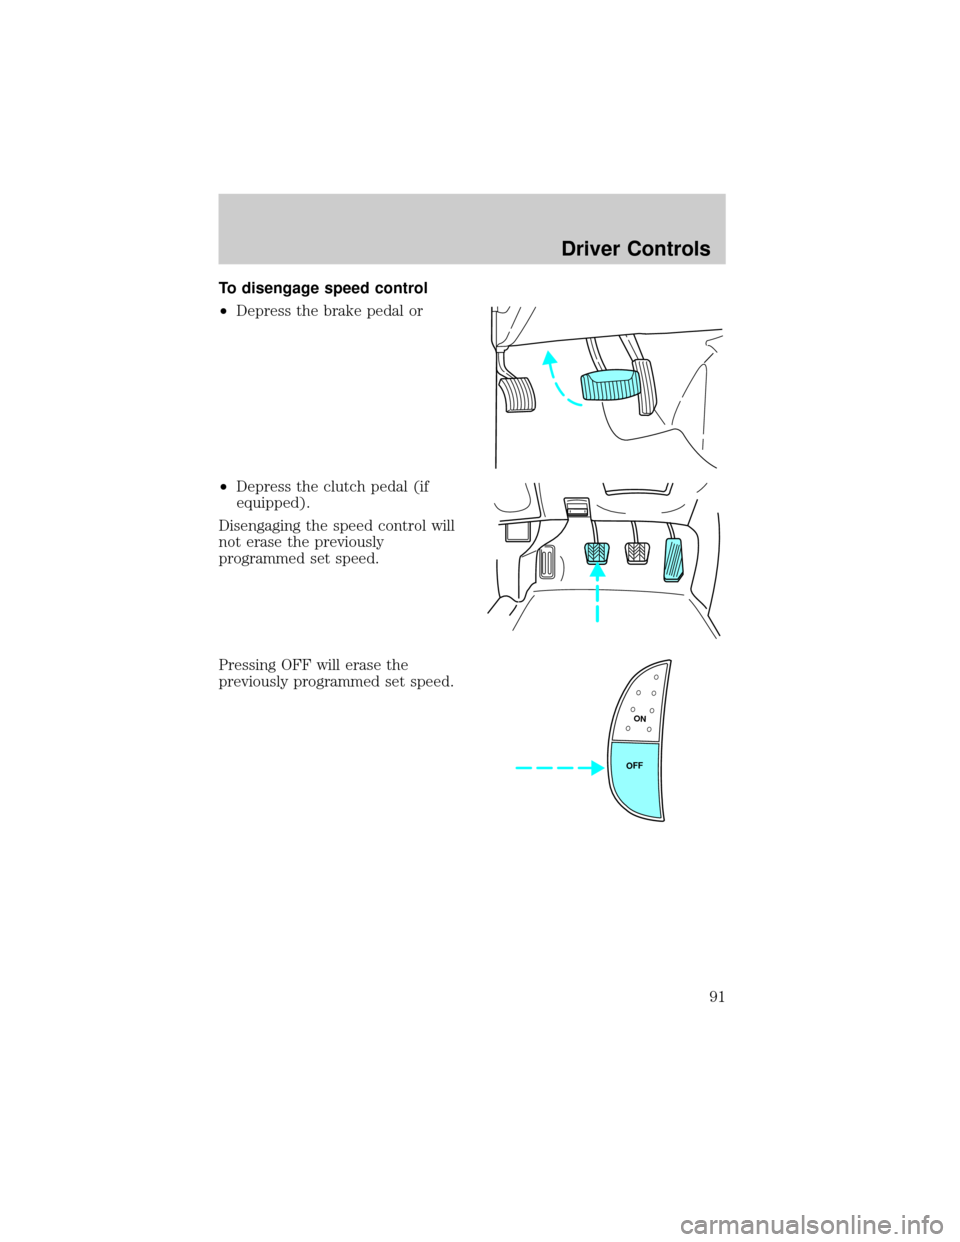
To disengage speed control
²Depress the brake pedal or
²Depress the clutch pedal (if
equipped).
Disengaging the speed control will
not erase the previously
programmed set speed.
Pressing OFF will erase the
previously programmed set speed.
ON
OFF
Driver Controls
91
Page 92 of 320
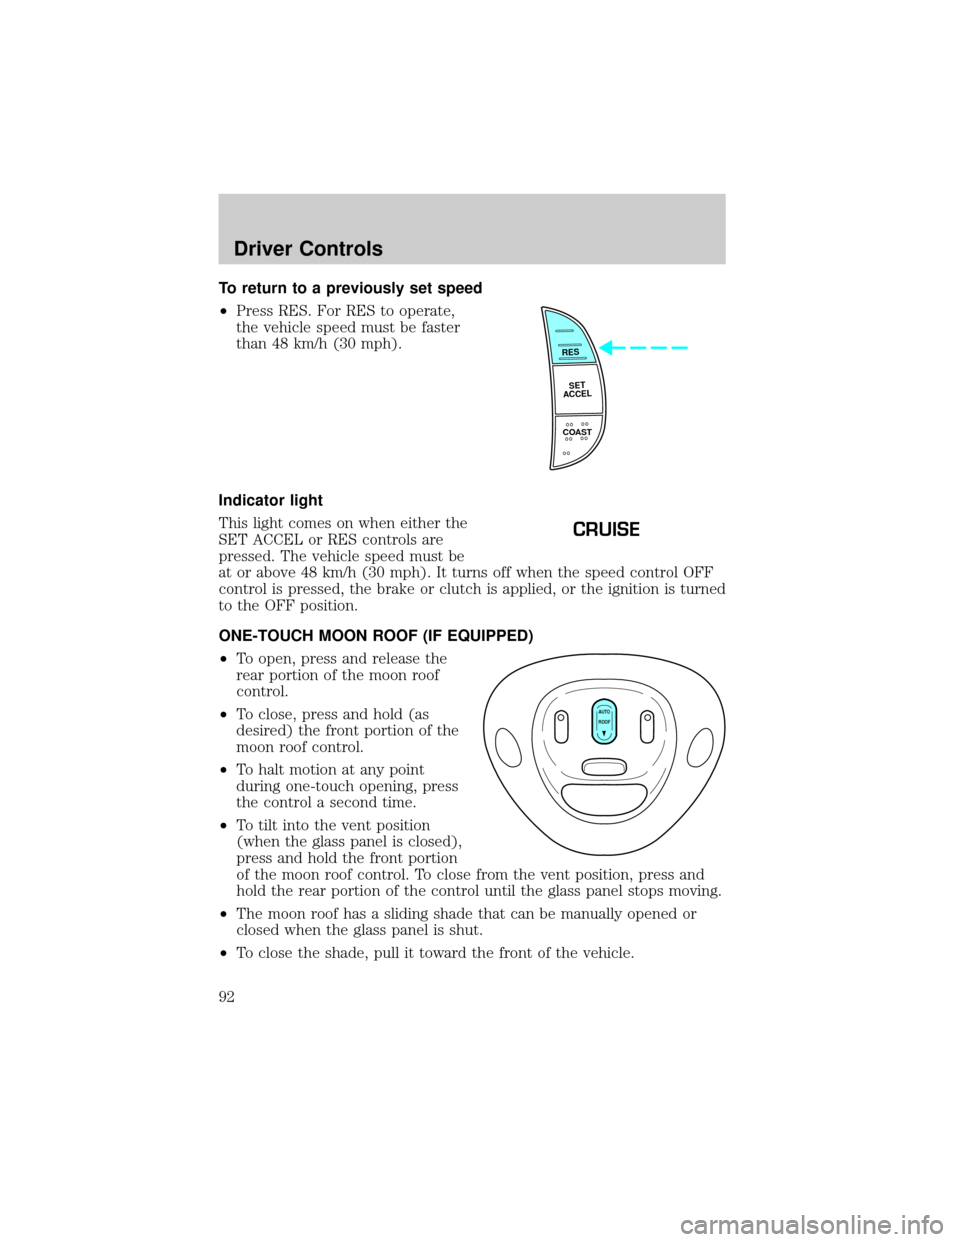
To return to a previously set speed
²Press RES. For RES to operate,
the vehicle speed must be faster
than 48 km/h (30 mph).
Indicator light
This light comes on when either the
SET ACCEL or RES controls are
pressed. The vehicle speed must be
at or above 48 km/h (30 mph). It turns off when the speed control OFF
control is pressed, the brake or clutch is applied, or the ignition is turned
to the OFF position.
ONE-TOUCH MOON ROOF (IF EQUIPPED)
²To open, press and release the
rear portion of the moon roof
control.
²To close, press and hold (as
desired) the front portion of the
moon roof control.
²To halt motion at any point
during one-touch opening, press
the control a second time.
²To tilt into the vent position
(when the glass panel is closed),
press and hold the front portion
of the moon roof control. To close from the vent position, press and
hold the rear portion of the control until the glass panel stops moving.
²The moon roof has a sliding shade that can be manually opened or
closed when the glass panel is shut.
²To close the shade, pull it toward the front of the vehicle.
RES
SET
ACCEL
COAST
CRUISE
AUTO
ROOF
Driver Controls
92
Page 167 of 320
²Make sure the gearshift is in P (Park).
If starting a vehicle with a manual transmission:
²Make sure the parking brake is set.
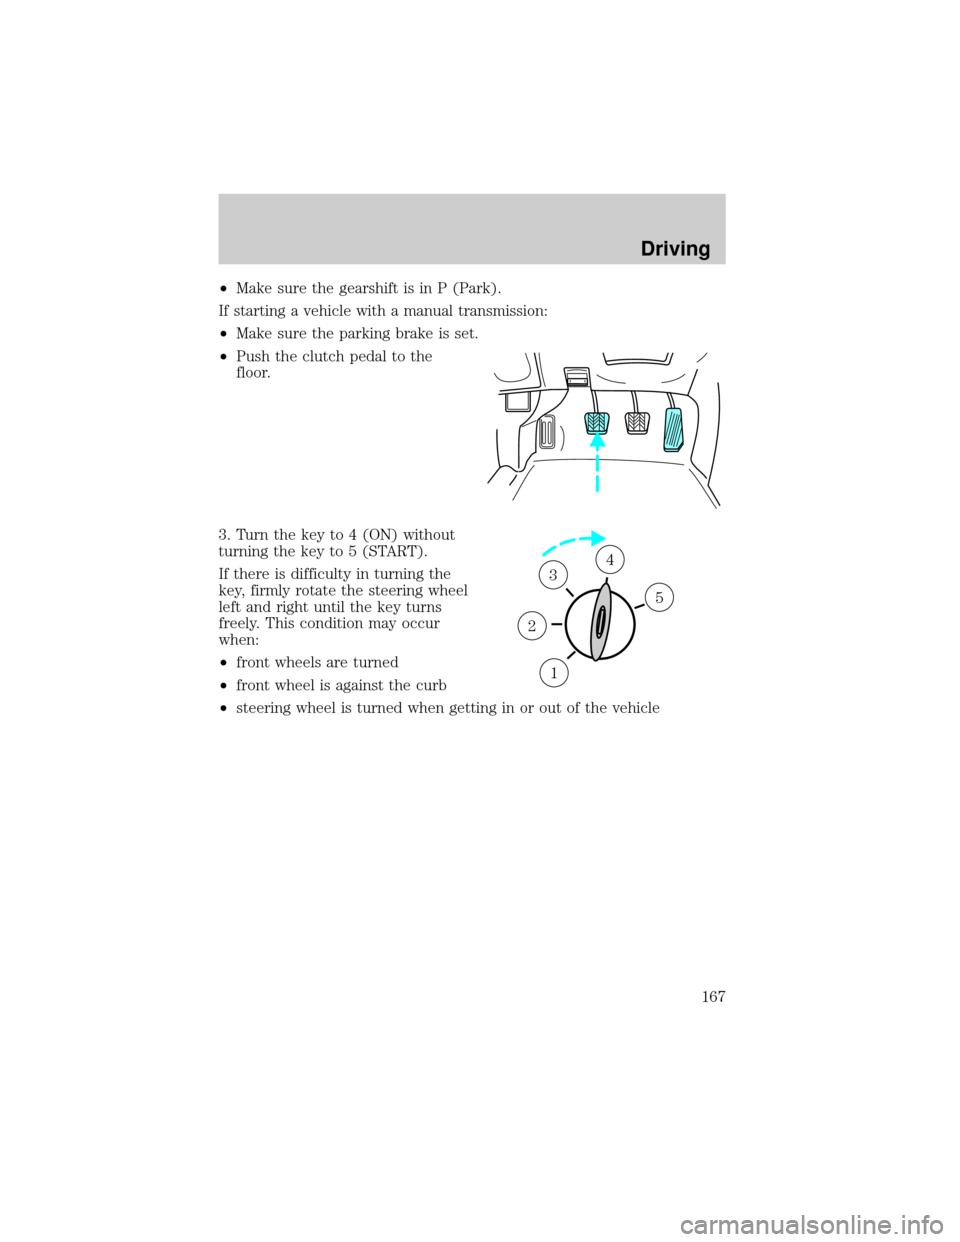
²Push the clutch pedal to the
floor.
3. Turn the key to 4 (ON) without
turning the key to 5 (START).
If there is difficulty in turning the
key, firmly rotate the steering wheel
left and right until the key turns
freely. This condition may occur
when:
²front wheels are turned
²front wheel is against the curb
²steering wheel is turned when getting in or out of the vehicle
1
2
34
5
Driving
167
Page 178 of 320
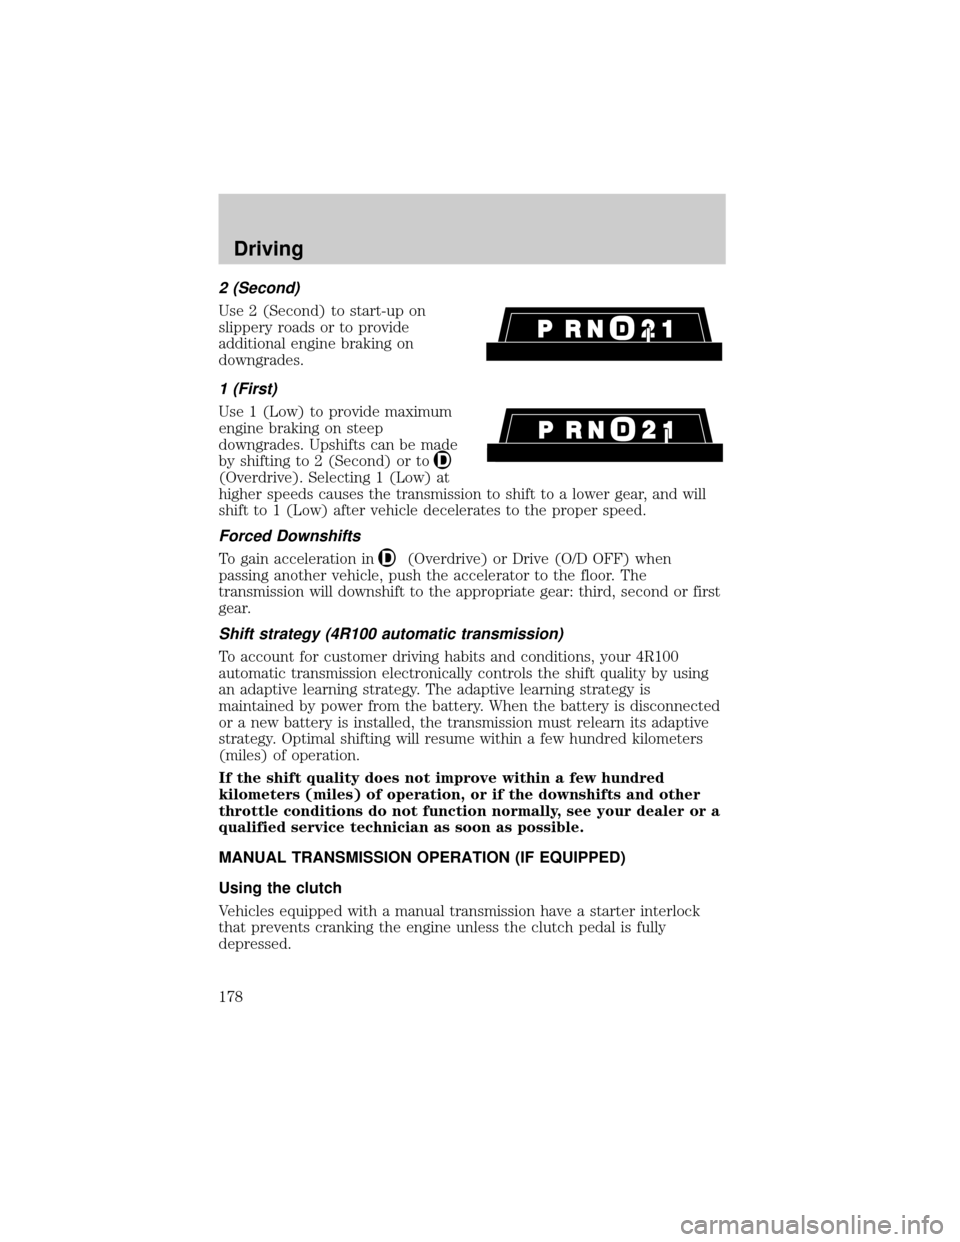
2 (Second)
Use 2 (Second) to start-up on
slippery roads or to provide
additional engine braking on
downgrades.
1 (First)
Use 1 (Low) to provide maximum
engine braking on steep
downgrades. Upshifts can be made
by shifting to 2 (Second) or to
(Overdrive). Selecting 1 (Low) at
higher speeds causes the transmission to shift to a lower gear, and will
shift to 1 (Low) after vehicle decelerates to the proper speed.
Forced Downshifts
To gain acceleration in(Overdrive) or Drive (O/D OFF) when
passing another vehicle, push the accelerator to the floor. The
transmission will downshift to the appropriate gear: third, second or first
gear.
Shift strategy (4R100 automatic transmission)
To account for customer driving habits and conditions, your 4R100
automatic transmission electronically controls the shift quality by using
an adaptive learning strategy. The adaptive learning strategy is
maintained by power from the battery. When the battery is disconnected
or a new battery is installed, the transmission must relearn its adaptive
strategy. Optimal shifting will resume within a few hundred kilometers
(miles) of operation.
If the shift quality does not improve within a few hundred
kilometers (miles) of operation, or if the downshifts and other
throttle conditions do not function normally, see your dealer or a
qualified service technician as soon as possible.
MANUAL TRANSMISSION OPERATION (IF EQUIPPED)
Using the clutch
Vehicles equipped with a manual transmission have a starter interlock
that prevents cranking the engine unless the clutch pedal is fully
depressed.
Driving
178
Page 179 of 320
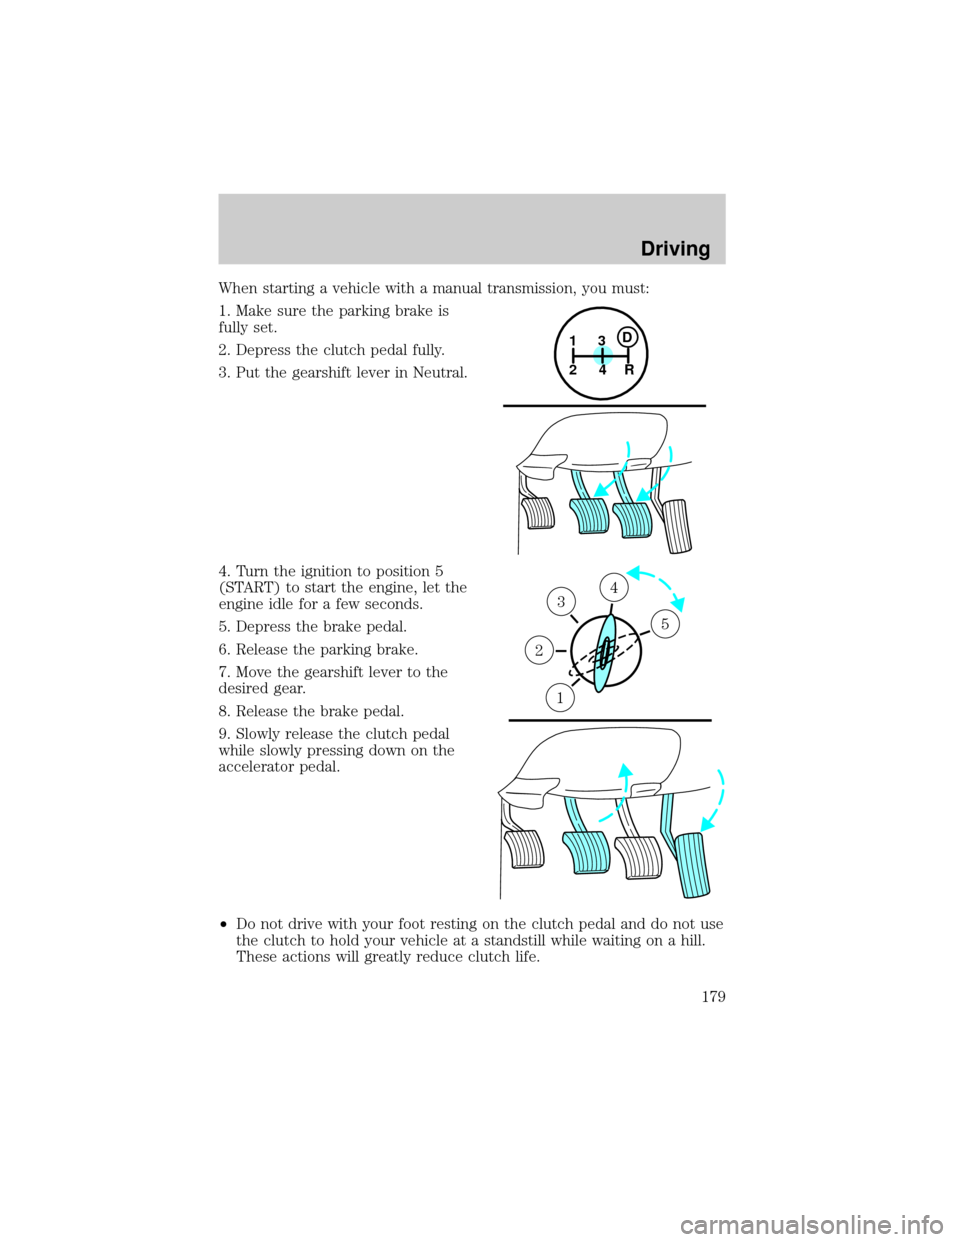
When starting a vehicle with a manual transmission, you must:
1. Make sure the parking brake is
fully set.
2. Depress the clutch pedal fully.
3. Put the gearshift lever in Neutral.
4. Turn the ignition to position 5
(START) to start the engine, let the
engine idle for a few seconds.
5. Depress the brake pedal.
6. Release the parking brake.
7. Move the gearshift lever to the
desired gear.
8. Release the brake pedal.
9. Slowly release the clutch pedal
while slowly pressing down on the
accelerator pedal.
²Do not drive with your foot resting on the clutch pedal and do not use
the clutch to hold your vehicle at a standstill while waiting on a hill.
These actions will greatly reduce clutch life.
1
24R3D
5
43
2
1
Driving
179
Page 182 of 320
Maximum downshift speeds1
4 - 3 72 km/h (45 mph) 27 km/h (17 mph)
3 - 2 56 km/h (35 mph) 21 km/h (13 mph)
2 - 1 32 km/h (20 mph) 11 km/h (7 mph)
1Downshift at lower speeds when driving on slippery surfaces.
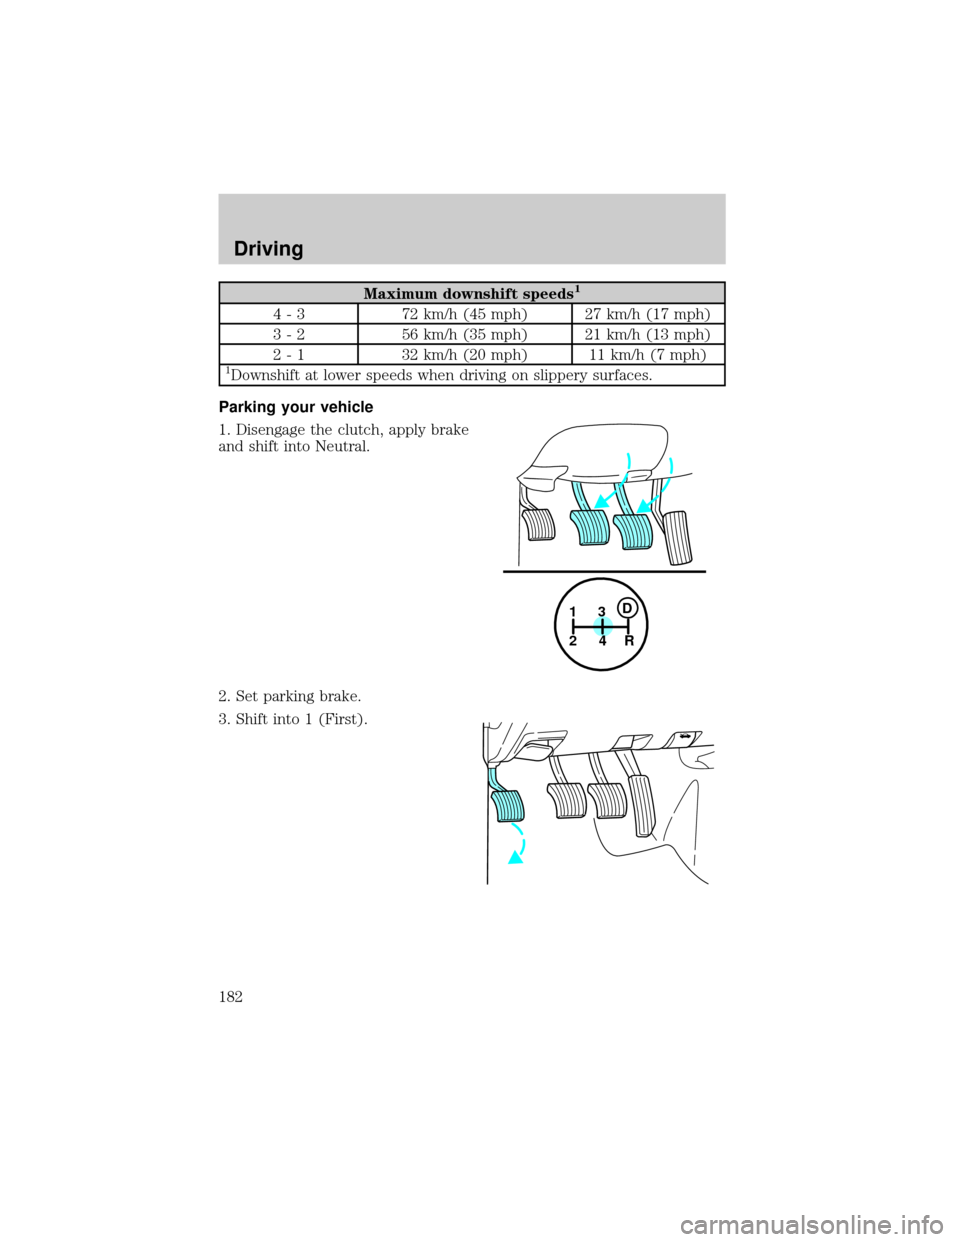
Parking your vehicle
1. Disengage the clutch, apply brake
and shift into Neutral.
2. Set parking brake.
3. Shift into 1 (First).
1
24R3D
Driving
182
Page 184 of 320
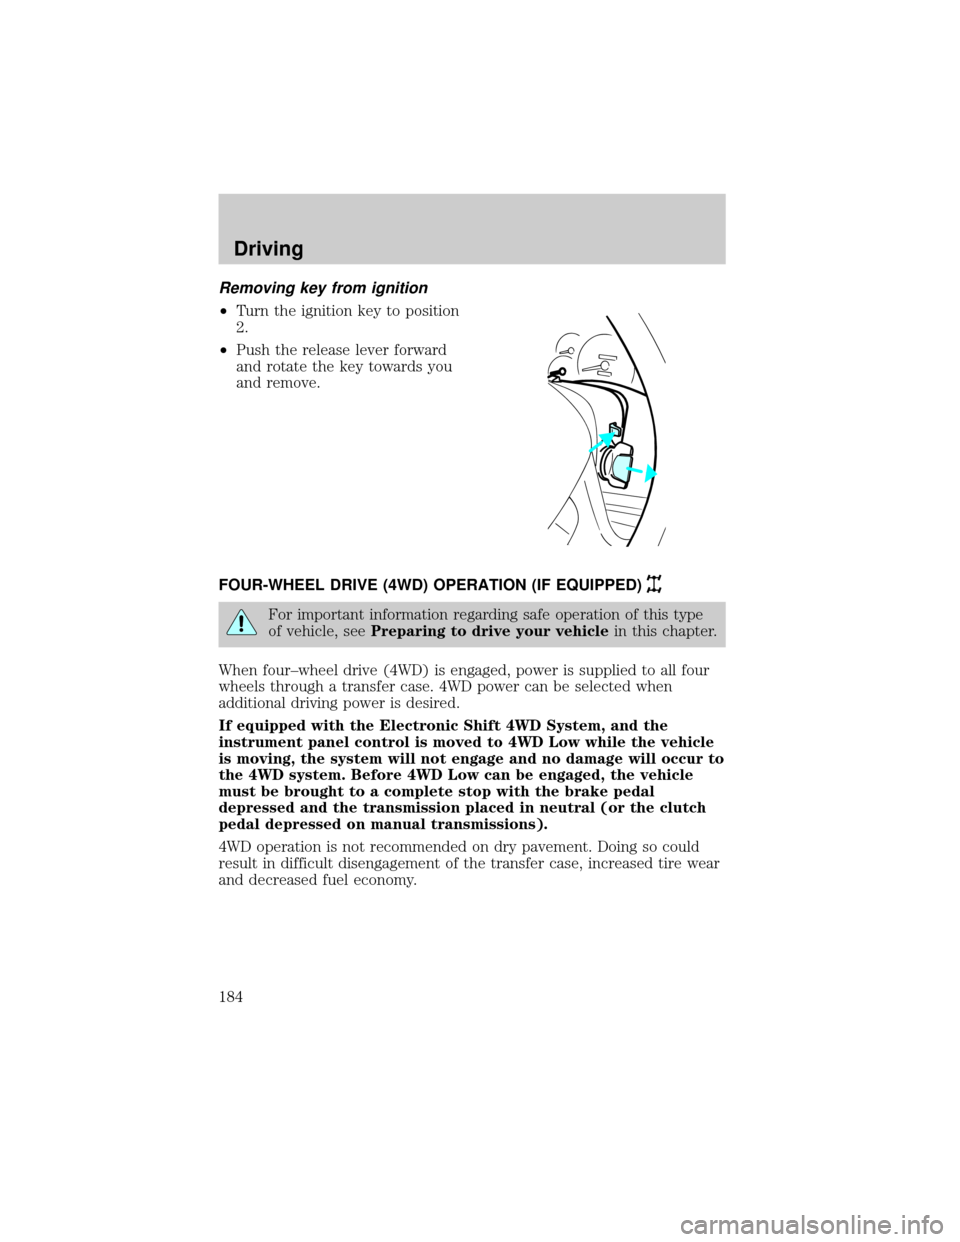
Removing key from ignition
²Turn the ignition key to position
2.
²Push the release lever forward
and rotate the key towards you
and remove.
FOUR-WHEEL DRIVE (4WD) OPERATION (IF EQUIPPED)
For important information regarding safe operation of this type
of vehicle, seePreparing to drive your vehiclein this chapter.
When four±wheel drive (4WD) is engaged, power is supplied to all four
wheels through a transfer case. 4WD power can be selected when
additional driving power is desired.
If equipped with the Electronic Shift 4WD System, and the
instrument panel control is moved to 4WD Low while the vehicle
is moving, the system will not engage and no damage will occur to
the 4WD system. Before 4WD Low can be engaged, the vehicle
must be brought to a complete stop with the brake pedal
depressed and the transmission placed in neutral (or the clutch
pedal depressed on manual transmissions).
4WD operation is not recommended on dry pavement. Doing so could
result in difficult disengagement of the transfer case, increased tire wear
and decreased fuel economy.
Driving
184
Page 186 of 320
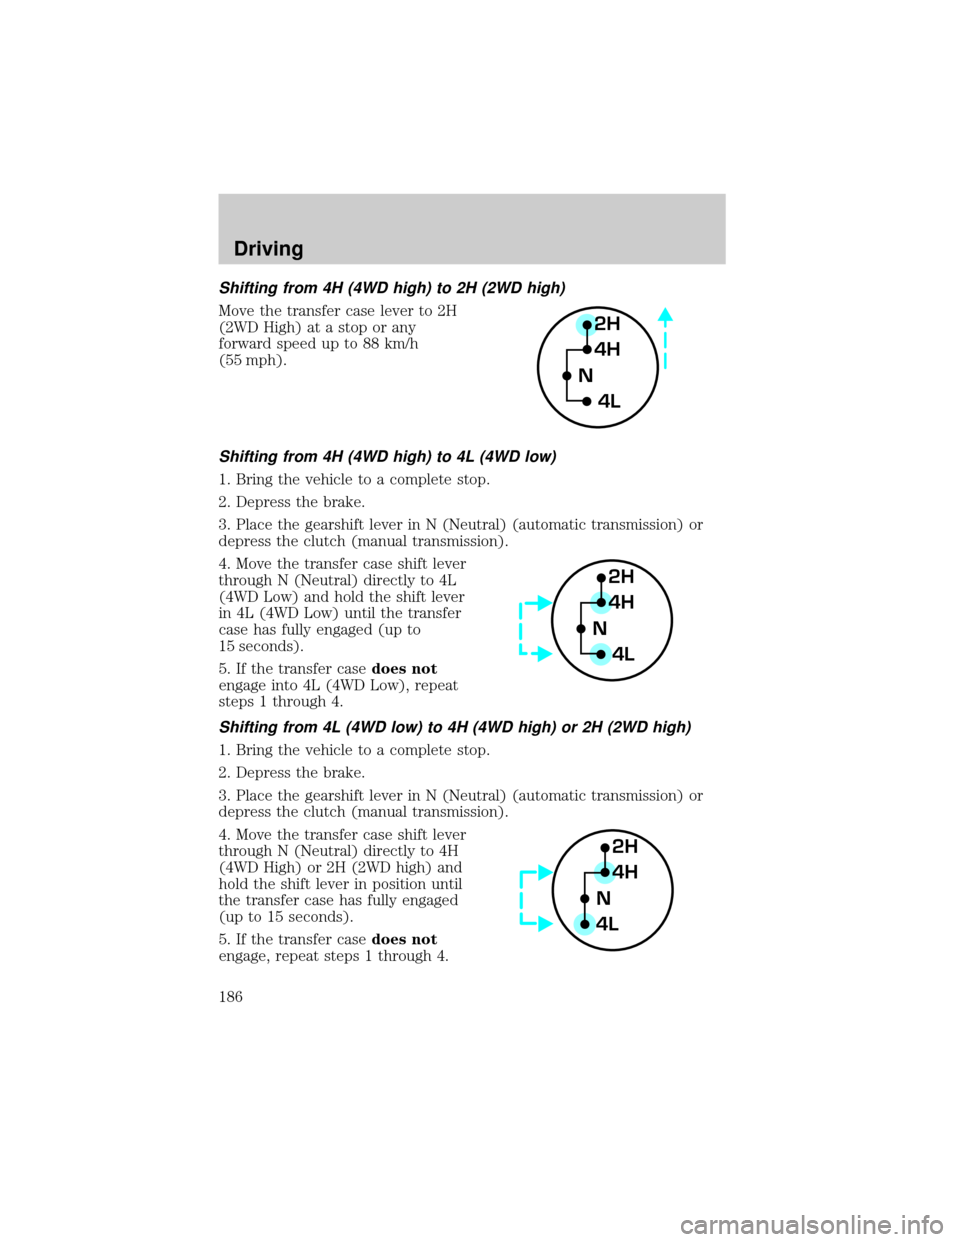
Shifting from 4H (4WD high) to 2H (2WD high)
Move the transfer case lever to 2H
(2WD High) at a stop or any
forward speed up to 88 km/h
(55 mph).
Shifting from 4H (4WD high) to 4L (4WD low)
1. Bring the vehicle to a complete stop.
2. Depress the brake.
3. Place the gearshift lever in N (Neutral) (automatic transmission) or
depress the clutch (manual transmission).
4. Move the transfer case shift lever
through N (Neutral) directly to 4L
(4WD Low) and hold the shift lever
in 4L (4WD Low) until the transfer
case has fully engaged (up to
15 seconds).
5. If the transfer casedoes not
engage into 4L (4WD Low), repeat
steps 1 through 4.
Shifting from 4L (4WD low) to 4H (4WD high) or 2H (2WD high)
1. Bring the vehicle to a complete stop.
2. Depress the brake.
3. Place the gearshift lever in N (Neutral) (automatic transmission) or
depress the clutch (manual transmission).
4. Move the transfer case shift lever
through N (Neutral) directly to 4H
(4WD High) or 2H (2WD high) and
hold the shift lever in position until
the transfer case has fully engaged
(up to 15 seconds).
5. If the transfer casedoes not
engage, repeat steps 1 through 4.
2H
4H
4L N
2H
4H
4L N
2H
4H
4LN
Driving
186
Page 188 of 320
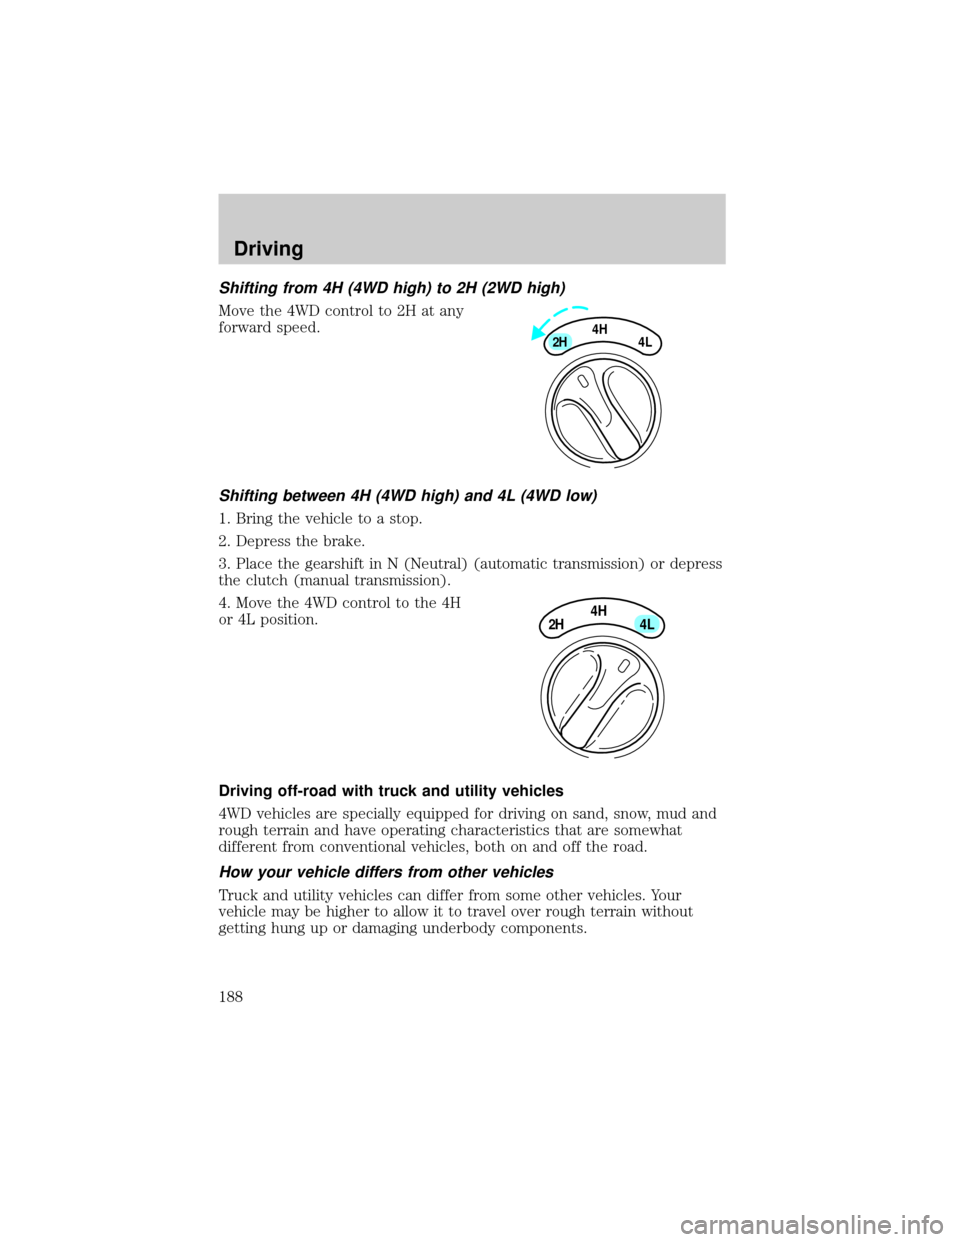
Shifting from 4H (4WD high) to 2H (2WD high)
Move the 4WD control to 2H at any
forward speed.
Shifting between 4H (4WD high) and 4L (4WD low)
1. Bring the vehicle to a stop.
2. Depress the brake.
3. Place the gearshift in N (Neutral) (automatic transmission) or depress
the clutch (manual transmission).
4. Move the 4WD control to the 4H
or 4L position.
Driving off-road with truck and utility vehicles
4WD vehicles are specially equipped for driving on sand, snow, mud and
rough terrain and have operating characteristics that are somewhat
different from conventional vehicles, both on and off the road.
How your vehicle differs from other vehicles
Truck and utility vehicles can differ from some other vehicles. Your
vehicle may be higher to allow it to travel over rough terrain without
getting hung up or damaging underbody components.
4H
2H
4L
4H
2H
4L
Driving
188
Page 216 of 320
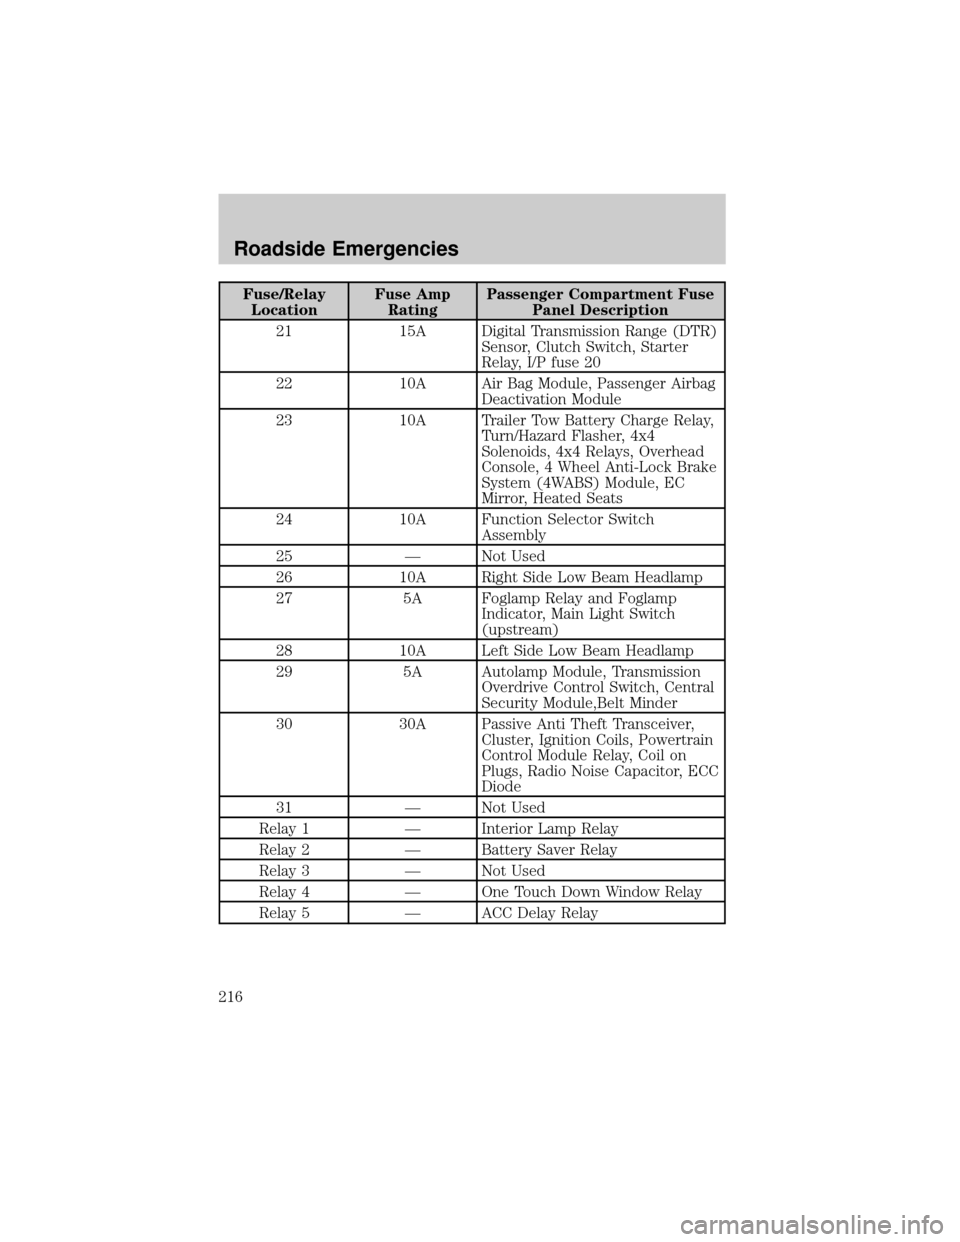
Fuse/Relay
LocationFuse Amp
RatingPassenger Compartment Fuse
Panel Description
21 15A Digital Transmission Range (DTR)
Sensor, Clutch Switch, Starter
Relay, I/P fuse 20
22 10A Air Bag Module, Passenger Airbag
Deactivation Module
23 10A Trailer Tow Battery Charge Relay,
Turn/Hazard Flasher, 4x4
Solenoids, 4x4 Relays, Overhead
Console, 4 Wheel Anti-Lock Brake
System (4WABS) Module, EC
Mirror, Heated Seats
24 10A Function Selector Switch
Assembly
25 Ð Not Used
26 10A Right Side Low Beam Headlamp
27 5A Foglamp Relay and Foglamp
Indicator, Main Light Switch
(upstream)
28 10A Left Side Low Beam Headlamp
29 5A Autolamp Module, Transmission
Overdrive Control Switch, Central
Security Module,Belt Minder
30 30A Passive Anti Theft Transceiver,
Cluster, Ignition Coils, Powertrain
Control Module Relay, Coil on
Plugs, Radio Noise Capacitor, ECC
Diode
31 Ð Not Used
Relay 1 Ð Interior Lamp Relay
Relay 2 Ð Battery Saver Relay
Relay 3 Ð Not Used
Relay 4 Ð One Touch Down Window Relay
Relay 5 Ð ACC Delay Relay
Roadside Emergencies
216