AUX FORD F150 2017 13.G Owners Manual
[x] Cancel search | Manufacturer: FORD, Model Year: 2017, Model line: F150, Model: FORD F150 2017 13.GPages: 599, PDF Size: 7.34 MB
Page 5 of 599
Anti-Theft Alarm............................................76
Power Running Boards
Using Power Running Boards....................78
Steering Wheel
Adjusting the Steering Wheel...................80
Audio Control
...................................................81
Voice Control
...................................................82
Cruise Control..................................................82
Information Display Control
.......................83
Pedals
Adjusting the Pedals....................................84
Wipers and Washers
Windshield Wipers........................................85
Autowipers.......................................................85
Windshield Washers.....................................86
Lighting
Lighting Control
..............................................87
Autolamps........................................................87
Instrument Lighting Dimmer.....................88
Daytime Running Lamps
............................89
Automatic High Beam Control.................89
Front Fog Lamps.............................................91
Direction Indicators
........................................91
Spot Lamps
.......................................................91
Interior Lamps
.................................................92
Ambient Lighting
...........................................94
Windows and Mirrors
Power Windows
.............................................95
Exterior Mirrors
................................................96
Interior Mirror
...................................................99
Sliding Windows..........................................100
Sun Visors
.......................................................100
Moonroof........................................................100 Instrument Cluster
Gauges
..............................................................
102
Warning Lamps and Indicators...............105
Audible Warnings and Indicators...........108
Information Displays
General Information.....................................110
Information Messages
................................126
Climate Control
Manual Climate Control..............................141
Automatic Climate Control
.......................143
Hints on Controlling the Interior Climate.........................................................144
Heated Windows and Mirrors
...................147
Cabin Air Filter
................................................147
Remote Start.................................................148
Seats
Sitting in the Correct Position..................149
Head Restraints
............................................149
Manual Seats
..................................................151
Power Seats
....................................................152
Memory Function
.........................................154
Rear Seats.......................................................156
Heated Seats
.................................................156
Climate Controlled Seats...........................157
Front Seat Armrest......................................159
Rear Seat Armrest........................................159
Universal Garage Door Opener
Universal Garage Door Opener...............160
Auxiliary Power Points
Auxiliary Power Points................................164
Storage Compartments
Center Console
..............................................166
2
F-150 (TFC) Canada/United States of America, enUSA, First Printing Table of Contents
Page 167 of 599
12 Volt DC Power Point
WARNINGS
Do not plug optional electrical
accessories into the cigar lighter
socket. Incorrect use of the cigar
lighter can cause damage not covered by
the vehicle warranty, and can result in fire
or serious injury. Do not use a power point for
operating a cigar lighter. Incorrect
use of the power points can cause
damage not covered by the vehicle
warranty, and can result in fire or serious
injury. Note:
When you switch the ignition on, you
can use the socket to power 12 volt
appliances with a maximum current rating
of 20 amps.
Note: Do not hang any accessory from the
accessory plug.
Note: Do not use the power point over the
vehicle capacity of 12 volt DC 240 watts or
a fuse may blow.
Note: Always keep the power point caps
closed when not in use.
Do not insert objects other than an
accessory plug into the power point. This
will damage the power point and blow the
fuse.
Run the vehicle for full capacity use of the
power point.
To prevent the battery from running out of
charge:
• Do not use the power point longer than
necessary when the vehicle is not
running.
• Do not leave devices plugged in
overnight or when you park your vehicle
for extended periods. Locations
Power points may be in the following
locations:
•
On the instrument panel.
• Inside the center console.
• On the rear of the center console.
• Inside the front under-seat storage
compartment.
Note: Timed power points remain on for 30
minutes if the vehicle is in accessory mode.
If you switch the vehicle off, the timed
power points remain on for 75 minutes.
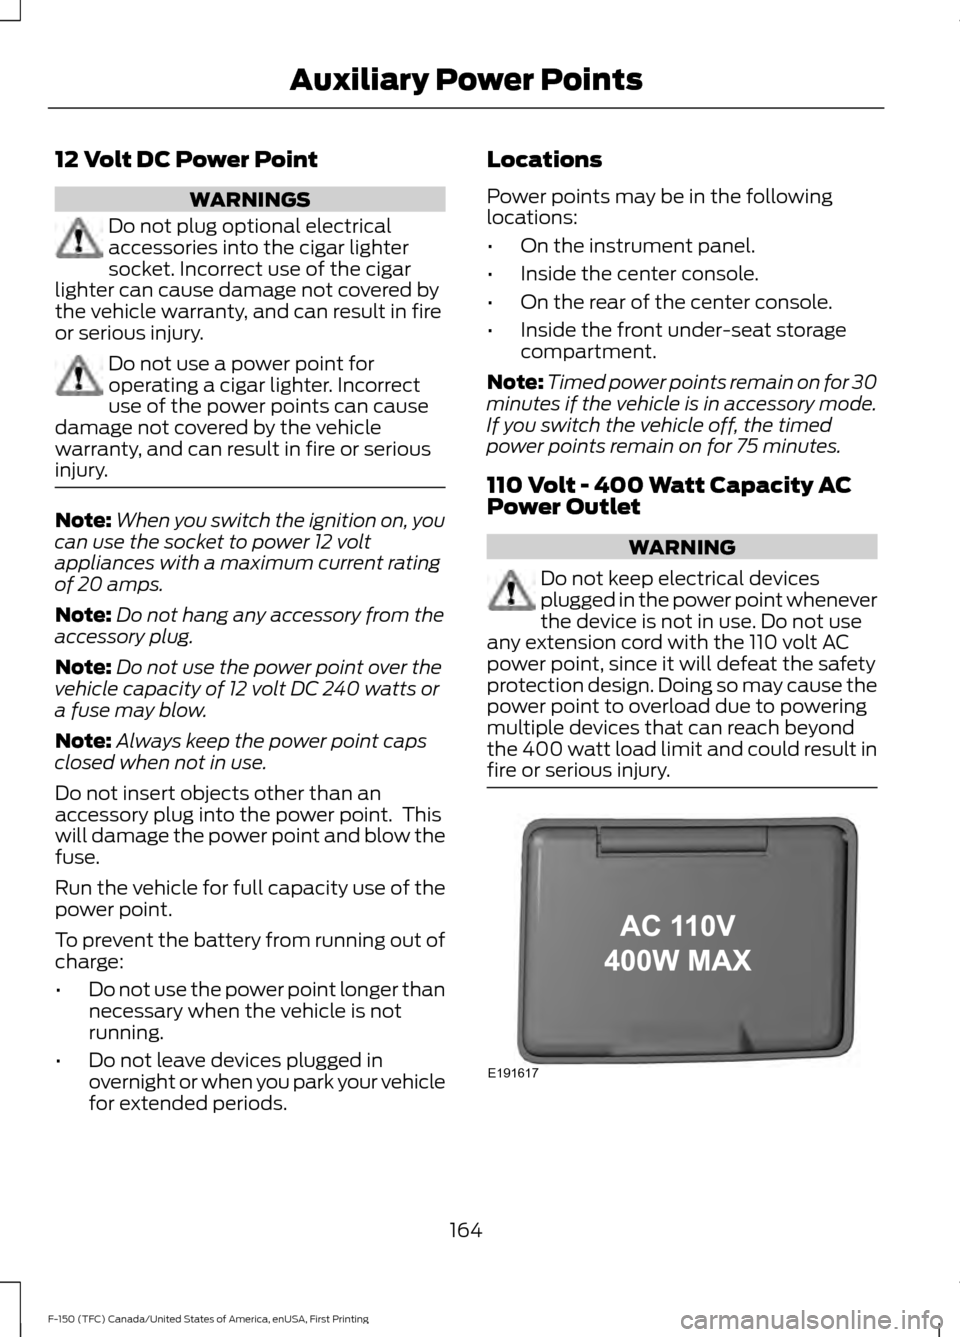
110 Volt - 400 Watt Capacity AC
Power Outlet WARNING
Do not keep electrical devices
plugged in the power point whenever
the device is not in use. Do not use
any extension cord with the 110 volt AC
power point, since it will defeat the safety
protection design. Doing so may cause the
power point to overload due to powering
multiple devices that can reach beyond
the 400 watt load limit and could result in
fire or serious injury. 164
F-150 (TFC) Canada/United States of America, enUSA, First Printing Auxiliary Power PointsE191617
Page 168 of 599
When the indicator light on the power point
is:
•
On: The power point is working, the
ignition is on and a device is plugged
in.
• Off: The power point is off, the ignition
is off or no device is plugged in.
• Flashing: The power point is in fault
mode.
The power outlet temporarily turns off
power when in fault mode if the device
exceeds the 400 watt limit. Unplug your
device and switch the ignition off. Switch
the ignition back on, but do not plug your
device back in. Let the system cool off and
switch the ignition off to reset the fault
mode. Switch the ignition back on and
make sure the indicator light remains on.
You can use the 400 watt power outlet for
these types of electric devices:
• Electric hand drills.
• Rechargeable power tools.
• Video games.
• Laptops.
• Televisions.
Do not use the power point for certain
electric devices, including:
• Cathode-ray, tube-type televisions.
• Motor loads, such as vacuum cleaners,
electric saws and other electric power
tools or compressor-driven
refrigerators.
• Measuring devices, which process
precise data, such as medical
equipment or measuring equipment.
• Other appliances requiring an
extremely stable power supply such as
microcomputer-controlled electric
blankets or touch-sensor lamps.
Note: This feature works only when the
vehicle is running. Note:
This feature has a maximum output
of 400 watts when the vehicle is in park (P).
Note: While in drive (D), the maximum
outlet output is 300 watts.
Note: When powering electric devices that
require more than 10 watts in vehicles
equipped with keyless start, the vehicle
must remain running. It does not allow you
to switch the ignition off or switch the
ignition to accessory mode.
165
F-150 (TFC) Canada/United States of America, enUSA, First Printing Auxiliary Power Points
Page 293 of 599
WARNINGS
Check attachment of floor mats on
a regular basis. Always properly
reinstall and secure floor mats that
have been removed for cleaning or
replacement. Always make sure that objects
cannot fall into the driver foot well
while the vehicle is moving. Objects
that are loose can become trapped under
the pedals causing a loss of vehicle control. Failure to properly follow floor mat
installation or attachment
instructions can potentially cause
interference with pedal operation causing
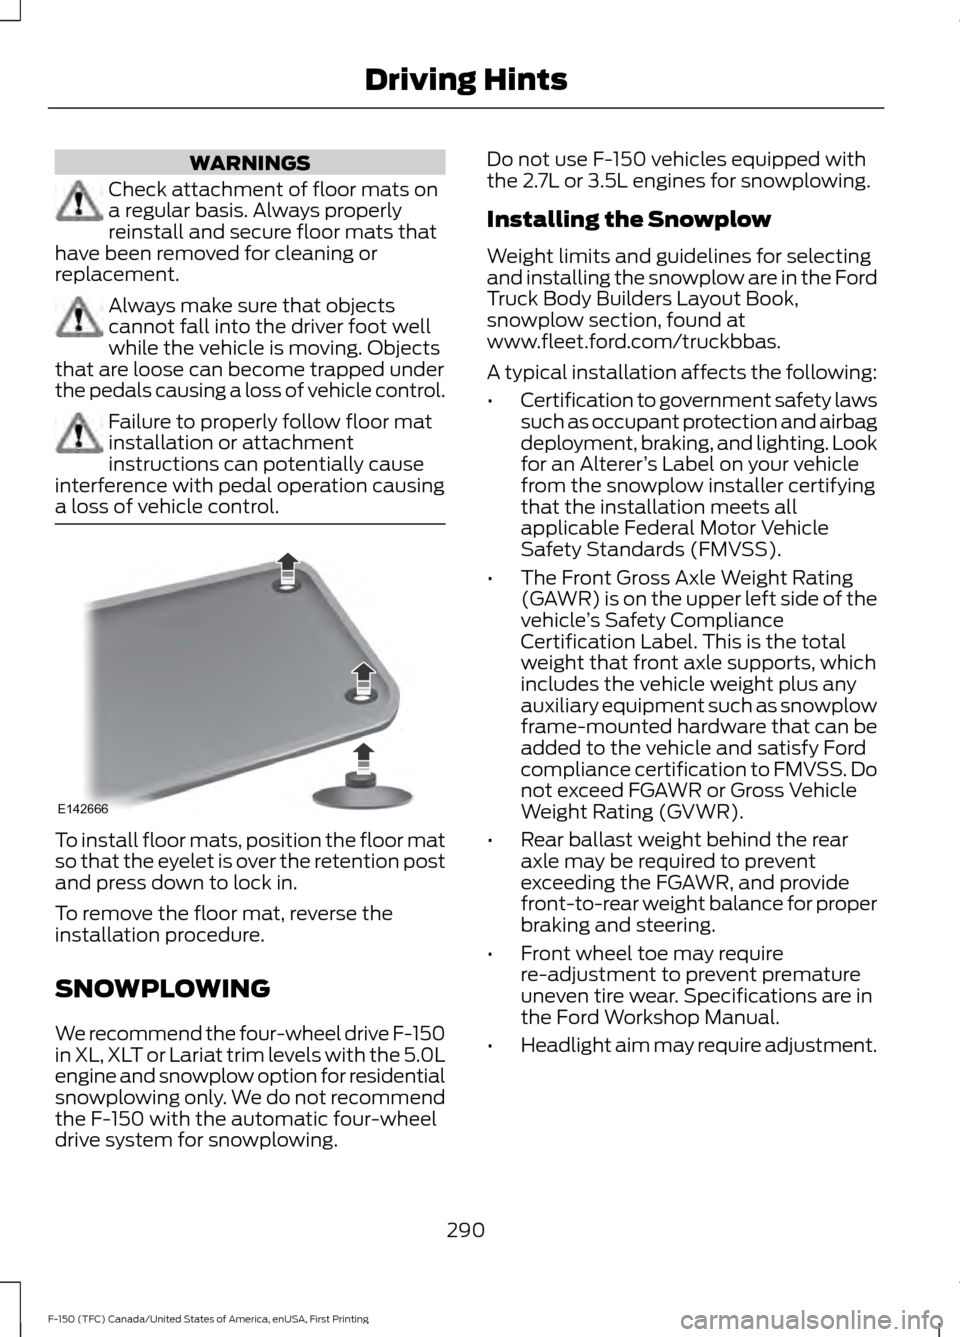
a loss of vehicle control. To install floor mats, position the floor mat
so that the eyelet is over the retention post
and press down to lock in.
To remove the floor mat, reverse the
installation procedure.
SNOWPLOWING
We recommend the four-wheel drive F-150
in XL, XLT or Lariat trim levels with the 5.0L
engine and snowplow option for residential
snowplowing only. We do not recommend
the F-150 with the automatic four-wheel
drive system for snowplowing. Do not use F-150 vehicles equipped with
the 2.7L or 3.5L engines for snowplowing.
Installing the Snowplow
Weight limits and guidelines for selecting
and installing the snowplow are in the Ford
Truck Body Builders Layout Book,
snowplow section, found at
www.fleet.ford.com/truckbbas.
A typical installation affects the following:
•
Certification to government safety laws
such as occupant protection and airbag
deployment, braking, and lighting. Look
for an Alterer ’s Label on your vehicle
from the snowplow installer certifying
that the installation meets all
applicable Federal Motor Vehicle
Safety Standards (FMVSS).
• The Front Gross Axle Weight Rating
(GAWR) is on the upper left side of the
vehicle ’s Safety Compliance
Certification Label. This is the total
weight that front axle supports, which
includes the vehicle weight plus any
auxiliary equipment such as snowplow
frame-mounted hardware that can be
added to the vehicle and satisfy Ford
compliance certification to FMVSS. Do
not exceed FGAWR or Gross Vehicle
Weight Rating (GVWR).
• Rear ballast weight behind the rear
axle may be required to prevent
exceeding the FGAWR, and provide
front-to-rear weight balance for proper
braking and steering.
• Front wheel toe may require
re-adjustment to prevent premature
uneven tire wear. Specifications are in
the Ford Workshop Manual.
• Headlight aim may require adjustment.
290
F-150 (TFC) Canada/United States of America, enUSA, First Printing Driving HintsE142666
Page 411 of 599
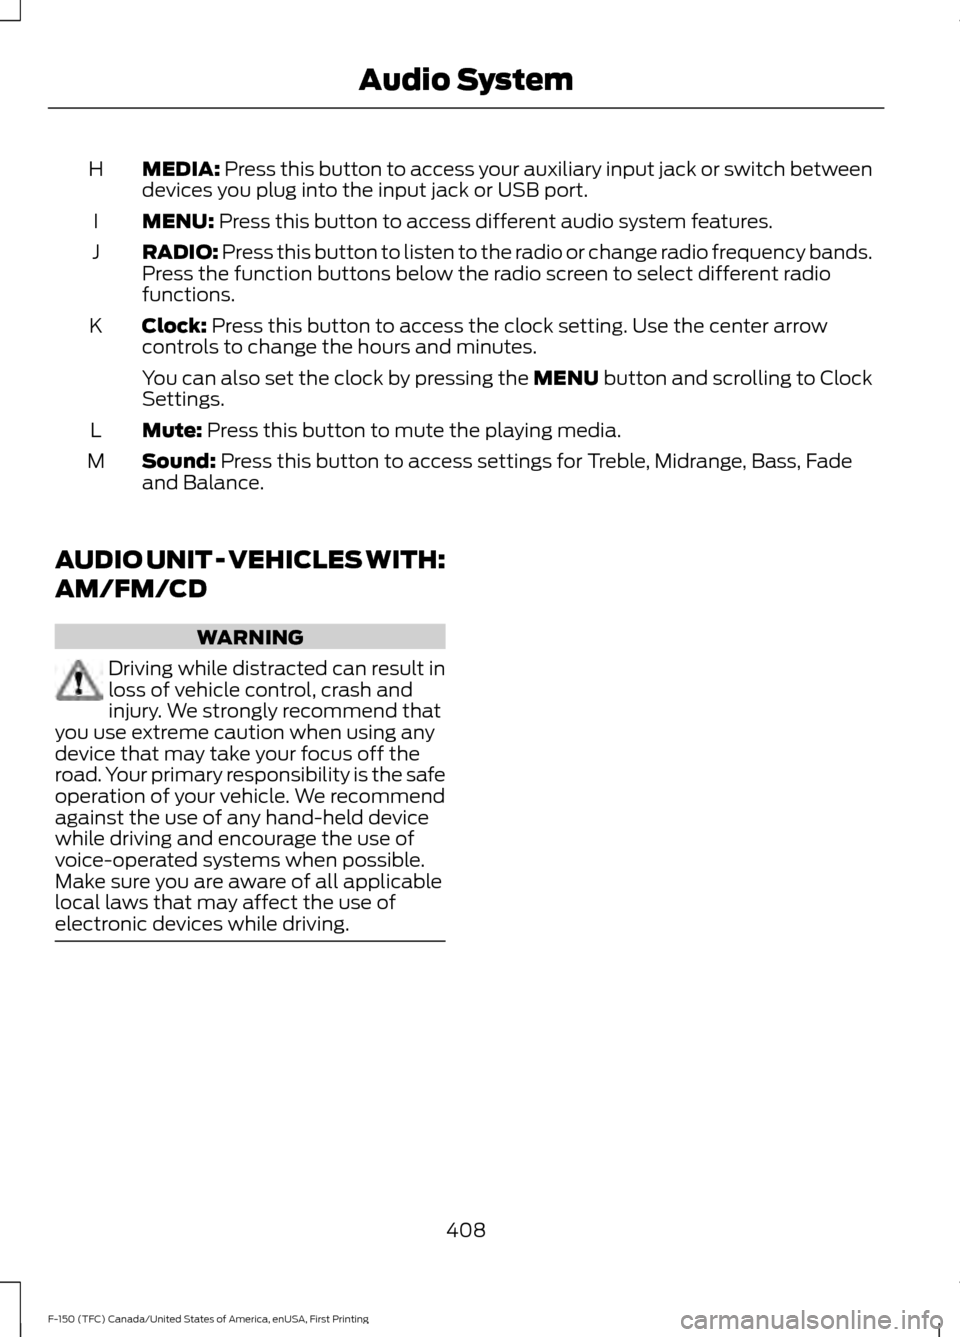
MEDIA: Press this button to access your auxiliary input jack or switch between
devices you plug into the input jack or USB port.
H
MENU:
Press this button to access different audio system features.
I
RADIO:
Press this button to listen to the radio or change radio frequency bands.
Press the function buttons below the radio screen to select different radio
functions.
J
Clock:
Press this button to access the clock setting. Use the center arrow
controls to change the hours and minutes.
K
You can also set the clock by pressing the MENU button and scrolling to Clock
Settings.
Mute:
Press this button to mute the playing media.
L
Sound:
Press this button to access settings for Treble, Midrange, Bass, Fade
and Balance.
M
AUDIO UNIT - VEHICLES WITH:
AM/FM/CD WARNING
Driving while distracted can result in
loss of vehicle control, crash and
injury. We strongly recommend that
you use extreme caution when using any
device that may take your focus off the
road. Your primary responsibility is the safe
operation of your vehicle. We recommend
against the use of any hand-held device
while driving and encourage the use of
voice-operated systems when possible.
Make sure you are aware of all applicable
local laws that may affect the use of
electronic devices while driving. 408
F-150 (TFC) Canada/United States of America, enUSA, First Printing Audio System
Page 413 of 599
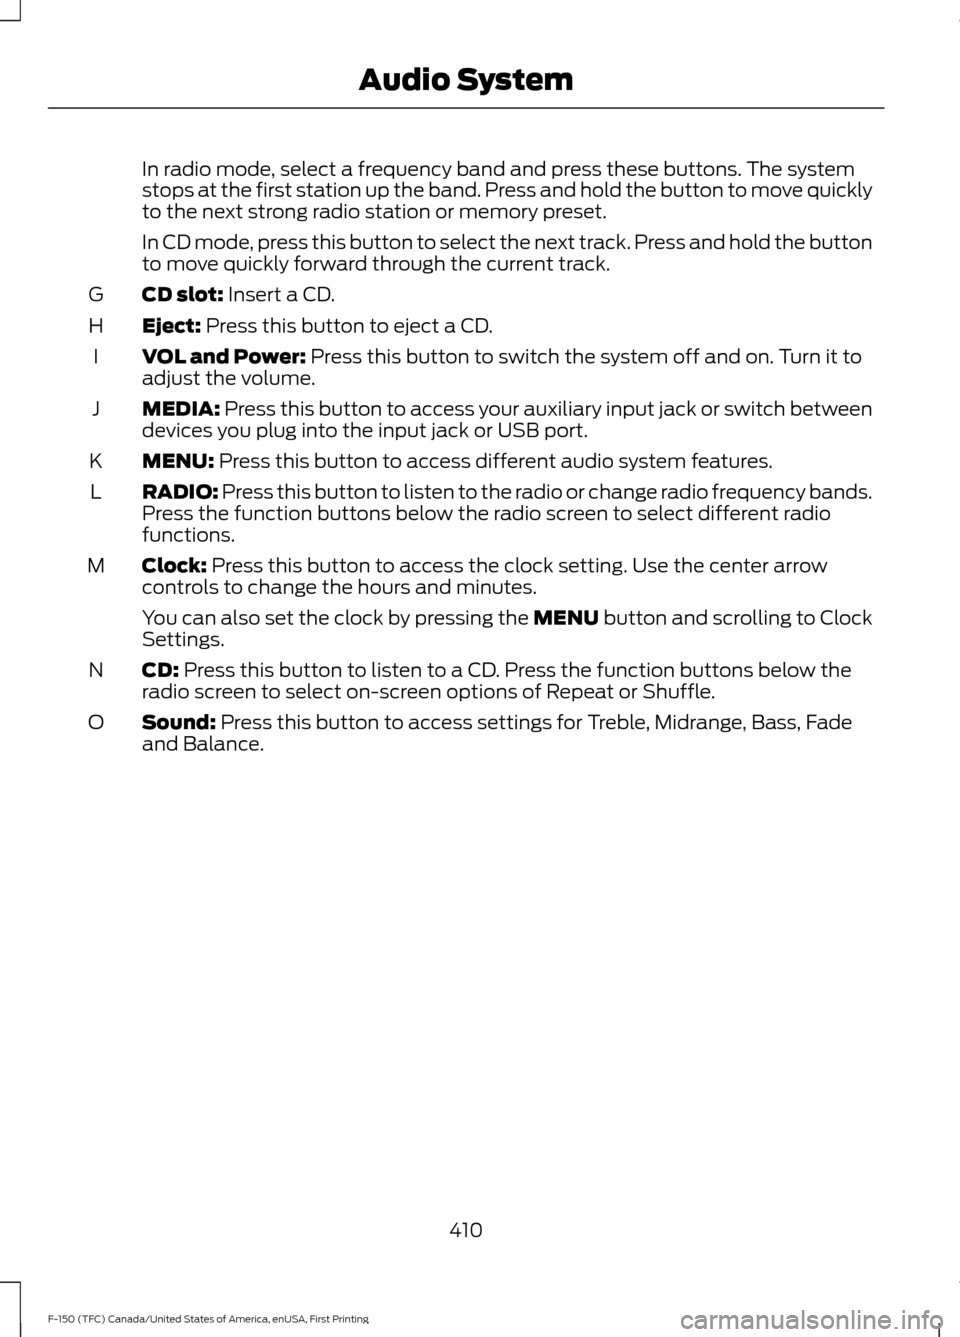
In radio mode, select a frequency band and press these buttons. The system
stops at the first station up the band. Press and hold the button to move quickly
to the next strong radio station or memory preset.
In CD mode, press this button to select the next track. Press and hold the button
to move quickly forward through the current track.
CD slot: Insert a CD.
G
Eject:
Press this button to eject a CD.
H
VOL and Power:
Press this button to switch the system off and on. Turn it to
adjust the volume.
I
MEDIA:
Press this button to access your auxiliary input jack or switch between
devices you plug into the input jack or USB port.
J
MENU:
Press this button to access different audio system features.
K
RADIO:
Press this button to listen to the radio or change radio frequency bands.
Press the function buttons below the radio screen to select different radio
functions.
L
Clock:
Press this button to access the clock setting. Use the center arrow
controls to change the hours and minutes.
M
You can also set the clock by pressing the MENU button and scrolling to Clock
Settings.
CD:
Press this button to listen to a CD. Press the function buttons below the
radio screen to select on-screen options of Repeat or Shuffle.
N
Sound:
Press this button to access settings for Treble, Midrange, Bass, Fade
and Balance.
O
410
F-150 (TFC) Canada/United States of America, enUSA, First Printing Audio System
Page 415 of 599
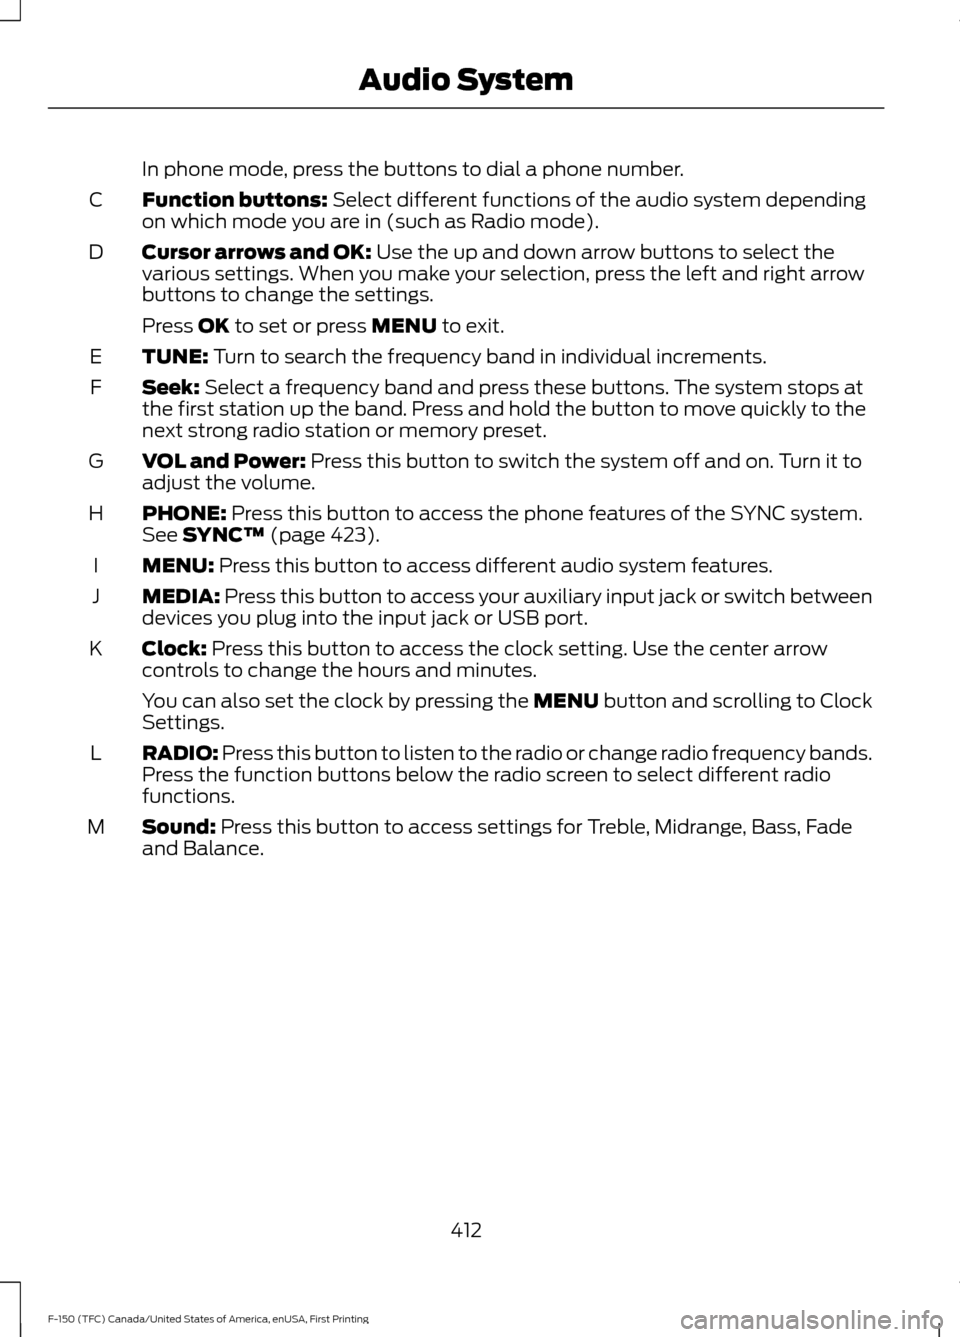
In phone mode, press the buttons to dial a phone number.
Function buttons: Select different functions of the audio system depending
on which mode you are in (such as Radio mode).
C
Cursor arrows and OK:
Use the up and down arrow buttons to select the
various settings. When you make your selection, press the left and right arrow
buttons to change the settings.
D
Press
OK to set or press MENU to exit.
TUNE:
Turn to search the frequency band in individual increments.
E
Seek:
Select a frequency band and press these buttons. The system stops at
the first station up the band. Press and hold the button to move quickly to the
next strong radio station or memory preset.
F
VOL and Power:
Press this button to switch the system off and on. Turn it to
adjust the volume.
G
PHONE:
Press this button to access the phone features of the SYNC system.
See SYNC™ (page 423).
H
MENU:
Press this button to access different audio system features.
I
MEDIA:
Press this button to access your auxiliary input jack or switch between
devices you plug into the input jack or USB port.
J
Clock:
Press this button to access the clock setting. Use the center arrow
controls to change the hours and minutes.
K
You can also set the clock by pressing the MENU button and scrolling to Clock
Settings.
RADIO:
Press this button to listen to the radio or change radio frequency bands.
Press the function buttons below the radio screen to select different radio
functions.
L
Sound:
Press this button to access settings for Treble, Midrange, Bass, Fade
and Balance.
M
412
F-150 (TFC) Canada/United States of America, enUSA, First Printing Audio System
Page 417 of 599
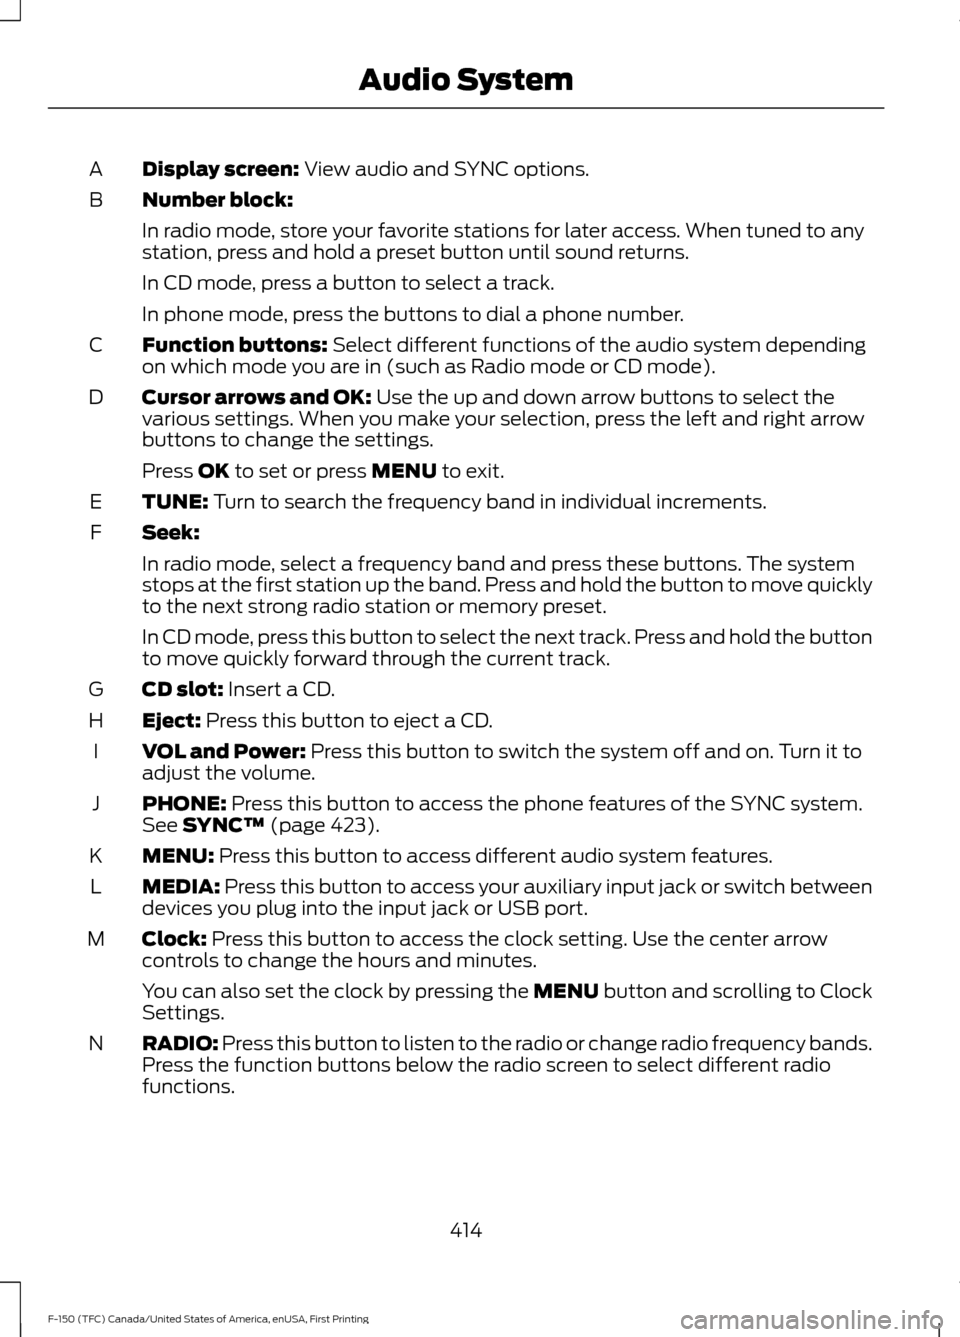
Display screen: View audio and SYNC options.
A
Number block:
B
In radio mode, store your favorite stations for later access. When tuned to any
station, press and hold a preset button until sound returns.
In CD mode, press a button to select a track.
In phone mode, press the buttons to dial a phone number.
Function buttons:
Select different functions of the audio system depending
on which mode you are in (such as Radio mode or CD mode).
C
Cursor arrows and OK:
Use the up and down arrow buttons to select the
various settings. When you make your selection, press the left and right arrow
buttons to change the settings.
D
Press
OK to set or press MENU to exit.
TUNE:
Turn to search the frequency band in individual increments.
E
Seek:
F
In radio mode, select a frequency band and press these buttons. The system
stops at the first station up the band. Press and hold the button to move quickly
to the next strong radio station or memory preset.
In CD mode, press this button to select the next track. Press and hold the button
to move quickly forward through the current track.
CD slot:
Insert a CD.
G
Eject:
Press this button to eject a CD.
H
VOL and Power:
Press this button to switch the system off and on. Turn it to
adjust the volume.
I
PHONE:
Press this button to access the phone features of the SYNC system.
See SYNC™ (page 423).
J
MENU:
Press this button to access different audio system features.
K
MEDIA:
Press this button to access your auxiliary input jack or switch between
devices you plug into the input jack or USB port.
L
Clock:
Press this button to access the clock setting. Use the center arrow
controls to change the hours and minutes.
M
You can also set the clock by pressing the MENU button and scrolling to Clock
Settings.
RADIO:
Press this button to listen to the radio or change radio frequency bands.
Press the function buttons below the radio screen to select different radio
functions.
N
414
F-150 (TFC) Canada/United States of America, enUSA, First Printing Audio System
Page 589 of 599
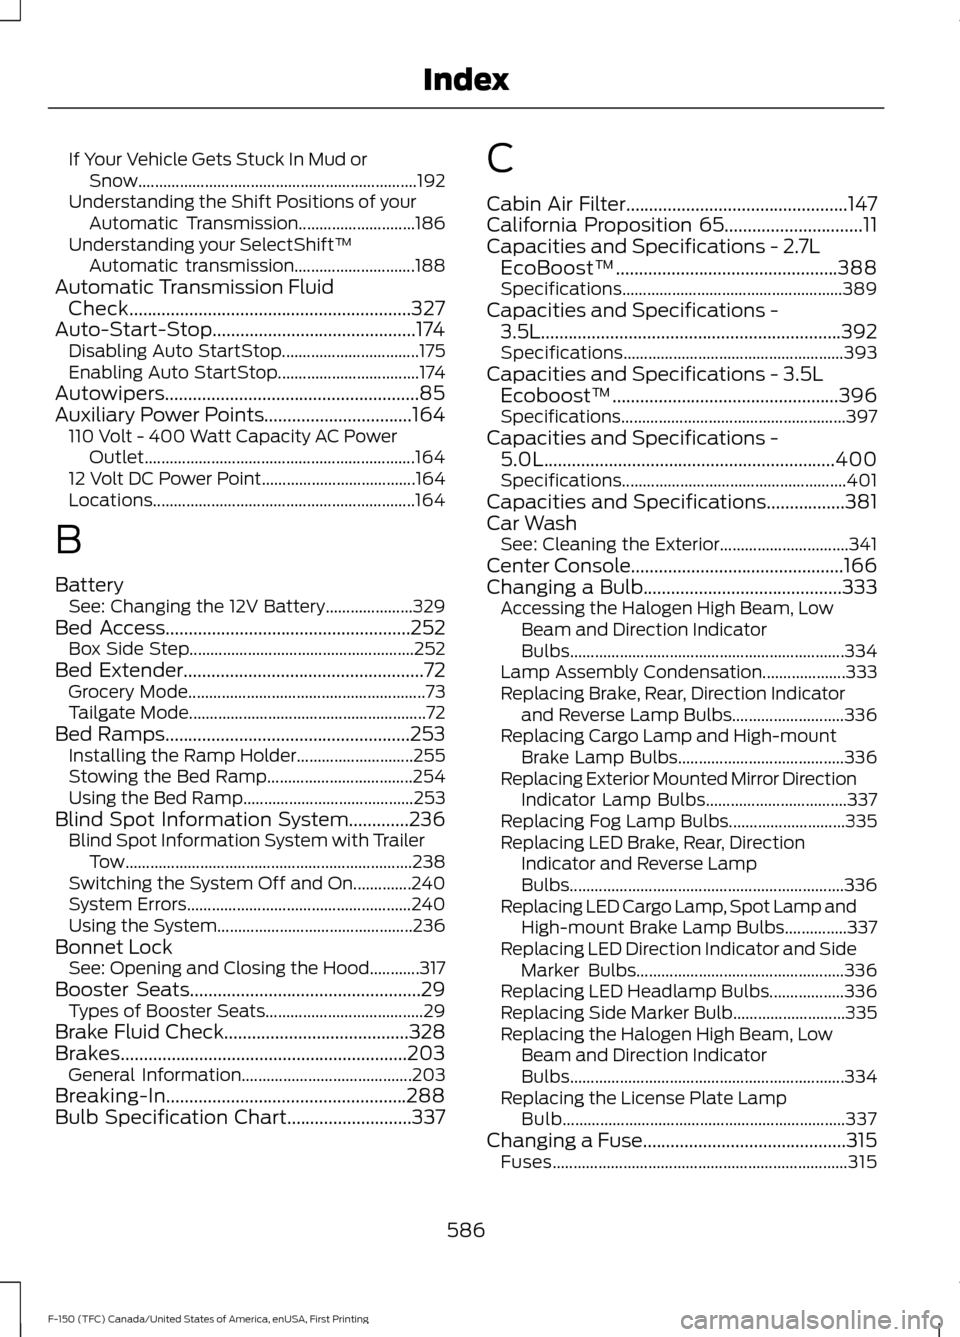
If Your Vehicle Gets Stuck In Mud or
Snow................................................................... 192
Understanding the Shift Positions of your Automatic Transmission............................ 186
Understanding your SelectShift™ Automatic transmission............................. 188
Automatic Transmission Fluid Check.............................................................327
Auto-Start-Stop............................................174 Disabling Auto StartStop................................. 175
Enabling Auto StartStop.................................. 174
Autowipers.......................................................85
Auxiliary Power Points................................164 110 Volt - 400 Watt Capacity AC Power
Outlet................................................................. 164
12 Volt DC Power Point..................................... 164
Locations............................................................... 164
B
Battery See: Changing the 12V Battery..................... 329
Bed Access.....................................................252
Box Side Step...................................................... 252
Bed Extender
....................................................72
Grocery Mode......................................................... 73
Tailgate Mode......................................................... 72
Bed Ramps
.....................................................253
Installing the Ramp Holder............................ 255
Stowing the Bed Ramp................................... 254
Using the Bed Ramp......................................... 253
Blind Spot Information System.............236 Blind Spot Information System with Trailer
Tow..................................................................... 238
Switching the System Off and On..............240
System Errors...................................................... 240
Using the System............................................... 236
Bonnet Lock See: Opening and Closing the Hood............317
Booster Seats
..................................................29
Types of Booster Seats...................................... 29
Brake Fluid Check
........................................328
Brakes..............................................................203 General Information......................................... 203
Breaking-In....................................................288
Bulb Specification Chart...........................337 C
Cabin Air Filter................................................147
California Proposition 65..............................11
Capacities and Specifications - 2.7L
EcoBoost™
................................................388
Specifications..................................................... 389
Capacities and Specifications - 3.5L.................................................................392
Specifications..................................................... 393
Capacities and Specifications - 3.5L Ecoboost™
.................................................396
Specifications ...................................................... 397
Capacities and Specifications - 5.0L...............................................................400
Specifications...................................................... 401
Capacities and Specifications
.................381
Car Wash See: Cleaning the Exterior............................... 341
Center Console
..............................................166
Changing a Bulb...........................................333
Accessing the Halogen High Beam, Low
Beam and Direction Indicator
Bulbs.................................................................. 334
Lamp Assembly Condensation.................... 333
Replacing Brake, Rear, Direction Indicator and Reverse Lamp Bulbs........................... 336
Replacing Cargo Lamp and High-mount Brake Lamp Bulbs........................................ 336
Replacing Exterior Mounted Mirror Direction Indicator Lamp Bulbs.................................. 337
Replacing Fog Lamp Bulbs............................ 335
Replacing LED Brake, Rear, Direction Indicator and Reverse Lamp
Bulbs.................................................................. 336
Replacing LED Cargo Lamp, Spot Lamp and High-mount Brake Lamp Bulbs...............337
Replacing LED Direction Indicator and Side Marker Bulbs.................................................. 336
Replacing LED Headlamp Bulbs.................. 336
Replacing Side Marker Bulb........................... 335
Replacing the Halogen High Beam, Low Beam and Direction Indicator
Bulbs.................................................................. 334
Replacing the License Plate Lamp Bulb.................................................................... 337
Changing a Fuse............................................315 Fuses....................................................................... 315
586
F-150 (TFC) Canada/United States of America, enUSA, First Printing Index