manual transmission FORD F250 1998 Owner's Guide
[x] Cancel search | Manufacturer: FORD, Model Year: 1998, Model line: F250, Model: FORD F250 1998Pages: 219, PDF Size: 1.65 MB
Page 129 of 219
either full left or full right to
provide maximum airflow to the
radiator.
If you are driving less than 24 km
(15 miles) at speeds up to 64 km/h
(40 mph) in cold weather, you will
not need to worry about blade
position to provide maximum
airflow.
Transmission operation while
plowing
²Shift transfer case to 4L (4WD
Low) when plowing in small
areas at speeds below 8 km/h
(5 mph).
²Shift transfer case to 4H (4WD
High) when plowing larger areas
or light snow at higher speeds.
Do not exceed 24 km/h
(15 mph).
²Do not shift the transmission
from a forward gear to R
(Reverse) until the engine is at
idle and the wheels are stopped.
²If the vehicle is stuck, shift the
transmission in a steady motion
between forward and reverse
gears. Do not rock the vehicle
for more than a few minutes.
The transmission and tires may
be damaged or the engine can
overheat.
Do not spin the wheels at
over 35 mph (55 km/h).
The tires may fail and injure a
passenger or bystander.
Driving
129
ProCarManuals.com
Page 135 of 219

Fuse/Relay Location Fuse Amp Rating Description
5 15A Digital Transmission
Range (DTR) Sensor
(A/T), Backup Lamp
Switch (M/T), Daytime
Running Lights (DRL)
Module, Speed Control
Servo/Amplifier
Assembly, Heater-A/C
Control Assembly,
Blend Door Actuator
6 5A Shift Lock Actuator,
Generic Electronic
Module (GEM), Rear
Air Suspension (RAS)
Module
7 Ð Not Used
8 5A Radio, Main Light
Switch, Remote
Anti-Theft Personality
(RAP) Module
9 Ð Not Used
10 Ð Not Used
11 30A Washer Pump Relay,
Wiper Run/Park Relay,
Wiper Hi/LO Relay,
Windshield Wiper
Motor
12 5A Data Link Connector
(DLC)
13 15A Rear Anti-Lock Brake
System (RABS)
Module, Brake On/Off
(BOO) Switch, Brake
Pressure Switch
Roadside emergencies
135
ProCarManuals.com
Page 137 of 219

Fuse/Relay Location Fuse Amp Rating Description
21 15A Clutch Pedal Position
(CPP) Switch (W/O
RAP), Starter
Interrupt Relay
(W/RAP)
22 10A Air Bag Diagnostic
Monitor, Passive
De-Activation (PAD)
Module
23 10A Trailer tow Battery
Charge Relay, 4X4
Hub Solenoid, 4X2
Hub Solenoid, Flasher
Relay, Shift on the Fly
Relay
24 10A Blower Relay
25 5A 4 Wheel Anti-Lock
Brake System
(4WABS) Module,
4WABS Relay
26 10A Daytime Running
Lamps (DRL) Module,
Right Headlamp
27 5A Main Light Switch,
Fog Lamp Relay
28 10A Left Headlamp
29 5A Autolamp Module,
Instrument Cluster,
Transmission Control
Switch (TCS), Brake
Warning
Resistor/Diode
Assembly (W/RABS)
Roadside emergencies
137
ProCarManuals.com
Page 144 of 219
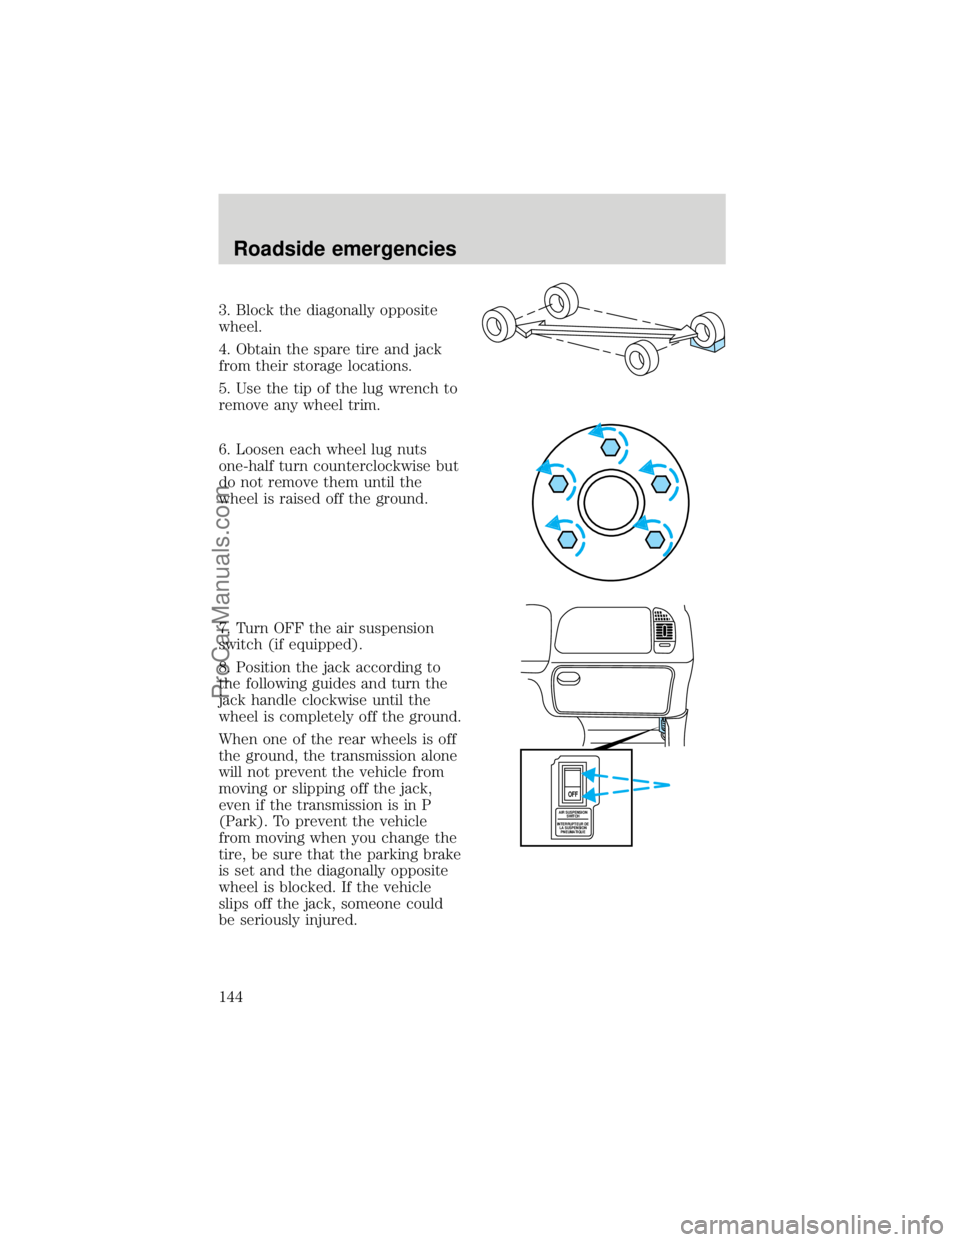
3. Block the diagonally opposite
wheel.
4. Obtain the spare tire and jack
from their storage locations.
5. Use the tip of the lug wrench to
remove any wheel trim.
6. Loosen each wheel lug nuts
one-half turn counterclockwise but
do not remove them until the
wheel is raised off the ground.
7. Turn OFF the air suspension
switch (if equipped).
8. Position the jack according to
the following guides and turn the
jack handle clockwise until the
wheel is completely off the ground.
When one of the rear wheels is off
the ground, the transmission alone
will not prevent the vehicle from
moving or slipping off the jack,
even if the transmission is in P
(Park). To prevent the vehicle
from moving when you change the
tire, be sure that the parking brake
is set and the diagonally opposite
wheel is blocked. If the vehicle
slips off the jack, someone could
be seriously injured.
AIR SUSPENSION
SWITCH
INTERRUPTEUR DE
LA SUSPENSION
PNEUMATIQUE
OFF
Roadside emergencies
144
ProCarManuals.com
Page 153 of 219

²Do not work on a vehicle with
the engine running in an
enclosed space, unless you are
sure you have enough
ventilation.
²Keep all lit cigarettes, open
flames and other lit material
away from the battery and all
fuel related parts.
If you disconnect the battery, the
engine must ªrelearnº its idle
conditions before your vehicle will
drive properly, as explained in
Batteryin this chapter.
Working with the engine off
²Automatic transmission:
1. Set the parking brake fully and
ensure the gearshift is securely
latched in P (Park).
2. Turn off the engine and remove
the key.
3. Block the wheels to prevent the
vehicle from moving unexpectedly.
²Manual transmission:
1. Set the parking brake, depress
the clutch and place the gearshift
in 1 (First).
2. Turn off the engine and remove
the key.
3. Block the wheels to prevent the
vehicle from moving unexpectedly.
Maintenance and care
153
ProCarManuals.com
Page 154 of 219
Working with the engine on
²Automatic transmission:
1. Set the parking brake fully and
ensure the gearshift is securely
latched in P (Park).
2. Block the wheels to prevent the
vehicle from moving unexpectedly.
Do not start your engine
with the air cleaner
removed and do not remove it
while the engine is running.
²Manual transmission:
1. Set the parking brake, depress
the clutch and place the gearshift
in 1 (First).
2. Block the wheels to prevent the
vehicle from moving unexpectedly.
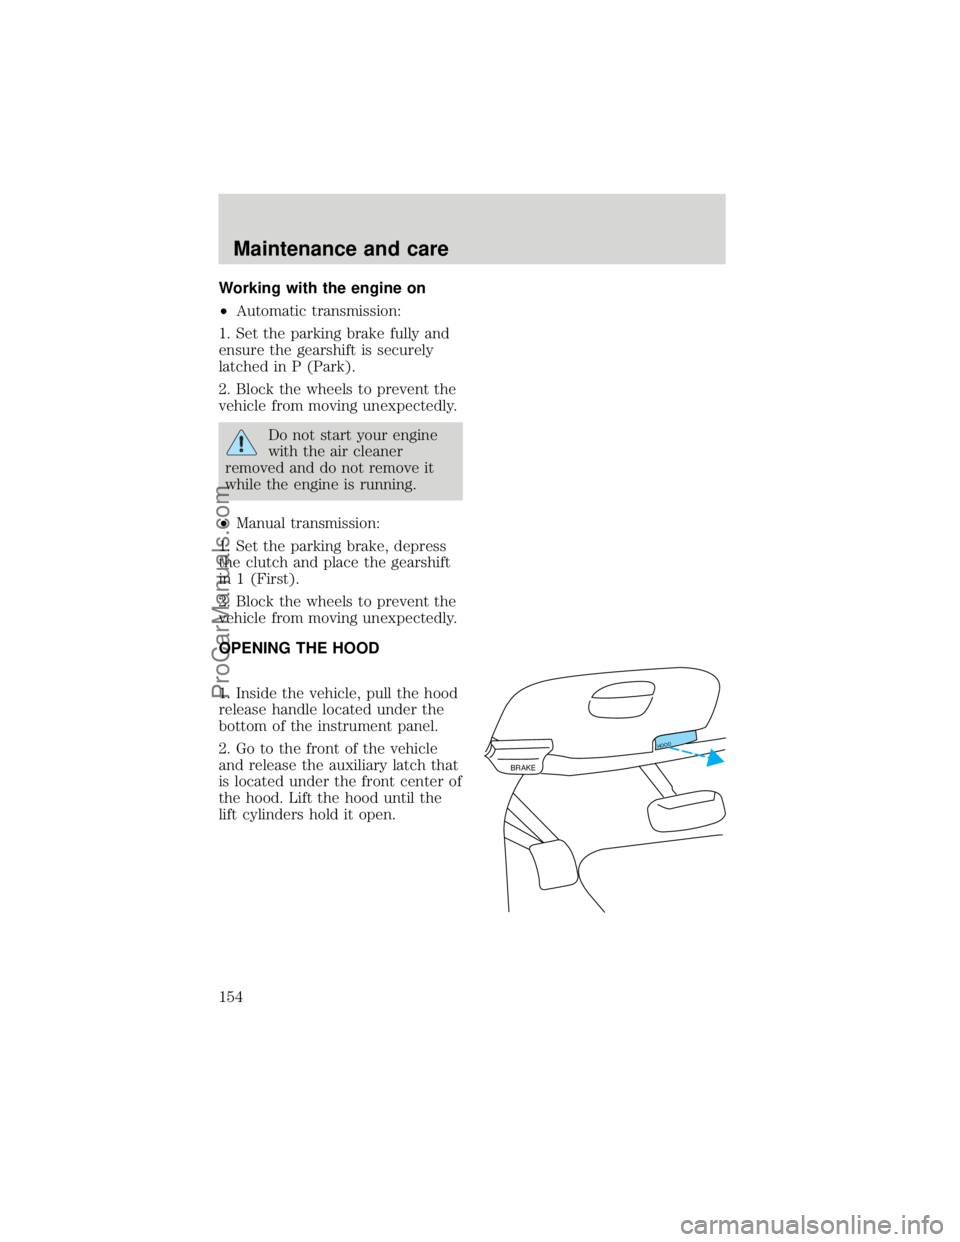
OPENING THE HOOD
1. Inside the vehicle, pull the hood
release handle located under the
bottom of the instrument panel.
2. Go to the front of the vehicle
and release the auxiliary latch that
is located under the front center of
the hood. Lift the hood until the
lift cylinders hold it open.
BRAKE
HOOD
Maintenance and care
154
ProCarManuals.com
Page 155 of 219
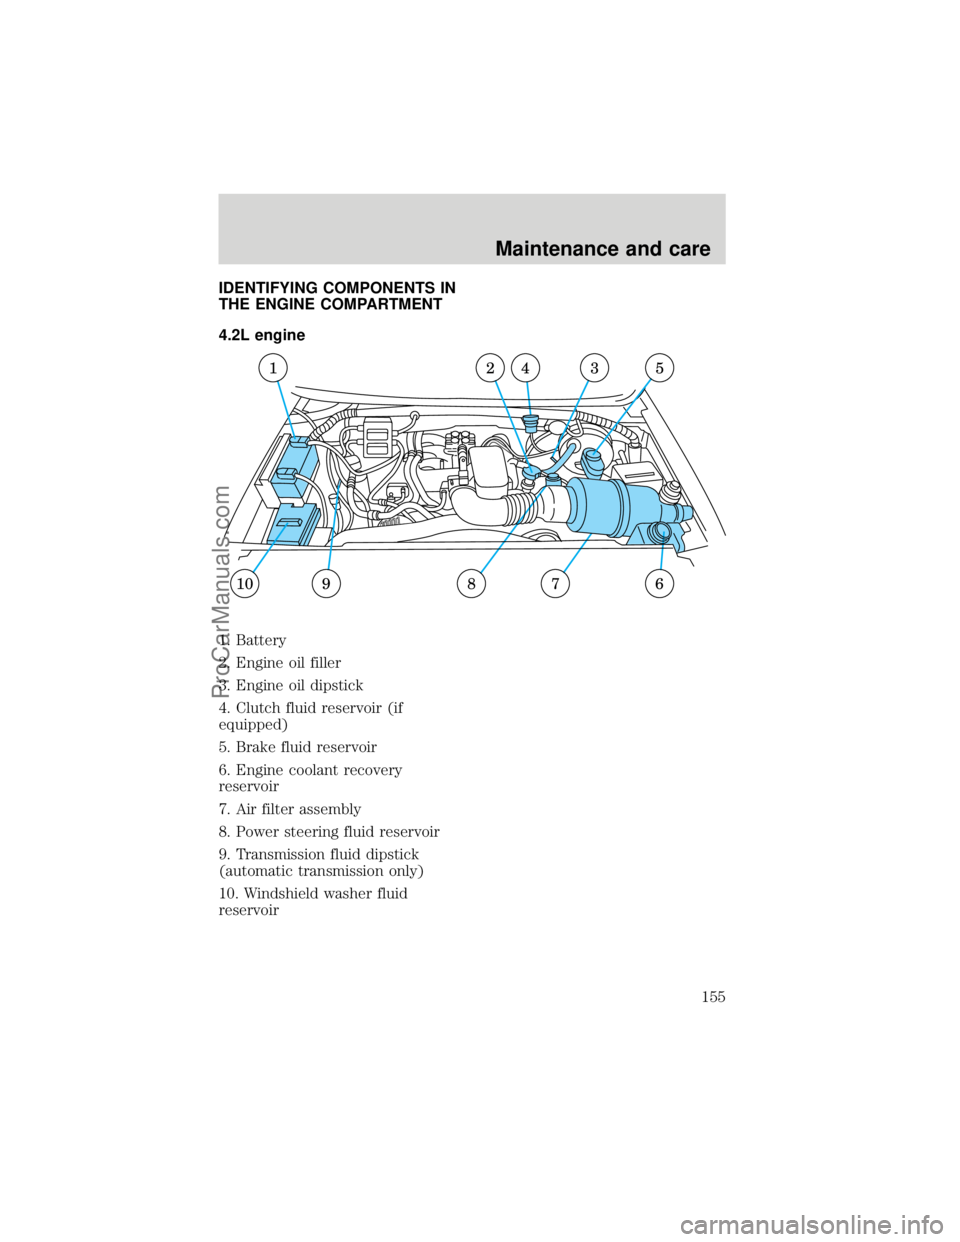
IDENTIFYING COMPONENTS IN
THE ENGINE COMPARTMENT
4.2L engine
1. Battery
2. Engine oil filler
3. Engine oil dipstick
4. Clutch fluid reservoir (if
equipped)
5. Brake fluid reservoir
6. Engine coolant recovery
reservoir
7. Air filter assembly
8. Power steering fluid reservoir
9. Transmission fluid dipstick
(automatic transmission only)
10. Windshield washer fluid
reservoir
67
1245
8910
3
Maintenance and care
155
ProCarManuals.com
Page 156 of 219
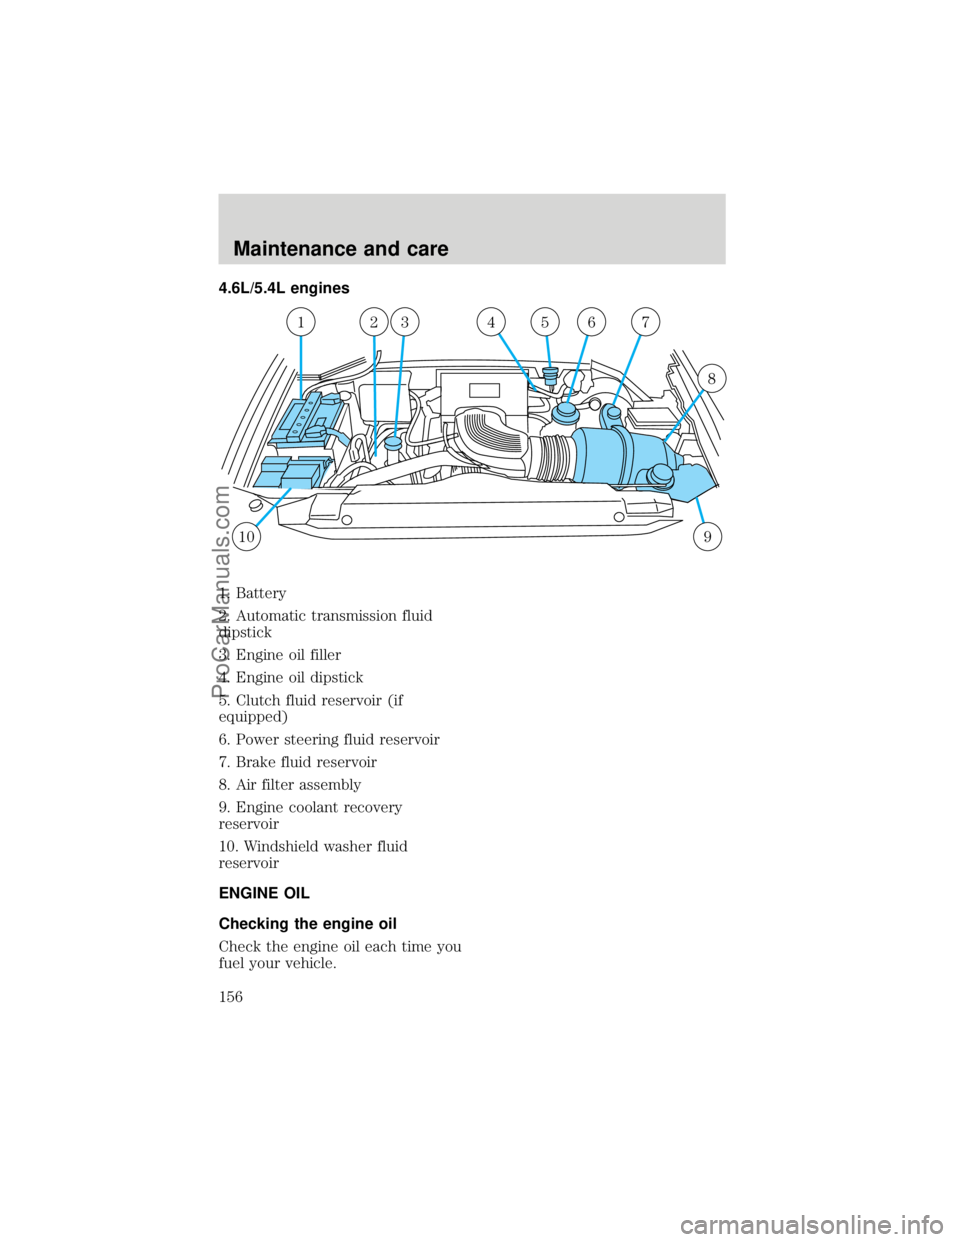
4.6L/5.4L engines
1. Battery
2. Automatic transmission fluid
dipstick
3. Engine oil filler
4. Engine oil dipstick
5. Clutch fluid reservoir (if
equipped)
6. Power steering fluid reservoir
7. Brake fluid reservoir
8. Air filter assembly
9. Engine coolant recovery
reservoir
10. Windshield washer fluid
reservoir
ENGINE OIL
Checking the engine oil
Check the engine oil each time you
fuel your vehicle.
109
1234657
8
Maintenance and care
156
ProCarManuals.com
Page 158 of 219
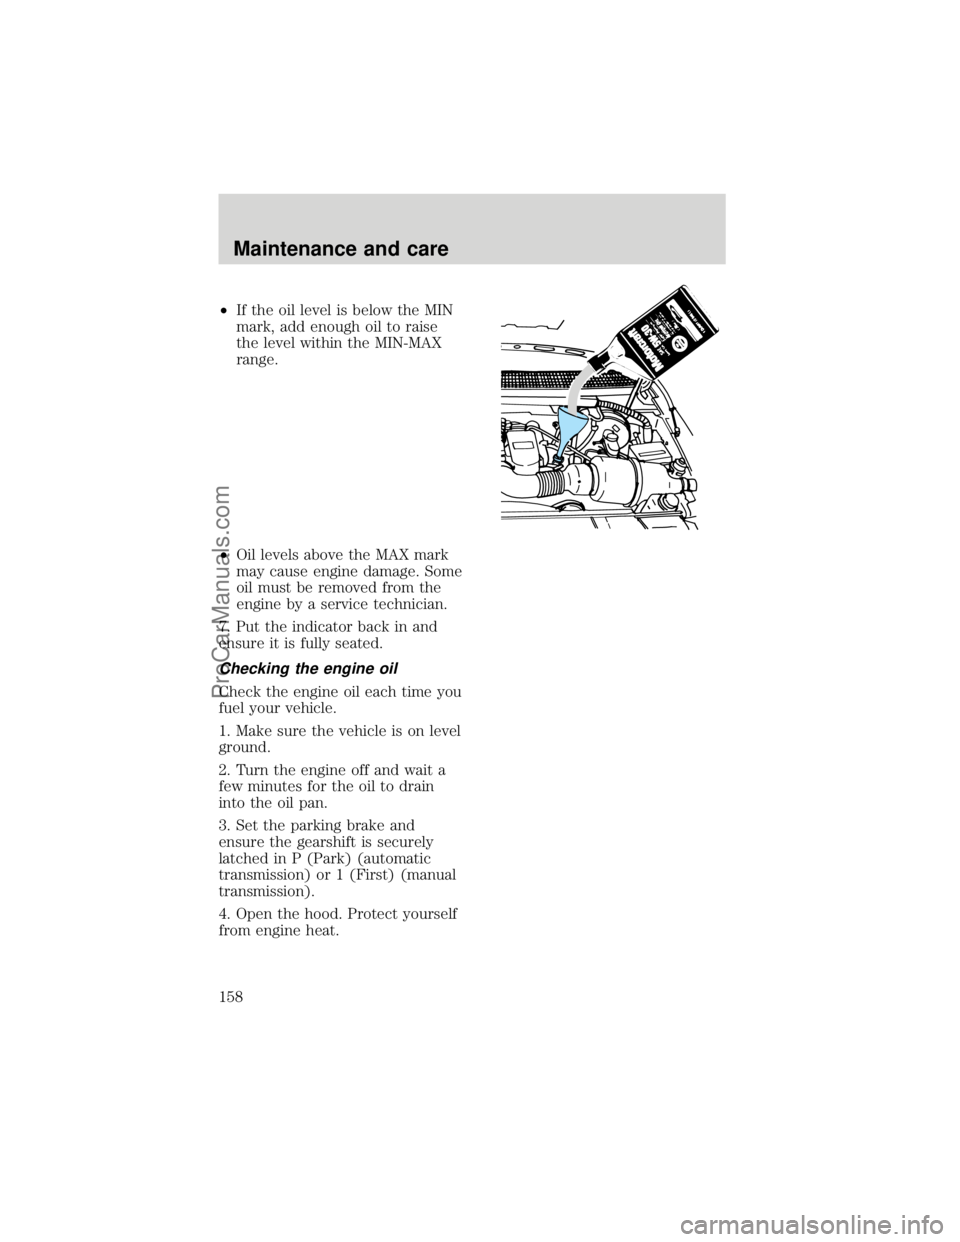
²If the oil level is below the MIN
mark, add enough oil to raise
the level within the MIN-MAX
range.
²Oil levels above the MAX mark
may cause engine damage. Some
oil must be removed from the
engine by a service technician.
7. Put the indicator back in and
ensure it is fully seated.
Checking the engine oil
Check the engine oil each time you
fuel your vehicle.
1. Make sure the vehicle is on level
ground.
2. Turn the engine off and wait a
few minutes for the oil to drain
into the oil pan.
3. Set the parking brake and
ensure the gearshift is securely
latched in P (Park) (automatic
transmission) or 1 (First) (manual
transmission).
4. Open the hood. Protect yourself
from engine heat.
Maintenance and care
158
ProCarManuals.com
Page 170 of 219
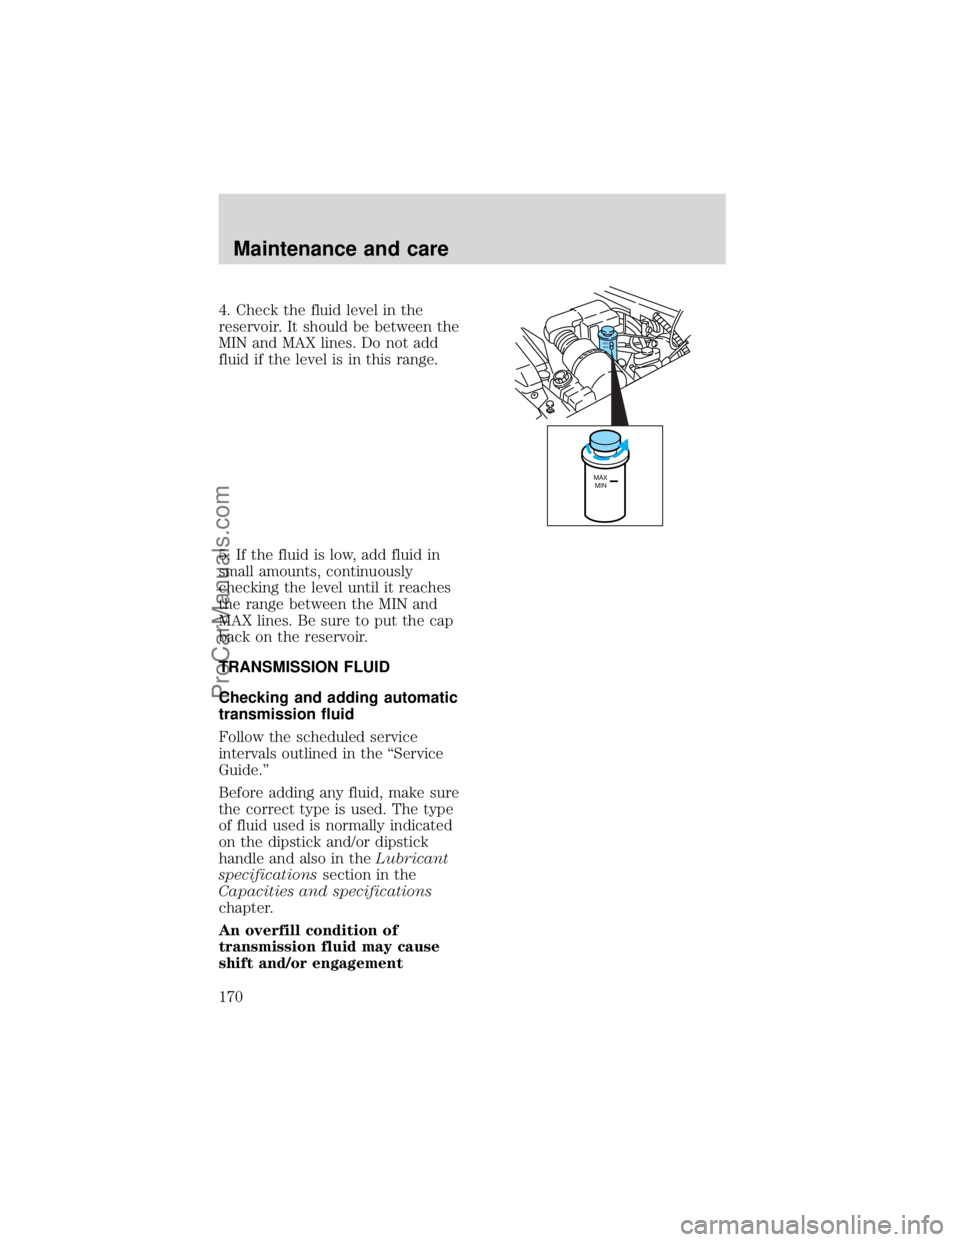
4. Check the fluid level in the
reservoir. It should be between the
MIN and MAX lines. Do not add
fluid if the level is in this range.
5. If the fluid is low, add fluid in
small amounts, continuously
checking the level until it reaches
the range between the MIN and
MAX lines. Be sure to put the cap
back on the reservoir.
TRANSMISSION FLUID
Checking and adding automatic
transmission fluid
Follow the scheduled service
intervals outlined in the ªService
Guide.º
Before adding any fluid, make sure
the correct type is used. The type
of fluid used is normally indicated
on the dipstick and/or dipstick
handle and also in theLubricant
specificationssection in the
Capacities and specifications
chapter.
An overfill condition of
transmission fluid may cause
shift and/or engagement
MAX
MIN
MAX
MIN
Maintenance and care
170
ProCarManuals.com