FORD F250 SUPER DUTY 2015 Repair Manual
Manufacturer: FORD, Model Year: 2015, Model line: F250 SUPER DUTY, Model: FORD F250 SUPER DUTY 2015Pages: 470, PDF Size: 18.27 MB
Page 61 of 470
PASSIVE ANTI-THEFT
SYSTEM (IF EQUIPPED)
Note:The system is not compatible withnon-Ford aftermarket remote start systems.Use of these systems may result in vehiclestarting problems and a loss of securityprotection.
Note:Metallic objects, electronic devicesor a second coded key on the same keychain may cause vehicle starting problemsif they are too close to the key when startingthe engine. Prevent these objects fromtouching the coded key while starting theengine. Switch the ignition off, move allobjects on the key chain away from thecoded key and restart the engine if aproblem occurs.
Note:Do not leave a duplicate coded keyin the vehicle. Always take your keys andlock all doors when leaving the vehicle.
SecuriLock™
The system is an engine immobilizationsystem. It helps prevent the engine fromstarting unless you use a coded keyprogrammed to your vehicle. Using thewrong key may prevent the engine fromstarting. A message may appear in theinformation display.
If you are unable to start the engine with acorrectly coded key, the system hasmalfunctioned. A message may appear inthe information display.
Automatic Arming
The system arms immediately after youswitch the ignition off.
Automatic Disarming
Switching the ignition on with a coded keydisarms the system.
Replacement Keys
Note:Your vehicle may have two integratedkeyhead transmitters.
The integrated keyhead transmitterfunctions as a programmed ignition key. Itoperates all the locks, starts the vehicleand acts as a remote control.
If your programmed transmitters orstandard SecuriLock coded keys are lostor stolen and you do not have an extracoded key, you will need to have yourvehicle towed to an authorized dealer. Youneed to erase the key codes from yourvehicle and program new coded keys.
Store an extra programmed key away fromyour vehicle in a safe place to help preventany inconveniences. See an authorizeddealer to purchase additional spare orreplacement keys.
Programming a Spare Key
Note:You can program a maximum of eightcoded keys to your vehicle. Only four ofthese can be integrated keyheadtransmitters.
You can program your own integratedkeyhead transmitter or standardSecuriLock coded keys to your vehicle. Thisprocedure will program both the engineimmobilizer keycode and the remote entryportion of the remote control to yourvehicle.
Only use integrated keyhead transmittersor standard SecuriLock keys.
You must have two previouslyprogrammed coded keys and the newunprogrammed key readily accessible. Seean authorized dealer to have the spare keyprogrammed if two previouslyprogrammed coded keys are not available.
Read and understand the entire procedurebefore you begin.
58
Super Duty (), enUSA
Security
Page 62 of 470
1.Insert the first previously programmedcoded key into the ignition.
2.Switch the ignition from off to on. Keepthe ignition on for at least threeseconds, but no more than 10 seconds.
3.Switch the ignition off and remove thefirst coded key from the ignition.
4. After three seconds but within 10seconds of switching the ignition off,insert the second previously coded keyinto the ignition.
5.Switch the ignition from off to on. Keepthe ignition on for at least threeseconds, but no more than 10 seconds.
6.Switch the ignition off and remove thesecond previously programmed codedkey from the ignition.
7. After three seconds but within 10seconds of switching the ignition offand removing the previouslyprogrammed coded key, insert the newunprogrammed key into the ignition.
8.Switch the ignition from off to on. Keepthe ignition on for at least six secondsuntil you hear the door locks cycle.
9.Remove the newly programmed codedkey from the ignition.
The key will start the engine ifprogramming is successful. You canoperate the remote entry system if the newkey is an integrated keyhead transmitter.
If programming was not successful, wait20 seconds and repeat Steps 1 through 8.If you are still unsuccessful, take yourvehicle to an authorized dealer.
ANTI-THEFT ALARM (IF EQUIPPED)
The system warns you of an unauthorizedentry to your vehicle. It triggers if any dooror the hood opens without using the key,remote control or keyless entry keypad.
The direction indicators flash and the hornsounds if the system triggers while thealarm is armed.
Take all remote controls to an authorizeddealer if there is any potential alarmproblem with your vehicle.
Arming the Alarm
The alarm is ready to arm when there isnot a key in the ignition. Electronically lockthe vehicle to arm the alarm.
The direction indicators flash once afteryou lock the vehicle. This indicates thealarm is in the pre-armed mode. It will fullyarm in 20 seconds.
Disarming the Alarm
Disarm the alarm by any of the followingactions:
•Press the power door unlock buttonwithin the 20-second pre-armed mode.
•Unlock the doors with the remotecontrol or keyless entry keypad.
•Switch the ignition on or start thevehicle.
•Use a key in the driver door to unlockthe vehicle, then switch the ignition onwithin 12 seconds.
Note:Pressing the panic button on theremote control will stop the horn and signalindicators, but will not disarm the system.
59
Super Duty (), enUSA
Security
Page 63 of 470
ADJUSTING THE STEERING
WHEEL
WARNING
Do not adjust the steering wheelwhen your vehicle is moving.
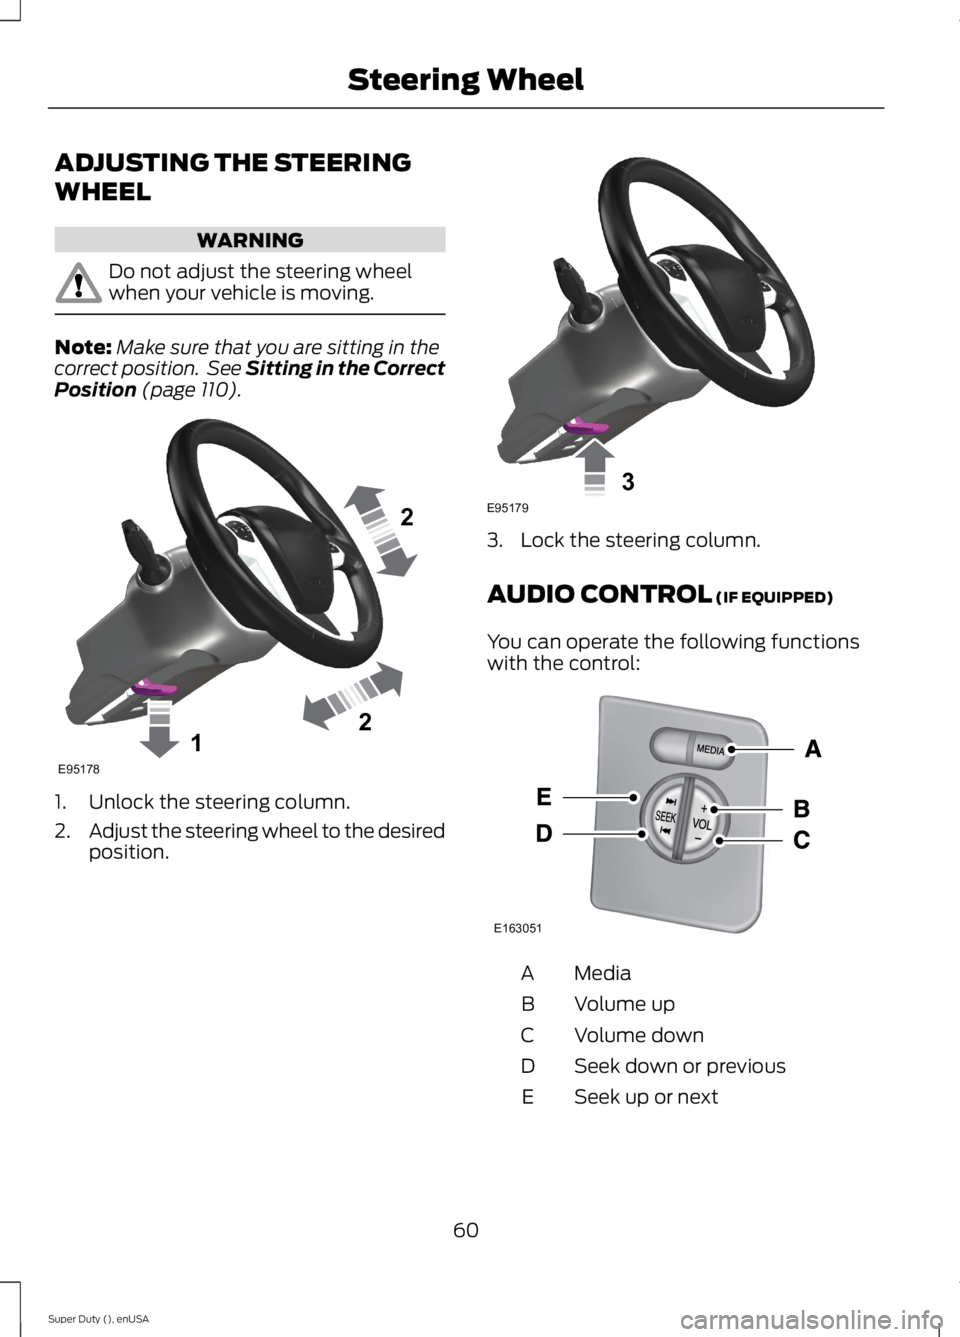
Note:Make sure that you are sitting in thecorrect position. See Sitting in the CorrectPosition (page 110).
1. Unlock the steering column.
2.Adjust the steering wheel to the desiredposition.
3. Lock the steering column.
AUDIO CONTROL (IF EQUIPPED)
You can operate the following functionswith the control:
MediaA
Volume upB
Volume downC
Seek down or previousD
Seek up or nextE
60
Super Duty (), enUSA
Steering Wheel122E95178 3E95179 E163051
Page 64 of 470
Media
Press repeatedly to scroll through availableaudio modes.
Seek, Next or Previous
Press the seek button to:
•tune the radio to the next or previousstored preset
•play the next or the previous track.
Press and hold the seek button to:
•tune the radio to the next station up ordown the frequency band
•seek through a track.
VOICE CONTROL (IF EQUIPPED)
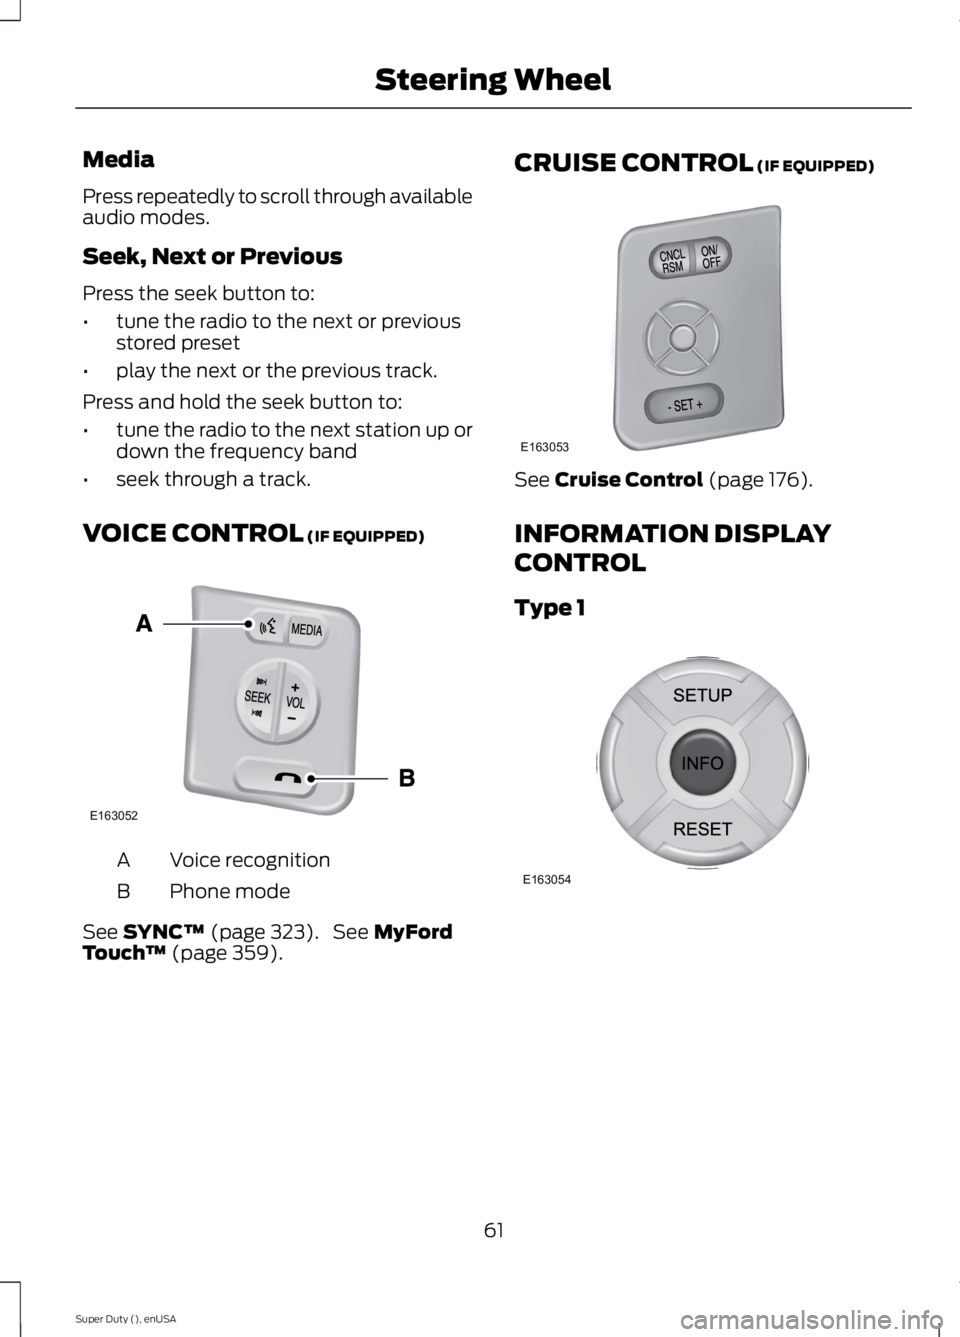
Voice recognitionA
Phone modeB
See SYNC™ (page 323). See MyFordTouch™ (page 359).
CRUISE CONTROL (IF EQUIPPED)
See Cruise Control (page 176).
INFORMATION DISPLAY
CONTROL
Type 1
61
Super Duty (), enUSA
Steering WheelE163052 E163053 E163054
Page 65 of 470
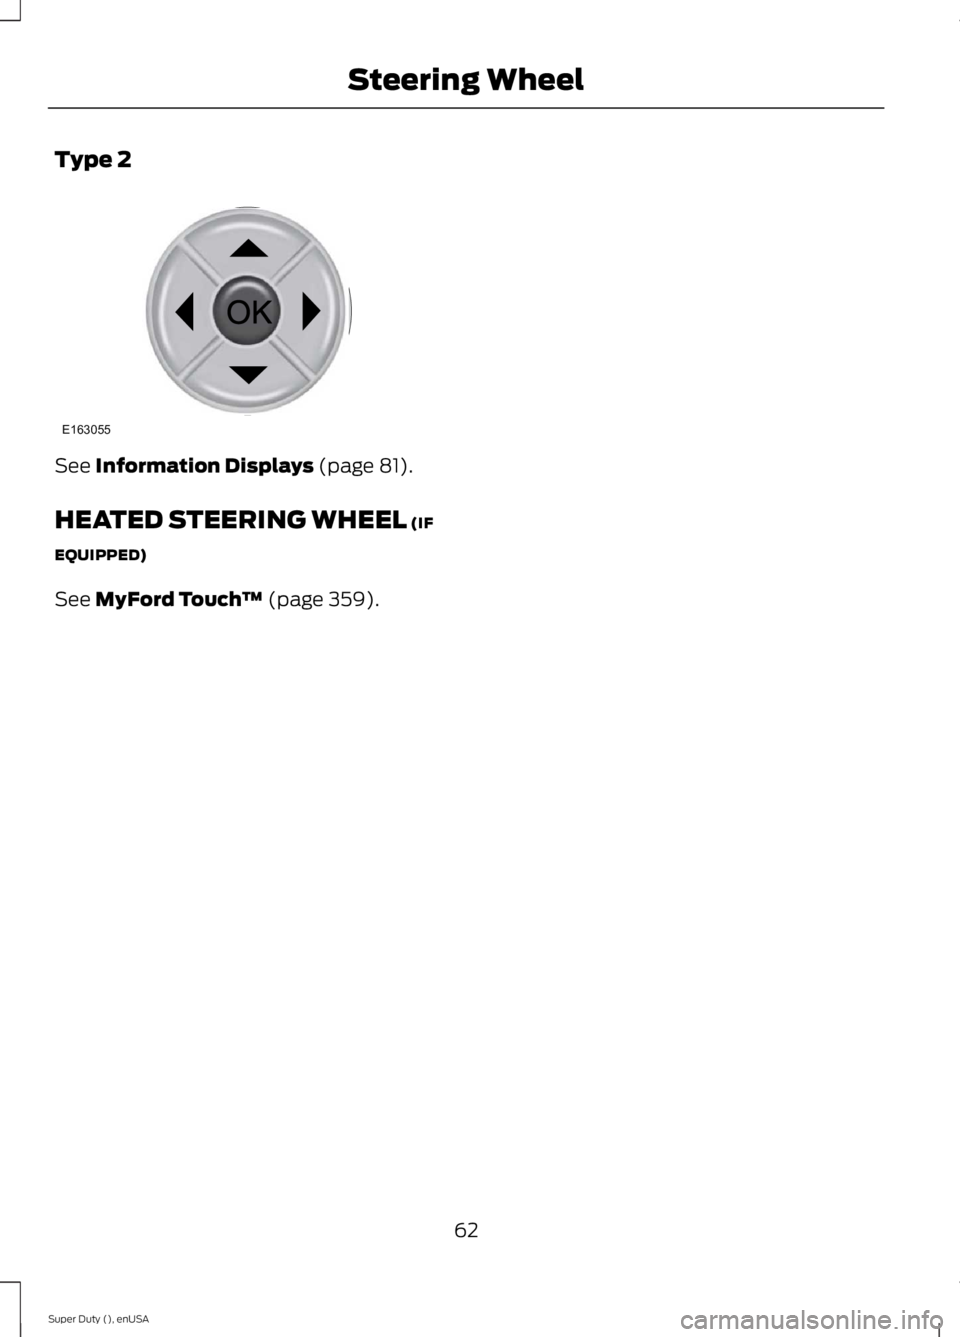
Type 2
See Information Displays (page 81).
HEATED STEERING WHEEL (IF
EQUIPPED)
See MyFord Touch™ (page 359).
62
Super Duty (), enUSA
Steering WheelE163055
Page 66 of 470
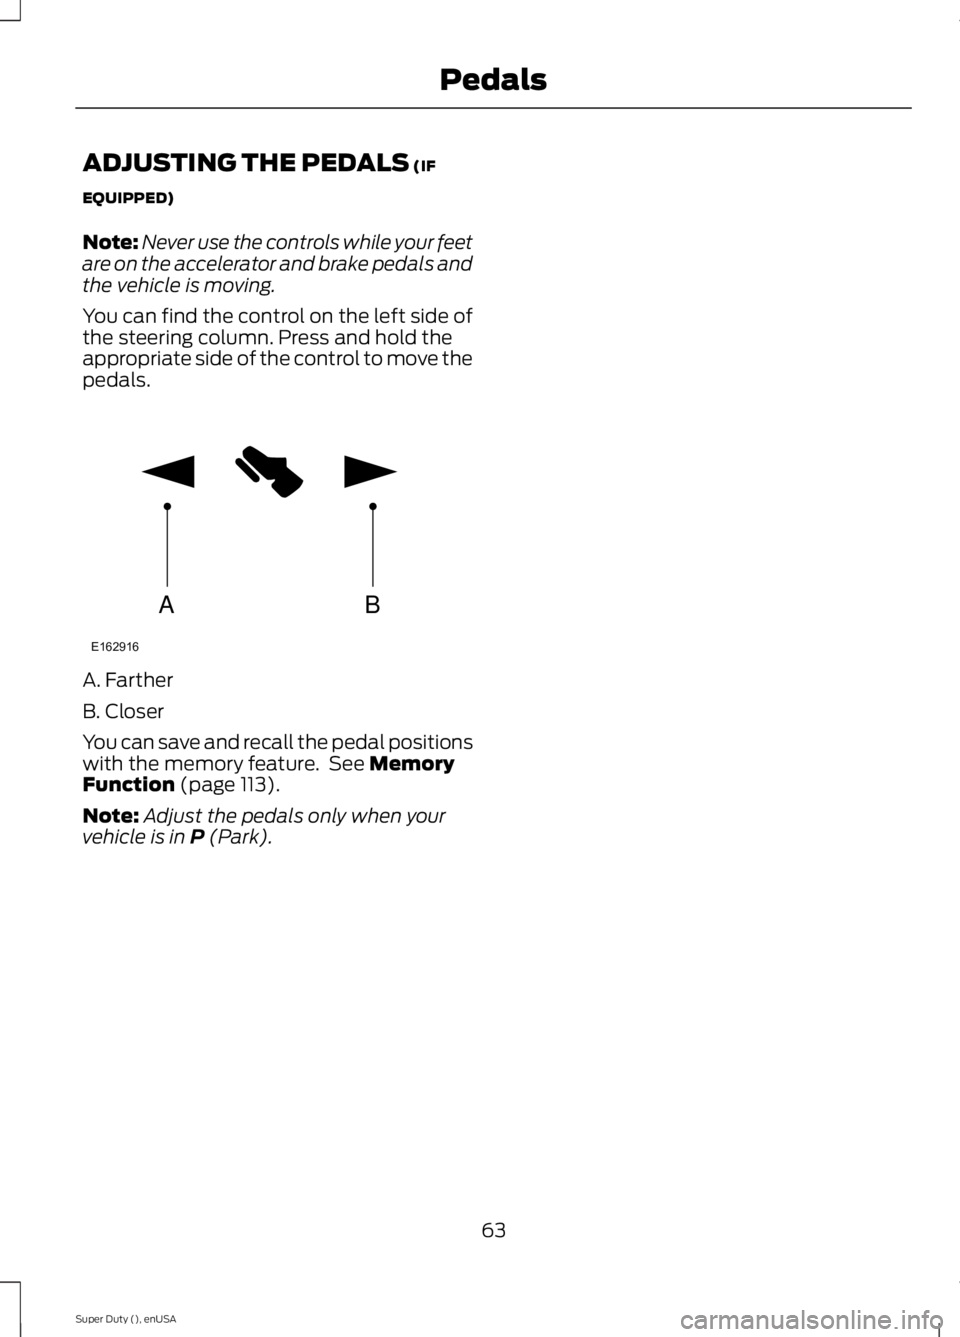
ADJUSTING THE PEDALS (IF
EQUIPPED)
Note:Never use the controls while your feetare on the accelerator and brake pedals andthe vehicle is moving.
You can find the control on the left side ofthe steering column. Press and hold theappropriate side of the control to move thepedals.
A. Farther
B. Closer
You can save and recall the pedal positionswith the memory feature. See MemoryFunction (page 113).
Note:Adjust the pedals only when yourvehicle is in P (Park).
63
Super Duty (), enUSA
PedalsAB
E162916
Page 67 of 470
WINDSHIELD WIPERS
Note:Fully defrost the windshield beforeswitching on the windshield wipers.
Note:Make sure the windshield wipers areswitched off before entering a car wash.
Note:Clean the windshield and wiperblades if they begin to leave streaks orsmears. If that does not resolve the issue,install new wiper blades.
Note:Do not operate the wipers on a drywindshield. This may scratch the glass,damage the wiper blades or cause the wipermotor to burn out. Always use thewindshield washers before wiping a drywindshield.
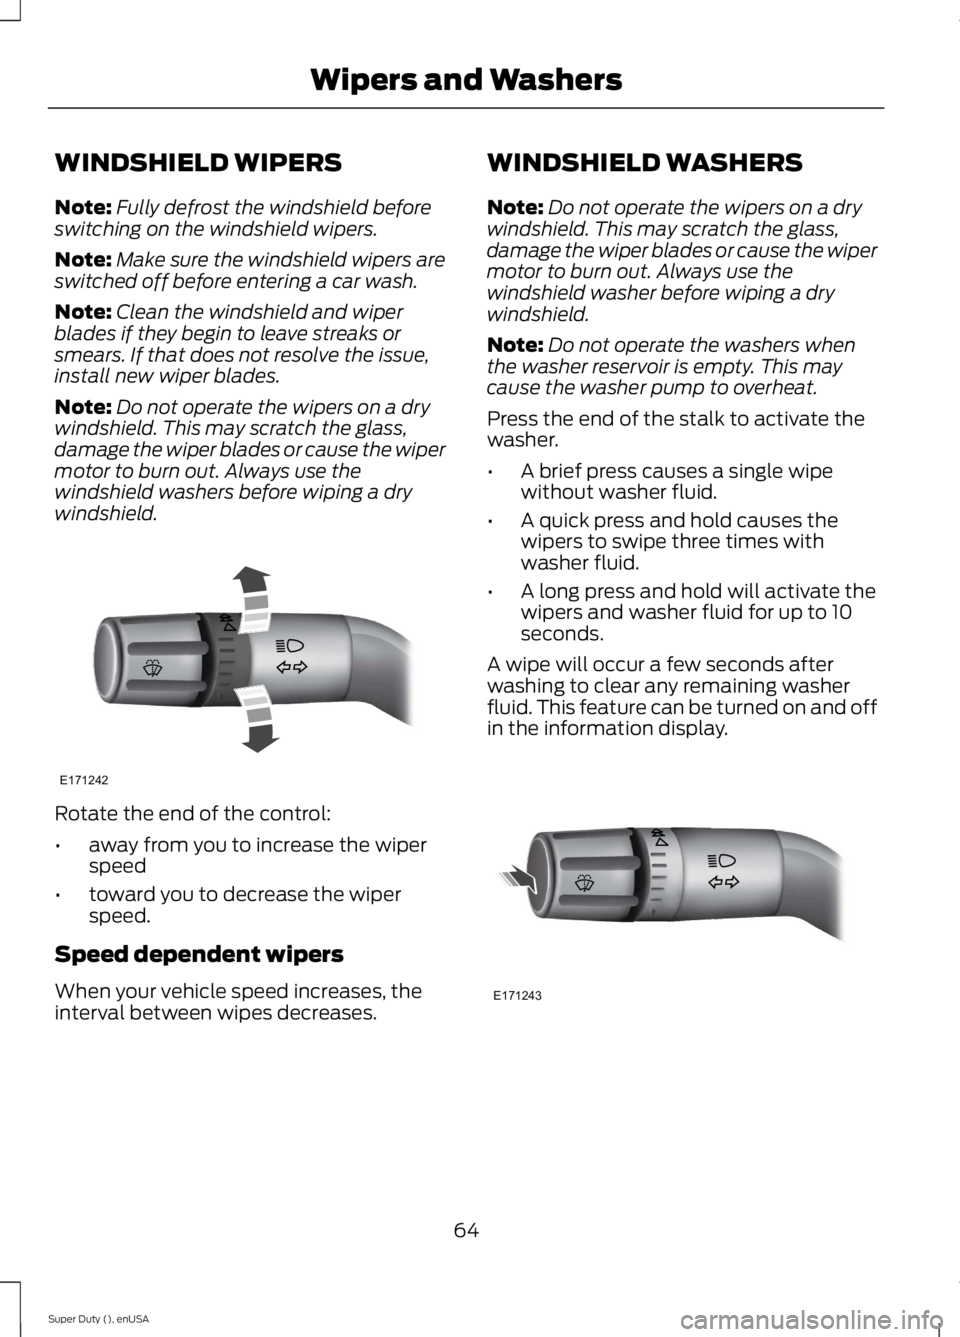
Rotate the end of the control:
•away from you to increase the wiperspeed
•toward you to decrease the wiperspeed.
Speed dependent wipers
When your vehicle speed increases, theinterval between wipes decreases.
WINDSHIELD WASHERS
Note:Do not operate the wipers on a drywindshield. This may scratch the glass,damage the wiper blades or cause the wipermotor to burn out. Always use thewindshield washer before wiping a drywindshield.
Note:Do not operate the washers whenthe washer reservoir is empty. This maycause the washer pump to overheat.
Press the end of the stalk to activate thewasher.
•A brief press causes a single wipewithout washer fluid.
•A quick press and hold causes thewipers to swipe three times withwasher fluid.
•A long press and hold will activate thewipers and washer fluid for up to 10seconds.
A wipe will occur a few seconds afterwashing to clear any remaining washerfluid. This feature can be turned on and offin the information display.
64
Super Duty (), enUSA
Wipers and WashersE171242 E171243
Page 68 of 470
LIGHTING CONTROL
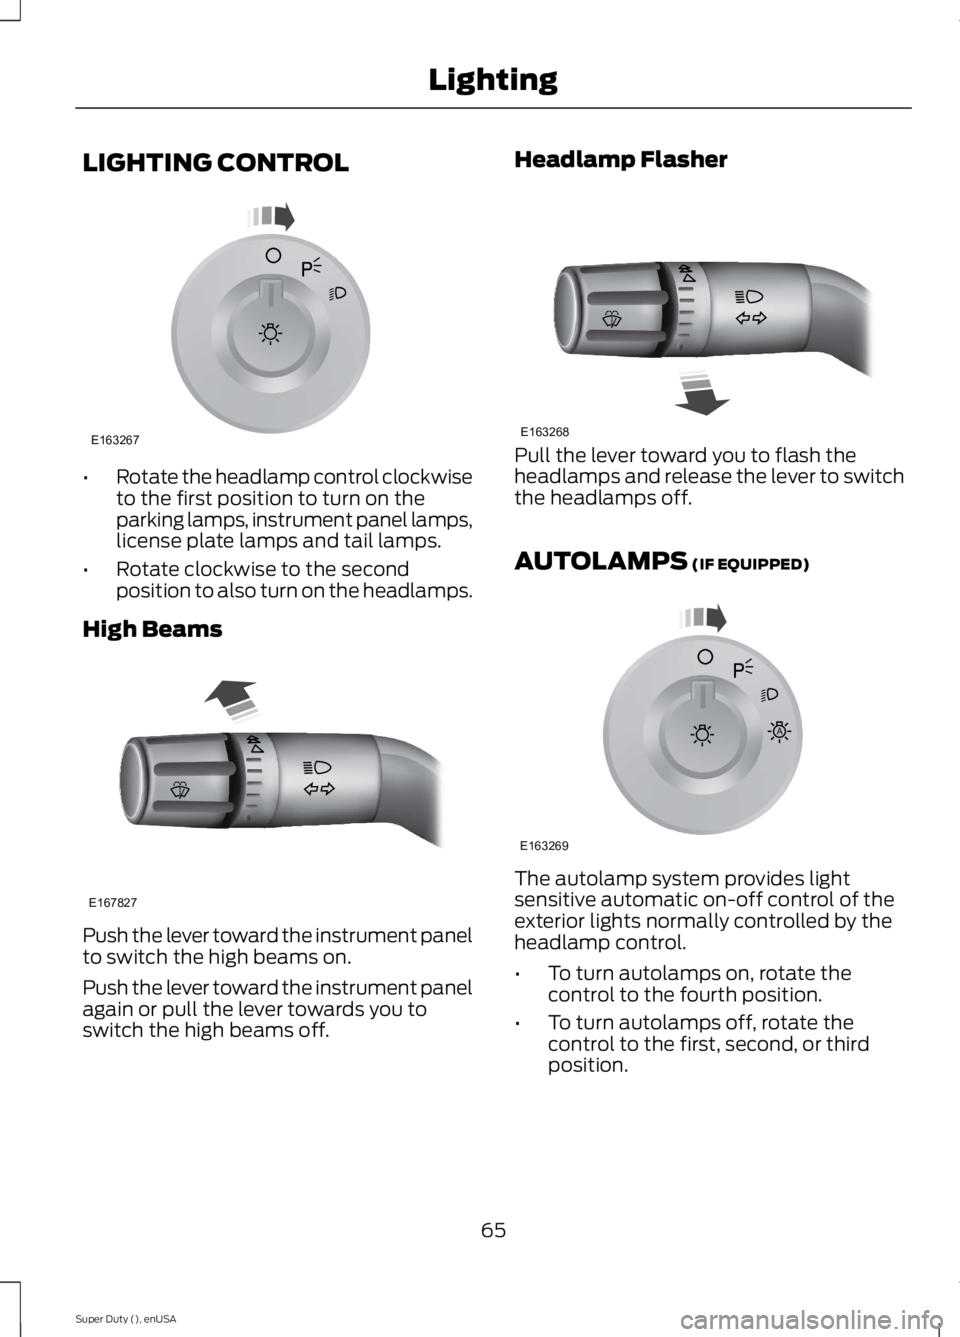
•Rotate the headlamp control clockwiseto the first position to turn on theparking lamps, instrument panel lamps,license plate lamps and tail lamps.
•Rotate clockwise to the secondposition to also turn on the headlamps.
High Beams
Push the lever toward the instrument panelto switch the high beams on.
Push the lever toward the instrument panelagain or pull the lever towards you toswitch the high beams off.
Headlamp Flasher
Pull the lever toward you to flash theheadlamps and release the lever to switchthe headlamps off.
AUTOLAMPS (IF EQUIPPED)
The autolamp system provides lightsensitive automatic on-off control of theexterior lights normally controlled by theheadlamp control.
•To turn autolamps on, rotate thecontrol to the fourth position.
•To turn autolamps off, rotate thecontrol to the first, second, or thirdposition.
65
Super Duty (), enUSA
LightingE163267 E167827 E163268 E163269
A
Page 69 of 470
Note:If the vehicle is equipped withautolamps, it will have the headlamps onwith windshield wipers feature. If thewindshield wipers are turned on, the exteriorlamps will turn on with the headlampcontrol in the autolamp position.
The autolamp system also keeps the lightson for a predetermined amount of time afterthe ignition switch is turned to off. You canchange the amount of time the lamps stayon by using the programming procedure thatfollows:
Autolamps - Programmable ExitDelay
Programmable exit delay allows the lengthof the autolamp exit delay to be changed.
To program the auto lamp exit time delay:
1.Start with the ignition in the off positionand the headlamp control in theautolamp position.
2. Turn the headlamp control to off.
3.Turn the ignition switch to on and thenback to off.
4. Turn the headlamp control to theautolamp position. The headlamps willturn on.
5. Wait the desired amount of time forthe exit delay you want (up to threeminutes), then turn the headlamps off.
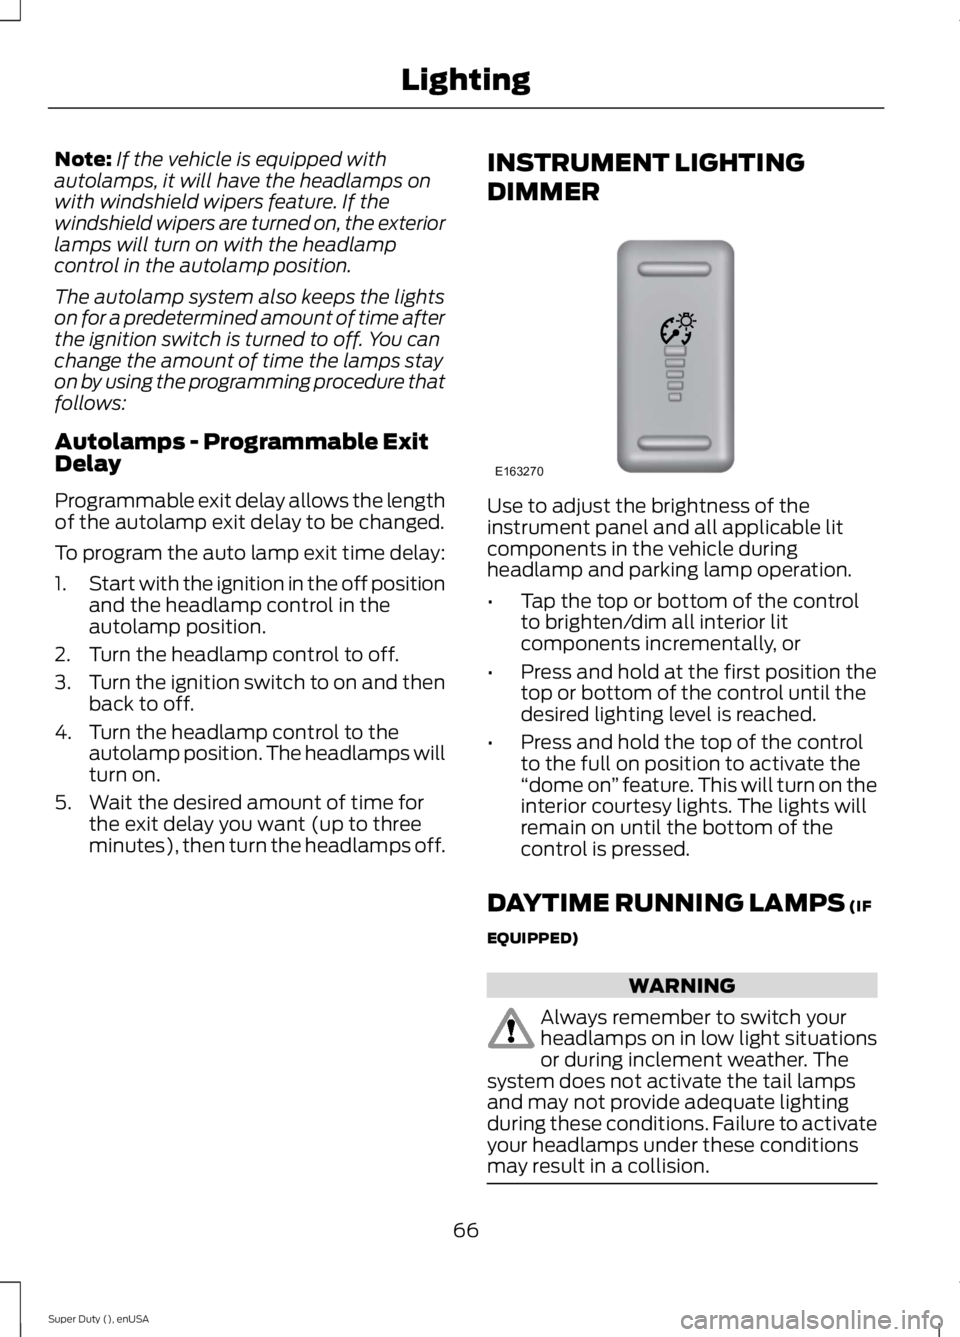
INSTRUMENT LIGHTING
DIMMER
Use to adjust the brightness of theinstrument panel and all applicable litcomponents in the vehicle duringheadlamp and parking lamp operation.
•Tap the top or bottom of the controlto brighten/dim all interior litcomponents incrementally, or
•Press and hold at the first position thetop or bottom of the control until thedesired lighting level is reached.
•Press and hold the top of the controlto the full on position to activate the“dome on” feature. This will turn on theinterior courtesy lights. The lights willremain on until the bottom of thecontrol is pressed.
DAYTIME RUNNING LAMPS (IF
EQUIPPED)
WARNING
Always remember to switch yourheadlamps on in low light situationsor during inclement weather. Thesystem does not activate the tail lampsand may not provide adequate lightingduring these conditions. Failure to activateyour headlamps under these conditionsmay result in a collision.
66
Super Duty (), enUSA
LightingE163270
Page 70 of 470
The system switches the headlamps onwith a reduced output in daylightconditions.
To switch the system on:
1. Switch the ignition on.
2. Switch the lighting control to the off,or parking lamp position.
3. Disengage the parking brake.
4. Make sure the transmission selectorlever is not in position P.
FRONT FOG LAMPS (IF EQUIPPED)
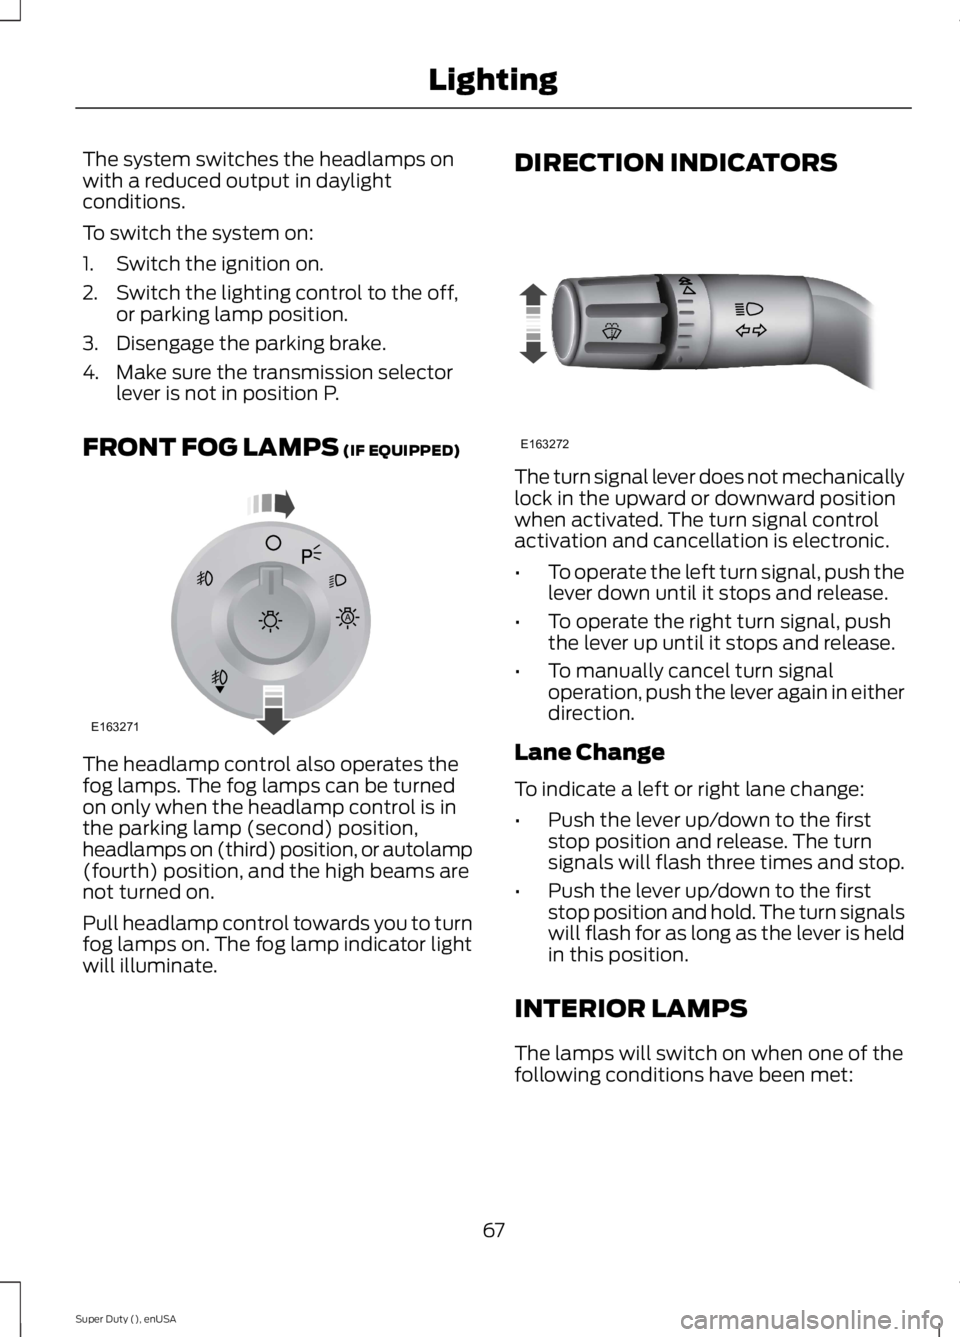
The headlamp control also operates thefog lamps. The fog lamps can be turnedon only when the headlamp control is inthe parking lamp (second) position,headlamps on (third) position, or autolamp(fourth) position, and the high beams arenot turned on.
Pull headlamp control towards you to turnfog lamps on. The fog lamp indicator lightwill illuminate.
DIRECTION INDICATORS
The turn signal lever does not mechanicallylock in the upward or downward positionwhen activated. The turn signal controlactivation and cancellation is electronic.
•To operate the left turn signal, push thelever down until it stops and release.
•To operate the right turn signal, pushthe lever up until it stops and release.
•To manually cancel turn signaloperation, push the lever again in eitherdirection.
Lane Change
To indicate a left or right lane change:
•Push the lever up/down to the firststop position and release. The turnsignals will flash three times and stop.
•Push the lever up/down to the firststop position and hold. The turn signalswill flash for as long as the lever is heldin this position.
INTERIOR LAMPS
The lamps will switch on when one of thefollowing conditions have been met:
67
Super Duty (), enUSA
LightingE163271
A E163272