open hood FORD F650 2015 13.G Owners Manual
[x] Cancel search | Manufacturer: FORD, Model Year: 2015, Model line: F650, Model: FORD F650 2015 13.GPages: 384, PDF Size: 4.95 MB
Page 5 of 384
Fuses 187
Changing a fuse......................................187
Fuse specification chart................................188
Fuses and relays......................................196
Maintenance 197
General information...................................197
Opening and closing the hood............................208
Engine oil dipstick....................................210
Engine oil check......................................210
Engine coolant check..................................211
Automatic transmission fluid check........................215
Brake fluid check.....................................220
Power steering fluid check..............................222
Fuel filter...........................................224
Washer fluid check....................................224
Changing the vehicle battery.............................224
Checking the wiper blades..............................227
Changing the wiper blades..............................228
Air filter(s).........................................228
Adjusting the headlamps................................231
Changing a bulb......................................231
Bulb specification chart.................................233
4Table of Contents
2015 F-650/750(f67)
Owners Guide gf(ownloose), 1st Printing, December 2013
Canadian_French(fr_can)
Page 122 of 384
•DEF freezes below 12°F (-11°C). Your vehicle is equipped with an
automatic pre-heating system which allows the DEF system to
operate below 12°F (-11°C).
•Do not store the DEF bottle in your vehicle. If it leaks, it could cause
damage to interior components or release an ammonia odor inside
your vehicle.
•Store DEF out of direct sunlight and in temperatures between
23°F–68°F (-5°C–20°C).
NOISE EMISSIONS
In order to keep to the federal exterior noise regulations, your vehicle
may be equipped with noise emission items. Depending on your vehicle
configuration, it may have all or some of the following items:
Air Intake System:Inspect the air cleaner. Do not alter its location. Do
not alter inlet and outlet piping.
Body:Inspect wheel well splash shields, cab shields and under hood
insulation for deterioration, dislocation and orientation.
Cooling System:
•Inspect the fan for blade damage. If you find any damage, replace
with the recommended parts. Inspect for fan-to-shroud interference
and any damage to shroud, such as cracks and holes.
•Do not change fan ratio or alter fan spacer dimensions and positions.
•Inspect fan clutch for proper operation. Make sure the fan is
disengaged when cooling of the engine is not required.
•Inspect radiator shutters (if equipped) for proper operation. The
shutters should be open during normal operating temperatures.
Engine:Valve covers and block covers damp-out engine mechanical
noise. If they need replacing, make sure to replace them with the
recommended parts. Check for mechanical isolations.
Transmission Enclosure:Inspect for cracks, holes and tears. Clean any
deposits, such as oil, dirt and stones.
Exhaust System:
•Inspect for leaks at various joint connections and loose clamps.
•
Perform a visual inspection for cracks or holes in the muffler and tail pipe.
•Always use the recommended replacement parts.
•Do not change the tail pipe elbow or offset tail pipe orientation from the
standard position as originally received.
•To avoid abnormal changes in vehicle sound levels, it is necessary for the
owner to perform inspections and necessary maintenance at the intervals
shown in theScheduled Maintenancechapter.
Fuel and Refueling121
2015 F-650/750(f67)
Owners Guide gf(ownloose), 1st Printing, December 2013
Canadian_French(fr_can)
Page 209 of 384
OPENING AND CLOSING THE HOOD
WARNING:The parking brake must be fully set before opening
the hood or possible personal injury may occur.
WARNING:To reduce the risk of the possibility of personal
injury, never stand beneath the hood when it is being raised or
lowered.
WARNING:If you must leave the engine running while checking
under the hood, do not allow any loose clothing, jewelry, hair or
other items to get near moving engine components or possible personal
injury may occur.
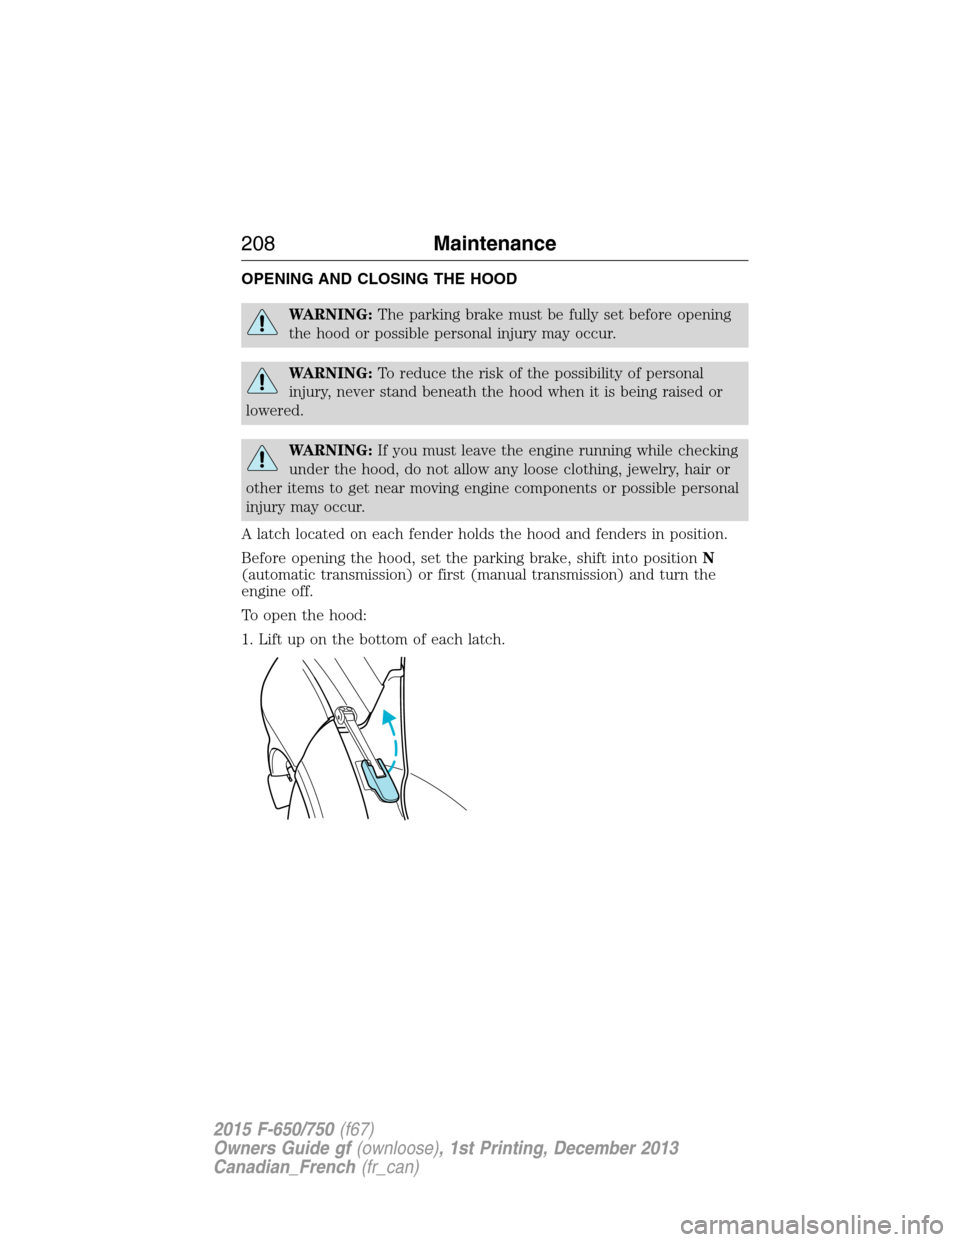
A latch located on each fender holds the hood and fenders in position.
Before opening the hood, set the parking brake, shift into positionN
(automatic transmission) or first (manual transmission) and turn the
engine off.
To open the hood:
1. Lift up on the bottom of each latch.
208Maintenance
2015 F-650/750(f67)
Owners Guide gf(ownloose), 1st Printing, December 2013
Canadian_French(fr_can)
Page 211 of 384
ENGINE OIL DIPSTICK
Diesel Engine
See your engine operator’s manual for information on the engine oil
dipstick.
Gasoline Engine
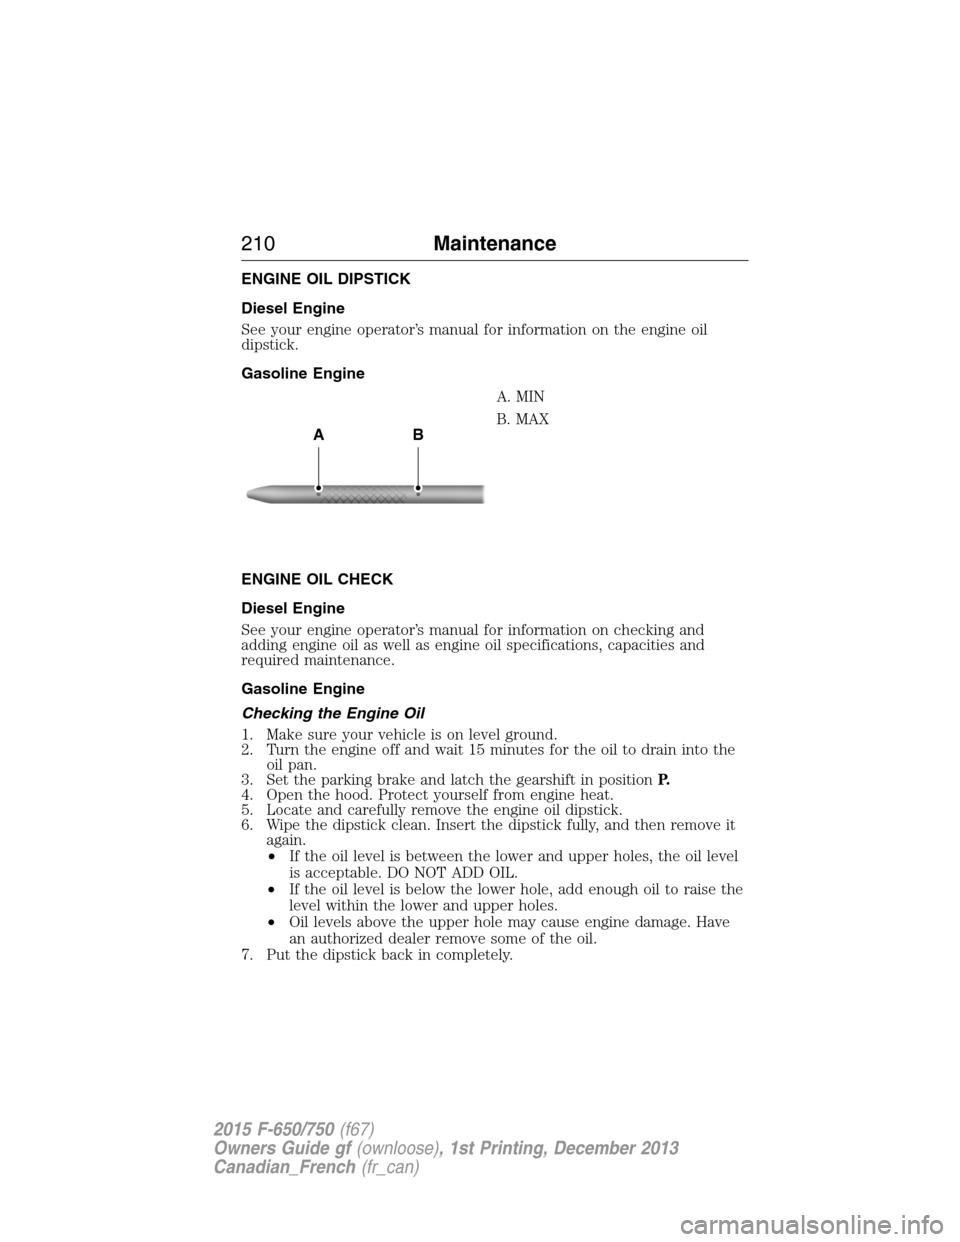
A. MIN
B. MAX
ENGINE OIL CHECK
Diesel Engine
See your engine operator’s manual for information on checking and
adding engine oil as well as engine oil specifications, capacities and
required maintenance.
Gasoline Engine
Checking the Engine Oil
1. Make sure your vehicle is on level ground.
2. Turn the engine off and wait 15 minutes for the oil to drain into the
oil pan.
3. Set the parking brake and latch the gearshift in positionP.
4. Open the hood. Protect yourself from engine heat.
5. Locate and carefully remove the engine oil dipstick.
6. Wipe the dipstick clean. Insert the dipstick fully, and then remove it
again.
•If the oil level is between the lower and upper holes, the oil level
is acceptable. DO NOT ADD OIL.
•If the oil level is below the lower hole, add enough oil to raise the
level within the lower and upper holes.
•Oil levels above the upper hole may cause engine damage. Have
an authorized dealer remove some of the oil.
7. Put the dipstick back in completely.
AB
210Maintenance
2015 F-650/750(f67)
Owners Guide gf(ownloose), 1st Printing, December 2013
Canadian_French(fr_can)
Page 223 of 384
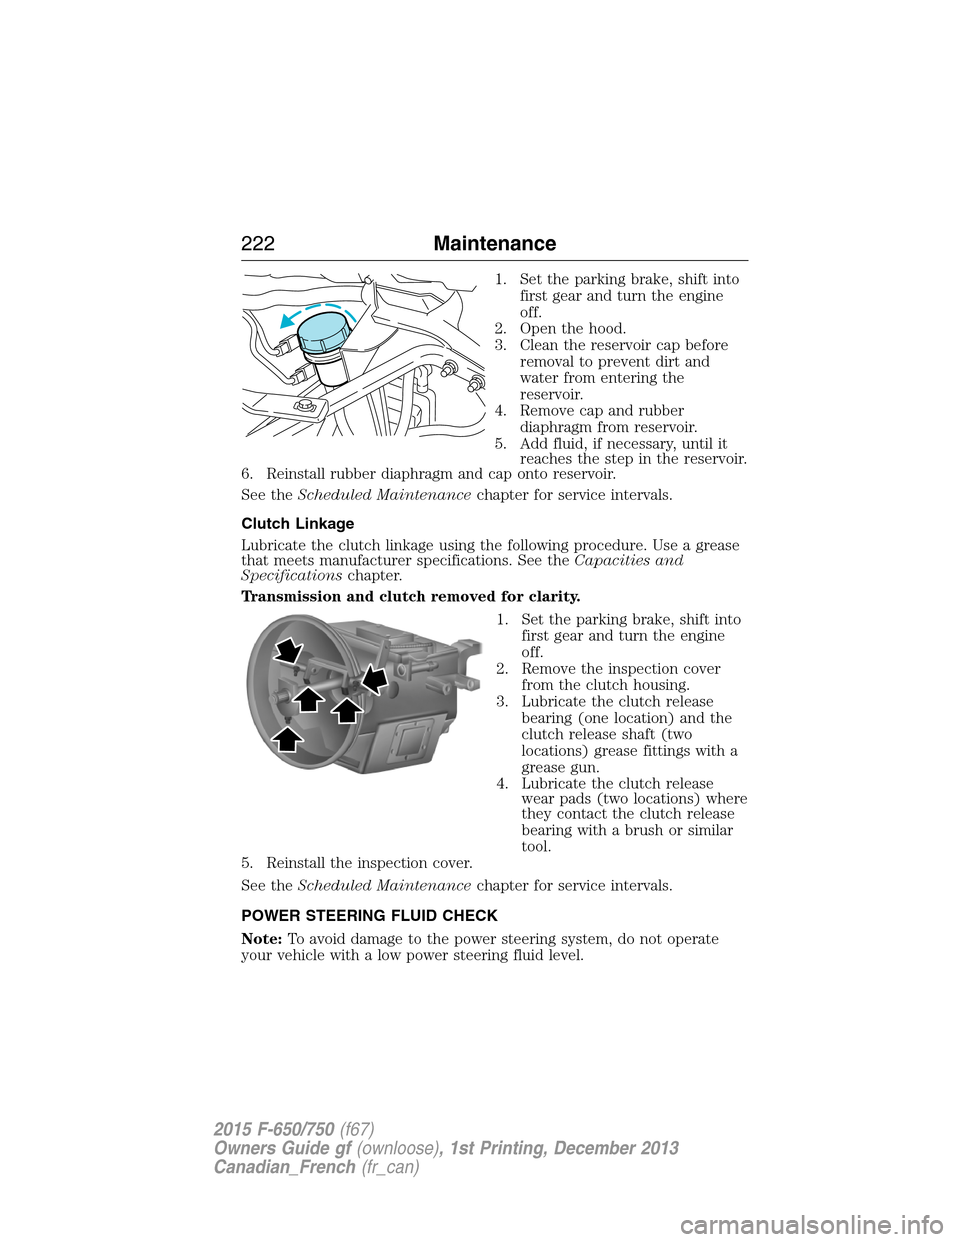
1. Set the parking brake, shift into
first gear and turn the engine
off.
2. Open the hood.
3. Clean the reservoir cap before
removal to prevent dirt and
water from entering the
reservoir.
4. Remove cap and rubber
diaphragm from reservoir.
5. Add fluid, if necessary, until it
reaches the step in the reservoir.
6. Reinstall rubber diaphragm and cap onto reservoir.
See theScheduled Maintenancechapter for service intervals.
Clutch Linkage
Lubricate the clutch linkage using the following procedure. Use a grease
that meets manufacturer specifications. See theCapacities and
Specificationschapter.
Transmission and clutch removed for clarity.
1. Set the parking brake, shift into
first gear and turn the engine
off.
2. Remove the inspection cover
from the clutch housing.
3. Lubricate the clutch release
bearing (one location) and the
clutch release shaft (two
locations) grease fittings with a
grease gun.
4. Lubricate the clutch release
wear pads (two locations) where
they contact the clutch release
bearing with a brush or similar
tool.
5. Reinstall the inspection cover.
See theScheduled Maintenancechapter for service intervals.
POWER STEERING FLUID CHECK
Note:To avoid damage to the power steering system, do not operate
your vehicle with a low power steering fluid level.
222Maintenance
2015 F-650/750(f67)
Owners Guide gf(ownloose), 1st Printing, December 2013
Canadian_French(fr_can)
Page 224 of 384
Note:If adding fluid is necessary, use only the appropriate fluid. See the
Capacities and Specificationschapter. A low fluid level may indicate a
leak in the power steering system. Inspect the power steering system
and repair the leak or see an authorized dealer or a qualified technician
for service. See theScheduled Maintenancechapter for the
recommended service intervals.
Check the fluid level when it is at ambient temperature, 20°F–80°F
(-7°C–25°C):
1. Set the parking brake, and then start the engine.
2. Shift into positionNorP(if equipped) (automatic transmission) or
first gear (manual transmission) and turn the engine off.
3. Open the hood.
4. Clean the top of the power steering fluid reservoir.
5. Remove the dipstick from the reservoir and wipe the dipstick clean.
6. Reinstall the dipstick. Remove it again and check the fluid level.
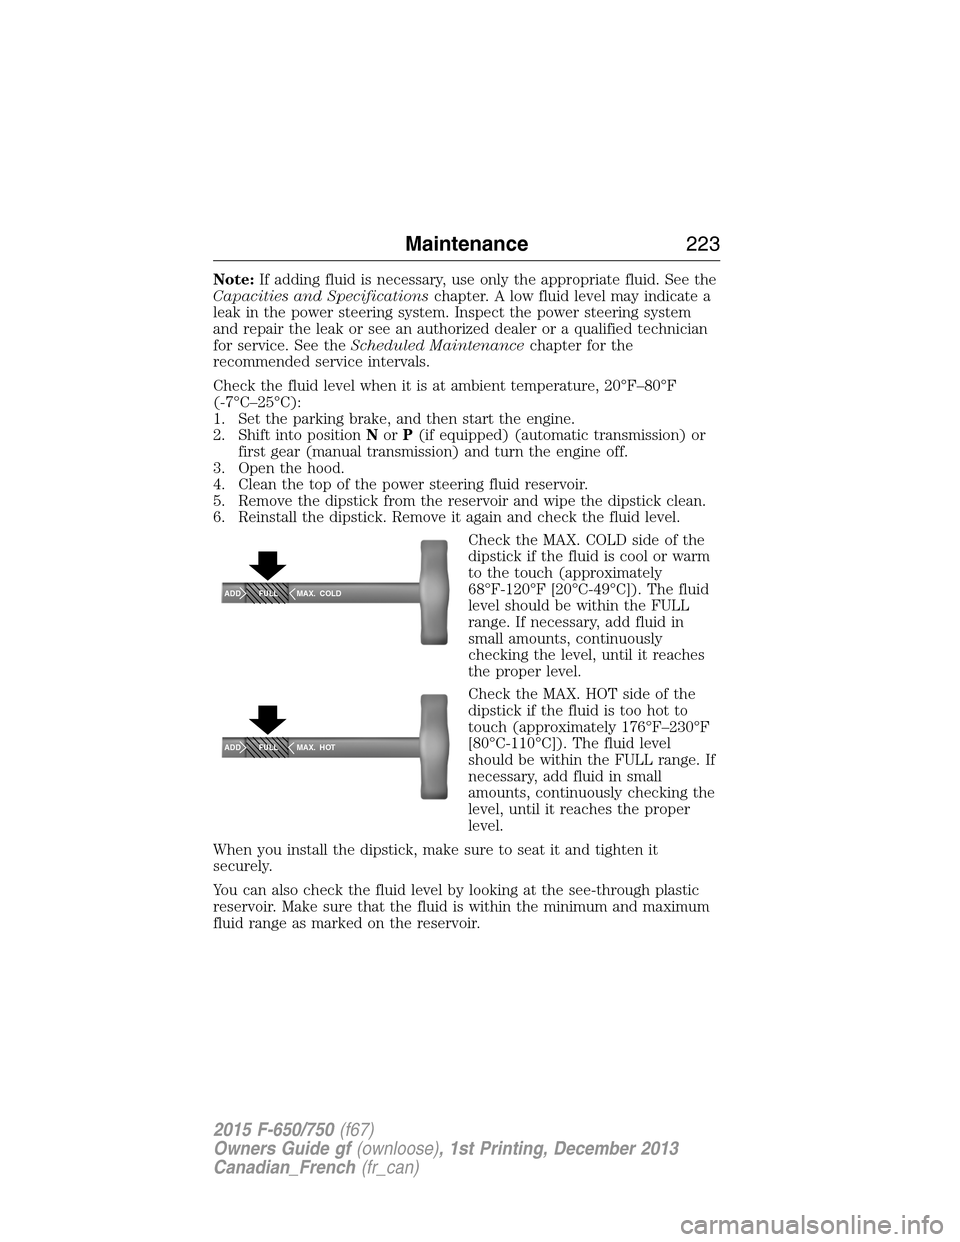
Check the MAX. COLD side of the
dipstick if the fluid is cool or warm
to the touch (approximately
68°F-120°F [20°C-49°C]). The fluid
level should be within the FULL
range. If necessary, add fluid in
small amounts, continuously
checking the level, until it reaches
the proper level.
Check the MAX. HOT side of the
dipstick if the fluid is too hot to
touch (approximately 176°F–230°F
[80°C-110°C]). The fluid level
should be within the FULL range. If
necessary, add fluid in small
amounts, continuously checking the
level, until it reaches the proper
level.
When you install the dipstick, make sure to seat it and tighten it
securely.
You can also check the fluid level by looking at the see-through plastic
reservoir. Make sure that the fluid is within the minimum and maximum
fluid range as marked on the reservoir.
ADD MAX. COLD
FULL
ADD MAX. HOT
FULL
Maintenance223
2015 F-650/750(f67)
Owners Guide gf(ownloose), 1st Printing, December 2013
Canadian_French(fr_can)