FORD F650/750 2024 Repair Manual
Manufacturer: FORD, Model Year: 2024, Model line: F650/750, Model: FORD F650/750 2024Pages: 386, PDF Size: 8.7 MB
Page 61 of 386
DAYTIME RUNNING LAMPS -
VEHICLES WITH: DAYTIME
RUNNING LAMPS (DRL)
WARNING: The daytime runninglamps system does not activate the rearlamps and may not provide adequatelighting during low visibility drivingconditions. Make sure you switch theheadlamps on, as appropriate, during alllow visibility conditions. Failure to do somay result in a crash.
The system turns the lamps on in daylightconditions.
To switch the system on, switch thelighting control to any position exceptheadlamps.
DAYTIME RUNNING LAMPS -
VEHICLES WITH:
CONFIGURABLE DAYTIME
RUNNING LAMPS
WARNING: The daytime runninglamps system does not activate the rearlamps and may not provide adequatelighting during low visibility drivingconditions. Make sure you switch theheadlamps on, as appropriate, during alllow visibility conditions. Failure to do somay result in a crash.
Switch the daytime running lamps on oroff using the information display. SeeGeneral Information (page 71).
The daytime running lamps turn on when:
1.The lamps are on in the informationdisplay.
2.You switch the ignition on.
3.The transmission is not in park (P) forvehicles with automatic transmissionsor you release the parking brake forvehicles with manual transmissions.
4.The lighting control is in the autolampsposition.
5.The headlamps are off.
The other lighting control switch positionsdo not turn on the daytime running lamps.
If the daytime running lamps are off in theinformation display, the lamps stay off inall switch positions.
AUTOMATIC HIGH BEAM
CONTROL (IF EQUIPPED)
WARNING: The system does notrelieve you of your responsibility to drivewith due care and attention. You mayneed to override the system if it does notturn the high beams on or off.
The system turns on high beams if it is darkenough and no other traffic is present. If itdetects an approaching vehicle’sheadlamps or tail lamps, or street lightingahead, the system turns off high beamsbefore they can distract other road users.Low beams remain on.
Note:The system may not operate properlyif the sensor is blocked. Keep the windshieldfree from obstruction or damage.
Note:The system may not operate properlyin cold or inclement conditions. You canswitch on the high beams by overriding thesystem.
Note:If the system detects a blockage, forexample bird droppings, bug splatter, snowor ice, the system goes into low beam modeuntil you clear the blockage. A message mayappear in the information display if thecamera is blocked.
57
2024 F-650/750 (TBC) , enUSA, Edition date: 202210, First-PrintingLighting
Page 62 of 386
Note:Using much larger tires or equippingvehicle accessories such as snowplows canmodify your vehicle's ride height anddegrade automatic high beam controlperformance.
A camera sensor, centrally mountedbehind the windshield of your vehicle,continuously monitors conditions to turnthe high beams on and off.
Once the system is active, the high beamsturn on if:
•The ambient light level is low enough.
•There is no traffic in front of yourvehicle.
•The vehicle speed is greater thanapproximately 32 mph (51 km/h).
The system turns the high beams off if:
•The ambient light level is high enoughthat high beams are not required.
•The system detects an approachingvehicle's headlamps or tail lamps.
•The vehicle speed falls belowapproximately 27 mph (44 km/h).
•The system detects severe rain, snowor fog.
•The camera is blocked.
Switching the System On and Off
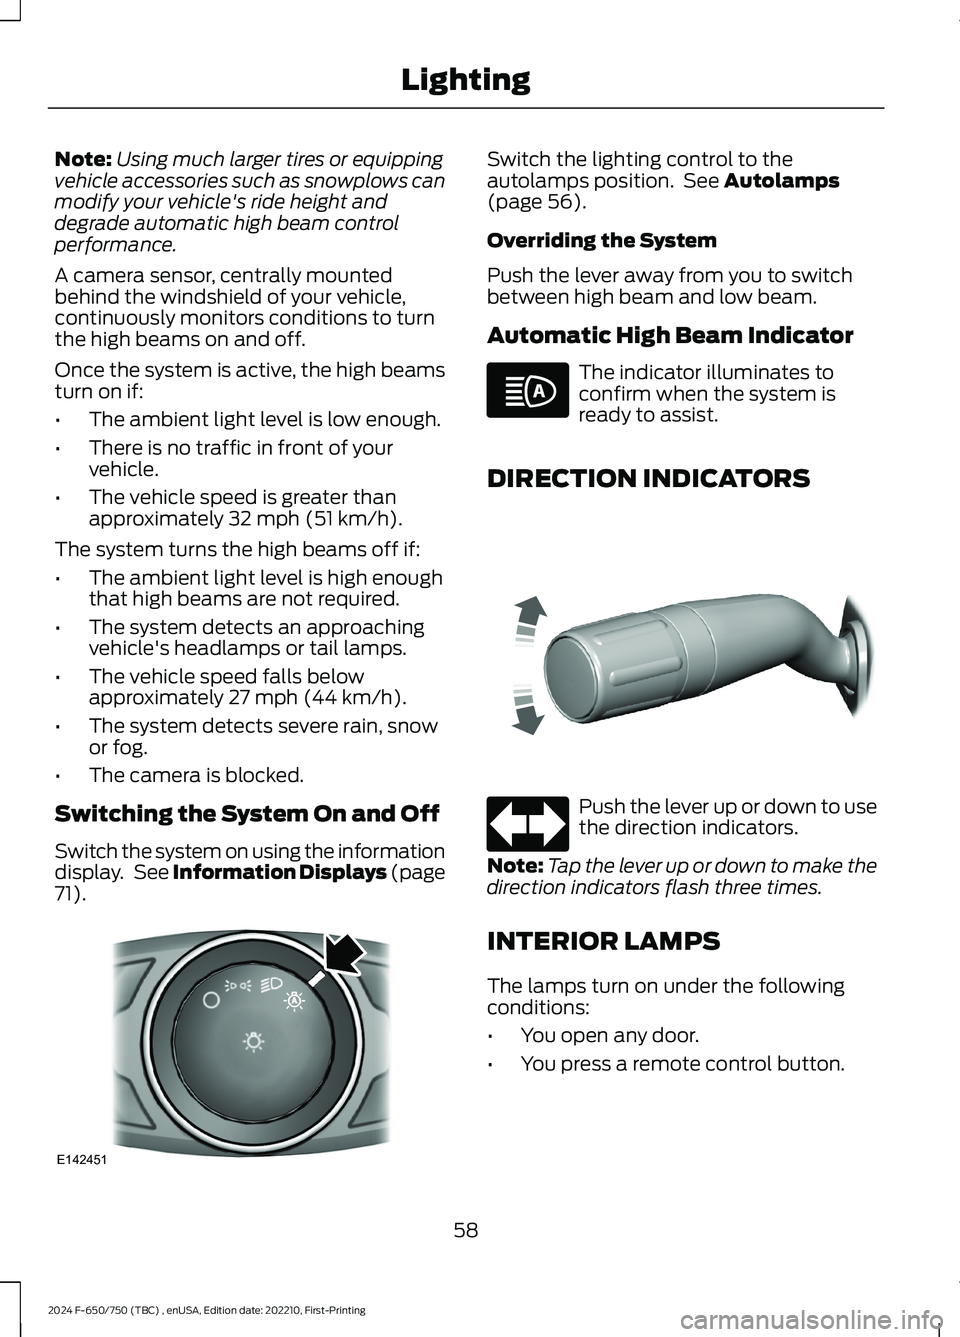
Switch the system on using the informationdisplay. See Information Displays (page71).
Switch the lighting control to theautolamps position. See Autolamps(page 56).
Overriding the System
Push the lever away from you to switchbetween high beam and low beam.
Automatic High Beam Indicator
The indicator illuminates toconfirm when the system isready to assist.
DIRECTION INDICATORS
Push the lever up or down to usethe direction indicators.
Note:Tap the lever up or down to make thedirection indicators flash three times.
INTERIOR LAMPS
The lamps turn on under the followingconditions:
•You open any door.
•You press a remote control button.
58
2024 F-650/750 (TBC) , enUSA, Edition date: 202210, First-PrintingLightingE142451 E146105 E311431 E67018
Page 63 of 386
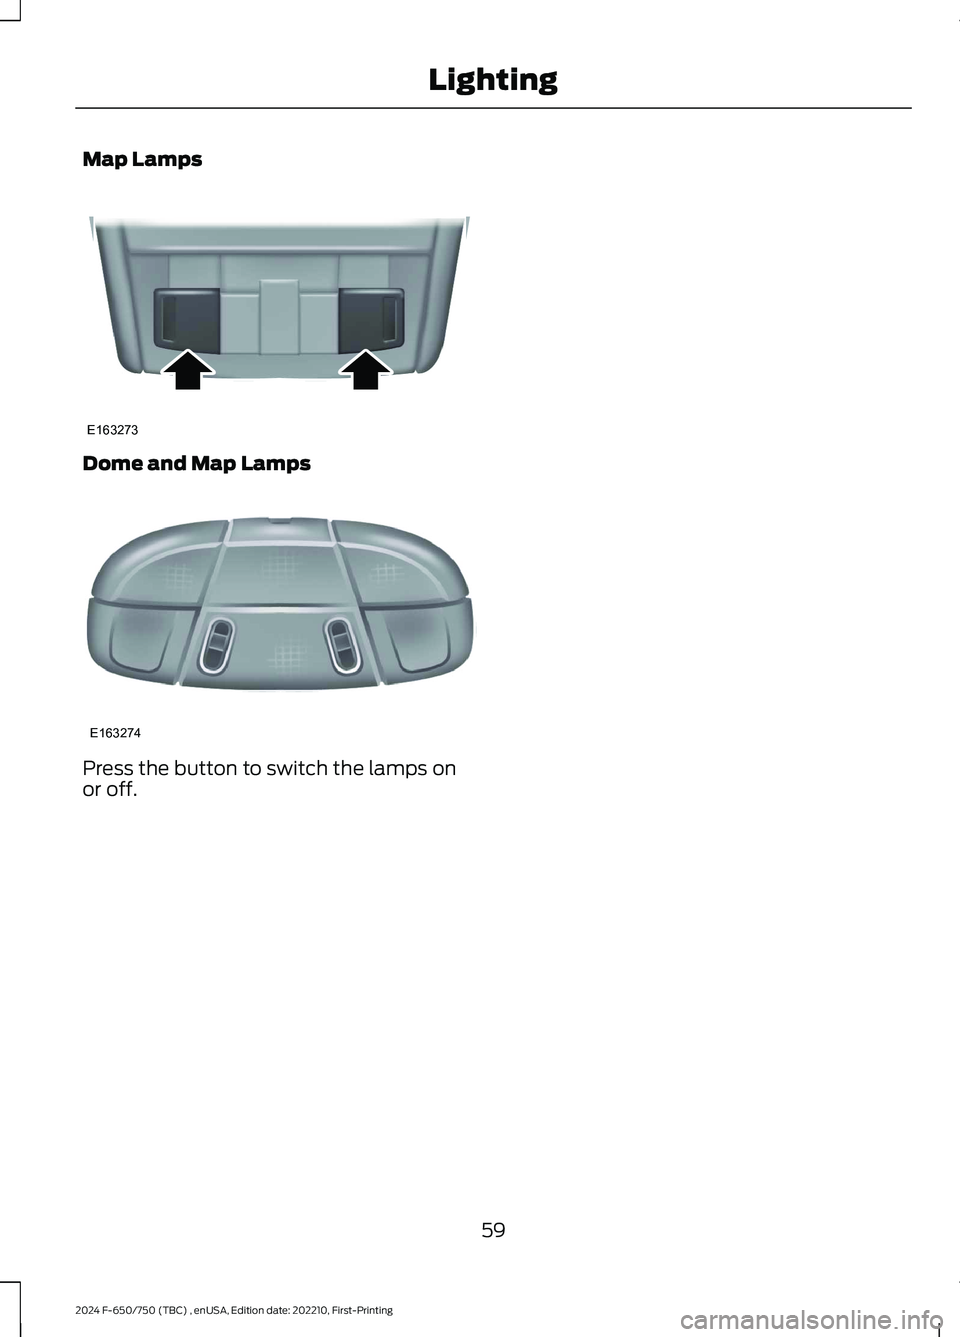
Map Lamps
Dome and Map Lamps
Press the button to switch the lamps onor off.
59
2024 F-650/750 (TBC) , enUSA, Edition date: 202210, First-PrintingLightingE163273 E163274
Page 64 of 386
POWER WINDOWS (IF EQUIPPED)
WARNING: Do not leave childrenunattended in your vehicle and do notlet them play with the power windows.Failure to follow this instruction couldresult in personal injury.
WARNING: When closing thepower windows, verify they are free ofobstruction and make sure that childrenand pets are not in the proximity of thewindow openings.
Note:You may hear a pulsing noise whenjust one of the windows is open. Lower theopposite window slightly to reduce thisnoise.
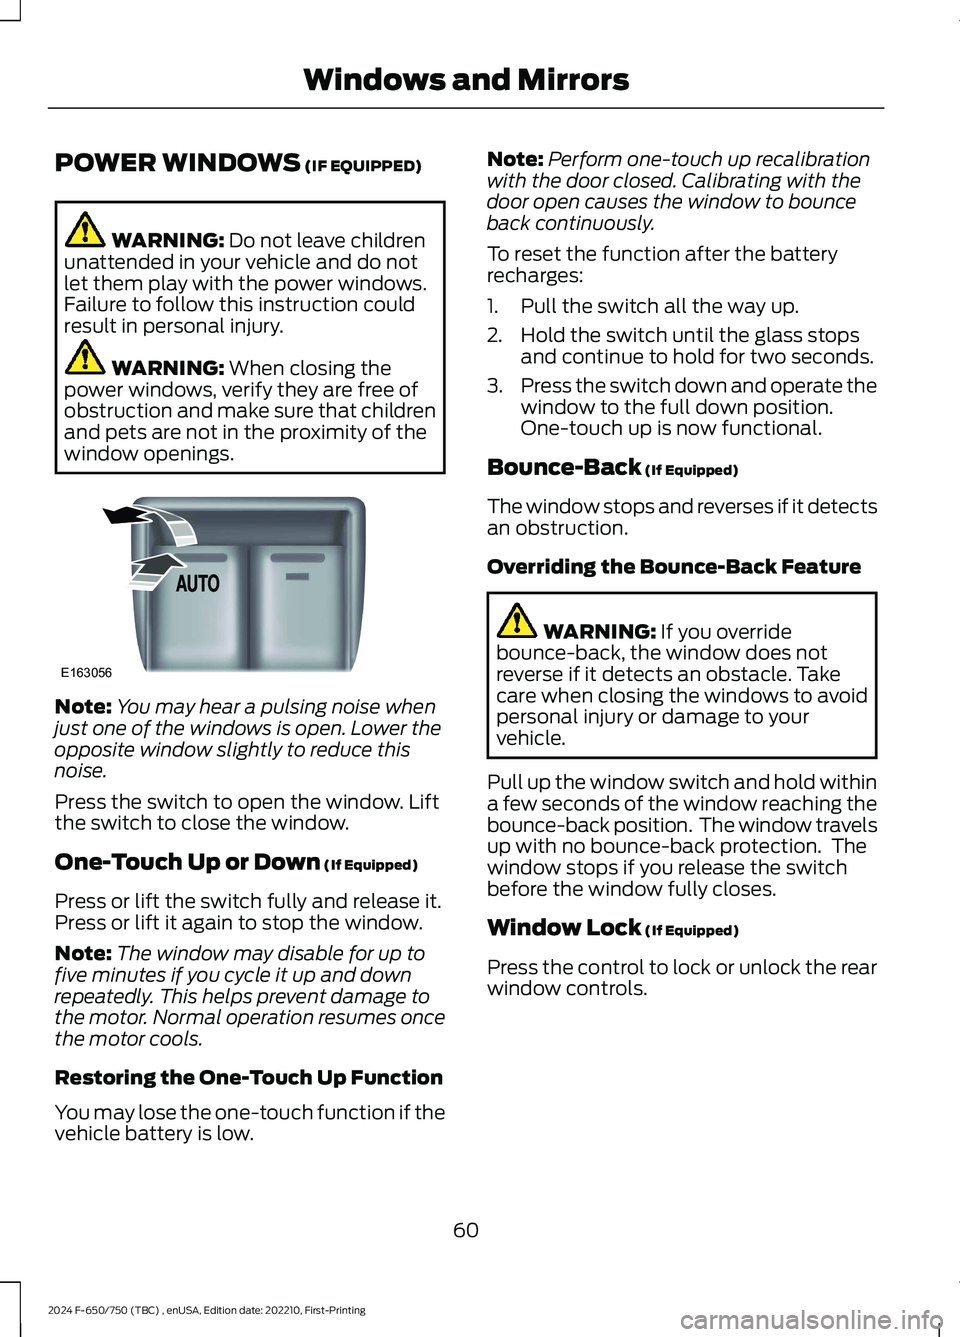
Press the switch to open the window. Liftthe switch to close the window.
One-Touch Up or Down (If Equipped)
Press or lift the switch fully and release it.Press or lift it again to stop the window.
Note:The window may disable for up tofive minutes if you cycle it up and downrepeatedly. This helps prevent damage tothe motor. Normal operation resumes oncethe motor cools.
Restoring the One-Touch Up Function
You may lose the one-touch function if thevehicle battery is low.
Note:Perform one-touch up recalibrationwith the door closed. Calibrating with thedoor open causes the window to bounceback continuously.
To reset the function after the batteryrecharges:
1.Pull the switch all the way up.
2.Hold the switch until the glass stopsand continue to hold for two seconds.
3.Press the switch down and operate thewindow to the full down position.One-touch up is now functional.
Bounce-Back (If Equipped)
The window stops and reverses if it detectsan obstruction.
Overriding the Bounce-Back Feature
WARNING: If you overridebounce-back, the window does notreverse if it detects an obstacle. Takecare when closing the windows to avoidpersonal injury or damage to yourvehicle.
Pull up the window switch and hold withina few seconds of the window reaching thebounce-back position. The window travelsup with no bounce-back protection. Thewindow stops if you release the switchbefore the window fully closes.
Window Lock (If Equipped)
Press the control to lock or unlock the rearwindow controls.
60
2024 F-650/750 (TBC) , enUSA, Edition date: 202210, First-PrintingWindows and MirrorsE163056
Page 65 of 386
EXTERIOR MIRRORS
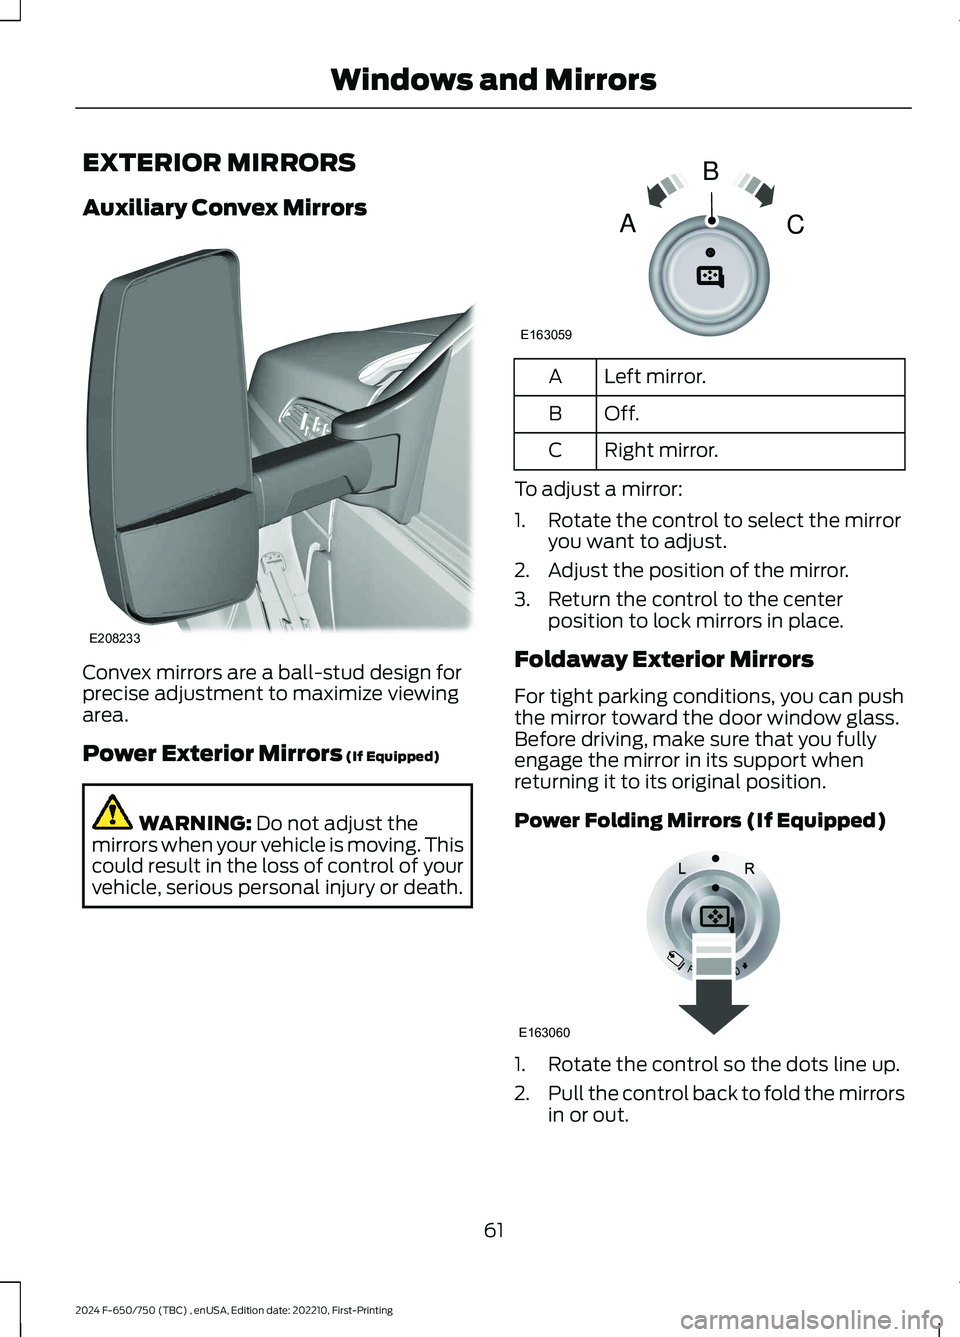
Auxiliary Convex Mirrors
Convex mirrors are a ball-stud design forprecise adjustment to maximize viewingarea.
Power Exterior Mirrors (If Equipped)
WARNING: Do not adjust themirrors when your vehicle is moving. Thiscould result in the loss of control of yourvehicle, serious personal injury or death.
Left mirror.A
Off.B
Right mirror.C
To adjust a mirror:
1.Rotate the control to select the mirroryou want to adjust.
2.Adjust the position of the mirror.
3.Return the control to the centerposition to lock mirrors in place.
Foldaway Exterior Mirrors
For tight parking conditions, you can pushthe mirror toward the door window glass.Before driving, make sure that you fullyengage the mirror in its support whenreturning it to its original position.
Power Folding Mirrors (If Equipped)
1.Rotate the control so the dots line up.
2.Pull the control back to fold the mirrorsin or out.
61
2024 F-650/750 (TBC) , enUSA, Edition date: 202210, First-PrintingWindows and MirrorsE208233 E163059BAC E163060
Page 66 of 386
Note: If you repeatedly fold and unfold themirrors several times within one minute, thesystem may disable to protect the motorsfrom overheating. It resets to normalfunction automatically within three to fiveminutes.
You can also fold a mirror manually bypushing it toward the door window glass.After you manually adjust the mirror, youneed to reset it.
To reset the power folding mirror systemand return it to its normal function:
•Fold the mirror manually by pushing ittoward the door window glass.
•Use the power fold control to fold andunfold the mirror two or three times.The mirror makes a sound as it resets.
Heated Exterior Mirrors (If Equipped)
See Heated Exterior Mirrors (page 88).
Signal Indicator Mirrors (If Equipped)
The outer portion of the appropriate mirrorhousing blinks when you use the directionindicator.
Clearance Lamps (If Equipped)
The lower, outer part of the mirror housingslight when you switch on the headlampsor parking lamps.
Telescoping Mirrors (If Equipped)
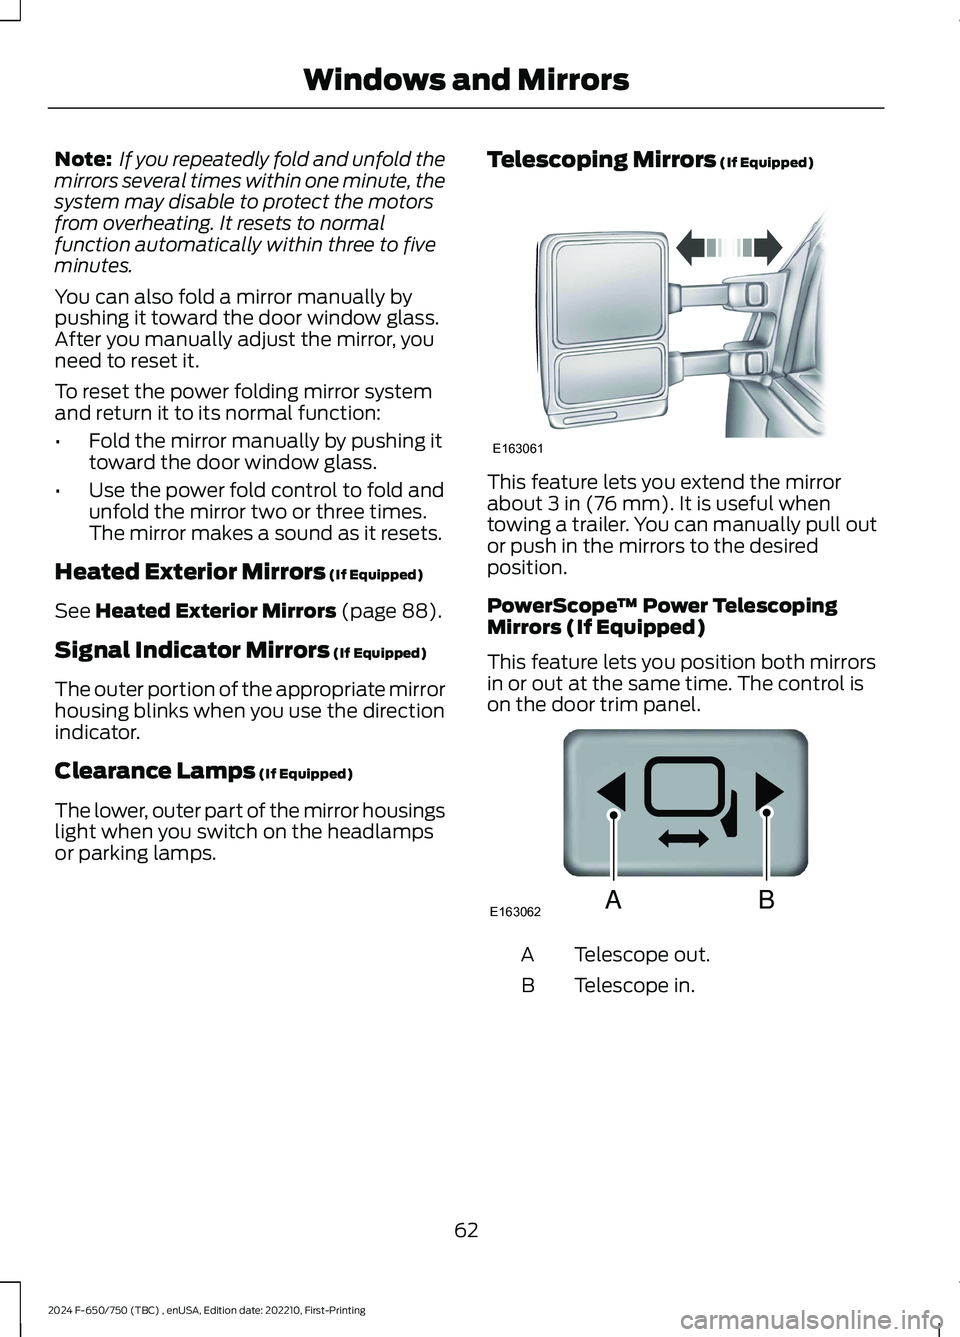
This feature lets you extend the mirrorabout 3 in (76 mm). It is useful whentowing a trailer. You can manually pull outor push in the mirrors to the desiredposition.
PowerScope™ Power TelescopingMirrors (If Equipped)
This feature lets you position both mirrorsin or out at the same time. The control ison the door trim panel.
Telescope out.A
Telescope in.B
62
2024 F-650/750 (TBC) , enUSA, Edition date: 202210, First-PrintingWindows and MirrorsE163061 E163062BA
Page 67 of 386
To adjust the mirrors:
•Press and hold the control.
•When you position the mirrors in or out,the motors run as long as you hold thecontrol. The running motors allow youto make adjustments as needed.
•After positioning the mirrors, return thecontrol to the center position to helpprotect the motors from overheating.
INTERIOR MIRROR (IF EQUIPPED)
WARNING: Do not adjust the mirrorwhen your vehicle is moving.
Note:Do not clean the housing or glass ofany mirror with harsh abrasives, fuel or otherpetroleum or ammonia-based cleaningproducts
You can adjust the interior mirror to yourpreference. Some mirrors also have asecond pivot point. This lets you move themirror head up or down and from side toside.
Pull the tab below the mirror toward youto reduce glare at night.
SUN VISORS
Slide-on-rod (If Equipped)
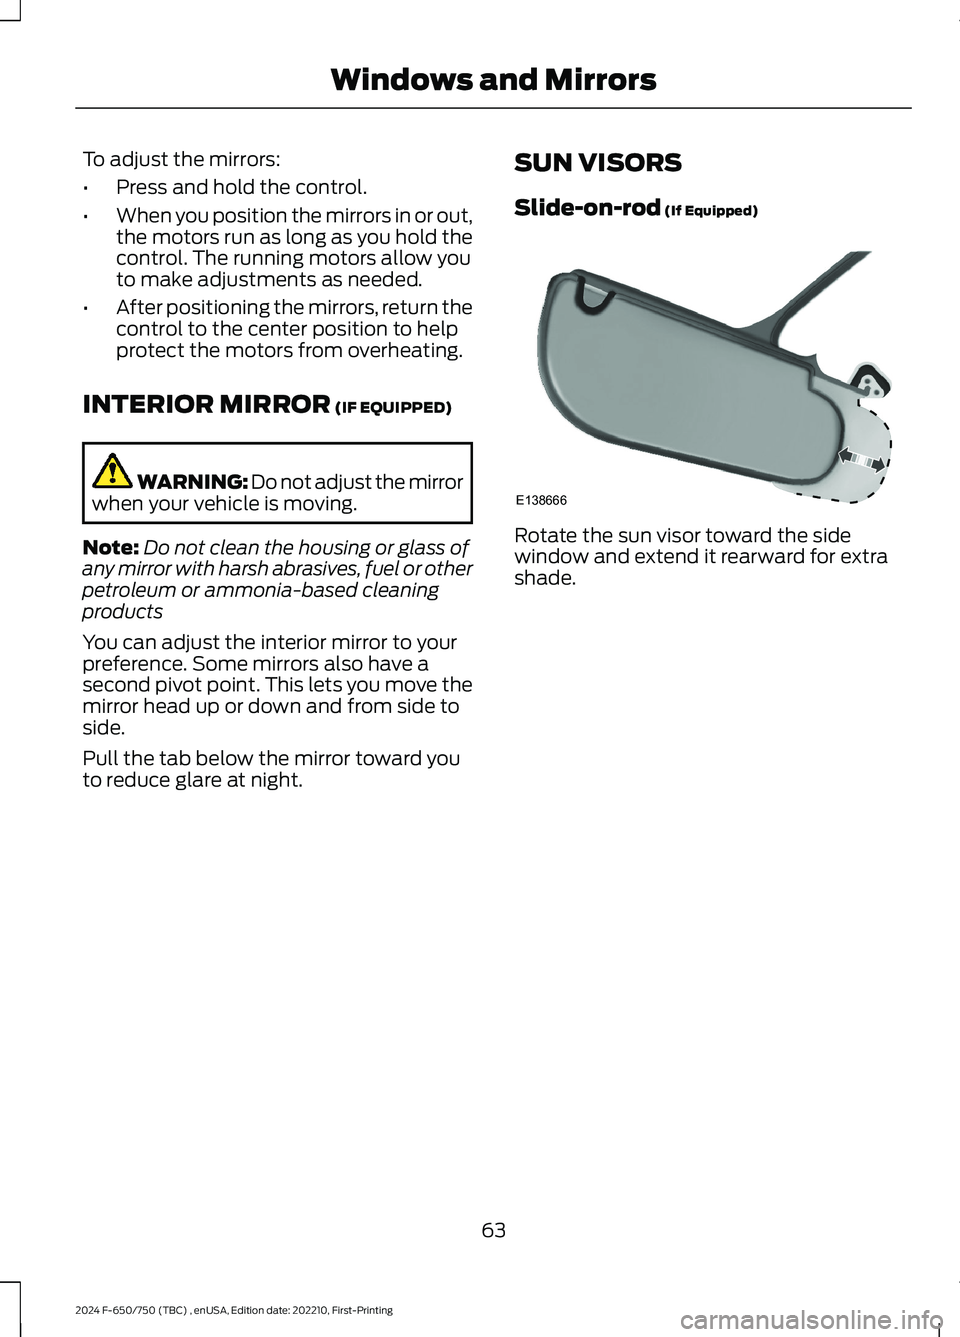
Rotate the sun visor toward the sidewindow and extend it rearward for extrashade.
63
2024 F-650/750 (TBC) , enUSA, Edition date: 202210, First-PrintingWindows and MirrorsE138666
Page 68 of 386
GAUGES
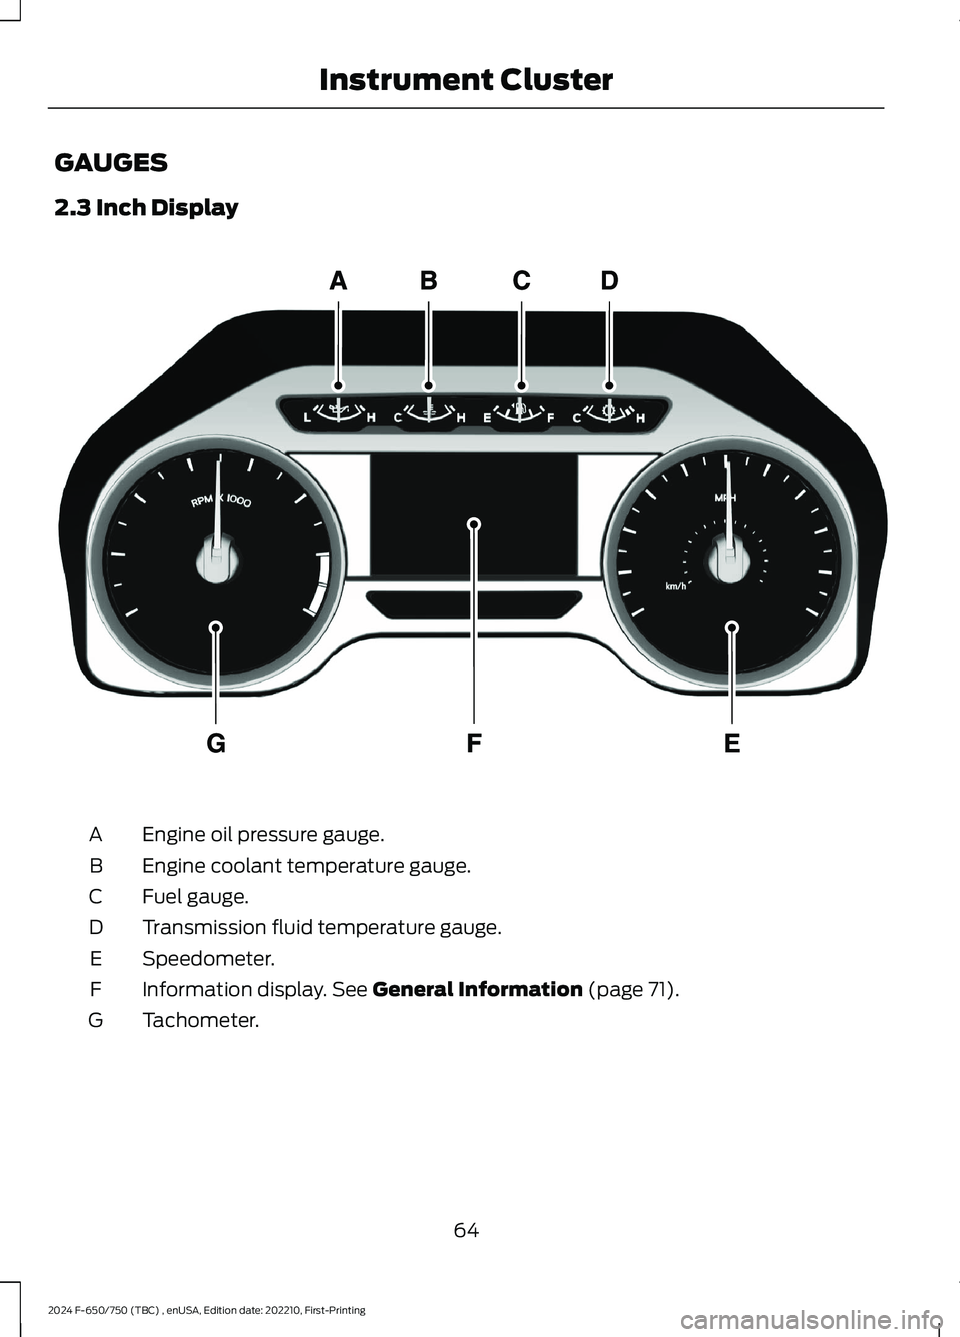
2.3 Inch Display
Engine oil pressure gauge.A
Engine coolant temperature gauge.B
Fuel gauge.C
Transmission fluid temperature gauge.D
Speedometer.E
Information display. See General Information (page 71).F
Tachometer.G
64
2024 F-650/750 (TBC) , enUSA, Edition date: 202210, First-PrintingInstrument ClusterE219638
Page 69 of 386
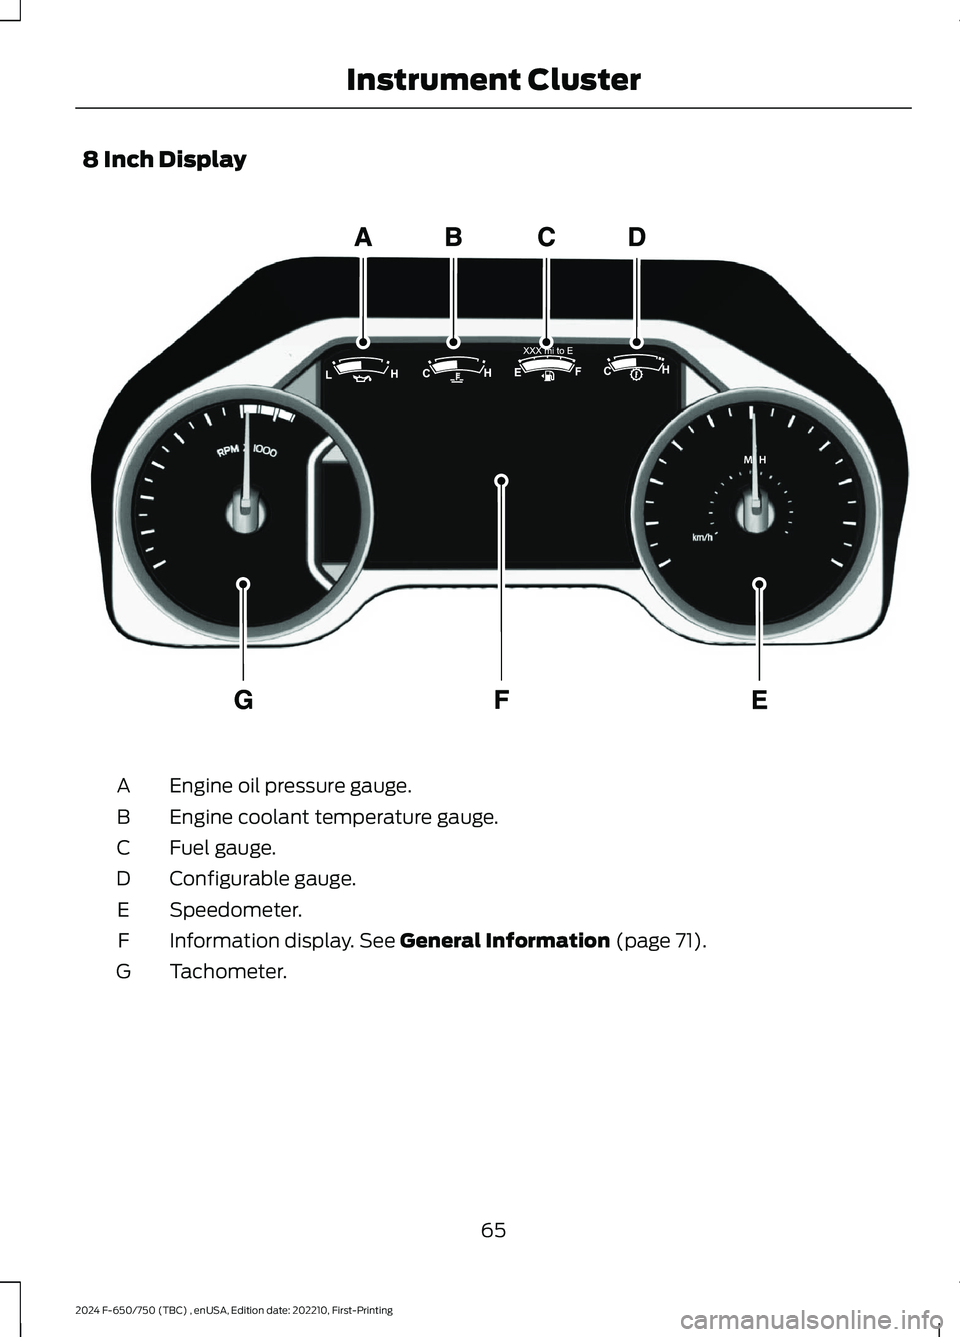
8 Inch Display
Engine oil pressure gauge.A
Engine coolant temperature gauge.B
Fuel gauge.C
Configurable gauge.D
Speedometer.E
Information display. See General Information (page 71).F
Tachometer.G
65
2024 F-650/750 (TBC) , enUSA, Edition date: 202210, First-PrintingInstrument ClusterE299699
Page 70 of 386
Engine Oil Pressure Gauge
Indicates engine oil pressure. At normaloperating temperature, the level indicatoris in the normal range. If the pressure gaugefalls below the normal range, stop yourvehicle, switch off the engine and checkthe engine oil level. Add oil if needed. If theoil level is correct, have your vehiclechecked by an authorized dealer.
Engine Coolant TemperatureGauge
WARNING: Do not remove thecoolant reservoir cap when the engine ison or the cooling system is hot. Wait 10minutes for the cooling system to cooldown. Cover the coolant reservoir capwith a thick cloth to prevent thepossibility of scalding and slowly removethe cap. Failure to follow this instructioncould result in personal injury.
Indicates engine coolant temperature. Atnormal operating temperature, the levelindicator is in the normal range. If theengine coolant temperature exceeds thenormal range, stop your vehicle as soon aspossible, switch off the engine and let theengine cool.
Fuel Gauge
The fuel gauge indicates about how muchfuel is in the fuel tank.
The arrow adjacent to the fuel pumpsymbol indicates on which side of yourvehicle the fuel filler door is located.
Note:The fuel gauge may vary slightlywhen your vehicle is moving or on a slope.
Low Fuel Reminder
A low fuel level reminder displays andsounds when the distance to emptyreaches 50 mi (80 km),25 mi (40 km),10 mi (20 km) and 0 mi (0 km) for allvehicle keys.
Note:The low fuel reminder can appear atdifferent fuel gauge positions depending onfuel economy conditions. This variation isnormal.
Distance to Empty
Indicates the approximate distance yourvehicle can travel on the fuel remaining inthe tank. Changes in driving pattern cancause the value to not only decrease butalso increase or stay constant for periodsof time.
Configurable Gauge
Transmission Fluid Temperature Gauge
Indicates transmission fluid temperature.At normal operating temperature, the levelindicator is in the normal range. If thetransmission fluid temperature exceedsthe normal range, stop your vehicle as soonas possible and verify the airflow is notrestricted by snow or debris blockingairflow through the grille.
Special operating conditions such assnowplowing, towing, or off-road use maycause higher than normal operatingtemperatures. See Special OperatingConditions Scheduled Maintenance(page 335).
To lower the transmission temperatureinto the normal range, alter the severity ofyour driving conditions. Operating thetransmission for extended periods with thegauge in the higher than normal area maycause internal transmission damage. If thegauge continues to show hightemperatures, see an authorized dealer.
66
2024 F-650/750 (TBC) , enUSA, Edition date: 202210, First-PrintingInstrument Cluster