FORD F750 2015 13.G Owners Manual
Manufacturer: FORD, Model Year: 2015, Model line: F750, Model: FORD F750 2015 13.GPages: 384, PDF Size: 4.95 MB
Page 121 of 384
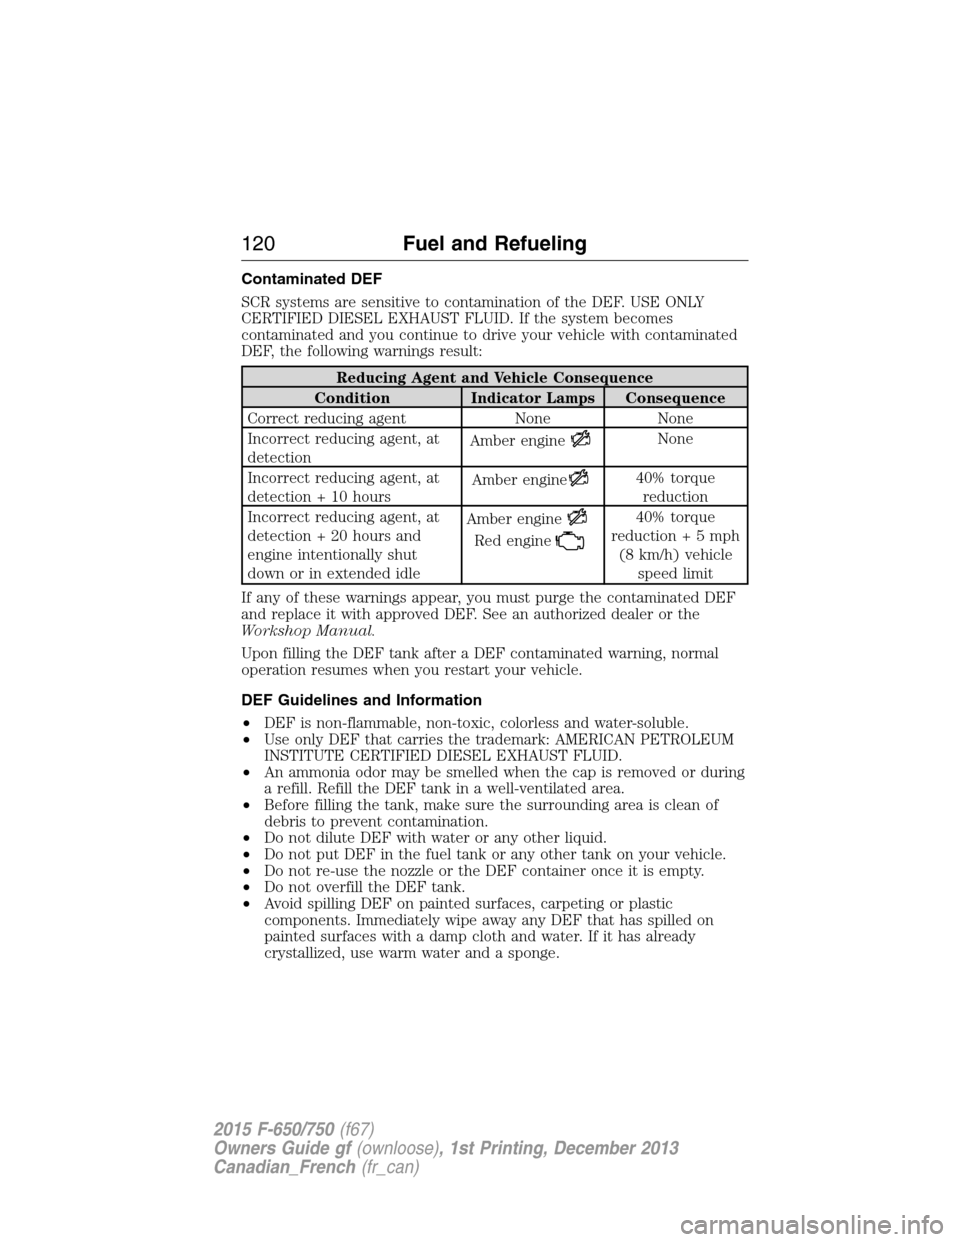
Contaminated DEF
SCR systems are sensitive to contamination of the DEF. USE ONLY
CERTIFIED DIESEL EXHAUST FLUID. If the system becomes
contaminated and you continue to drive your vehicle with contaminated
DEF, the following warnings result:
Reducing Agent and Vehicle Consequence
Condition Indicator Lamps Consequence
Correct reducing agent None None
Incorrect reducing agent, at
detectionAmber engine
None
Incorrect reducing agent, at
detection + 10 hoursAmber engine
40% torque
reduction
Incorrect reducing agent, at
detection + 20 hours and
engine intentionally shut
down or in extended idleAmber engine
Red engine
40% torque
reduction+5mph
(8 km/h) vehicle
speed limit
If any of these warnings appear, you must purge the contaminated DEF
and replace it with approved DEF. See an authorized dealer or the
Workshop Manual.
Upon filling the DEF tank after a DEF contaminated warning, normal
operation resumes when you restart your vehicle.
DEF Guidelines and Information
•DEF is non-flammable, non-toxic, colorless and water-soluble.
•Use only DEF that carries the trademark: AMERICAN PETROLEUM
INSTITUTE CERTIFIED DIESEL EXHAUST FLUID.
•An ammonia odor may be smelled when the cap is removed or during
a refill. Refill the DEF tank in a well-ventilated area.
•Before filling the tank, make sure the surrounding area is clean of
debris to prevent contamination.
•Do not dilute DEF with water or any other liquid.
•Do not put DEF in the fuel tank or any other tank on your vehicle.
•Do not re-use the nozzle or the DEF container once it is empty.
•Do not overfill the DEF tank.
•Avoid spilling DEF on painted surfaces, carpeting or plastic
components. Immediately wipe away any DEF that has spilled on
painted surfaces with a damp cloth and water. If it has already
crystallized, use warm water and a sponge.
120Fuel and Refueling
2015 F-650/750(f67)
Owners Guide gf(ownloose), 1st Printing, December 2013
Canadian_French(fr_can)
Page 122 of 384
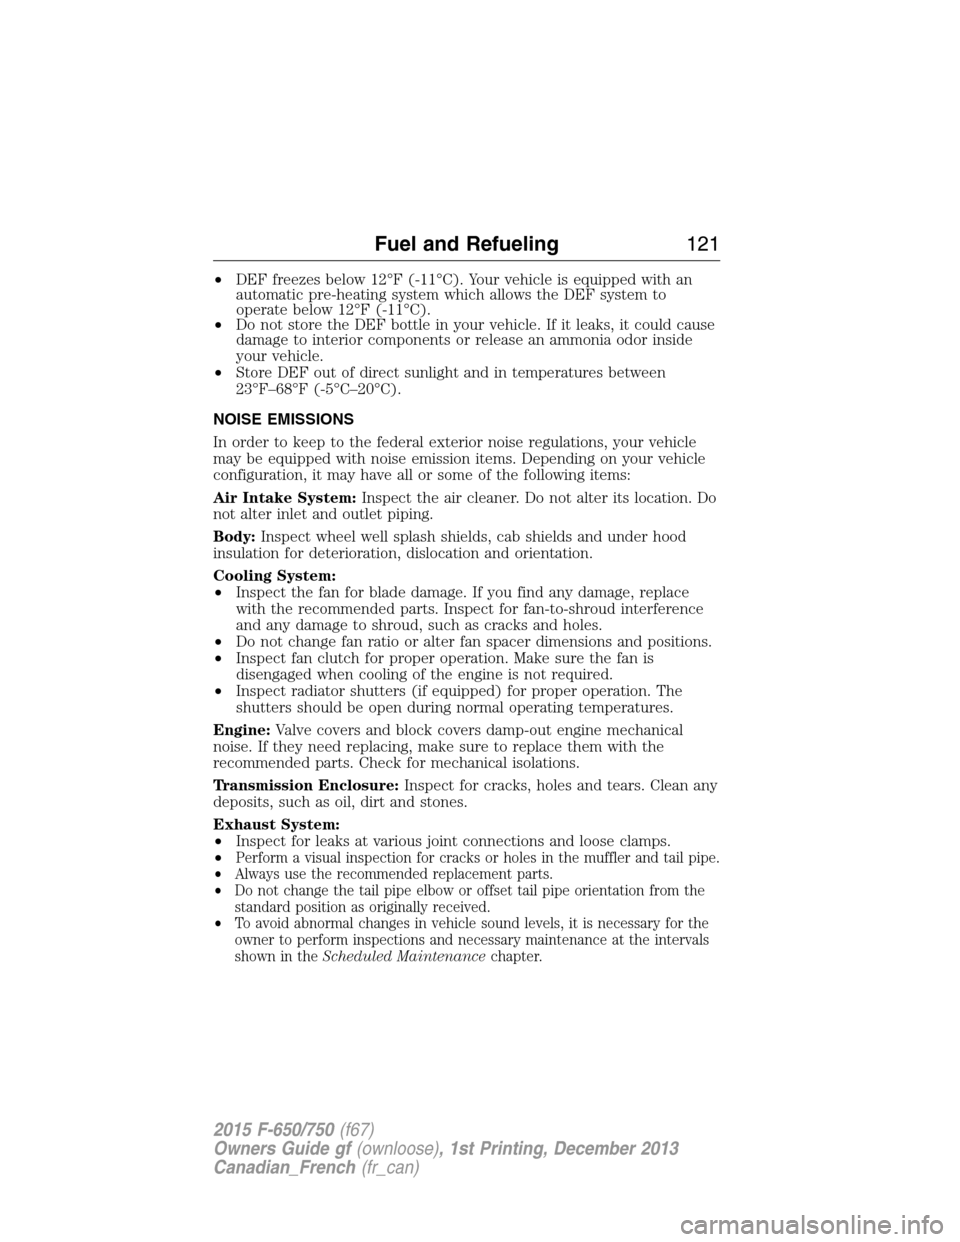
•DEF freezes below 12°F (-11°C). Your vehicle is equipped with an
automatic pre-heating system which allows the DEF system to
operate below 12°F (-11°C).
•Do not store the DEF bottle in your vehicle. If it leaks, it could cause
damage to interior components or release an ammonia odor inside
your vehicle.
•Store DEF out of direct sunlight and in temperatures between
23°F–68°F (-5°C–20°C).
NOISE EMISSIONS
In order to keep to the federal exterior noise regulations, your vehicle
may be equipped with noise emission items. Depending on your vehicle
configuration, it may have all or some of the following items:
Air Intake System:Inspect the air cleaner. Do not alter its location. Do
not alter inlet and outlet piping.
Body:Inspect wheel well splash shields, cab shields and under hood
insulation for deterioration, dislocation and orientation.
Cooling System:
•Inspect the fan for blade damage. If you find any damage, replace
with the recommended parts. Inspect for fan-to-shroud interference
and any damage to shroud, such as cracks and holes.
•Do not change fan ratio or alter fan spacer dimensions and positions.
•Inspect fan clutch for proper operation. Make sure the fan is
disengaged when cooling of the engine is not required.
•Inspect radiator shutters (if equipped) for proper operation. The
shutters should be open during normal operating temperatures.
Engine:Valve covers and block covers damp-out engine mechanical
noise. If they need replacing, make sure to replace them with the
recommended parts. Check for mechanical isolations.
Transmission Enclosure:Inspect for cracks, holes and tears. Clean any
deposits, such as oil, dirt and stones.
Exhaust System:
•Inspect for leaks at various joint connections and loose clamps.
•
Perform a visual inspection for cracks or holes in the muffler and tail pipe.
•Always use the recommended replacement parts.
•Do not change the tail pipe elbow or offset tail pipe orientation from the
standard position as originally received.
•To avoid abnormal changes in vehicle sound levels, it is necessary for the
owner to perform inspections and necessary maintenance at the intervals
shown in theScheduled Maintenancechapter.
Fuel and Refueling121
2015 F-650/750(f67)
Owners Guide gf(ownloose), 1st Printing, December 2013
Canadian_French(fr_can)
Page 123 of 384
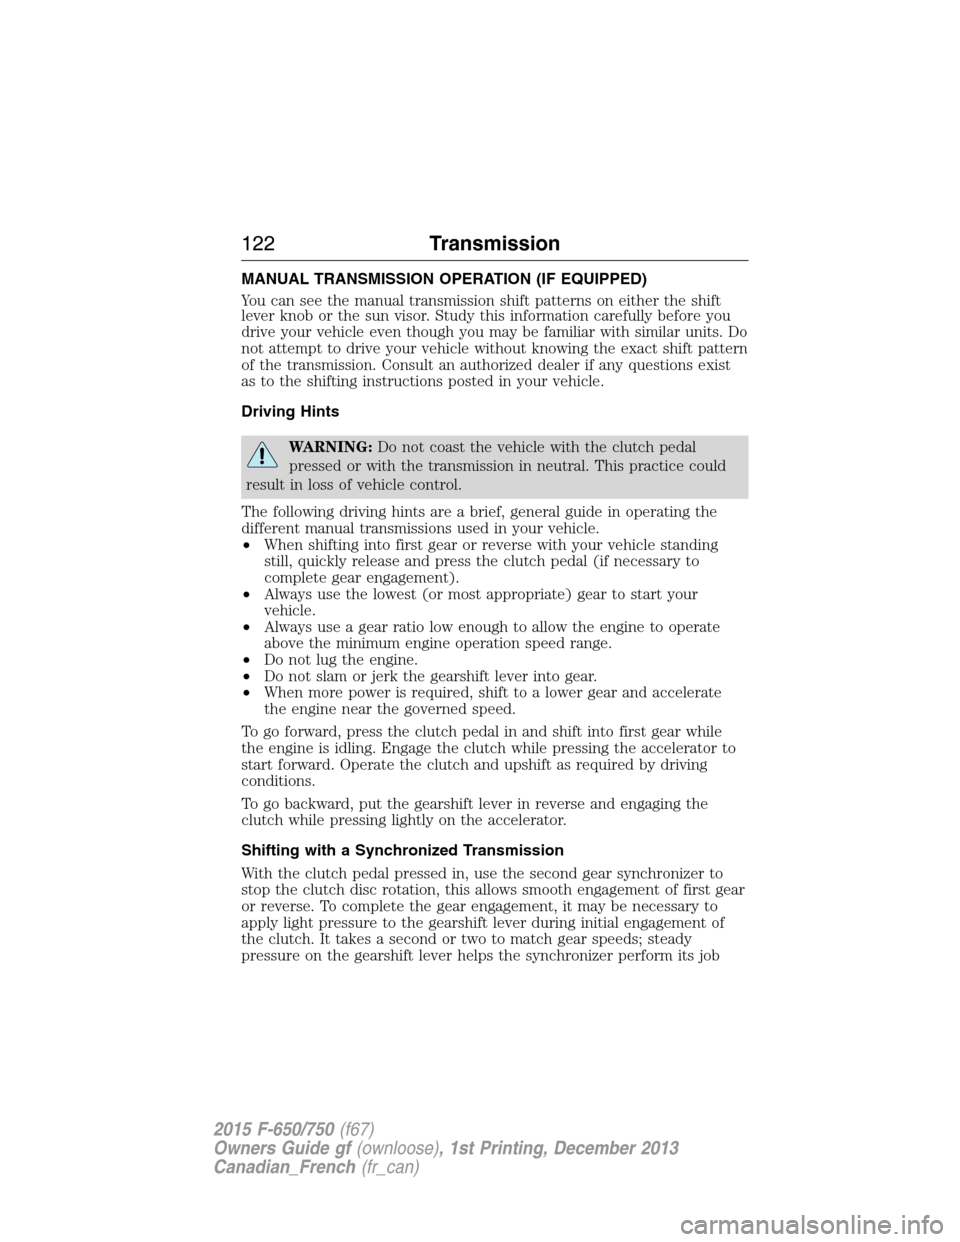
MANUAL TRANSMISSION OPERATION (IF EQUIPPED)
You can see the manual transmission shift patterns on either the shift
lever knob or the sun visor. Study this information carefully before you
drive your vehicle even though you may be familiar with similar units. Do
not attempt to drive your vehicle without knowing the exact shift pattern
of the transmission. Consult an authorized dealer if any questions exist
as to the shifting instructions posted in your vehicle.
Driving Hints
WARNING:Do not coast the vehicle with the clutch pedal
pressed or with the transmission in neutral. This practice could
result in loss of vehicle control.
The following driving hints are a brief, general guide in operating the
different manual transmissions used in your vehicle.
•When shifting into first gear or reverse with your vehicle standing
still, quickly release and press the clutch pedal (if necessary to
complete gear engagement).
•Always use the lowest (or most appropriate) gear to start your
vehicle.
•Always use a gear ratio low enough to allow the engine to operate
above the minimum engine operation speed range.
•Do not lug the engine.
•Do not slam or jerk the gearshift lever into gear.
•When more power is required, shift to a lower gear and accelerate
the engine near the governed speed.
To go forward, press the clutch pedal in and shift into first gear while
the engine is idling. Engage the clutch while pressing the accelerator to
start forward. Operate the clutch and upshift as required by driving
conditions.
To go backward, put the gearshift lever in reverse and engaging the
clutch while pressing lightly on the accelerator.
Shifting with a Synchronized Transmission
With the clutch pedal pressed in, use the second gear synchronizer to
stop the clutch disc rotation, this allows smooth engagement of first gear
or reverse. To complete the gear engagement, it may be necessary to
apply light pressure to the gearshift lever during initial engagement of
the clutch. It takes a second or two to match gear speeds; steady
pressure on the gearshift lever helps the synchronizer perform its job
122Transmission
2015 F-650/750(f67)
Owners Guide gf(ownloose), 1st Printing, December 2013
Canadian_French(fr_can)
Page 124 of 384
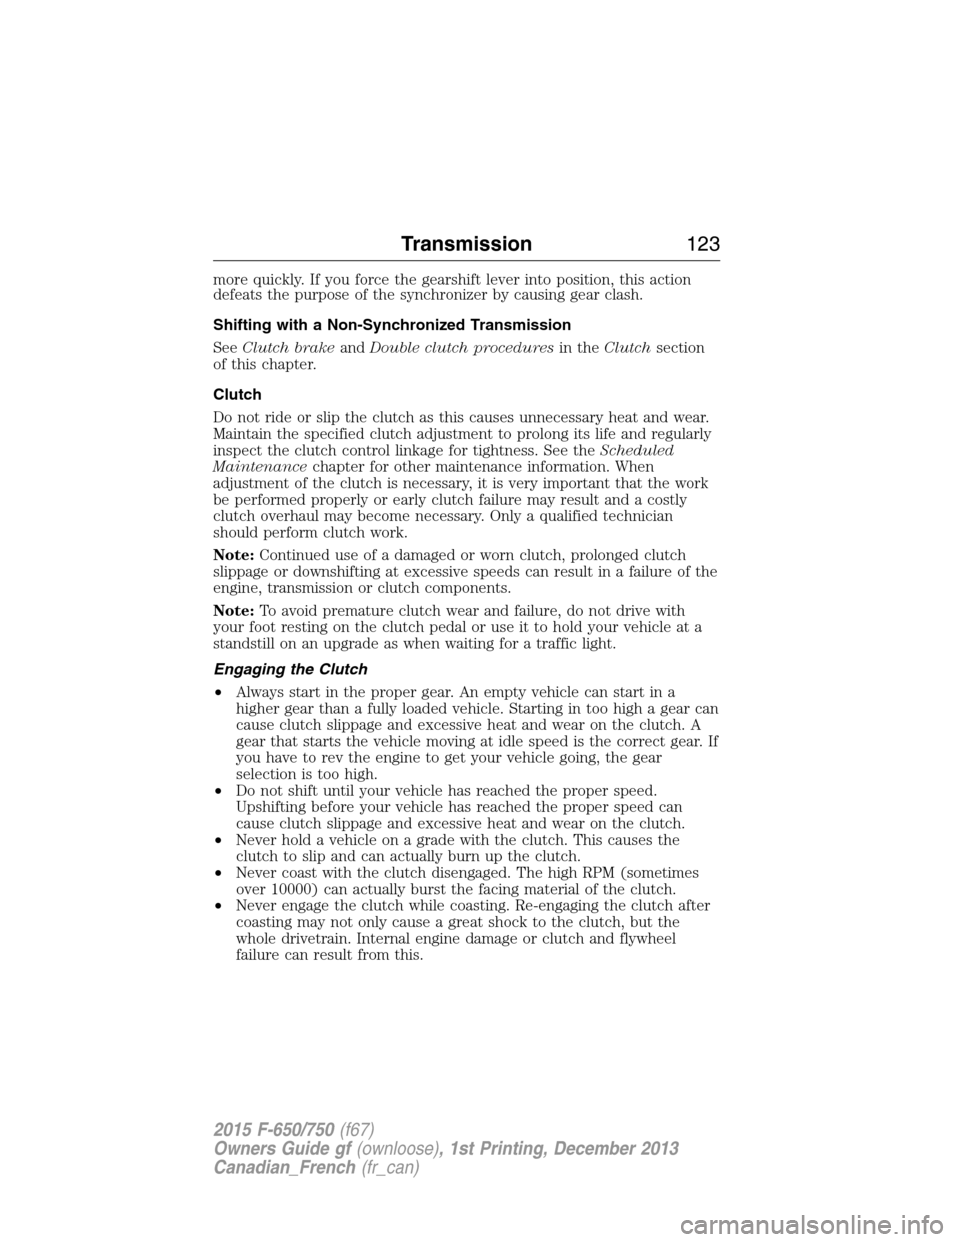
more quickly. If you force the gearshift lever into position, this action
defeats the purpose of the synchronizer by causing gear clash.
Shifting with a Non-Synchronized Transmission
SeeClutch brakeandDouble clutch proceduresin theClutchsection
of this chapter.
Clutch
Do not ride or slip the clutch as this causes unnecessary heat and wear.
Maintain the specified clutch adjustment to prolong its life and regularly
inspect the clutch control linkage for tightness. See theScheduled
Maintenancechapter for other maintenance information. When
adjustment of the clutch is necessary, it is very important that the work
be performed properly or early clutch failure may result and a costly
clutch overhaul may become necessary. Only a qualified technician
should perform clutch work.
Note:Continued use of a damaged or worn clutch, prolonged clutch
slippage or downshifting at excessive speeds can result in a failure of the
engine, transmission or clutch components.
Note:To avoid premature clutch wear and failure, do not drive with
your foot resting on the clutch pedal or use it to hold your vehicle at a
standstill on an upgrade as when waiting for a traffic light.
Engaging the Clutch
•Always start in the proper gear. An empty vehicle can start in a
higher gear than a fully loaded vehicle. Starting in too high a gear can
cause clutch slippage and excessive heat and wear on the clutch. A
gear that starts the vehicle moving at idle speed is the correct gear. If
you have to rev the engine to get your vehicle going, the gear
selection is too high.
•Do not shift until your vehicle has reached the proper speed.
Upshifting before your vehicle has reached the proper speed can
cause clutch slippage and excessive heat and wear on the clutch.
•Never hold a vehicle on a grade with the clutch. This causes the
clutch to slip and can actually burn up the clutch.
•Never coast with the clutch disengaged. The high RPM (sometimes
over 10000) can actually burst the facing material of the clutch.
•Never engage the clutch while coasting. Re-engaging the clutch after
coasting may not only cause a great shock to the clutch, but the
whole drivetrain. Internal engine damage or clutch and flywheel
failure can result from this.
Transmission123
2015 F-650/750(f67)
Owners Guide gf(ownloose), 1st Printing, December 2013
Canadian_French(fr_can)
Page 125 of 384
If the transmission is equipped with a ceramic clutch, you must start
your vehicle moving in first gear and engage the clutch before pressing
the accelerator at idle. In addition, do not try to slip the clutch by raising
engine RPM and riding or feathering the clutch pedal since this causes
erratic engagement that can cause engine stalling and potential serious
damage to driveline components.
Clutch Brake (Non-Synchronized Transmissions) - Vehicle
Stationary
A clutch brake stops transmission input shaft rotation so you can
accomplish the initial first gear or reverse gear selection when your
vehicle is stationary and the engine is at idle speed. Clutch brake
application occurs in the last 1 inch (25 millimeters) of clutch pedal
travel.
When using the clutch brake, fully press the clutch pedal and shift the
transmission into first gear or reverse. If the transmission does not go
into one of these gears, slowly release the clutch pedal while applying
light pressure on the transmission shift lever until it shifts into gear.
Note:After engagement of first gear, do not use the clutch brake for
upshifting or downshifting. If you do, clutch brake life shortens and gear
selection shift efforts may increase.
Double-Clutch Procedures - Non-Synchronized Transmissions
In order to properly upshift or downshift:
1. Press the clutch pedal to disengage the clutch.
2. Shift the transmission into neutral.
3. Release the clutch pedal.
If upshifting, wait until the engine speed matches the transmission speed
of the gear you are selecting.
If downshifting, accelerate the engine until the engine speed matches the
input speed of the gear you are selecting. Press the clutch pedal
immediately and shift into the desired gear, then release the clutch
pedal.
124Transmission
2015 F-650/750(f67)
Owners Guide gf(ownloose), 1st Printing, December 2013
Canadian_French(fr_can)
Page 126 of 384
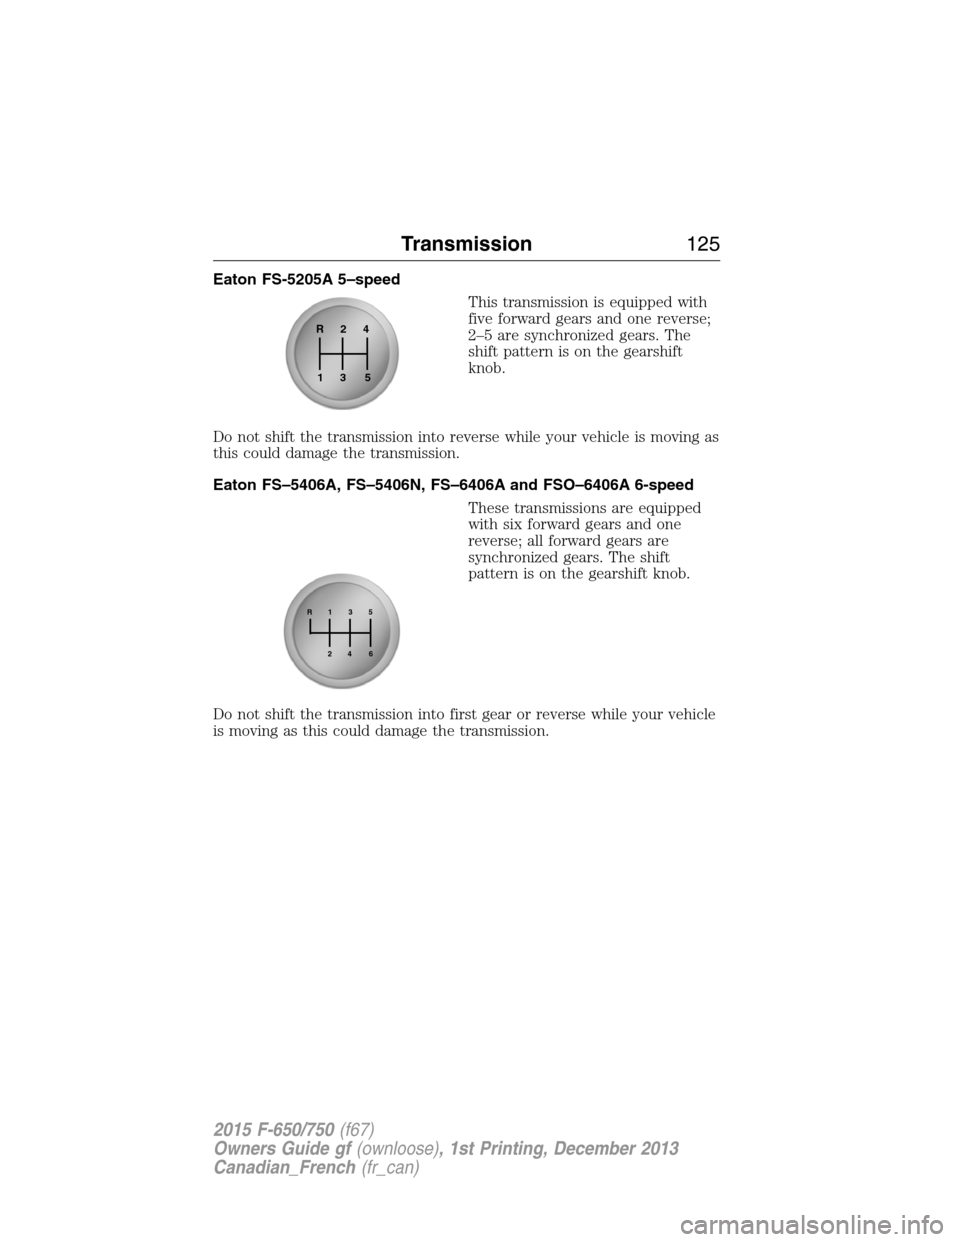
Eaton FS-5205A 5–speed
This transmission is equipped with
five forward gears and one reverse;
2–5 are synchronized gears. The
shift pattern is on the gearshift
knob.
Do not shift the transmission into reverse while your vehicle is moving as
this could damage the transmission.
Eaton FS–5406A, FS–5406N, FS–6406A and FSO–6406A 6-speed
These transmissions are equipped
with six forward gears and one
reverse; all forward gears are
synchronized gears. The shift
pattern is on the gearshift knob.
Do not shift the transmission into first gear or reverse while your vehicle
is moving as this could damage the transmission.
R24
5 3 1
R13
465
2
Transmission125
2015 F-650/750(f67)
Owners Guide gf(ownloose), 1st Printing, December 2013
Canadian_French(fr_can)
Page 127 of 384
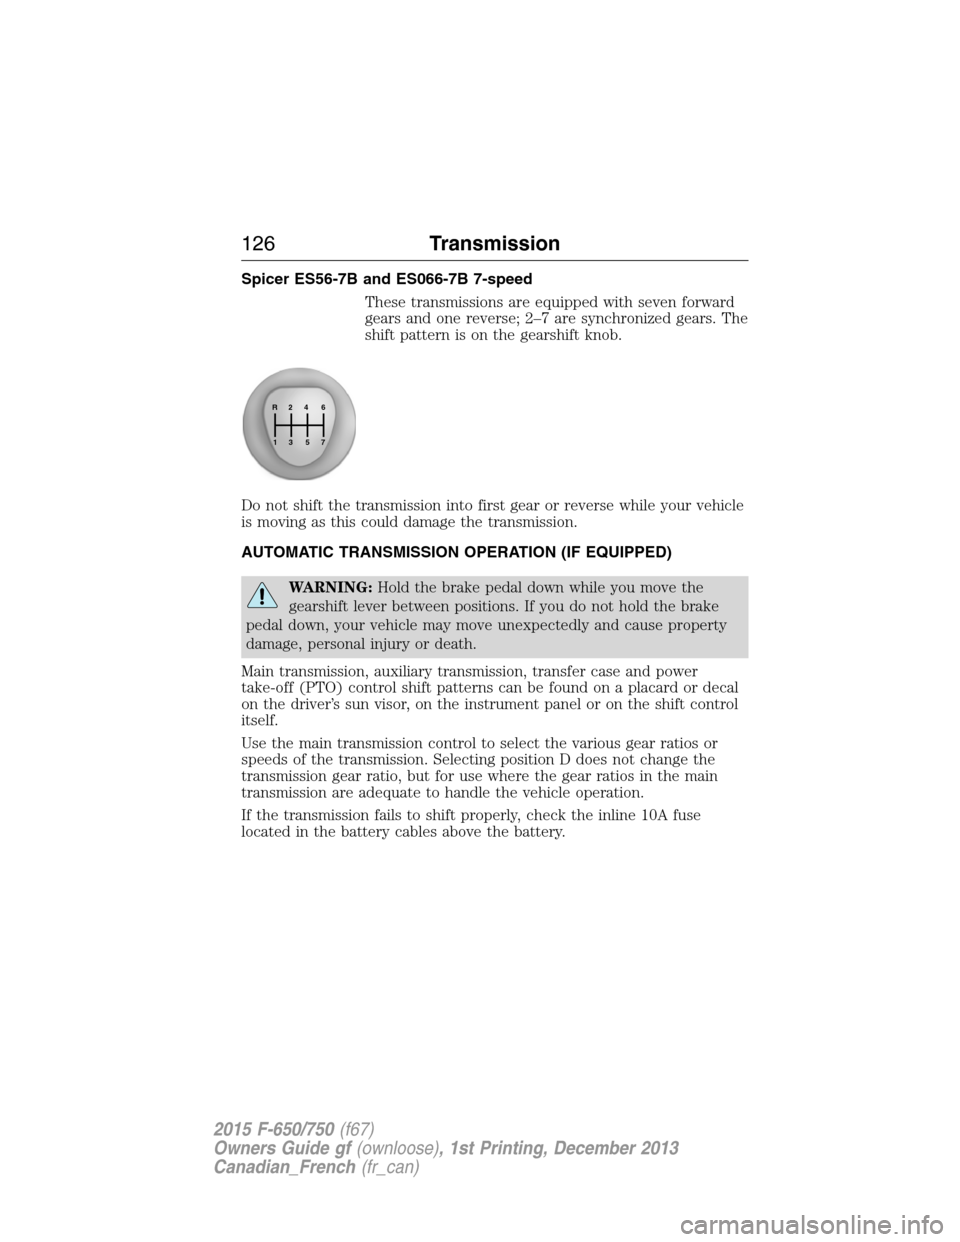
Spicer ES56-7B and ES066-7B 7-speed
These transmissions are equipped with seven forward
gears and one reverse; 2–7 are synchronized gears. The
shift pattern is on the gearshift knob.
Do not shift the transmission into first gear or reverse while your vehicle
is moving as this could damage the transmission.
AUTOMATIC TRANSMISSION OPERATION (IF EQUIPPED)
WARNING:Hold the brake pedal down while you move the
gearshift lever between positions. If you do not hold the brake
pedal down, your vehicle may move unexpectedly and cause property
damage, personal injury or death.
Main transmission, auxiliary transmission, transfer case and power
take-off (PTO) control shift patterns can be found on a placard or decal
on the driver’s sun visor, on the instrument panel or on the shift control
itself.
Use the main transmission control to select the various gear ratios or
speeds of the transmission. Selecting position D does not change the
transmission gear ratio, but for use where the gear ratios in the main
transmission are adequate to handle the vehicle operation.
If the transmission fails to shift properly, check the inline 10A fuse
located in the battery cables above the battery.
R24
576
3 1
126Transmission
2015 F-650/750(f67)
Owners Guide gf(ownloose), 1st Printing, December 2013
Canadian_French(fr_can)
Page 128 of 384
Brake-shift Interlock
Vehicles equipped with a gasoline engine have a brake-shift interlock
feature that prevents you from moving the gearshift lever from position
Pwhen the ignition is in the on position and the brake pedal is not
pressed.
If you cannot move the gearshift lever out of positionPwith the ignition
in the on position and the brake pedal pressed, it is possible that a fuse
has blown or your vehicle’s brake lamps are not operating properly. See
theFuseschapter.
WARNING:Do not drive your vehicle until you verify that the
brake lamps are working.
WARNING:When doing this procedure, you will be taking the
vehicle out of park which means the vehicle can roll freely. To
avoid unwanted vehicle movement, always fully set the parking brake
prior to doing this procedure. Use wheel chocks if appropriate.
WARNING:If the parking brake is fully released, but the brake
warning lamp remains illuminated, the brakes may not be
working properly. See your authorized dealer.
Transmission127
2015 F-650/750(f67)
Owners Guide gf(ownloose), 1st Printing, December 2013
Canadian_French(fr_can)
Page 129 of 384
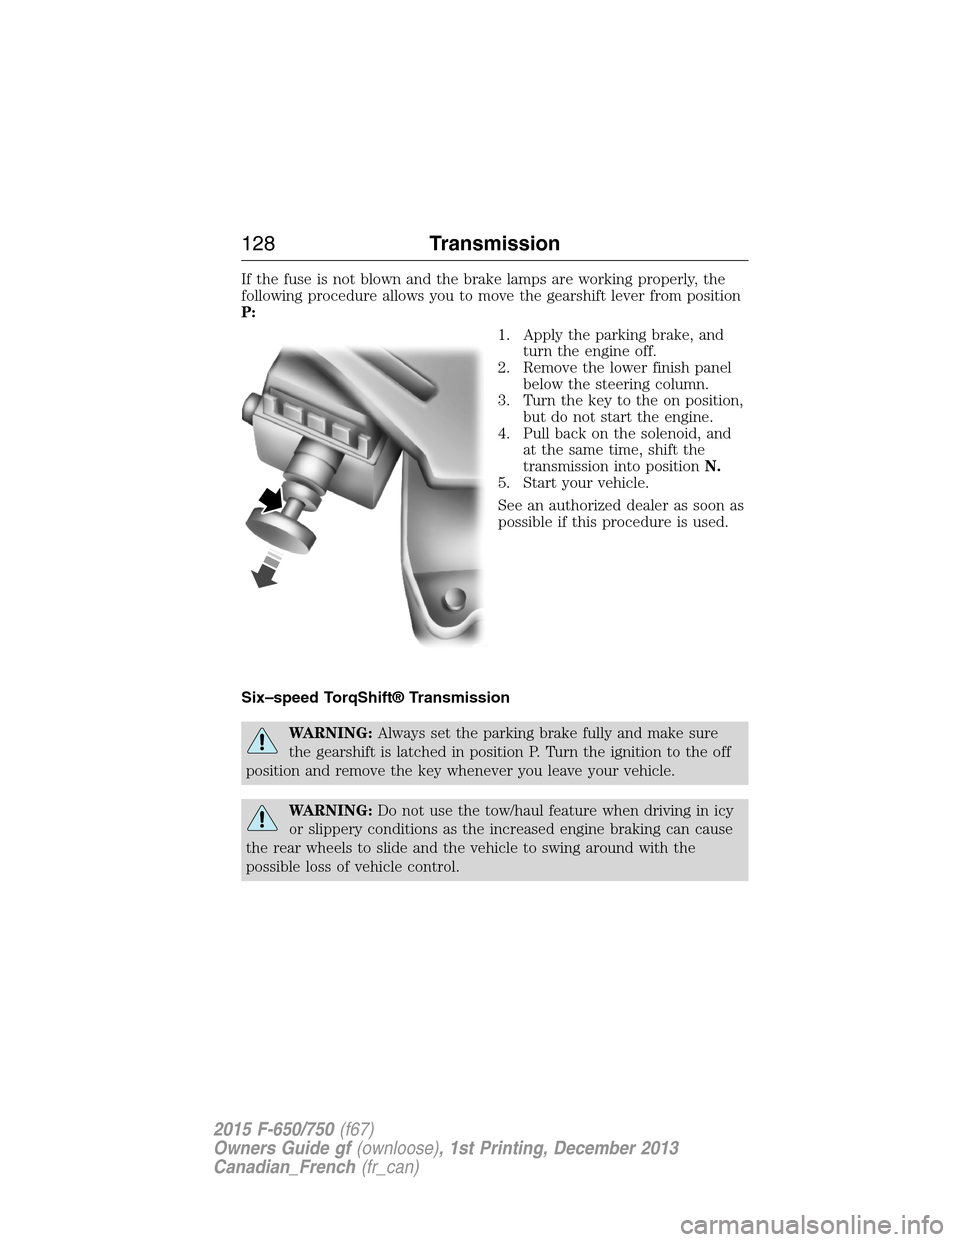
If the fuse is not blown and the brake lamps are working properly, the
following procedure allows you to move the gearshift lever from position
P:
1. Apply the parking brake, and
turn the engine off.
2. Remove the lower finish panel
below the steering column.
3. Turn the key to the on position,
but do not start the engine.
4. Pull back on the solenoid, and
at the same time, shift the
transmission into positionN.
5. Start your vehicle.
See an authorized dealer as soon as
possible if this procedure is used.
Six–speed TorqShift® Transmission
WARNING:Always set the parking brake fully and make sure
the gearshift is latched in position P. Turn the ignition to the off
position and remove the key whenever you leave your vehicle.
WARNING:Do not use the tow/haul feature when driving in icy
or slippery conditions as the increased engine braking can cause
the rear wheels to slide and the vehicle to swing around with the
possible loss of vehicle control.
128Transmission
2015 F-650/750(f67)
Owners Guide gf(ownloose), 1st Printing, December 2013
Canadian_French(fr_can)
Page 130 of 384
Position P
This position locks the transmission and prevents the rear wheels from
turning.
To put your vehicle in gear:
1. Start the engine.
2. Press the brake pedal.
3. Move the gearshift lever into the desired gear.
To put your vehicle in positionP:
1. Come to a complete stop.
2. Move the gearshift lever and securely latch it in positionP.
Position R
With the gearshift lever in positionR,your vehicle moves backward.
Always come to a complete stop before shifting into and out of position
R.
Position N
With the gearshift lever in positionN,you can start your vehicle and it is
free to roll. Hold the brake pedal down while in this position.
Position D
This is the normal driving position for the best fuel economy. This
position allows automatic upshifts and downshifts in gears one through
six.
Position 4
This position allows automatic upshifts and downshifts in gears one
through four.
Position 2
Use this position to start-up on slippery roads or provide extra engine
braking on downgrades.
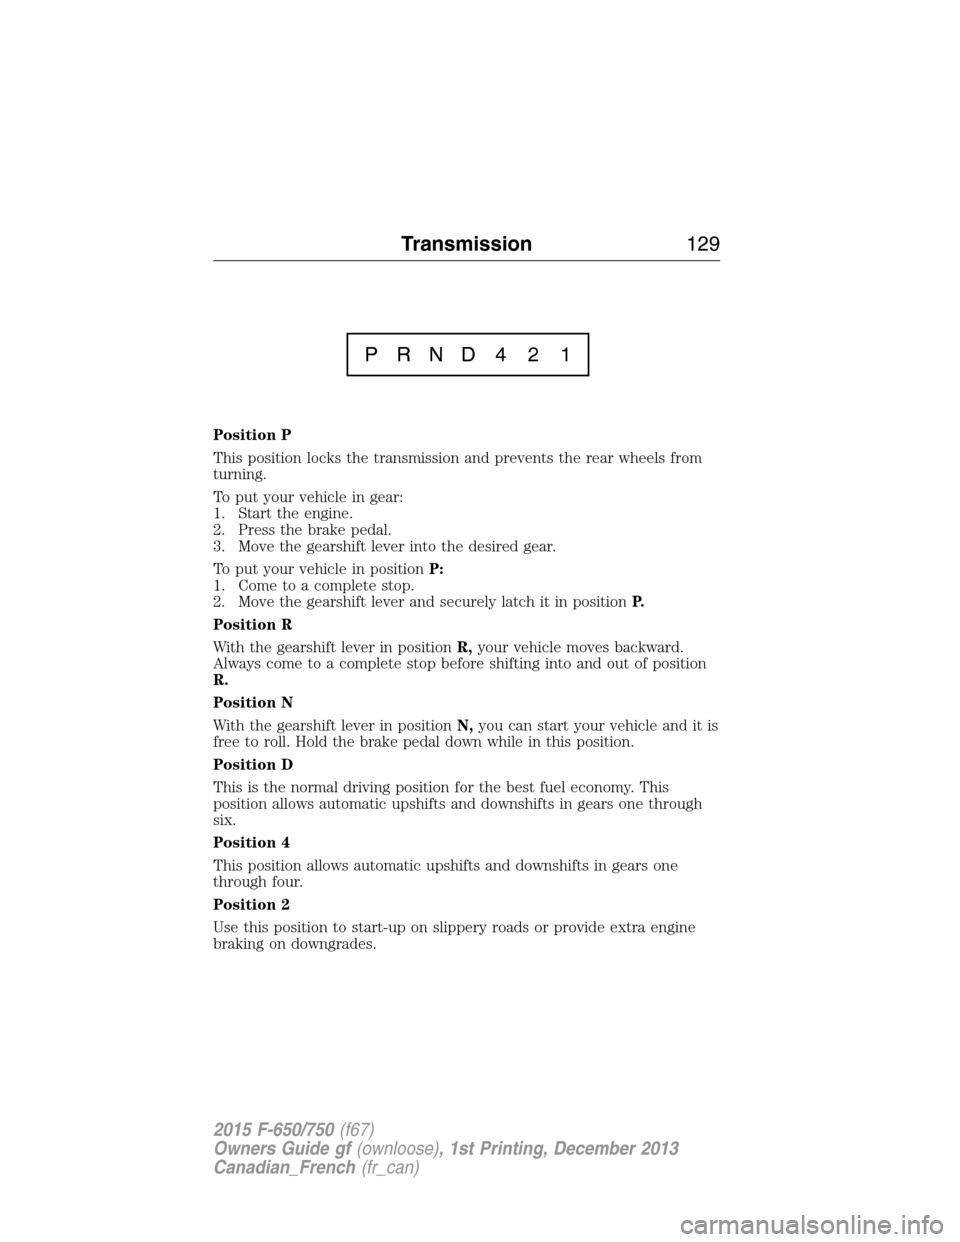
PRND 4 2 1
Transmission129
2015 F-650/750(f67)
Owners Guide gf(ownloose), 1st Printing, December 2013
Canadian_French(fr_can)