FORD F750 2015 13.G Owners Manual
Manufacturer: FORD, Model Year: 2015, Model line: F750, Model: FORD F750 2015 13.GPages: 384, PDF Size: 4.95 MB
Page 211 of 384
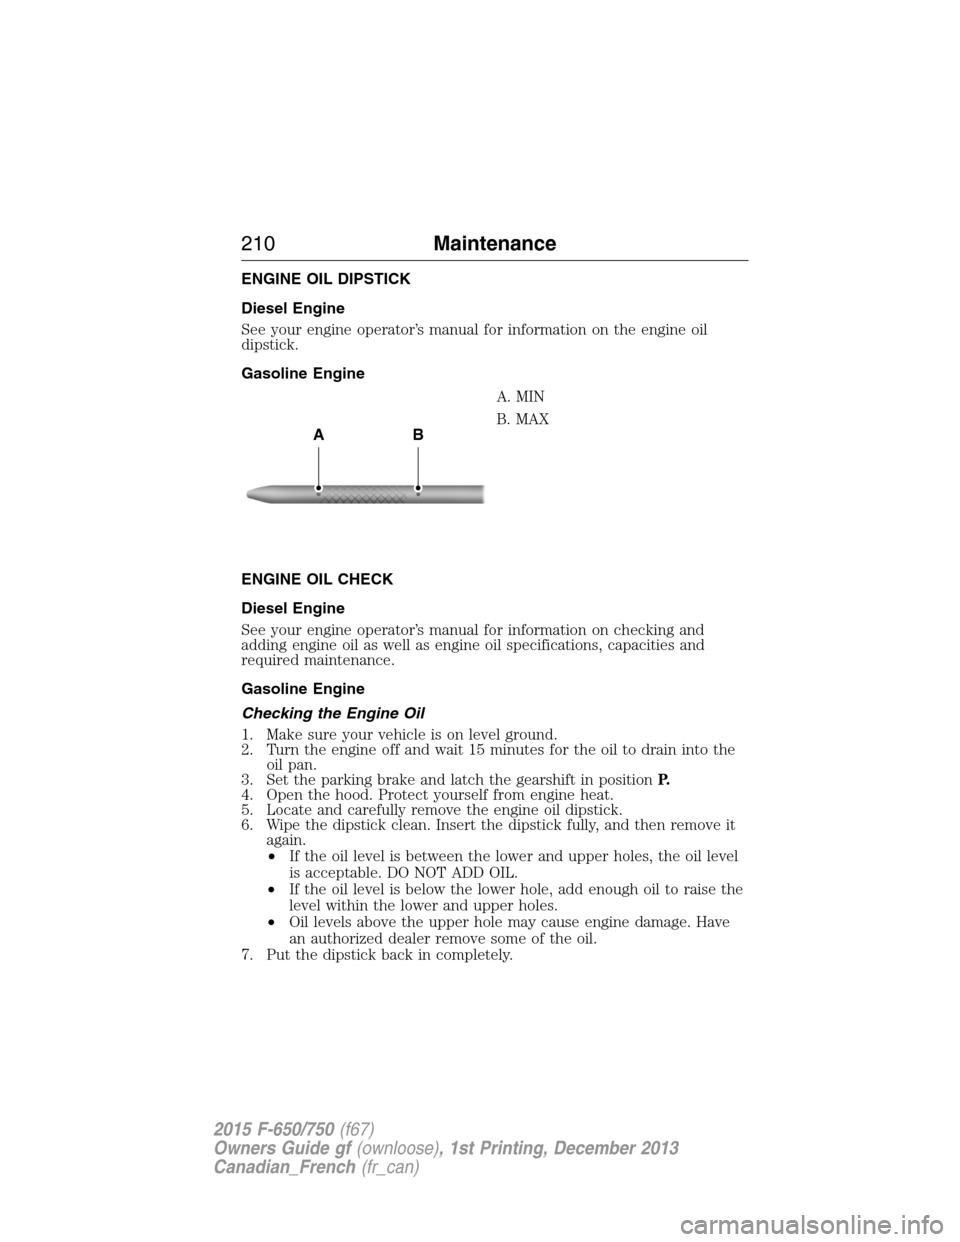
ENGINE OIL DIPSTICK
Diesel Engine
See your engine operator’s manual for information on the engine oil
dipstick.
Gasoline Engine
A. MIN
B. MAX
ENGINE OIL CHECK
Diesel Engine
See your engine operator’s manual for information on checking and
adding engine oil as well as engine oil specifications, capacities and
required maintenance.
Gasoline Engine
Checking the Engine Oil
1. Make sure your vehicle is on level ground.
2. Turn the engine off and wait 15 minutes for the oil to drain into the
oil pan.
3. Set the parking brake and latch the gearshift in positionP.
4. Open the hood. Protect yourself from engine heat.
5. Locate and carefully remove the engine oil dipstick.
6. Wipe the dipstick clean. Insert the dipstick fully, and then remove it
again.
•If the oil level is between the lower and upper holes, the oil level
is acceptable. DO NOT ADD OIL.
•If the oil level is below the lower hole, add enough oil to raise the
level within the lower and upper holes.
•Oil levels above the upper hole may cause engine damage. Have
an authorized dealer remove some of the oil.
7. Put the dipstick back in completely.
AB
210Maintenance
2015 F-650/750(f67)
Owners Guide gf(ownloose), 1st Printing, December 2013
Canadian_French(fr_can)
Page 212 of 384
Adding Engine Oil
Note:Do not remove the engine oil dipstick or the filler cap when the
engine is running.
Note:Do not add engine oil further than the MAX mark. Oil levels above
the MAX mark may cause engine damage.
Only use oils certified for gasoline engines by the
American Petroleum Institute (API). Oil with this
trademark symbol conforms to the current engine and
emission system protection standards and fuel
economy requirements of the International Lubricants
Specification Advisory Council (ILSAC), comprised of
U.S. and Japanese automobile manufacturers.
1. Check the engine oil level.
2. If the engine oil level is not within the normal range, add engine oil
that meets Ford specifications. SeeCapacities and Specifications
for more information. Remove the engine oil filler cap and use a
funnel to pour the engine oil into the opening.
3. Recheck the engine oil level. Make sure the oil level is not above the
normal operating range on the engine oil dipstick.
4. Put the dipstick back in completely.
5. Fully install the oil filler cap by turning it clockwise until it clicks or
stops turning.
ENGINE COOLANT CHECK
Diesel Engine
See your engine operator’s manual for information on checking and
adding engine coolant.
Fan Clutches
WARNING:Stay clear of the fan and fan area while the engine is
running or possible personal injury may occur.
Your vehicle’s cooling system is equipped with a viscous fan clutch
which:
•Helps control cooling, increases performance, improves fuel economy
and reduces noise.
•Bimetallic spring sensors control. Do not tamper with these sensors
as this may change their calibration or keep the fan clutch from
operating at all.
Maintenance211
2015 F-650/750(f67)
Owners Guide gf(ownloose), 1st Printing, December 2013
Canadian_French(fr_can)
Page 213 of 384
Gasoline Engine
Checking the Engine Coolant
When the engine is cold, check the concentration and level of engine
coolant at the intervals listed in theScheduled Maintenancechapter.
Note:Make sure that the level is between the MIN and MAX marks on
the coolant reservoir.
Note:Coolant expands when it is hot. The level may extend beyond the
MAX mark.
Note:If the level is at the MIN mark, below the MIN mark, or empty,
add coolant immediately. SeeAdding engine coolantin this section.
Note:For best results, coolant concentration should be tested with a
refractometer such as Rotunda tool 300-ROB75240 available from an
authorized dealer. Ford does not recommend the use of hydrometers or
coolant test strips for measuring coolant concentrations.
Note:Automotive fluids are not interchangeable; do not use engine
coolant, antifreeze or windshield washer fluid outside of its specified
function and vehicle location.
Adding Engine Coolant
WARNING:Do not add engine coolant when the engine is hot.
Steam and scalding liquids released from a hot cooling system
can burn you badly. Also, you can be burned if you spill coolant on hot
engine parts.
WARNING:Do not put engine coolant in the windshield washer
fluid container. If sprayed on the windshield, engine coolant
could make it difficult to see through the windshield.
WARNING:To reduce the risk of personal injury, make sure the
engine is cool before unscrewing the coolant pressure relief cap.
The cooling system is under pressure; steam and hot liquid can come
out forcefully when the cap is loosened slightly.
WARNING:Do not add coolant further than the MAX mark.
212Maintenance
2015 F-650/750(f67)
Owners Guide gf(ownloose), 1st Printing, December 2013
Canadian_French(fr_can)
Page 214 of 384
Note:Do not use stop leak pellets or cooling system sealants or
additives as they can cause damage to the engine cooling and heating
systems. Your vehicle’s warranty does not cover this damage.
Note:During normal vehicle operation, the engine coolant may change
color from orange to pink or light red. As long as the engine coolant is
clear and uncontaminated, this color change does not indicate the engine
coolant has degraded nor does it require draining the engine coolant,
flushing the system, or replacing the engine coolant.
•DO NOT MIX different colors or types of coolant in your vehicle.
Make sure the correct coolant is used. Mixing of engine coolants may
harm your engine’s cooling system. The use of an improper coolant
may harm engine and cooling system components and may void the
warranty. Use prediluted engine coolant meeting the Ford
specification. See theCapacities and Specificationschapter for
more information.
•In case of emergency, you may add a large amount of water without
engine coolant in order to reach a vehicle service location. In this
instance, drain the cooling system, chemically clean it with Motorcraft
Premium Cooling System Flush, and refill it with engine coolant as
soon as possible. Water alone (without engine coolant) can cause
engine damage from corrosion, overheating or freezing.
•Do not use alcohol, methanol, brine or any engine coolants mixed
with alcohol or methanol antifreeze (coolant). Alcohol and other
liquids can cause engine damage from overheating or freezing.
•Do not add extra inhibitors or additives to the coolant. These can be
harmful and compromise the corrosion protection of the engine
coolant.
Unscrew the cap slowly. Any pressure escapes as you unscrew the cap.
Add prediluted engine coolant meeting the Ford specification. See
Capacities and Specificationsfor more information.
Whenever you add coolant, check the coolant level in the coolant
reservoir the next few times you drive your vehicle. If necessary, add
enough prediluted engine coolant to bring the coolant level to the proper
level.
Recycled Engine Coolant
Ford Motor Company does not recommend the use of recycled engine
coolant since a Ford-approved recycling process is not yet available.
Dispose of used engine coolant in an appropriate manner. Follow your
community’s regulations and standards for recycling and disposing of
automotive fluids.
Maintenance213
2015 F-650/750(f67)
Owners Guide gf(ownloose), 1st Printing, December 2013
Canadian_French(fr_can)
Page 215 of 384
Severe Climates
If you drive in extremely cold climates:
•It may be necessary to have an authorized dealer increase the coolant
concentration above 50%.
•A coolant concentration of 60% provides improved freeze point
protection. Engine coolant concentrations above 60% decrease the
overheat protection characteristics of the engine coolant and may
cause engine damage.
If you drive in extremely hot climates:
•It may be necessary to have an authorized dealer decrease the
coolant concentration to 40%.
•A coolant concentration of 40% provides improved overheat
protection. Engine coolant concentrations below 40% decrease the
corrosion and freeze protection characteristics of the engine coolant
and may cause engine damage.
Vehicles driven year-round in non-extreme climates should use
prediluted engine coolant for optimum cooling system and engine
protection.
What You Should Know About Fail-Safe Cooling (If Equipped)
(Gasoline Engine Only)
WARNING:If fail-safe cooling activates, pull off the road as soon
as safely possible and turn the engine off. The engine may
automatically shut off while driving without further indication.
If the engine coolant supply is very low, this feature allows you to drive
your vehicle temporarily before incremental component damage occurs.
The fail-safe distance depends on ambient temperatures, vehicle load and
terrain.
How Fail-Safe Cooling Works
If the engine begins to overheat:
•The engine coolant temperature gauge moves to the red (hot) area.
•The information display indicates the engine is overheating.
•The service engine soon indicator illuminates.
If the engine reaches a preset over-temperature condition, the engine
automatically switches to alternating cylinder operation. Each disabled
cylinder acts as an air pump and cools the engine.
214Maintenance
2015 F-650/750(f67)
Owners Guide gf(ownloose), 1st Printing, December 2013
Canadian_French(fr_can)
Page 216 of 384
When Fail-Safe Mode Turns On
WARNING:Never remove the coolant reservoir cap while the
engine is running or hot.
Note:Driving your vehicle without repairing the engine problem
increases the chance of engine damage. Take your vehicle to an
authorized dealer as soon as possible.
You have limited engine power when in the fail-safe mode, so drive your
vehicle with caution. Your vehicle is not able to maintain high-speed
operation and the engine runs rough. Remember that the engine is
capable of completely shutting down automatically to prevent engine
damage; therefore:
1. Pull off the road as soon as safely possible and turn off the engine.
2. Have your vehicle taken to an authorized dealer.
3. If this is not possible, wait a short period for the engine to cool.
4. Check the coolant level and replenish if low.
5. Restart the engine and take your vehicle to an authorized dealer.
TRANSMISSION FLUID CHECK
Allison Automatic Transmissions
See yourAllison Automatic Transmission Operator’s Manualfor
scheduled transmission fluid checks and change intervals. Your
transmission does not consume fluid. However, you should check the
fluid level if the transmission is not working properly. For example, if the
transmission slips or shifts slowly or if you notice some sign of fluid
leakage.
Automatic transmission fluid expands when warmed. To obtain an
accurate fluid check, drive your vehicle until it is at normal operating
temperature, approximately 20 miles (30 kilometers). Verify that the
transmission fluid temperature gauge, located on the instrument cluster,
is within the normal range.
1. Drive your vehicle 20 miles (30 kilometers) or until it reaches normal
operating temperature.
2. Park your vehicle on a level surface and engage the parking brake.
3. With the engine running, parking brake engaged and your foot on the
brake pedal, move the gearshift lever through all of the gear ranges.
Allow sufficient time for each gear to engage.
4. Latch the gearshift lever in positionNorPand leave the engine
running.
5. Remove the dipstick, wiping it clean with a clean, dry, lint-free rag.
Maintenance215
2015 F-650/750(f67)
Owners Guide gf(ownloose), 1st Printing, December 2013
Canadian_French(fr_can)
Page 217 of 384
6. Install the dipstick making sure to seat it fully in the filler tube.
7. Remove the dipstick and inspect the fluid level. The fluid should be
in the designated area for normal operating temperature or ambient
temperature.
If you must add transmission fluid, see yourAllison Automatic
Transmission Operator’s Manualfor the correct fluid type.Use of a
non-approved automatic transmission fluid may cause internal
transmission component damage.
Fluid levels above the safe range may result in transmission failure. An
overfill condition of transmission fluid may cause shift or engagement
concerns or possible damage.
TorqShift® Automatic Transmission
See theScheduled Maintenancechapter for scheduled intervals for
fluid checks and changes. Your transmission does not consume fluid.
However, you should check the fluid level if the transmission is not
working properly. For example, if the transmission slips or shifts slowly
or if you notice some sign of fluid leakage.
Automatic transmission fluid expands when warmed. To obtain an
accurate fluid check, drive your vehicle until it is at normal operating
temperature, approximately 20 miles (30 kilometers). Verify that the
transmission fluid temperature gauge, located on the instrument cluster,
is within the normal range.
1. Drive your vehicle 20 miles (30 kilometers) or until it reaches normal
operating temperature.
2. Park your vehicle on a level surface and engage the parking brake.
3. With the engine running, parking brake engaged and your foot on the
brake pedal, move the gearshift lever through all of the gear ranges.
Allow sufficient time for each gear to engage.
4. Latch the gearshift lever in positionPand leave the engine running.
5. Remove the dipstick, wiping it clean with a clean, dry, lint-free rag.
6. Install the dipstick making sure to seat it fully in the filler tube.
7. Remove the dipstick and inspect the fluid level. The fluid should be
in the designated area for normal operating temperature or ambient
temperature.
216Maintenance
2015 F-650/750(f67)
Owners Guide gf(ownloose), 1st Printing, December 2013
Canadian_French(fr_can)
Page 218 of 384
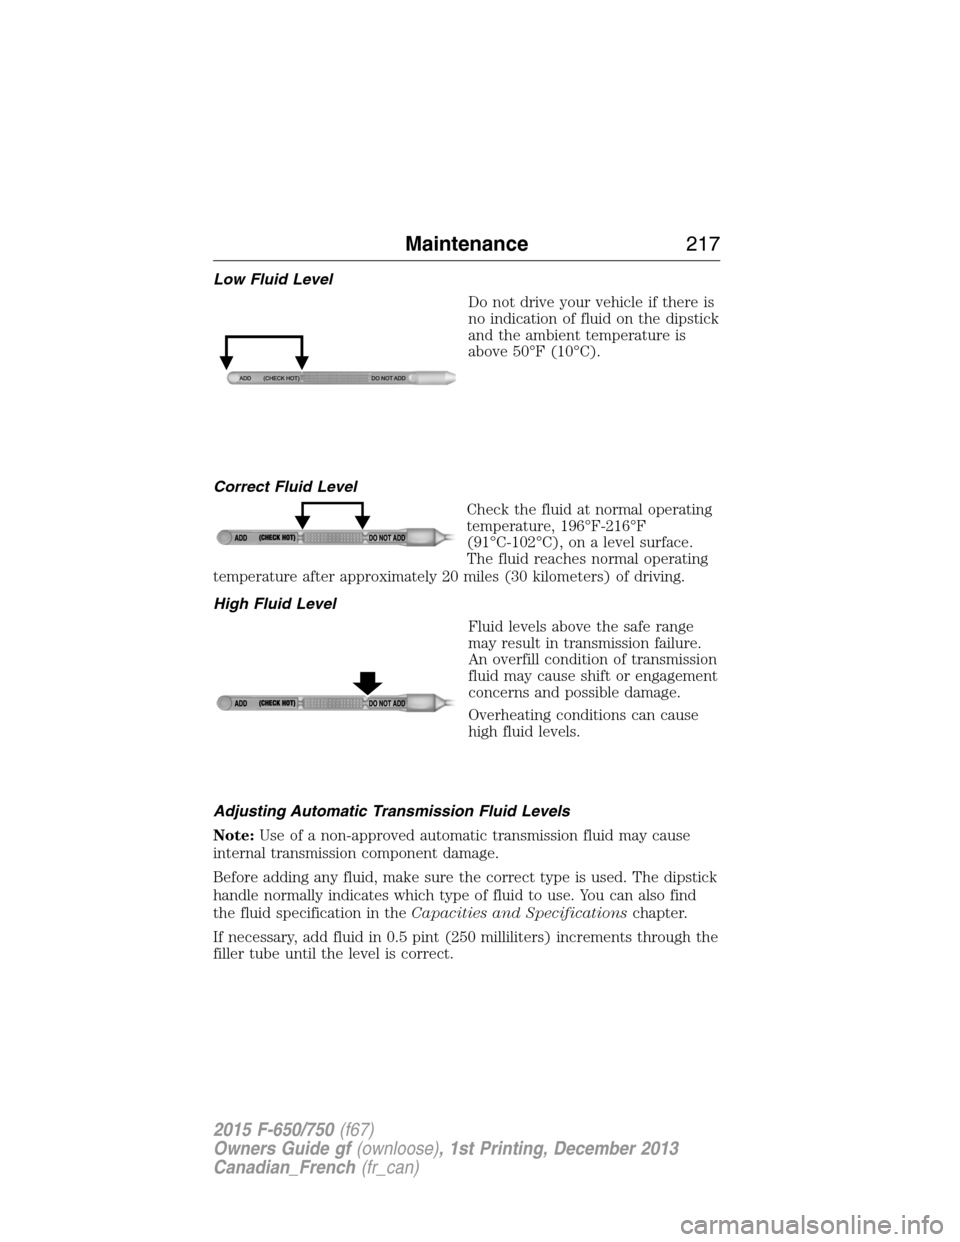
Low Fluid Level
Do not drive your vehicle if there is
no indication of fluid on the dipstick
and the ambient temperature is
above 50°F (10°C).
Correct Fluid Level
Check the fluid at normal operating
temperature, 196°F-216°F
(91°C-102°C), on a level surface.
The fluid reaches normal operating
temperature after approximately 20 miles (30 kilometers) of driving.
High Fluid Level
Fluid levels above the safe range
may result in transmission failure.
An overfill condition of transmission
fluid may cause shift or engagement
concerns and possible damage.
Overheating conditions can cause
high fluid levels.
Adjusting Automatic Transmission Fluid Levels
Note:Use of a non-approved automatic transmission fluid may cause
internal transmission component damage.
Before adding any fluid, make sure the correct type is used. The dipstick
handle normally indicates which type of fluid to use. You can also find
the fluid specification in theCapacities and Specificationschapter.
If necessary, add fluid in 0.5 pint (250 milliliters) increments through the
filler tube until the level is correct.
Maintenance217
2015 F-650/750(f67)
Owners Guide gf(ownloose), 1st Printing, December 2013
Canadian_French(fr_can)
Page 219 of 384
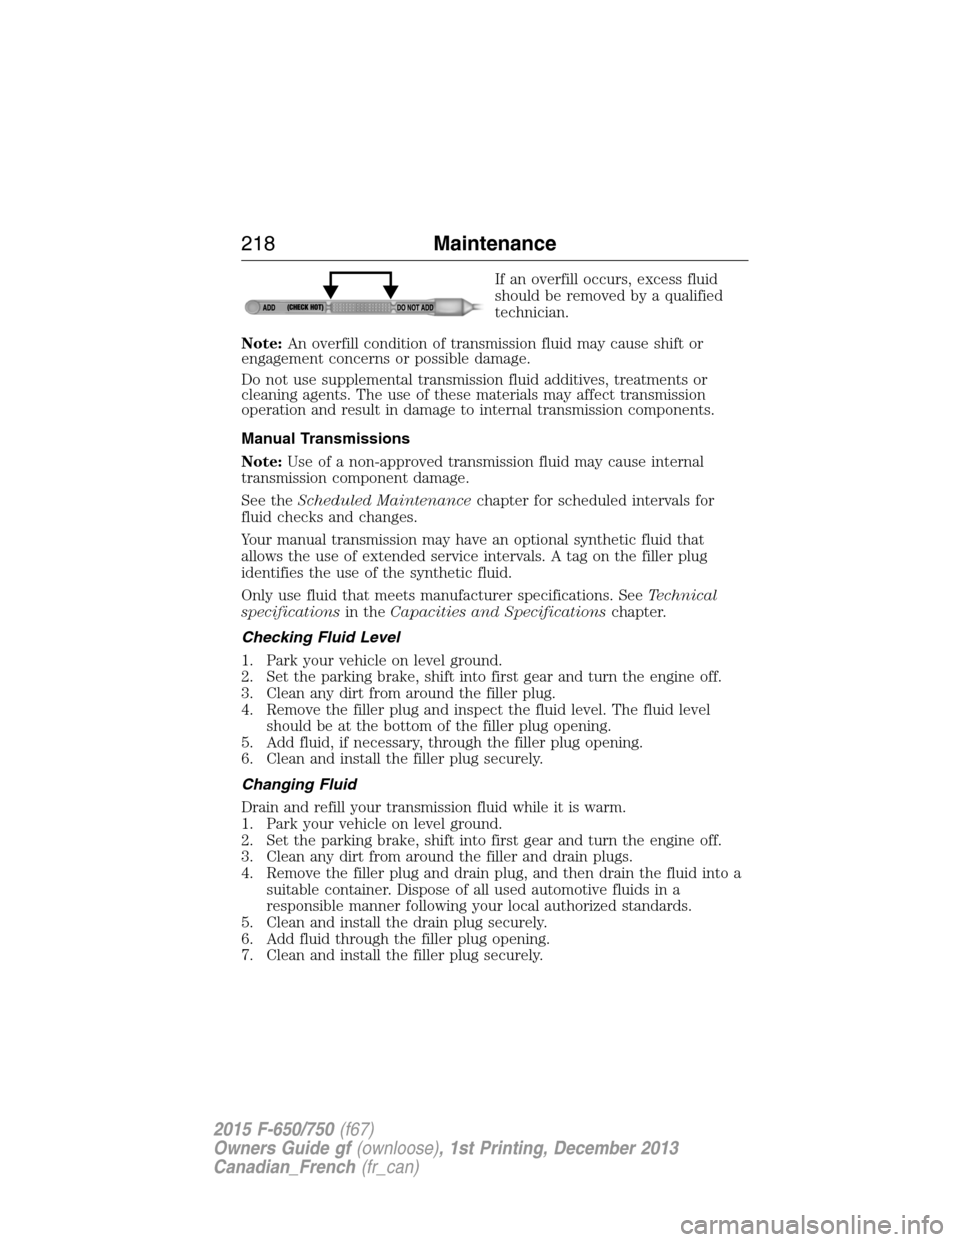
If an overfill occurs, excess fluid
should be removed by a qualified
technician.
Note:An overfill condition of transmission fluid may cause shift or
engagement concerns or possible damage.
Do not use supplemental transmission fluid additives, treatments or
cleaning agents. The use of these materials may affect transmission
operation and result in damage to internal transmission components.
Manual Transmissions
Note:Use of a non-approved transmission fluid may cause internal
transmission component damage.
See theScheduled Maintenancechapter for scheduled intervals for
fluid checks and changes.
Your manual transmission may have an optional synthetic fluid that
allows the use of extended service intervals. A tag on the filler plug
identifies the use of the synthetic fluid.
Only use fluid that meets manufacturer specifications. SeeTechnical
specificationsin theCapacities and Specificationschapter.
Checking Fluid Level
1. Park your vehicle on level ground.
2. Set the parking brake, shift into first gear and turn the engine off.
3. Clean any dirt from around the filler plug.
4. Remove the filler plug and inspect the fluid level. The fluid level
should be at the bottom of the filler plug opening.
5. Add fluid, if necessary, through the filler plug opening.
6. Clean and install the filler plug securely.
Changing Fluid
Drain and refill your transmission fluid while it is warm.
1. Park your vehicle on level ground.
2. Set the parking brake, shift into first gear and turn the engine off.
3. Clean any dirt from around the filler and drain plugs.
4. Remove the filler plug and drain plug, and then drain the fluid into a
suitable container. Dispose of all used automotive fluids in a
responsible manner following your local authorized standards.
5. Clean and install the drain plug securely.
6. Add fluid through the filler plug opening.
7. Clean and install the filler plug securely.
218Maintenance
2015 F-650/750(f67)
Owners Guide gf(ownloose), 1st Printing, December 2013
Canadian_French(fr_can)
Page 220 of 384
DRIVESHAFT
Check the universal joints for any evidence of wear or looseness at the
regular lubrication interval. Stop your vehicle immediately, should
driveshaft vibrations occur, to avoid possible hazardous consequences or
damage to other components.
REAR AXLE FLUID
Your rear axle may have an optional synthetic lubricant that allows the
use of extended service intervals. A tag on the filler plug identifies the
use of the synthetic lubricant.
Only use a lubricant that meets manufacturer specifications. See the
Capacities and Specificationschapter.Use of a non-approved rear
axle lubricant may cause internal axle component damage.
Checking the Fluid Level
See theScheduled Maintenancechapter for lubricant check intervals.
1. Park your vehicle on level ground.
2. Set the parking brake and shift into positionNorP(automatic
transmission), or first gear (manual transmission). Turn the engine
off.
3. Clean any dirt from around the axle filler plug.
4. Remove the filler plug and inspect the lubricant level. It should be at
the bottom of the filler plug opening.
5. Add lubricant, if necessary, through the filler plug opening.
6. Clean and install the filler plug securely.
Changing the Fluid
See theScheduled Maintenancechapter for lubricant change intervals.
1. Drain the rear axle while the lubricant is warm.
2. Park your vehicle on level ground.
3. Set the parking brake and shift into positionNorP(automatic
transmission), or first gear (manual transmission). Turn the engine
off.
4. Clean any dirt from around the rear axle filler and drain plugs.
5. Remove the filler and drain plugs. Drain the lubricant into a suitable
container. Dispose of all used automotive fluids in a responsible
manner following your local authorized standards.
6. Clean and install the drain plug securely.
7. Add lubricant through the filler plug opening.
8. Clean and install the filler plug securely.
Maintenance219
2015 F-650/750(f67)
Owners Guide gf(ownloose), 1st Printing, December 2013
Canadian_French(fr_can)