FORD F750 2017 13.G Owners Manual
Manufacturer: FORD, Model Year: 2017, Model line: F750, Model: FORD F750 2017 13.GPages: 382, PDF Size: 5.18 MB
Page 131 of 382
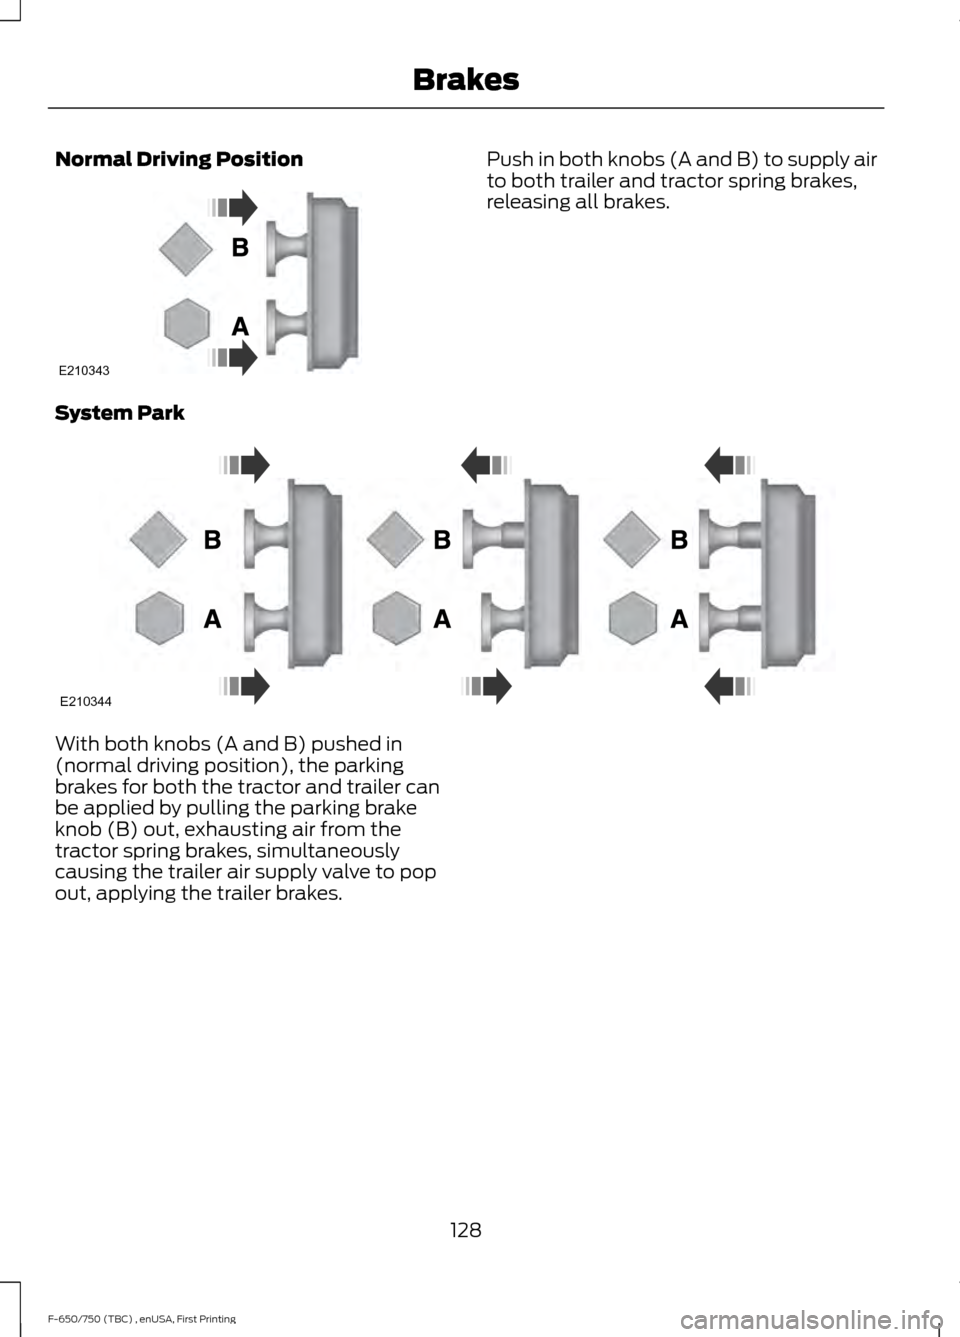
Normal Driving Position Push in both knobs (A and B) to supply air
to both trailer and tractor spring brakes,
releasing all brakes.
System Park With both knobs (A and B) pushed in
(normal driving position), the parking
brakes for both the tractor and trailer can
be applied by pulling the parking brake
knob (B) out, exhausting air from the
tractor spring brakes, simultaneously
causing the trailer air supply valve to pop
out, applying the trailer brakes.
128
F-650/750 (TBC) , enUSA, First Printing BrakesE210343 E210344
Page 132 of 382

Trailer Charge
If both knobs (A and B) are out, and you
want to recharge the trailer while leaving
the tractor spring brakes applied, the trailer
air supply (A) can be pushed in to recharge
the trailer air supply line. You can also use
this mode to park a combination vehicle
with tractor spring brakes.
Automatic Application
If both knobs (A and B) are pushed in and
the brake system air pressure is reduced
to approximately 35 psi (249 kPa), the
trailer air supply (A) knob automatically
pops out applying the emergency or
parking brakes on the trailer. If the trailer
air supply (A) knob is manually held in and
the air pressure is reduced to
approximately
30 psi (207 kPa), a tripper piston within the valve moves, exhausting
the trailer air supply, applying the trailer
brakes. Further reduction of air pressure,
while holding the trailer air supply knob in,
causes the parking brake knob to pop out
at
25 psi (172 kPa).
Actuation of Trailer Park (Emergency)
or Tractor Bobtail Position To actuate the trailer brakes only, pull out
the trailer air supply (A) knob. This applies
the trailer brakes whether the trailer uses
emergency or spring brakes.
You can also use this mode when the
tractor or truck with trailer is used during
bobtail operation.
129
F-650/750 (TBC) , enUSA, First Printing BrakesE210342 E210345 E210345
Page 133 of 382
PRINCIPLE OF OPERATION
The traction control system helps avoid
drive wheel spin and loss of traction.
If your vehicle begins to slide, the system
applies the brakes to individual wheels
and, when needed, reduces engine power
at the same time. If the wheels spin when
accelerating on slippery or loose surfaces,
the system reduces engine power in order
to increase traction.
Note:
The system does not apply the brakes
when vehicle speed is above 25 mph
(40 km/h).
USING TRACTION CONTROL -
VEHICLES WITH: AIR BRAKES WARNING
Aggressive driving in any road
conditions can cause you to lose
control of your vehicle increasing the
risk of severe personal injury or property
damage. The occurrence of a traction
control event is an indication that at least
some of the tires have exceeded their
ability to grip the road; this may lead to an
increased risk of loss of vehicle control,
vehicle rollover, personal injury and death.
If you experience a severe road event,
SLOW DOWN. Use the traction control switch on the
instrument panel to select Off Road or
Mud/Snow traction mode.
This is beneficial when your vehicle is stuck
in snow or on a slippery road surface. This
mode allows excess wheel spin to dig your
vehicle out and allows you to rock your
vehicle.
Press the switch again to select standard
traction control. The system automatically
selects standard traction control at the
next ignition cycle. System Indicator Light
Note:
If the traction control light does not
flash during a traction control event or stays
illuminated, the system is not functioning
properly. Take your vehicle to an authorized
dealer for service.
During traction control operation, the
traction control light flashes rapidly and
the engine does not rev-up when you press
further on the accelerator. This is normal
and is no reason for concern.
In Off Road or Mud/Snow mode, the
traction control light illuminates and
flashes slowly. If a traction event occurs in
either mode, the light flashes rapidly.
USING TRACTION CONTROL -
VEHICLES WITH: HYDRAULIC
BRAKES WARNING
Aggressive driving in any road
conditions can cause you to lose
control of your vehicle increasing the
risk of severe personal injury or property
damage. The occurrence of a traction
control event is an indication that at least
some of the tires have exceeded their
ability to grip the road; this may lead to an
increased risk of loss of vehicle control,
vehicle rollover, personal injury and death.
If you experience a severe road event,
SLOW DOWN. The system automatically turns on each
time you switch the ignition on.
Use the traction control switch on the
instrument panel to switch the system off
or on.
If your vehicle is stuck in mud or snow,
switching traction control off may be
beneficial as this allows the wheels to spin.
130
F-650/750 (TBC) , enUSA, First Printing Traction Control
Page 134 of 382
Press the switch again to enable the
traction control system.
System Indicator Light
Note:
If the traction control light does not
flash during a traction control event or stays
illuminated, the system is not functioning
properly. Take your vehicle to an authorized
dealer for service.
During traction control operation, the
traction control light flashes rapidly and
the engine does not rev-up when you press
further on the accelerator. This is normal
and is no reason for concern.
When traction control is disabled, the
traction control light illuminates and
flashes slowly.
131
F-650/750 (TBC) , enUSA, First Printing Traction Control
Page 135 of 382
PRINCIPLE OF OPERATION
Cruise control lets you maintain a set
speed without keeping your foot on the
accelerator pedal. You can use cruise
control when your vehicle speed is greater
than 20 mph (30 km/h).
USING CRUISE CONTROL WARNINGS
Do not use cruise control on winding
roads, in heavy traffic or when the
road surface is slippery. This could
result in loss of vehicle control, serious
injury or death. When you are going downhill, your
vehicle speed may increase above
the set speed. The system will not
apply the brakes but a warning displays.
Failure to follow this warning could result
in serious personal injury or death. Note:
Cruise control will disengage if the
vehicle speed decreases more than 10 mph
(16 km/h) below the set speed while driving
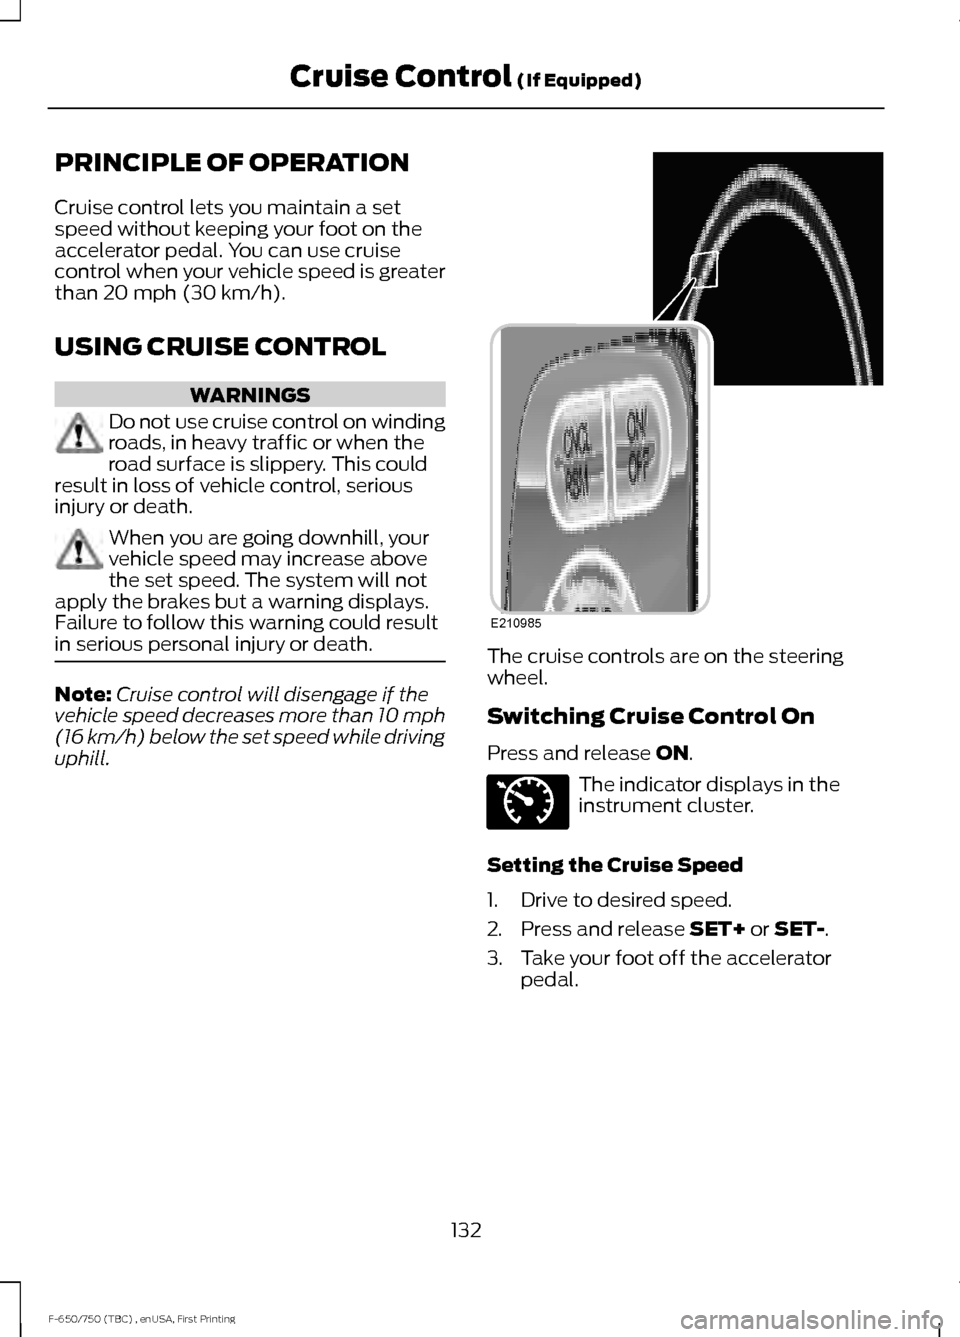
uphill. The cruise controls are on the steering
wheel.
Switching Cruise Control On
Press and release
ON.
The indicator displays in the
instrument cluster.
Setting the Cruise Speed
1. Drive to desired speed.
2. Press and release
SET+ or SET-.
3. Take your foot off the accelerator pedal.
132
F-650/750 (TBC) , enUSA, First Printing Cruise Control
(If Equipped)E210985 E71340
Page 136 of 382
Changing the Set Speed
•
Press and release SET+ or SET-. When
You select km/h as the display
measurement in the information
display, the set speed changes in
approximately 2 km/h increments.
When you select mph as the display
measurement in the information
display, the set speed changes in
approximately 1 mph increments.
• Press the accelerator or brake pedal
until you reach the desired speed. Press
and release SET+ or SET-.
• Press and hold SET+ or SET-. Release
the control when you reach the desired
speed.
Canceling the Set Speed
Press and release
CNCL or tap the brake
pedal. The set speed does not erase.
Resuming the Set Speed
Press and release
RSM.
Switching Cruise Control Off
Press and release
OFF when the system
is in stand by mode or switch the ignition
off.
Note: You erase the set speed when you
switch the system off.
133
F-650/750 (TBC) , enUSA, First Printing Cruise Control
(If Equipped)
Page 137 of 382
STEERING
To help prevent damage to the power
steering system:
•
Never hold the steering wheel at its
furthest turning points (until it stops)
for more than three to five seconds
when the engine is running.
• Do not operate the vehicle with a low
power steering pump fluid level (below
the MIN mark on the reservoir).
• Some noise is normal during operation.
If excessive, check for low power
steering pump fluid level before
seeking service by your dealer.
• Heavy or uneven efforts may be caused
by low power steering fluid. Check for
low power steering pump fluid level
before seeking service by your dealer.
• Do not fill the power steering pump
reservoir above the MAX mark on the
reservoir, as this may result in leaks
from the reservoir.
If the power steering system breaks down
(or if the engine is turned off), you can
steer the vehicle manually, but it takes
more effort.
Operating the steering system excessively
at an elevated engine RPM (>1200 rpm)
for more than 2 minutes can result in
steering system damage from overheating.
Move the steering wheel to the full left
position then full right position at idle
speed, or stop using the system for 2
minutes to allow the system to cool down.
If the power steering system exhibits heavy
or uneven efforts, check for the following
before seeking service from your dealer:
• An improperly inflated tire.
• Overloading of front suspension.
• Uneven vehicle loading.
• Binding suspension components. If the power steering system wanders or
pulls, check for:
•
An improperly inflated tire.
• Uneven vehicle loading.
• Uneven tire wear.
• Loose or worn suspension
components.
• Loose or worn steering components.
• Improper vehicle alignment.
• High crosswinds.
If any steering components are serviced or
replaced, install new fasteners (many are
coated with thread adhesive or have
prevailing torque features which may not
be re-used). Never re-use a bolt or nut.
Torque fasteners to specifications.
A high crown in the road or high crosswinds
may also make the steering seem to
wander or pull.
134
F-650/750 (TBC) , enUSA, First Printing Driving Aids
Page 138 of 382
LOAD LIMIT
WARNINGS
Do not exceed the GVWR or
the GAWR specified on the
Safety Compliance Certification
Label. Do not use replacement tires
with lower load carrying
capacities than the original tires
because they may lower the
vehicle's GVWR and GAWR
limitations. Replacement tires
with a higher limit than the
originals do not increase the
GVWR and GAWR limitations. Exceeding any vehicle weight
rating limitation could result
in serious damage to the vehicle
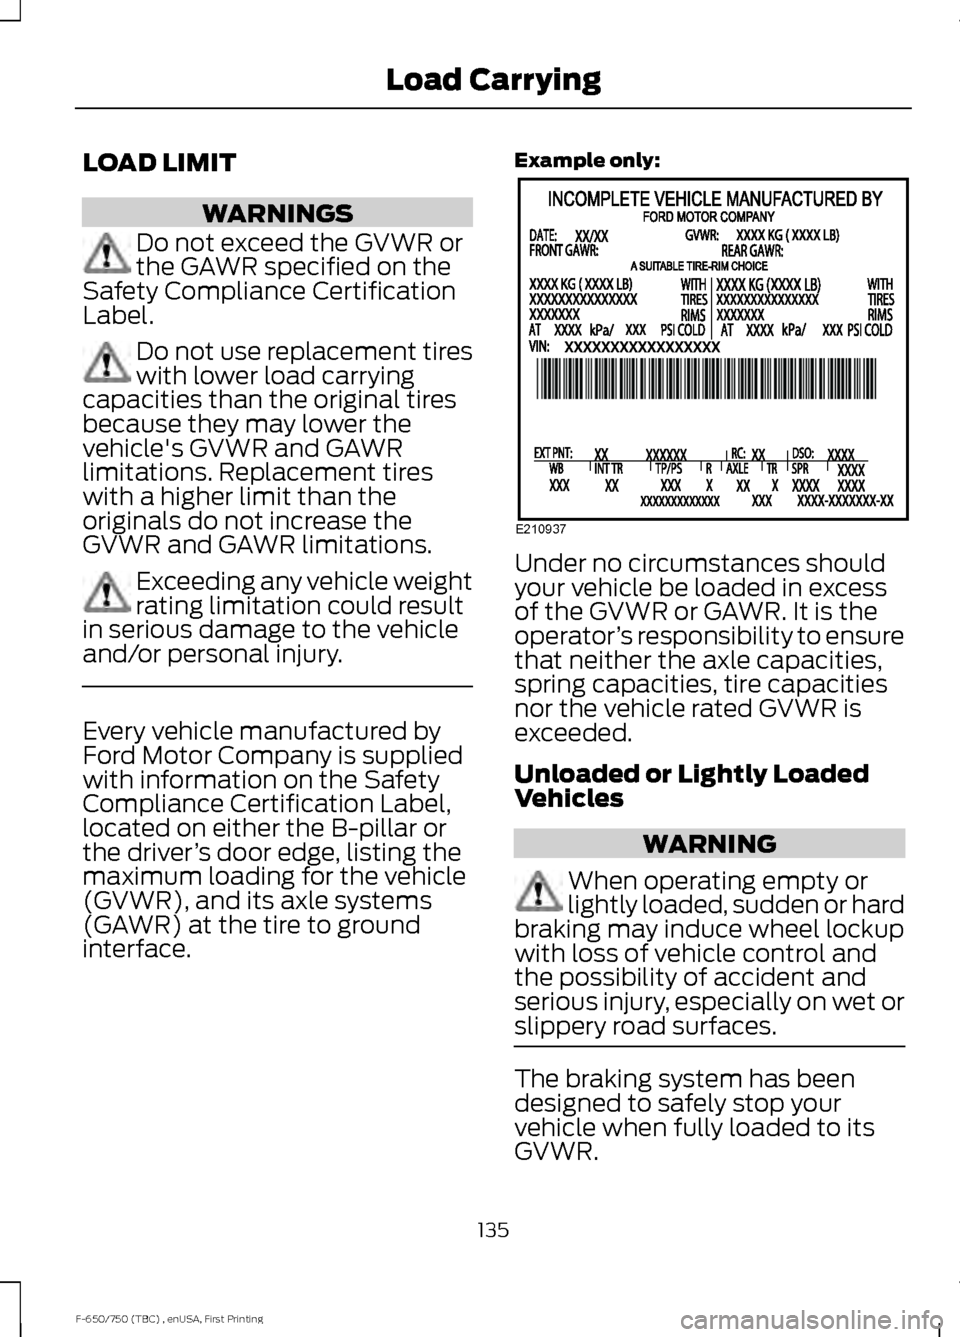
and/or personal injury. Every vehicle manufactured by
Ford Motor Company is supplied
with information on the Safety
Compliance Certification Label,
located on either the B-pillar or
the driver
’s door edge, listing the
maximum loading for the vehicle
(GVWR), and its axle systems
(GAWR) at the tire to ground
interface. Example only:
Under no circumstances should
your vehicle be loaded in excess
of the GVWR or GAWR. It is the
operator
’s responsibility to ensure
that neither the axle capacities,
spring capacities, tire capacities
nor the vehicle rated GVWR is
exceeded.
Unloaded or Lightly Loaded
Vehicles WARNING
When operating empty or
lightly loaded, sudden or hard
braking may induce wheel lockup
with loss of vehicle control and
the possibility of accident and
serious injury, especially on wet or
slippery road surfaces. The braking system has been
designed to safely stop your
vehicle when fully loaded to its
GVWR.
135
F-650/750 (TBC) , enUSA, First Printing Load CarryingE210937
Page 139 of 382
AIR SUSPENSION (If Equipped)
Note: Do not operate your vehicle without
air in the suspension springs. Operating your
vehicle without air in the suspension springs
damages the suspension, degrades ride
performance and may cause property
damage.
The air suspension system automatically
adjusts to different loads to maintain a
constant frame height, allows for ease of
vehicle loading, provides improved vehicle
ride, and increased driver comfort.
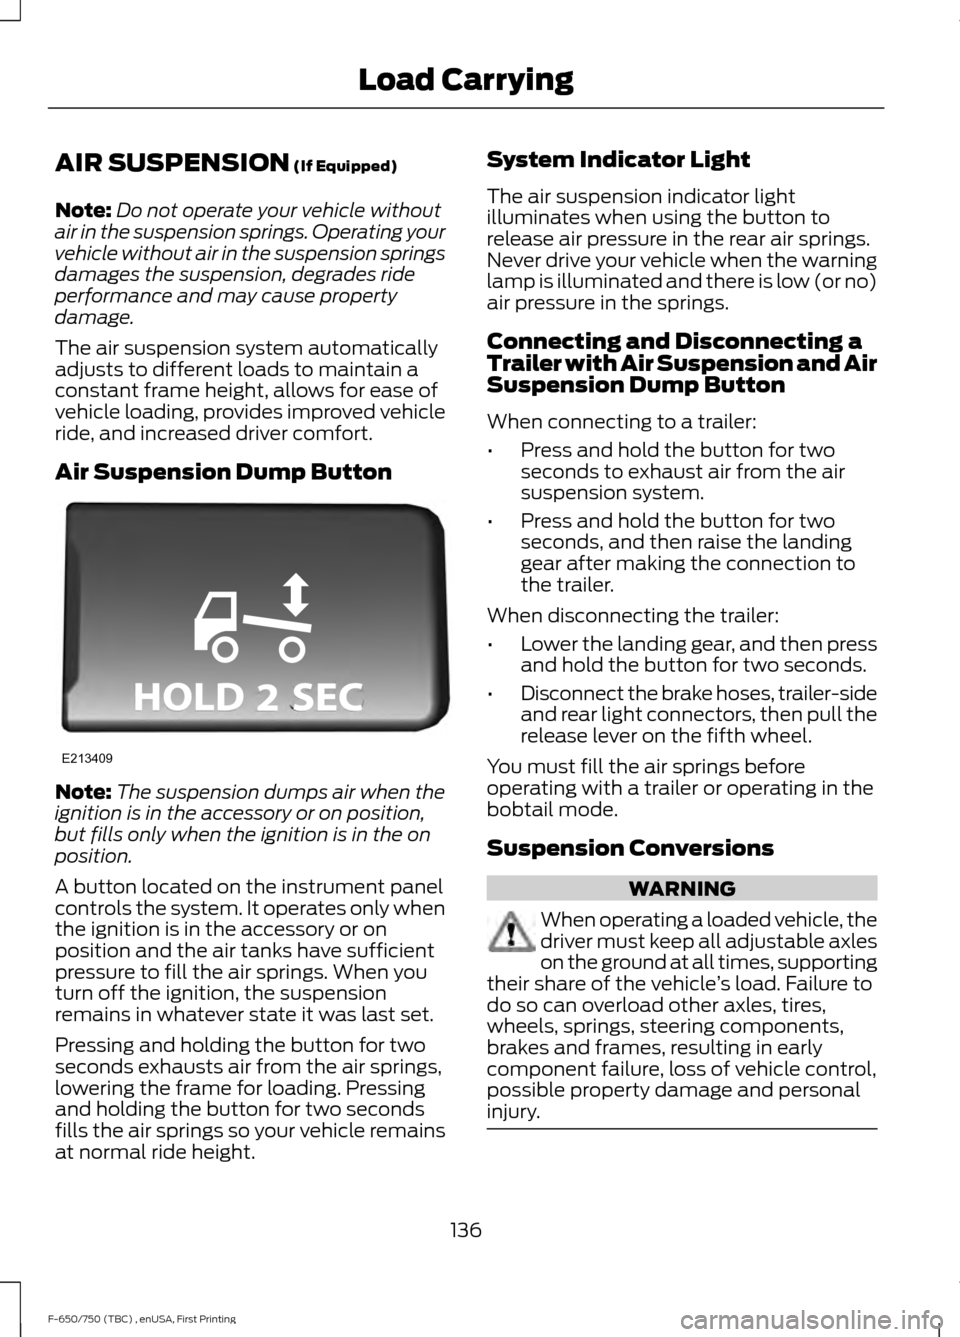
Air Suspension Dump Button Note:
The suspension dumps air when the
ignition is in the accessory or on position,
but fills only when the ignition is in the on
position.
A button located on the instrument panel
controls the system. It operates only when
the ignition is in the accessory or on
position and the air tanks have sufficient
pressure to fill the air springs. When you
turn off the ignition, the suspension
remains in whatever state it was last set.
Pressing and holding the button for two
seconds exhausts air from the air springs,
lowering the frame for loading. Pressing
and holding the button for two seconds
fills the air springs so your vehicle remains
at normal ride height. System Indicator Light
The air suspension indicator light
illuminates when using the button to
release air pressure in the rear air springs.
Never drive your vehicle when the warning
lamp is illuminated and there is low (or no)
air pressure in the springs.
Connecting and Disconnecting a
Trailer with Air Suspension and Air
Suspension Dump Button
When connecting to a trailer:
•
Press and hold the button for two
seconds to exhaust air from the air
suspension system.
• Press and hold the button for two
seconds, and then raise the landing
gear after making the connection to
the trailer.
When disconnecting the trailer:
• Lower the landing gear, and then press
and hold the button for two seconds.
• Disconnect the brake hoses, trailer-side
and rear light connectors, then pull the
release lever on the fifth wheel.
You must fill the air springs before
operating with a trailer or operating in the
bobtail mode.
Suspension Conversions WARNING
When operating a loaded vehicle, the
driver must keep all adjustable axles
on the ground at all times, supporting
their share of the vehicle ’s load. Failure to
do so can overload other axles, tires,
wheels, springs, steering components,
brakes and frames, resulting in early
component failure, loss of vehicle control,
possible property damage and personal
injury. 136
F-650/750 (TBC) , enUSA, First Printing Load CarryingE213409
Page 140 of 382
We do not recommend performing, or
approve of, suspension conversions.
However, we understand that, on occasion,
others install aftermarket add-on
suspensions on the truck chassis that allow
operator control for weight transfer from
other axles (such as air lift axles).
137
F-650/750 (TBC) , enUSA, First Printing Load Carrying