fog light FORD FUSION HYBRID 2014 Owners Manual
[x] Cancel search | Manufacturer: FORD, Model Year: 2014, Model line: FUSION HYBRID, Model: FORD FUSION HYBRID 2014Pages: 473, PDF Size: 5.93 MB
Page 5 of 473
Wipers and Washers Windshield Wipers.........................................67
Autowiper s........................................................67
Windshield Washers.....................................68
Lighting Lighting Control..............................................69
Autolamps........................................................69
Instrument Lighting Dimmer.....................70
Headlamp Exit Delay....................................70
Daytime Running Lamps.............................70
Automatic High Beam Control...................71
Front Fog Lamps.............................................72
Direction Indicators........................................72
Interior Lamps..................................................72
Ambient Lighting............................................73
Windows and Mirrors Power Windows..............................................74
Global Opening and Closing......................75
Exterior Mirrors.................................................75
Interior Mirror....................................................76
Sun Visors..........................................................77
Moonroof............................................................77
Instrument Cluster Gauges................................................................79
Warning Lamps and Indicators..................81
Audible Warnings and Indicators.............85
Information Displays General Information.....................................86
Information Messages.................................98
Climate Control Automatic Climate Control........................113
Automatic Climate Control........................114
Automatic Climate Control.......................116 Hints on Controlling the Interior
Climate..........................................................118
Heated Windows and Mirrors...................119
Cabin Air Filter................................................119
Remote Start.................................................120
Seats Sitting in the Correct Position...................121
Head Restraints..............................................121
Manual Seats.................................................123
Power Seats....................................................123
Memory Function.........................................124
Rear Seats.......................................................126
Heated Seats..................................................127
Ventilated Seats............................................127
Rear Seat Armrest........................................127
Universal Ga rage Door
Opener Universal Garage Door Opener...............129
Auxiliary Power Points Auxiliary Power Points................................133
Storage C ompartmentsCenter Console..............................................135
Overhead Console........................................135
Starting and Stopping the
Engine General Information....................................136
Ignition Switch...............................................136
Keyless Starting............................................136
Starting a Gasoline Engine........................137
Engine Block Heater....................................140
Unique Driving Character-
istics
Hybrid Electric Vehicle................................142
2Table of Contents
Page 11 of 473
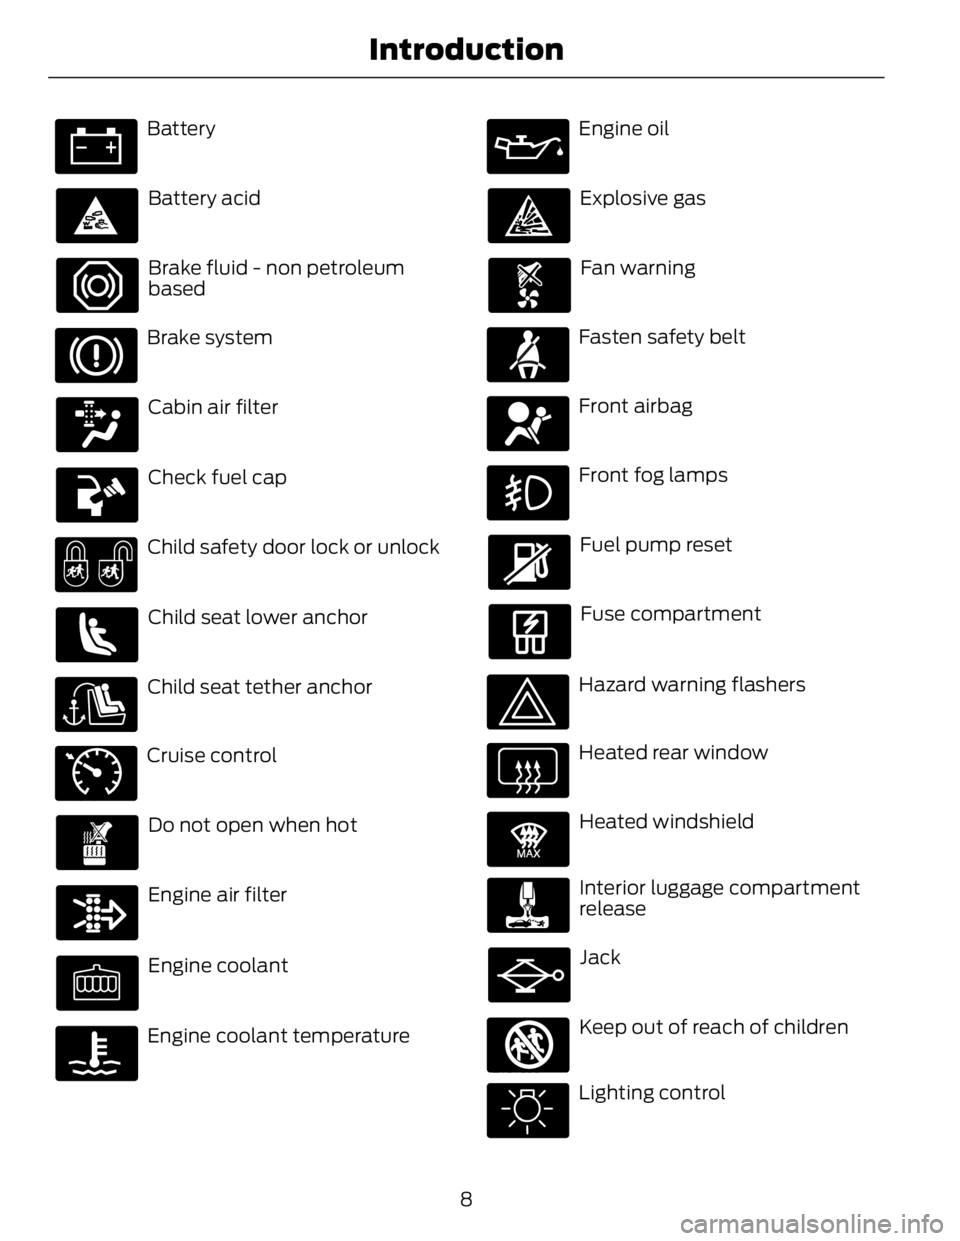
Battery
Battery acid
Brake fluid - non petroleum
based
Brake system
Cabin air filter
Check fuel cap
Child safety door lock or unlock
Child seat lower anchor
Child seat tether anchorE71340
Cruise control
Do not open when hot
Engine air filter
Engine coolant
Engine coolant temperature Engine oil
Explosive gas
Fan warning
Fasten safety belt
Front airbag
Front fog lamps
Fuel pump reset
Fuse compartment
Hazard warning flashers
Heated rear window E91392
Heated windshield
Interior luggage compartment
release
Jack
E161353
Keep out of reach of children
Lighting control
8Introduction
Page 73 of 473
Note: If you switch autolamps on in
conjunction with autowipers, low beam
headlamps will illuminate automatically
when the rain sensor activates the
windshield wipers continuously.
INSTRUMENT LIGHTING
DIMMER Note: If you disconnect the battery or it
becomes discharged, the illuminated
components will switch to the maximum
setting.
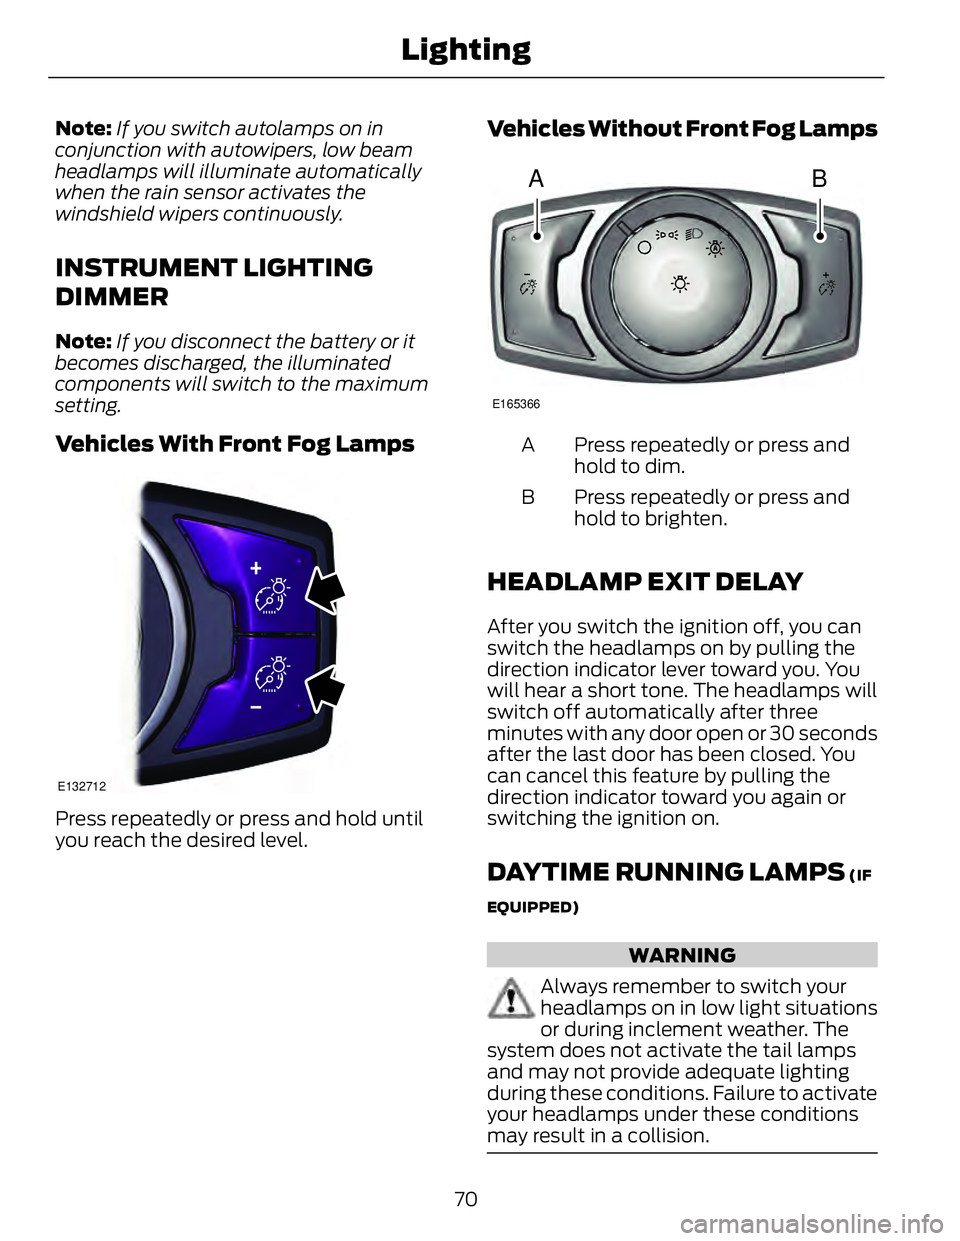
Vehicles With Front Fog Lamps E132712
Press repeatedly or press and hold until
you reach the desired level. Vehicles Without Front Fog Lamps
A B E165366
Press repeatedly or press and
hold to dim.A
Press repeatedly or press and
hold to brighten.B
HEADLAMP EXIT DELAY After you switch the ignition off, you can
switch the headlamps on by pulling the
direction indicator lever toward you. You
will hear a short tone. The headlamps will
switch off automatically after three
minutes with any door open or 30 seconds
after the last door has been closed. You
can cancel this feature by pulling the
direction indicator toward you again or
switching the ignition on.
DAYTIME RUNNING LAMPS (IF
EQUIPPED)
WARNING
Always remember to switch your
headlamps on in low light situations
or during inclement weather. The
system does not activate the tail lamps
and may not provide adequate lighting
during these conditions. Failure to activate
your headlamps under these conditions
may result in a collision.
70Lighting
Page 74 of 473
The system switches the low beam
headlamps on at a reduced intensity in
daylight conditions.
To switch the system on, switch the
ignition on, and switch the lighting control
to the off, autolamp or parking lamp
position.
AUTOMATIC HIGH BEAM
CONTROL (IF EQUIPPED)
The system will automatically turn on your
high beams if it is dark enough and no other
traffic is present. When it detects the
headlights of an approaching vehicle, the
tail lamps of the preceding vehicle or street
lighting, the system will turn off the high
beams before they distract other drivers.
The low beams remain on.
Note: If it appears that automatic control
of the high beams is not functioning
properly, check the windshield in front of
the camera for a blockage. A clear view of
the road is required for proper system
operation. Have any windshield damage in
the area of the camera’s field-of-view
repaired.
Note: If the system detects a blockage such
as bird droppings, bug splatter, snow or ice,
and you do not observe changes, the system
will go into low beam mode until you clear
the blockage. A message may also appear
in the instrument cluster display noting the
front camera is blocked.
Note: Typical road dust, dirt and water
spots will not affect the performance of the
automatic high beam system . However, in
cold or inclement weather conditions, you
will notice a decrease in the availability of
the high beam system, especially at start
up. If you want to change the beam state
independently of the system, you may
switch the high beams on or off using the
multifunction switch. Automatic control will
resume when conditions are correct. Note: Modification of the vehicle ride height
such as using much larger tires, may
degrade feature performance.
A camera sensor, centrally mounted
behind the windshield of your vehicle,
continuously monitors conditions to decide
when to switch the high beams off and on.
Once the system is active, the high beams
will switch on if:
• the ambient light level is low enough
• there is no traffic in front of the vehicle
• the vehicle speed is greater than
25 mph (40 km/h)
The high beams will switch off if:
• the system detects the headlamps of
an approaching vehicle or the tail
lamps of a preceding vehicle.
• vehicle speed falls below 16 mph
(25 km/h)
• the ambient light level is high enough
that high beams are not required
• the system detects severe rain, snow
or fog
• the camera is blocked
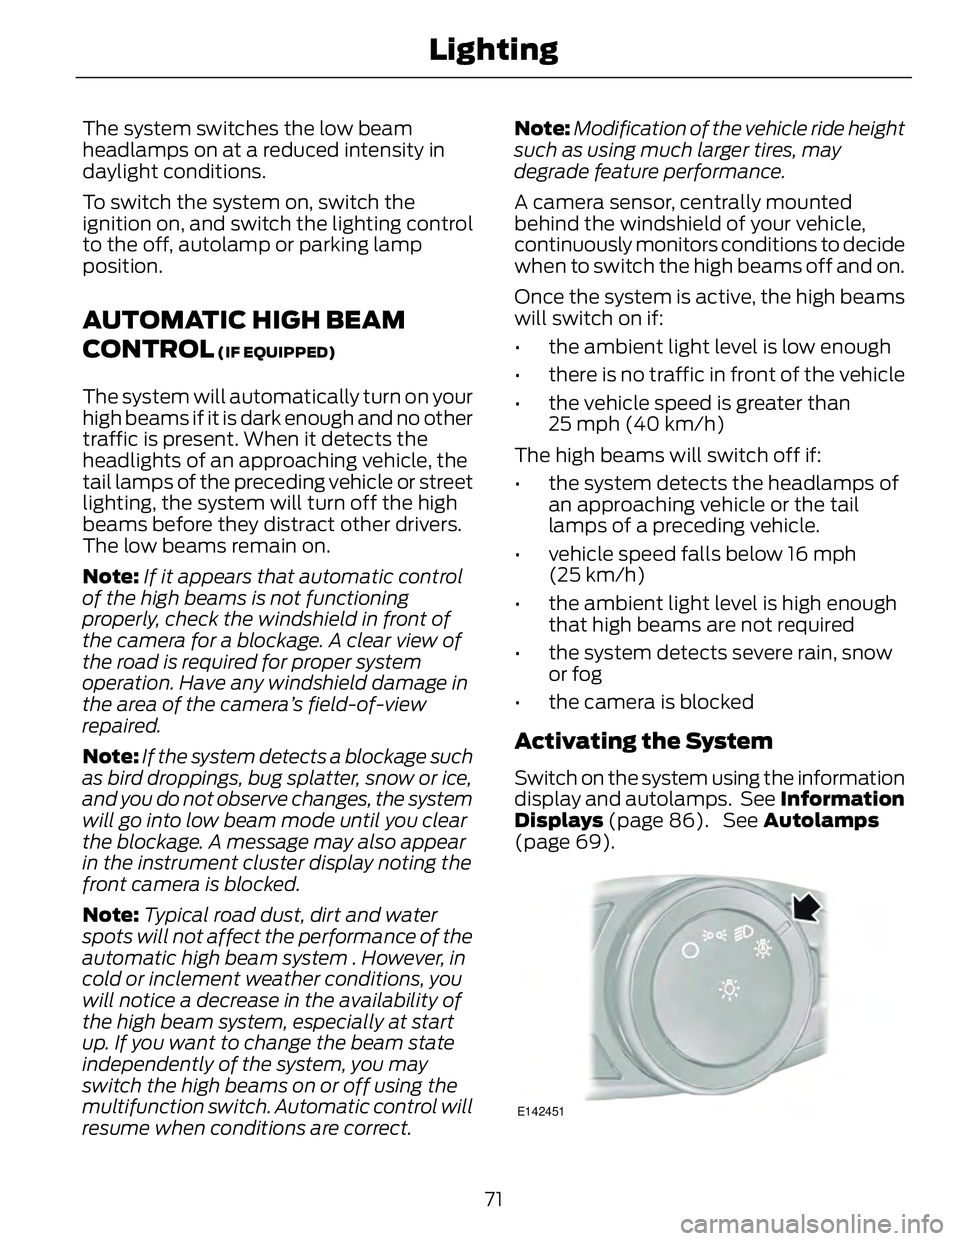
Activating the System Switch on the system using the information
display and autolamps. See Information
Displays (page 86). See Autolamps
(page 69).
E142451
71Lighting
Page 75 of 473
Switch the lighting control to the
autolamps position.
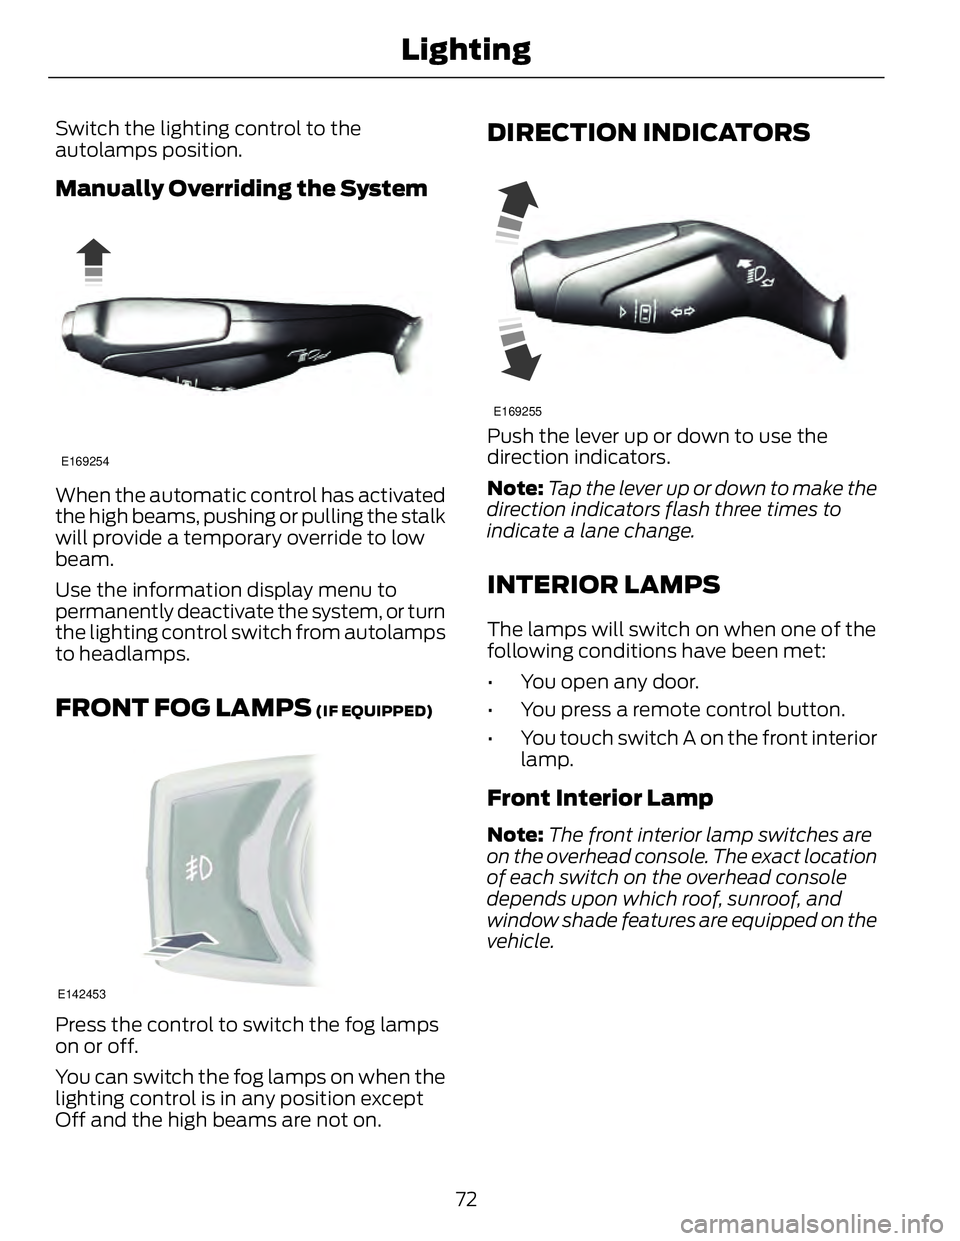
Manually Overriding the System E169254
When the automatic control has activated
the high beams, pushing or pulling the stalk
will provide a temporary override to low
beam.
Use the information display menu to
permanently deactivate the system, or turn
the lighting control switch from autolamps
to headlamps.
FRONT FOG LAMPS (IF EQUIPPED)
E142453
Press the control to switch the fog lamps
on or off.
You can switch the fog lamps on when the
lighting control is in any position except
Off and the high beams are not on. DIRECTION INDICATORS E169255
Push the lever up or down to use the
direction indicators.
Note: Tap the lever up or down to make the
direction indicators flash three times to
indicate a lane change.
INTERIOR LAMPS The lamps will switch on when one of the
following conditions have been met:
• You open any door.
• You press a remote control button.
• You touch switch A on the front interior
lamp.
Front Interior Lamp Note: The front interior lamp switches are
on the overhead console. The exact location
of each switch on the overhead console
depends upon which roof, sunroof, and
window shade features are equipped on the
vehicle.
72Lighting
Page 86 of 473
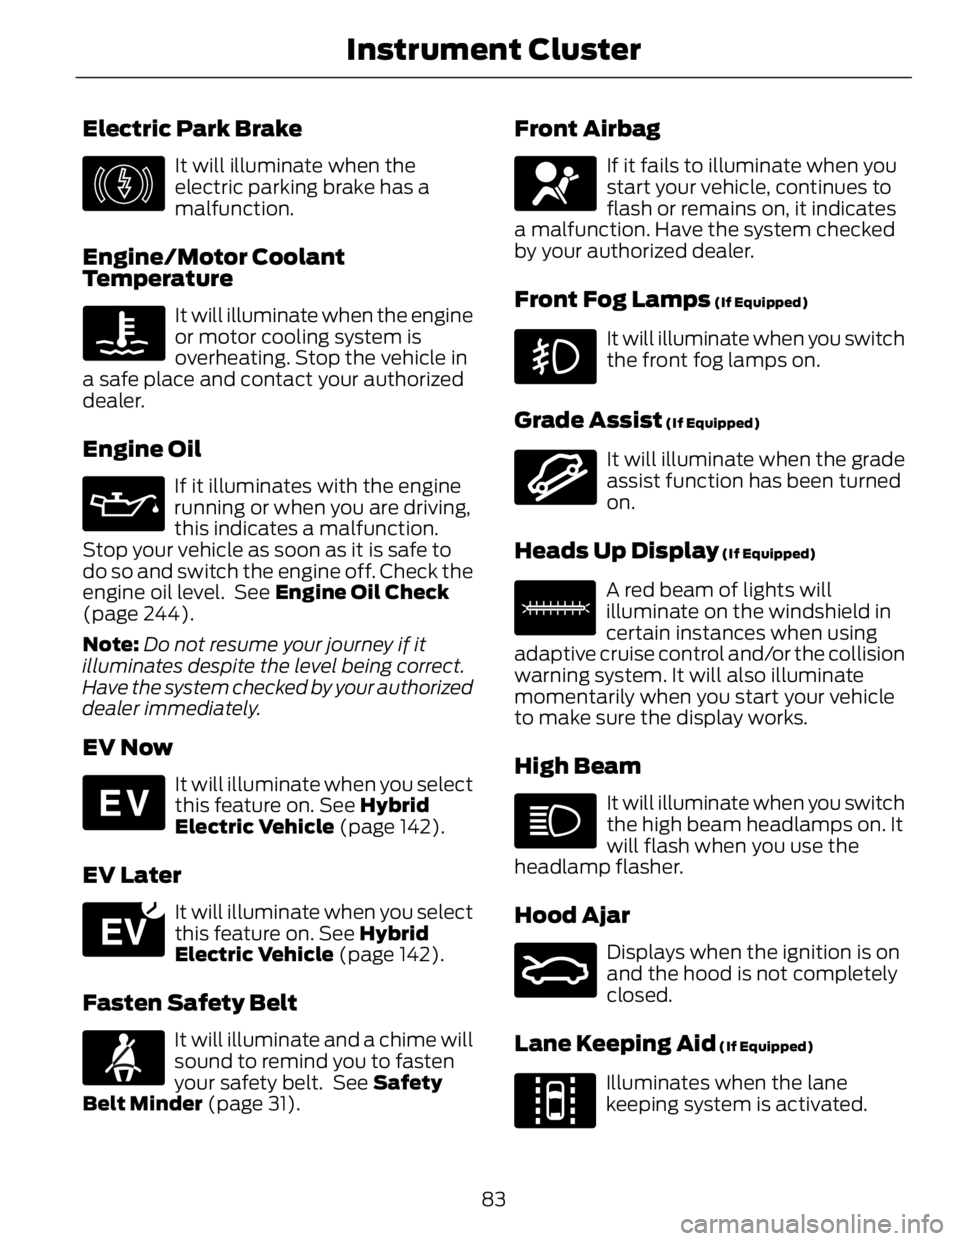
Electric Park Brake E146190
It will illuminate when the
electric parking brake has a
malfunction.
Engine/Motor Coolant
Temperature It will illuminate when the engine
or motor cooling system is
overheating. Stop the vehicle in
a safe place and contact your authorized
dealer.
Engine Oil If it illuminates with the engine
running or when you are driving,
this indicates a malfunction.
Stop your vehicle as soon as it is safe to
do so and switch the engine off. Check the
engine oil level. See Engine Oil Check
(page 244).
Note: Do not resume your journey if it
illuminates despite the level being correct.
Have the system checked by your authorized
dealer immediately.
EV Now E144814
It will illuminate when you select
this feature on. See Hybrid
Electric Vehicle (page 142).
EV Later E151263
It will illuminate when you select
this feature on. See Hybrid
Electric Vehicle (page 142).
Fasten Safety Belt
It will illuminate and a chime will
sound to remind you to fasten
your safety belt. See Safety
Belt Minder (page 31). Front Airbag If it fails to illuminate when you
start your vehicle, continues to
flash or remains on, it indicates
a malfunction. Have the system checked
by your authorized dealer.
Front Fog Lamps (If Equipped)
It will illuminate when you switch
the front fog lamps on.
Grade Assist (If Equipped)
E144523
It will illuminate when the grade
assist function has been turned
on.
Heads Up Display (If Equipped)
E156133
A red beam of lights will
illuminate on the windshield in
certain instances when using
adaptive cruise control and/or the collision
warning system. It will also illuminate
momentarily when you start your vehicle
to make sure the display works.
High Beam It will illuminate when you switch
the high beam headlamps on. It
will flash when you use the
headlamp flasher.
Hood Ajar E159324
Displays when the ignition is on
and the hood is not completely
closed.
Lane Keeping Aid (If Equipped)
E144813
Illuminates when the lane
keeping system is activated.
83Instrument Cluster
Page 117 of 473
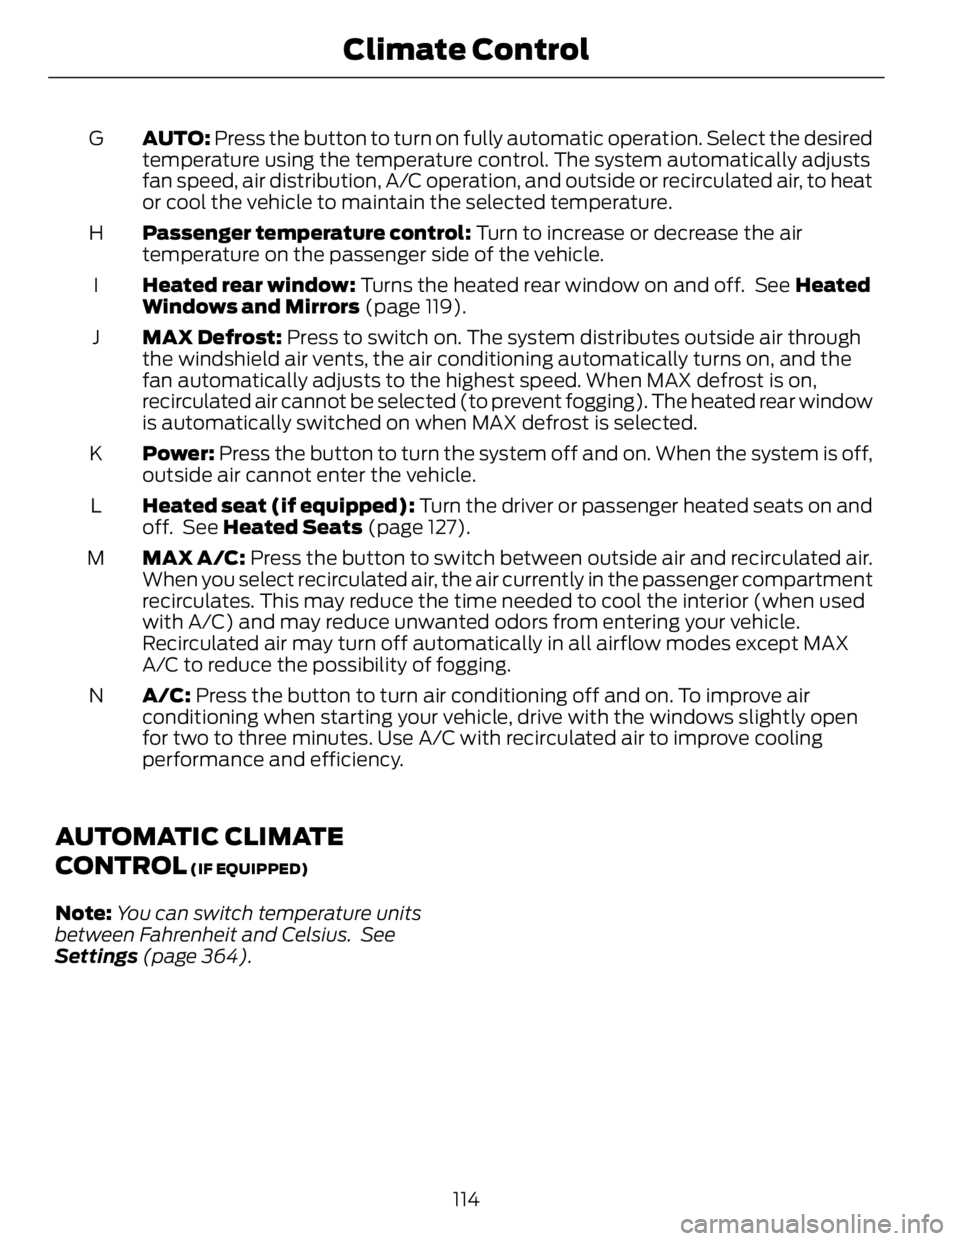
AUTO: Press the button to turn on fully automatic operation. Select the desired
temperature using the temperature control. The system automatically adjusts
fan speed, air distribution, A/C operation, and outside or recirculated air, to heat
or cool the vehicle to maintain the selected temperature.G
Passenger temperature control: Turn to increase or decrease the air
temperature on the passenger side of the vehicle.H
Heated rear window: Turns the heated rear window on and off. See Heated
Windows and Mirrors (page 119).I
MAX Defrost: Press to switch on. The system distributes outside air through
the windshield air vents, the air conditioning automatically turns on, and the
fan automatically adjusts to the highest speed. When MAX defrost is on,
recirculated air cannot be selected (to prevent fogging). The heated rear window
is automatically switched on when MAX defrost is selected.J
Power: Press the button to turn the system off and on. When the system is off,
outside air cannot enter the vehicle.K
Heated seat (if equipped): Turn the driver or passenger heated seats on and
off. See Heated Seats (page 127).L
MAX A/C: Press the button to switch between outside air and recirculated air.
When you select recirculated air, the air currently in the passenger compartment
recirculates. This may reduce the time needed to cool the interior (when used
with A/C) and may reduce unwanted odors from entering your vehicle.
Recirculated air may turn off automatically in all airflow modes except MAX
A/C to reduce the possibility of fogging.M
A/C: Press the button to turn air conditioning off and on. To improve air
conditioning when starting your vehicle, drive with the windows slightly open
for two to three minutes. Use A/C with recirculated air to improve cooling
performance and efficiency.N
AUTOMATIC CLIMATE
CONTROL (IF EQUIPPED)
Note: You can switch temperature units
between Fahrenheit and Celsius. See
Settings (page 364).
114Climate Control
Page 118 of 473
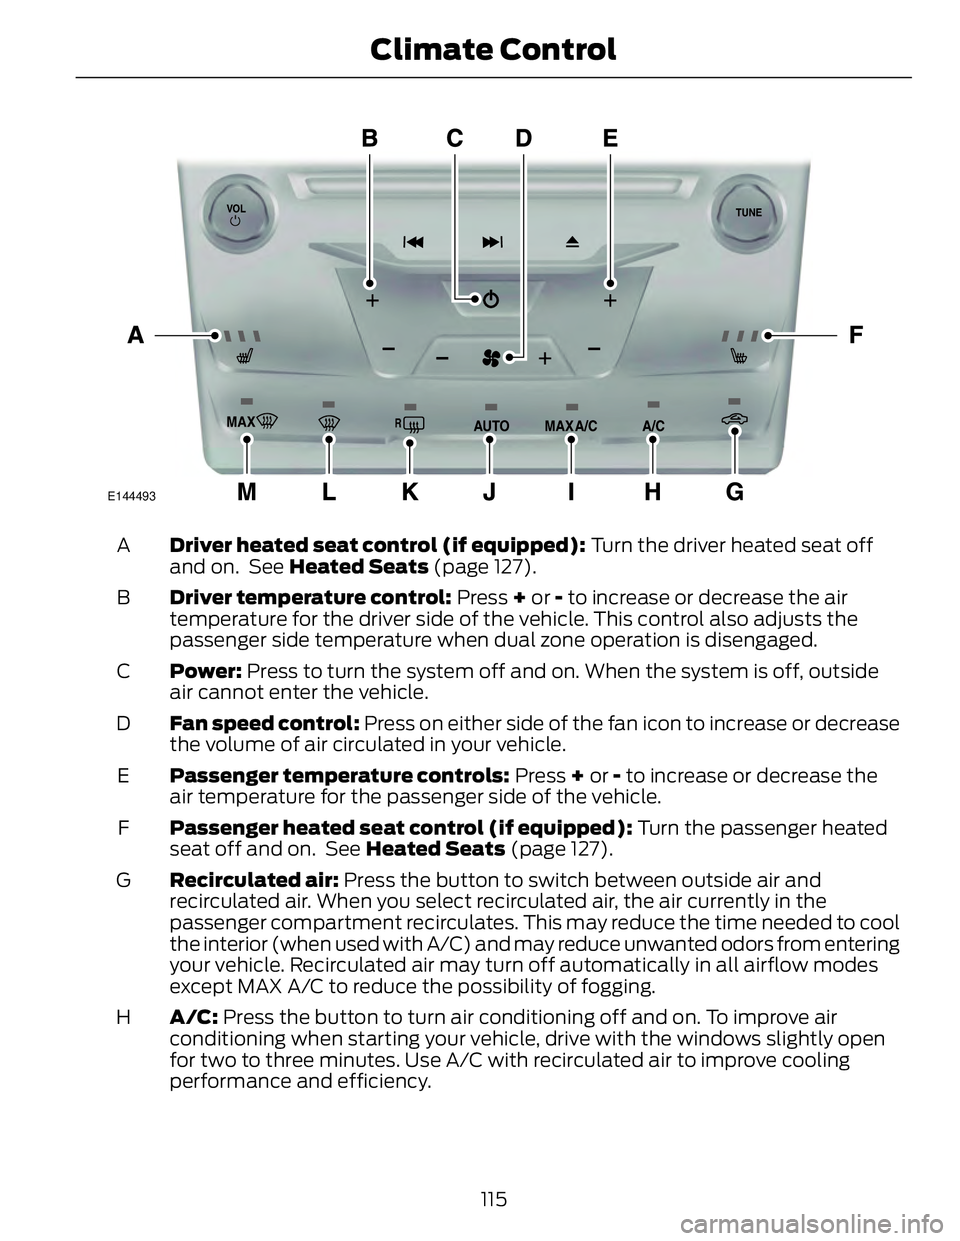
E144493
Driver heated seat control (if equipped): Turn the driver heated seat off
and on. See Heated Seats (page 127).A
Driver temperature control: Press + or - to increase or decrease the air
temperature for the driver side of the vehicle. This control also adjusts the
passenger side temperature when dual zone operation is disengaged.B
Power: Press to turn the system off and on. When the system is off, outside
air cannot enter the vehicle.C
Fan speed control: Press on either side of the fan icon to increase or decrease
the volume of air circulated in your vehicle.D
Passenger temperature controls: Press + or - to increase or decrease the
air temperature for the passenger side of the vehicle.E
Passenger heated seat control (if equipped): Turn the passenger heated
seat off and on. See Heated Seats (page 127).F
Recirculated air: Press the button to switch between outside air and
recirculated air. When you select recirculated air, the air currently in the
passenger compartment recirculates. This may reduce the time needed to cool
the interior (when used with A/C) and may reduce unwanted odors from entering
your vehicle. Recirculated air may turn off automatically in all airflow modes
except MAX A/C to reduce the possibility of fogging.G
A/C: Press the button to turn air conditioning off and on. To improve air
conditioning when starting your vehicle, drive with the windows slightly open
for two to three minutes. Use A/C with recirculated air to improve cooling
performance and efficiency.H
115Climate Control
Page 120 of 473
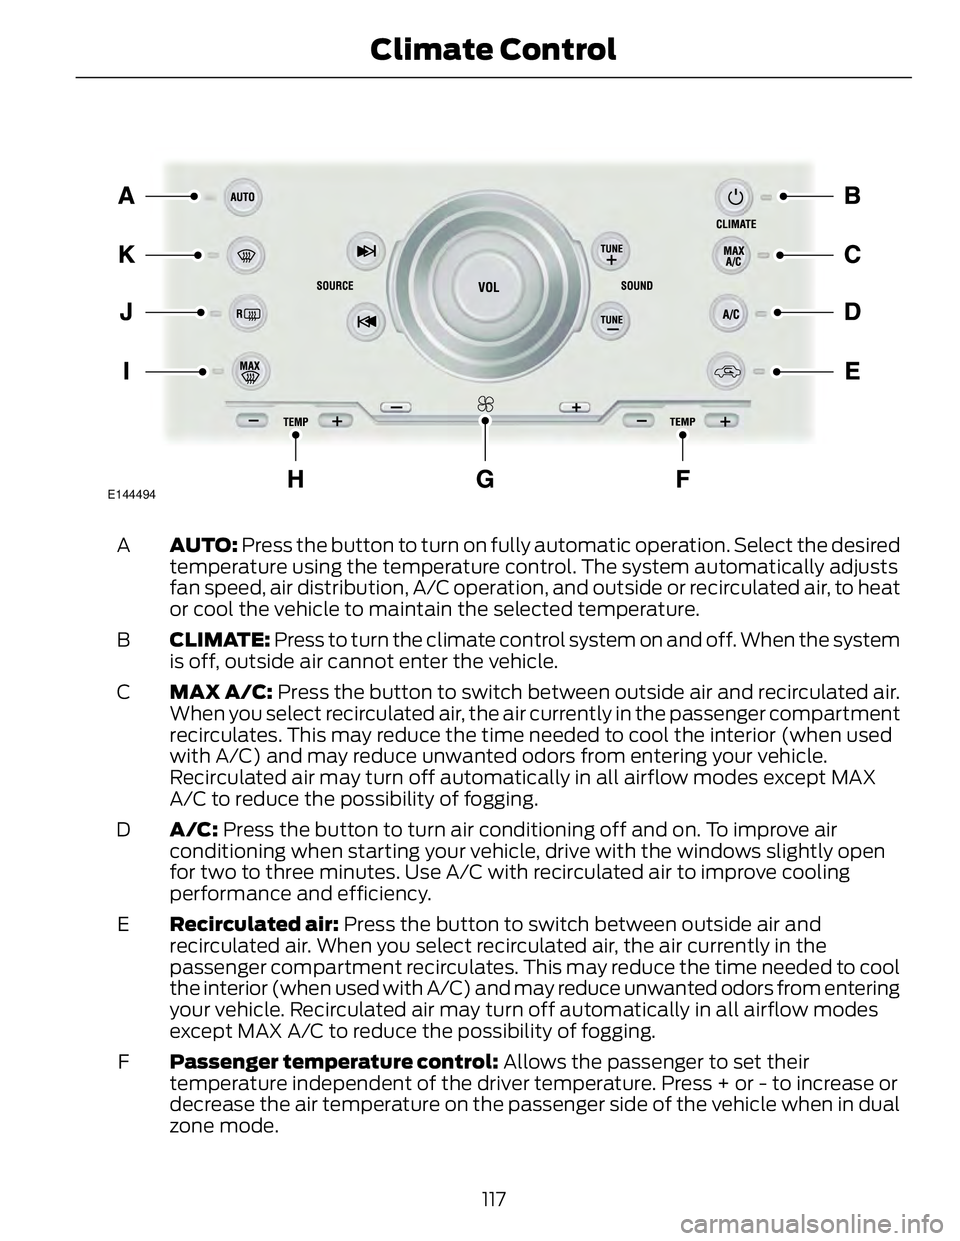
E144494
AUTO: Press the button to turn on fully automatic operation. Select the desired
temperature using the temperature control. The system automatically adjusts
fan speed, air distribution, A/C operation, and outside or recirculated air, to heat
or cool the vehicle to maintain the selected temperature.A
CLIMATE: Press to turn the climate control system on and off. When the system
is off, outside air cannot enter the vehicle.B
MAX A/C: Press the button to switch between outside air and recirculated air.
When you select recirculated air, the air currently in the passenger compartment
recirculates. This may reduce the time needed to cool the interior (when used
with A/C) and may reduce unwanted odors from entering your vehicle.
Recirculated air may turn off automatically in all airflow modes except MAX
A/C to reduce the possibility of fogging.C
A/C: Press the button to turn air conditioning off and on. To improve air
conditioning when starting your vehicle, drive with the windows slightly open
for two to three minutes. Use A/C with recirculated air to improve cooling
performance and efficiency.D
Recirculated air: Press the button to switch between outside air and
recirculated air. When you select recirculated air, the air currently in the
passenger compartment recirculates. This may reduce the time needed to cool
the interior (when used with A/C) and may reduce unwanted odors from entering
your vehicle. Recirculated air may turn off automatically in all airflow modes
except MAX A/C to reduce the possibility of fogging.E
Passenger temperature control: Allows the passenger to set their
temperature independent of the driver temperature. Press + or - to increase or
decrease the air temperature on the passenger side of the vehicle when in dual
zone mode.F
117Climate Control
Page 189 of 473
ECO Cruise Control This feature saves vehicle energy by
relaxing acceleration compared to
standard cruise control. For example, your
vehicle may temporarily lose speed when
going uphill. ECO will appear in the
information display when ECO cruise
control is activated. It can be switched on
or off in the information display. See
General Information (page 86).
USING ADAPTIVE CRUISE
CONTROL (IF EQUIPPED)
WARNINGS
Always pay close attention to
changing road conditions, especially
when using adaptive cruise control.
Adaptive cruise control cannot replace
attentive driving. Failing to follow any of
the warnings below or failing to pay
attention to the road may result in a crash,
serious injury or death.
Adaptive cruise control is not a crash
warning or avoidance system.
Adaptive cruise control will not
detect stationary or slow moving
vehicles below 6 mph (10 km/h).
Adaptive cruise control will not
detect pedestrians or objects in the
roadway.
Adaptive cruise control will not
detect oncoming vehicles in the
same lane.
Do not use the adaptive cruise
control when entering or leaving a
highway, in heavy traffic or on roads
that are winding, slippery or unpaved.
Do not use in poor visibility,
specifically fog, rain, spray or snow. Note: It is your responsibility to stay alert,
drive safely and be in control of the vehicle
at all times.
The system adjusts your speed to maintain
a proper distance between you and the
vehicle in front of you in the same lane. You
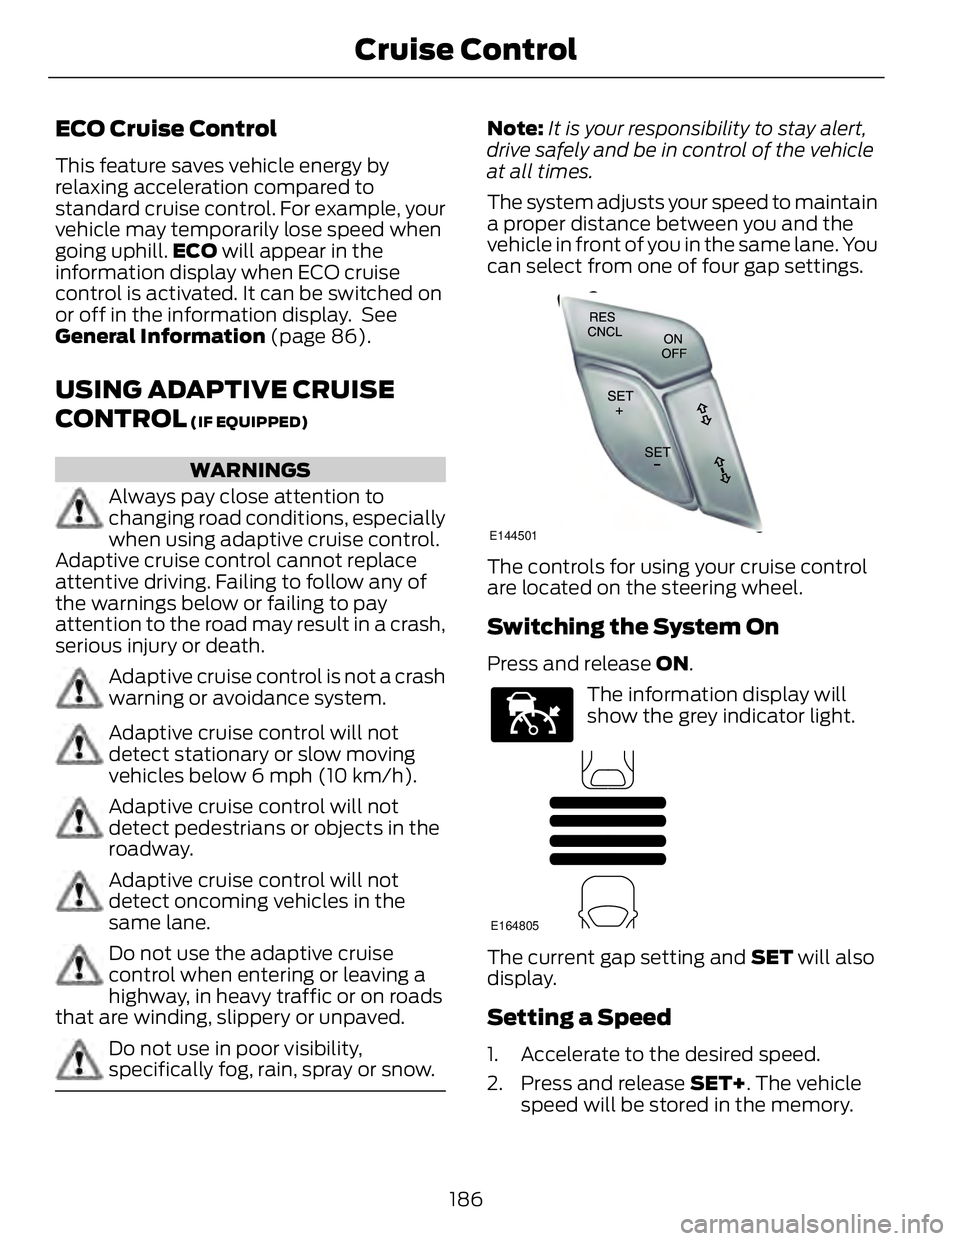
can select from one of four gap settings. E144501
The controls for using your cruise control
are located on the steering wheel.
Switching the System On Press and release ON . E144529
The information display will
show the grey indicator light.
E164805
The current gap setting and SET will also
display.
Setting a Speed
1. Accelerate to the desired speed.
2. Press and release SET+ . The vehicle
speed will be stored in the memory.
186Cruise Control