jump cable FORD GRANADA 1985 Service Repair Manual
[x] Cancel search | Manufacturer: FORD, Model Year: 1985, Model line: GRANADA, Model: FORD GRANADA 1985Pages: 255, PDF Size: 14.98 MB
Page 10 of 255
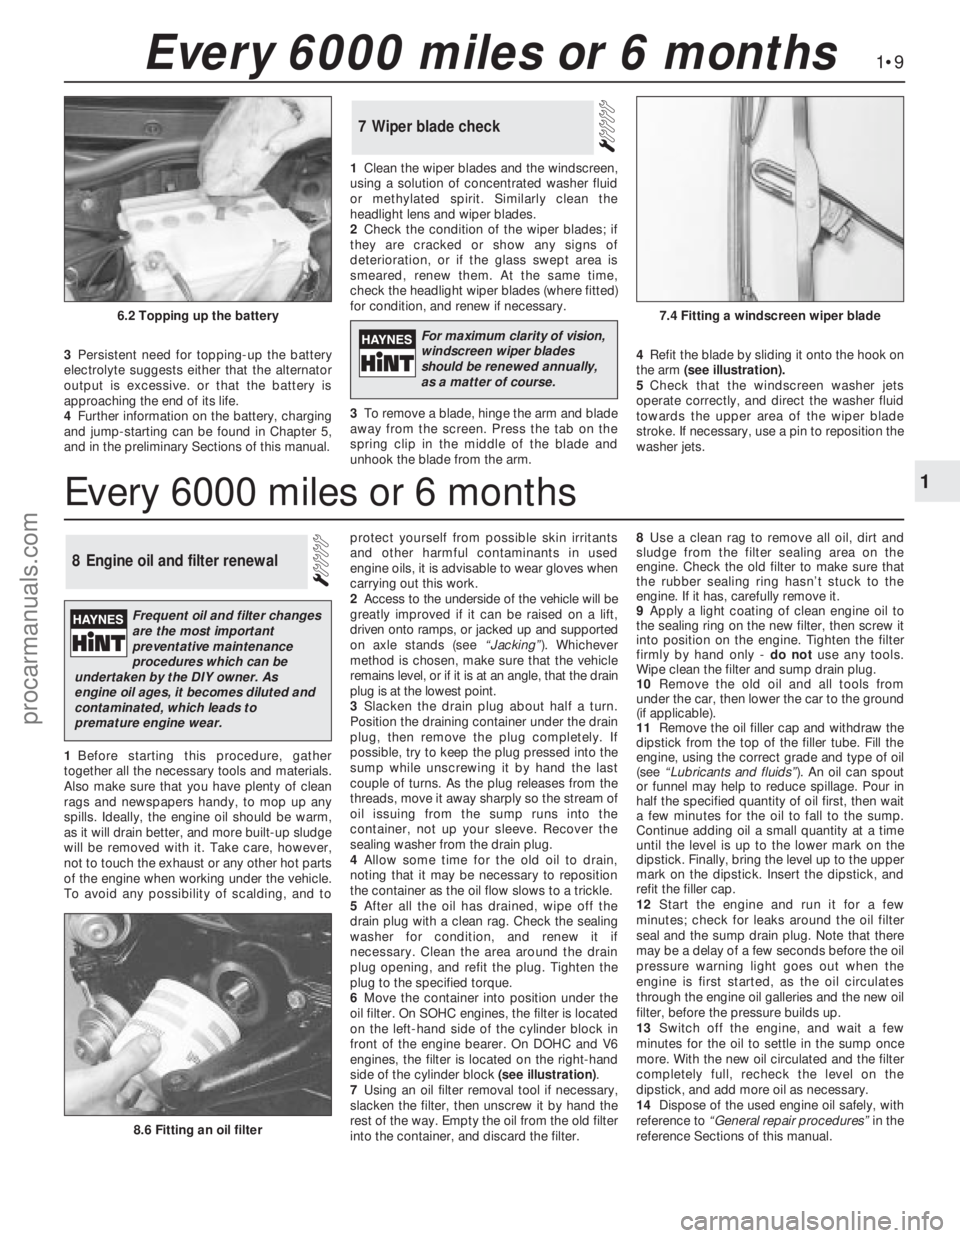
3Persistent need for topping-up the battery
electrolyte suggests either that the alternator
output is excessive. or that the battery is
approaching the end of its life.
4Further information on the battery, charging
and jump-starting can be found in Chapter 5,
and in the preliminary Sections of this manual.1Clean the wiper blades and the windscreen,
using a solution of concentrated washer fluid
or methylated spirit. Similarly clean the
headlight lens and wiper blades.
2Check the condition of the wiper blades; if
they are cracked or show any signs of
deterioration, or if the glass swept area is
smeared, renew them. At the same time,
check the headlight wiper blades (where fitted)
for condition, and renew if necessary.
3To remove a blade, hinge the arm and blade
away from the screen. Press the tab on the
spring clip in the middle of the blade and
unhook the blade from the arm. 4Refit the blade by sliding it onto the hook on
the arm(see illustration).
5Check that the windscreen washer jets
operate correctly, and direct the washer fluid
towards the upper area of the wiper blade
stroke. If necessary, use a pin to reposition the
washer jets.
7Wiper blade check
1Before starting this procedure, gather
together all the necessary tools and materials.
Also make sure that you have plenty of clean
rags and newspapers handy, to mop up any
spills. Ideally, the engine oil should be warm,
as it will drain better, and more built-up sludge
will be removed with it. Take care, however,
not to touch the exhaust or any other hot parts
of the engine when working under the vehicle.
To avoid any possibility of scalding, and toprotect yourself from possible skin irritants
and other harmful contaminants in used
engine oils, it is advisable to wear gloves when
carrying out this work.
2Access to the underside of the vehicle will be
greatly improved if it can be raised on a lift,
driven onto ramps, or jacked up and supported
on axle stands (see “Jacking”). Whichever
method is chosen, make sure that the vehicle
remains level, or if it is at an angle, that the drain
plug is at the lowest point.
3Slacken the drain plug about half a turn.
Position the draining container under the drain
plug, then remove the plug completely. If
possible, try to keep the plug pressed into the
sump while unscrewing it by hand the last
couple of turns. As the plug releases from the
threads, move it away sharply so the stream of
oil issuing from the sump runs into the
container, not up your sleeve. Recover the
sealing washer from the drain plug.
4Allow some time for the old oil to drain,
noting that it may be necessary to reposition
the container as the oil flow slows to a trickle.
5After all the oil has drained, wipe off the
drain plug with a clean rag. Check the sealing
washer for condition, and renew it if
necessary. Clean the area around the drain
plug opening, and refit the plug. Tighten the
plug to the specified torque.
6Move the container into position under the
oil filter. On SOHC engines, the filter is located
on the left-hand side of the cylinder block in
front of the engine bearer. On DOHC and V6
engines, the filter is located on the right-hand
side of the cylinder block (see illustration).
7Using an oil filter removal tool if necessary,
slacken the filter, then unscrew it by hand the
rest of the way. Empty the oil from the old filter
into the container, and discard the filter.8Use a clean rag to remove all oil, dirt and
sludge from the filter sealing area on the
engine. Check the old filter to make sure that
the rubber sealing ring hasn’t stuck to the
engine. If it has, carefully remove it.
9Apply a light coating of clean engine oil to
the sealing ring on the new filter, then screw it
into position on the engine. Tighten the filter
firmly by hand only - do notuse any tools.
Wipe clean the filter and sump drain plug.
10Remove the old oil and all tools from
under the car, then lower the car to the ground
(if applicable).
11Remove the oil filler cap and withdraw the
dipstick from the top of the filler tube. Fill the
engine, using the correct grade and type of oil
(see “Lubricants and fluids”). An oil can spout
or funnel may help to reduce spillage. Pour in
half the specified quantity of oil first, then wait
a few minutes for the oil to fall to the sump.
Continue adding oil a small quantity at a time
until the level is up to the lower mark on the
dipstick. Finally, bring the level up to the upper
mark on the dipstick. Insert the dipstick, and
refit the filler cap.
12Start the engine and run it for a few
minutes; check for leaks around the oil filter
seal and the sump drain plug. Note that there
may be a delay of a few seconds before the oil
pressure warning light goes out when the
engine is first started, as the oil circulates
through the engine oil galleries and the new oil
filter, before the pressure builds up.
13Switch off the engine, and wait a few
minutes for the oil to settle in the sump once
more. With the new oil circulated and the filter
completely full, recheck the level on the
dipstick, and add more oil as necessary.
14Dispose of the used engine oil safely, with
reference to “General repair procedures”in the
reference Sections of this manual.
8Engine oil and filter renewal
1•9
1
Every 6000 miles or 6 months
8.6 Fitting an oil filter
6.2 Topping up the battery7.4 Fitting a windscreen wiper blade
Every 6000 miles or 6 months
For maximum clarity of vision,
windscreen wiper blades
should be renewed annually,
as a matter of course.
Frequent oil and filter changes
are the most important
preventative maintenance
procedures which can be
undertaken by the DIY owner. As
engine oil ages, it becomes diluted and
contaminated, which leads to
premature engine wear.
procarmanuals.com
Page 14 of 255
DOHC engines
12On this engine, the coolant/alternator
drivebelt also drives the power steering pump
and (where applicable) the air conditioning
compressor. The drivebelt tension is set by an
automatic tensioner assembly.
13The condition of the drivebelt should be
checked as described above.
14An idea of the amount of wear which has
taken place on the belt can be gained from the
position of indicator mark (A) on the mounting
bracket in relation to the block (B) on the
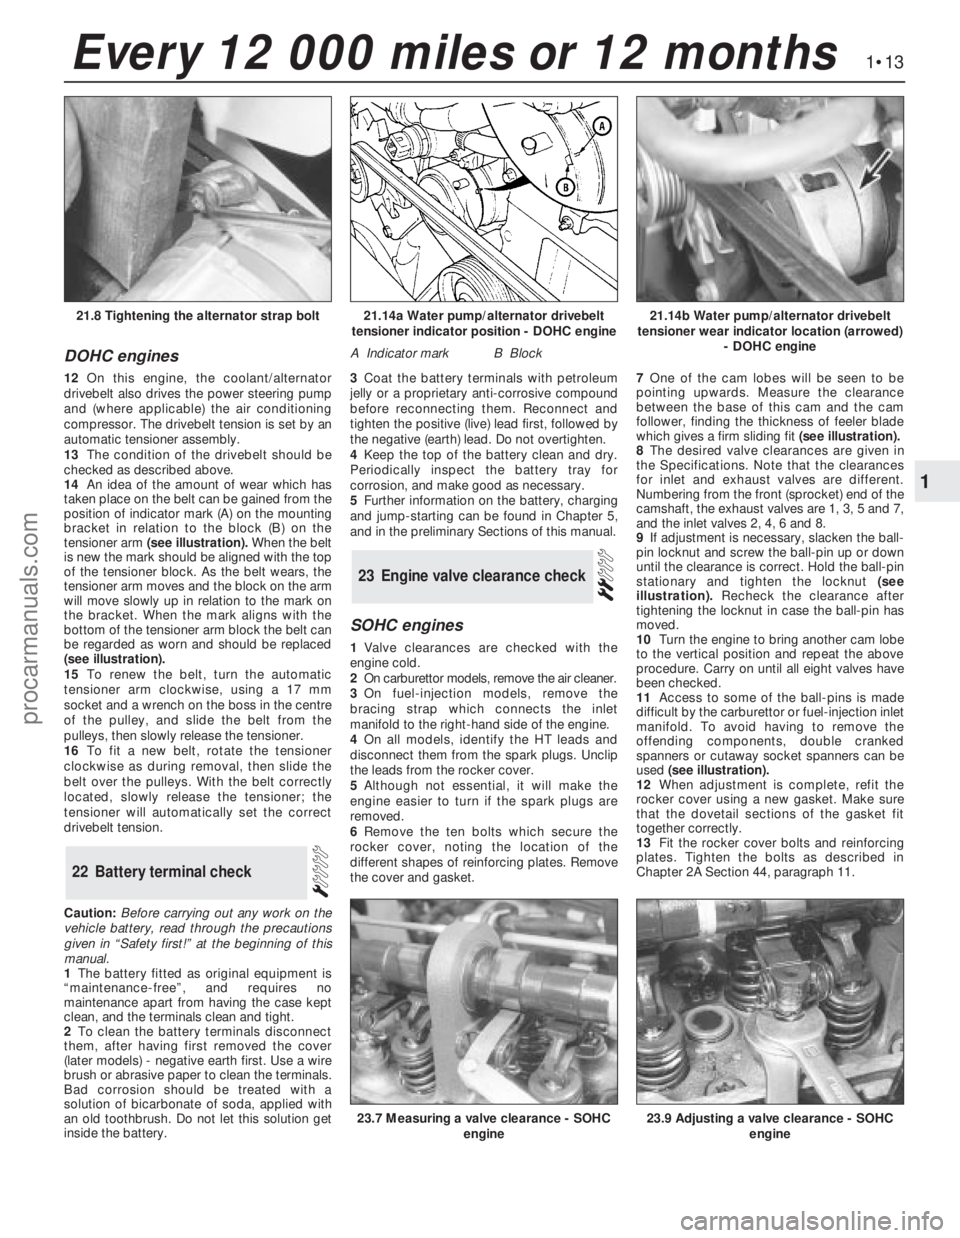
tensioner arm (see illustration).When the belt
is new the mark should be aligned with the top
of the tensioner block. As the belt wears, the
tensioner arm moves and the block on the arm
will move slowly up in relation to the mark on
the bracket. When the mark aligns with the
bottom of the tensioner arm block the belt can
be regarded as worn and should be replaced
(see illustration).
15To renew the belt, turn the automatic
tensioner arm clockwise, using a 17 mm
socket and a wrench on the boss in the centre
of the pulley, and slide the belt from the
pulleys, then slowly release the tensioner.
16To fit a new belt, rotate the tensioner
clockwise as during removal, then slide the
belt over the pulleys. With the belt correctly
located, slowly release the tensioner; the
tensioner will automatically set the correct
drivebelt tension.
Caution:Before carrying out any work on the
vehicle battery, read through the precautions
given in “Safety first!” at the beginning of this
manual.
1The battery fitted as original equipment is
“maintenance-free”, and requires no
maintenance apart from having the case kept
clean, and the terminals clean and tight.
2To clean the battery terminals disconnect
them, after having first removed the cover
(later models) -negative earth first. Use a wire
brush or abrasive paper to clean the terminals.
Bad corrosion should be treated with a
solution of bicarbonate of soda, applied with
an old toothbrush. Do not let this solution get
inside the battery.3Coat the battery terminals with petroleum
jelly or a proprietary anti-corrosive compound
before reconnecting them. Reconnect and
tighten the positive (live) lead first, followed by
the negative (earth) lead. Do not overtighten.
4Keep the top of the battery clean and dry.
Periodically inspect the battery tray for
corrosion, and make good as necessary.
5Further information on the battery, charging
and jump-starting can be found in Chapter 5,
and in the preliminary Sections of this manual.
SOHC engines
1Valve clearances are checked with the
engine cold.
2On carburettor models, remove the air cleaner.
3On fuel-injection models, remove the
bracing strap which connects the inlet
manifold to the right-hand side of the engine.
4On all models, identify the HT leads and
disconnect them from the spark plugs. Unclip
the leads from the rocker cover.
5Although not essential, it will make the
engine easier to turn if the spark plugs are
removed.
6Remove the ten bolts which secure the
rocker cover, noting the location of the
different shapes of reinforcing plates. Remove
the cover and gasket.7One of the cam lobes will be seen to be
pointing upwards. Measure the clearance
between the base of this cam and the cam
follower, finding the thickness of feeler blade
which gives a firm sliding fit(see illustration).
8The desired valve clearances are given in
the Specifications. Note that the clearances
for inlet and exhaust valves are different.
Numbering from the front (sprocket) end of the
camshaft, the exhaust valves are 1, 3, 5 and 7,
and the inlet valves 2, 4, 6 and 8.
9If adjustment is necessary, slacken the ball-
pin locknut and screw the ball-pin up or down
until the clearance is correct. Hold the ball-pin
stationary and tighten the locknut(see
illustration).Recheck the clearance after
tightening the locknut in case the ball-pin has
moved.
10Turn the engine to bring another cam lobe
to the vertical position and repeat the above
procedure. Carry on until all eight valves have
been checked.
11Access to some of the ball-pins is made
difficult by the carburettor or fuel-injection inlet
manifold. To avoid having to remove the
offending components, double cranked
spanners or cutaway socket spanners can be
used (see illustration).
12When adjustment is complete, refit the
rocker cover using a new gasket. Make sure
that the dovetail sections of the gasket fit
together correctly.
13Fit the rocker cover bolts and reinforcing
plates. Tighten the bolts as described in
Chapter 2A Section 44, paragraph 11.
23Engine valve clearance check
22Battery terminal check
1•13
1
Every 12 000 miles or 12 months
21.14a Water pump/alternator drivebelt
tensioner indicator position - DOHC engine
A Indicator markB Block
21.14b Water pump/alternator drivebelt
tensioner wear indicator location (arrowed)
- DOHC engine21.8 Tightening the alternator strap bolt
23.7 Measuring a valve clearance - SOHC
engine23.9 Adjusting a valve clearance - SOHC
engine
procarmanuals.com
Page 180 of 255
The electrical system is a 12 volt, negative
earth type. Electricity is generated by an
alternator, belt-driven from the crankshaft pulley.
A lead-acid battery provides a reserve of power
for starting and when the demands of the system
temporarily exceed the alternator output.
The battery negative terminal is connected
to “earth” - vehicle metal - and most electrical
system components are wired so that they
only receive a positive feed, the current
returning via vehicle metal. This means that
the component mounting forms part of the
circuit. Loose or corroded mountings can
therefore cause apparent electrical faults.
Many semiconductor devices are used in
the electrical system, both in the “black
boxes” which control vehicle functions and in
other components. Semiconductors are very
sensitive to excessive (or wrong polarity)
voltage, and to extremes of heat. Observe the
appropriate precautions to avoid damage.
Although some repair procedures are given
in this Chapter, sometimes renewal of a well-
used item will prove more satisfactory. The
reader whose interests extend beyond
component renewal should obtain a copy of
the “Automobile Electrical Manual”, available
from the publishers of this book.
Before starting work on the electrical
system, read the precautions listed in “Safety
first!” at the beginning of the manual.
Note:Refer to the precautions given in “Safety
first!” and in Section 1 of this Chapter before
starting work. The following tests relate to testing
of the main electrical circuits, and should not be
used to test delicate electronic circuits (such as
anti-lock braking systems), particularly where an
electronic control unit (ECU) is involved.
General
1A typical electrical circuit consists of an
electrical component, any switches, relays,
motors, fuses, fusible links or circuit breakers
related to that component, and the wiring and
connectors which link the component to both
the battery and the chassis. To help to
pinpoint a problem in an electrical circuit,
wiring diagrams are included at the end of this
Chapter.
2Before attempting to diagnose an electrical
fault, first study the appropriate wiring
diagram, to obtain a more complete
understanding of the components included in
the particular circuit concerned. The possible
sources of a fault can be narrowed down by
noting whether other components related to
the circuit are operating properly. If several
components or circuits fail at one time, the
problem is likely to be related to a shared fuse
or earth connection.
3Electrical problems usually stem from
simple causes, such as loose or corroded
connections, a faulty earth connection, a
blown fuse, a melted fusible link, or a faulty
relay. Visually inspect the condition of all
fuses, wires and connections in a problem
circuit before testing the components. Use the
wiring diagrams to determine which terminal
connections will need to be checked in order
to pinpoint the trouble-spot.
4The basic tools required for electrical fault-
finding include: a circuit tester or voltmeter (a
12-volt bulb with a set of test leads can also
be used for certain tests), a self-powered test
light (sometimes known as a continuity tester),
an ohmmeter (to measure resistance), a
battery and set of test leads, and a jumper
wire, preferably with a circuit breaker or fuse
incorporated, which can be used to bypass
suspect wires or electrical components.
Before attempting to locate a problem with
test instruments, use the wiring diagram to
determine where to make the connections.
5To find the source of an intermittent wiring
fault (usually due to a poor or dirty connection,
or damaged wiring insulation), an integrity testcan be performed on the wiring, which
involves moving the wiring by hand, to see if
the fault occurs as the wiring is moved. It
should be possible to narrow down the source
of the fault to a particular section of wiring.
This method of testing can be used in
conjunction with any of the tests described in
the following sub-Sections.
6Apart from problems due to poor
connections, two basic types of fault can
occur in an electrical circuit - open-circuit or
short-circuit.
7Open-circuit faults are caused by a break
somewhere in the circuit, which prevents
current from flowing. An open-circuit fault will
prevent a component from working, but will
not cause the relevant circuit fuse to blow.
8Short-circuit faults are caused by a “short”
somewhere in the circuit, which allows the
current flowing in the circuit to “escape” along
an alternative route, usually to earth. Short-
circuit faults are normally caused by a
breakdown in wiring insulation, which allows a
feed wire to touch either another wire, or an
earthed component such as the bodyshell. A
short-circuit fault will normally cause the
relevant circuit fuse to blow. Note: A short-
circuit that occurs in the wiring between a
circuit’s battery supply and its fuse will not
cause the fuse in that particular circuit to blow.
This part of the circuit is unprotected - bear
this in mind when fault-finding on the vehicle’s
electrical system.
Finding an open-circuit
9To check for an open-circuit, connect one
lead of a circuit tester or voltmeter to either the
negative battery terminal or a known good earth.
10Connect the other lead to a connector in
the circuit being tested, preferably nearest to
the battery or fuse.
11Switch on the circuit, bearing in mind that
some circuits are live only when the ignition
switch is moved to a particular position.
12If voltage is present (indicated either by
the tester bulb lighting or a voltmeter reading,
as applicable), this means that the section of
2Electrical fault-finding - general
information
1General information
Body electrical system 13•3
13
Other relays and modules (continued)
IdentificationFunction
Behind facia (passenger side) (continued):
M4 . . . . . . . . . . . . . . . . . . . . . . . . . . . . . . . . . . . . . . . . . . . . . . . . . . . .Heated windscreen (timer)
M5 . . . . . . . . . . . . . . . . . . . . . . . . . . . . . . . . . . . . . . . . . . . . . . . . . . . .Air conditioning cooling fan
M6 . . . . . . . . . . . . . . . . . . . . . . . . . . . . . . . . . . . . . . . . . . . . . . . . . . . .ABS pump relay
M7 . . . . . . . . . . . . . . . . . . . . . . . . . . . . . . . . . . . . . . . . . . . . . . . . . . . .ABS main relay
M8 . . . . . . . . . . . . . . . . . . . . . . . . . . . . . . . . . . . . . . . . . . . . . . . . . . . .ABS control unit
M9 . . . . . . . . . . . . . . . . . . . . . . . . . . . . . . . . . . . . . . . . . . . . . . . . . . . .Ride height control
Below instrument panel (driver’s side):
N1 . . . . . . . . . . . . . . . . . . . . . . . . . . . . . . . . . . . . . . . . . . . . . . . . . . . .Bulb failure warning unit
Below facia (passenger side):
P1 . . . . . . . . . . . . . . . . . . . . . . . . . . . . . . . . . . . . . . . . . . . . . . . . . . . .ABS module
P2 . . . . . . . . . . . . . . . . . . . . . . . . . . . . . . . . . . . . . . . . . . . . . . . . . . . .Fuel-injection system module
Behind facia (passenger side):
R1 . . . . . . . . . . . . . . . . . . . . . . . . . . . . . . . . . . . . . . . . . . . . . . . . . . . .Speed control system module
R2 . . . . . . . . . . . . . . . . . . . . . . . . . . . . . . . . . . . . . . . . . . . . . . . . . . . .Auxiliary warning system module
R3 . . . . . . . . . . . . . . . . . . . . . . . . . . . . . . . . . . . . . . . . . . . . . . . . . . . .Rear audio console module
Torque wrench settingsNmlbf ft
Alternator adjusting strap:
To steering pump bracket (SOHC) . . . . . . . . . . . . . . . . . . . . . . . . . . .21 to 2616 to 19
To front cover (V6) . . . . . . . . . . . . . . . . . . . . . . . . . . . . . . . . . . . . . . . .41 to 5130 to 38
procarmanuals.com
Page 241 of 255
REF•6
Engine fails to rotate when attempting to start
m mBattery terminal connections loose or corroded (Chapter 1).
m mBattery discharged or faulty (Chapter 5).
m mBroken, loose or disconnected wiring in the starting circuit
(Chapter 5).
m mDefective starter solenoid or switch (Chapter 5).
m mDefective starter motor (Chapter 5).
m mStarter pinion or flywheel/driveplate ring gear teeth loose or broken
(Chapters 2 or 5).
m mEngine earth strap broken or disconnected.
Starter motor turns engine slowly
m
mPartially-discharged battery (recharge, use jump leads, or push
start) (Chapter 5).
m mBattery terminals loose or corroded (Chapter 1).
m mBattery earth to body defective (Chapter 5).
m mEngine earth strap loose.
m mStarter motor (or solenoid) wiring loose (Chapter 5).
m mStarter motor internal fault (Chapter 5).
Engine rotates, but will not start
m
mFuel pump inertia switch tripped (electric pump) (Chapter 4).
m mFuel tank empty.
m mBattery discharged (engine rotates slowly) (Chapter 5).
m mBattery terminal connections loose or corroded (Chapter 1).
m mIgnition components damp or damaged (Chapters 1 and 5).
m mBroken, loose or disconnected wiring in the ignition circuit
(Chapters 1 and 5).
m mWorn, faulty or incorrectly-gapped spark plugs (Chapter 1).
m mFuel injection system fault (Chapter 4).
m mMajor mechanical failure (eg broken timing chain) (Chapter 2).
Engine difficult to start when cold
m
mBattery discharged (Chapter 5).
m mBattery terminal connections loose or corroded (Chapter 1).
m mWorn, faulty or incorrectly-gapped spark plugs (Chapter 1).
m mFuel injection system fault (Chapter 4).
m mOther ignition system fault (Chapters 1 and 5).
m mLow cylinder compressions (Chapter 2).
Engine difficult to start when hot
m
mAir filter element dirty or clogged (Chapter 1).
m mFuel injection system fault (Chapter 4).
m mLow cylinder compressions (Chapter 2).
Starter motor noisy or excessively-rough in
engagement
m mStarter pinion or flywheel/driveplate ring gear teeth loose or broken
(Chapters 2 or 5).
m mStarter motor mounting bolts loose or missing (Chapter 5).
m mStarter motor internal components worn or damaged (Chapter 5).
Engine starts, but stops immediately
m
mLoose or faulty electrical connections in the ignition circuit
(Chapters 1 and 5).
m mVacuum leak at the throttle body or inlet manifold (Chapter 4).
m mFuel injection system fault (Chapter 4).
Engine idles erratically
m
mCarburettor stepper motor plunger dirty (2.0 litre only) (Chapter 5)
m mIncorrectly-adjusted idle speed (Chapter 4).
m mAir filter element clogged (Chapter 1).
m mVacuum leak at the throttle body, inlet manifold or associated hoses
(Chapter 4).
m mWorn, faulty or incorrectly-gapped spark plugs (Chapter 1).
m mUneven or low cylinder compressions (Chapter 2).
m mCamshaft lobes worn (Chapter 2).
m mFuel injection system fault (Chapter 4).
Engine misfires at idle speed
m
mWorn, faulty or incorrectly-gapped spark plugs (Chapter 1).
m mFaulty spark plug HT leads (Chapter 5).
m mVacuum leak at the throttle body, inlet manifold or associated hoses
(Chapter 4).
m mFuel injection system fault (Chapter 4).
m mDistributor cap cracked or tracking internally, where applicable
(Chapter 5).
m mUneven or low cylinder compressions (Chapter 2).
m mDisconnected, leaking, or perished crankcase ventilation hoses
(Chapter 4).
Fault Finding
spark plugs may only be pointers to some underlying fault.
The pages which follow provide an easy-reference guide to the more
common problems which may occur during the operation of the
vehicle. These problems and their possible causes are grouped under
headings denoting various components or systems, such as Engine,
Cooling system, etc. The Chapter and/or Section which deals with the
problem is also shown in brackets. Whatever the fault, certain basic
principles apply. These are as follows:
Verify the fault. This is simply a matter of being sure that you know
what the symptoms are before starting work. This is particularly
important if you are investigating a fault for someone else, who may
not have described it very accurately.
Don’t overlook the obvious. For example, if the vehicle won’t start, is
there fuel in the tank? (Don’t take anyone else’s word on this particular
point, and don’t trust the fuel gauge either!) If an electrical fault isindicated, look for loose or broken wires before digging out the test
gear.
Cure the disease, not the symptom. Substituting a flat battery with a
fully-charged one will get you off the hard shoulder, but if the
underlying cause is not attended to, the new battery will go the same
way. Similarly, changing oil-fouled spark plugs for a new set will get
you moving again, but remember that the reason for the fouling (if it
wasn’t simply an incorrect grade of plug) will have to be established
and corrected.
Don’t take anything for granted. Particularly, don’t forget that a
“new” component may itself be defective (especially if it’s been rattling
around in the boot for months), and don’t leave components out of a
fault diagnosis sequence just because they are new or recently-fitted.
When you do finally diagnose a difficult fault, you’ll probably realise
that all the evidence was there from the start.
1 Engine
procarmanuals.com
Page 243 of 255
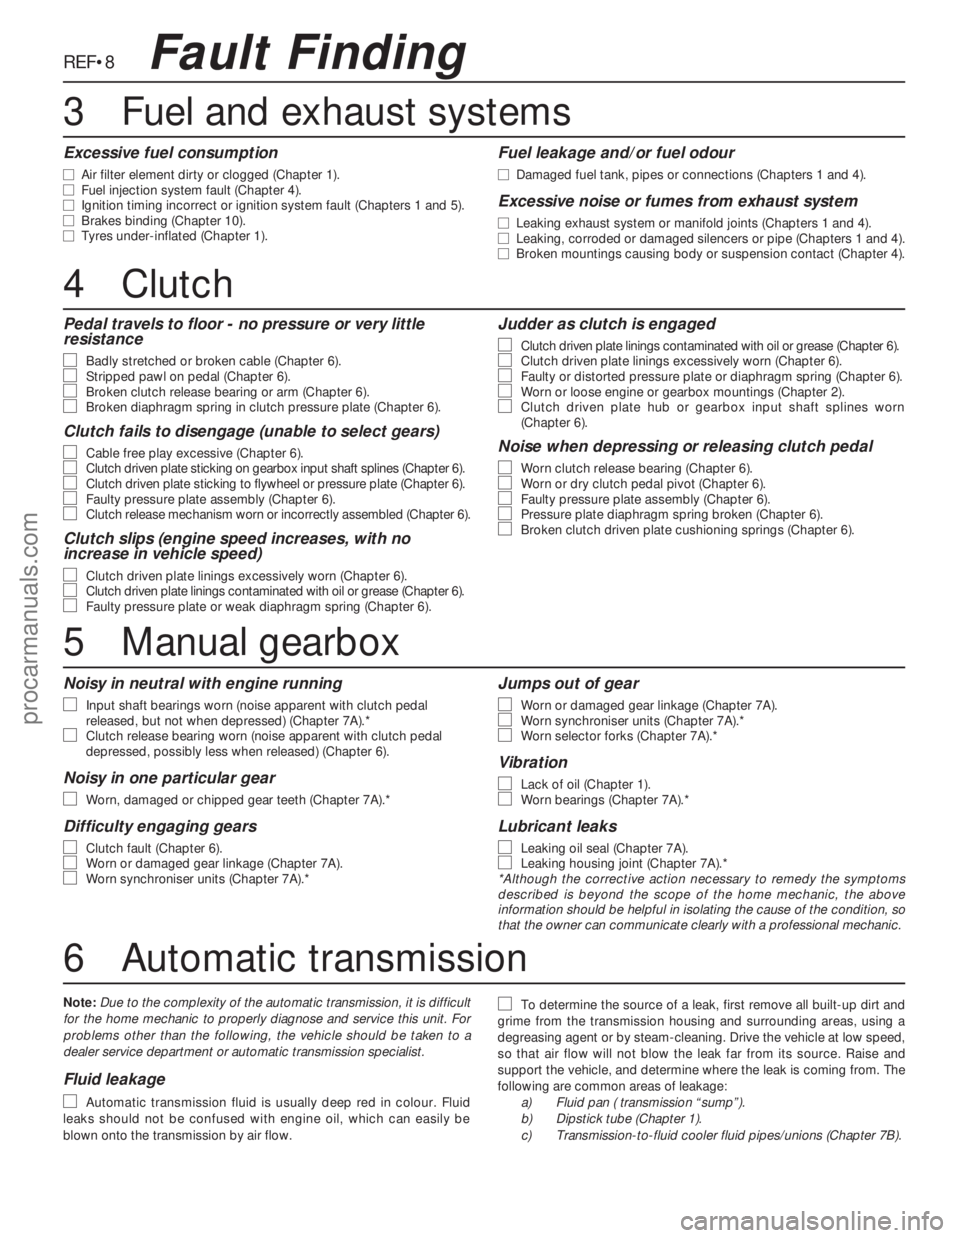
REF•8
Pedal travels to floor - no pressure or very little
resistance
m m
Badly stretched or broken cable (Chapter 6).m
mStripped pawl on pedal (Chapter 6).m
mBroken clutch release bearing or arm (Chapter 6).m
mBroken diaphragm spring in clutch pressure plate (Chapter 6).
Clutch fails to disengage (unable to select gears)
m m
Cable free play excessive (Chapter 6).m
mClutch driven plate sticking on gearbox input shaft splines (Chapter 6).m
mClutch driven plate sticking to flywheel or pressure plate (Chapter 6).m
mFaulty pressure plate assembly (Chapter 6).m
mClutch release mechanism worn or incorrectly assembled (Chapter 6).
Clutch slips (engine speed increases, with no
increase in vehicle speed)
m m
Clutch driven plate linings excessively worn (Chapter 6).m
mClutch driven plate linings contaminated with oil or grease (Chapter 6).m
mFaulty pressure plate or weak diaphragm spring (Chapter 6).
Judder as clutch is engaged
m m
Clutch driven plate linings contaminated with oil or grease (Chapter 6).m
mClutch driven plate linings excessively worn (Chapter 6).m
mFaulty or distorted pressure plate or diaphragm spring (Chapter 6).m
mWorn or loose engine or gearbox mountings (Chapter 2).m
mClutch driven plate hub or gearbox input shaft splines worn
(Chapter 6).
Noise when depressing or releasing clutch pedal
m m
Worn clutch release bearing (Chapter 6).m
mWorn or dry clutch pedal pivot (Chapter 6).m
mFaulty pressure plate assembly (Chapter 6).m
mPressure plate diaphragm spring broken (Chapter 6).m
mBroken clutch driven plate cushioning springs (Chapter 6).
Excessive fuel consumption
m
mAir filter element dirty or clogged (Chapter 1).
m mFuel injection system fault (Chapter 4).
m mIgnition timing incorrect or ignition system fault (Chapters 1 and 5).
m mBrakes binding (Chapter 10).
m mTyres under-inflated (Chapter 1).
Fuel leakage and/or fuel odour
m
mDamaged fuel tank, pipes or connections (Chapters 1 and 4).
Excessive noise or fumes from exhaust system
m
mLeaking exhaust system or manifold joints (Chapters 1 and 4).
m mLeaking, corroded or damaged silencers or pipe (Chapters 1 and 4).
m mBroken mountings causing body or suspension contact (Chapter 4).
Fault Finding
4Clutch
5Manual gearbox
Noisy in neutral with engine running
m m
Input shaft bearings worn (noise apparent with clutch pedal
released, but not when depressed) (Chapter 7A).*
m mClutch release bearing worn (noise apparent with clutch pedal
depressed, possibly less when released) (Chapter 6).
Noisy in one particular gear
m m
Worn, damaged or chipped gear teeth (Chapter 7A).*
Difficulty engaging gears
m m
Clutch fault (Chapter 6).m
mWorn or damaged gear linkage (Chapter 7A).m
mWorn synchroniser units (Chapter 7A).*
Jumps out of gear
m m
Worn or damaged gear linkage (Chapter 7A).m
mWorn synchroniser units (Chapter 7A).*m
mWorn selector forks (Chapter 7A).*
Vibration
m m
Lack of oil (Chapter 1).m
mWorn bearings (Chapter 7A).*
Lubricant leaks
m m
Leaking oil seal (Chapter 7A).m
mLeaking housing joint (Chapter 7A).*
*Although the corrective action necessary to remedy the symptoms
described is beyond the scope of the home mechanic, the above
information should be helpful in isolating the cause of the condition, so
that the owner can communicate clearly with a professional mechanic.
6Automatic transmission
Note:Due to the complexity of the automatic transmission, it is difficult
for the home mechanic to properly diagnose and service this unit. For
problems other than the following, the vehicle should be taken to a
dealer service department or automatic transmission specialist.
Fluid leakage
m m
Automatic transmission fluid is usually deep red in colour. Fluid
leaks should not be confused with engine oil, which can easily be
blown onto the transmission by air flow.
m mTo determine the source of a leak, first remove all built-up dirt and
grime from the transmission housing and surrounding areas, using a
degreasing agent or by steam-cleaning. Drive the vehicle at low speed,
so that air flow will not blow the leak far from its source. Raise and
support the vehicle, and determine where the leak is coming from. The
following are common areas of leakage:
a)Fluid pan ( transmission “sump”).
b)Dipstick tube (Chapter 1).
c)Transmission-to-fluid cooler fluid pipes/unions (Chapter 7B).
3Fuel and exhaust systems
procarmanuals.com
Page 252 of 255
A
ABS module - 10•11
Accelerator pump diaphragm renewal - 4•12
Accessory shops - 0•8
Acknowledgements - 0•4
Aerial pre-amplifier - 13•22
Air bags - 0•5
Air charge temperature sensor - 5•12
Air cleaner - 1•16, 4•4
Air conditioner - 1•14, 1•15, 3•2, 3•9
Air temperature sensor - 13•18
Alarm signal buzzer - 13•23
Alarm system horn - 13•23
Alternator - 3•7, 5•4
Anti-roll bar - 11•9, 11•12
Anti-theft alarm - 13•22, 13•23
Antifreeze mixture - 3•2
Asbestos - 0•5
Ashtray light - 13•8
Automatic choke - 1•16, 4•10, 4•12
Automatic transmission- 1•11, 1•15, 2B•6,
2B•7, 7B•1et seq, REF•8
Automatic transmission brake band
adjustment - 1•19
Automatic transmission selector light - 13•9
Auxiliary drivebelt - 1•12
Auxiliary driving light - 13•4, 13•6
Auxiliary shaft - 2A•9, 2A•14, 2A•16
Auxiliary warning system components - 13•18
B
Backrests - 12•19, 12•18
Battery - 0•5, 1•8, 1•13, 5•3, 5•4
Battery will not hold a charge for more than
a few days - REF•11
Bleeding the brakes - 10•3
Bleeding the power steering - 11•3
Body corrosion - 0•14
Body damage - 12•2, 12•4
Body electrical system- 13•1et seq
Bodywork and fittings- 12•1et seq
Bodywork repairs - 12•3
Bonnet - 12•4, 12•9
Bonnet release cable - 12•6
Booster battery (jump) starting - 0•10
Boot lid - 12•5
Boot lid lock barrel - 12•7
Brake band adjustment - 1•19, 7B•3
Brake fluid - 1•7, 1•19
Brake hydraulic system - 10•3
Brake pedal effort high to stop vehicle - REF•9
Brake pedal feels spongy when depressed
- REF•9
Brake pedal pulsates when braking hard -
REF•10
Brake pedal travel excessive - REF•9
Brake pipe and hoses - 1•15, 10•10
Brakes binding - REF•10
Braking system- 0•13, 10•1et seq, REF•9
Bulb failure module - 13•19
Bulbs - 13•4, 13•7
Bumper - 12•10, 12•11
Burning - 0•5
C
Cables - 3•8, 4•7, 6•3, 7B•3, 10•11
Caliper - 10•5, 10•6
Camshaft - 2A•7, 2A•14, 2A•17, 2B•14,
2C•12, 2C•13, 2C•15
Camshaft drivebelt - 1•20
Capacities - 1•3
Carbon canister - 4•23
Carburettor stepper motor - 5•10
Catalytic converter - 4•4
Central locking motor - 13•13
Central locking system inoperative, or
unsatisfactory in operation - REF•11
Centre console - 12•15
Cigarette lighter - 13•10
Clock - 13•9, 13•10
Clutch- 6•1et seq, REF•8
Clutch fails to disengage (unable to select
gears) - REF•8
Clutch pedal travels to floor - REF•8
Clutch release bearing and arm - 6•4
Clutch slips (engine speed increases, with
no increase in vehicle speed) - REF•8
CO emissions (mixture) - 0•14
Compliance bushes - 11•9
Compression test - 2A•20, 2B•18, 2C•21
Compressor drivebelt - 3•9
Computer module and bulb - 13•18
Condenser fan and motor - 3•10
Connecting rods - 2A•11, 2A•13, 2A•15,
2B•17, 2C•12, 2C•14, 2C•16
Console light - 13•9
Contents - 0•2
Control assembly - 13•19
Control module - 10•13
Control switches - 13•19
Control units - 13•13
Conversion factors - REF•16
Coolant - 1•6, 1•20
Coolant hoses - 2C•7
Coolant leakage - REF•7
Coolant level switch - 13•18
Coolant temperature sensor - 5•10
Cooling, heating and ventilation systems-
3•1 et seq, REF•7
Corrosion - REF•7
Courtesy light - 13•7
Crankcase ventilation system - 1•19,
2A•12, 2B•3, 2C•15
Crankshaft and bearings - 2A•11, 2A•12,
2A•15, 2B•17, 2B•18, 2C•12, 2C•14,
2C•15
Crankshaft oil seals - 2A•10, 2B•15, 2C•12
Crankshaft speed/position sensor - 5•11
Crossmember insulator - 11•12
Crushing - 0•5
Cushion - 12•18
Cylinder block and bores - 2A•13
Cylinder bores - 2C•14
Cylinder head - 2A•6, 2A•8, 2A•14, 2A•17,
2B•10, 2B•11, 2B•14, 2C•8, 2C•13,
2C•19
D
De-ice thermostat - 3•10
Decarbonising - 2A•14
Dents in bodywork - 12•2
Direction indicator - 13•5, 13•11
Discs - 10•3, 10•4, 10•8
Distributor - 5•5
Door exterior handle - 12•6
Door interior trim panel - 12•7
Door latch assembly - 12•6
Door lights - 13•7
Door lock barrel - 12•6
Door pillar switch - 13•12
Door speakers - 13•21
Door striker plate - 12•6
Door switch - 13•18
Door weatherstrip - 12•7
Door window - 12•8, 12•9
Doors - 0•12, 12•4, 12•7, 12•8, 12•9, 12•10
Downshift mechanism - 7B•3
Drivebelts - 1•12, 1•20, 3•7, 3•9, 11•6
Driveshaft - 1•15, 9•3
Drivetrain - 1•16
E
Earth fault - 13•4
EEC IV module - 5•9
Electric shock - 0•5
Electric windows inoperative, or
unsatisfactory in operation - REF•11
Electrical system - 0•12, 1•8, REF•10
Electronic ignition systems - 5•3
Engine- 2A•1 et seq, 2B•1 et seq, 2C•1 et
seq, REF•6
Engine backfires - REF•7
Engine bay light - 13•8
Engine difficult to start - REF•6
Engine dismantling - 2B•8
Engine electrical systems- 5•1et seq
Engine fails to rotate when attempting to
start - REF•6
Engine hesitates on acceleration - REF•7
Engine idles erratically - REF•6
Engine lacks power - REF•7
Engine management control module - 5•9
Engine management system relays - 5•11
Engine misfires - REF•6, REF•7
Engine mountings - 2A•11, 2B•8, 2C•12
Engine oil and filter - 1•6, 1•9
Engine rotates, but will not start - REF•6
Engine runs-on after switching off - REF•7
Engine stalls - REF•7
Engine starts, but stops immediately -
REF•6
Engine will not start in any gear, or starts in
gears other than Park or Neutral -
REF•9
Entertainment console - 13•22
Environmental considerations - REF•4
ESC II module - 5•3, 5•9
Exhaust emission checks - 0•14
Exhaust gas oxygen (HEGO) sensor - 4•22
Exhaust manifold(s) - 4•21
Exhaust system - 0•13, 1•10, 4•22
Expansion tank - 3•7
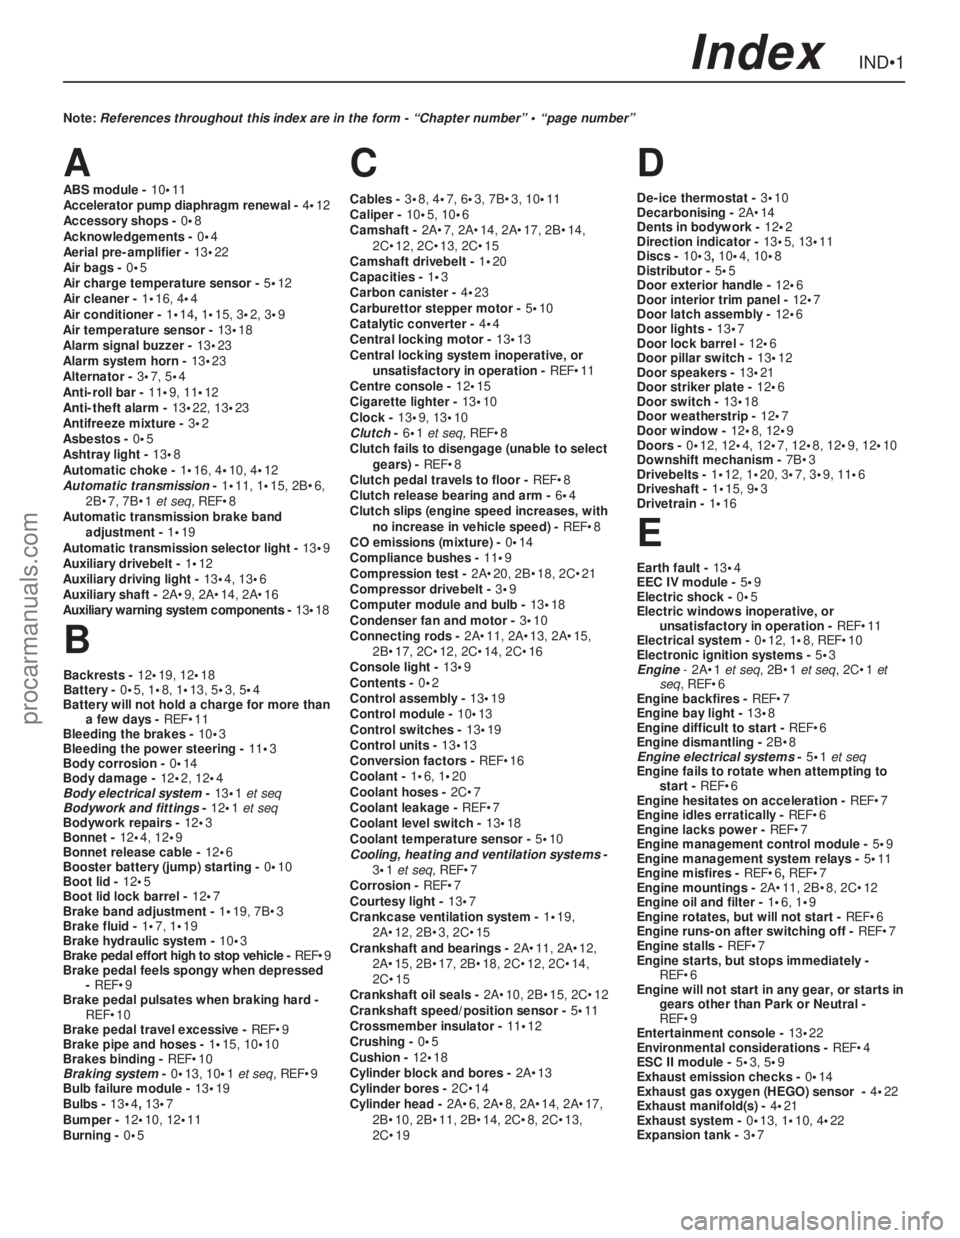
IND•1Index
Note: References throughout this index are in the form - “Chapter number” • “page number”
procarmanuals.com