key FORD KUGA 2010 1.G Owners Manual
[x] Cancel search | Manufacturer: FORD, Model Year: 2010, Model line: KUGA, Model: FORD KUGA 2010 1.GPages: 226, PDF Size: 8.07 MB
Page 3 of 226
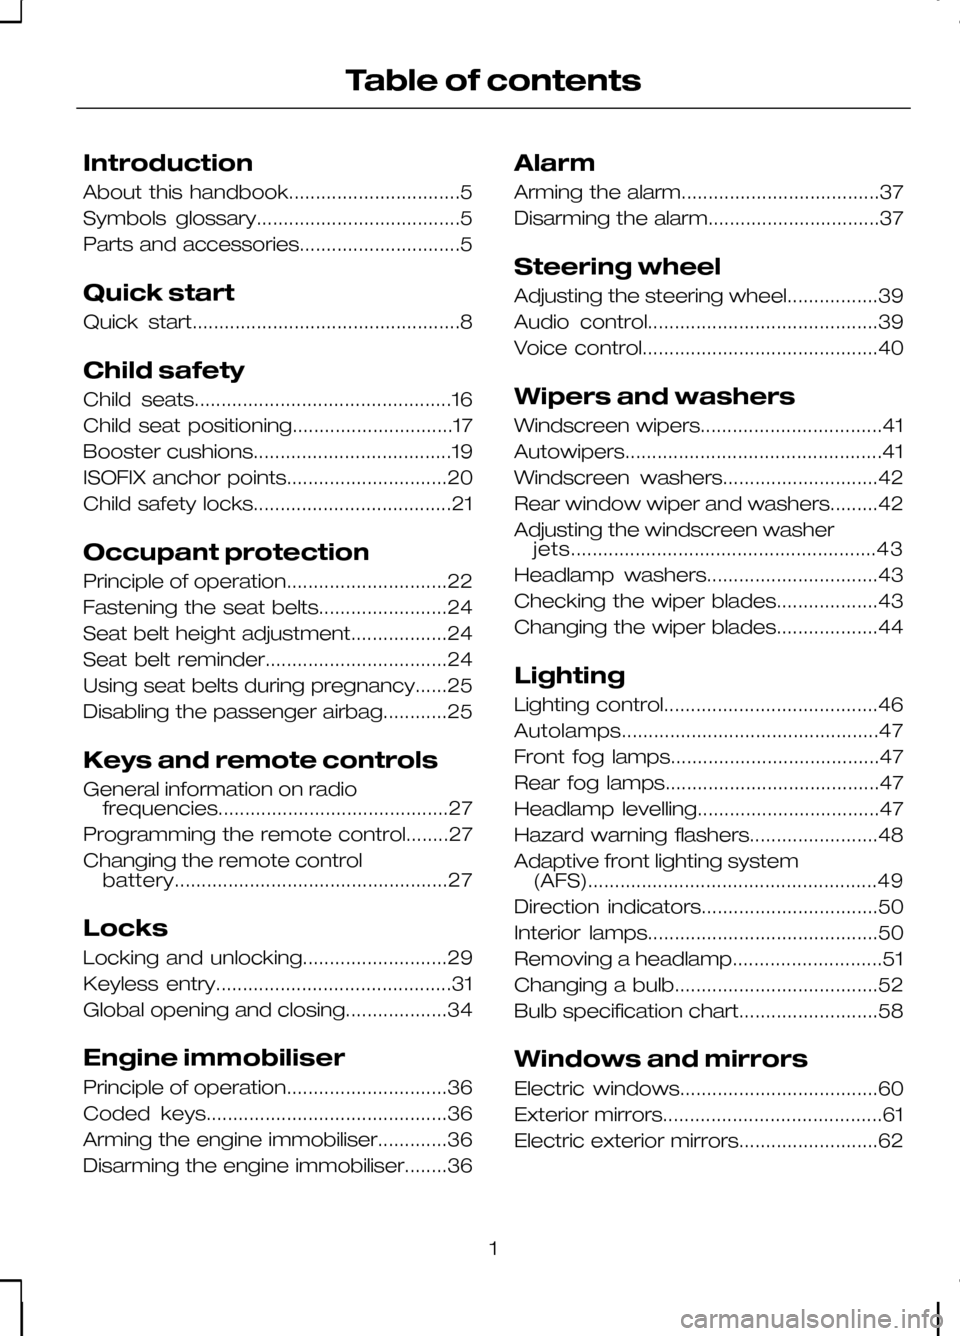
Introduction
About this handbook................................5
Symbols glossary......................................5
Parts and accessories..............................5
Quick start
Quick start..................................................8
Child safety
Child seats................................................16
Child seat positioning..............................17
Booster cushions.....................................19
ISOFIX anchor points..............................20
Child safety locks.....................................21
Occupant protection
Principle of operation..............................22
Fastening the seat belts........................24
Seat belt height adjustment..................24
Seat belt reminder..................................24
Using seat belts during pregnancy......25
Disabling the passenger airbag............25
Keys and remote controls
General information on radio
frequencies...........................................27
Programming the remote control........27
Changing the remote control battery...................................................27
Locks
Locking and unlocking...........................29
Keyless entry............................................31
Global opening and closing...................34
Engine immobiliser
Principle of operation..............................36
Coded keys.............................................36
Arming the engine immobiliser.............36
Disarming the engine immobiliser........36 Alarm
Arming the alarm.....................................37
Disarming the alarm................................37
Steering wheel
Adjusting the steering wheel.................39
Audio control...........................................39
Voice control............................................40
Wipers and washers
Windscreen wipers..................................41
Autowipers................................................41
Windscreen washers.............................42
Rear window wiper and washers.........42
Adjusting the windscreen washer
jets.........................................................43
Headlamp washers................................43
Checking the wiper blades...................43
Changing the wiper blades...................44
Lighting
Lighting control........................................46
Autolamps................................................47
Front fog lamps.......................................47
Rear fog lamps........................................47
Headlamp levelling..................................47
Hazard warning flashers........................48
Adaptive front lighting system (AFS)......................................................49
Direction indicators.................................50
Interior lamps...........................................50
Removing a headlamp............................51
Changing a bulb......................................52
Bulb specification chart..........................58
Windows and mirrors
Electric windows.....................................60
Exterior mirrors.........................................61
Electric exterior mirrors..........................62
1
Table of contents
Page 4 of 226
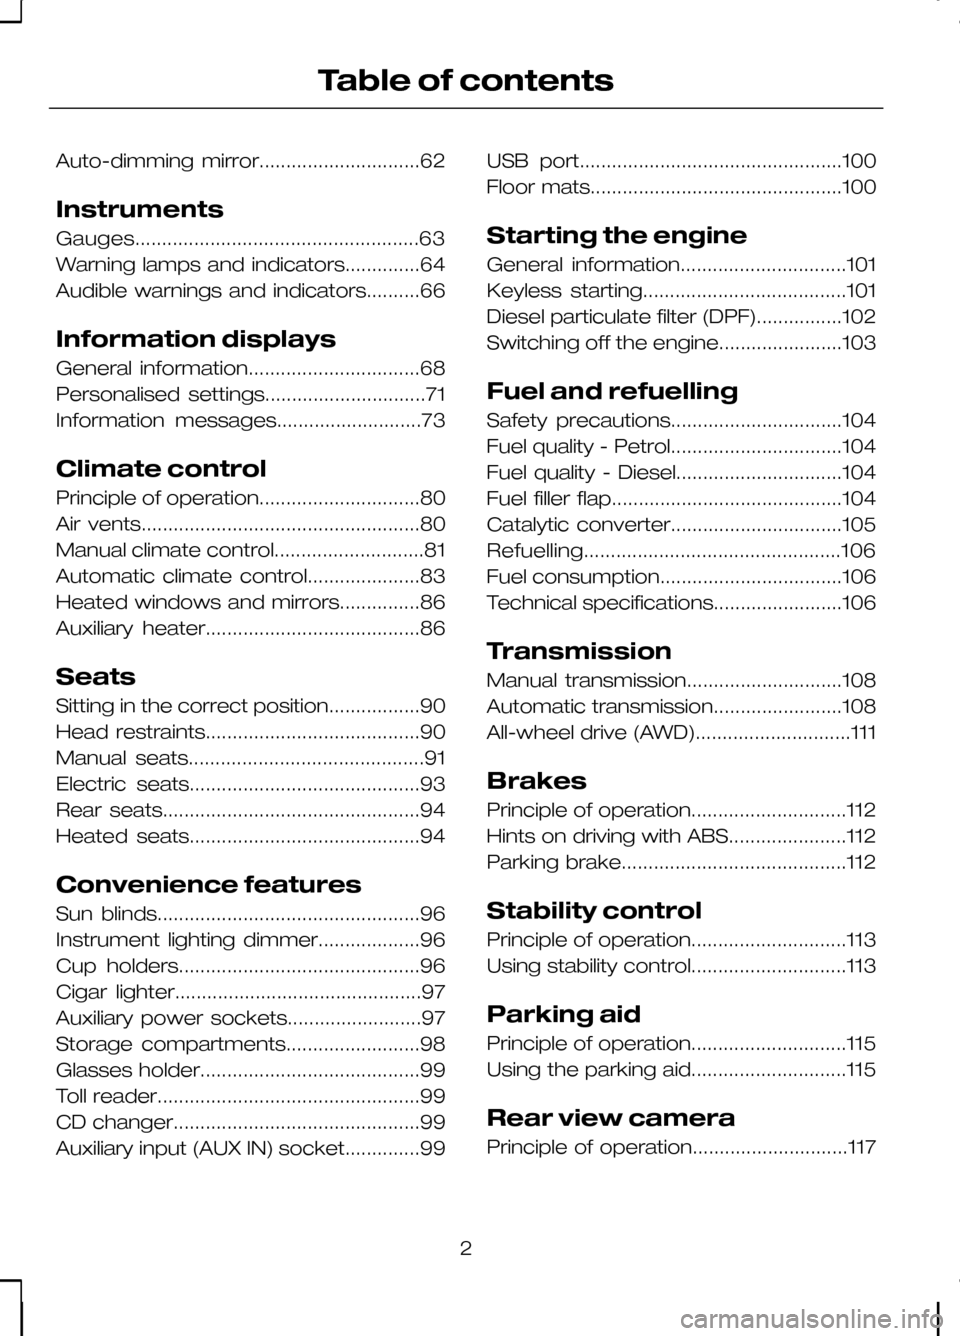
Auto-dimming mirror..............................62
Instruments
Gauges.....................................................63
Warning lamps and indicators..............64
Audible warnings and indicators..........66
Information displays
General information................................68
Personalised settings..............................71
Information messages...........................73
Climate control
Principle of operation..............................80
Air vents....................................................80
Manual climate control............................81
Automatic climate control.....................83
Heated windows and mirrors...............86
Auxiliary heater........................................86
Seats
Sitting in the correct position.................90
Head restraints........................................90
Manual seats............................................91
Electric seats...........................................93
Rear seats................................................94
Heated seats...........................................94
Convenience features
Sun blinds.................................................96
Instrument lighting dimmer...................96
Cup holders.............................................96
Cigar lighter..............................................97
Auxiliary power sockets.........................97
Storage compartments.........................98
Glasses holder.........................................99
Toll reader.................................................99
CD changer..............................................99
Auxiliary input (AUX IN) socket..............99
USB port.................................................100
Floor mats...............................................100
Starting the engine
General information...............................101
Keyless starting......................................101
Diesel particulate filter (DPF)................102
Switching off the engine.......................103
Fuel and refuelling
Safety precautions................................104
Fuel quality - Petrol................................104
Fuel quality - Diesel...............................104
Fuel filler flap...........................................104
Catalytic converter................................105
Refuelling................................................106
Fuel consumption..................................106
Technical specifications........................106
Transmission
Manual transmission.............................108
Automatic transmission........................108
All-wheel drive (AWD).............................111
Brakes
Principle of operation.............................112
Hints on driving with ABS......................112
Parking brake..........................................112
Stability control
Principle of operation.............................113
Using stability control.............................113
Parking aid
Principle of operation.............................115
Using the parking aid.............................115
Rear view camera
Principle of operation.............................117
2
Table of contents
Page 12 of 226
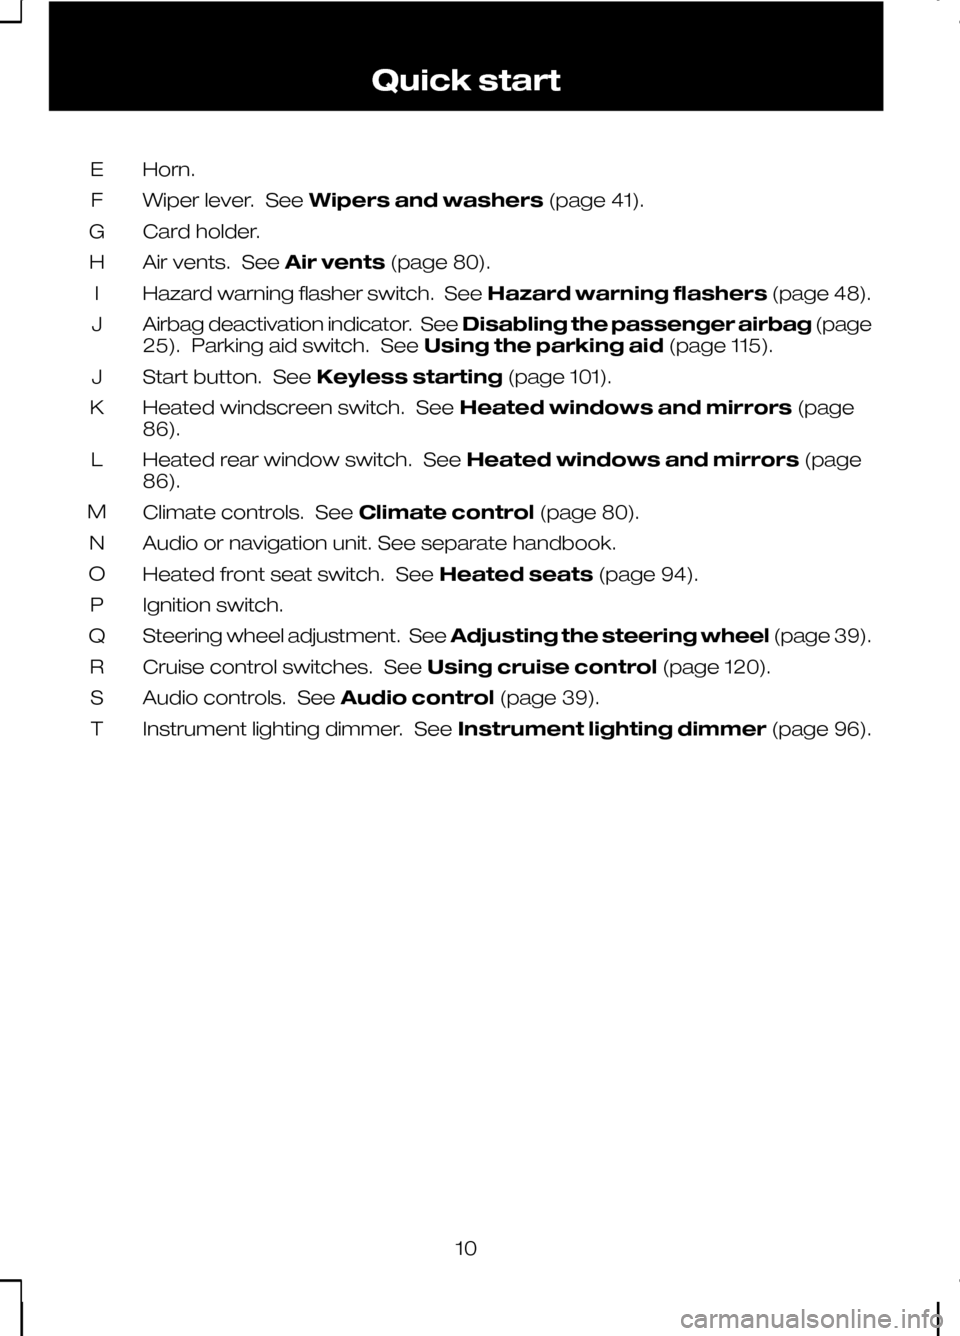
Horn.
E
Wiper lever. See Wipers and washers (page 41).
F
Card holder.
G
Air vents. See Air vents(page 80).
H
Hazard warning flasher switch. See Hazard warning flashers(page 48).
I
Airbag deactivation indicator. See Disabling the passenger airbag (page
25). Parking aid switch. See Using the parking aid(page 115).
J
Start button. See Keyless starting (page 101).
J
Heated windscreen switch. See Heated windows and mirrors (page
86).
K
Heated rear window switch. See Heated windows and mirrors (page
86).
L
Climate controls. See Climate control(page 80).
M
Audio or navigation unit. See separate handbook.
N
Heated front seat switch. See Heated seats(page 94).
O
Ignition switch.
P
Steering wheel adjustment. See Adjusting the steering wheel (page 39).
Q
Cruise control switches. See Using cruise control(page 120).
R
Audio controls. See Audio control(page 39).
S
Instrument lighting dimmer. See Instrument lighting dimmer(page 96).
T
10Quick start
Page 14 of 226
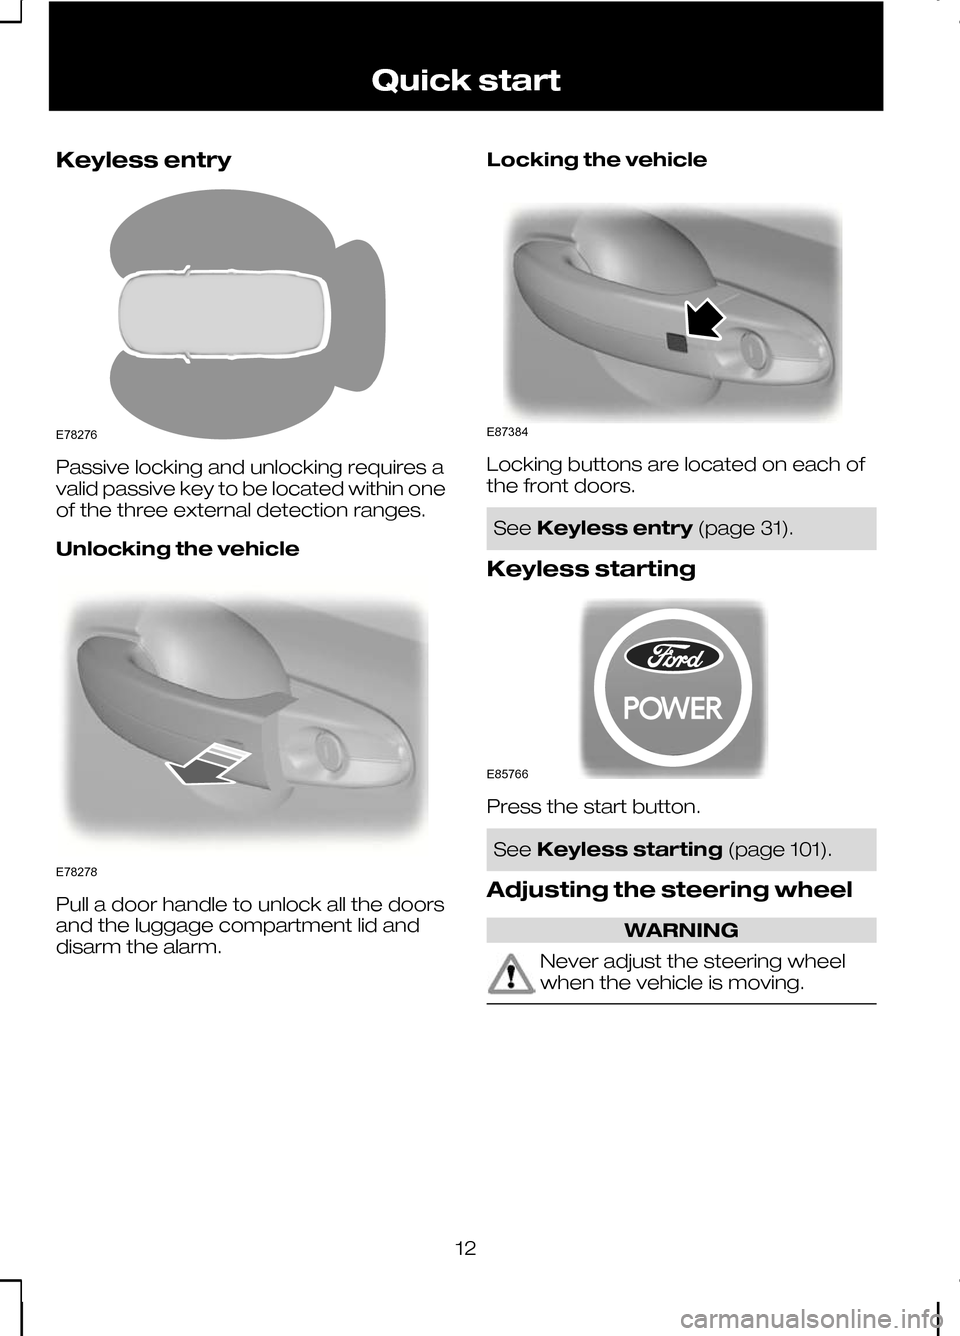
Keyless entry
Passive locking and unlocking requires a
valid passive key to be located within one
of the three external detection ranges.
Unlocking the vehicle
Pull a door handle to unlock all the doors
and the luggage compartment lid and
disarm the alarm. Locking the vehicle Locking buttons are located on each of
the front doors.
See
Keyless entry (page 31).
Keyless starting Press the start button.
See
Keyless starting (page 101).
Adjusting the steering wheel WARNING
Never adjust the steering wheel
when the vehicle is moving.
12Quick startE78276 E78278 E87384 E85766
Page 27 of 226
Deactivating the seat belt
reminder
See your dealer.
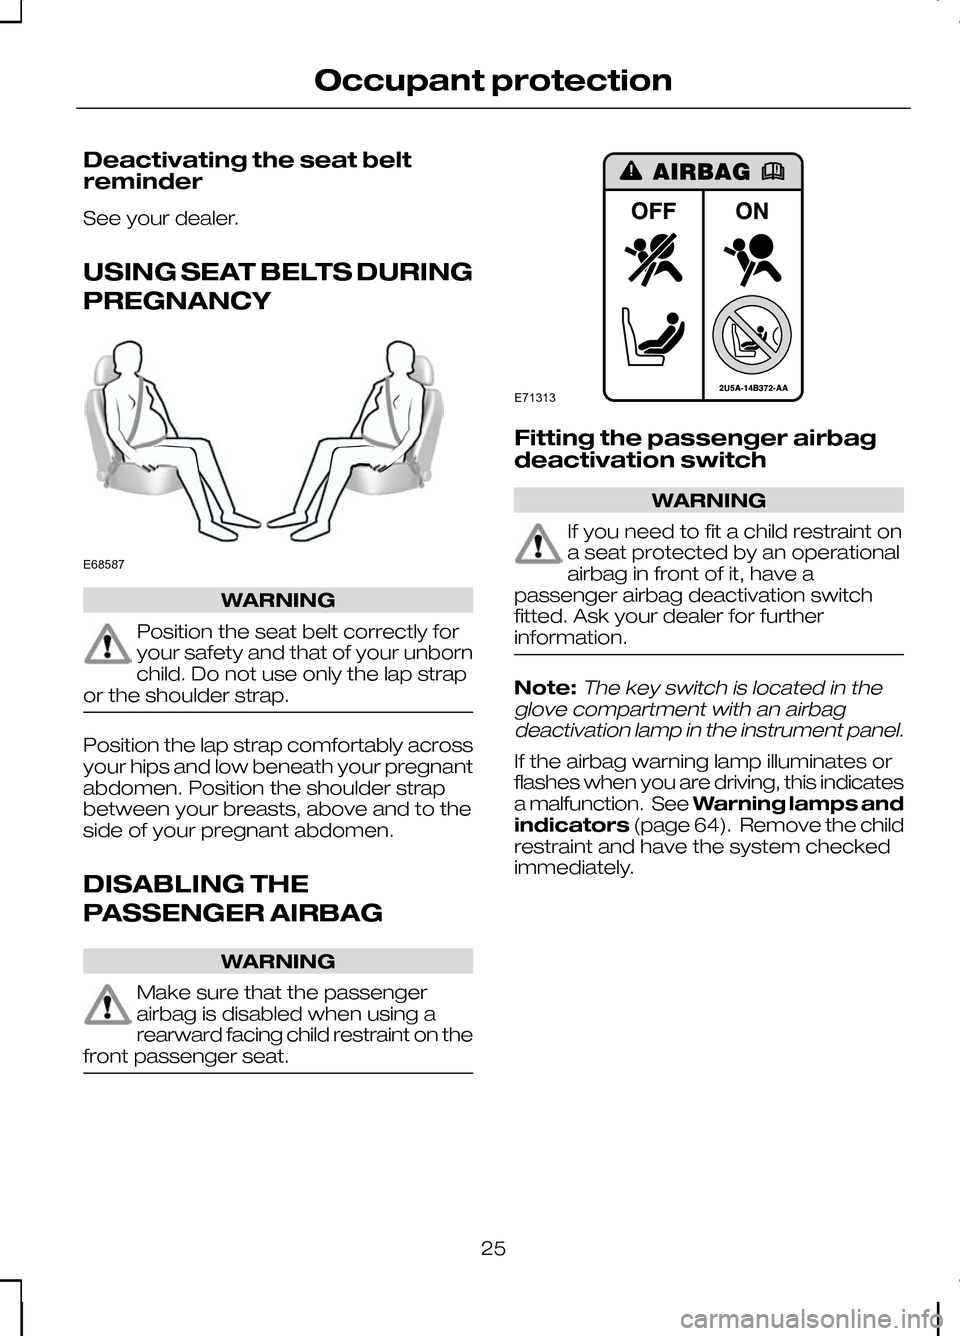
USING SEAT BELTS DURING
PREGNANCY
WARNING
Position the seat belt correctly for
your safety and that of your unborn
child. Do not use only the lap strap
or the shoulder strap. Position the lap strap comfortably across
your hips and low beneath your pregnant
abdomen. Position the shoulder strap
between your breasts, above and to the
side of your pregnant abdomen.
DISABLING THE
PASSENGER AIRBAG
WARNING
Make sure that the passenger
airbag is disabled when using a
rearward facing child restraint on the
front passenger seat. Fitting the passenger airbag
deactivation switch
WARNING
If you need to fit a child restraint on
a seat protected by an operational
airbag in front of it, have a
passenger airbag deactivation switch
fitted. Ask your dealer for further
information. Note:The key switch is located in the
glove compartment with an airbag deactivation lamp in the instrument panel.
If the airbag warning lamp illuminates or
flashes when you are driving, this indicates
a malfunction. See Warning lamps and
indicators (page 64). Remove the child
restraint and have the system checked
immediately.
25
Occupant protectionE68587 E71313
Page 29 of 226
GENERAL INFORMATION ON
RADIO FREQUENCIES
CAUTION
The radio frequency used by your
remote control can also be used by
other short distance radio
transmissions (e.g. amateur radios,
medical equipment, wireless headphones,
remote controls and alarm systems). If
the frequencies are jammed, you will not
be able to use your remote control. You
can lock and unlock the doors with the
key. Note:You could unlock the doors if you
press the buttons on the remote control unintentionally.
The operating range between your
remote control and your vehicle varies
depending on the environment.
PROGRAMMING THE
REMOTE CONTROL
You can programme a maximum of eight
remote controls to use with your vehicle
(including any supplied with your vehicle).
Ask your dealer for instructions.
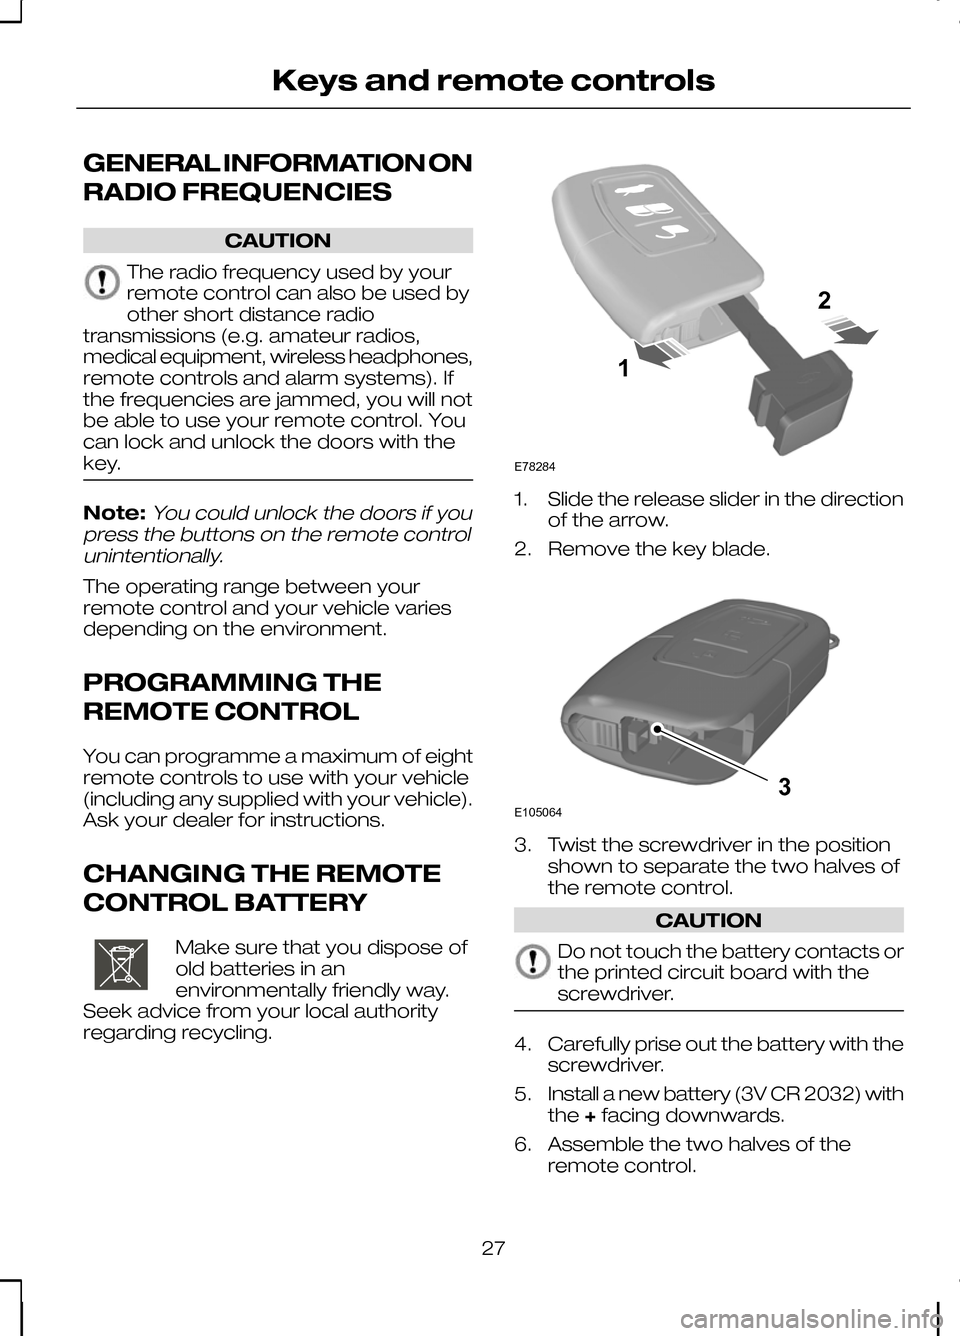
CHANGING THE REMOTE
CONTROL BATTERY Make sure that you dispose of
old batteries in an
environmentally friendly way.
Seek advice from your local authority
regarding recycling. 1. Slide the release slider in the direction
of the arrow.
2. Remove the key blade. 3. Twist the screwdriver in the position
shown to separate the two halves of
the remote control. CAUTION
Do not touch the battery contacts or
the printed circuit board with the
screwdriver.
4.
Carefully prise out the battery with the
screwdriver.
5. Install a new battery (3V CR 2032) with
the +facing downwards.
6. Assemble the two halves of the remote control.
27
Keys and remote controlsE107998 12E78284 E1050643
Page 30 of 226
7. Install the key blade.
28
Keys and remote controls
Page 31 of 226
LOCKING AND UNLOCKING
Central locking
You can only centrally lock the doors if
they are all closed.
Note:The driver’s door can be unlocked
with the key. This needs to be used if the remote control is not functioning.
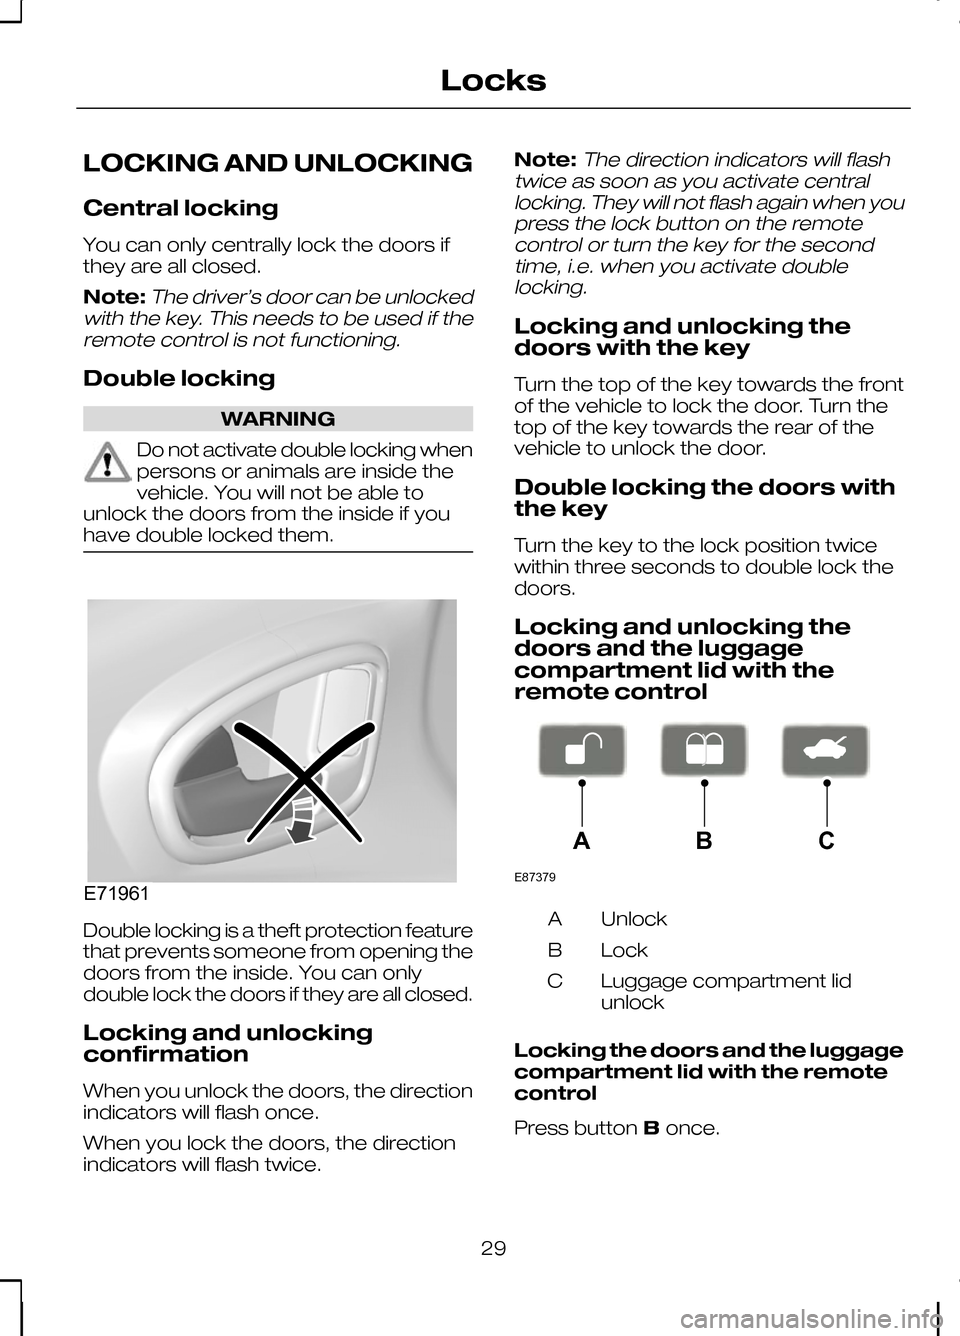
Double locking WARNING
Do not activate double locking when
persons or animals are inside the
vehicle. You will not be able to
unlock the doors from the inside if you
have double locked them. Double locking is a theft protection feature
that prevents someone from opening the
doors from the inside. You can only
double lock the doors if they are all closed.
Locking and unlocking
confirmation
When you unlock the doors, the direction
indicators will flash once.
When you lock the doors, the direction
indicators will flash twice. Note:
The direction indicators will flash
twice as soon as you activate central locking. They will not flash again when youpress the lock button on the remotecontrol or turn the key for the secondtime, i.e. when you activate doublelocking.
Locking and unlocking the
doors with the key
Turn the top of the key towards the front
of the vehicle to lock the door. Turn the
top of the key towards the rear of the
vehicle to unlock the door.
Double locking the doors with
the key
Turn the key to the lock position twice
within three seconds to double lock the
doors.
Locking and unlocking the
doors and the luggage
compartment lid with the
remote control Unlock
A
Lock
B
Luggage compartment lid
unlock
C
Locking the doors and the luggage
compartment lid with the remote
control
Press button Bonce.
29
LocksE71961 E87379ABC
Page 33 of 226
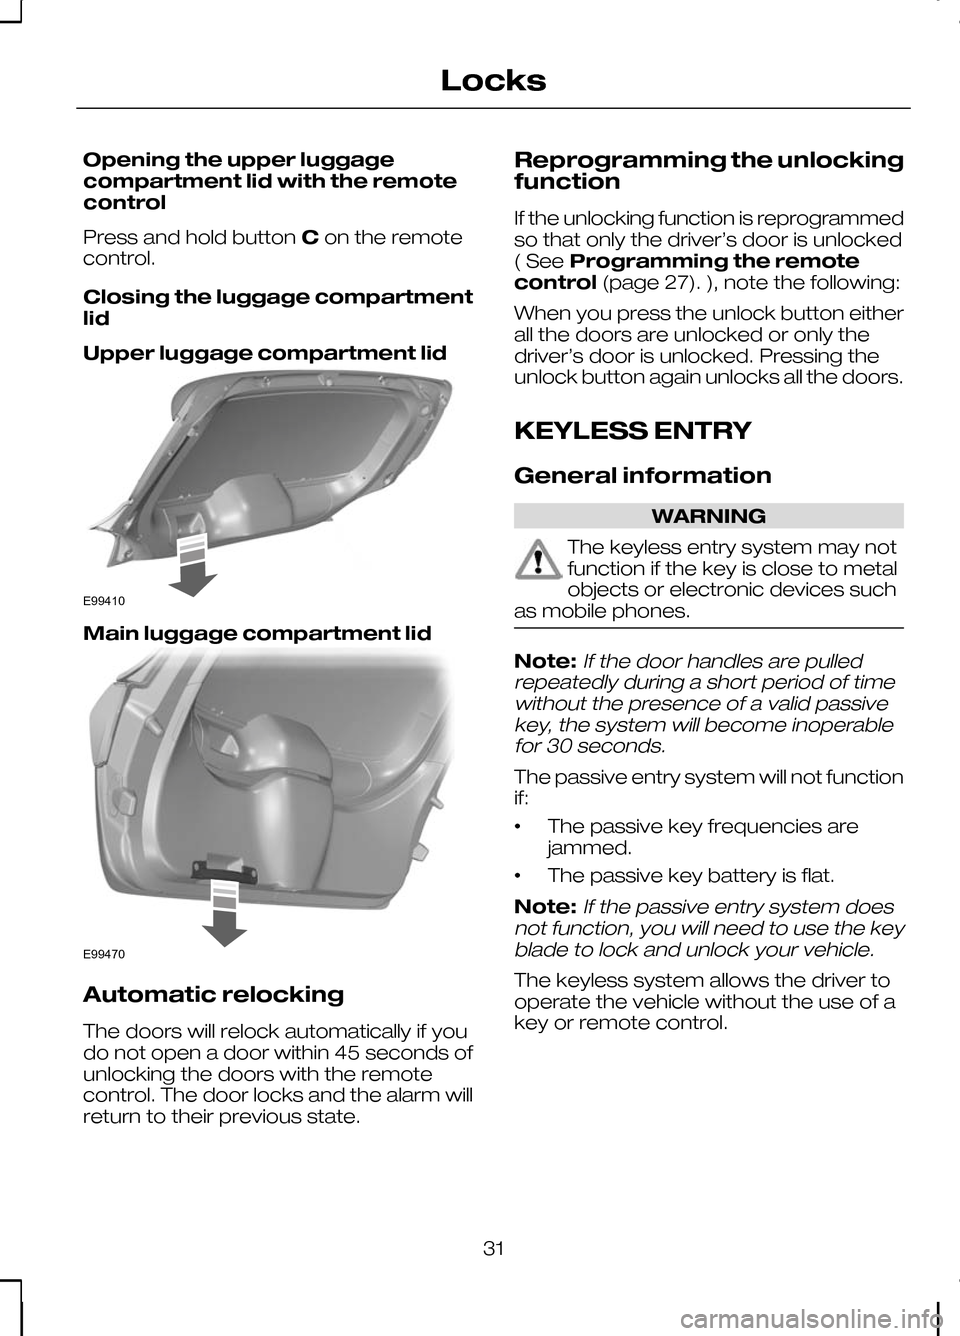
Opening the upper luggage
compartment lid with the remote
control
Press and hold button
Con the remote
control.
Closing the luggage compartment
lid
Upper luggage compartment lid Main luggage compartment lid
Automatic relocking
The doors will relock automatically if you
do not open a door within 45 seconds of
unlocking the doors with the remote
control. The door locks and the alarm will
return to their previous state. Reprogramming the unlocking
function
If the unlocking function is reprogrammed
so that only the driver’s door is unlocked
( See
Programming the remote
control (page 27). ), note the following:
When you press the unlock button either
all the doors are unlocked or only the
driver’s door is unlocked. Pressing the
unlock button again unlocks all the doors.
KEYLESS ENTRY
General information WARNING
The keyless entry system may not
function if the key is close to metal
objects or electronic devices such
as mobile phones. Note:If the door handles are pulled
repeatedly during a short period of time without the presence of a valid passivekey, the system will become inoperablefor 30 seconds.
The passive entry system will not function
if:
• The passive key frequencies are
jammed.
• The passive key battery is flat.
Note:
If the passive entry system does
not function, you will need to use the key blade to lock and unlock your vehicle.
The keyless system allows the driver to
operate the vehicle without the use of a
key or remote control.
31
LocksE99410 E99470
Page 34 of 226
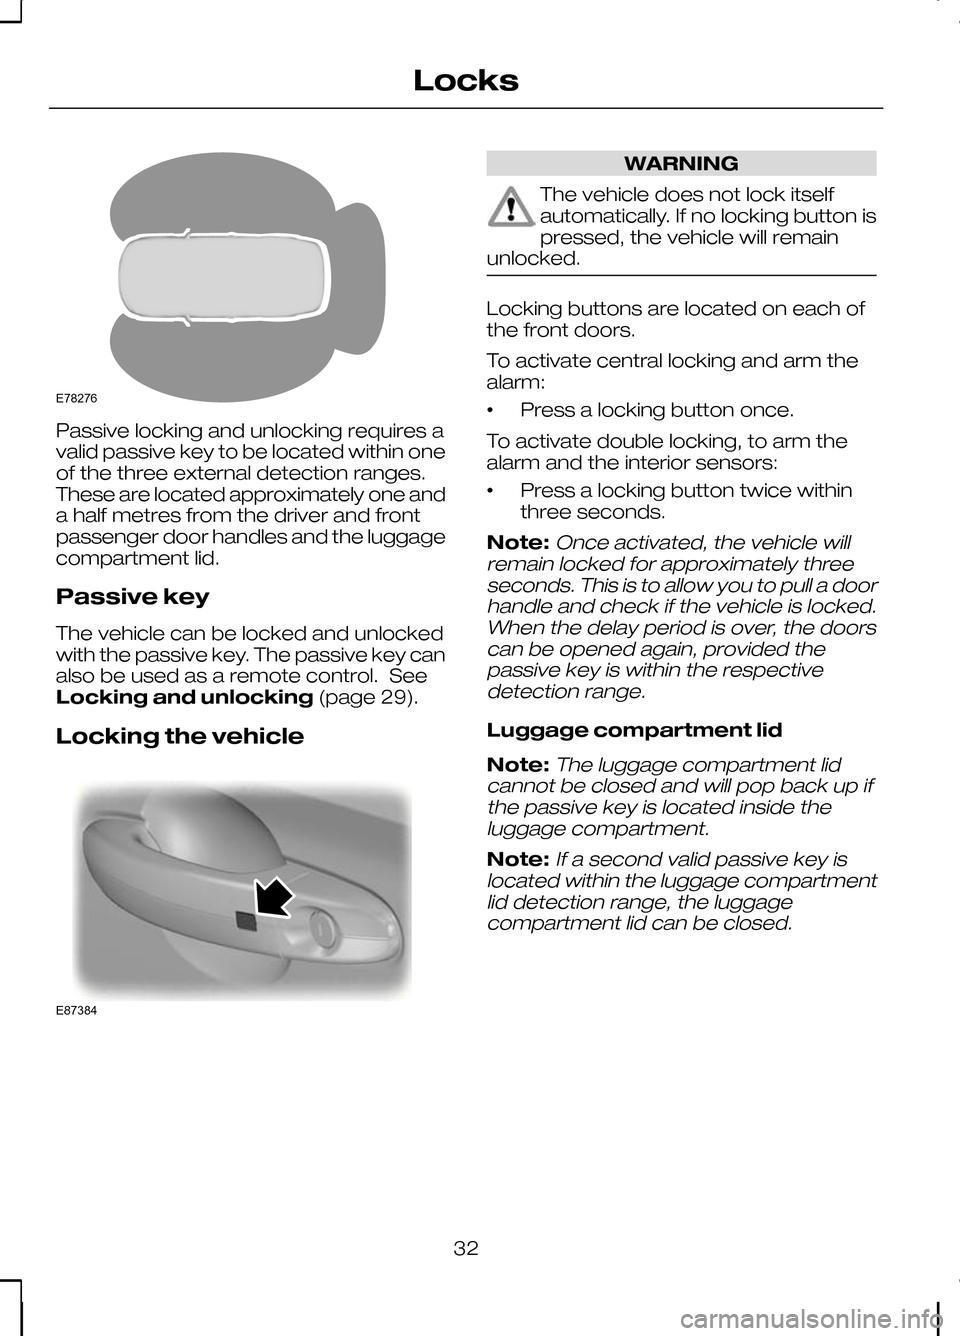
Passive locking and unlocking requires a
valid passive key to be located within one
of the three external detection ranges.
These are located approximately one and
a half metres from the driver and front
passenger door handles and the luggage
compartment lid.
Passive key
The vehicle can be locked and unlocked
with the passive key. The passive key can
also be used as a remote control. See
Locking and unlocking
(page 29).
Locking the vehicle WARNING
The vehicle does not lock itself
automatically. If no locking button is
pressed, the vehicle will remain
unlocked. Locking buttons are located on each of
the front doors.
To activate central locking and arm the
alarm:
•
Press a locking button once.
To activate double locking, to arm the
alarm and the interior sensors:
• Press a locking button twice within
three seconds.
Note:Once activated, the vehicle will
remain locked for approximately three seconds. This is to allow you to pull a doorhandle and check if the vehicle is locked.When the delay period is over, the doorscan be opened again, provided thepassive key is within the respectivedetection range.
Luggage compartment lid
Note:
The luggage compartment lid
cannot be closed and will pop back up if the passive key is located inside theluggage compartment.
Note:If a second valid passive key is
located within the luggage compartment lid detection range, the luggagecompartment lid can be closed.
32
LocksE78276 E87384