key FORD MUSTANG 2001 4.G User Guide
[x] Cancel search | Manufacturer: FORD, Model Year: 2001, Model line: MUSTANG, Model: FORD MUSTANG 2001 4.GPages: 240, PDF Size: 2.11 MB
Page 70 of 240
Please read and understand the entire procedure
before you begin.
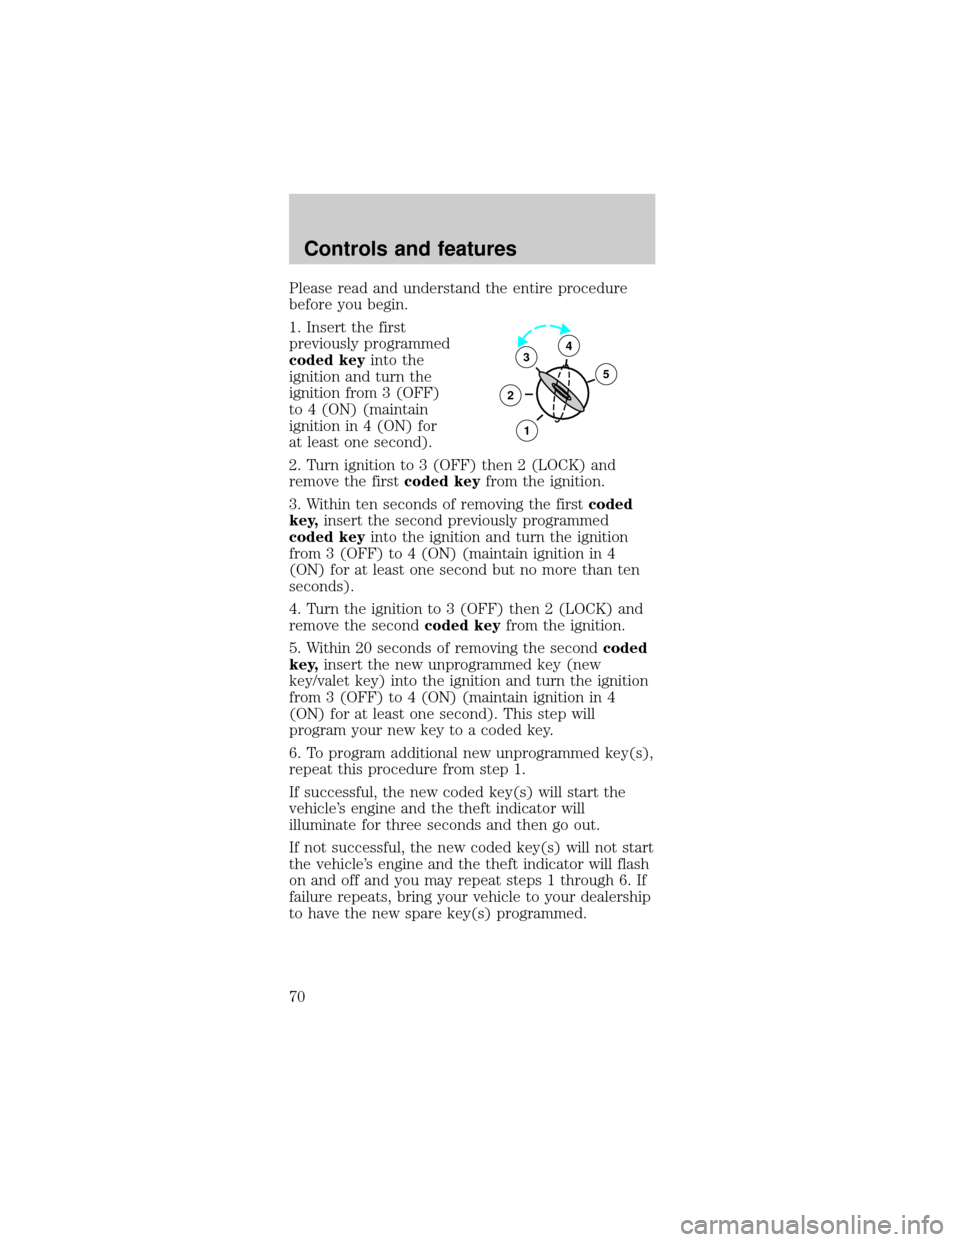
1. Insert the first
previously programmed
coded keyinto the
ignition and turn the
ignition from 3 (OFF)
to 4 (ON) (maintain
ignition in 4 (ON) for
at least one second).
2. Turn ignition to 3 (OFF) then 2 (LOCK) and
remove the firstcoded keyfrom the ignition.
3. Within ten seconds of removing the firstcoded
key,insert the second previously programmed
coded keyinto the ignition and turn the ignition
from 3 (OFF) to 4 (ON) (maintain ignition in 4
(ON) for at least one second but no more than ten
seconds).
4. Turn the ignition to 3 (OFF) then 2 (LOCK) and
remove the secondcoded keyfrom the ignition.
5. Within 20 seconds of removing the secondcoded
key,insert the new unprogrammed key (new
key/valet key) into the ignition and turn the ignition
from 3 (OFF) to 4 (ON) (maintain ignition in 4
(ON) for at least one second). This step will
program your new key to a coded key.
6. To program additional new unprogrammed key(s),
repeat this procedure from step 1.
If successful, the new coded key(s) will start the
vehicle's engine and the theft indicator will
illuminate for three seconds and then go out.
If not successful, the new coded key(s) will not start
the vehicle's engine and the theft indicator will flash
on and off and you may repeat steps 1 through 6. If
failure repeats, bring your vehicle to your dealership
to have the new spare key(s) programmed.
3
2
1
5
4
Controls and features
70
Page 72 of 240
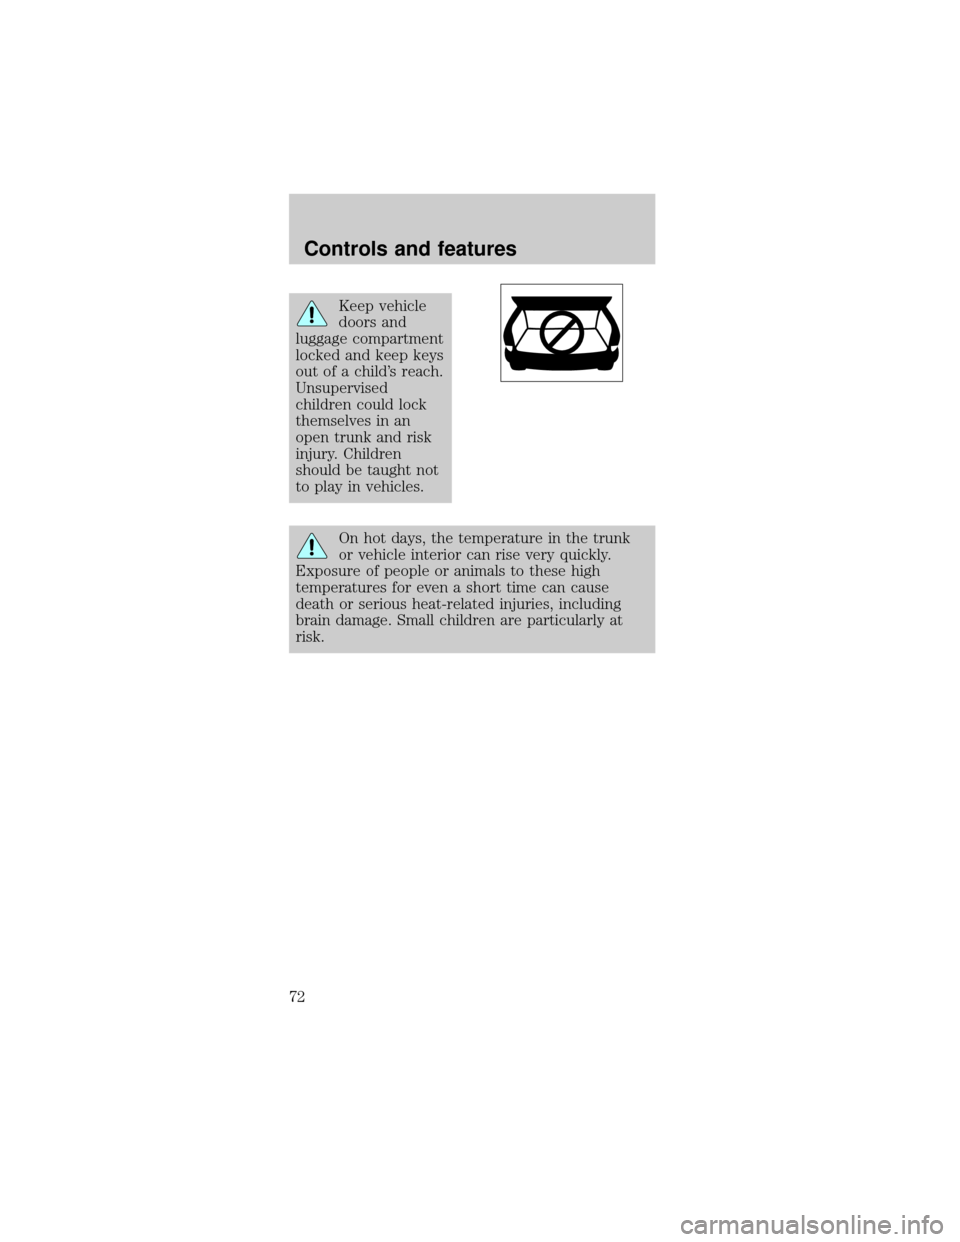
Keep vehicle
doors and
luggage compartment
locked and keep keys
out of a child's reach.
Unsupervised
children could lock
themselves in an
open trunk and risk
injury. Children
should be taught not
to play in vehicles.
On hot days, the temperature in the trunk
or vehicle interior can rise very quickly.
Exposure of people or animals to these high
temperatures for even a short time can cause
death or serious heat-related injuries, including
brain damage. Small children are particularly at
risk.
Controls and features
72
Page 105 of 240
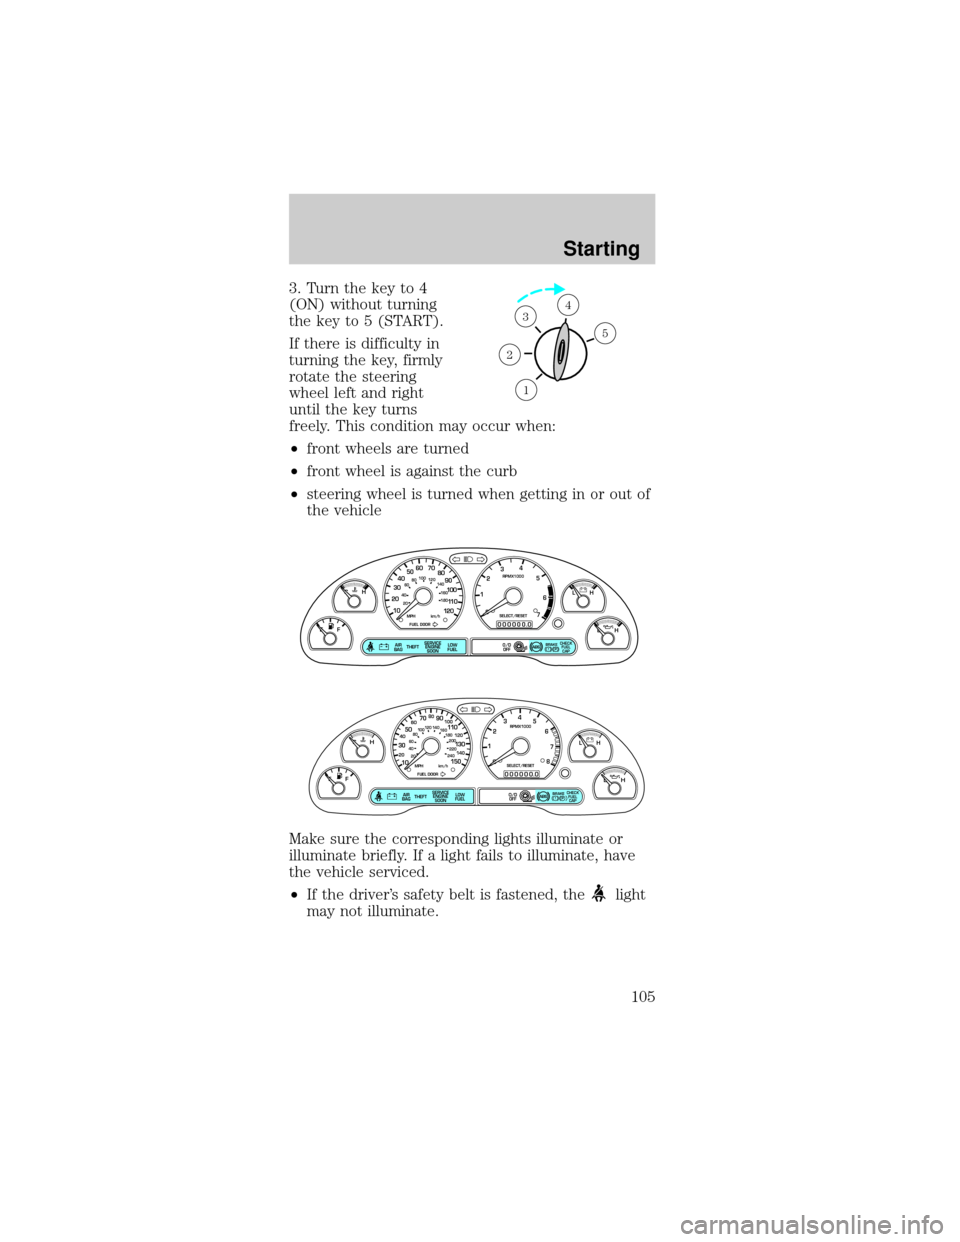
3. Turn the key to 4
(ON) without turning
the key to 5 (START).
If there is difficulty in
turning the key, firmly
rotate the steering
wheel left and right
until the key turns
freely. This condition may occur when:
²front wheels are turned
²front wheel is against the curb
²steering wheel is turned when getting in or out of
the vehicle
Make sure the corresponding lights illuminate or
illuminate briefly. If a light fails to illuminate, have
the vehicle serviced.
²If the driver's safety belt is fastened, the
light
may not illuminate.
1
2
34
5
P! BRAKE
L
0
00000 00
C
E
FH
LH
10 203020 406080100
120
140
160
180
405060 70
80
90
100
11 0
1204
5
6
7 3
2
1
H
THEFT
RPMX1000
FUEL DOORSELECT/RESET
LOW
FUELO/D
OFF AIR
BAGSERVICE
ENGINE
SOON
MPH km/h
ABS
.
CHECK
FUEL
CAP
P! BRAKE
L
0
00000 00
C
E
FH
LH
102040608020 40608010 012 0 14 0
160
180
200
220
240
100
120
140
305070 90
110
13 0
1504
5
6
7
8 3
2
1
H
THEFT
RPMX1000
FUEL DOORSELECT/RESET
LOW
FUELO/D
OFF AIR
BAGSERVICE
ENGINE
SOON
MPH km/h
ABS
.
CHECK
FUEL
CAP
Starting
105
Page 106 of 240
STARTING THE ENGINE
NOTE:Whenever you start your vehicle, release the
key as soon as the engine starts. Excessive cranking
could damage the starter.
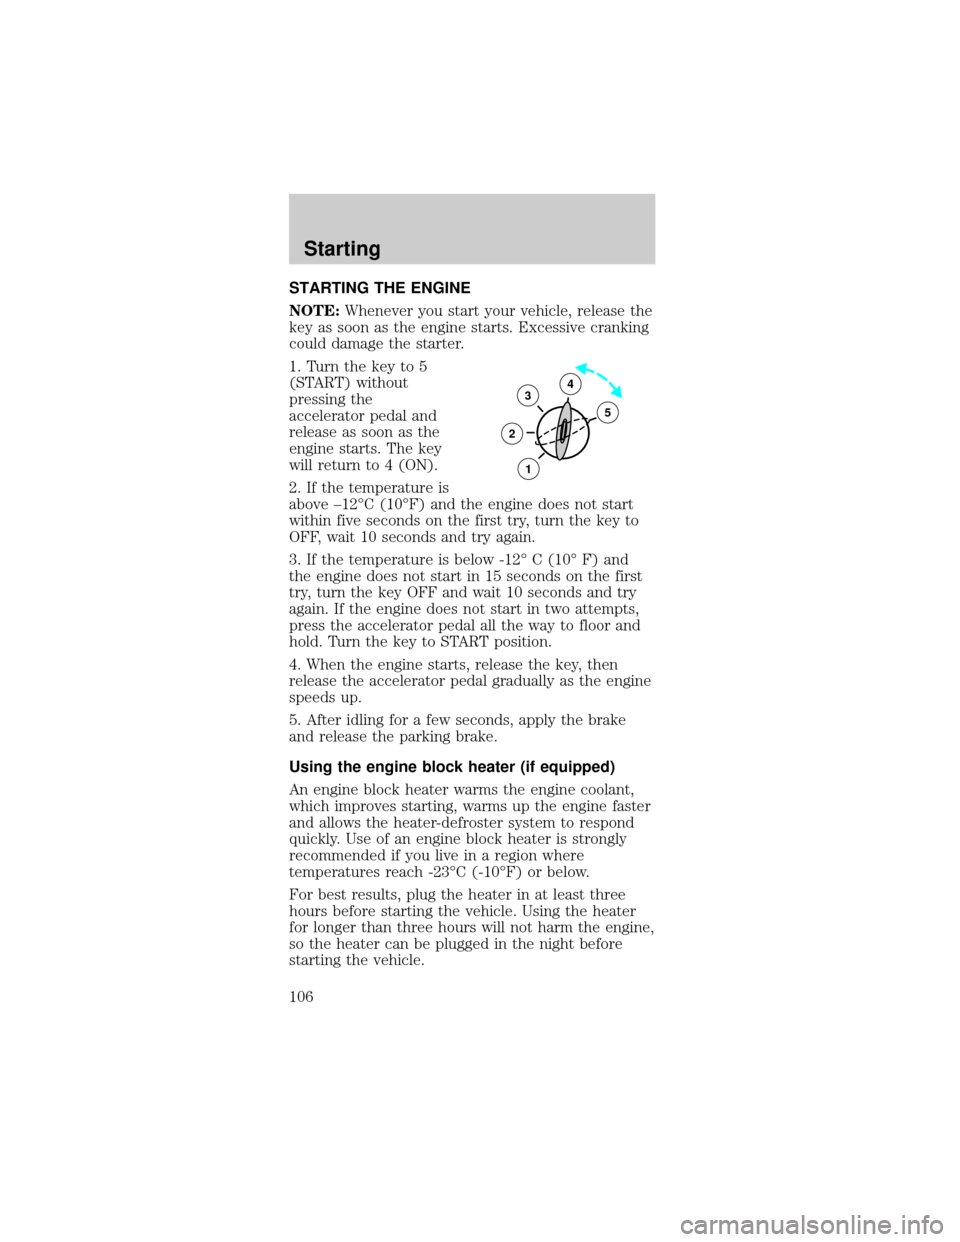
1. Turn the key to 5
(START) without
pressing the
accelerator pedal and
release as soon as the
engine starts. The key
will return to 4 (ON).
2. If the temperature is
above ±12ÉC (10ÉF) and the engine does not start
within five seconds on the first try, turn the key to
OFF, wait 10 seconds and try again.
3. If the temperature is below -12É C (10É F) and
the engine does not start in 15 seconds on the first
try, turn the key OFF and wait 10 seconds and try
again. If the engine does not start in two attempts,
press the accelerator pedal all the way to floor and
hold. Turn the key to START position.
4. When the engine starts, release the key, then
release the accelerator pedal gradually as the engine
speeds up.
5. After idling for a few seconds, apply the brake
and release the parking brake.
Using the engine block heater (if equipped)
An engine block heater warms the engine coolant,
which improves starting, warms up the engine faster
and allows the heater-defroster system to respond
quickly. Use of an engine block heater is strongly
recommended if you live in a region where
temperatures reach -23ÉC (-10ÉF) or below.
For best results, plug the heater in at least three
hours before starting the vehicle. Using the heater
for longer than three hours will not harm the engine,
so the heater can be plugged in the night before
starting the vehicle.
3
2
1
5
4
Starting
106
Page 113 of 240

STEERING
Your vehicle is equipped with power steering. Power
steering uses energy from the engine to help steer
the vehicle.
To prevent damage to the power steering pump:
²Never hold the steering wheel to the extreme
right or the extreme left for more than a few
seconds when the engine is running.
²Do not operate the vehicle with a low power
steering pump fluid level (below the MIN mark on
the reservoir).
If the power steering system breaks down (or if the
engine is turned off), you can steer the vehicle
manually, but it takes more effort.
If the steering wanders or pulls, the condition could
be caused by any of the following:
²underinflated tire(s) on any wheel(s)
²uneven vehicle loading
²high crown in center of road
²high crosswinds
²wheels out of alignment
²loose or worn suspension components
AUTOMATIC TRANSMISSION OPERATION
(IF EQUIPPED)
Brake-shift interlock
This vehicle is equipped with a brake-shift interlock
feature that prevents the gearshift lever from being
moved from P (Park) when the ignition is in the ON
position unless brake pedal is depressed.
If you cannot move the gearshift lever out of P
(Park) with ignition in the ON position and the
brake pedal depressed:
1. Apply the parking brake, turn ignition key to
LOCK, then remove the key.
Driving
113
Page 114 of 240
2. Insert the key and turn it to OFF. Apply the brake
pedal and shift to N (Neutral).
3. Start the vehicle.
If it is necessary to use the above procedure to
move the gearshift lever, it is possible that a fuse
has blown or the vehicle's brakelamps are not
operating properly. Refer toFuses and relaysin the
Roadside emergencieschapter.
Do not drive your vehicle until you verify
that the brakelamps are working.
If your vehicle gets stuck in mud or snow it may be
rocked out by shifting from forward and reverse
gears, stopping between shifts, in a steady pattern.
Press lightly on the accelerator in each gear.
Do not rock the vehicle if the engine is not at
normal operating temperature or damage to
the transmission may occur.
Do not rock the vehicle for more than a few
minutes or damage to the transmission and
tires may occur or the engine may overheat.
Always set the parking brake fully and make
sure the gearshift is latched in P (Park).
Turn off the ignition whenever you leave your
vehicle.
If the parking brake is fully released, but the
brake warning lamp remains illuminated, the
brakes may not be working properly. See your
dealer or a qualified service technician.
Driving
114
Page 121 of 240
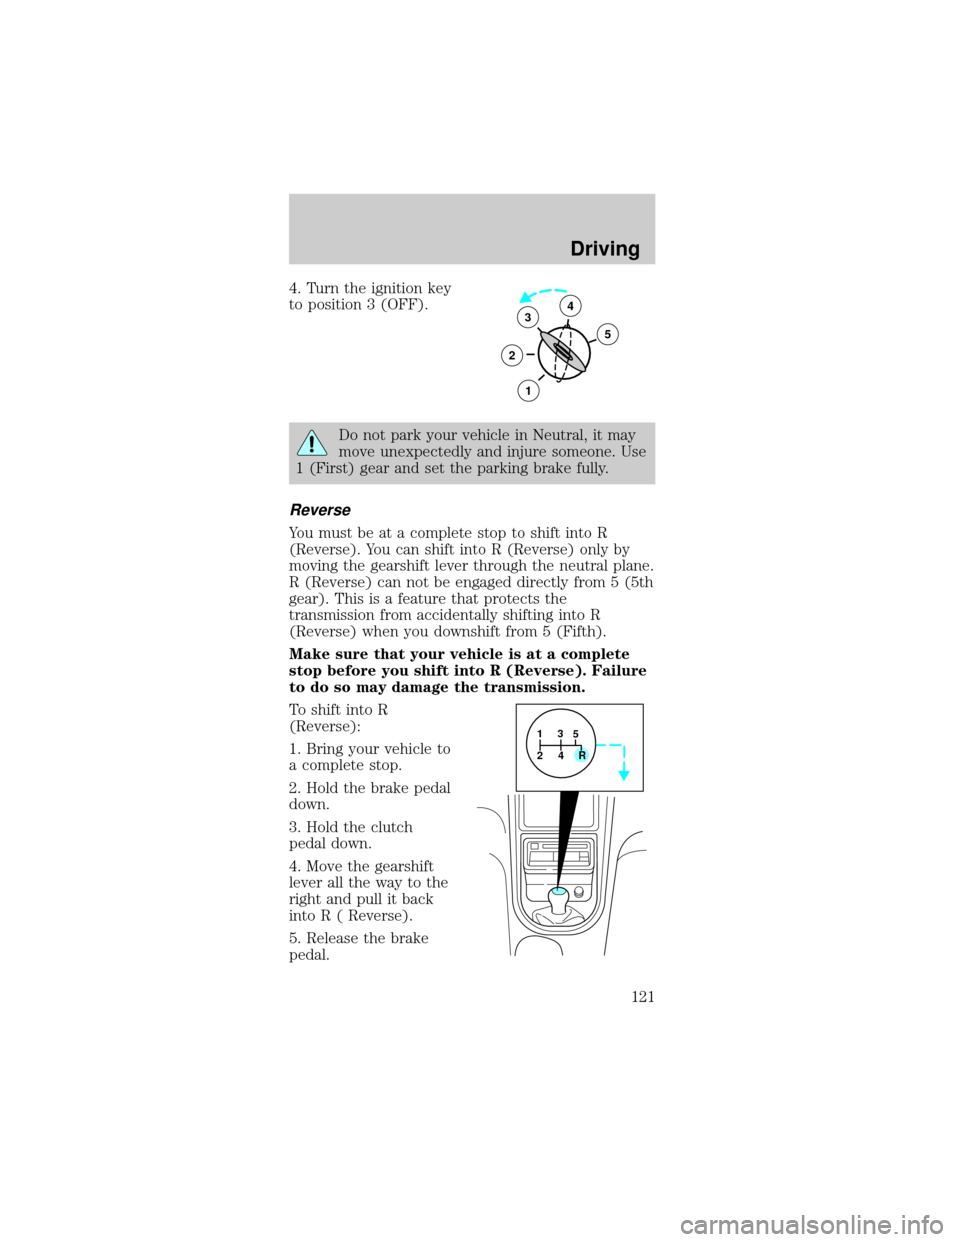
4. Turn the ignition key
to position 3 (OFF).
Do not park your vehicle in Neutral, it may
move unexpectedly and injure someone. Use
1 (First) gear and set the parking brake fully.
Reverse
You must be at a complete stop to shift into R
(Reverse). You can shift into R (Reverse) only by
moving the gearshift lever through the neutral plane.
R (Reverse) can not be engaged directly from 5 (5th
gear). This is a feature that protects the
transmission from accidentally shifting into R
(Reverse) when you downshift from 5 (Fifth).
Make sure that your vehicle is at a complete
stop before you shift into R (Reverse). Failure
to do so may damage the transmission.
To shift into R
(Reverse):
1. Bring your vehicle to
a complete stop.
2. Hold the brake pedal
down.
3. Hold the clutch
pedal down.
4. Move the gearshift
lever all the way to the
right and pull it back
into R ( Reverse).
5. Release the brake
pedal.
3
2
1
5
4
1
24R3
5
Driving
121
Page 122 of 240
6. Slowly release the clutch pedal.
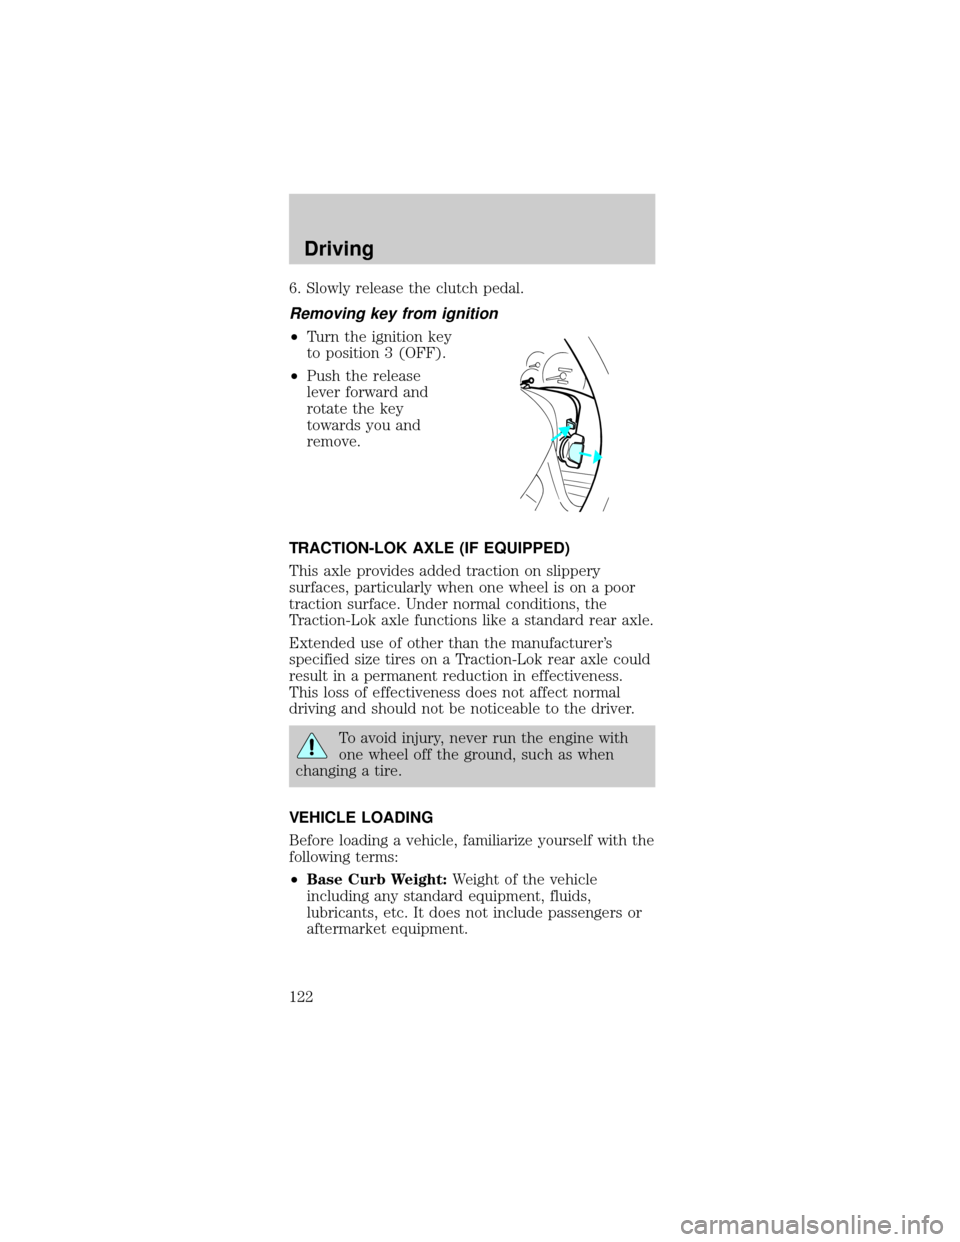
Removing key from ignition
²Turn the ignition key
to position 3 (OFF).
²Push the release
lever forward and
rotate the key
towards you and
remove.
TRACTION-LOK AXLE (IF EQUIPPED)
This axle provides added traction on slippery
surfaces, particularly when one wheel is on a poor
traction surface. Under normal conditions, the
Traction-Lok axle functions like a standard rear axle.
Extended use of other than the manufacturer's
specified size tires on a Traction-Lok rear axle could
result in a permanent reduction in effectiveness.
This loss of effectiveness does not affect normal
driving and should not be noticeable to the driver.
To avoid injury, never run the engine with
one wheel off the ground, such as when
changing a tire.
VEHICLE LOADING
Before loading a vehicle, familiarize yourself with the
following terms:
²Base Curb Weight:Weight of the vehicle
including any standard equipment, fluids,
lubricants, etc. It does not include passengers or
aftermarket equipment.
Driving
122
Page 131 of 240
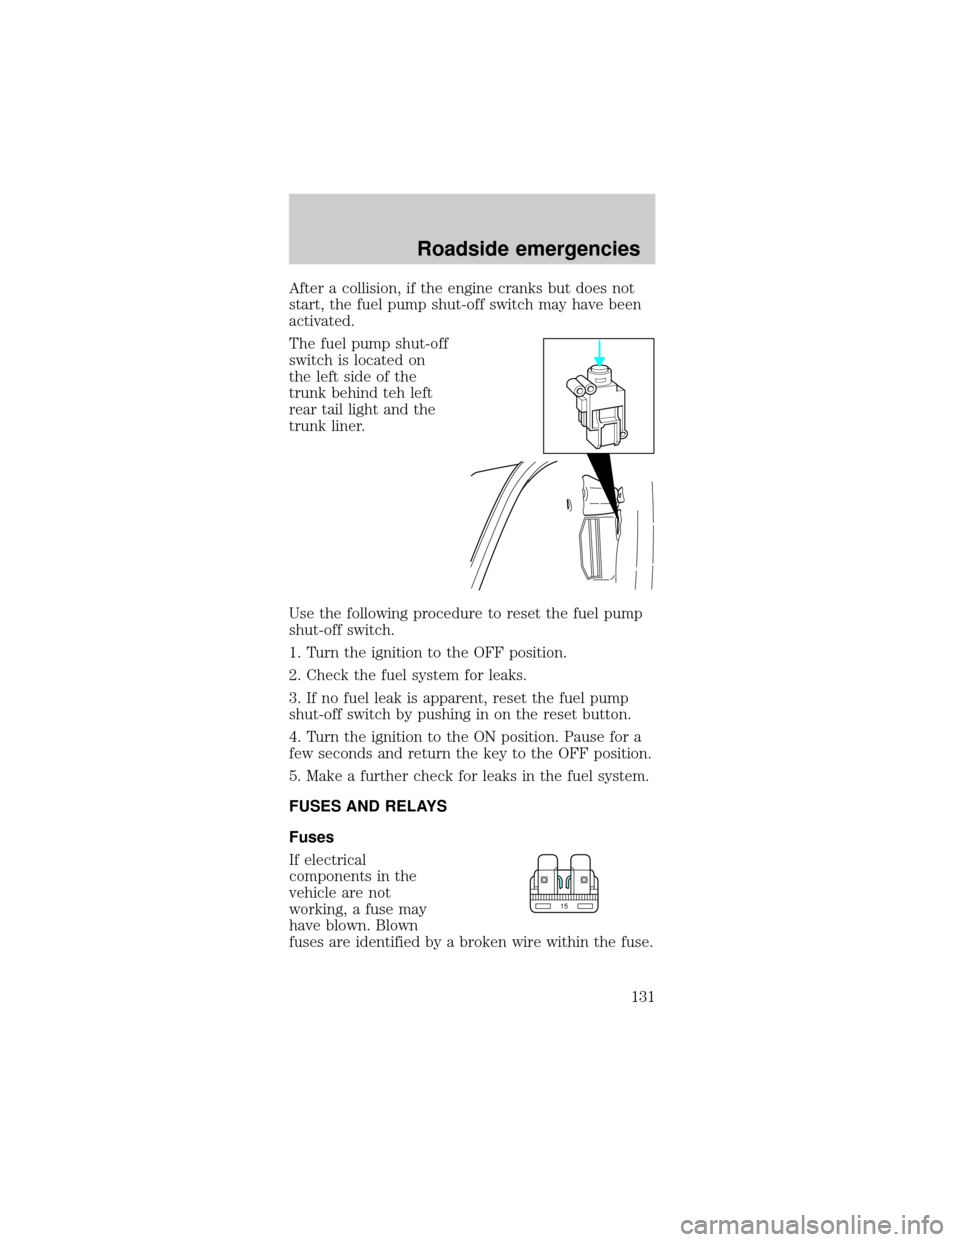
After a collision, if the engine cranks but does not
start, the fuel pump shut-off switch may have been
activated.
The fuel pump shut-off
switch is located on
the left side of the
trunk behind teh left
rear tail light and the
trunk liner.
Use the following procedure to reset the fuel pump
shut-off switch.
1. Turn the ignition to the OFF position.
2. Check the fuel system for leaks.
3. If no fuel leak is apparent, reset the fuel pump
shut-off switch by pushing in on the reset button.
4. Turn the ignition to the ON position. Pause for a
few seconds and return the key to the OFF position.
5. Make a further check for leaks in the fuel system.
FUSES AND RELAYS
Fuses
If electrical
components in the
vehicle are not
working, a fuse may
have blown. Blown
fuses are identified by a broken wire within the fuse.
15
Roadside emergencies
131
Page 140 of 240
To lessen the risk of personal injury, do not
put any part of your body under the vehicle
while changing a tire. Do not start the engine
when your vehicle is on the jack. The jack is only
meant for changing the tire.
6. Remove the lug nuts with the lug wrench.
7.
Replace the flat tire with the spare tire, making
sure the valve stem is facing outward. Reinstall lug
nuts until the wheel is snug against the hub. Do not
fully tighten the lug nuts until the wheel has been
lowered.
If you are using the temporary tire, the lug nut
washers will not appear to be flush with the rim. This
is normal only when using the temporary spare tire.
8. Lower the wheel by turning the jack handle
counterclockwise.
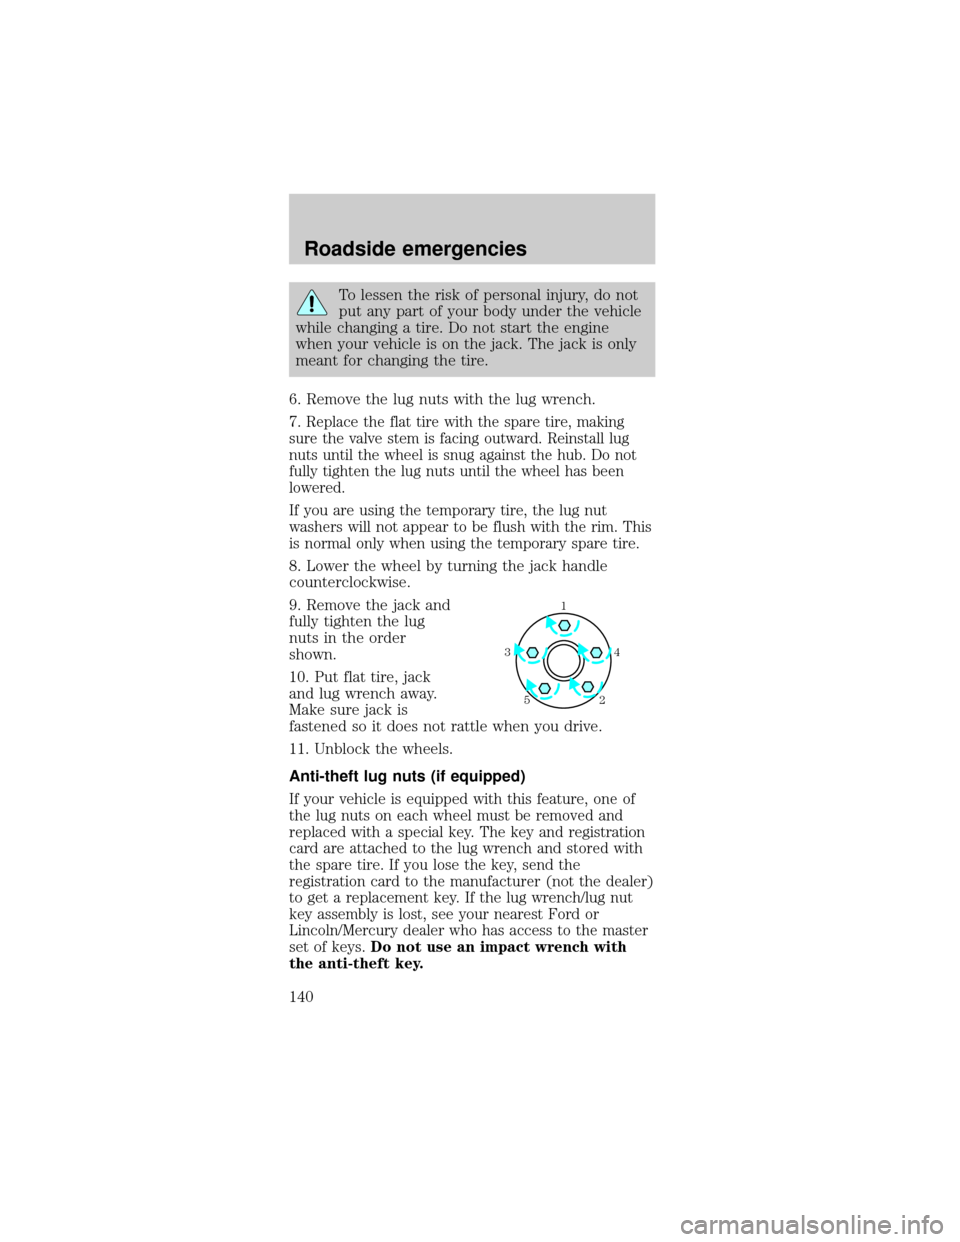
9. Remove the jack and
fully tighten the lug
nuts in the order
shown.
10. Put flat tire, jack
and lug wrench away.
Make sure jack is
fastened so it does not rattle when you drive.
11. Unblock the wheels.
Anti-theft lug nuts (if equipped)
If your vehicle is equipped with this feature, one of
the lug nuts on each wheel must be removed and
replaced with a special key. The key and registration
card are attached to the lug wrench and stored with
the spare tire. If you lose the key, send the
registration card to the manufacturer (not the dealer)
to get a replacement key. If the lug wrench/lug nut
key assembly is lost, see your nearest Ford or
Lincoln/Mercury dealer who has access to the master
set of keys.Do not use an impact wrench with
the anti-theft key.
1
4 3
2 5
Roadside emergencies
140