boot FORD MUSTANG 2003 4.G Owners Manual
[x] Cancel search | Manufacturer: FORD, Model Year: 2003, Model line: MUSTANG, Model: FORD MUSTANG 2003 4.GPages: 256, PDF Size: 2.4 MB
Page 86 of 256
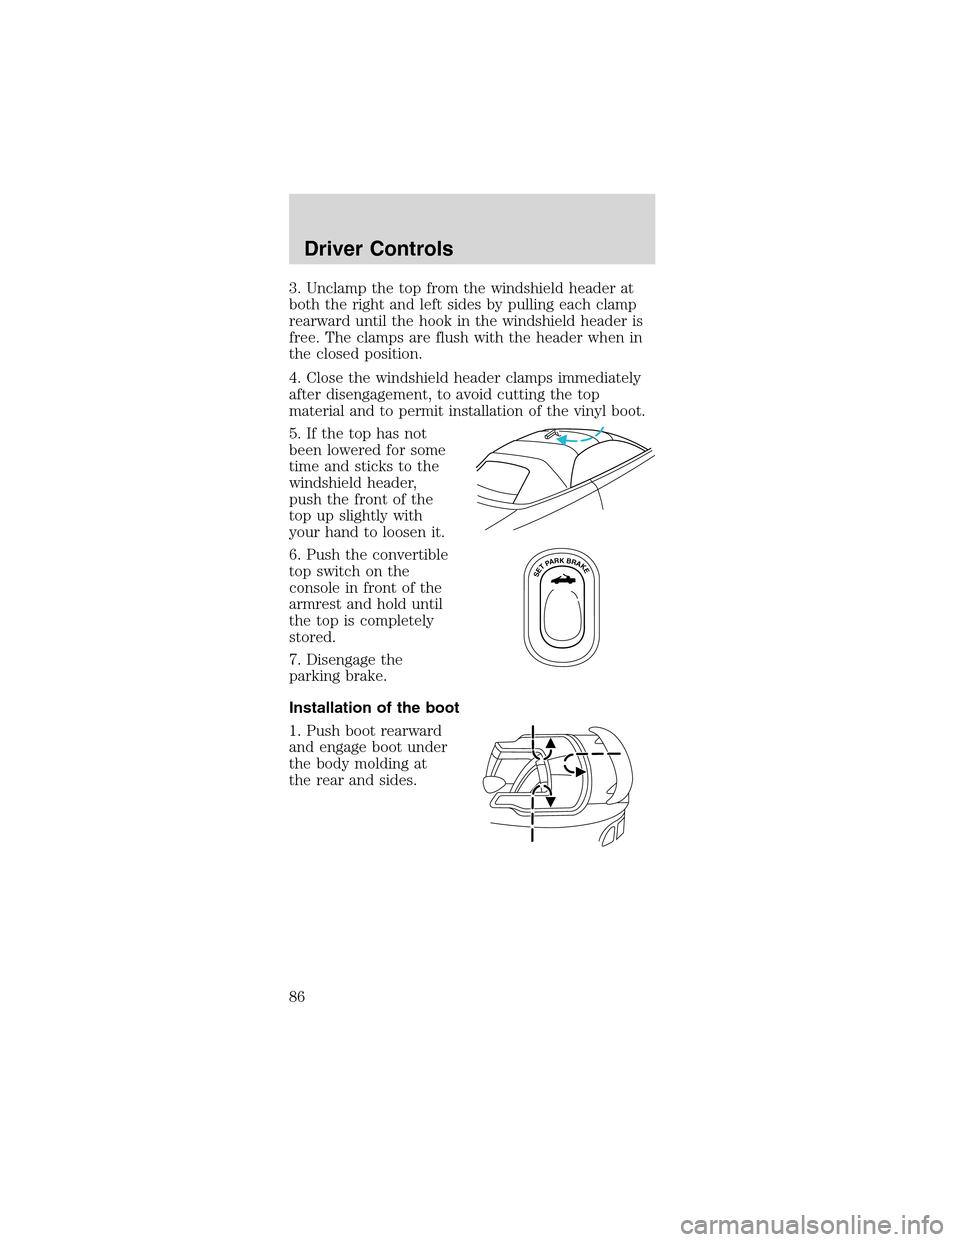
3. Unclamp the top from the windshield header at
both the right and left sides by pulling each clamp
rearward until the hook in the windshield header is
free. The clamps are flush with the header when in
the closed position.
4. Close the windshield header clamps immediately
after disengagement, to avoid cutting the top
material and to permit installation of the vinyl boot.
5. If the top has not
been lowered for some
time and sticks to the
windshield header,
push the front of the
top up slightly with
your hand to loosen it.
6. Push the convertible
top switch on the
console in front of the
armrest and hold until
the top is completely
stored.
7. Disengage the
parking brake.
Installation of the boot
1. Push boot rearward
and engage boot under
the body molding at
the rear and sides.
SETPARKBRAKE
Driver Controls
86
Page 87 of 256
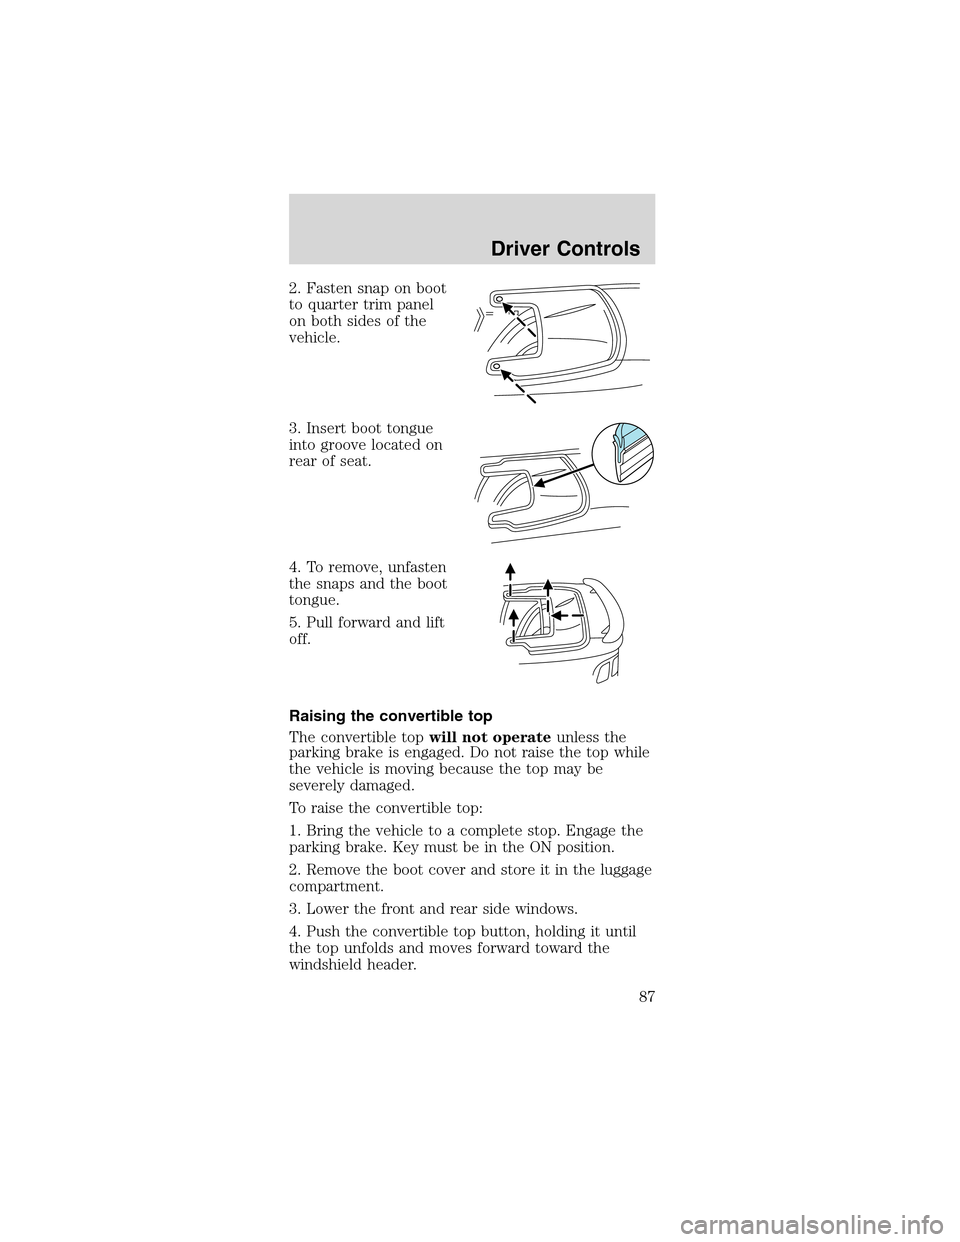
2. Fasten snap on boot
to quarter trim panel
on both sides of the
vehicle.
3. Insert boot tongue
into groove located on
rear of seat.
4. To remove, unfasten
the snaps and the boot
tongue.
5. Pull forward and lift
off.
Raising the convertible top
The convertible topwill not operateunless the
parking brake is engaged. Do not raise the top while
the vehicle is moving because the top may be
severely damaged.
To raise the convertible top:
1. Bring the vehicle to a complete stop. Engage the
parking brake. Key must be in the ON position.
2. Remove the boot cover and store it in the luggage
compartment.
3. Lower the front and rear side windows.
4. Push the convertible top button, holding it until
the top unfolds and moves forward toward the
windshield header.
Driver Controls
87
Page 102 of 256
outboard back of the seat. The seatback locks
automatically when returned to the normal position.
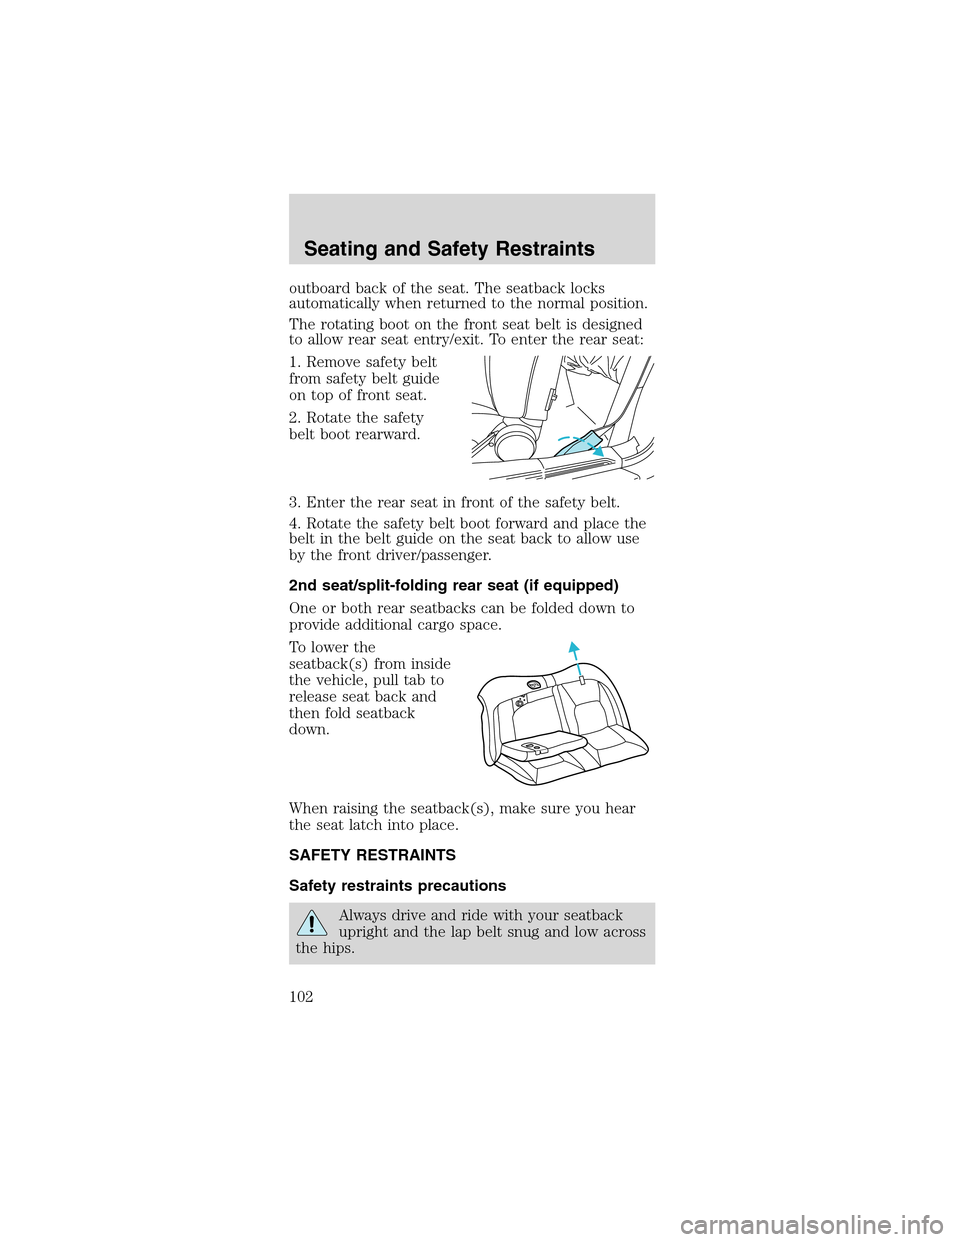
The rotating boot on the front seat belt is designed
to allow rear seat entry/exit. To enter the rear seat:
1. Remove safety belt
from safety belt guide
on top of front seat.
2. Rotate the safety
belt boot rearward.
3. Enter the rear seat in front of the safety belt.
4. Rotate the safety belt boot forward and place the
belt in the belt guide on the seat back to allow use
by the front driver/passenger.
2nd seat/split-folding rear seat (if equipped)
One or both rear seatbacks can be folded down to
provide additional cargo space.
To lower the
seatback(s) from inside
the vehicle, pull tab to
release seat back and
then fold seatback
down.
When raising the seatback(s), make sure you hear
the seat latch into place.
SAFETY RESTRAINTS
Safety restraints precautions
Always drive and ride with your seatback
upright and the lap belt snug and low across
the hips.
Seating and Safety Restraints
102
Page 128 of 256
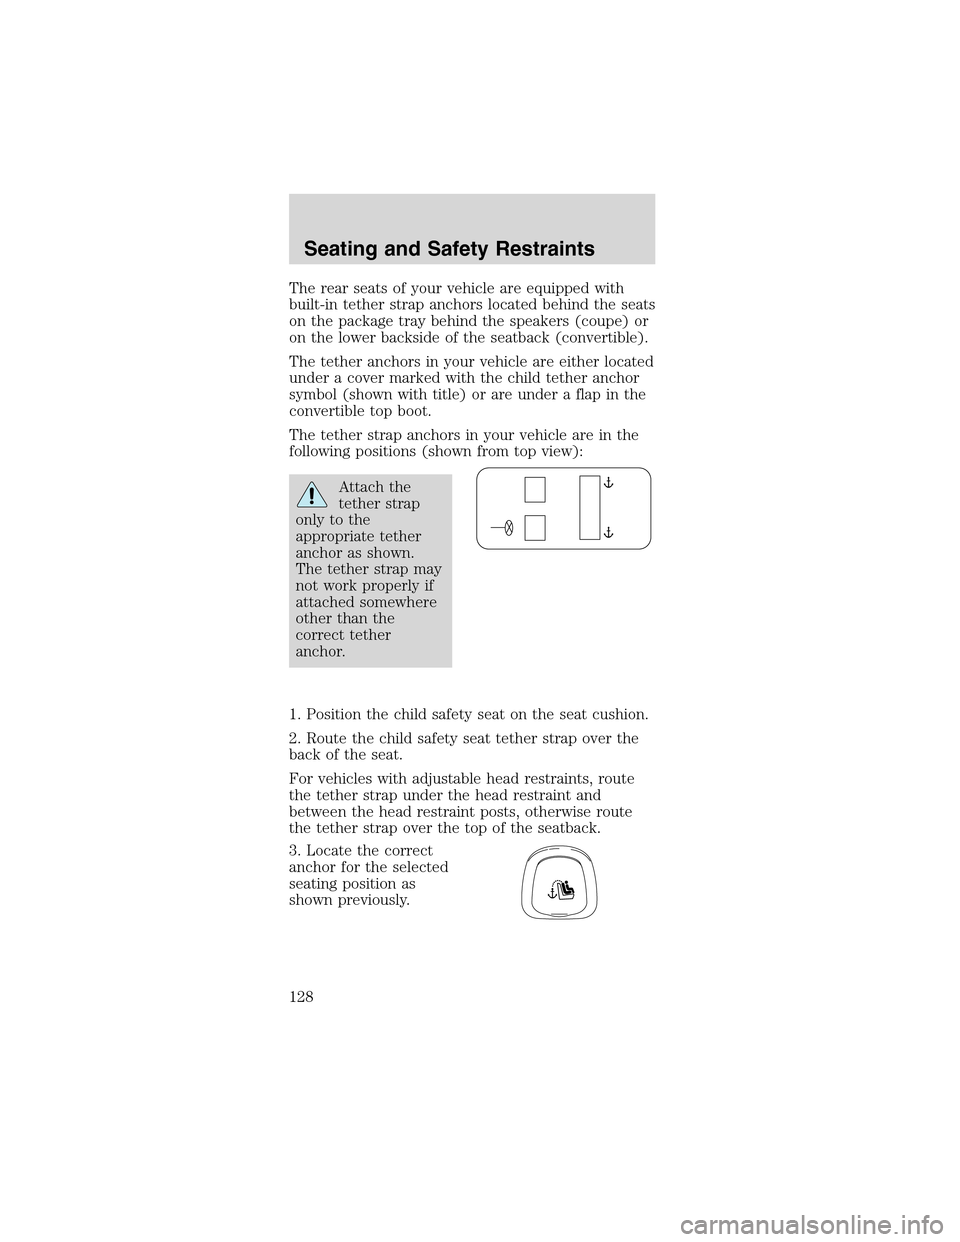
The rear seats of your vehicle are equipped with
built-in tether strap anchors located behind the seats
on the package tray behind the speakers (coupe) or
on the lower backside of the seatback (convertible).
The tether anchors in your vehicle are either located
under a cover marked with the child tether anchor
symbol (shown with title) or are under a flap in the
convertible top boot.
The tether strap anchors in your vehicle are in the
following positions (shown from top view):
Attach the
tether strap
only to the
appropriate tether
anchor as shown.
The tether strap may
not work properly if
attached somewhere
other than the
correct tether
anchor.
1. Position the child safety seat on the seat cushion.
2. Route the child safety seat tether strap over the
back of the seat.
For vehicles with adjustable head restraints, route
the tether strap under the head restraint and
between the head restraint posts, otherwise route
the tether strap over the top of the seatback.
3. Locate the correct
anchor for the selected
seating position as
shown previously.
Seating and Safety Restraints
128
Page 249 of 256
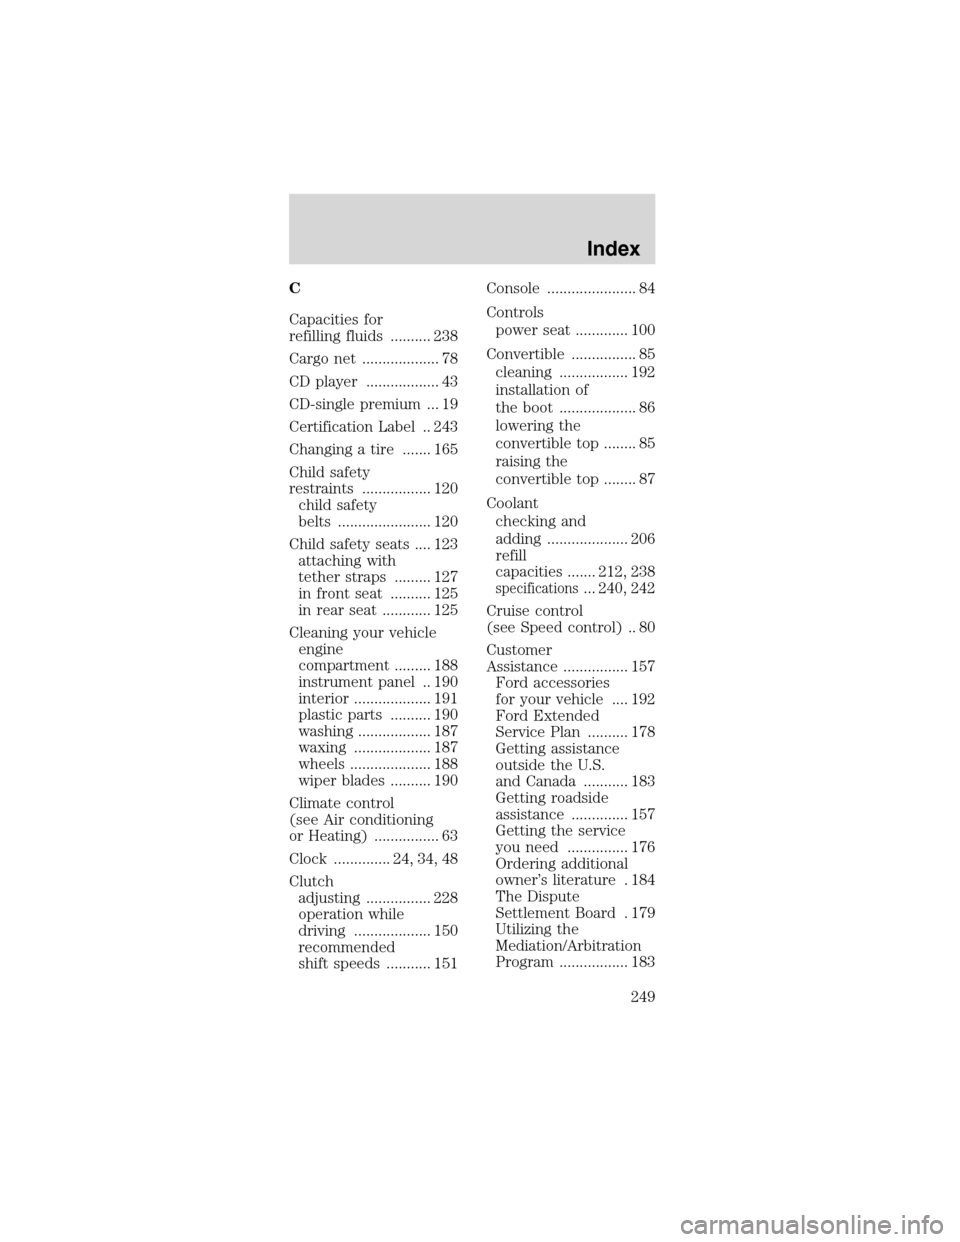
C
Capacities for
refilling fluids .......... 238
Cargo net ................... 78
CD player .................. 43
CD-single premium ... 19
Certification Label .. 243
Changing a tire ....... 165
Child safety
restraints ................. 120
child safety
belts ....................... 120
Child safety seats .... 123
attaching with
tether straps ......... 127
in front seat .......... 125
in rear seat ............ 125
Cleaning your vehicle
engine
compartment ......... 188
instrument panel .. 190
interior ................... 191
plastic parts .......... 190
washing .................. 187
waxing ................... 187
wheels .................... 188
wiper blades .......... 190
Climate control
(see Air conditioning
or Heating) ................ 63
Clock .............. 24, 34, 48
Clutch
adjusting ................ 228
operation while
driving ................... 150
recommended
shift speeds ........... 151Console ...................... 84
Controls
power seat ............. 100
Convertible ................ 85
cleaning ................. 192
installation of
the boot ................... 86
lowering the
convertible top ........ 85
raising the
convertible top ........ 87
Coolant
checking and
adding .................... 206
refill
capacities ....... 212, 238
specifications... 240, 242
Cruise control
(see Speed control) .. 80
Customer
Assistance ................ 157
Ford accessories
for your vehicle .... 192
Ford Extended
Service Plan .......... 178
Getting assistance
outside the U.S.
and Canada ........... 183
Getting roadside
assistance .............. 157
Getting the service
you need ............... 176
Ordering additional
owner’s literature . 184
The Dispute
Settlement Board . 179
Utilizing the
Mediation/Arbitration
Program ................. 183
Index
249