clock FORD MUSTANG 2006 5.G Owners Manual
[x] Cancel search | Manufacturer: FORD, Model Year: 2006, Model line: MUSTANG, Model: FORD MUSTANG 2006 5.GPages: 248, PDF Size: 2.38 MB
Page 20 of 248
Balance:Press to adjust the audio between the left and right speakers.
Use
//SEEK.
Fade:Press to adjust the audio between the front and rear speakers.
Use
//SEEK.
Speed sensitive volume:Radio volume changes automatically and
slightly with vehicle speed to compensate for road and wind noise.
Recommended level is 1–3. Level 0 turns the feature off and level 7 is
the maximum setting.
Press MENU to access and use
//SEEKto adjust the
volume setting. The level will appear in the display.
Setting the clock:Press MENU until SELECT HOUR or SELECT
MINUTE is displayed. Use
/to manually increase/decrease Press
MENU again to disengage clock mode.
Autoset:Allows you to set the strongest local radio stations without
losing your original manually set preset stations for AM/FM1/FM2. Press
MENU to access. Use
//SEEKto set or turn on/off.
When the six strongest stations are filled, the station stored in preset 1
will begin playing. If there are less than six strong stations, the system
will store the last one in the remaining presets. You can then access the
stations by pressing the memory presets. To disengage, press MENU to
access and press
//SEEKto turn the feature off.
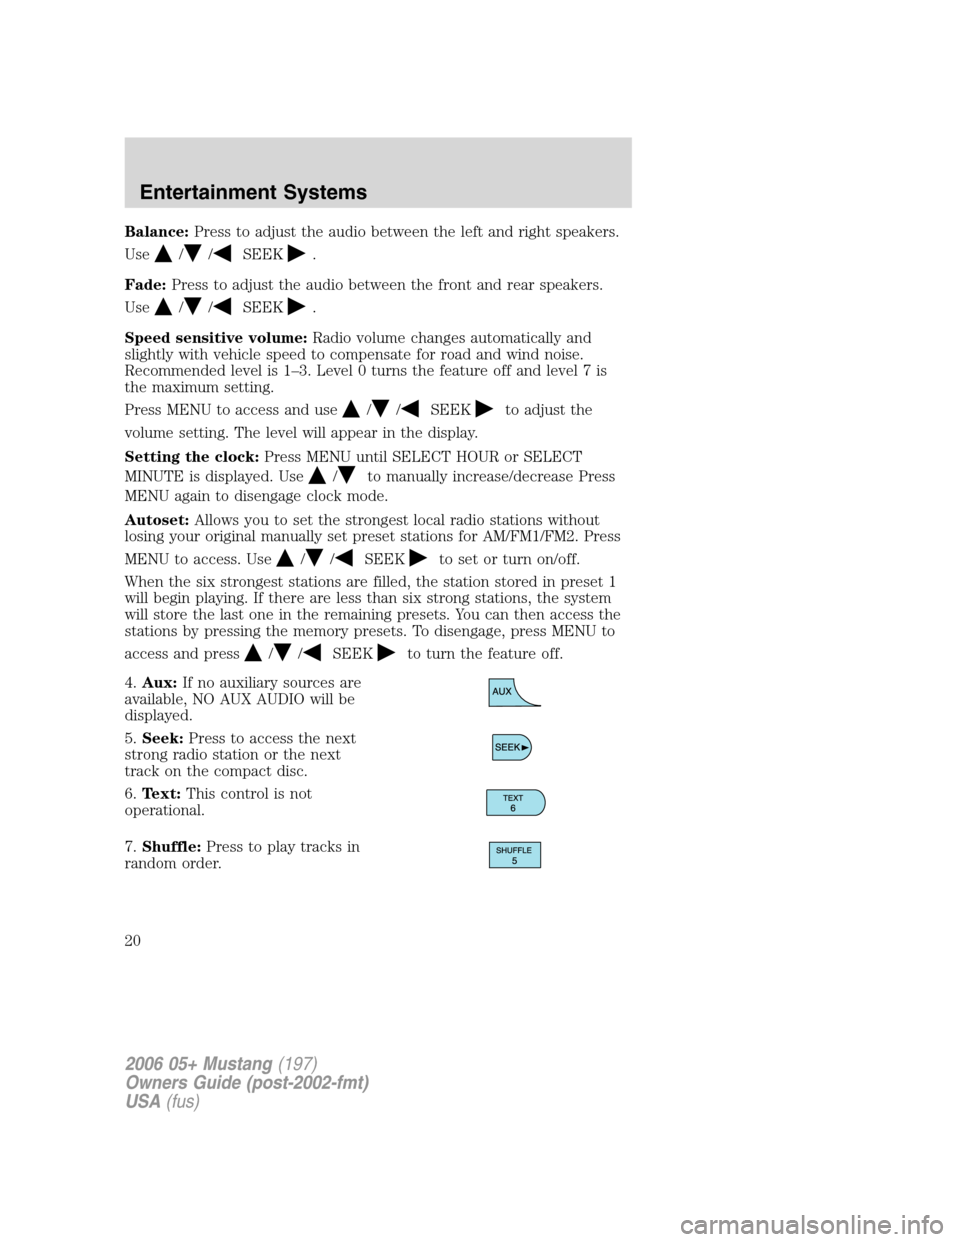
4.Aux:If no auxiliary sources are
available, NO AUX AUDIO will be
displayed.
5.Seek:Press to access the next
strong radio station or the next
track on the compact disc.
6.Text:This control is not
operational.
7.Shuffle:Press to play tracks in
random order.
2006 05+ Mustang(197)
Owners Guide (post-2002-fmt)
USA(fus)
Entertainment Systems
20
Page 24 of 248
3.Menu:Press to toggle through
the following modes:
Setting the clock:Press until SELECT HOUR or SELECT MINS is
displayed. Press
//SEEKto adjust the hours/minutes.
SHAKER(Available with the SHAKER 1000 only): Select to engage
SHAKER 1000 mode. SHAKER 1000 mode enhances acoustic sound for
all seating locations and increases the signal to the trunk mounted
speakers and amplifiers for enhanced bass performance. Use
/
orSEEKto toggle SHAKER mode on/off.
Track/Folder Mode:Available only on MP3 discs in CD mode. In Track
Mode, pressing
SEEKwill scroll through all tracks on the disc.
In Folder mode, pressing
SEEKwill scroll only through tracks
within the selected folder.
Compression:Available only in CD mode, brings soft and loud CD
passages together for a more consistent listening level.
Repeat:Available only in CD mode. Press to repeat the current CD
track.
Autoset:Allows you to set the strongest local radio stations without
losing your original manually set preset stations for AM/FM1/FM2. Press
MENU to access. Use
//, SEEKto set or turn on/off.
When the six strongest stations are filled, the station stored in preset 1
will begin playing. If there are less than six strong stations, the system
will store the last one in the remaining presets. You can then access the
stations by pressing the memory presets. To disengage, press MENU to
access and press
//SEEKto turn the feature off.
Bass:Press to adjust the bass setting. Use
//SEEK.
Treble:Press to adjust the treble setting. Use
//SEEK.
Balance:Press to adjust the audio between the left and right speakers.
Use
//, SEEK.
Fade:Press to adjust the audio between the front and rear speakers.
Use
//, SEEK.
2006 05+ Mustang(197)
Owners Guide (post-2002-fmt)
USA(fus)
Entertainment Systems
24
Page 37 of 248
Using the right bulbs
Replacement bulbs are specified in the chart below. Headlamp bulbs must
be marked with an authorized “D.O.T.” for North America and an “E” for
Europe to ensure lamp performance, light brightness and pattern and safe
visibility. The correct bulbs will not damage the lamp assembly or void the
lamp assembly warranty and will provide quality bulb burn time.
Function Trade Number
Headlamp H13
Park lamp, turn lamp, side marker (front) 3157 or 3157K
Sidemarker (front) W5W or W5WL
Fog lamp9145–GT or H11–Pony
(if equipped)
Tail lamp, brakelamp, turn lamp 3057K or 4057K
Sidemarker (rear) W5W or W5WL
High-mount brakelamp 921
Backup lamp 921
License plate lamp 168
Overhead console/map lamp W5W
All replacement bulbs are clear in color except where noted.
To replace all instrument panel lights - see your authorized dealer.
Interior bulbs
Check the operation of all bulbs frequently.
Replacing headlamp bulbs
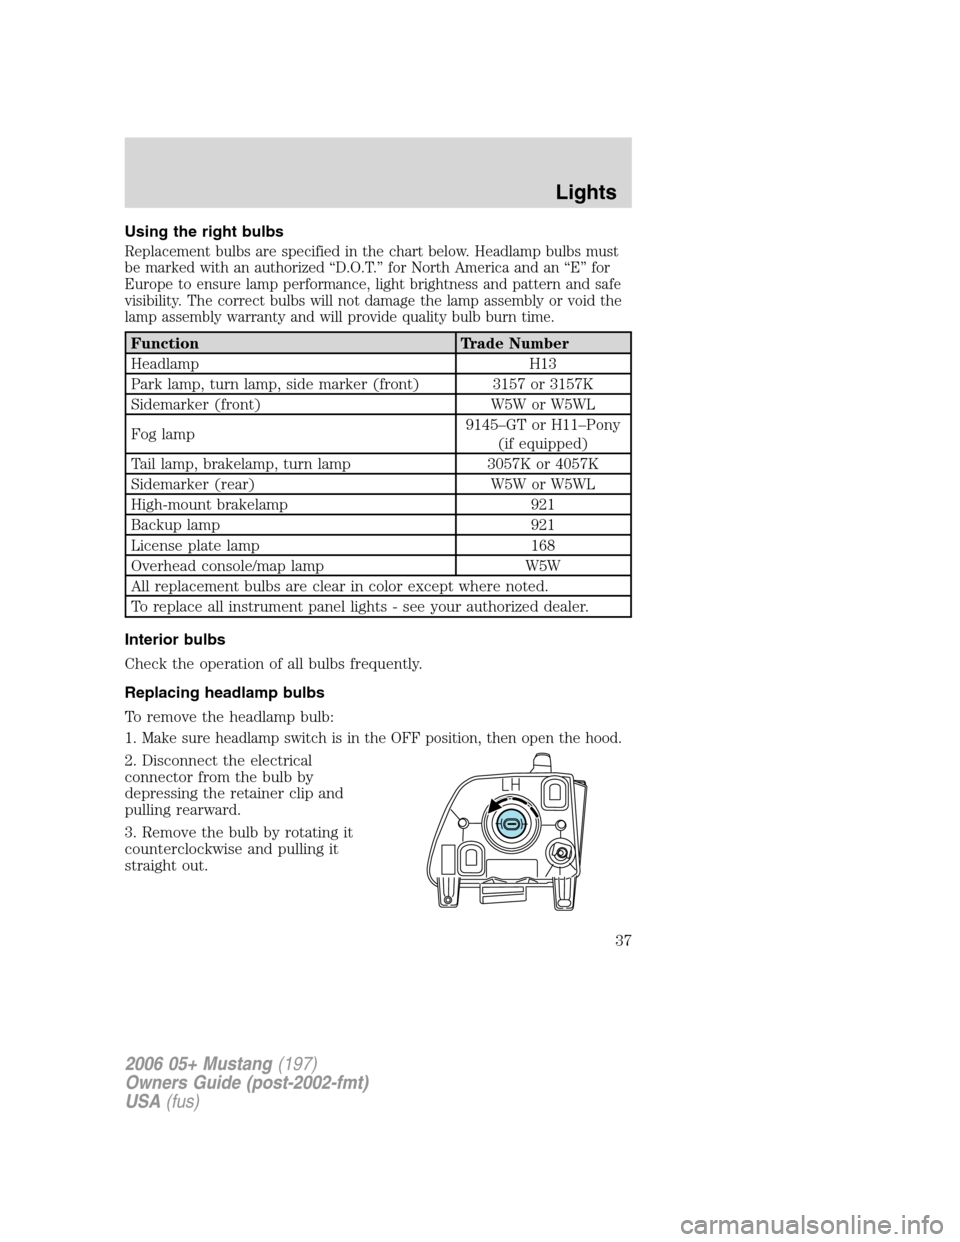
To remove the headlamp bulb:
1.
Make sure headlamp switch is in the OFF position, then open the hood.
2. Disconnect the electrical
connector from the bulb by
depressing the retainer clip and
pulling rearward.
3. Remove the bulb by rotating it
counterclockwise and pulling it
straight out.
2006 05+ Mustang(197)
Owners Guide (post-2002-fmt)
USA(fus)
Lights
37
Page 38 of 248
Handle a halogen headlamp
bulb carefully and keep out
of children’s reach. Grasp the bulb
only by its plastic base and do not
touch the glass. The oil from your
hand could cause the bulb to
break the next time the
headlamps are operated.
Install the new bulb in reverse order.
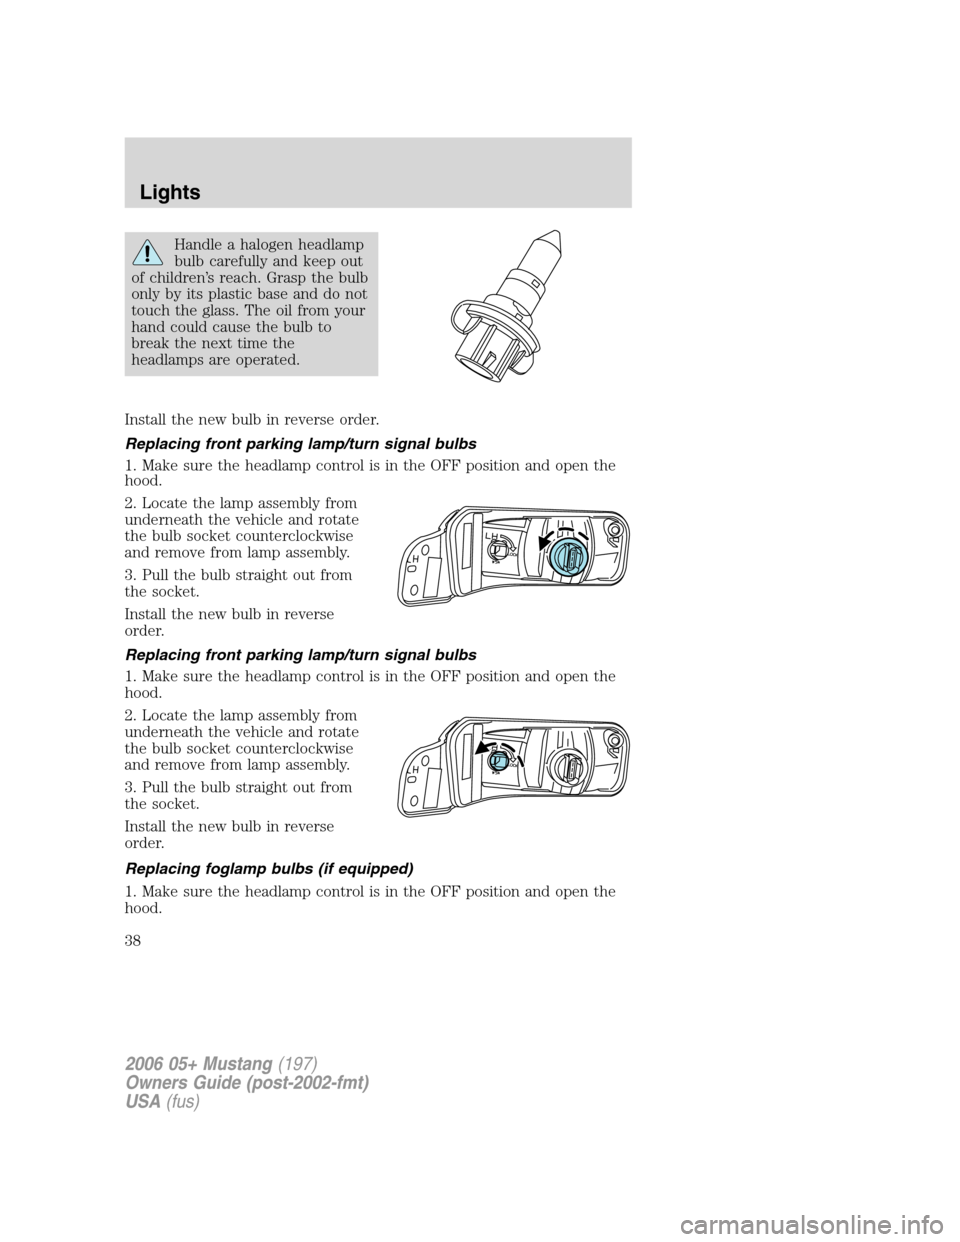
Replacing front parking lamp/turn signal bulbs
1. Make sure the headlamp control is in the OFF position and open the
hood.
2. Locate the lamp assembly from
underneath the vehicle and rotate
the bulb socket counterclockwise
and remove from lamp assembly.
3. Pull the bulb straight out from
the socket.
Install the new bulb in reverse
order.
Replacing foglamp bulbs (if equipped)
1. Make sure the headlamp control is in the OFF position and open the
hood.
2006 05+ Mustang(197)
Owners Guide (post-2002-fmt)
USA(fus)
Lights
38
Page 39 of 248
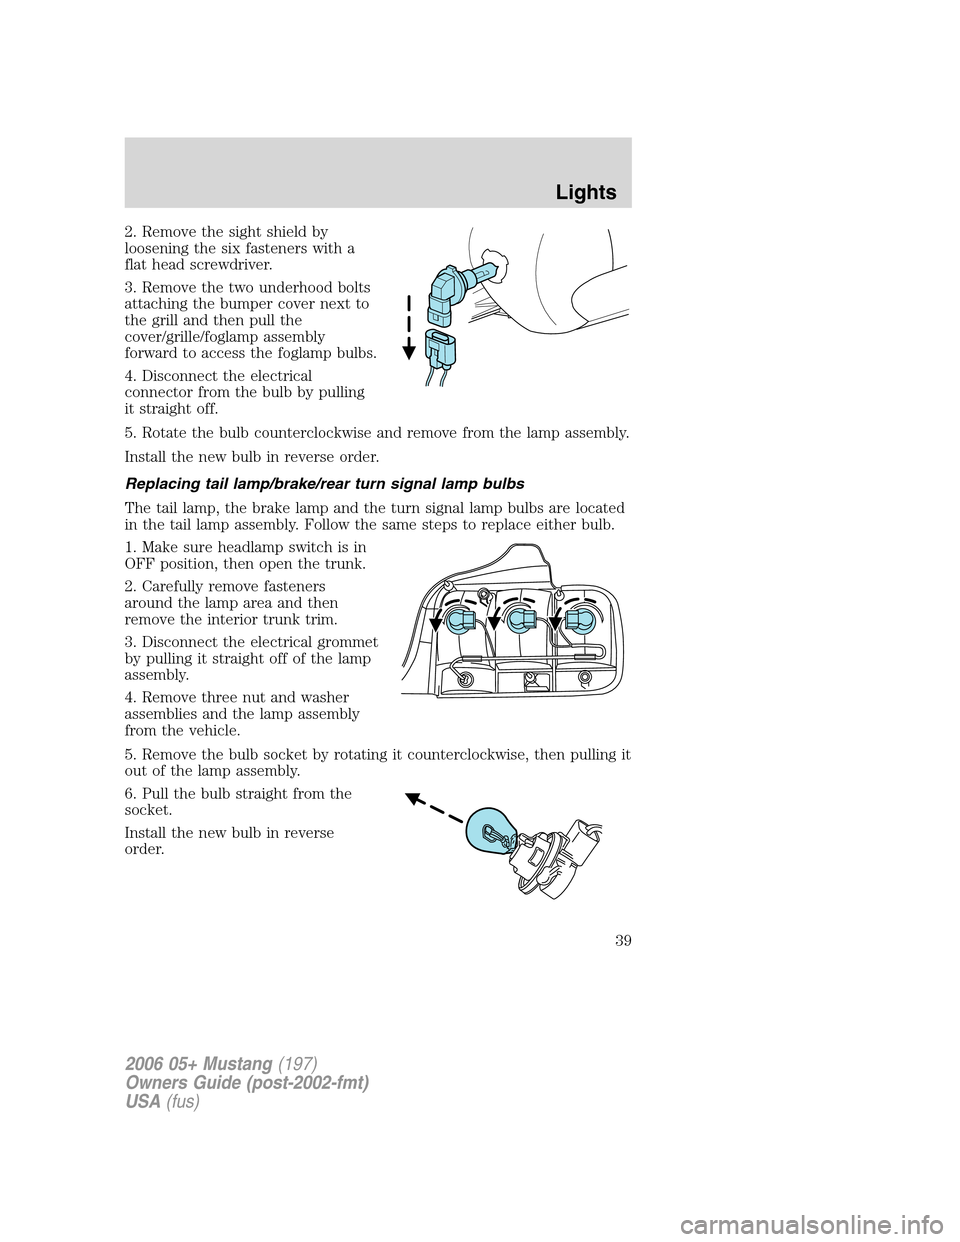
2. Remove the sight shield by
loosening the six fasteners with a
flat head screwdriver.
3. Remove the two underhood bolts
attaching the bumper cover next to
the grill and then pull the
cover/grille/foglamp assembly
forward to access the foglamp bulbs.
4. Disconnect the electrical
connector from the bulb by pulling
it straight off.
5. Rotate the bulb counterclockwise and remove from the lamp assembly.
Install the new bulb in reverse order.
Replacing tail lamp/brake/rear turn signal lamp bulbs
The tail lamp, the brake lamp and the turn signal lamp bulbs are located
in the tail lamp assembly. Follow the same steps to replace either bulb.
1. Make sure headlamp switch is in
OFF position, then open the trunk.
2. Carefully remove fasteners
around the lamp area and then
remove the interior trunk trim.
3. Disconnect the electrical grommet
by pulling it straight off of the lamp
assembly.
4. Remove three nut and washer
assemblies and the lamp assembly
from the vehicle.
5. Remove the bulb socket by rotating it counterclockwise, then pulling it
out of the lamp assembly.
6. Pull the bulb straight from the
socket.
Install the new bulb in reverse
order.
2006 05+ Mustang(197)
Owners Guide (post-2002-fmt)
USA(fus)
Lights
39
Page 40 of 248
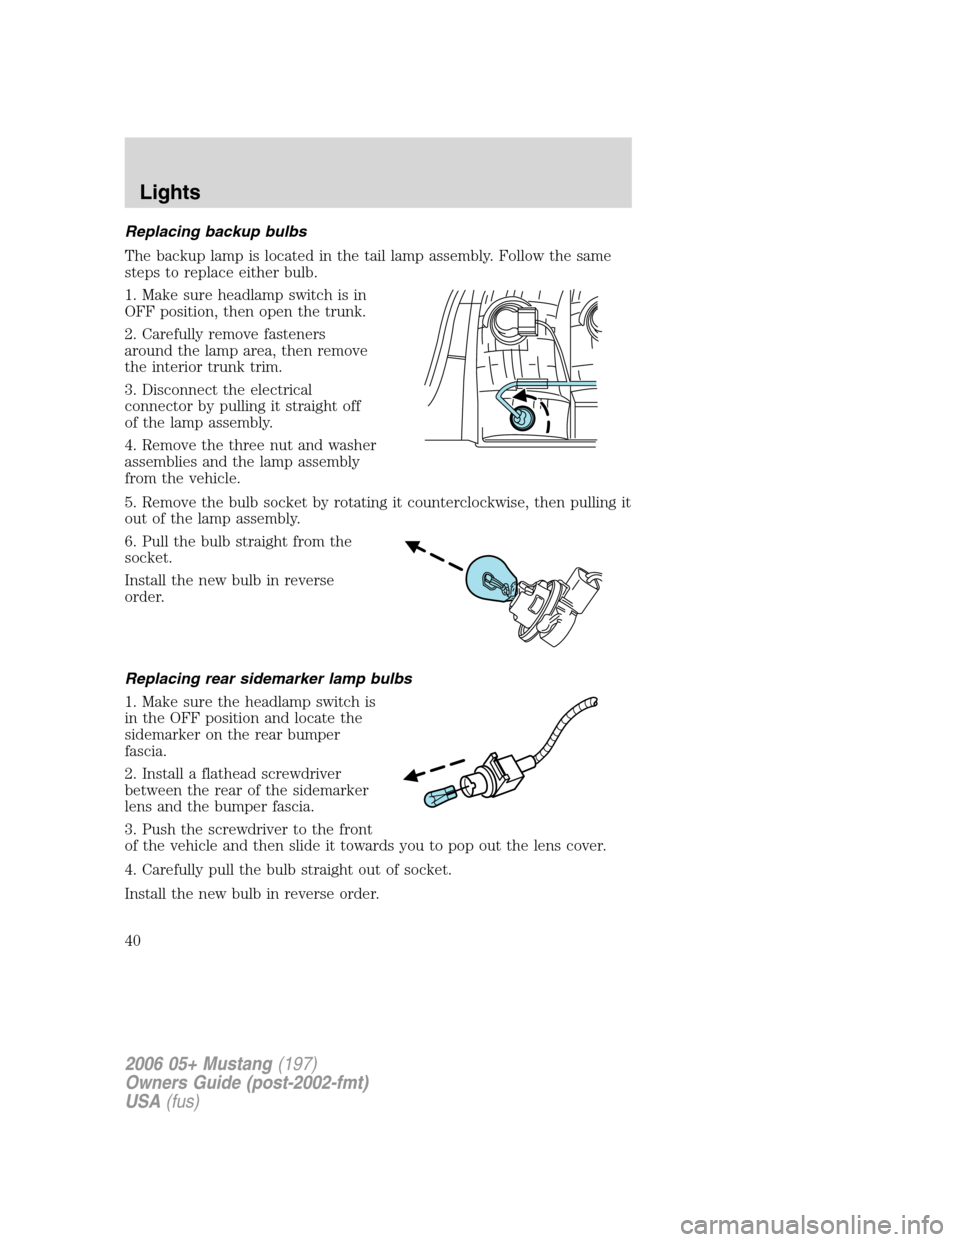
Replacing backup bulbs
The backup lamp is located in the tail lamp assembly. Follow the same
steps to replace either bulb.
1. Make sure headlamp switch is in
OFF position, then open the trunk.
2. Carefully remove fasteners
around the lamp area, then remove
the interior trunk trim.
3. Disconnect the electrical
connector by pulling it straight off
of the lamp assembly.
4. Remove the three nut and washer
assemblies and the lamp assembly
from the vehicle.
5. Remove the bulb socket by rotating it counterclockwise, then pulling it
out of the lamp assembly.
6. Pull the bulb straight from the
socket.
Install the new bulb in reverse
order.
Replacing rear sidemarker lamp bulbs
1. Make sure the headlamp switch is
in the OFF position and locate the
sidemarker on the rear bumper
fascia.
2. Install a flathead screwdriver
between the rear of the sidemarker
lens and the bumper fascia.
3. Push the screwdriver to the front
of the vehicle and then slide it towards you to pop out the lens cover.
4. Carefully pull the bulb straight out of socket.
Install the new bulb in reverse order.
2006 05+ Mustang(197)
Owners Guide (post-2002-fmt)
USA(fus)
Lights
40
Page 41 of 248
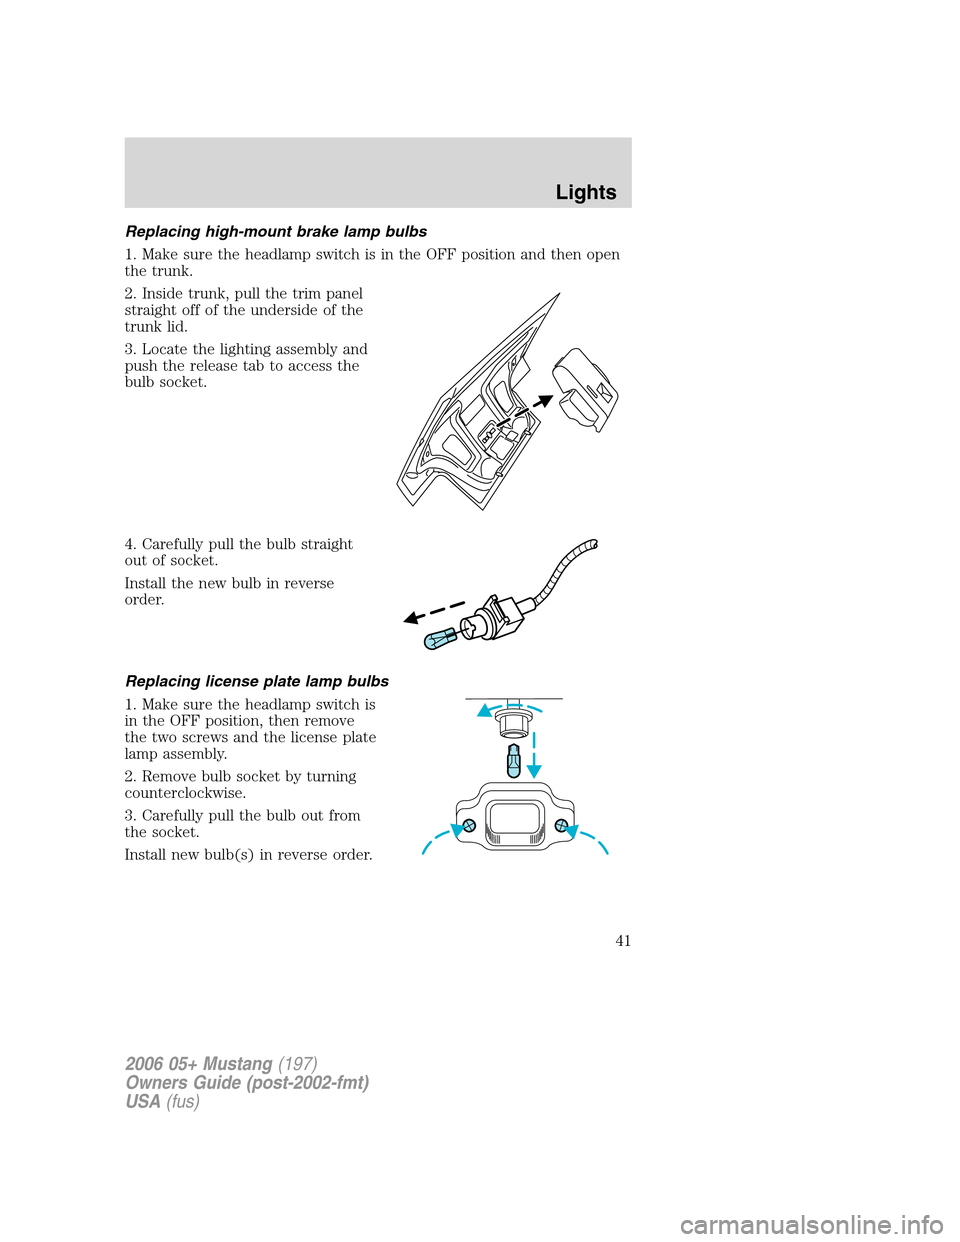
Replacing high-mount brake lamp bulbs
1. Make sure the headlamp switch is in the OFF position and then open
the trunk.
2. Inside trunk, pull the trim panel
straight off of the underside of the
trunk lid.
3. Locate the lighting assembly and
push the release tab to access the
bulb socket.
4. Carefully pull the bulb straight
out of socket.
Install the new bulb in reverse
order.
Replacing license plate lamp bulbs
1. Make sure the headlamp switch is
in the OFF position, then remove
the two screws and the license plate
lamp assembly.
2. Remove bulb socket by turning
counterclockwise.
3. Carefully pull the bulb out from
the socket.
Install new bulb(s) in reverse order.
2006 05+ Mustang(197)
Owners Guide (post-2002-fmt)
USA(fus)
Lights
41
Page 47 of 248
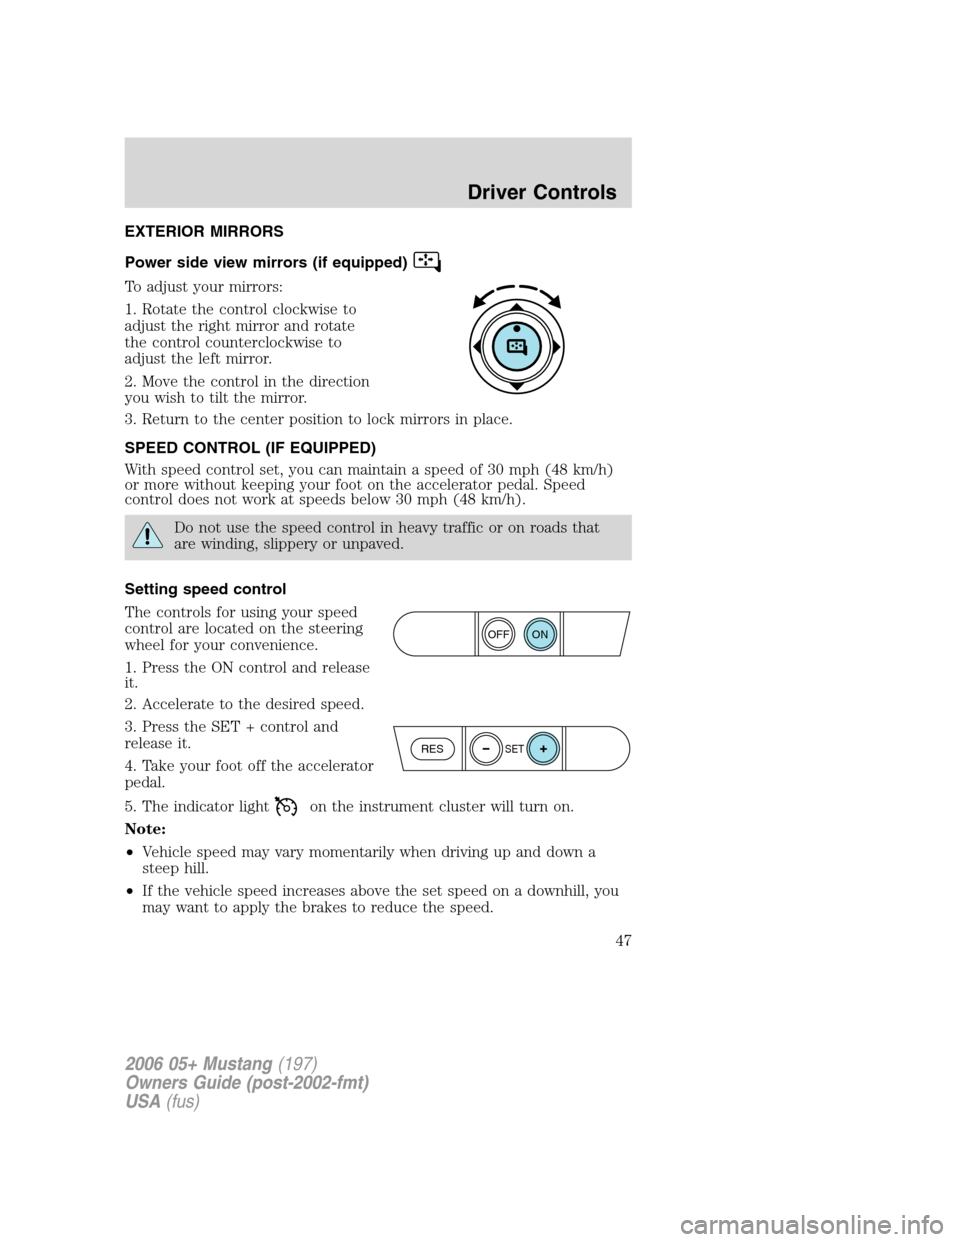
EXTERIOR MIRRORS
Power side view mirrors (if equipped)
To adjust your mirrors:
1. Rotate the control clockwise to
adjust the right mirror and rotate
the control counterclockwise to
adjust the left mirror.
2. Move the control in the direction
you wish to tilt the mirror.
3. Return to the center position to lock mirrors in place.
SPEED CONTROL (IF EQUIPPED)
With speed control set, you can maintain a speed of 30 mph (48 km/h)
or more without keeping your foot on the accelerator pedal. Speed
control does not work at speeds below 30 mph (48 km/h).
Do not use the speed control in heavy traffic or on roads that
are winding, slippery or unpaved.
Setting speed control
The controls for using your speed
control are located on the steering
wheel for your convenience.
1. Press the ON control and release
it.
2. Accelerate to the desired speed.
3. Press the SET + control and
release it.
4. Take your foot off the accelerator
pedal.
5. The indicator light
on the instrument cluster will turn on.
Note:
•Vehicle speed may vary momentarily when driving up and down a
steep hill.
•If the vehicle speed increases above the set speed on a downhill, you
may want to apply the brakes to reduce the speed.
ON
OFF
RESSET
2006 05+ Mustang(197)
Owners Guide (post-2002-fmt)
USA(fus)
Driver Controls
47
Page 174 of 248
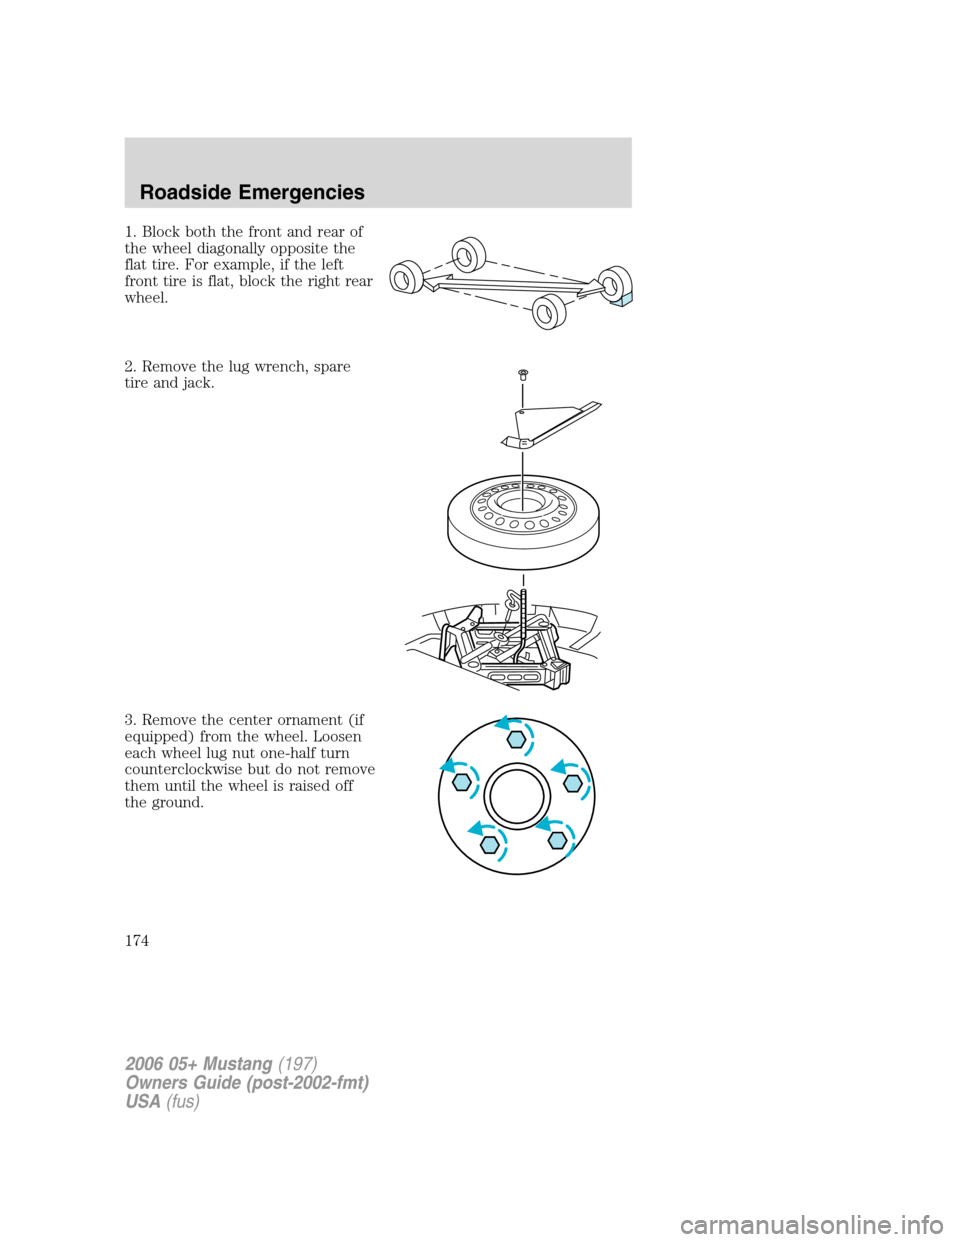
1. Block both the front and rear of
the wheel diagonally opposite the
flat tire. For example, if the left
front tire is flat, block the right rear
wheel.
2. Remove the lug wrench, spare
tire and jack.
3. Remove the center ornament (if
equipped) from the wheel. Loosen
each wheel lug nut one-half turn
counterclockwise but do not remove
them until the wheel is raised off
the ground.
2006 05+ Mustang(197)
Owners Guide (post-2002-fmt)
USA(fus)
Roadside Emergencies
174
Page 175 of 248
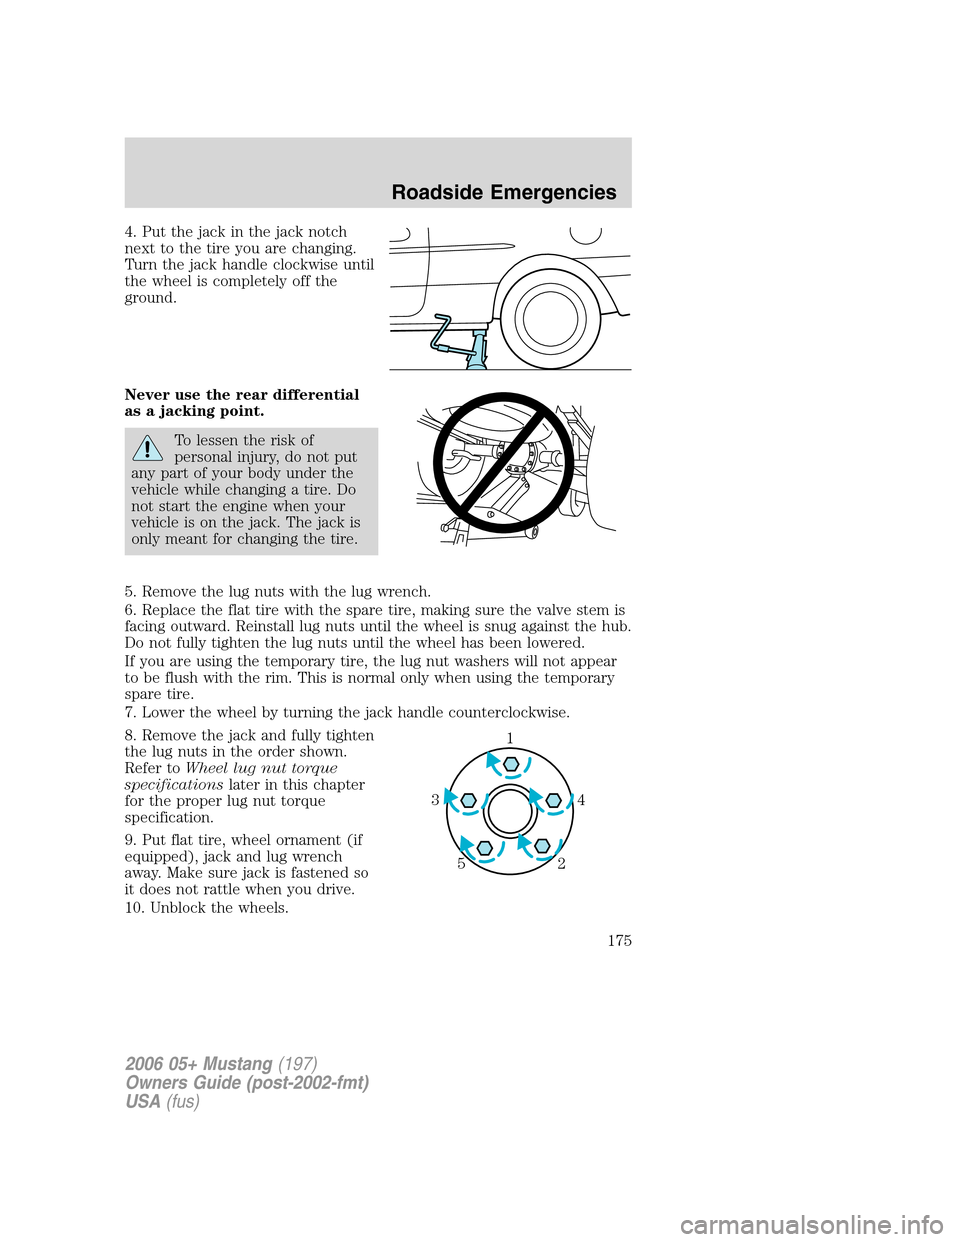
4. Put the jack in the jack notch
next to the tire you are changing.
Turn the jack handle clockwise until
the wheel is completely off the
ground.
Never use the rear differential
as a jacking point.
To lessen the risk of
personal injury, do not put
any part of your body under the
vehicle while changing a tire. Do
not start the engine when your
vehicle is on the jack. The jack is
only meant for changing the tire.
5. Remove the lug nuts with the lug wrench.
6. Replace the flat tire with the spare tire, making sure the valve stem is
facing outward. Reinstall lug nuts until the wheel is snug against the hub.
Do not fully tighten the lug nuts until the wheel has been lowered.
If you are using the temporary tire, the lug nut washers will not appear
to be flush with the rim. This is normal only when using the temporary
spare tire.
7. Lower the wheel by turning the jack handle counterclockwise.
8. Remove the jack and fully tighten
the lug nuts in the order shown.
Refer toWheel lug nut torque
specificationslater in this chapter
for the proper lug nut torque
specification.
9. Put flat tire, wheel ornament (if
equipped), jack and lug wrench
away. Make sure jack is fastened so
it does not rattle when you drive.
10. Unblock the wheels.
1
4 3
2 5
2006 05+ Mustang(197)
Owners Guide (post-2002-fmt)
USA(fus)
Roadside Emergencies
175